

When it comes to Italian desserts, there’s something truly special about their ability to boost your mood. From the rich layers of a classic Tiramisu to the smoothness of a velvety Panna Cotta, these treats bring joy with every bite. Picture yourself enjoying the crispy Cannoli or the refreshing Lemon Granita. Each dessert offers a taste of Italy right at home. Ready to explore more delicious options?
Classic Tiramisu
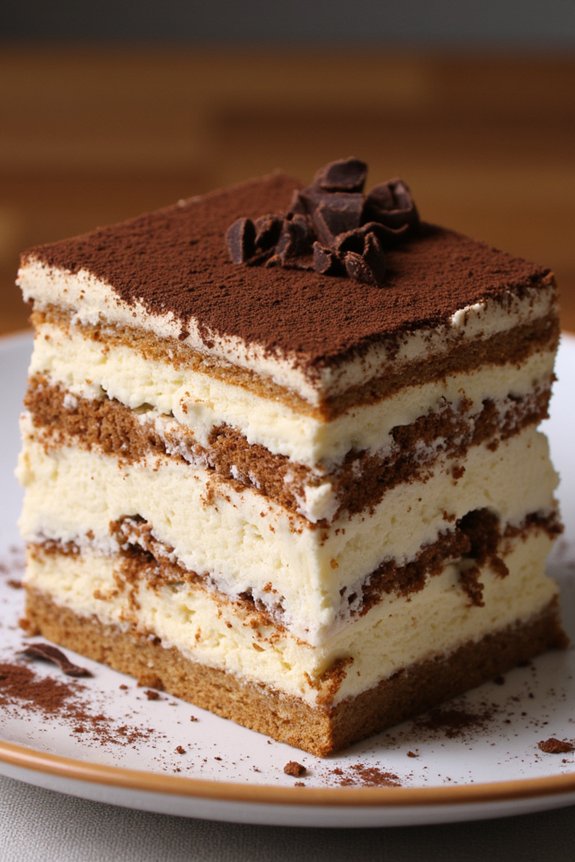
Tiramisu is a beloved Italian dessert that combines layers of coffee-soaked ladyfingers with a rich mascarpone cream filling, topped with a dusting of cocoa powder. This no-bake dessert is perfect for both casual gatherings and special occasions, offering a delightful combination of flavors and textures.
Originating from the Veneto region, Tiramisu has become a staple in Italian cuisine, celebrated for its simplicity and elegance.
Making Classic Tiramisu at home is easier than you might think, and it requires only a few basic ingredients. The key to a perfect Tiramisu is to use high-quality ingredients and allow enough time for the flavors to meld together. This recipe serves 4-6 people, making it an ideal choice for a dinner party or a family gathering.
Ingredients (Serves 4-6):
- 3 large eggs, separated
- 1 cup granulated sugar
- 1 cup mascarpone cheese
- 1 cup strong brewed espresso, cooled
- 1 tablespoon coffee liqueur (optional)
- 24 ladyfingers (savoiardi)
- Unsweetened cocoa powder, for dusting
- Dark chocolate shavings (optional)
Cooking Instructions:
1. Prepare the Mascarpone Mixture: In a large mixing bowl, whisk the egg yolks and granulated sugar together until the mixture becomes thick and pale. This should take about 5 minutes.
Gently fold in the mascarpone cheese until you achieve a smooth and creamy texture.
2. Beat the Egg Whites: In a separate bowl, beat the egg whites until stiff peaks form. This process is essential for adding lightness to your Tiramisu.
Carefully fold the beaten egg whites into the mascarpone mixture, being gentle to maintain the airy consistency.
3. Prepare the Coffee Mixture****: In a shallow dish, mix the cooled espresso with the coffee liqueur, if using.
Quickly dip each ladyfinger into the coffee mixture, ensuring they’re soaked but not overly saturated, as this could make the dessert soggy.
4. Assemble the Tiramisu: In a 9×9 inch dish or similar, arrange a layer of coffee-soaked ladyfingers at the bottom.
Spread half of the mascarpone mixture over the ladyfingers. Repeat with another layer of soaked ladyfingers and the remaining mascarpone mixture.
5. Chill and Serve: Cover the dish with plastic wrap and refrigerate for at least 4 hours, or overnight for best results.
Before serving, dust the top with cocoa powder and, if desired, garnish with dark chocolate shavings.
Extra Tips:
When making Tiramisu, it’s essential to use fresh eggs and high-quality mascarpone cheese to achieve the best flavor and texture.
If you prefer a non-alcoholic version, simply omit the coffee liqueur. To enhance the flavor, consider adding a teaspoon of vanilla extract to the mascarpone mixture.
Remember that Tiramisu tastes best when given enough time to set, allowing the flavors to meld beautifully. Enjoy this classic Italian dessert with a cup of coffee or a glass of dessert wine for an authentic experience.
Velvety Panna Cotta
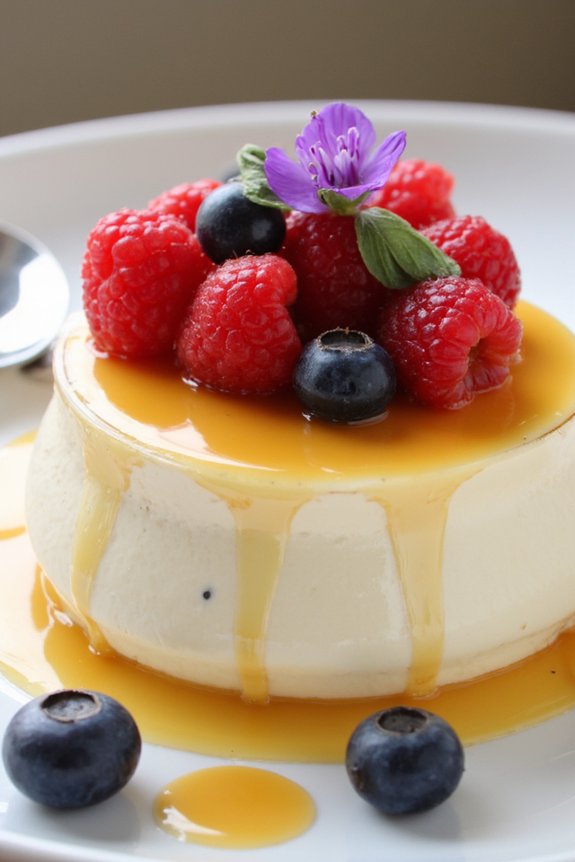
Velvety Panna Cotta is a classic Italian dessert that translates to “cooked cream.” This elegant treat is known for its smooth, silky texture and delicate flavor, making it a favorite at dinner parties and special occasions. The beauty of panna cotta lies in its simplicity; requiring only a few basic ingredients, it can be dressed up with a variety of toppings, from fresh berries to a drizzle of caramel sauce.
Despite its sophisticated appearance, panna cotta is surprisingly easy to prepare, making it an ideal dessert for those looking to impress without spending hours in the kitchen.
Originating from the Piedmont region in Northern Italy, panna cotta has made its way into the hearts and kitchens of dessert lovers worldwide. Its creamy base is typically flavored with vanilla, although variations with coffee, chocolate, or fruit are also popular. The key to achieving the perfect panna cotta is getting the right balance of creaminess and firmness, which is accomplished with the correct amount of gelatin.
Served chilled, this dessert offers a revitalizing end to any meal, and its lightness guarantees that it never feels too heavy.
Ingredients for 4-6 servings:
- 2 cups heavy cream
- 1 cup whole milk
- 1/2 cup granulated sugar
- 2 teaspoons vanilla extract
- 1 packet (about 2 1/4 teaspoons) unflavored gelatin
- 3 tablespoons water
- Fresh berries or fruit coulis for topping (optional)
Cooking Instructions:
- Prepare the Gelatin: In a small bowl, sprinkle the unflavored gelatin over 3 tablespoons of water. Let it sit for about 5-10 minutes to bloom. This step is essential as it guarantees that the gelatin dissolves properly into the mixture later.
- Heat the Cream Mixture: In a medium saucepan, combine the heavy cream, whole milk, and granulated sugar. Place the saucepan over medium heat and stir gently until the sugar has fully dissolved and the mixture is heated through. Avoid bringing it to a boil.
- Incorporate the Gelatin: Once the cream mixture is hot, remove it from the heat. Add the bloomed gelatin to the mixture and stir until completely dissolved. Make sure no gelatin clumps remain. Stir in the vanilla extract.
- Strain and Pour: To guarantee a silky smooth texture, strain the mixture through a fine-mesh sieve into a large measuring cup or a bowl with a spout. This step removes any undissolved gelatin or impurities.
- Chill the Panna Cotta: Divide the mixture evenly into 4-6 individual ramekins or dessert glasses. Allow them to cool at room temperature for about 10 minutes, then cover with plastic wrap and refrigerate for at least 4 hours, or until set.
- Serve and Garnish: Once set, panna cotta can be served directly from the ramekins or turned out onto dessert plates. To unmold, dip the bottoms of the ramekins briefly in hot water and gently run a knife around the edge. Garnish with fresh berries or a drizzle of fruit coulis if desired.
Extra Tips:
For a perfect panna cotta, guarantee that the cream mixture isn’t overheated, as boiling can prevent the gelatin from setting properly. If you’re experimenting with flavors, consider adding a splash of liqueur or a pinch of citrus zest for a unique twist.
When serving, panna cotta pairs beautifully with a variety of toppings, so feel free to get creative with seasonal fruits or even a sprinkle of chopped nuts for added texture.
Luscious Cannoli
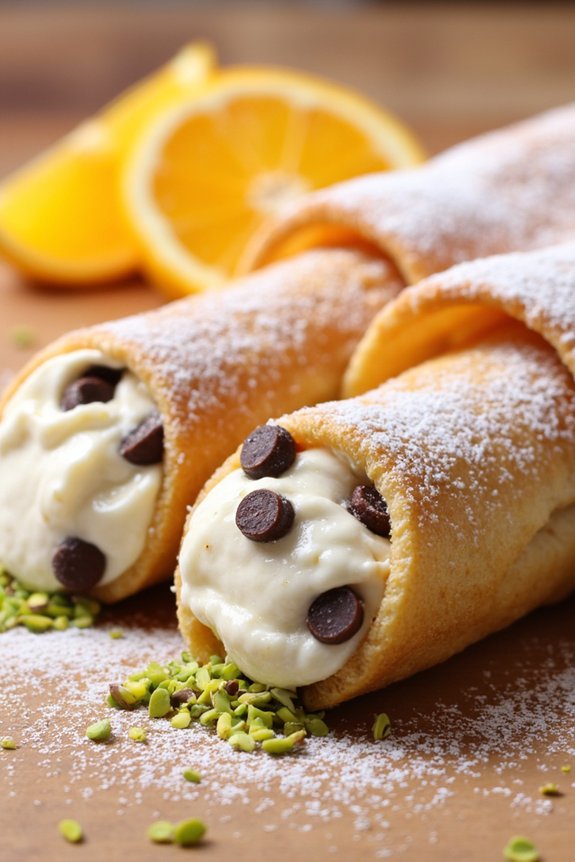
Cannoli, a classic Italian dessert, is a delightful treat that consists of crispy, fried pastry shells filled with a creamy, sweet ricotta filling. Originating from Sicily, cannoli have become a beloved dessert worldwide, known for their unique texture and rich flavor. The combination of the crunchy shell with the smooth, slightly tangy filling creates a perfect balance that’s both indulgent and satisfying.
To make Luscious Cannoli from scratch, you’ll need to prepare both the shells and the filling. The shells are traditionally made with a mixture of flour, sugar, and butter, rolled thin, and wrapped around metal tubes before being fried to a golden brown. The filling, made from fresh ricotta cheese, is sweetened with sugar and often flavored with vanilla or citrus zest. The following recipe serves 4-6 people, making it perfect for a family gathering or a small dinner party.
Ingredients:
*For the Shells:*
- 1 1/2 cups all-purpose flour
- 2 tablespoons granulated sugar
- 1/4 teaspoon salt
- 1 tablespoon unsalted butter, cubed
- 1 large egg yolk
- 1/3 cup sweet Marsala wine (or white wine)
- Vegetable oil, for frying
For the Filling:
- 2 cups ricotta cheese, drained
- 3/4 cup powdered sugar
- 1 teaspoon vanilla extract
- 1/2 teaspoon cinnamon
- 1/4 cup mini chocolate chips
- Zest of one orange
For Garnish:
- Additional powdered sugar
- Chopped pistachios (optional)
Instructions:
- Make the Dough for Shells:
- In a large bowl, combine the flour, sugar, and salt. Add the cubed butter and rub it into the flour mixture using your fingers until it resembles coarse crumbs.
- Mix in the egg yolk and Marsala wine until the dough comes together. Knead the dough on a lightly floured surface until smooth, about 5 minutes. Wrap the dough in plastic wrap and refrigerate for at least an hour.
- Prepare the Ricotta Filling:
- In a medium bowl, mix the drained ricotta, powdered sugar, vanilla extract, and cinnamon until smooth. Stir in the mini chocolate chips and orange zest. Cover and refrigerate until ready to use.
- Roll and Cut the Dough:
- On a floured surface, roll out the dough to about 1/8-inch thickness. Using a 4-inch round cutter, cut circles from the dough. Wrap each circle around a metal cannoli tube, sealing the edges with a bit of water.
- Fry the Shells:
- Heat about 2 inches of vegetable oil in a heavy pot to 350°F (175°C). Fry the cannoli shells in batches until golden brown and crisp, about 2-3 minutes. Remove the shells from the oil, let them cool slightly, and carefully slide them off the tubes.
- Fill the Cannoli:
- Spoon the ricotta filling into a piping bag fitted with a wide tip. Pipe the filling into both ends of each cannoli shell.
- Garnish and Serve:
- Dust the filled cannoli with additional powdered sugar. Optionally, dip the ends in chopped pistachios for added flavor and texture. Serve immediately to enjoy the crispiness of the shells.
Extra Tips:
To guarantee the best consistency for your ricotta filling, make sure to drain the ricotta cheese thoroughly; you can do this by placing it in a cheesecloth-lined sieve over a bowl in the fridge for a few hours.
For a quicker process, use store-bought cannoli shells if you’re short on time. Also, fill the cannoli shells just before serving to prevent them from becoming soggy. If you’re not serving them immediately, store the shells and filling separately and assemble them when ready to enjoy.
Creamy Zabaglione
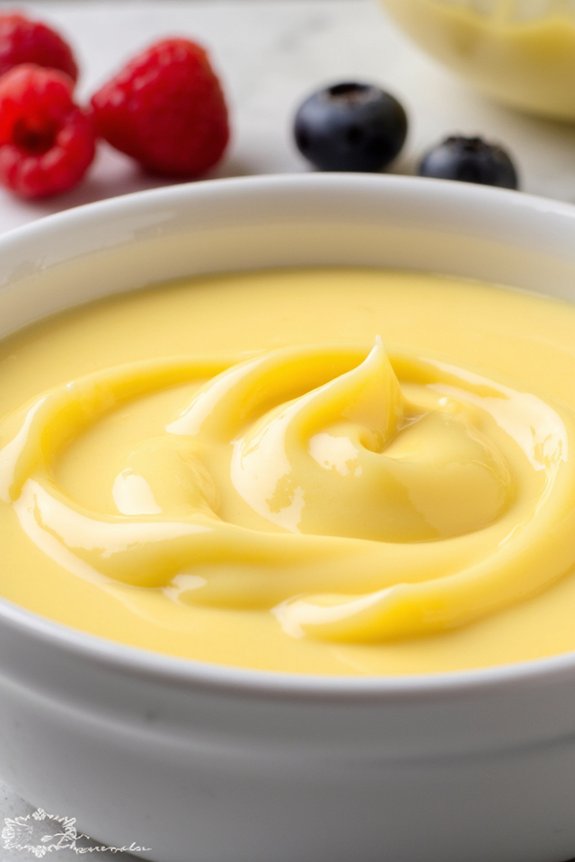
Creamy Zabaglione is a classic Italian dessert that’s both elegant and simple to prepare. This luscious treat is made by whisking together egg yolks, sugar, and Marsala wine to create a smooth and creamy custard. Served either warm or chilled, Zabaglione is often enjoyed on its own or paired with fresh fruit, such as berries, to add a rejuvenating contrast to the rich custard. Its velvety texture and delicate flavor make it a delightful end to any meal.
Originating from Italy, Zabaglione has been a beloved dessert for centuries. It’s a versatile dish that can be adapted with various wines and liqueurs, giving it a unique twist depending on the region or the cook’s preference. The key to a perfect Zabaglione is patience and gentle heat, as the mixture is carefully whisked over simmering water to achieve its creamy consistency. This dessert isn’t only pleasing to the palate but also a visually appealing treat that will impress your guests.
Ingredients for 4-6 servings:
- 6 large egg yolks
- 1/2 cup granulated sugar
- 1/2 cup Marsala wine
- Fresh berries, for serving (optional)
Cooking Instructions:
- Prepare a Double Boiler: Fill a medium pot with about an inch of water and bring it to a gentle simmer. Place a heatproof bowl on top of the pot, ensuring that the bottom of the bowl doesn’t touch the water.
- Combine Ingredients: In the heatproof bowl, combine the egg yolks and sugar. Whisk them together until the mixture becomes pale and thick, about 2-3 minutes.
- Add Marsala Wine: Slowly pour the Marsala wine into the egg mixture, continuing to whisk until fully combined.
- Cook the Zabaglione: Place the bowl over the simmering water and whisk continuously. The mixture should be whisked constantly to prevent the eggs from scrambling. Continue whisking until the mixture doubles in volume and becomes thick and creamy, which should take about 10 minutes.
- Check Consistency: The Zabaglione is ready when it has a ribbon-like consistency, meaning that when you lift the whisk, the mixture should fall back onto itself in a ribbon that holds its shape for a few seconds.
- Serve: Remove the bowl from the heat and serve the Zabaglione immediately if you prefer it warm. Alternatively, let it cool and then chill in the refrigerator if a cold dessert is desired. Serve with fresh berries if you like.
Extra Tips:
When making Zabaglione, it’s essential to maintain a gentle simmer under the bowl to avoid overheating the egg mixture. If the bowl becomes too hot, the eggs may scramble, resulting in a lumpy texture.
Whisking constantly is vital to achieving a smooth and creamy consistency. Also, for a flavor variation, you can substitute Marsala wine with other dessert wines or liqueurs, such as sherry or amaretto, to give your Zabaglione a unique taste.
Finally, if you prefer a thicker consistency, you can beat the mixture a little longer until it reaches your desired thickness.
Sweet Ricotta Pie

Sweet Ricotta Pie is a classic Italian dessert that combines the creamy texture of ricotta cheese with a sweet, buttery crust. This pie is perfect for those who enjoy a light, yet satisfying sweet treat. Traditionally served during holiday gatherings, Sweet Ricotta Pie is a beloved dish in Italian households, evoking memories of family celebrations and festive occasions. Its delicate flavor and smooth consistency make it a favorite among both adults and children.
The pie’s filling is made by blending ricotta cheese with sugar, eggs, and a hint of vanilla, creating a luscious custard-like texture. Encased in a buttery, flaky crust, the filling is baked until it sets, resulting in a dessert that’s both rich in flavor and pleasing to the eye. This dessert is perfect for serving at dinner parties or as a special treat after a Sunday meal. The following recipe will guide you through creating a Sweet Ricotta Pie that serves 4-6 people, guaranteeing that everyone can enjoy this delightful dessert.
Ingredients:
- 1 1/2 cups ricotta cheese
- 3/4 cup granulated sugar
- 3 large eggs
- 1 teaspoon vanilla extract
- 1/2 teaspoon lemon zest
- 1 pre-made pie crust (or homemade if preferred)
- 1 tablespoon all-purpose flour
- 1/4 teaspoon salt
- Powdered sugar for dusting (optional)
Cooking Instructions:
- Preheat the Oven: Start by preheating your oven to 350°F (175°C). This guarantees that your pie will bake evenly.
- Prepare the Pie Crust: Roll out your pre-made pie crust and fit it into a 9-inch pie pan. Trim any excess dough from the edges and crimp the edges to give it a nice finish.
- Mix the Filling: In a large mixing bowl, combine the ricotta cheese, granulated sugar, eggs, vanilla extract, lemon zest, flour, and salt. Use a hand mixer or whisk to blend the ingredients until the mixture is smooth and creamy.
- Fill the Pie Crust: Pour the ricotta mixture into the prepared pie crust, spreading it evenly with a spatula.
- Bake the Pie: Place the pie in the preheated oven and bake for about 45-50 minutes, or until the filling is set and the top is lightly golden. You can test the doneness by inserting a toothpick into the center; it should come out clean.
- Cool the Pie: Once baked, remove the pie from the oven and allow it to cool at room temperature for at least 30 minutes. This will help the filling to set properly.
- Serve: Before serving, you may dust the top with powdered sugar for an extra touch of sweetness. Slice and enjoy!
Extra Tips:
For the best results, make sure your ricotta cheese is well-drained to avoid a watery filling. If you prefer a more pronounced lemon flavor, you can add a bit more lemon zest.
Additionally, for a homemade touch, consider making your pie crust from scratch; it can add a layer of flavor and texture to the pie. When serving, pair your Sweet Ricotta Pie with a cup of espresso or a light dessert wine to enhance its flavors.
Delicate Amaretti Cookies
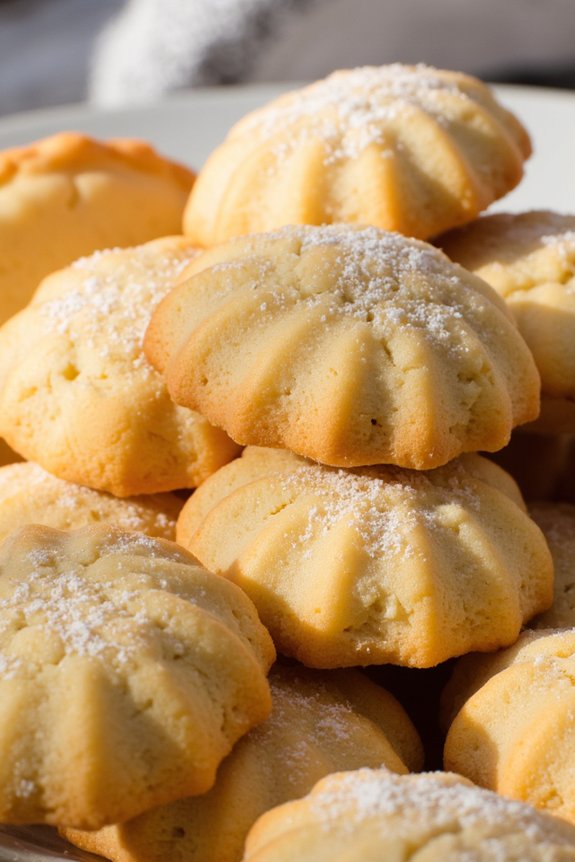
Amaretti cookies are a classic Italian treat, known for their delightful almond flavor and delicate, crumbly texture. These cookies are perfect for pairing with a cup of coffee or as a delightful finish to a meal. Originating from the Italian region of Lombardy, amaretti are traditionally made with ground almonds, egg whites, and sugar, resulting in a naturally gluten-free cookie.
While there are several variations of this recipe, the classic version delivers a perfect balance of sweetness and nuttiness that’s sure to please any dessert lover.
Making Delicate Amaretti Cookies is a simple and rewarding process, requiring just a few ingredients and minimal preparation time. These cookies can be enjoyed fresh out of the oven or stored for later enjoyment. The recipe is designed to serve 4-6 people, making it ideal for small gatherings or as an indulgent treat for yourself.
Whether you prefer them soft or crisp, these amaretti cookies are a versatile dessert that can be adapted to your personal taste.
Ingredients for 4-6 servings:
- 2 cups almond flour
- 1 cup granulated sugar
- 2 large egg whites
- 1/2 teaspoon almond extract
- 1/4 teaspoon vanilla extract
- A pinch of salt
- Powdered sugar, for dusting
Instructions:
- Prepare the Oven and Baking Sheet: Preheat your oven to 325°F (165°C). Line a baking sheet with parchment paper to prevent the cookies from sticking and to guarantee even baking.
- Combine Dry Ingredients: In a large mixing bowl, combine the almond flour, granulated sugar, and a pinch of salt. Mix well to guarantee the ingredients are evenly distributed.
- Whip Egg Whites: In a separate bowl, use an electric mixer to beat the egg whites until they form soft peaks. This will help give the cookies a light and airy texture.
- Incorporate Flavors: Gently fold the almond extract and vanilla extract into the whipped egg whites. Be careful not to deflate the mixture as you want to retain as much air as possible for a light cookie.
- Mix Ingredients Together: Gradually fold the dry ingredient mixture into the whipped egg whites. Stir until a sticky dough forms, making sure all ingredients are well combined.
- Shape the Cookies: Using a small spoon or your hands, scoop tablespoon-sized portions of the dough and roll them into balls. Place each ball onto the prepared baking sheet, spacing them about 2 inches apart to allow room for spreading.
- Dust with Powdered Sugar: Lightly dust the tops of the cookies with powdered sugar, adding a subtle sweetness and a lovely finish to the baked cookies.
- Bake the Cookies: Place the baking sheet in the preheated oven and bake for 20-25 minutes, or until the cookies are lightly golden around the edges. They should be firm to the touch but still slightly soft in the center.
- Cool and Serve: Allow the cookies to cool on the baking sheet for a few minutes before transferring them to a wire rack to cool completely. Enjoy them warm or store them in an airtight container for later.
Extra Tips:
For a more intense almond flavor, consider using almond paste or adding finely chopped almonds to the dough. If you prefer a chewier texture, slightly underbake the cookies. Conversely, for crispier cookies, bake them until they’re a deeper golden brown.
Remember that the cookies will continue to firm up as they cool, so it’s essential not to overbake them in the oven. Finally, to guarantee the best results, use high-quality almond flour and fresh egg whites for the lightest texture.
Refreshing Lemon Granita
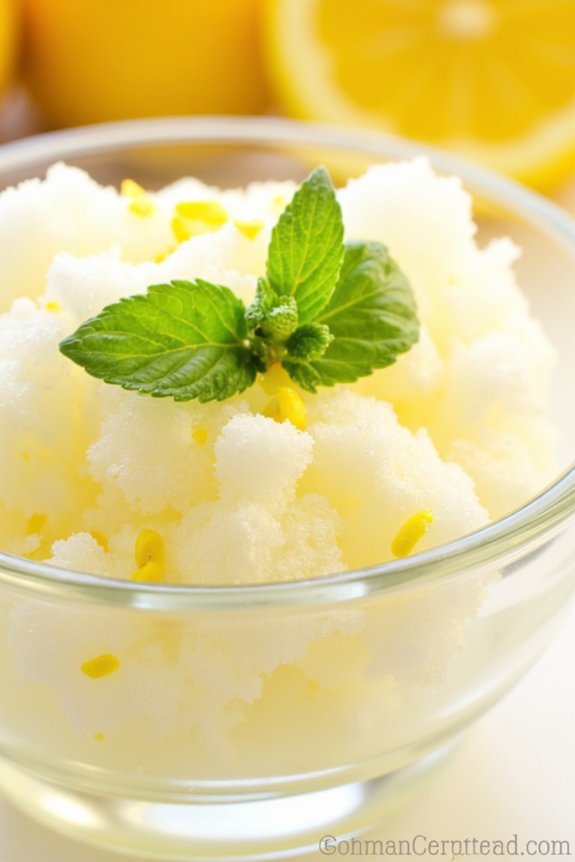
Lemon Granita is a quintessential Italian dessert that captures the essence of a sunny Sicilian summer in every icy bite. This invigorating, semi-frozen dessert is the perfect way to end a meal, offering a burst of citrusy goodness with its tart and sweet flavors. Granita is a simple dessert made from sugar, water, and lemon juice, and its texture is somewhere between sorbet and shaved ice. It’s incredibly easy to make and requires no special equipment, making it an ideal treat for those hot days when you crave something cool and light.
Originating from Sicily, Lemon Granita is often enjoyed as a breakfast treat in Italy, served alongside a brioche. Its versatility allows it to be served in a variety of settings, from a casual family dinner to an elegant summer soirée. The key to a perfect granita is achieving the right balance of sweet and sour, with a texture that’s both icy and smooth. By carefully following the steps below, you can create this delightful dessert that will transport you straight to the Italian coast.
Ingredients (Serves 4-6)
- 4 cups water
- 1 cup granulated sugar
- 1 cup freshly squeezed lemon juice (approximately 4-6 lemons)
- Zest of 2 lemons
- Fresh mint leaves, for garnish (optional)
Cooking Instructions
- Prepare the Sugar Syrup: In a medium saucepan, combine the water and granulated sugar. Place the saucepan over medium heat and stir the mixture until the sugar dissolves completely. This should take about 5 minutes. Once dissolved, remove the saucepan from the heat and let the syrup cool to room temperature.
- Add the Lemon Elements: Once the sugar syrup has cooled, stir in the freshly squeezed lemon juice and the lemon zest. Mix well to guarantee the flavors are evenly distributed throughout the syrup.
- Freeze the Mixture: Pour the lemon mixture into a shallow baking dish or a freezer-safe container. Place it in the freezer. After about 30 minutes, when the edges begin to freeze, use a fork to stir and break up the icy parts. Return it to the freezer.
- Scraping for Texture: Continue to check the granita every 30 minutes, using a fork to scrape and fluff the ice crystals each time. This process will take about 2 to 3 hours, depending on your freezer. The goal is to achieve a light, flaky texture.
- Serve and Garnish: Once the granita is fully frozen and flaky, scoop it into serving dishes or glasses. Garnish with fresh mint leaves for an added touch of freshness and aroma, if desired. Serve immediately.
Extra Tips
For the best results, use freshly squeezed lemon juice and avoid bottled varieties, as they can alter the taste of the granita. If you prefer a sweeter granita, you can adjust the sugar to your liking, but be careful not to overshadow the natural tartness of the lemons.
When zesting the lemons, confirm you only grate the yellow part of the peel, avoiding the bitter white pith. If you’re planning a large gathering, the granita can be made a day in advance and fluffed with a fork just before serving to restore its light texture.
Enjoy your lemon granita as a palate cleanser between courses or as an invigorating dessert on a warm day.
Fluffy Italian Sponge Cake
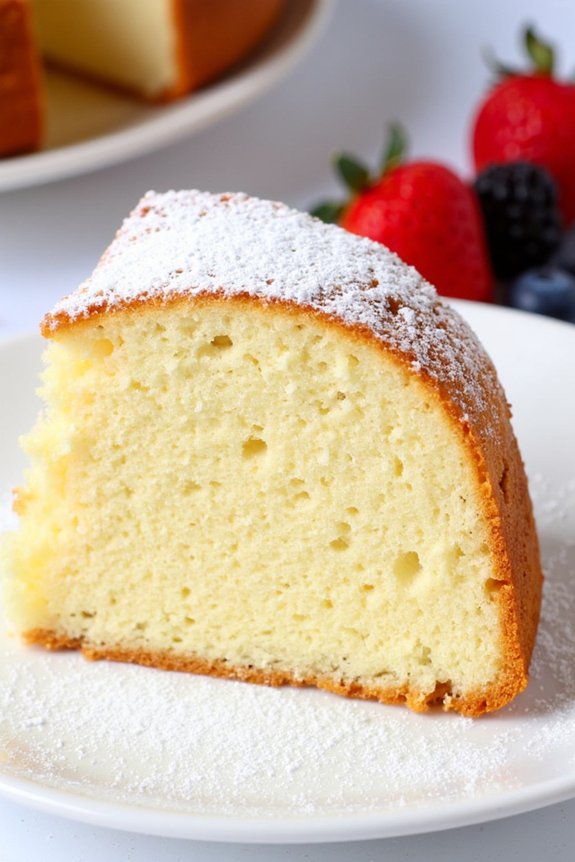
Fluffy Italian Sponge Cake, known as Pan di Spagna in Italy, is a classic and versatile dessert that forms the base for many Italian sweets. This cake is renowned for its light and airy texture, achieved without the use of any leavening agents like baking powder or soda. Instead, the fluffiness comes from well-beaten eggs, which are carefully folded into the batter to create a delicate crumb.
Typically, Pan di Spagna is used in layered cakes, trifles, or simply enjoyed with a dusting of powdered sugar and fresh fruit. To create a perfect Fluffy Italian Sponge Cake, it’s important to handle the batter with care to maintain its airy structure. This cake is ideal for those who appreciate a dessert that isn’t overly sweet, as it allows for creativity with fillings and toppings such as whipped cream, fruit preserves, or custard.
Whether it’s a special occasion or a simple family meal, this cake is sure to impress with its classic charm and delightful taste.
Ingredients for Fluffy Italian Sponge Cake (serves 4-6):
- 5 large eggs
- 150 grams of granulated sugar
- 150 grams of all-purpose flour
- 1 teaspoon of vanilla extract
- A pinch of salt
- Powdered sugar for dusting (optional)
Cooking Instructions:
- Preheat and Prepare: Preheat your oven to 350°F (175°C). Grease and line an 8-inch round cake pan with parchment paper to prevent sticking.
- Separate and Beat Eggs: Separate the egg whites from the yolks. In a large mixing bowl, beat the egg yolks with the sugar and vanilla extract until the mixture is pale and creamy. This should take about 5 minutes with an electric mixer.
- Whip Egg Whites: In another clean bowl, whisk the egg whites with a pinch of salt until they form stiff peaks. This can take 3-5 minutes, depending on your mixer’s speed.
- Combine Mixtures: Gently fold the whipped egg whites into the yolk mixture using a spatula. Be careful to maintain as much airiness as possible.
- Incorporate Flour: Sift the flour over the egg mixture and gently fold it in until just combined. Be cautious not to deflate the batter.
- Bake: Pour the batter into the prepared cake pan, smoothing the top with a spatula. Bake in the preheated oven for 25-30 minutes or until a toothpick inserted into the center comes out clean.
- Cool and Serve: Allow the cake to cool in the pan for 10 minutes before transferring it to a wire rack to cool completely. Dust with powdered sugar before serving, if desired.
Extra Tips:
For best results, verify all your ingredients are at room temperature before starting. This helps the eggs whip up to their fullest volume, contributing to the cake’s fluffiness.
Additionally, take care not to over-mix when incorporating the flour, as this can deflate the batter and result in a denser cake. If you’d like to add a touch of citrus, you can include the zest of one lemon or orange in the egg yolk mixture for a revitalizing twist.
Nutty Biscotti
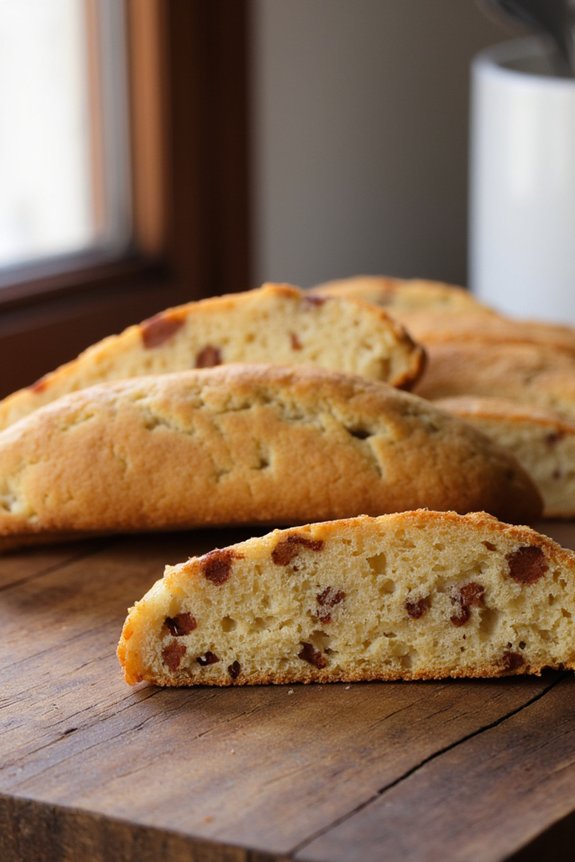
Nutty Biscotti is a classic Italian treat, perfect for pairing with your morning coffee or an afternoon tea. These twice-baked cookies are crunchy, flavorful, and can be customized with your favorite nuts and spices.
Originating from the Italian word “bis” (twice) and “cotto” (cooked), biscotti refers to the unique baking method that gives these cookies their distinctive crispiness. This versatile dessert isn’t only easy to make but also stores well, making it an excellent choice for making ahead of time and enjoying at your leisure.
In this recipe, we’ll create a delicious batch of Nutty Biscotti that serves 4-6 people. By incorporating a mix of almonds and hazelnuts, along with a hint of vanilla and cinnamon, we’ll achieve a delightful blend of flavors that’s sure to please.
Whether you’re hosting a dinner party or simply indulging your sweet tooth, this Nutty Biscotti recipe will become a staple in your dessert repertoire.
Ingredients (Serves 4-6):
- 2 cups all-purpose flour
- 1 cup granulated sugar
- 1 teaspoon baking powder
- 1/2 teaspoon salt
- 1/2 teaspoon ground cinnamon
- 3 large eggs
- 1 teaspoon vanilla extract
- 1 cup whole almonds, toasted and roughly chopped
- 1 cup hazelnuts, toasted and roughly chopped
Cooking Instructions:
- Preheat and Prepare: Preheat your oven to 350°F (175°C). Line a baking sheet with parchment paper to prevent sticking.
- Mix Dry Ingredients: In a large bowl, combine the flour, sugar, baking powder, salt, and cinnamon. Stir until all the dry ingredients are well mixed, ensuring an even distribution of the baking powder and spices.
- Blend Wet Ingredients: In a separate bowl, whisk the eggs and vanilla extract together until well combined. This mixture will add moisture and flavor to your biscotti dough.
- Combine and Form Dough: Gradually add the wet ingredients to the dry ingredients, stirring until a rough dough forms. Add the chopped almonds and hazelnuts, mixing until they’re evenly distributed throughout the dough.
- Shape the Biscotti Log: Transfer the dough onto a lightly floured surface. With floured hands, shape the dough into a 12-inch long and 3-inch wide log. Place the log onto the prepared baking sheet.
- First Bake: Bake the biscotti log in the preheated oven for about 25-30 minutes, or until it’s firm to the touch and lightly golden brown. Remove from the oven and allow it to cool for 10 minutes.
- Slice the Biscotti: Once slightly cooled, transfer the log to a cutting board. Using a sharp serrated knife, cut the log diagonally into 1/2-inch thick slices.
- Second Bake: Place the slices back onto the baking sheet, cut side down. Bake for an additional 10-12 minutes, then flip the slices over and bake for another 10-12 minutes, or until the biscotti are dry and golden.
- Cool and Store: Remove the biscotti from the oven and let them cool completely on a wire rack. Once cool, store them in an airtight container.
Extra Tips:
For an added layer of flavor, consider dipping one end of your Nutty Biscotti in melted chocolate and allowing it to set before serving. You can also experiment with different nuts such as pistachios or walnuts, or add dried fruit like cranberries or apricots for a fruity twist.
Rich Chocolate Semifreddo
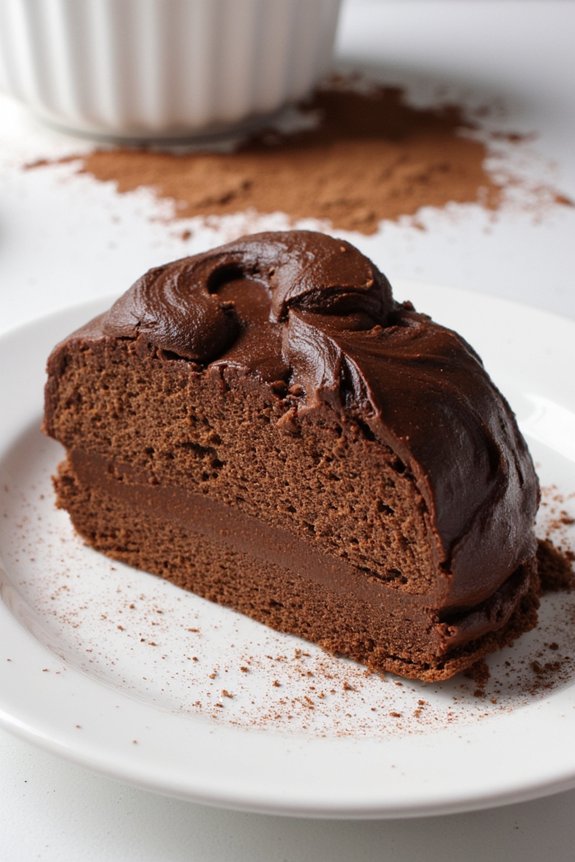
Rich Chocolate Semifreddo is a classic Italian dessert that offers an indulgent experience for chocolate lovers. With its creamy texture and deep chocolate flavor, this semifreddo is a delightful treat that requires no churning, making it an easy yet sophisticated dessert to prepare. The word “semifreddo” translates to “half-cold” in Italian, and it perfectly describes the soft, mousse-like consistency of this dessert.
It’s a wonderful choice for a make-ahead dessert, as it can be stored in the freezer and brought out to impress guests with its elegant simplicity.
This Rich Chocolate Semifreddo combines the richness of dark chocolate with the smoothness of whipped cream and the lightness of egg whites, creating a harmonious blend of flavors and textures. The dessert is then frozen until it’s firm enough to slice, yet still soft enough to melt in your mouth. Perfect for serving at gatherings or special occasions, this semifreddo is sure to be a crowd-pleaser with its luxurious taste and beautiful presentation.
Ingredients for 4-6 servings:
- 200g dark chocolate (70% cocoa)
- 4 large eggs, separated
- 100g granulated sugar
- 1 teaspoon vanilla extract
- 300ml heavy cream
- A pinch of salt
- Cocoa powder or grated chocolate for garnish (optional)
Cooking Instructions:
- Prepare the Chocolate: Begin by melting the dark chocolate. Break the chocolate into small pieces and place them in a heatproof bowl. Set the bowl over a pot of simmering water, making sure the bottom of the bowl doesn’t touch the water. Stir occasionally until the chocolate has completely melted. Remove the bowl from the heat and set it aside to cool slightly.
- Whip the Egg Yolks: In a separate large bowl, whisk together the egg yolks, sugar, and vanilla extract until the mixture becomes pale and creamy. This process helps to incorporate air and dissolve the sugar, resulting in a smooth texture. Slowly pour the melted chocolate into the egg yolk mixture, stirring continuously to combine.
- Beat the Egg Whites: In another clean bowl, add a pinch of salt to the egg whites and beat them with an electric mixer until stiff peaks form. This will add volume and lightness to the semifreddo. Gently fold the beaten egg whites into the chocolate mixture, being careful not to deflate the air incorporated into the whites.
- Whip the Cream: In a chilled bowl, whip the heavy cream until soft peaks form. The cream should be smooth and hold its shape without being too stiff. Carefully fold the whipped cream into the chocolate and egg mixture, again taking care to maintain the airy consistency.
- Assemble and Freeze: Line a loaf pan or a similar mold with plastic wrap, leaving excess wrap hanging over the edges for easy removal later. Pour the semifreddo mixture into the prepared mold, smoothing the top with a spatula. Cover the top with the overhanging plastic wrap and place it in the freezer for at least 4-6 hours, or until firm.
- Serve: To serve, remove the semifreddo from the freezer and let it sit at room temperature for a few minutes to soften slightly. Unwrap the plastic and turn the semifreddo out onto a serving platter. Slice into portions and, if desired, dust with cocoa powder or sprinkle with grated chocolate before serving.
Extra Tips:
When making Rich Chocolate Semifreddo, it’s vital to work quickly when folding the whipped ingredients together to prevent the mixture from deflating, which can affect the dessert’s texture.
Additionally, using high-quality chocolate will enhance the overall flavor of the semifreddo. For a more intense chocolate experience, consider adding a tablespoon of coffee liqueur or espresso to the melted chocolate mixture.
Finally, verify all utensils used for beating egg whites are clean and dry to achieve the best volume.