

I recently discovered the irresistible allure of Italian ricotta desserts, and I’m completely smitten. Picture yourself enjoying a luscious Classic Ricotta Cheesecake or a tender Lemon Ricotta Cookie. Each bite melts in your mouth with a gentle sweetness that leaves you wanting more. Ready to explore these delightful treats? Here are 13 smooth and easy recipes that will turn your kitchen into an Italian dessert oasis.
Classic Ricotta Cheesecake

Indulge in the creamy and classic delight of Italian Ricotta Cheesecake, a timeless dessert that brings the essence of Italy to your table. This cheesecake is a perfect blend of smooth ricotta cheese and a hint of citrus zest, which adds a revitalizing twist to the traditional cheesecake flavor. Its light and airy texture makes it a sophisticated dessert that’s both satisfying and not overly dense, ideal for ending any meal on a high note.
This recipe yields a cheesecake that serves 4-6 people, perfect for a family gathering or a cozy dinner with friends. The preparation process is straightforward, using simple and fresh ingredients commonly found in Italian kitchens. With a delicate base made from crushed graham crackers or biscotti, the cheesecake is topped with a generous layer of ricotta filling, then baked to perfection.
Ingredients:
- 1 ½ cups ricotta cheese
- ¾ cup granulated sugar
- 3 large eggs
- 1 teaspoon vanilla extract
- 1 tablespoon lemon zest
- 2 tablespoons all-purpose flour
- ¼ teaspoon salt
- 1 cup graham cracker crumbs
- 4 tablespoons unsalted butter, melted
- 1 cup sour cream (optional, for topping)
Instructions:
- Preheat the Oven: Preheat your oven to 325°F (165°C) to confirm it reaches the right temperature by the time you’re ready to bake your cheesecake.
- Prepare the Crust: In a medium mixing bowl, combine the graham cracker crumbs and melted butter. Mix until the crumbs are evenly coated with butter. Press the mixture firmly into the bottom of a 9-inch springform pan to create an even crust layer.
- Make the Filling: In a large bowl, beat the ricotta cheese until smooth using an electric mixer. Gradually add in the sugar, then the eggs one at a time, mixing well after each addition. Stir in the vanilla extract, lemon zest, flour, and salt until just combined.
- Assemble the Cheesecake: Pour the ricotta mixture over the prepared crust in the springform pan, spreading it evenly with a spatula.
- Bake the Cheesecake: Place the cheesecake in the preheated oven and bake for 45-50 minutes, or until the edges are set and the center is slightly jiggly. Avoid overbaking as it may cause the cheesecake to crack.
- Cool and Set: Once baked, allow the cheesecake to cool in the pan for about 15 minutes. Run a knife around the edge of the pan to loosen the cheesecake, then remove the outer ring. Let the cheesecake cool completely before refrigerating for at least 4 hours or overnight to set.
- Optional Topping: Before serving, spread a layer of sour cream over the top of the cheesecake for added creaminess and tang.
Extra Tips:
For best results, use high-quality ricotta cheese that’s well-drained to confirm a smooth texture. This cheesecake is best when allowed to chill overnight, allowing the flavors to meld beautifully.
If you’re in a hurry, a few hours in the fridge will suffice, but the longer it sets, the better it tastes. To prevent cracking, avoid opening the oven door while baking, and consider baking your cheesecake in a water bath for gentle, even cooking.
Lemon Ricotta Cookies

Lemon Ricotta Cookies are a delightful Italian treat that perfectly balance the creamy texture of ricotta cheese with the bright, zesty flavor of fresh lemon. These cookies are soft, cake-like, and invigoratingly light, making them an ideal dessert or afternoon snack. The ricotta cheese provides a moistness that keeps the cookies tender, while the lemon glaze adds a sweet and citrusy finish. Perfect for any gathering or to enjoy with a cup of tea, these cookies are a favorite among lemon lovers.
The recipe for Lemon Ricotta Cookies is straightforward, requiring only a handful of ingredients that you likely already have in your pantry and refrigerator. With a preparation time of about 15 minutes and a baking time of 15 minutes, you’ll have these delightful cookies ready to enjoy in no time. This recipe serves 4-6 people, making it perfect for a family dessert or a small get-together with friends.
Ingredients:
- 1 ¾ cups all-purpose flour
- 1 teaspoon baking powder
- ½ teaspoon salt
- ½ cup unsalted butter, softened
- 1 cup granulated sugar
- 1 large egg
- 8 ounces ricotta cheese
- Zest of 1 lemon
- 3 tablespoons lemon juice
For the glaze:
- 1 cup powdered sugar
- 3 tablespoons lemon juice
- Zest of 1 lemon
Instructions:
- Preheat the Oven: Preheat your oven to 350°F (175°C). Line a baking sheet with parchment paper or a silicone baking mat to prevent the cookies from sticking.
- Mix Dry Ingredients: In a medium-sized bowl, whisk together the flour, baking powder, and salt until well combined. Set this dry mixture aside.
- Cream Butter and Sugar: In a large mixing bowl, use an electric mixer to cream the softened butter and granulated sugar until light and fluffy, about 2-3 minutes.
- Add Wet Ingredients: Beat in the egg until fully incorporated. Then, add the ricotta cheese, lemon zest, and lemon juice. Mix until smooth and well combined.
- Combine Ingredients: Gradually add the dry ingredients to the wet ingredients, mixing on low speed until just combined. Don’t overmix, as this can lead to tougher cookies.
- Scoop the Dough: Using a tablespoon or cookie scoop, drop rounded tablespoons of dough onto the prepared baking sheet, spacing them about 2 inches apart.
- Bake the Cookies: Bake in the preheated oven for 13-15 minutes, or until the edges are lightly golden. The centers should remain soft. Remove from the oven and allow the cookies to cool on the baking sheet for 5 minutes before transferring them to a wire rack to cool completely.
- Prepare the Glaze: While the cookies are cooling, prepare the glaze by whisking together the powdered sugar, lemon juice, and lemon zest in a small bowl until smooth.
- Glaze the Cookies: Once the cookies are completely cooled, spoon the lemon glaze over each cookie, allowing it to drizzle down the sides. Let the glaze set for about 15 minutes before serving.
Extra Tips:
When making Lemon Ricotta Cookies, be sure to use fresh lemon juice and zest for the best flavor. The freshness of the lemon is key to achieving the bright, citrusy taste that complements the creamy ricotta.
Additionally, confirm that your butter is properly softened to blend seamlessly with the sugar, creating a light and fluffy base for the cookies. If you prefer a more pronounced lemon flavor, you can add an extra tablespoon of lemon juice to the glaze.
Finally, these cookies are best enjoyed the day they’re made, but they can be stored in an airtight container at room temperature for up to 3 days.
Ricotta Tiramisu

Ricotta Tiramisu is an exquisite Italian dessert that combines the creamy texture of ricotta cheese with the rich flavors of coffee and cocoa. This delightful twist on the classic tiramisu is light yet indulgent, making it a perfect treat for any occasion.
The use of ricotta cheese offers a slightly different texture compared to traditional mascarpone, delivering a unique taste experience that’s both revitalizing and satisfying. This recipe is ideal for those who appreciate the classic Italian dessert but are looking for an alternative that’s just as delicious and easy to make.
The preparation of Ricotta Tiramisu involves layering coffee-soaked ladyfingers with a creamy ricotta mixture, topped with a dusting of cocoa powder. The dessert is then chilled, allowing the flavors to meld together and create an unforgettable taste.
With a serving size suitable for 4-6 people, this dessert is perfect for family gatherings or dinner parties. The following recipe provides step-by-step instructions to guide you in creating this delectable dessert, guaranteeing a perfect outcome every time.
Ingredients (Serves 4-6):
- 2 cups ricotta cheese
- 1 cup heavy cream
- 1/2 cup granulated sugar
- 1 teaspoon vanilla extract
- 1 cup strong brewed coffee, cooled
- 2 tablespoons coffee liqueur (optional)
- 24 ladyfinger biscuits
- Unsweetened cocoa powder, for dusting
- Chocolate shavings, for garnish (optional)
Cooking Instructions:
- Prepare the Ricotta Mixture: In a large mixing bowl, combine the ricotta cheese, heavy cream, granulated sugar, and vanilla extract. Use a hand mixer or whisk to blend the ingredients until smooth and creamy. This mixture will form the creamy layers of your tiramisu.
- Prepare the Coffee Mixture: In a shallow dish, mix the brewed coffee and coffee liqueur (if using). Stir well to combine. This mixture will be used to soak the ladyfinger biscuits.
- Layer the Tiramisu: Quickly dip each ladyfinger biscuit into the coffee mixture, making sure they’re coated but not overly saturated. Arrange a layer of soaked ladyfingers in the bottom of a serving dish.
- Add the Ricotta Layer: Spread half of the prepared ricotta mixture over the layer of ladyfingers, smoothing it out with a spatula to guarantee an even layer.
- Repeat the Layers: Add another layer of coffee-soaked ladyfingers on top of the ricotta layer, followed by the remaining ricotta mixture. Smooth the top layer with a spatula.
- Chill the Dessert: Cover the dish with plastic wrap and refrigerate for at least 4 hours, or overnight if possible. This allows the flavors to meld and the dessert to set properly.
- Serve and Garnish: Before serving, dust the top of the tiramisu with a generous amount of unsweetened cocoa powder. Optionally, add chocolate shavings for extra garnish. Slice and serve chilled.
Extra Tips:
For the best results, make sure that your ricotta cheese is well-drained before use to prevent the tiramisu from becoming too watery. If you prefer a stronger coffee flavor, feel free to adjust the coffee strength or add more coffee liqueur.
Additionally, allowing the tiramisu to chill overnight will enhance the flavors and improve the texture. Remember to serve the dessert cold, as it tastes best when properly chilled. Enjoy your homemade Ricotta Tiramisu with a cup of espresso for an authentic Italian experience!
Cannoli With Ricotta Filling

Cannoli, a classic Italian pastry, is revered for its crispy, tubular shell filled with a creamy ricotta mixture. Originating from Sicily, this dessert has become a staple in Italian cuisine and is loved by many worldwide for its perfect combination of textures and flavors.
The contrast between the crunchy shell and the smooth, sweet filling makes every bite a delightful experience. Traditionally, cannoli are made with a hint of citrus zest, vanilla, and sometimes even chocolate chips or candied fruit, creating a complex yet harmonious taste.
Preparing cannoli at home can be a rewarding endeavor, offering the opportunity to personalize the filling to your taste. The shells can be made from scratch, or you can use store-bought ones for convenience.
The key to a great cannoli is a perfectly prepared ricotta filling, which should be creamy, flavorful, and not too sweet. The process involves mixing fresh ricotta cheese with sugar, vanilla extract, and additional flavorings, then piping it into the shells just before serving to maintain their crispness.
Ingredients (Serving Size: 4-6 people):
- 12 pre-made cannoli shells
- 2 cups ricotta cheese, drained
- 1 cup powdered sugar
- 1 teaspoon vanilla extract
- 1/2 teaspoon ground cinnamon
- 1/4 cup mini chocolate chips
- Zest of 1 orange
- 1/4 cup chopped candied fruit (optional)
- 1/4 cup pistachios, finely chopped (optional for garnish)
- Powdered sugar for dusting
Instructions:
- Prepare the Ricotta: Begin by draining the ricotta cheese using a fine mesh strainer or cheesecloth for at least 1 hour. This step is essential to remove excess moisture and achieve a thick, creamy filling.
- Make the Filling: In a mixing bowl, combine the drained ricotta cheese, powdered sugar, and vanilla extract. Mix well until the ingredients are fully incorporated and the mixture becomes smooth.
- Add Flavors: Stir in the ground cinnamon, mini chocolate chips, orange zest, and candied fruit (if using). Confirm the ingredients are evenly distributed throughout the filling.
- Chill the Filling: Cover the ricotta mixture with plastic wrap and refrigerate for at least 30 minutes. This allows the flavors to meld and the filling to firm up slightly.
- Fill the Cannoli Shells: Once chilled, transfer the ricotta filling to a piping bag fitted with a large, round nozzle. Pipe the filling into both ends of each cannoli shell, confirming they’re completely filled.
- Garnish and Serve: Optionally, dip the ends of each filled cannoli into the chopped pistachios for added texture and flavor. Dust the cannoli with powdered sugar just before serving.
Extra Tips:
When making cannoli, the quality of the ricotta cheese is paramount. Choose a high-quality, fresh ricotta to guarantee a creamy consistency in the filling.
If you prefer a smoother texture, you can also blend the ricotta for a few seconds before mixing in other ingredients. Additionally, only fill the cannoli shells just before serving to maintain their crisp texture—this prevents them from becoming soggy.
If you like variation, consider adding a splash of almond extract or a sprinkle of nutmeg to the filling for a unique twist.
Ricotta and Almond Cake
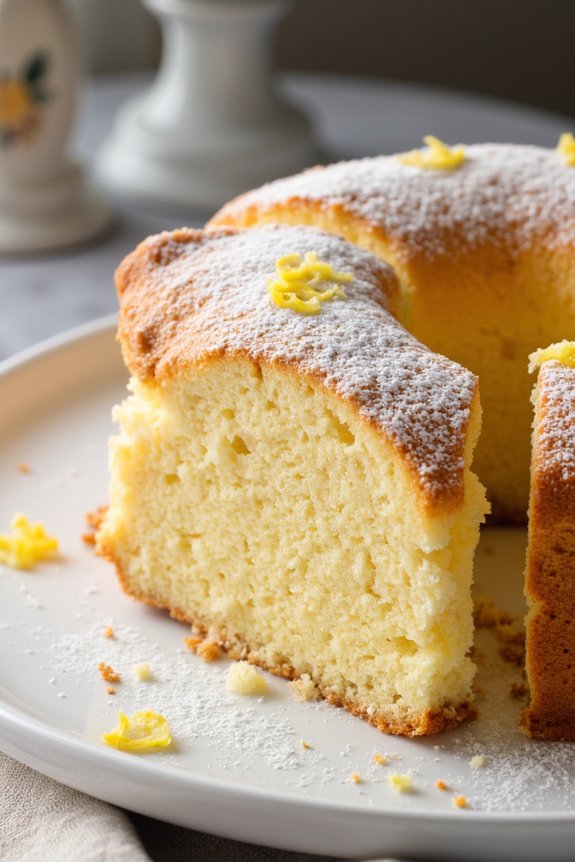
Indulge in the delightful fusion of creamy ricotta and nutty almonds with this traditional Italian Ricotta and Almond Cake. This dessert perfectly blends the subtle sweetness of ricotta cheese with the rich, buttery taste of almonds, creating a moist and flavorful cake that’s perfect for any occasion.
Whether it’s a family gathering, a dinner party, or simply a cozy afternoon treat, this cake is sure to impress with its delicate texture and exquisite taste.
The Ricotta and Almond Cake isn’t only delicious but also surprisingly easy to make. With simple ingredients and straightforward steps, even novice bakers can create this elegant dessert.
The cake’s soft and moist crumb, paired with a hint of citrus zest, makes it a rejuvenating and satisfying end to any meal. Serve it with a dusting of powdered sugar or a dollop of whipped cream for an added touch of decadence.
Ingredients (serves 4-6):
- 1 cup ricotta cheese
- 1 cup almond flour
- 1/2 cup all-purpose flour
- 3/4 cup granulated sugar
- 1/2 cup unsalted butter, softened
- 3 large eggs
- 1 teaspoon vanilla extract
- 1 teaspoon almond extract
- 1 teaspoon baking powder
- Zest of 1 lemon
- A pinch of salt
- Powdered sugar for dusting (optional)
Instructions:
- Preheat the Oven: Begin by preheating your oven to 350°F (175°C). Grease a 9-inch round cake pan with butter or line it with parchment paper to prevent sticking.
- Cream the Butter and Sugar: In a large mixing bowl, cream together the softened butter and granulated sugar using an electric mixer on medium speed until the mixture is light and fluffy, about 3-4 minutes.
- Add the Eggs: Add the eggs one at a time, beating well after each addition to make certain they’re fully incorporated. This process helps to achieve a light and airy texture in the cake.
- Mix in the Ricotta and Extracts: Reduce the mixer speed to low and add the ricotta cheese, vanilla extract, almond extract, and lemon zest. Mix until well combined and smooth.
- Combine Dry Ingredients: In a separate bowl, whisk together the almond flour, all-purpose flour, baking powder, and salt.
- Incorporate Dry Ingredients: Gradually add the dry ingredients to the wet mixture, folding gently with a spatula until just combined. Be careful not to overmix, as this can result in a dense cake.
- Pour into the Pan: Pour the batter into the prepared cake pan, smoothing the top with a spatula to make sure of an even surface.
- Bake the Cake: Place the cake in the preheated oven and bake for 35-40 minutes, or until a toothpick inserted into the center comes out clean. The top should be golden brown.
- Cool and Serve: Allow the cake to cool in the pan for about 10 minutes before transferring it to a wire rack to cool completely. Once cooled, dust with powdered sugar if desired, and serve.
Extra Tips:
For an extra burst of flavor, consider adding a handful of toasted slivered almonds on top of the cake before baking. This will add a delightful crunch and enhance the almond flavor.
If you prefer a gluten-free option, you can substitute the all-purpose flour with a gluten-free flour blend. Remember to store any leftovers in an airtight container at room temperature for up to three days, or refrigerate for up to a week to maintain the cake’s freshness.
Enjoy your homemade Ricotta and Almond Cake with a cup of coffee or tea for a truly Italian culinary experience.
Chocolate Ricotta Mousse

Chocolate Ricotta Mousse is an indulgent and creamy dessert that perfectly balances the richness of chocolate with the lightness of ricotta cheese. This Italian-inspired treat is incredibly easy to make and will impress your guests with its velvety texture and exquisite taste.
Whether you’re hosting a dinner party or simply craving a sweet delight, this mousse offers a delightful experience that satisfies your chocolate desires without being overly heavy.
The combination of ricotta cheese and chocolate creates a dessert that’s both airy and luscious. Ricotta, with its mild flavor and smooth texture, serves as the perfect base to carry the deep, rich notes of chocolate.
This mousse can be prepared in advance, allowing you to focus more on your entertaining and less on last-minute preparations. Serve it in elegant dessert glasses or simple bowls, and garnish with a sprinkle of cocoa powder or fresh berries for an added touch of sophistication.
Ingredients for 4-6 servings:
- 1 cup (approximately 250g) ricotta cheese
- 4 ounces (approximately 115g) dark chocolate (70% cocoa), chopped
- 1/2 cup (approximately 120ml) heavy cream
- 1/4 cup (approximately 50g) granulated sugar
- 1 teaspoon vanilla extract
- A pinch of salt
- Optional: cocoa powder or fresh berries for garnish
Instructions:
- Prepare the Ricotta: Place the ricotta cheese in a fine mesh strainer set over a bowl. Let it drain for about 15 minutes to remove excess moisture, which will help achieve a smoother mousse.
- Melt the Chocolate: In a heatproof bowl, melt the chopped dark chocolate over a pot of simmering water (double boiler method). Stir occasionally until the chocolate is completely smooth. Remove from heat and let it cool slightly.
- Whip the Cream: In a separate mixing bowl, whip the heavy cream with a hand mixer or stand mixer on medium speed until it holds soft peaks. Be careful not to over-whip the cream.
- Mix Ricotta and Chocolate: In a large bowl, beat the drained ricotta cheese, sugar, vanilla extract, and a pinch of salt until smooth. Gradually fold in the melted chocolate, making sure it’s well incorporated.
- Combine and Fold: Gently fold the whipped cream into the ricotta-chocolate mixture using a spatula. Be careful to maintain the airy texture by folding rather than stirring.
- Chill the Mousse: Spoon the mousse into serving glasses or bowls. Cover and refrigerate for at least 2 hours to allow the flavors to meld and the mousse to set.
- Serve with Garnishes: Before serving, optionally dust the mousse with cocoa powder or top with fresh berries for a burst of color and flavor.
Extra Tips:
For best results, confirm that the ricotta is well-drained to avoid a watery mousse. High-quality dark chocolate will elevate the taste, so choose chocolate with at least 70% cocoa content.
The mousse can be made a day in advance, making it a convenient dessert for dinner parties. If you prefer a sweeter mousse, adjust the sugar according to your taste.
Additionally, a touch of espresso powder or a splash of liqueur can be added to the chocolate for an extra depth of flavor.
Ricotta and Berry Tart

Ricotta and Berry Tart is an exquisite Italian dessert that combines the creamy texture of ricotta cheese with the sweet and slightly tart flavors of fresh berries. This delightful tart is perfect for any occasion, from casual family dinners to elegant gatherings.
The buttery crust provides a satisfying crunch that beautifully complements the smooth, rich filling and the burst of freshness from the berries, making each bite a harmonious blend of taste and texture.
This dessert isn’t only delicious but also visually stunning, with the vibrant colors of the berries creating a beautiful mosaic on top of the creamy ricotta filling. The preparation is straightforward, and the result is a dessert that looks as impressive as it tastes.
With its combination of simplicity and elegance, the Ricotta and Berry Tart is sure to become a favorite in your dessert repertoire.
Ingredients (Serves 4-6):
- 1 1/2 cups all-purpose flour
- 1/2 cup unsalted butter, cold and cubed
- 1/4 cup granulated sugar
- 1/4 teaspoon salt
- 1 large egg
- 1 teaspoon vanilla extract
- 1 lb fresh ricotta cheese
- 1/2 cup powdered sugar
- 1 teaspoon lemon zest
- 1 teaspoon vanilla extract
- 2 cups mixed fresh berries (such as strawberries, blueberries, raspberries)
- 1 tablespoon honey (optional for drizzling)
Cooking Instructions:
1. Prepare the Crust: In a large mixing bowl, combine the flour, granulated sugar, and salt. Add the cold, cubed butter and use a pastry cutter or your fingertips to work the butter into the flour mixture until it resembles coarse crumbs.
Add the egg and vanilla extract, mixing until the dough comes together. Form the dough into a disk, wrap it in plastic wrap, and chill for at least 30 minutes.
2. Preheat the Oven: Preheat your oven to 350°F (175°C).
3. Roll Out the Dough: On a lightly floured surface, roll out the chilled dough to fit a 9-inch tart pan. Gently press the dough into the pan, trimming any excess edges. Prick the bottom of the crust with a fork to prevent it from puffing up during baking.
4. Bake the Crust: Place the tart pan on a baking sheet and bake in the preheated oven for 15 minutes or until lightly golden. Remove from the oven and let it cool completely.
5. Prepare the Ricotta Filling: In a medium bowl, mix the ricotta cheese, powdered sugar, lemon zest, and vanilla extract until smooth and well combined.
6. Assemble the Tart: Spread the ricotta mixture over the cooled crust, smoothing it out with a spatula. Arrange the fresh berries on top of the ricotta filling in a decorative pattern.
7. Optional Drizzle: If desired, gently warm the honey and drizzle it over the berries for added sweetness and shine.
8. Chill the Tart: Place the tart in the refrigerator for at least 1 hour before serving to allow the flavors to meld and the filling to set.
Extra Tips:
When making the Ricotta and Berry Tart, make certain that the ricotta cheese is well-drained to prevent the filling from becoming too watery.
If your ricotta is particularly wet, you may want to wrap it in a cheesecloth and let it drain over a bowl for several hours before using. Additionally, feel free to experiment with different types of berries based on what’s in season—this tart is versatile and can be adapted to suit your preferences.
For added depth of flavor, consider adding a splash of your favorite liqueur, such as limoncello or amaretto, to the ricotta filling.
Sicilian Ricotta Pie

Sicilian Ricotta Pie is a delightful Italian dessert that combines the creaminess of ricotta cheese with the tangy zest of citrus and the sweetness of sugar. This traditional pie is known for its rich texture and aromatic flavors, often associated with festive occasions and family gatherings.
The filling, made primarily from ricotta cheese, is lightened with eggs and complemented by the unique addition of citrus zest and vanilla, creating a harmonious balance of flavors. The crust is typically a simple pastry that encases the filling, baking to a golden perfection.
This dessert is perfect for those who enjoy a touch of sweetness without overwhelming sugary intensity. The freshness of the ricotta, combined with the subtle hints of lemon or orange, makes it an ideal treat for spring and summer gatherings.
Preparing a Sicilian Ricotta Pie is surprisingly straightforward, making it an excellent choice for both novice and experienced bakers aiming to impress their guests with a traditional Italian dessert that carries the warmth and love of Sicilian heritage.
Ingredients (Serves 4-6):
- 1 cup all-purpose flour
- 1/4 cup sugar
- 1/2 teaspoon salt
- 1/2 cup unsalted butter, chilled and cubed
- 2 tablespoons cold water
- 2 cups fresh ricotta cheese
- 1/2 cup sugar
- 2 large eggs
- Zest of 1 lemon or orange
- 1 teaspoon vanilla extract
- 1/4 teaspoon cinnamon (optional)
- Powdered sugar for dusting (optional)
Cooking Instructions:
1. Prepare the Pastry Crust: In a large bowl, combine the flour, sugar, and salt. Add the chilled butter cubes and mix using a pastry blender or fork until the mixture resembles coarse crumbs. Gradually add cold water, one tablespoon at a time, mixing until the dough comes together.
Form the dough into a ball, wrap it in plastic wrap, and refrigerate for at least 30 minutes.
2. Preheat the Oven: While the dough chills, preheat your oven to 350°F (175°C).
3. Prepare the Ricotta Filling: In a separate bowl, combine the ricotta cheese, sugar, eggs, citrus zest, vanilla extract, and cinnamon (if using). Mix well until the filling is smooth and creamy.
4. Roll Out the Dough: On a lightly floured surface, roll out the chilled dough to fit a 9-inch pie dish. Carefully transfer the dough to the pie dish, pressing it gently into the bottom and sides. Trim any excess dough hanging over the edges.
5. Assemble the Pie: Pour the ricotta filling into the prepared crust, spreading it evenly with a spatula.
6. Bake the Pie: Place the pie in the preheated oven and bake for 45-50 minutes, or until the filling is set and the crust is golden brown. A toothpick inserted into the center should come out clean.
7. Cool and Serve: Allow the pie to cool at room temperature before transferring it to the refrigerator to chill for at least 2 hours. Dust with powdered sugar before serving, if desired.
Extra Tips:
When preparing Sicilian Ricotta Pie, make certain that the ricotta cheese is well-drained to avoid a soggy filling. You can do this by placing it in a strainer over a bowl and letting it sit for about 30 minutes.
For added flavor, consider incorporating a touch of almond extract or a sprinkle of nutmeg into the filling. If you prefer a sweeter crust, lightly brush it with a beaten egg and sprinkle with sugar before baking.
Store any leftovers in the refrigerator for up to three days, but note that the pie is best enjoyed fresh.
Baked Ricotta Pudding

Baked Ricotta Pudding is a delightful Italian dessert that combines the creamy texture of ricotta cheese with a rich and satisfying flavor. This dessert is perfect for anyone who enjoys a light yet indulgent treat. The pudding is gently sweetened and flavored with zesty lemon and aromatic vanilla, resulting in a dish that’s both comforting and sophisticated.
It’s a great option for a dinner party or a special family gathering, offering a taste of Italy with every bite. This pudding is particularly appealing because it’s easy to prepare and doesn’t require any exotic ingredients. With its simple preparation and baking process, even novice cooks can create a dessert that’s bound to impress.
The key to achieving the perfect texture is to carefully blend the ingredients and bake the pudding until it’s just set, resulting in a smooth and creamy consistency that’s utterly satisfying. Enjoy this dessert warm or chilled, and consider serving it with fresh berries or a dollop of whipped cream to further enhance its flavors.
Ingredients (Serves 4-6):
- 500g ricotta cheese
- 100g granulated sugar
- 3 large eggs
- Zest of 1 lemon
- 1 teaspoon vanilla extract
- 50g all-purpose flour
- A pinch of salt
- Butter for greasing the baking dish
Cooking Instructions:
- Prepare the Oven and Dish: Preheat your oven to 180°C (350°F). Grease a medium-sized baking dish with butter to prevent sticking. This will guarantee your pudding comes out easily after baking.
- Mix the Base Ingredients: In a large bowl, combine the ricotta cheese and sugar. Mix well until the sugar is fully dissolved and the mixture is smooth. This base will create the creamy texture of your pudding.
- Add Eggs and Flavorings: Add the eggs to the ricotta mixture one at a time, beating well after each addition to fully incorporate. Then, stir in the lemon zest and vanilla extract. These ingredients will infuse your pudding with invigorating flavors.
- Combine Dry Ingredients: In a separate bowl, sift the flour and add a pinch of salt. Gradually fold this dry mixture into the wet ingredients, making sure there are no lumps. This step is essential for achieving the right consistency.
- Pour and Bake: Pour the mixture into the prepared baking dish, smoothing the top with a spatula. Place in the preheated oven and bake for 35-40 minutes, or until the pudding is set and lightly golden on top. A toothpick inserted in the center should come out clean.
- Cool and Serve: Allow the pudding to cool slightly before serving. You can enjoy it warm or chill it in the refrigerator for a few hours if you prefer a firmer texture.
Extra Tips:
For an extra burst of flavor, consider adding a splash of almond extract or a sprinkle of cinnamon to the mixture. If you prefer a smoother consistency, you can blend the ricotta cheese before mixing it with other ingredients.
To elevate the presentation, dust the top of the pudding with powdered sugar before serving. Additionally, if you find the pudding is browning too quickly in the oven, cover it loosely with aluminum foil to prevent over-browning while it finishes baking.
Ricotta and Honey Parfaits

Indulge in the simple yet exquisite flavors of Italian cuisine with these Ricotta and Honey Parfaits. This delightful dessert combines the creamy texture of ricotta cheese with the natural sweetness of honey, layered beautifully with crunchy granola and fresh berries.
Perfect for any occasion, these parfaits aren’t only easy to make but also a feast for the eyes and the palate. Whether you’re hosting a dinner party or simply treating yourself, these parfaits promise a touch of elegance and a burst of freshness in every spoonful.
Ricotta and Honey Parfaits are a versatile dessert, offering the freedom to customize with your choice of fruits and nuts. The creaminess of the ricotta pairs perfectly with the light crunch of granola, while the honey adds a subtle sweetness that ties all the elements together.
Serve them in individual glass cups for an appealing presentation that showcases the beautiful layers. This recipe serves 4-6 people, making it perfect for a small gathering or family dessert.
Ingredients:
- 2 cups ricotta cheese
- 1/2 cup honey
- 2 teaspoons vanilla extract
- 1 cup granola
- 1 cup fresh berries (such as strawberries, blueberries, or raspberries)
- 1/4 cup chopped nuts (optional)
- Mint leaves for garnish
Instructions:
- Prepare the Ricotta Mixture: In a medium bowl, combine the ricotta cheese, honey, and vanilla extract. Stir until the mixture is smooth and well-blended. This mixture will form the creamy base of your parfait.
- Layer the Parfaits: In individual glass cups or bowls, begin by adding a layer of the ricotta mixture, followed by a layer of granola. Next, add a layer of fresh berries. Repeat the layers until the cups are filled, ending with a final layer of berries on top.
- Add Toppings: Sprinkle chopped nuts over the top layer of berries for added crunch, if desired. Drizzle a little extra honey over the top for additional sweetness.
- Garnish and Serve: Place a mint leaf on top of each parfait for a fresh touch. Serve immediately or refrigerate for up to an hour to let the flavors meld together.
Extra Tips:
For an added depth of flavor, consider using a variety of honey such as wildflower or orange blossom. If you prefer a smoother texture, you can process the ricotta mixture in a food processor before assembling the parfaits.
Feel free to experiment with different types of granola or substitute with crushed biscotti for a more traditional Italian touch. Additionally, if you’re preparing the parfaits in advance, add the granola just before serving to maintain its crunchiness.
Ricotta Zeppole
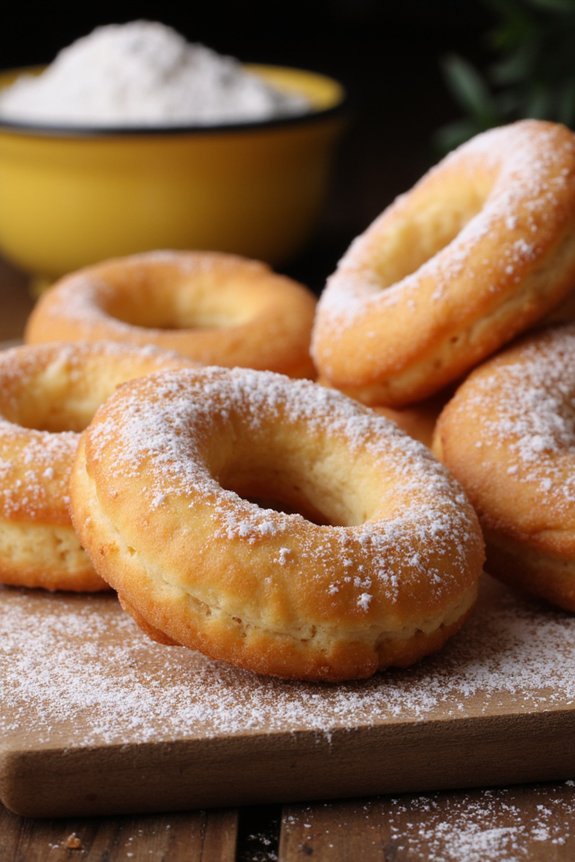
Indulge in the delectable delight of Ricotta Zeppole, a classic Italian dessert that’s sure to impress your family and friends. These delightful, fluffy doughnuts are traditionally enjoyed during special occasions and festivals in Italy but can easily be made at home for a delightful treat.
Ricotta Zeppole are known for their light, airy texture and subtle sweetness, making them a perfect dessert or even a sweet breakfast indulgence. The addition of ricotta cheese gives these zeppoles a creamy richness and guarantees they remain moist and tender.
Prepare to be captivated by the simplicity and elegance of this recipe as you create these mouthwatering treats. The key to perfecting Ricotta Zeppole lies in the quality of the ingredients and following the steps carefully to achieve that perfect golden-brown exterior and tender interior.
The intoxicating aroma of freshly fried dough and the sprinkle of powdered sugar make these zeppoles irresistible. Serve them warm for the best experience, and watch as they quickly disappear from the plate.
Ingredients for Ricotta Zeppole (Serves 4-6):
- 1 cup ricotta cheese
- 2 large eggs
- 1/4 cup granulated sugar
- 1 teaspoon vanilla extract
- 1 cup all-purpose flour
- 1 tablespoon baking powder
- 1/4 teaspoon salt
- Zest of 1 lemon
- Vegetable oil, for frying
- Powdered sugar, for dusting
Cooking Instructions:
- Prepare the Batter: In a mixing bowl, combine the ricotta cheese, eggs, granulated sugar, and vanilla extract. Mix well until the ingredients are fully incorporated and the batter is smooth.
- Combine Dry Ingredients: In a separate bowl, sift together the flour, baking powder, and salt. Add the lemon zest to the dry ingredients, mixing thoroughly to distribute the zest evenly.
- Combine Wet and Dry Mixtures: Gradually add the dry ingredients to the ricotta mixture. Stir gently until a thick, cohesive batter forms. Be careful not to overmix, as this can lead to dense zeppoles.
- Heat the Oil: In a deep saucepan or fryer, heat vegetable oil to 350°F (175°C). Ascertain there’s enough oil for the zeppoles to float and cook evenly. Use a thermometer to maintain the correct temperature.
- Fry the Zeppoles: Using a small ice cream scoop or tablespoon, carefully drop spoonfuls of the batter into the hot oil. Fry in batches to avoid overcrowding, allowing each zeppole space to cook evenly. Fry for 2-3 minutes per side, or until golden brown and puffed up.
- Drain and Cool: Use a slotted spoon to remove the zeppoles from the oil and place them on a paper towel-lined plate to drain excess oil. Allow them to cool slightly.
- Dust and Serve: Once the zeppoles are cool enough to handle, generously dust them with powdered sugar. Serve them warm for the best flavor and texture.
Extra Tips:
For the fluffiest Ricotta Zeppole, make sure your ricotta cheese is well-drained before use to prevent the batter from becoming too wet. If you prefer an extra burst of flavor, try adding a pinch of cinnamon or nutmeg to the batter.
Always keep an eye on the oil temperature to prevent the zeppoles from browning too quickly or absorbing too much oil. Finally, enjoy these treats fresh, as they’re best enjoyed warm and crisp!
Orange Ricotta Pancakes

Orange Ricotta Pancakes are a delightful twist on the traditional breakfast fare, combining the creamy texture of ricotta cheese with the bright, zesty flavor of oranges. These pancakes are tender, fluffy, and rich, making them a perfect choice for a special breakfast or brunch. The use of ricotta adds moisture and a subtle sweetness, while the fresh orange zest provides a rejuvenating citrus note that elevates the pancakes to a whole new level.
Whether you’re looking to impress guests or simply treat yourself to a gourmet breakfast experience, Orange Ricotta Pancakes are sure to please. This recipe is designed for a serving size of 4-6 people, allowing you to share the joy of this delectable dish. Pair these pancakes with a drizzle of maple syrup and a dusting of powdered sugar for a meal that’s both indulgent and satisfying.
Ingredients:
- 1 1/2 cups all-purpose flour
- 1 tablespoon baking powder
- 1/4 teaspoon salt
- 3 tablespoons granulated sugar
- Zest of 1 large orange
- 1 cup ricotta cheese
- 1 cup milk
- 3 large eggs
- 1 teaspoon vanilla extract
- 3 tablespoons unsalted butter, melted
- Additional butter for cooking
- Maple syrup and powdered sugar (optional, for serving)
Instructions:
1. Prepare the Batter:
In a large mixing bowl, whisk together the flour, baking powder, salt, and sugar. Add the orange zest to the dry ingredients and mix to combine, ensuring the zest is evenly distributed.
2. Combine Wet Ingredients:
In a separate bowl, combine the ricotta cheese, milk, eggs, and vanilla extract. Whisk until the mixture is smooth and well combined. Slowly incorporate the melted butter while continuing to whisk.
3. Mix Wet and Dry Ingredients:
Gradually add the wet ingredients to the dry ingredients, mixing gently until just combined. Be careful not to overmix; the batter should be slightly lumpy but with no visible streaks of flour.
4. Cook the Pancakes:
Heat a large non-stick skillet or griddle over medium heat and add a small amount of butter to coat the surface. Pour about 1/4 cup of batter for each pancake onto the skillet. Cook until bubbles begin to form on the surface and the edges look set, about 2-3 minutes. Flip the pancakes and cook for an additional 2 minutes, or until golden brown and cooked through. Repeat with the remaining batter, adding more butter to the skillet as needed.
5. Serve:
Serve the pancakes warm, topped with a drizzle of maple syrup and a dusting of powdered sugar, if desired.
Extra Tips:
For the best results, use fresh, high-quality ricotta cheese, which will contribute to the pancakes’ creamy texture. To enhance the citrus flavor, you can add a tablespoon of fresh orange juice to the wet ingredients. If you prefer your pancakes slightly sweeter, adjust the sugar to your taste.
Ricotta and Fig Crostata

Ricotta and Fig Crostata is a delightful Italian dessert that beautifully combines the creamy texture of ricotta cheese with the natural sweetness of figs, all enveloped in a buttery, flaky crust. This rustic crostata is perfect for showcasing the seasonal flavors of fresh figs, making it an ideal treat for summer gatherings or a cozy fall dessert.
The crostata, with its open-faced style, allows the vibrant colors of the figs to shine, making it as visually appealing as it’s delicious.
This recipe for Ricotta and Fig Crostata serves 4-6 people and is perfect for both novice and experienced bakers. The key to a successful crostata lies in balancing the flavors and textures: the richness of the ricotta filling, the sweetness of the figs, and the crispiness of the crust.
With a few simple steps, you can create this impressive dessert that’s sure to become a favorite among your family and friends.
Ingredients:
- 1 1/4 cups all-purpose flour
- 1/4 cup granulated sugar
- 1/2 teaspoon salt
- 1/2 cup unsalted butter, chilled and cubed
- 3-4 tablespoons ice water
- 1 cup ricotta cheese
- 1/4 cup honey
- 1 teaspoon vanilla extract
- Zest of 1 lemon
- 1 egg
- 8-10 fresh figs, quartered
- 1 tablespoon apricot jam (optional, for glazing)
- Powdered sugar for dusting (optional)
Instructions:
1. Prepare the Dough: In a large bowl, combine the flour, sugar, and salt. Add the chilled butter cubes and use a pastry cutter or your fingers to work the butter into the flour until the mixture resembles coarse crumbs. Gradually add the ice water, one tablespoon at a time, until the dough begins to come together.
Form the dough into a disk, wrap it in plastic wrap, and refrigerate for at least 30 minutes.
2. Make the Ricotta Filling: In a medium bowl, mix together the ricotta cheese, honey, vanilla extract, lemon zest, and egg until smooth and well combined. Set aside.
3. Roll Out the Dough: Preheat your oven to 375°F (190°C). On a lightly floured surface, roll out the chilled dough into a circle about 12 inches in diameter. Transfer the rolled dough onto a baking sheet lined with parchment paper.
4. Assemble the Crostata: Spread the ricotta mixture evenly over the rolled-out dough, leaving a 2-inch border around the edges. Arrange the quartered figs over the ricotta filling in a decorative pattern.
Gently fold the edges of the dough over the filling, pleating as needed to create a rustic edge.
5. Bake the Crostata: Place the crostata in the preheated oven and bake for 35-40 minutes, or until the crust is golden brown and the figs are tender. If desired, brush the figs with apricot jam for a shiny glaze during the last 5 minutes of baking.
6. Cool and Serve: Allow the crostata to cool slightly before dusting with powdered sugar, if using. Slice and serve warm or at room temperature.
Extra Tips:
For the best results, make sure your butter is very cold when preparing the dough, as this will help achieve a flaky crust. If fresh figs aren’t available, dried figs can be rehydrated in warm water and used in this recipe.
Additionally, feel free to experiment with different honey varieties or citrus zest to add unique flavor profiles to your crostata. Remember, the beauty of a crostata lies in its rustic appearance, so don’t worry too much about perfect edges—embrace the imperfections!