

Hello lovely readers! If you adore the creamy, comforting taste of ricotta cheese, you’re in for a treat. Ricotta is the star ingredient in these deliciously indulgent Italian recipes. From timeless lasagna to luscious Sicilian cheesecake, these dishes bring a touch of luxury to your kitchen. Let’s explore these mouthwatering creations that are sure to inspire your next meal.
Classic Ricotta Lasagna
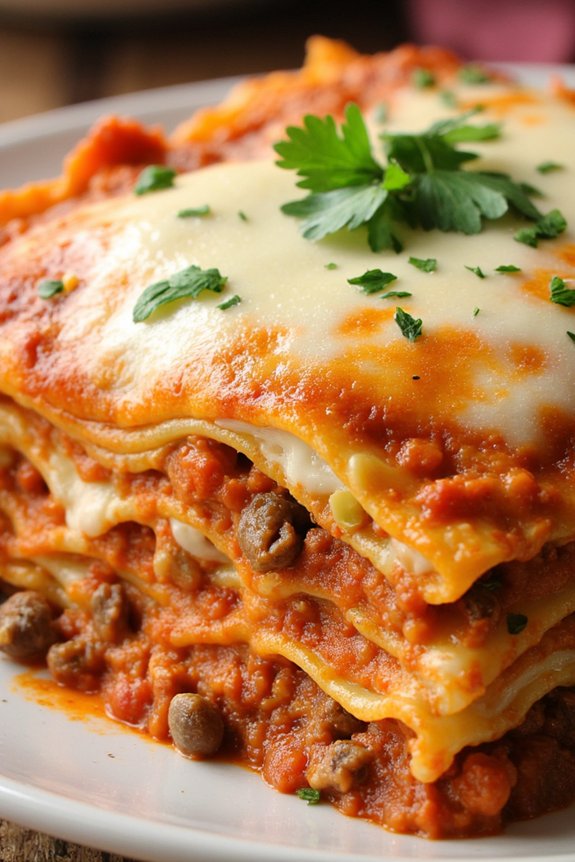
Classic Ricotta Lasagna is a staple in Italian cuisine, known for its rich layers of pasta, cheese, and a hearty meat sauce. This dish is perfect for family gatherings or a cozy dinner, as it combines the comforting flavors of ricotta cheese with savory meats and tangy tomato sauce. The ricotta cheese adds a creamy texture that balances the acidity of the tomatoes and the richness of the meats, while the melted mozzarella on top creates a delectable golden crust.
Preparing a Classic Ricotta Lasagna is a culinary journey that involves crafting a robust Bolognese sauce, layering it with tender pasta sheets, and a creamy ricotta mixture. The process may seem intricate, but with a bit of patience, you can create a lasagna that’s bursting with flavor and texture.
Whether you’re a seasoned cook or a beginner in the kitchen, this recipe will guide you in making a lasagna that’s as authentic as it’s delicious, serving 4-6 people.
Ingredients
- 9 lasagna noodles
- 1 pound ground beef
- 1 pound ground pork
- 1 medium onion, chopped
- 2 cloves garlic, minced
- 1 can (28 ounces) crushed tomatoes
- 2 tablespoons tomato paste
- 1 teaspoon dried basil
- 1 teaspoon dried oregano
- Salt and pepper to taste
- 15 ounces ricotta cheese
- 1 large egg
- 2 cups shredded mozzarella cheese
- 1 cup grated Parmesan cheese
- Fresh parsley, chopped, for garnish
Cooking Instructions
1. Prepare the Meat Sauce: In a large skillet over medium heat, cook the ground beef and ground pork until browned. Drain excess fat and add the chopped onion and minced garlic. Sauté until onions are translucent.
Stir in crushed tomatoes, tomato paste, basil, oregano, salt, and pepper. Simmer for 30 minutes, stirring occasionally to let the flavors meld.
2. Cook the Lasagna Noodles: While the sauce is simmering, bring a large pot of salted water to a boil. Cook the Lasagna Noodles according to package instructions until al dente. Drain and lay them flat on a towel to prevent sticking.
3. Prepare the Ricotta Mixture: In a medium bowl, combine ricotta cheese with the egg, a pinch of salt, and pepper. Mix well until smooth. Set aside.
4. Assemble the Lasagna: Preheat your oven to 375°F (190°C). In a 9×13 inch baking dish, spread a thin layer of meat sauce on the bottom. Place three lasagna noodles over the sauce.
Spread half of the ricotta mixture over the noodles, followed by a layer of meat sauce and a sprinkle of mozzarella cheese. Repeat the layers, ending with a layer of noodles, remaining meat sauce, and a generous topping of mozzarella and Parmesan cheese.
5. Bake the Lasagna: Cover the dish with aluminum foil and bake for 25 minutes. Remove the foil and bake for an additional 15 minutes, or until the cheese is bubbly and golden brown.
Allow the lasagna to rest for 10 minutes before slicing. Garnish with chopped parsley before serving.
Extra Tips
When preparing Classic Ricotta Lasagna, make sure you let the sauce simmer long enough for the flavors to develop fully. If you have time, making the sauce a day ahead can enhance the taste even more.
For a lighter version, consider using ground turkey instead of beef and pork. Additionally, you can add a layer of sautéed spinach or mushrooms for extra flavor and nutrition.
Remember to let the lasagna rest before cutting; this helps the layers set and makes serving much easier.
Lemon Ricotta Pancakes
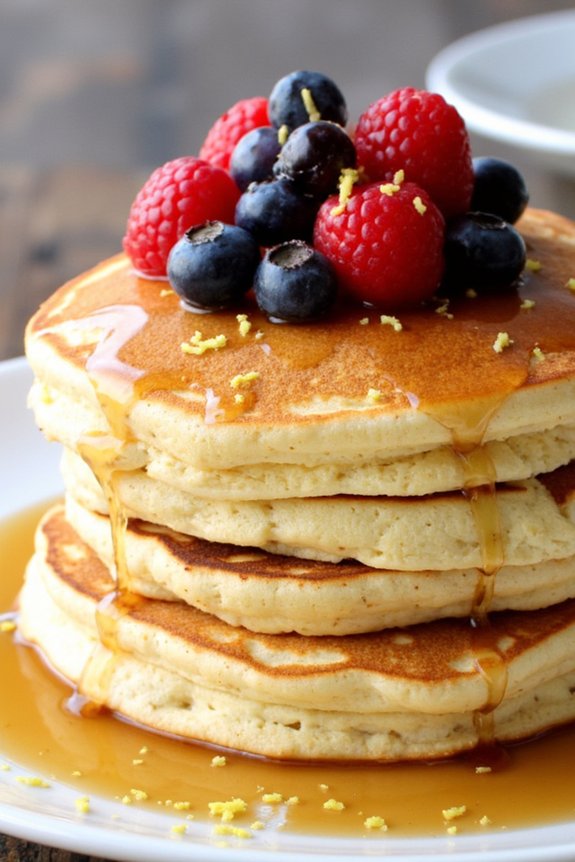
Lemon Ricotta Pancakes are a delightful and fluffy breakfast option that combines the creamy texture of ricotta cheese with the invigorating zest of lemon. Perfect for a weekend brunch or any special occasion, these pancakes offer a unique twist on the traditional recipe, providing a light and airy treat that will impress your family and guests.
The addition of ricotta cheese not only enhances the flavor but also guarantees that these pancakes remain moist and tender, while the lemon adds a bright and citrusy note that perfectly complements the creamy cheese.
This recipe yields enough Lemon Ricotta Pancakes to serve 4-6 people, making it ideal for a small gathering or a family breakfast. The key to achieving the perfect pancake lies in the balance of ingredients and the careful folding of the batter to maintain its airy texture. With just a few simple steps, you can create a breakfast masterpiece that will become a staple in your recipe collection.
Ingredients:
- 1 cup ricotta cheese
- 1 cup all-purpose flour
- 2 tablespoons granulated sugar
- 1 teaspoon baking powder
- 1/2 teaspoon baking soda
- 1/4 teaspoon salt
- 3/4 cup milk
- 2 large eggs, separated
- 1 teaspoon vanilla extract
- Zest of 1 lemon
- Butter or oil for cooking
- Maple syrup or fresh berries for serving
Instructions:
- Prepare the dry ingredients: In a large mixing bowl, combine the all-purpose flour, granulated sugar, baking powder, baking soda, and salt. Whisk these ingredients together until they’re well incorporated.
- Mix the wet ingredients: In a separate bowl, add the ricotta cheese, milk, egg yolks, vanilla extract, and lemon zest. Stir these ingredients together until the mixture is smooth and creamy.
- Combine the mixtures: Gradually add the wet mixture to the dry ingredients, stirring gently until just combined. Be careful not to overmix, as this can lead to dense pancakes.
- Whip the egg whites: In a clean bowl, beat the egg whites until stiff peaks form. This step is vital for creating a light and airy pancake texture.
- Fold in the egg whites: Gently fold the beaten egg whites into the pancake batter, using a spatula. Make sure that you do this step slowly and gently to maintain the volume of the egg whites.
- Cook the pancakes: Heat a non-stick skillet or griddle over medium heat and lightly grease it with butter or oil. Pour about 1/4 cup of batter onto the skillet for each pancake. Cook until bubbles form on the surface and the edges appear set, about 2-3 minutes. Flip the pancakes and cook for another 1-2 minutes until golden brown and cooked through.
- Serve and enjoy: Serve the Lemon Ricotta Pancakes warm, topped with maple syrup or fresh berries as desired.
Extra Tips:
For the fluffiest pancakes, make sure that your egg whites are beaten to stiff peaks before folding them into the batter. This will help create a light and airy texture.
If you find the batter too thick, you can add a bit more milk to reach your desired consistency. Additionally, make sure your skillet or griddle is properly heated before cooking the pancakes to guarantee an even, golden-brown finish.
For an extra burst of lemon flavor, you can also squeeze a little lemon juice into the batter. Enjoy your pancakes immediately for the best taste and texture.
Ricotta-Stuffed Shells
Ricotta-Stuffed Shells are a classic Italian dish that combines the creamy texture of ricotta cheese with the rich flavors of marinara sauce and pasta. This comforting and satisfying meal is perfect for both family dinners and special occasions.
The large pasta shells are filled with a delectable mixture of ricotta cheese, herbs, and sometimes spinach or other vegetables, then baked with a layer of tomato sauce and melted cheese on top. The result is a dish that’s both hearty and flavorful, appealing to pasta and cheese lovers alike.
In addition to being incredibly delicious, Ricotta-Stuffed Shells are relatively easy to prepare, making them an excellent choice for cooks of all skill levels. The recipe involves a few simple steps: preparing the ricotta filling, stuffing the pasta shells, and baking everything together until bubbly and golden.
This dish can also be made ahead of time and stored in the refrigerator or freezer, allowing for convenient meal prep and planning. Whether you’re serving it as a main course or as part of a larger Italian feast, Ricotta-Stuffed Shells are sure to be a hit.
Ingredients (Serves 4-6 people):
- 24 jumbo pasta shells
- 2 cups ricotta cheese
- 1 cup mozzarella cheese, shredded
- 1/2 cup Parmesan cheese, grated
- 1 large egg
- 2 cups spinach, chopped (optional)
- 2 garlic cloves, minced
- 1 tablespoon fresh basil, chopped
- 1 tablespoon fresh parsley, chopped
- 1/2 teaspoon salt
- 1/4 teaspoon black pepper
- 3 cups marinara sauce
- 1 tablespoon olive oil
Cooking Instructions:
- Preheat the Oven: Preheat your oven to 375°F (190°C). This will guarantee that the oven is hot enough to bake the shells evenly.
- Cook the Pasta: Bring a large pot of salted water to a boil. Add the jumbo pasta shells and cook them until they’re al dente, according to the package instructions. Drain the shells and set them aside to cool slightly.
- Prepare the Ricotta Filling: In a large mixing bowl, combine the ricotta cheese, 1/2 cup of mozzarella cheese, Parmesan cheese, egg, chopped spinach (if using), minced garlic, basil, parsley, salt, and pepper. Mix well until all ingredients are thoroughly combined.
- Stuff the Shells: Using a spoon, fill each cooked pasta shell with the ricotta mixture. Be generous with the filling to guarantee each shell is packed with flavor.
- Assemble the Dish: Grease a 9×13-inch baking dish with olive oil. Spread 1 cup of marinara sauce evenly over the bottom of the dish. Arrange the stuffed shells in the dish, open side up. Pour the remaining marinara sauce over the shells, then sprinkle the rest of the mozzarella cheese on top.
- Bake: Cover the baking dish with aluminum foil and bake in the preheated oven for 25 minutes. Remove the foil and bake for an additional 10 minutes, or until the cheese is melted and bubbly.
- Serve: Remove the dish from the oven and let it cool for a few minutes before serving. Garnish with extra basil or parsley if desired.
Extra Tips:
When making Ricotta-Stuffed Shells, feel free to customize the filling to your taste. You can add ingredients such as cooked sausage, mushrooms, or different cheeses to enhance the flavor.
Make sure not to overcook the pasta shells, as they’ll continue to cook in the oven. Additionally, if you’re preparing this dish ahead of time, you can assemble it and store it in the refrigerator for up to 24 hours before baking, or freeze it for later use. Just remember to adjust the baking time if you’re cooking it from frozen.
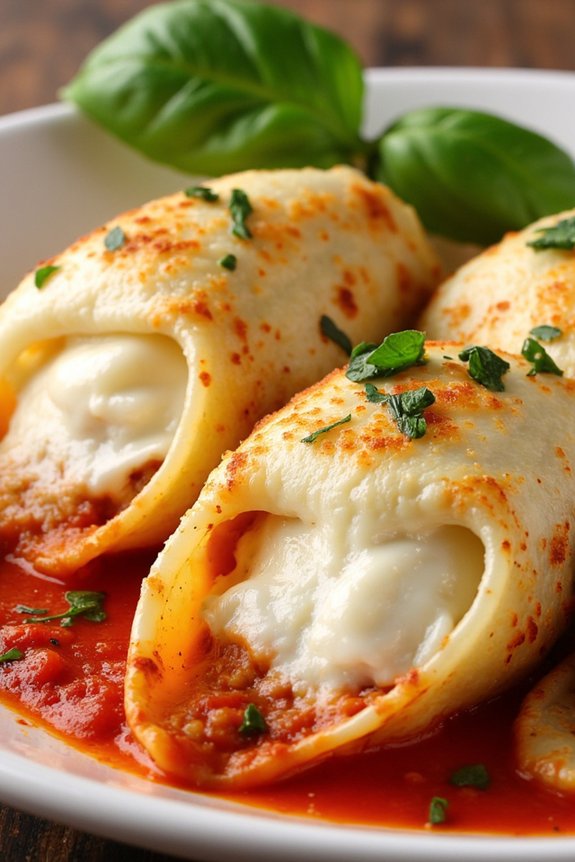
Spinach and Ricotta Cannelloni

Spinach and Ricotta Cannelloni is a classic Italian dish that combines the creamy richness of ricotta cheese with the earthy taste of spinach, all wrapped in tender pasta and baked to perfection in a tomato sauce. This comforting dish is perfect for family dinners or gatherings, bringing a taste of Italy to your table.
The ricotta’s mild flavor is enhanced by the addition of spinach, creating a filling that’s both nutritious and delicious. Covered in a savory tomato sauce and topped with melted cheese, this dish is sure to be a hit with everyone.
Making Spinach and Ricotta Cannelloni involves preparing a flavorful filling, stuffing the cannelloni tubes, and baking them in a luscious tomato sauce. This recipe yields a serving size for 4-6 people, making it ideal for a family meal or a small dinner party.
It’s a dish that can be prepared in advance, allowing you to enjoy your company without the stress of last-minute cooking. With simple ingredients and easy-to-follow steps, this recipe guarantees a satisfying and impressive meal.
Ingredients (Serves 4-6):
- 12 cannelloni tubes
- 250g fresh spinach
- 500g ricotta cheese
- 1 egg
- 1/2 cup grated Parmesan cheese
- 2 cups mozzarella cheese, shredded
- 2 cups tomato passata or tomato sauce
- 2 garlic cloves, minced
- 1 tablespoon olive oil
- 1 teaspoon salt
- 1/2 teaspoon black pepper
- 1/2 teaspoon nutmeg
- Fresh basil leaves for garnish (optional)
Cooking Instructions:
- Preheat the Oven: Set your oven to 180°C (350°F) to allow it to fully preheat while you prepare the other ingredients.
- Prepare the Spinach: In a large pan, heat the olive oil over medium heat. Add the minced garlic and sauté for about 1 minute until fragrant. Add the spinach and cook until wilted, about 3-4 minutes. Remove from heat and let cool slightly.
- Make the Filling: In a large bowl, combine the ricotta cheese, egg, Parmesan cheese, salt, black pepper, and nutmeg. Stir in the cooled spinach mixture until well combined.
- Stuff the Cannelloni: Using a small spoon or piping bag, fill each cannelloni tube with the ricotta and spinach mixture. Be careful to not overfill as they may burst during cooking.
- Assemble the Dish: Spread a thin layer of tomato passata or sauce on the bottom of a baking dish. Arrange the filled cannelloni tubes in a single layer on top of the sauce. Cover the cannelloni with the remaining tomato sauce and sprinkle the shredded mozzarella cheese on top.
- Bake: Cover the dish with aluminum foil and bake in the preheated oven for 25 minutes. Remove the foil and bake for an additional 15 minutes until the cheese is golden and bubbly.
- Garnish and Serve: Remove from the oven and let it cool for a few minutes. Garnish with fresh basil leaves if desired and serve warm.
Extra Tips:
When preparing Spinach and Ricotta Cannelloni, make sure to use fresh spinach for the best flavor and texture, although frozen spinach can be used if necessary—just remember to drain it thoroughly to remove excess moisture.
For an added twist, consider adding a pinch of chili flakes for a bit of heat or incorporating other herbs like oregano or thyme into the tomato sauce for additional depth of flavor.
If you’re making this dish ahead of time, assemble the cannelloni as instructed and refrigerate until ready to bake, adding an extra 5-10 minutes to the baking time if needed.
Sicilian Ricotta Cheesecake
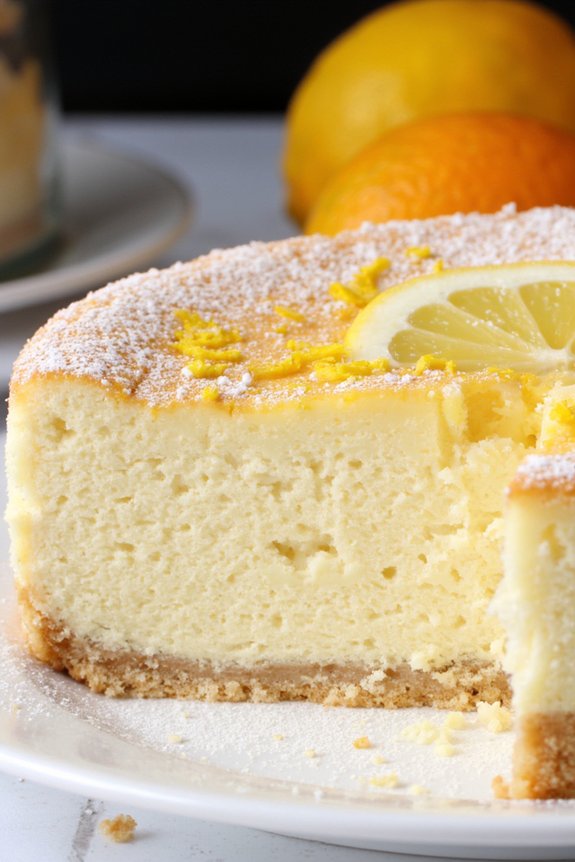
Sicilian Ricotta Cheesecake is a delightful Italian dessert that combines the creamy texture of ricotta cheese with the sweet, zesty flavors typical of Sicily. Unlike the traditional New York-style cheesecake, this Italian version is lighter and less dense, offering a unique taste experience that’s both invigorating and indulgent.
The use of ricotta cheese gives the cheesecake a distinctively smooth and airy texture that melts in your mouth, while the hint of citrus zest adds a bright and aromatic note to the dessert. This cheesecake is perfect for a weekend family gathering or as an exquisite ending to a dinner party.
The preparation is straightforward, and the result is a cake that’s both rustic and elegant. When baked to perfection, the cheesecake boasts a slightly golden top and a creamy, fluffy interior. Whether you’re a fan of cheesecake or just looking to explore Italian desserts, the Sicilian Ricotta Cheesecake is sure to become a favorite.
Ingredients for 4-6 servings:
- 1 1/2 cups ricotta cheese
- 1 cup granulated sugar
- 3 large eggs
- 1 teaspoon vanilla extract
- Zest of 1 lemon
- Zest of 1 orange
- 1/4 cup all-purpose flour
- 1/4 teaspoon salt
- 1/2 teaspoon ground cinnamon
- Powdered sugar for dusting (optional)
Cooking Instructions:
- Preheat the Oven: Start by preheating your oven to 350°F (175°C). Grease a 9-inch springform pan with butter or non-stick spray and set it aside.
- Prepare Ricotta Mixture: In a large mixing bowl, beat the ricotta cheese until smooth. Add the granulated sugar and continue mixing until fully combined and creamy.
- Add Wet Ingredients and Zest: Incorporate the eggs one at a time, making sure each egg is fully mixed before adding the next. Then, add the vanilla extract, lemon zest, and orange zest, stirring until evenly distributed in the mixture.
- Add Dry Ingredients: Sift the flour, salt, and ground cinnamon into the ricotta mixture. Gently fold the dry ingredients into the wet mixture until just combined, being careful not to overmix, which can deflate the batter.
- Pour and Bake: Pour the batter into the prepared springform pan, smoothing the top with a spatula. Place the pan in the preheated oven and bake for 45-55 minutes, or until the top is lightly golden and a toothpick inserted into the center comes out clean.
- Cool and Serve: Allow the cheesecake to cool in the pan for about 10 minutes, then run a knife around the edge of the cake to loosen it before removing the side of the springform pan. Let it cool completely before dusting with powdered sugar, if desired, and serving.
Extra Tips:
To guarantee your Sicilian Ricotta Cheesecake has the perfect texture, make sure to use high-quality ricotta cheese, as it greatly affects the creaminess of the cake. If possible, drain the ricotta cheese in a fine mesh sieve for an hour to remove excess moisture, resulting in a firmer cake.
Also, for a more pronounced citrus flavor, slightly increase the amount of lemon or orange zest according to your preference. Finally, refrigerate any leftovers, as the flavors will continue to develop and the texture will firm up, making for an even more delicious treat the next day.
Ricotta Gnocchi With Sage Butter
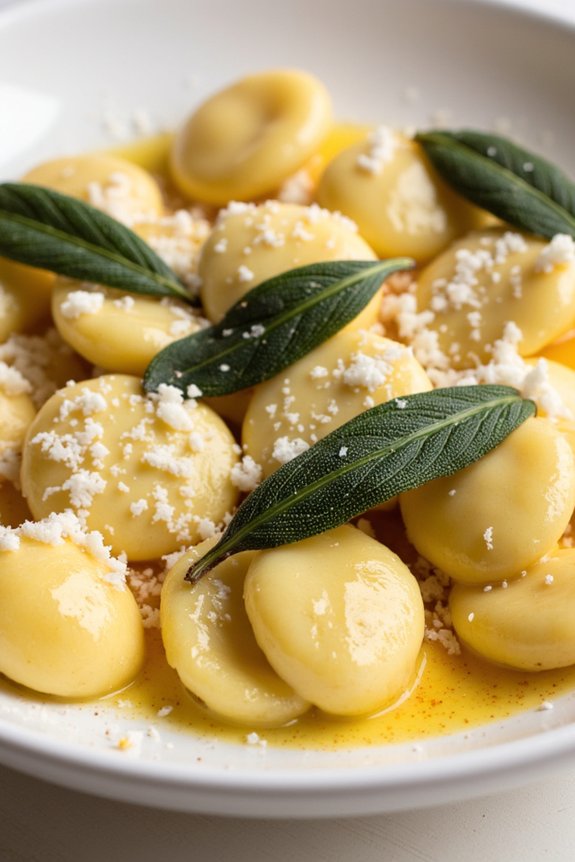
Ricotta Gnocchi With Sage Butter is a delightful Italian dish that combines the light, airy texture of ricotta with the rich, aromatic flavor of sage-infused butter. This recipe is perfect for those who wish to experience a taste of Italy in their own home. The simplicity of the ingredients allows the flavors to shine, making it an ideal dish for both novice and experienced cooks.
With its soft, pillow-like gnocchi and the nutty, buttery sauce, this dish is sure to impress at any dinner table. The preparation of Ricotta Gnocchi With Sage Butter is straightforward, yet it requires a gentle touch to guarantee the gnocchi are light and fluffy. The key is to handle the dough as little as possible and to cook the gnocchi just until they float to the surface of the boiling water.
The sage butter sauce, with its fragrant notes, perfectly complements the delicate taste of the gnocchi, creating a harmonious balance of flavors. This dish is best served immediately after preparation to enjoy the full depth of its flavors.
Ingredients (Serves 4-6):
- 2 cups fresh ricotta cheese
- 1 large egg
- 1 cup all-purpose flour, plus extra for dusting
- 1/2 cup grated Parmesan cheese
- Salt and pepper to taste
- 1/2 cup unsalted butter
- 12 fresh sage leaves
- Grated Parmesan cheese, for garnish
Instructions:
- Prepare the Ricotta Gnocchi Dough: In a large bowl, combine the ricotta cheese, egg, and grated Parmesan cheese. Add salt and pepper to taste. Gradually mix in the flour, using a spatula or your hands, until a soft dough forms. Be careful not to overwork the dough to keep the gnocchi light.
- Shape the Gnocchi: Transfer the dough onto a lightly floured surface. Divide it into four equal parts. Roll each portion into a long rope about 1/2 inch in diameter. Cut the ropes into 1-inch pieces. Dust the pieces lightly with flour to prevent sticking.
- Cook the Gnocchi: Bring a large pot of salted water to a boil. Gently add the gnocchi to the boiling water in batches, avoiding overcrowding. Cook until they float to the surface, about 2-3 minutes. Use a slotted spoon to remove them and transfer to a plate.
- Prepare the Sage Butter Sauce: In a large skillet, melt the butter over medium heat. Add the sage leaves and cook until the butter turns a golden brown and the sage becomes crispy, about 3 minutes. Stir the skillet occasionally to prevent burning.
- Combine and Serve: Add the cooked gnocchi to the skillet with the sage butter. Toss gently to coat the gnocchi in the sauce. Serve immediately, garnished with additional grated Parmesan cheese.
Extra Tips:
For the best results, drain the ricotta cheese overnight in a fine-mesh sieve to remove excess moisture, which will help the dough hold together better.
When cutting the gnocchi, use a sharp knife or a dough cutter to guarantee clean edges. If you prefer a richer flavor, consider adding a touch of nutmeg to the dough.
Finally, always taste the sage butter sauce before serving to adjust the seasoning as needed. Enjoy this dish with a side of fresh greens or a glass of your favorite white wine for a complete meal.
Whipped Ricotta Crostini
Whipped Ricotta Crostini is a delightful appetizer that marries the creamy, rich texture of ricotta with the crunchy base of perfectly toasted bread. This dish is incredibly versatile, lending itself to a range of toppings from sweet to savory. Whether you’re hosting a casual get-together or a sophisticated dinner party, these crostini are sure to impress your guests with their simplicity and elegance.
The whipped ricotta provides a luscious base, while the toppings add layers of flavor and visual appeal. The beauty of Whipped Ricotta Crostini lies in its simplicity and the capacity to customize it to your liking. You can opt for classic toppings like tomatoes and basil for an Italian flair, or venture into more adventurous combinations like roasted figs with honey.
The key is to keep the ricotta airy and smooth, which will complement the crispy texture of the crostini perfectly. The following recipe serves 4-6 people, making it an ideal choice for a small gathering or a starter dish.
Ingredients:
- 1 baguette, sliced into 1/2-inch thick rounds
- 1 cup ricotta cheese
- 2 tablespoons olive oil, plus extra for drizzling
- Salt and pepper to taste
- 1 pint cherry tomatoes, halved
- Fresh basil leaves
- Balsamic glaze
- Honey (optional)
- Prosciutto slices (optional)
Instructions:
- Preheat the Oven: Start by preheating your oven to 375°F (190°C). This will guarantee that the baguette slices toast evenly and become nice and crispy.
- Prepare the Baguette Slices: Arrange the baguette slices on a baking sheet. Brush each slice lightly with olive oil on both sides, and sprinkle a little salt and pepper over them.
- Toast the Baguette: Place the baking sheet in the preheated oven and bake for about 8-10 minutes, or until the slices are golden brown and crispy. Remove from the oven and let them cool slightly.
- Whip the Ricotta: In a medium bowl, combine the ricotta cheese with 2 tablespoons of olive oil. Use a whisk or an electric mixer to beat the mixture until it’s smooth and fluffy. Season with salt and pepper to taste.
- Assemble the Crostini: Spread a generous dollop of the whipped ricotta onto each toasted baguette slice. Top with halved cherry tomatoes and a drizzle of balsamic glaze. Add a basil leaf for garnish. For a sweet variation, you can top with a drizzle of honey or add a slice of prosciutto.
- Serve: Arrange the crostini on a serving platter and serve immediately to enjoy the contrast of textures and flavors.
Extra Tips:
For the best results, use fresh, high-quality ricotta cheese for a richer flavor and creamier texture. If you have time, allow the whipped ricotta to sit for about 30 minutes in the fridge after whipping to let the flavors meld together.
You can also experiment with different toppings like roasted red peppers, olives, or even a sprinkle of nuts for added crunch and flavor. Adjust the seasoning of the ricotta to your liking, and don’t be afraid to get creative with your toppings!
Ricotta and Tomato Salad
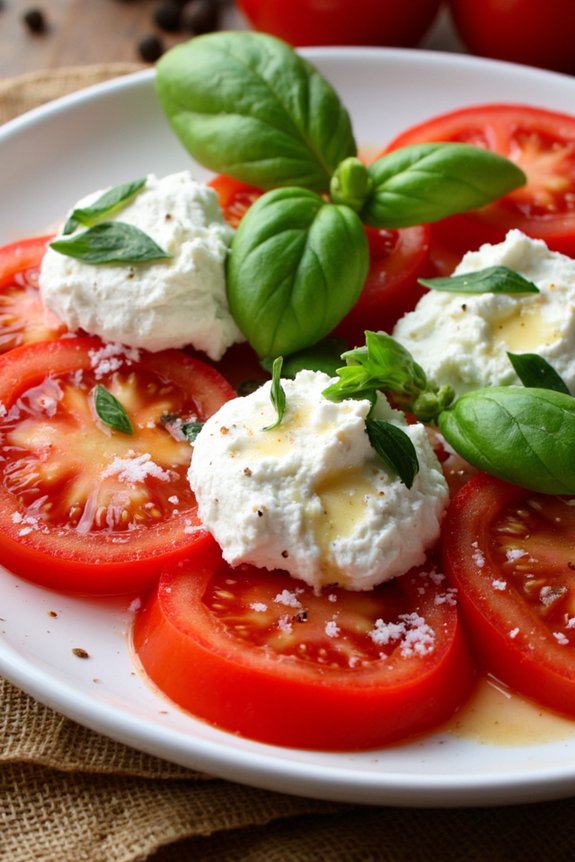
The Italian Ricotta and Tomato Salad is a revitalizing and flavorful dish that highlights the creamy texture of ricotta cheese paired with the fresh, juicy taste of ripe tomatoes. This salad is perfect for a light lunch or as a starter for a larger meal. The combination of vibrant tomatoes, aromatic basil, and rich ricotta creates a delightful harmony of flavors that’s both satisfying and nutritious.
This dish isn’t only easy to prepare but also a wonderful way to showcase the simple yet exquisite ingredients characteristic of Italian cuisine.
The recipe calls for fresh, quality ingredients to truly shine. The use of ripe, seasonal tomatoes and fresh basil leaves is vital to achieve the authentic taste that this salad is known for. Additionally, the ricotta cheese should be creamy and smooth, providing a delicate backdrop for the bold flavors of the tomatoes and basil.
When paired with a drizzle of olive oil and a sprinkle of sea salt, this salad becomes a delicious proof of the beauty of simple, well-prepared food.
Ingredients for 4-6 servings:
- 4 large ripe tomatoes
- 1 cup fresh ricotta cheese
- 1/4 cup extra virgin olive oil
- 1/2 teaspoon sea salt
- 1/4 teaspoon freshly ground black pepper
- 1/4 cup fresh basil leaves
- 1 tablespoon balsamic vinegar (optional)
Cooking Instructions:
- Prepare the Tomatoes: Start by washing the tomatoes thoroughly under running water. Pat them dry with a clean kitchen towel. Cut each tomato into thick slices, about 1/4 inch thick, and arrange them on a large serving platter or individual plates.
- Add the Ricotta: Spoon the fresh ricotta cheese over the tomato slices. You can either dollop the ricotta generously or spread it slightly over the tomatoes, depending on your preference.
- Season the Salad: Drizzle the extra virgin olive oil evenly over the tomatoes and ricotta. Sprinkle the sea salt and freshly ground black pepper over the top to enhance the flavors of the salad.
- Garnish with Basil: Tear the fresh basil leaves into smaller pieces and scatter them over the salad. The basil should be fresh and aromatic, adding a fragrant touch to the dish.
- Optional Balsamic Drizzle: If desired, lightly drizzle balsamic vinegar over the salad for an additional layer of flavor. This step is optional but can add a pleasant tanginess to the dish.
- Serve: Serve the salad immediately as a revitalizing appetizer or alongside your favorite Italian main course.
Extra Tips:
For the best flavor, always use fresh, high-quality ingredients. The use of ripe tomatoes is essential as they provide the salad with its juicy and sweet flavor.
If possible, prepare the salad just before serving to guarantee the ingredients remain fresh and vibrant. If you prefer a bit of a crunch, consider adding some toasted pine nuts or croutons on top.
To make it more filling, you could also add slices of fresh mozzarella or avocado. Finally, this dish pairs beautifully with a crisp white wine or a light rosé. Enjoy your Italian Ricotta and Tomato Salad!
Chocolate Ricotta Mousse
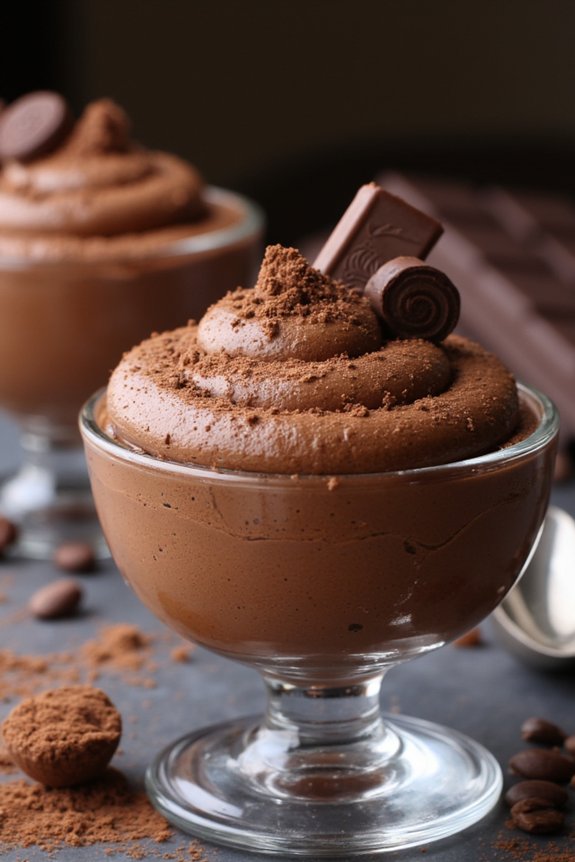
Indulge in the delightful fusion of creamy ricotta cheese and rich chocolate with this Chocolate Ricotta Mousse recipe. This dessert is a perfect blend of Italian flavors and a luxurious chocolate treat, making it an ideal choice for special occasions or a sweet end to a family dinner.
Ricotta cheese adds a unique texture that makes the mousse light and airy, while the chocolate provides a luscious depth of flavor that will satisfy any sweet tooth.
Preparing this mousse is a straightforward process that results in a decadent dessert that looks as impressive as it tastes. This recipe serves 4-6 people, making it perfect for entertaining guests or enjoying a quiet night in with loved ones.
With a few simple ingredients and easy-to-follow steps, you’ll create a dessert that’s bound to become a favorite in your home.
Ingredients for 4-6 Servings:
- 1 cup ricotta cheese
- 1 cup heavy cream
- 1/2 cup powdered sugar
- 1/3 cup cocoa powder
- 1 teaspoon vanilla extract
- 1/4 teaspoon salt
- Optional: grated chocolate or chocolate shavings for garnish
Instructions:
- Prepare the Ricotta: Place the ricotta cheese in a fine-mesh sieve over a bowl and let it drain for about 30 minutes to remove any excess liquid. This step guarantees a smooth and creamy mousse.
- Whip the Cream: In a large mixing bowl, combine the heavy cream and powdered sugar. Use an electric mixer on medium-high speed to whip the cream until it forms stiff peaks. This will create a light, airy mousse texture.
- Mix Ricotta and Cocoa: In a separate bowl, mix the drained ricotta cheese, cocoa powder, vanilla extract, and salt until well combined. Make sure the mixture is smooth and free of lumps.
- Fold Ingredients Together: Gently fold the whipped cream into the ricotta mixture using a spatula. Be careful not to overmix, as this can deflate the mousse and make it less airy.
- Chill the Mousse: Divide the mousse evenly into individual serving dishes. Cover and refrigerate for at least 2 hours before serving, allowing the flavors to meld together and the texture to set.
- Garnish and Serve: Before serving, garnish each mousse with grated chocolate or chocolate shavings for an elegant touch. Serve chilled and enjoy!
Extra Tips:
For an extra layer of flavor, consider adding a tablespoon of espresso powder to the cocoa powder for a subtle coffee taste that complements the chocolate.
Also, verify that all ingredients are at the right temperature; cold cream whips better, and room temperature ricotta mixes more smoothly with the cocoa.
If you prefer a sweeter mousse, adjust the powdered sugar to taste. Finally, this mousse can be prepared a day in advance, making it a convenient dessert option for entertaining.
Ricotta and Honey Tart
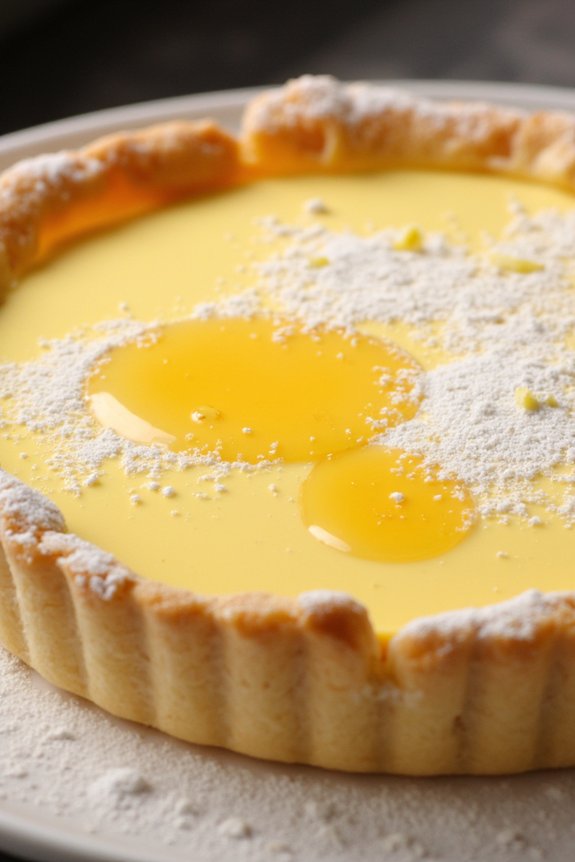
Indulge in the sweet and creamy delight of a Ricotta and Honey Tart, a perfect blend of rich ricotta cheese and the natural sweetness of honey. This Italian dessert is an ideal choice for a sophisticated end to any meal, offering a light yet satisfying treat that beautifully balances flavors and textures.
The tart features a delicate crust filled with a smooth ricotta mixture, with hints of vanilla and lemon zest for added depth. The ultimate touch—a drizzle of honey—brings a golden finish and a touch of sweetness that ties everything together.
This recipe serves 4-6 people, making it a great option for family gatherings or intimate dinner parties. While the tart is impressive in presentation, it’s surprisingly simple to prepare, with most of the work done in the mixing and baking stages. The result is a deliciously creamy tart that pairs wonderfully with a cup of coffee or a dessert wine.
Ingredients:
- 1 pre-made pie crust or homemade tart shell
- 2 cups ricotta cheese
- 1/2 cup granulated sugar
- 2 large eggs
- 1 teaspoon vanilla extract
- Zest of 1 lemon
- Pinch of salt
- 1/4 cup honey, plus extra for drizzling
- 1 tablespoon all-purpose flour
- Powdered sugar for dusting (optional)
Cooking Instructions:
- Preheat the Oven: Preheat your oven to 350°F (175°C) to verify it reaches the right temperature while you prepare the tart.
- Prepare the Tart Shell: Roll out the pie crust and line a 9-inch tart pan with it. Trim the edges and prick the base with a fork to prevent bubbling. Set aside.
- Mix Ricotta Filling: In a mixing bowl, combine the ricotta cheese, granulated sugar, and honey. Mix until smooth and creamy.
- Add Eggs and Flavorings: Add the eggs, one at a time, mixing well after each addition. Stir in the vanilla extract, lemon zest, and a pinch of salt.
- Thicken with Flour: Sprinkle the all-purpose flour over the mixture and gently fold it in until fully incorporated. This will help thicken the filling slightly.
- Fill the Tart Shell: Pour the ricotta mixture into the prepared tart shell, spreading it evenly with a spatula.
- Bake the Tart: Place the tart in the preheated oven and bake for 35-40 minutes, or until the filling is set and slightly golden on top.
- Cool and Serve: Let the tart cool at room temperature for at least 30 minutes before removing from the pan. Drizzle with additional honey and dust with powdered sugar if desired.
Extra Tips:
For the best results, use fresh ricotta cheese, as it has a superior texture and flavor compared to packaged varieties. If possible, allow the ricotta to drain in a fine-mesh sieve for an hour before use to remove excess moisture, which will help the tart set nicely without becoming watery.
Additionally, consider experimenting with different types of honey to find the one that best complements your taste preferences; a floral variety such as acacia or orange blossom can add a delightful aroma to the dish.
Finally, this tart can be made a day in advance and stored in the refrigerator, allowing the flavors to meld beautifully. Enjoy your Ricotta and Honey Tart slightly chilled or at room temperature for the best taste experience.
Ricotta and Zucchini Fritters
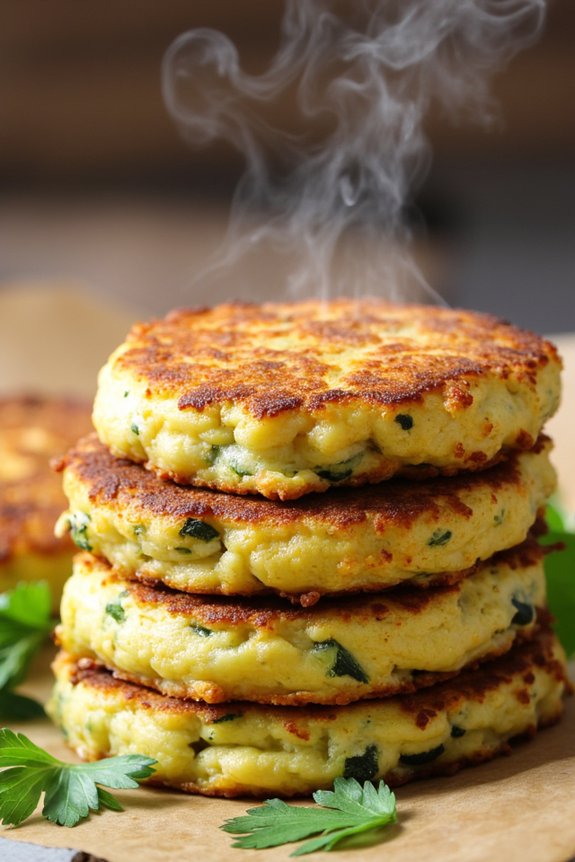
Ricotta and Zucchini Fritters are a delightful dish that showcases the versatility of ricotta cheese, a staple in Italian cuisine. These fritters are light, fluffy, and packed with flavor, making them an excellent appetizer or side dish. The creamy texture of ricotta pairs beautifully with the mild, slightly sweet taste of zucchini, resulting in a dish that’s both satisfying and invigorating.
Perfect for a summer meal or a cozy indoor dinner, these fritters can be enjoyed on their own or dipped in a tangy sauce. In addition to their delicious taste, Ricotta and Zucchini Fritters are also easy to prepare, making them an ideal choice for home cooks of all skill levels.
The key to achieving the perfect fritter lies in the balance of ingredients and the cooking technique. By following the recipe closely, you’ll be able to create a dish that’s golden brown on the outside and tender on the inside. Serve these fritters with a simple salad or a side of marinara sauce for a complete meal that’s sure to impress friends and family alike.
Ingredients for 4-6 servings:
- 2 medium zucchinis, grated
- 1 cup ricotta cheese
- 2 large eggs
- 1/2 cup all-purpose flour
- 1/4 cup grated Parmesan cheese
- 2 tablespoons chopped fresh parsley
- 1 garlic clove, minced
- Salt and pepper to taste
- Olive oil for frying
Cooking Instructions:
- Prepare the Zucchini: Start by grating the zucchinis using a box grater. Place the grated zucchini in a clean kitchen towel or cheesecloth and squeeze out as much moisture as possible. This step is vital to prevent the fritters from becoming soggy.
- Mix the Ingredients: In a large mixing bowl, combine the squeezed zucchini, ricotta cheese, eggs, flour, Parmesan cheese, parsley, and minced garlic. Season the mixture with salt and pepper to taste. Mix until all ingredients are well incorporated and you have a thick batter.
- Heat the Oil: In a large skillet, heat about 2 tablespoons of olive oil over medium heat. You want the oil to be hot but not smoking, which guarantees the fritters cook evenly.
- Form the Fritters: Using a spoon or your hands, scoop about 2 tablespoons of the zucchini mixture and shape it into a small patty. Carefully place the patty into the hot oil. Repeat this process, cooking a few fritters at a time, making sure not to overcrowd the skillet.
- Cook the Fritters: Fry the fritters for about 3-4 minutes on each side, or until they’re golden brown and crispy. Adjust the heat as necessary to avoid burning. Once cooked, transfer the fritters to a plate lined with paper towels to drain any excess oil.
- Serve: Serve the Ricotta and Zucchini Fritters warm, garnished with additional parsley if desired. They can be enjoyed plain or with a side of marinara sauce or yogurt dip.
Extra Tips:
When cooking Ricotta and Zucchini Fritters, make sure that the zucchini is thoroughly drained to prevent the batter from becoming too wet. If the batter seems too runny, you can add a little more flour to help bind the ingredients.
Additionally, be mindful of the oil temperature; if it’s too hot, the fritters may burn before cooking through, while oil that’s not hot enough will result in greasy fritters. Finally, feel free to experiment with additional herbs or spices to suit your taste preferences.
Pappardelle With Lemon Ricotta
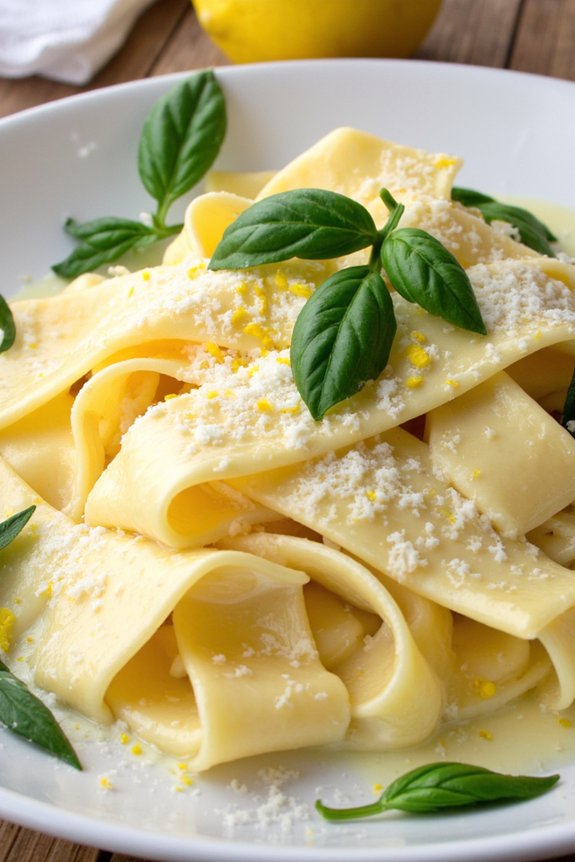
Pappardelle With Lemon Ricotta is a delightful Italian dish that brings together the creamy richness of ricotta cheese and the zesty freshness of lemon. This recipe is perfect for a light yet satisfying meal, offering a harmonious balance of flavors that will transport you straight to the sunny hills of Tuscany. The wide ribbons of pappardelle pasta provide the perfect vehicle for the luscious lemon-infused ricotta sauce, guaranteeing that each bite is bursting with zest and creaminess.
Whether you’re preparing a weeknight dinner or entertaining guests, this dish promises to impress with its simplicity and refined taste.
The beauty of Pappardelle With Lemon Ricotta lies in its minimal ingredients and straightforward preparation, making it an ideal choice for cooks of all skill levels. The key to this dish is using fresh, high-quality ingredients to maximize flavor. The creaminess of the ricotta pairs beautifully with the bright acidity of lemon zest and juice, while a touch of Parmesan adds depth and umami.
A sprinkle of fresh basil or parsley leaves at the end not only adds a pop of color but also enhances the dish with its aromatic charm. Follow the steps below to create a delicious meal that will surely become a household favorite.
Ingredients (Serves 4-6):
- 500g pappardelle pasta
- 1 cup ricotta cheese
- Zest of 2 lemons
- Juice of 1 lemon
- 1/2 cup freshly grated Parmesan cheese
- Salt, to taste
- Freshly ground black pepper, to taste
- 2 tablespoons olive oil
- Fresh basil or parsley leaves, for garnish
Cooking Instructions:
- Cook the Pasta: Begin by bringing a large pot of salted water to a boil. Add the pappardelle pasta and cook according to the package instructions until al dente. Reserve about 1 cup of pasta water, then drain the pasta and set aside.
- Prepare the Ricotta Mixture: In a large mixing bowl, combine the ricotta cheese, lemon zest, lemon juice, and grated Parmesan cheese. Mix well until the ingredients are fully incorporated. Season the mixture with salt and freshly ground black pepper to taste.
- Combine Pasta and Sauce: In a large skillet over medium heat, add the olive oil. Once heated, add the cooked pappardelle. Pour the ricotta mixture over the pasta and gently toss to coat the noodles evenly. If the sauce is too thick, gradually add some reserved pasta water until you reach the desired consistency.
- Final Touches: Once the pasta is well-coated with the sauce, taste and adjust the seasoning if necessary. Transfer the pappardelle to a serving platter or individual plates. Garnish with fresh basil or parsley leaves for an extra burst of flavor and aroma.
- Serve: Serve immediately while warm, allowing your guests to enjoy the full flavor of the lemon ricotta sauce.
Extra Tips:
For a richer flavor, consider adding a hint of garlic by finely mincing a clove and sautéing it in the olive oil before adding the pasta. Make certain the ricotta cheese is at room temperature before mixing it with the lemon zest and juice to achieve a smoother consistency.
If you prefer a more pronounced lemon flavor, you can add an additional teaspoon of lemon zest. For added texture, consider toasting some pine nuts and sprinkling them over the dish just before serving. Enjoy your meal with a side of crusty bread to scoop up any remaining sauce!
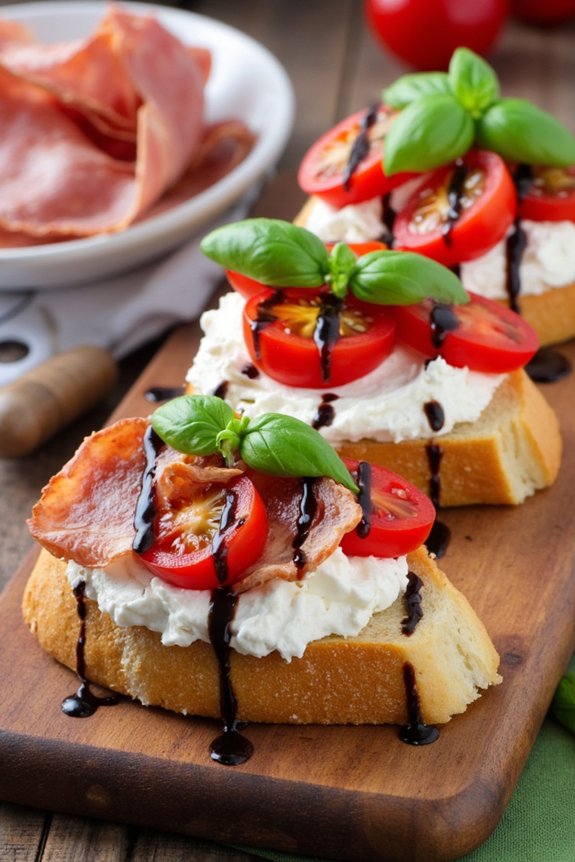
Ricotta and Pear Bruschetta
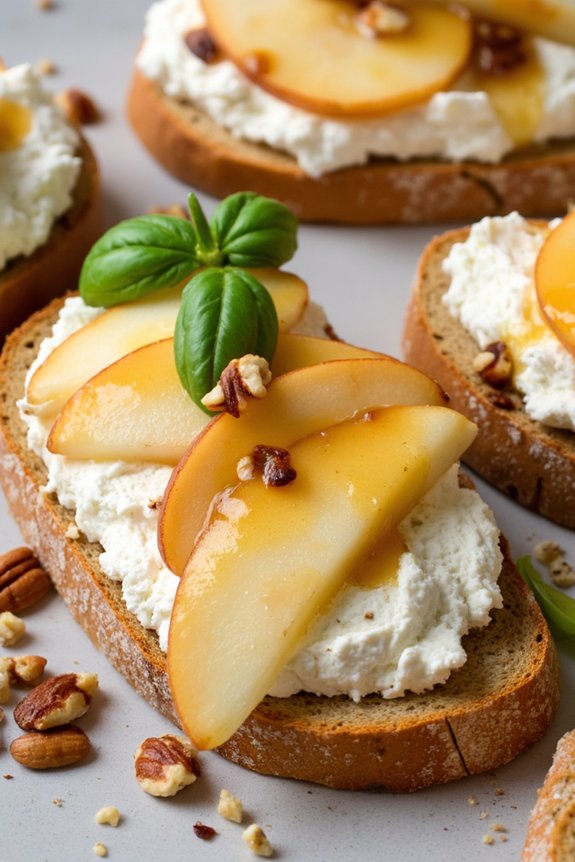
Ricotta and Pear Bruschetta is a delightful Italian appetizer that combines the creamy texture of ricotta cheese with the sweet juiciness of pears, all served atop crispy bruschetta. This dish is perfect for gatherings, offering a balance of flavors and textures that will tantalize your taste buds.
It’s a simple yet elegant dish that can be prepared in a short amount of time, making it an ideal choice for both casual and formal occasions.
The key to a perfect Ricotta and Pear Bruschetta lies in the quality of the ingredients. Fresh ripe pears, creamy ricotta cheese, and a good quality baguette are essential. This recipe serves 4-6 people, making it a great option for a small dinner party or a family gathering.
The combination of sweet and savory flavors, along with a hint of honey and a sprinkle of nuts, makes this bruschetta a memorable dish that your guests will love.
Ingredients (Serves 4-6):
- 1 baguette, sliced into 1/2-inch thick slices
- 1 cup ricotta cheese
- 2 ripe pears, thinly sliced
- 3 tablespoons honey
- 1/4 cup chopped walnuts or pecans
- 1 tablespoon olive oil
- Salt and pepper to taste
- Fresh basil leaves for garnish (optional)
Cooking Instructions:
- Prepare the Baguette: Preheat your oven to 375°F (190°C). Arrange the baguette slices on a baking sheet. Brush each slice lightly with olive oil. Bake the slices in the oven for about 8-10 minutes, or until they’re golden and crispy. Remove from the oven and let them cool slightly.
- Prepare the Ricotta Mixture: While the baguette is toasting, in a small bowl, mix the ricotta cheese with a pinch of salt and pepper. Stir well until the mixture is smooth and well combined. This will add a subtle flavor to the cheese, enhancing the overall taste of the bruschetta.
- Assemble the Bruschetta: Spread a generous amount of the ricotta mixture onto each toasted baguette slice. Top with a few slices of pear, ensuring they’re evenly distributed.
- Add the Finishing Touches: Drizzle honey over the pear-topped bruschetta. This will add a lovely sweetness that complements the creaminess of the ricotta and the crispness of the pears. Sprinkle chopped walnuts or pecans on top for a crunchy texture.
- Garnish and Serve: Optionally, garnish each bruschetta with fresh basil leaves for a touch of color and an additional layer of flavor. Serve immediately while the baguette is still warm.
Extra Tips:
When selecting pears, opt for those that are ripe but still firm to maintain their shape when sliced. If you prefer a slightly different flavor profile, you can substitute the walnuts or pecans with almonds or pistachios.
Additionally, for a more savory twist, consider adding a drizzle of balsamic reduction alongside the honey. This Ricotta and Pear Bruschetta pairs wonderfully with a crisp white wine or a light sparkling beverage, enhancing the dining experience.