

Craving something sweet but short on time?
I’ve got a collection of simple Italian quick dessert recipes that are perfect for those busy days.
Think creamy tiramisu or a delightful lemon ricotta cake, all made with ease.
These treats promise a touch of indulgence without the hassle.
Ready to whip up something special?
Classic Tiramisu
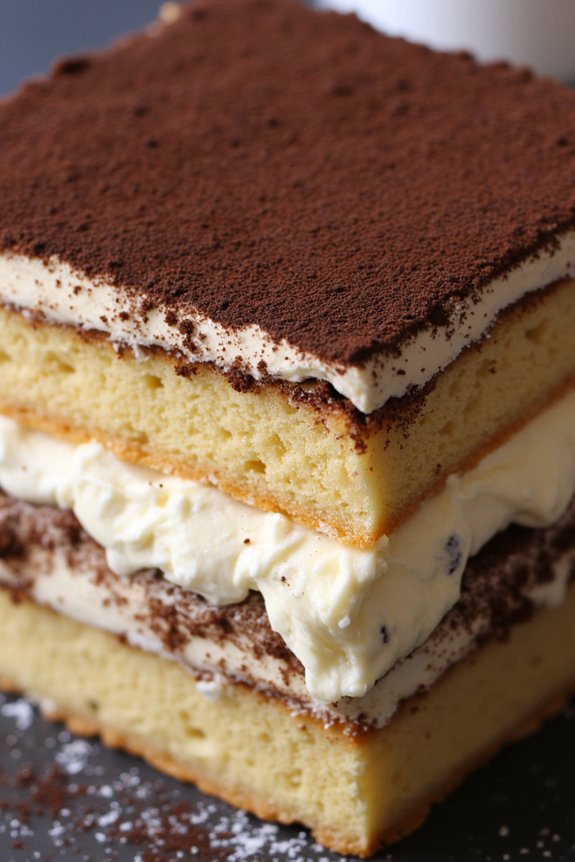
Tiramisu is a beloved Italian dessert known for its creamy texture and rich coffee flavor. This classic dessert is a perfect blend of mascarpone cheese, coffee-soaked ladyfingers, and a hint of cocoa, making it an indulgent treat for any occasion.
Originating from the Veneto region of Italy, tiramisu has become a staple in Italian cuisine and is adored worldwide for its simple yet luxurious taste.
Preparing a classic tiramisu is surprisingly straightforward, requiring no baking and minimal ingredients. This recipe serves 4-6 people, making it an ideal choice for a small gathering or family dinner. The key to a perfect tiramisu lies in using high-quality ingredients and allowing ample time for the flavors to meld together in the refrigerator.
Ingredients (serving size: 4-6 people):
- 3 large eggs, separated
- 100 grams of granulated sugar
- 250 grams of mascarpone cheese
- 200 ml of strong brewed coffee, cooled
- 2 tablespoons of coffee liqueur (optional)
- 200 grams of ladyfingers (savoiardi biscuits)
- Unsweetened cocoa powder for dusting
- Dark chocolate shavings or cocoa nibs (optional, for garnish)
Cooking Instructions:
- Prepare the Egg Mixture: Begin by separating the egg yolks from the whites. In a clean bowl, whisk the egg yolks with the granulated sugar until the mixture becomes pale and creamy. This should take about 3-5 minutes using an electric mixer.
- Incorporate Mascarpone: Gently fold the mascarpone cheese into the egg yolk mixture. Confirm that the mascarpone is smooth and thoroughly combined without over-mixing, as this can affect the texture.
- Whip the Egg Whites: In a separate bowl, whisk the egg whites until they form stiff peaks. Carefully fold the whipped egg whites into the mascarpone mixture. This will add lightness and volume to your tiramisu cream.
- Prepare the Coffee Mixture: Combine the cooled coffee with the coffee liqueur, if using. Pour the mixture into a shallow dish suitable for dipping the ladyfingers.
- Assemble the Tiramisu: Quickly dip each ladyfinger into the coffee mixture for about 2 seconds, allowing them to absorb the coffee without becoming too soggy. Arrange a layer of soaked ladyfingers at the bottom of a rectangular serving dish.
- Layer the Cream: Spread half of the mascarpone mixture over the layer of ladyfingers. Smooth the surface with a spatula for an even layer.
- Repeat the Layers: Add another layer of coffee-soaked ladyfingers on top of the mascarpone layer. Spread the remaining mascarpone mixture evenly over the second layer of ladyfingers.
- Chill the Tiramisu: Cover the dish with plastic wrap and refrigerate for at least 4 hours, preferably overnight. This allows the flavors to meld and the dessert to set properly.
- Finish with Cocoa: Just before serving, dust the top of the tiramisu with unsweetened cocoa powder. For added texture, you can sprinkle dark chocolate shavings or cocoa nibs on top.
Extra Tips:
For the best results, use fresh eggs and high-quality mascarpone cheese. Confirm the coffee is strong and fully cooled before dipping the ladyfingers to prevent them from becoming overly soft.
If you prefer a stronger coffee flavor, you can adjust the amount of coffee liqueur to taste. Finally, allowing the tiramisu to chill overnight is essential for the flavors to develop fully and achieve the classic creamy consistency.
Quick Panna Cotta
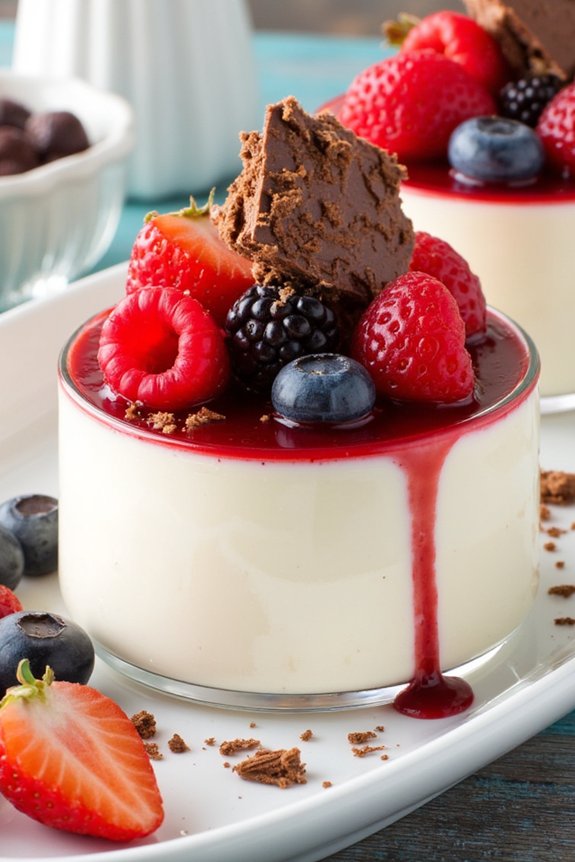
Panna Cotta is a classic Italian dessert that’s both elegant and simple to make. It’s a creamy, silky-smooth dessert that can be prepared in advance, making it perfect for entertaining. The term “panna cotta” translates to “cooked cream” in Italian, but despite its name, this dessert requires minimal cooking.
By using a few basic ingredients, you can create a luxurious treat that will impress your guests with its delicate texture and subtle flavors. This recipe for Quick Panna Cotta takes the traditional dessert and streamlines the process so you can enjoy it with minimal effort.
It’s perfect for serving 4-6 people and can be customized with different toppings such as fresh berries, a drizzle of caramel, or a sprinkle of shaved chocolate to suit your tastes. Whether you’re hosting a dinner party or simply want to treat yourself, this panna cotta is sure to be a hit.
Ingredients for 4-6 Servings:
- 2 cups heavy cream
- 1 cup whole milk
- 1/2 cup granulated sugar
- 2 teaspoons pure vanilla extract
- 1 packet (about 2 1/4 teaspoons) unflavored gelatin
- 3 tablespoons cold water
Instructions:
- Prepare the Gelatin: Start by sprinkling the gelatin over the cold water in a small bowl. Let it sit for about 5 minutes to allow the gelatin to soften and bloom. This step is essential for achieving the perfect texture of the panna cotta.
- Heat the Cream Mixture: In a medium saucepan, combine the heavy cream, whole milk, and granulated sugar. Place the saucepan over medium heat and stir the mixture occasionally until the sugar has completely dissolved and the mixture is hot but not boiling. This should take about 5-7 minutes.
- Add the Gelatin: Once the cream mixture is hot, remove it from the heat. Add the softened gelatin to the mixture and whisk until the gelatin has dissolved completely. This guarantees the panna cotta will set properly.
- Flavor the Mixture: Stir in the vanilla extract to infuse the panna cotta with a subtle vanilla flavor. Make sure the mixture is well combined.
- Strain the Mixture: For an extra smooth texture, pour the mixture through a fine-mesh sieve into a large measuring cup or a bowl with a spout. This will remove any undissolved gelatin or impurities.
- Pour into Molds: Divide the mixture evenly among 4-6 ramekins or serving glasses. Cover each with plastic wrap to prevent a skin from forming on top.
- Chill and Set: Place the ramekins in the refrigerator and let them chill for at least 4 hours, or until the panna cotta is set and firm to the touch. For best results, let them sit overnight.
- Serve: Once set, serve the panna cotta directly from the ramekins, or run a knife around the edge and invert onto a serving plate. Top with your choice of fresh fruit, caramel sauce, or chocolate shavings.
Extra Tips:
For a more intense vanilla flavor, consider using a vanilla bean instead of extract. Simply split the bean and scrape the seeds into the cream mixture before heating.
If you’re in a hurry, you can speed up the setting process by placing the ramekins in the freezer for about 30 minutes before transferring them to the refrigerator. Be sure to serve the panna cotta chilled for the best texture and flavor.
Experiment with different flavorings, such as almond or citrus zest, to create your own signature version of this classic Italian dessert.
Easy Affogato
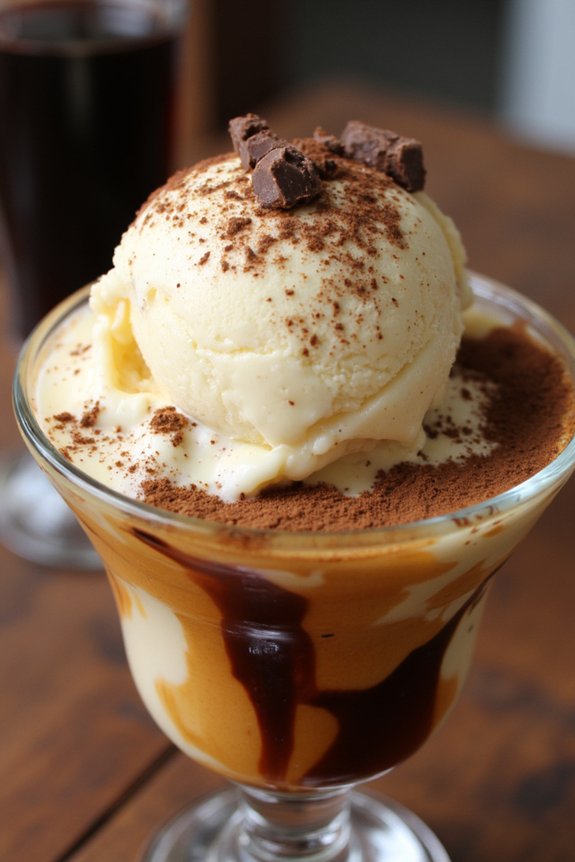
Affogato, a classic Italian dessert, is a delightful combination of rich espresso and creamy gelato. The word “affogato” translates to “drowned” in Italian, which perfectly describes this dessert as the gelato is submerged in a shot of hot espresso.
This simple yet elegant dessert is perfect for showcasing the robust flavors of coffee and the smoothness of the gelato, making it an ideal after-dinner treat or a revitalizing pick-me-up during any time of the day.
Preparing affogato at home is incredibly easy and requires minimal ingredients, making it a go-to dessert for quick and spontaneous indulgence. The contrast between the hot espresso and the cold gelato creates a wonderful mix of textures and temperatures, providing a sensory delight with each spoonful.
While traditionally made with vanilla gelato, you can experiment with different flavors to suit your taste preferences.
Ingredients for 4-6 servings:
- 4-6 scoops of vanilla gelato (or your preferred flavor)
- 4-6 shots of freshly brewed espresso
- Optional: Chocolate shavings or cocoa powder for garnish
- Optional: Amaretto or another liqueur (for an adult version)
Cooking Instructions:
- Prepare the Espresso: Start by brewing 4-6 shots of fresh espresso. You can use an espresso machine, a stovetop espresso maker, or even a high-quality instant espresso powder if you’re in a pinch. Confirm the espresso is hot and strong to balance the sweetness of the gelato.
- Scoop the Gelato: While the espresso is brewing, take out the gelato from the freezer to soften slightly. Place one generous scoop of gelato into each individual serving glass or bowl. If you’re using a larger bowl, add more scoops to accommodate the number of servings you require.
- Assemble the Affogato: Once the espresso is ready, swiftly pour one shot of espresso over each scoop of gelato. The hot espresso will begin to melt the gelato, creating a creamy, coffee-infused dessert.
- Add Garnishes (Optional): If you desire, sprinkle some chocolate shavings or a dusting of cocoa powder over the top for added flavor and presentation. For an adult twist, you can also add a splash of amaretto or another liqueur to each serving.
- Serve Immediately: Serve the affogato immediately after assembling for the best experience. The combination of hot and cold, along with the melting gelato, is what makes this dessert truly special.
Extra Tips:
When making affogato, the quality of the espresso and gelato is key to achieving the best flavor. Opt for high-quality, freshly brewed espresso and premium gelato to elevate the taste.
If you don’t have an espresso machine at home, a strong coffee can be a suitable substitute. Additionally, feel free to get creative with your choice of gelato flavors—hazelnut, chocolate, or pistachio can offer delicious variations.
Finally, serve the affogato in clear glasses or bowls to showcase its beautiful layers and enhance the dining experience.
Lemon Ricotta Cake
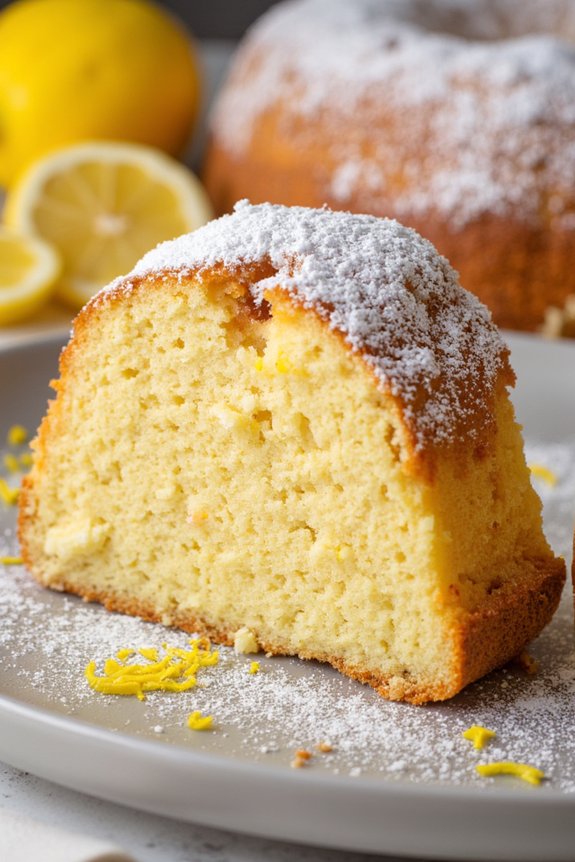
Lemon Ricotta Cake is a delightful Italian dessert that combines the zesty freshness of lemons with the creamy richness of ricotta cheese. This cake is perfect for those times when you want a light yet satisfyingly sweet treat. Its soft and moist texture, thanks to the ricotta, makes it a standout dessert that’s certain to impress guests at any gathering.
Whether you’re looking to end a meal on a sweet note or simply want to indulge in a quick baking session, this Lemon Ricotta Cake is an ideal choice for any occasion.
The beauty of this cake lies in its simplicity and ease of preparation, making it a favorite for both novice and seasoned bakers alike. The natural flavors of lemon and ricotta shine through without the need for elaborate decorations or complicated techniques.
With just a few ingredients and a couple of straightforward steps, you can create a dessert that embodies the essence of Italian baking. Serve it with a dusting of powdered sugar or a dollop of whipped cream to elevate its presentation and taste.
Ingredients (Serves 4-6):
- 1 1/2 cups ricotta cheese
- 1 cup granulated sugar
- 1/2 cup unsalted butter, softened
- 3 large eggs
- 1 teaspoon vanilla extract
- Zest of 2 lemons
- 1/4 cup freshly squeezed lemon juice
- 1 1/2 cups all-purpose flour
- 1 tablespoon baking powder
- 1/4 teaspoon salt
- Powdered sugar, for dusting (optional)
Cooking Instructions:
- Preheat and Prepare Pan: Preheat your oven to 350°F (175°C). Grease a 9-inch round cake pan with butter or non-stick cooking spray. Optionally, line the bottom with parchment paper for easy removal.
- Mix Wet Ingredients: In a large mixing bowl, combine the ricotta cheese, granulated sugar, and softened butter. Beat them together using an electric mixer on medium speed until smooth and creamy, about 2-3 minutes.
- Add Eggs and Flavorings: Add the eggs one at a time, beating well after each addition. Mix in the vanilla extract, lemon zest, and lemon juice, making sure that everything is well incorporated.
- Combine Dry Ingredients: In a separate bowl, whisk together the flour, baking powder, and salt. This will make sure the leavening agent is evenly distributed throughout the flour.
- Incorporate Dry Ingredients: Gradually add the dry ingredients to the wet mixture, stirring gently with a spatula until just combined. Be careful not to overmix, as this can lead to a denser cake.
- Bake the Cake: Pour the batter evenly into the prepared cake pan. Smooth the top with a spatula. Bake in the preheated oven for 45-50 minutes, or until a toothpick inserted into the center comes out clean.
- Cool and Serve: Allow the cake to cool in the pan for about 10 minutes, then turn it out onto a wire rack to cool completely. Dust with powdered sugar before serving, if desired.
Extra Tips:
For an extra burst of lemon flavor, consider adding a teaspoon of lemon extract along with the vanilla extract. Additionally, if you prefer a slightly denser texture, decrease the amount of baking powder to 2 teaspoons.
This cake pairs beautifully with a cup of espresso or a glass of limoncello. To store leftovers, keep the cake in an airtight container at room temperature for up to two days, or refrigerate for longer freshness.
Fast Cannoli Dip

Cannoli are a classic Italian dessert known for their crispy shells filled with a sweet, creamy filling. However, preparing traditional cannoli can be time-consuming and requires some skill, especially when it comes to frying the shells. For those who love the flavors but are short on time, a Fast Cannoli Dip offers a delightful alternative.
This dip captures all the deliciousness of cannoli filling in a quick and easy format, perfect for gatherings or a spontaneous sweet treat. This recipe creates a rich, creamy dip that pairs wonderfully with waffle cones, graham crackers, or fresh fruit. With just a few simple ingredients, you can whip up this dip in no time and serve a crowd of 4-6 people. It’s ideal for parties, potlucks, or any occasion when you want to impress without spending hours in the kitchen.
Ingredients:
- 2 cups ricotta cheese
- 1 cup mascarpone cheese
- 1 1/2 cups powdered sugar
- 1 teaspoon vanilla extract
- 1/2 teaspoon almond extract (optional)
- 1/2 cup mini chocolate chips
- Zest of one orange
- Waffle cones, broken into pieces, for serving
Instructions:
- Prepare the Ricotta: Begin by draining the ricotta cheese to remove excess moisture. Place it in a fine-mesh sieve over a bowl and let it sit for about 20 minutes. This will guarantee a thicker, creamier dip.
- Mix the Cheeses: In a large mixing bowl, combine the drained ricotta cheese and mascarpone cheese. Use a hand mixer on medium speed to blend until the mixture is smooth and creamy.
- Add the Sweetness: Gradually add the powdered sugar to the cheese mixture, continuing to mix until it’s fully incorporated and smooth. This step guarantees that the dip is sweet and creamy.
- Flavor the Dip: Stir in the vanilla extract and almond extract (if using). These extracts enhance the flavor profile, giving the dip a more authentic cannoli taste.
- Finish with Chocolate and Zest: Gently fold in the mini chocolate chips and the orange zest. These add texture and a burst of flavor that complements the creamy dip beautifully.
- Chill the Dip: Cover the bowl with plastic wrap and refrigerate the dip for at least 30 minutes. Chilling allows the flavors to meld together and the dip to firm up slightly.
- Serve: Once chilled, transfer the dip to a serving bowl. Serve with broken waffle cones or your choice of dippers.
Extra Tips:
When preparing the Fast Cannoli Dip, make sure to use high-quality ricotta and mascarpone cheeses for the best flavor and texture. If you find that the dip is too thick after chilling, you can gently fold in a tablespoon or two of heavy cream to reach your desired consistency.
For an added twist, consider sprinkling crushed pistachios or additional chocolate chips on top before serving. This dip can be made a day in advance, allowing the flavors to develop even more, making it a convenient option for pre-planning your dessert menu.
Simple Biscotti
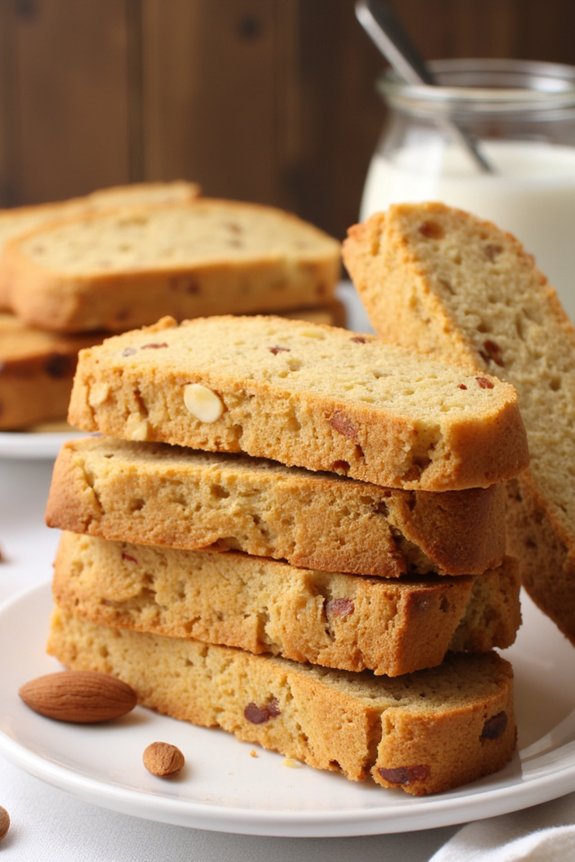
Biscotti are classic Italian cookies that are perfect for any occasion. These twice-baked cookies are known for their crunchy texture and delightful flavors, making them an ideal companion for coffee or tea. Simple Biscotti can be customized with various nuts, dried fruits, or chocolate chips, but their basic form is deliciously satisfying. This recipe is perfect for those who want to create an authentic Italian dessert with minimal fuss.
The following recipe serves 4-6 people and captures the essence of traditional biscotti. The ingredients are straightforward, and the preparation process is uncomplicated, making it an excellent option for both novice and experienced bakers. The key to achieving the perfect biscotti is baking them twice: first, as a loaf, and then slicing and baking them again to attain their signature crispness.
Ingredients:
- 2 cups all-purpose flour
- 1 cup granulated sugar
- 1 teaspoon baking powder
- 1/2 teaspoon salt
- 3 large eggs
- 1 teaspoon vanilla extract
- 1/2 teaspoon almond extract
- 1 cup almonds, toasted and chopped
Instructions:
- Preheat and Prep: Preheat your oven to 350°F (175°C). Line a baking sheet with parchment paper to prevent sticking and guarantee even baking.
- Mix Dry Ingredients: In a medium-sized bowl, whisk together the flour, sugar, baking powder, and salt until well combined. This helps distribute the baking powder evenly, guaranteeing the biscotti rise uniformly.
- Beat Wet Ingredients: In a separate large bowl, beat the eggs, vanilla extract, and almond extract together until the mixture is smooth and slightly frothy. This will incorporate air, contributing to the biscotti’s texture.
- Combine Mixtures: Gradually add the dry ingredients to the wet ingredients, mixing until a dough forms. The dough will be slightly sticky, which is normal.
- Add Nuts: Fold in the chopped almonds until they’re evenly distributed throughout the dough. The nuts add a delightful crunch and flavor to the biscotti.
- Shape and Bake: Divide the dough in half and shape each portion into a log, approximately 12 inches long and 2 inches wide. Place the logs on the prepared baking sheet and bake for 25-30 minutes, or until they’re lightly golden.
- Cool and Slice: Remove the logs from the oven and allow them to cool for about 10 minutes. Using a sharp knife, slice the logs diagonally into 1/2-inch thick slices.
- Second Bake: Arrange the slices cut-side down on the baking sheet. Bake for an additional 10-15 minutes, flipping them halfway through, until they’re crisp and golden brown.
- Cool and Serve: Let the biscotti cool completely on a wire rack before serving. They’ll continue to harden as they cool.
Extra Tips:
For a more enhanced flavor, consider adding a teaspoon of cinnamon or orange zest to the dough. If you prefer a sweeter biscotti, dip one end of the cooled cookies in melted chocolate and allow them to set.
To guarantee an even texture, be consistent with the thickness of your slices during the second bake. Remember, biscotti can be stored in an airtight container for up to two weeks, making them a convenient and delicious treat to have on hand.
Speedy Zabaglione

Zabaglione is a classic Italian dessert known for its rich and creamy texture, often served warm with fresh berries or as a topping for cakes. Its origins date back to the 16th century, and it has been a beloved sweet treat ever since.
The beauty of zabaglione lies in its simplicity, as it requires only a handful of ingredients to create a luscious and silky custard. This Speedy Zabaglione recipe is perfect for those who want to whip up a delectable dessert in no time, making it an ideal choice for impromptu gatherings or a last-minute indulgence.
Traditionally, zabaglione is made with egg yolks, sugar, and a sweet wine such as Marsala. The mixture is gently cooked over a double boiler until it becomes thick and frothy. This version, however, focuses on speed without compromising flavor, guaranteeing that you can enjoy this Italian delight without spending too much time in the kitchen.
Perfect for serving 4-6 people, this recipe is sure to impress your guests or satisfy your sweet tooth in a pinch.
Ingredients for 4-6 servings:
- 6 large egg yolks
- 1/2 cup granulated sugar
- 1/2 cup Marsala wine (or another sweet wine)
- 1 teaspoon vanilla extract
- Fresh berries (such as strawberries, raspberries, or blueberries) for serving
Cooking Instructions:
- Prepare the Double Boiler: Fill a medium saucepan with about an inch of water and bring it to a simmer over medium heat. Place a large heatproof bowl over the saucepan, making sure that the bottom of the bowl doesn’t touch the water.
- Whisk the Egg Yolks and Sugar: In the heatproof bowl, combine the egg yolks and sugar. Whisk vigorously until the mixture is pale and thick, about 3-4 minutes. This step helps to dissolve the sugar and incorporates air into the mixture for a light texture.
- Add Wine and Vanilla Extract: Slowly add the Marsala wine and vanilla extract to the egg mixture, whisking constantly to maintain a smooth and consistent mixture.
- Cook the Zabaglione: Continue whisking the mixture over the simmering water. Keep the heat moderate and whisk constantly to prevent the eggs from scrambling. Cook until the zabaglione has thickened and doubled in volume, about 8-10 minutes. The mixture should be smooth and frothy.
- Serve Immediately: Remove the bowl from the heat and divide the zabaglione among serving glasses or bowls. Top with fresh berries and serve immediately while still warm.
Extra Tips:
When making zabaglione, it’s essential to maintain a steady whisking motion to prevent the eggs from cooking too quickly and scrambling. If you find the mixture is getting too hot, simply lift the bowl off the saucepan for a few moments to cool it down slightly.
Additionally, using room temperature eggs can help the zabaglione to emulsify more evenly. If you prefer a thicker consistency, continue cooking the mixture for a few extra minutes.
Finally, experiment with different types of wine or liqueurs to customize the flavor to your liking. Enjoy your speedy zabaglione with a sprinkle of cinnamon or a dash of grated chocolate for an extra touch of indulgence.
Instant Italian Trifle
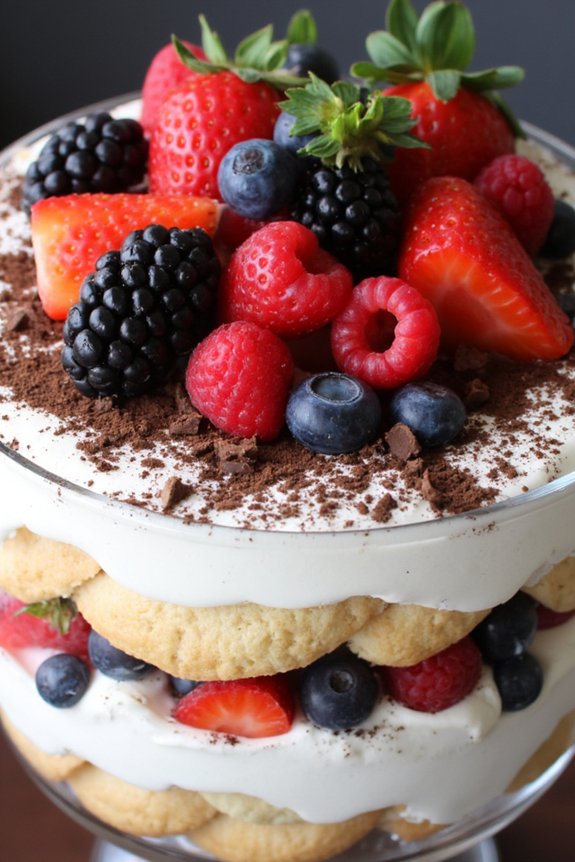
Indulge in a delightful fusion of flavors with this Instant Italian Trifle, an effortless dessert that brings together the classic elements of Italian cuisine in a sweet and satisfying way. Perfect for impromptu gatherings or when you’re short on time, this trifle layers creamy mascarpone, rich chocolate, and juicy berries, all elevated with a touch of aromatic espresso. The combination of textures and tastes will leave your guests impressed and craving for more, while you’ll appreciate the simplicity and speed of its preparation.
This trifle isn’t only quick to assemble but also allows for creative variations, letting you adapt it to your preference or the season’s freshest fruits. The mascarpone cheese provides a luscious base, while the ladyfingers soaked in espresso lend a subtle bitterness that balances the sweetness of the dessert. Topped with a sprinkle of cocoa powder and fresh berries, each bite is a celebration of Italy’s rich culinary heritage. This recipe yields enough to serve 4-6 people, making it ideal for a family dinner or small party.
Ingredients (Serves 4-6):
- 1 cup of mascarpone cheese
- 1 cup of heavy cream
- 1/4 cup of powdered sugar
- 1 teaspoon of vanilla extract
- 1 cup of strong brewed espresso, cooled
- 12-16 ladyfingers
- 1/2 cup of dark chocolate, finely chopped
- 1 cup of mixed fresh berries (e.g., strawberries, raspberries, blueberries)
- Cocoa powder for dusting
Instructions:
- Prepare the Cream Mixture: In a medium bowl, combine the mascarpone cheese, heavy cream, powdered sugar, and vanilla extract. Use an electric mixer to beat the ingredients until the mixture is smooth and thick, forming soft peaks. This creamy mixture will serve as the base for your trifle layers.
- Assemble the Trifle: Begin by dipping each ladyfinger briefly into the cooled espresso, making sure they’re soaked but not overly saturated. Place a layer of soaked ladyfingers at the bottom of your trifle dish or individual serving glasses.
- Layer with Cream and Chocolate: Spread a generous layer of the mascarpone cream mixture over the ladyfingers. Sprinkle a portion of the finely chopped dark chocolate over the cream for a rich, indulgent bite.
- Add Fruits and Repeat: Scatter a handful of mixed fresh berries over the chocolate layer. Repeat the layers of espresso-soaked ladyfingers, mascarpone cream, and chocolate until all ingredients are used, finishing with a top layer of cream and a final sprinkle of chocolate.
- Chill and Dust: Cover the trifle with plastic wrap and refrigerate for at least 2 hours to allow the flavors to meld and the dessert to set. Just before serving, dust the top with cocoa powder and garnish with additional berries for a fresh, vibrant touch.
Extra Tips:
To enhance the flavor, consider adding a splash of coffee liqueur to the espresso before soaking the ladyfingers. For a more decadent experience, use a combination of different chocolates, such as milk and dark chocolate layers.
If you’re serving the trifle in a glass dish, make sure the sides are clean for an appealing presentation. Finally, if you’re making the trifle ahead of time, add the berries and final cocoa dusting just before serving to keep them fresh and vibrant.
No-Bake Amaretti Cheesecake
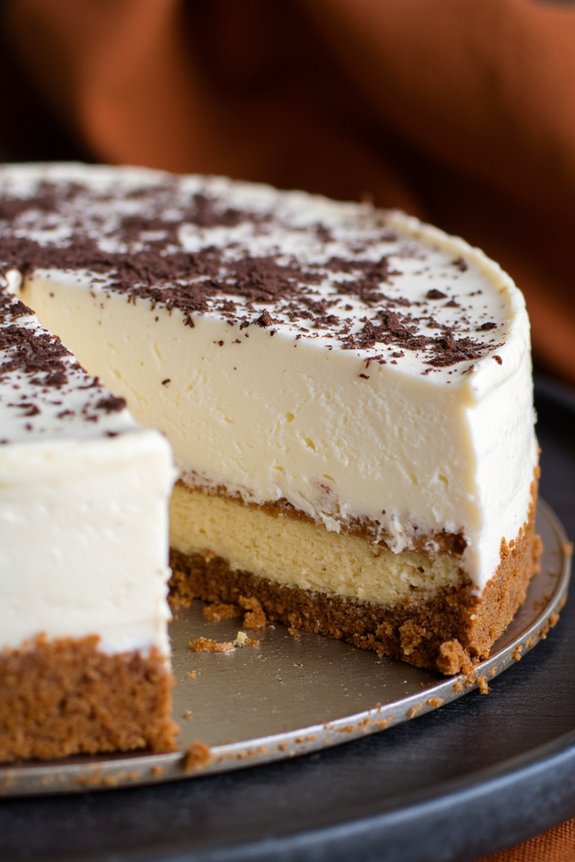
No-Bake Amaretti Cheesecake is a delightful and easy-to-make Italian dessert that’s perfect for those who want to enjoy a delectable treat without the fuss of baking. This cheesecake combines a creamy mascarpone filling with the delightful crunch of amaretti cookies, creating a harmonious blend of flavors and textures.
Ideal for both casual family dinners and elegant gatherings, this dessert not only saves time in the kitchen but also allows you to enjoy an authentic taste of Italy with minimal effort.
The key to a successful No-Bake Amaretti Cheesecake lies in its simplicity and the quality of its ingredients. By using fresh mascarpone cheese and authentic Italian amaretti cookies, you guarantee that each bite is rich, creamy, and full of flavor.
The no-bake aspect of this cheesecake also means you can prepare it in advance, making it a convenient option for entertaining guests or treating your family to something special. Whether you’re an experienced cook or a beginner, this recipe is sure to impress.
Ingredients for 4-6 servings:
- 200g amaretti cookies
- 100g unsalted butter, melted
- 500g mascarpone cheese
- 100g powdered sugar
- 1 teaspoon vanilla extract
- 200ml heavy cream
- 50g dark chocolate shavings (optional, for garnish)
Cooking Instructions:
- Prepare the Base: Begin by crushing the amaretti cookies into fine crumbs using a food processor or by placing them in a zip-lock bag and crushing with a rolling pin. Mix the crumbs with the melted butter until well combined.
- Form the Crust: Press the cookie mixture evenly into the bottom of a springform pan (20cm/8-inch diameter) to form the crust. Use the back of a spoon to smooth out the surface. Place the pan in the refrigerator to chill and firm up while you prepare the filling.
- Make the Filling: In a large mixing bowl, combine the mascarpone cheese, powdered sugar, and vanilla extract. Beat together until smooth and creamy.
- Whip the Cream: In a separate bowl, whip the heavy cream until it forms soft peaks. Gently fold the whipped cream into the mascarpone mixture, ensuring that it’s thoroughly combined without deflating the cream.
- Assemble the Cheesecake: Remove the crust from the refrigerator. Spoon the mascarpone filling over the crust, spreading it evenly with a spatula. Smooth out the top for an even surface.
- Chill: Cover the cheesecake with plastic wrap and refrigerate for at least 4 hours, or overnight, to allow it to set properly.
- Garnish and Serve: Before serving, optionally sprinkle dark chocolate shavings over the top for added flavor and decoration. Carefully remove the cheesecake from the springform pan, slice, and serve chilled.
Extra Tips:
To guarantee your No-Bake Amaretti Cheesecake sets properly, it’s important to allow sufficient chilling time in the refrigerator. If you’re in a rush, placing the cheesecake in the freezer for a short period (around 30 minutes) can help speed up the setting process.
When folding the whipped cream into the mascarpone mixture, use gentle motions to maintain the light and airy texture of the filling. For an additional twist, you can experiment with adding a dash of almond liqueur to the mascarpone mixture for an extra depth of flavor.
Enjoy your delicious creation with a cup of espresso or a glass of dessert wine for an authentic Italian experience.
Quick Chocolate Salami
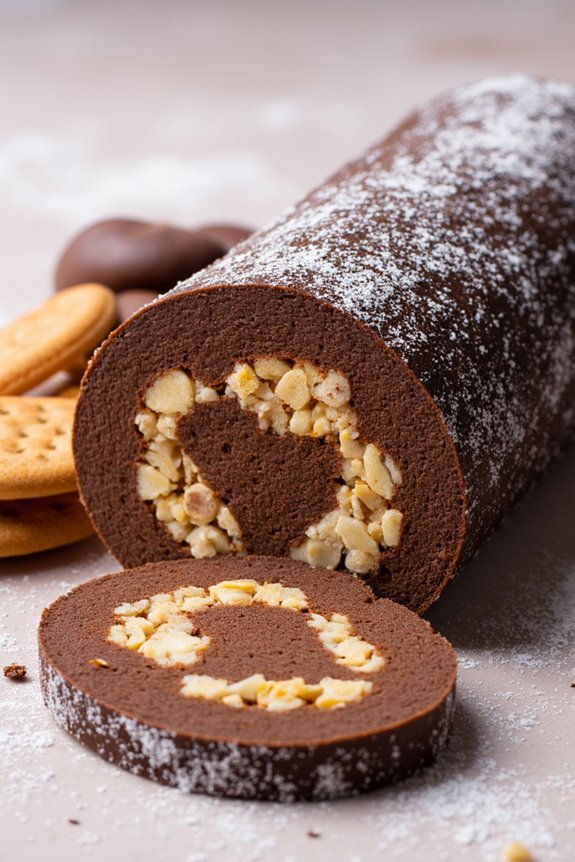
Chocolate salami, or “salame di cioccolato,” is a delightful no-bake Italian dessert that mimics the appearance of a traditional salami. Despite its savory appearance, this treat is a rich, chocolatey indulgence that combines crushed biscuits with a luscious blend of cocoa, butter, and sugar.
It’s a perfect blend of textures and flavors that can be prepared swiftly, making it an ideal choice for a last-minute dessert or a sweet gift. The beauty of chocolate salami lies in its simplicity and the ease with which it can be customized to suit personal preferences by adding nuts, dried fruits, or even a dash of liqueur.
This recipe for quick chocolate salami is designed to serve 4-6 people and can be prepared in about 20 minutes, with additional time needed for chilling. The result is a decadent treat that can be sliced and served as a sophisticated end to a meal or as a sweet snack throughout the day.
Whether you’re an experienced cook or new to the kitchen, this recipe offers a fun and rewarding culinary experience that captures the essence of Italian dessert-making.
Ingredients:
- 200g (7 oz) of digestive biscuits or tea biscuits
- 100g (3.5 oz) of unsalted butter
- 100g (3.5 oz) of granulated sugar
- 100g (3.5 oz) of dark chocolate
- 2 tablespoons of unsweetened cocoa powder
- 2 tablespoons of milk
- 1 teaspoon of vanilla extract
- Optional: 50g (1.75 oz) of chopped nuts (e.g., almonds, hazelnuts)
- Optional: 2 tablespoons of rum or liqueur of choice
- Icing sugar for dusting
Instructions:
- Prepare the Biscuits: Begin by placing the digestive biscuits in a large ziplock bag. Use a rolling pin to crush them into small pieces, leaving some larger bits for texture. Transfer the crushed biscuits to a large mixing bowl.
- Melt the Chocolate: In a heatproof bowl, add the dark chocolate and butter. Place the bowl over a pot of simmering water (double boiler method) and gently melt the chocolate and butter together, stirring occasionally until smooth.
- Combine Ingredients: Remove the melted chocolate and butter from the heat and let it cool slightly. Stir in the granulated sugar, cocoa powder, milk, and vanilla extract until well combined. If using, add the rum or liqueur at this stage.
- Mix with Biscuits: Pour the chocolate mixture over the crushed biscuits and mix thoroughly until all the biscuit pieces are well coated. If desired, add the chopped nuts and stir to incorporate.
- Shape the Salami: Lay a large piece of plastic wrap on the counter. Spoon the chocolate mixture onto the wrap and shape it into a log, resembling a salami. Roll it tightly in the plastic wrap and twist the ends to secure.
- Chill: Place the wrapped chocolate salami in the refrigerator for at least 2 hours, or until it’s firm enough to slice.
- Serve: Once chilled, remove the chocolate salami from the plastic wrap. Roll it in icing sugar for a classic salami look. Slice into rounds and serve.
Extra Tips:
To enhance the flavor profile, feel free to experiment with different types of biscuits or add-ins like dried fruits, such as cranberries or raisins.
If you prefer a sweeter taste, substitute milk chocolate for dark chocolate. Remember to let the salami sit at room temperature for a few minutes before slicing to prevent cracking.
For an elegant touch, wrap the slices in parchment paper and tie with a string before serving.
Effortless Semifreddo

Semifreddo is a classic Italian dessert that translates to “half-frozen,” offering a delightfully creamy texture that’s both invigorating and indulgent. Unlike traditional ice cream, semifreddo doesn’t require churning, making it an effortless choice for a quick yet impressive dessert.
Its soft, mousse-like consistency is achieved by folding in whipped cream, which gives it a lighter touch and allows it to be easily sliced straight from the freezer. With its roots in Italy, semifreddo can be customized with various flavors and toppings, making it a versatile treat for any occasion.
This particular recipe for an effortless semifreddo infuses the rich flavors of vanilla and almond, creating a harmonious blend of sweetness and nuttiness. Perfect for a serving size of 4-6 people, this recipe takes minimal effort to prepare and is sure to impress your guests with its sophisticated taste.
By following a few simple steps, you can create a luscious semifreddo that’s both elegant and satisfying, ideal for rounding off a meal or serving as a chilled afternoon delight.
Ingredients for 4-6 Servings:
- 4 large eggs, separated
- 1 cup granulated sugar
- 2 teaspoons pure vanilla extract
- 1 teaspoon almond extract
- 2 cups heavy cream
- ¼ cup chopped almonds
- A pinch of salt
Cooking Instructions:
- Prepare the Egg Mixture: In a large bowl, whisk together the egg yolks and half of the sugar until the mixture becomes thick and pale, about 3-4 minutes. Stir in the vanilla and almond extracts until well combined.
- Beat the Egg Whites: In a separate bowl, beat the egg whites with a pinch of salt until soft peaks form. Gradually add the remaining sugar, continuing to beat until stiff peaks form. Gently fold the egg white mixture into the yolk mixture until smooth.
- Whip the Cream: In another bowl, whip the heavy cream until soft peaks form, being careful not to overwhip. Gently fold the whipped cream into the egg mixture, making sure that the mixture remains light and airy.
- Add Almonds: Gently fold in the chopped almonds, distributing them evenly throughout the mixture to add a delightful crunch to the semifreddo.
- Freeze the Mixture: Pour the mixture into a loaf pan lined with plastic wrap, smoothing the top with a spatula. Cover with more plastic wrap and freeze for at least 4-6 hours, or until firm.
- Serve: To serve, remove the semifreddo from the pan using the plastic wrap, slice it into thick pieces, and place on serving plates. Optionally, garnish with additional chopped almonds or fresh berries.
Extra Tips:
For a smoother texture, make sure that the eggs are at room temperature before starting, as this helps them whip up more effectively.
Be gentle when folding the whipped cream and egg whites into the yolk mixture to maintain the light texture of the semifreddo. If you want to experiment with flavors, consider adding a hint of liqueur, such as Amaretto, for an extra layer of flavor.
Finally, remember to serve the semifreddo straight from the freezer to maintain its perfect consistency.
Fast Ricciarelli
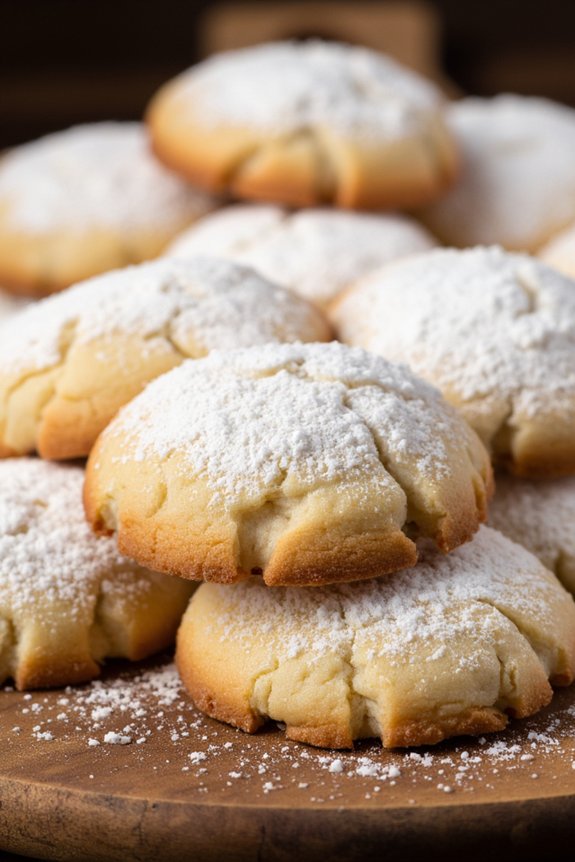
Ricciarelli are traditional Italian almond cookies from Siena, with a soft and chewy texture that makes them a delightful treat. Perfect for those who want to indulge in a quick dessert without spending too much time in the kitchen, these cookies offer a taste of Italy with every bite.
With a few simple ingredients, you can have these delicious cookies ready to impress your family or guests in no time. These cookies are naturally gluten-free, making them an excellent choice for those with dietary restrictions. Traditionally served during the holidays, Ricciarelli can be enjoyed year-round.
This recipe is designed for a serving size of 4-6 people, making it perfect for a small gathering or a cozy family dessert.
Ingredients (for 4-6 servings):
- 2 cups almond flour
- 1 cup granulated sugar
- 1 teaspoon vanilla extract
- 1 teaspoon almond extract
- 2 large egg whites
- 1 teaspoon lemon zest
- A pinch of salt
- Powdered sugar, for dusting
Cooking Instructions:
- Preheat the Oven: Start by preheating your oven to 325°F (160°C). This will guarantee that it reaches the right temperature while you prepare the dough.
- Prepare the Dough: In a large mixing bowl, combine the almond flour, granulated sugar, lemon zest, and a pinch of salt. Stir the dry ingredients until they’re well blended.
- Add Wet Ingredients: In a separate bowl, whisk the egg whites until they’re frothy but not stiff. Add the vanilla and almond extracts to the egg whites and mix well.
- Combine Ingredients: Gradually fold the egg white mixture into the dry ingredients until a sticky dough forms. Be gentle to avoid deflating the egg whites.
- Shape the Cookies: Dust your hands with powdered sugar to prevent sticking. Take small portions of the dough and shape them into oval or diamond-shaped cookies, about 2 inches in length.
- Arrange on a Baking Sheet: Line a baking sheet with parchment paper. Place the shaped cookies on the prepared sheet, leaving some space between each cookie.
- Dust and Bake: Lightly dust the cookies with powdered sugar before placing them in the oven. Bake for approximately 15-18 minutes, or until the edges are slightly golden. The centers should remain soft.
- Cool and Serve: Remove the cookies from the oven and let them cool on the baking sheet for about 10 minutes before transferring them to a wire rack to cool completely. Serve the Ricciarelli with a light dusting of additional powdered sugar if desired.
Extra Tips:
For an extra touch of flavor, you can add a small amount of orange zest in addition to the lemon zest. Ascertain that the egg whites aren’t over-whisked, as you want them to be frothy but not stiff, which helps keep the cookies soft and chewy.
If you prefer a more pronounced almond flavor, you can slightly increase the almond extract. Store any leftover cookies in an airtight container to maintain their softness and flavor for several days.
Instant Zeppole
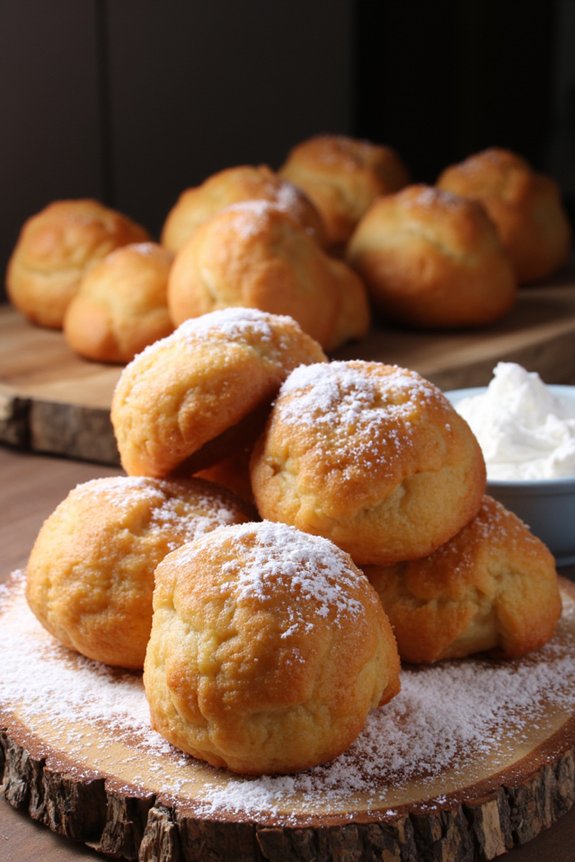
Zeppole are delightful Italian pastries that can be quickly whipped up to satisfy your sweet cravings. These golden, puffy doughnuts are traditionally enjoyed during Saint Joseph’s Day in Italy, but with this instant recipe, you can bring a taste of Italy to your home any time.
The beauty of these zeppole lies in their simplicity and the fact that they can be prepared in a flash, making them perfect for unexpected guests or a quick indulgence after dinner. With a crisp exterior that gives way to a soft, airy interior, each bite of these zeppole is a little piece of heaven.
Instant zeppole are made using common pantry staples, so you likely already have everything you need to create this Italian treat. This recipe serves 4-6 people, making it ideal for a family dessert or a small gathering. The dough is quickly mixed, fried to perfection, and dusted with powdered sugar for an irresistibly sweet finish. Serve them warm for the ultimate experience, as the taste and texture are at their best fresh out of the fryer.
Ingredients (serving size: 4-6 people):
- 1 cup all-purpose flour
- 1 tablespoon baking powder
- 1 tablespoon granulated sugar
- 1/4 teaspoon salt
- 1 cup ricotta cheese
- 2 large eggs
- 1 teaspoon vanilla extract
- Vegetable oil for frying
- Powdered sugar for dusting
Cooking Instructions:
- Prepare the Dough: In a large mixing bowl, combine the flour, baking powder, granulated sugar, and salt. In a separate bowl, mix together the ricotta cheese, eggs, and vanilla extract until smooth. Gradually add the dry ingredients to the wet ingredients, stirring until a thick, sticky dough forms.
- Heat the Oil: Pour vegetable oil into a deep pan or fryer, filling it about 2 inches deep. Heat the oil to 350°F (175°C). To test if the oil is ready, drop a small piece of dough into the oil; if it sizzles and rises to the surface, the oil is at the right temperature.
- Shape and Fry the Zeppole: Using two spoons, scoop out a small amount of dough (about the size of a walnut) and gently drop it into the hot oil. Fry the zeppole in batches, being careful not to overcrowd the pan, until they’re golden brown and cooked through, about 3-4 minutes per batch. Turn them occasionally for even cooking.
- Drain and Dust: Remove the zeppole from the oil using a slotted spoon and place them on a plate lined with paper towels to drain the excess oil. While still warm, generously dust the zeppole with powdered sugar.
- Serve Immediately: For the best flavor and texture, serve the zeppole while they’re still warm and crispy.
Extra Tips:
For a twist on the classic, consider adding a pinch of cinnamon or nutmeg to the dough for added warmth and flavor. If you prefer a citrus note, a teaspoon of lemon or orange zest can be mixed into the batter.
When frying, maintain a consistent oil temperature to guarantee even cooking and prevent the zeppole from becoming greasy. If you have any leftovers, store them in an airtight container and reheat them in a preheated oven to regain their crispness.