

As someone who adores Italian food but needs to avoid dairy, I’ve found the perfect collection of recipes that keeps things flavorful and light. Picture yourself enjoying a forkful of Spaghetti Aglio E Olio or a comforting bowl of creamy tomato basil soup made with coconut milk. These dishes celebrate fresh ingredients and vibrant flavors, sure to please any palate. Ready to explore this delicious journey without missing out on traditional Italian flair? Let’s get started with these 11 dairy-free Italian recipes that won’t compromise on taste.
Spaghetti Aglio E Olio
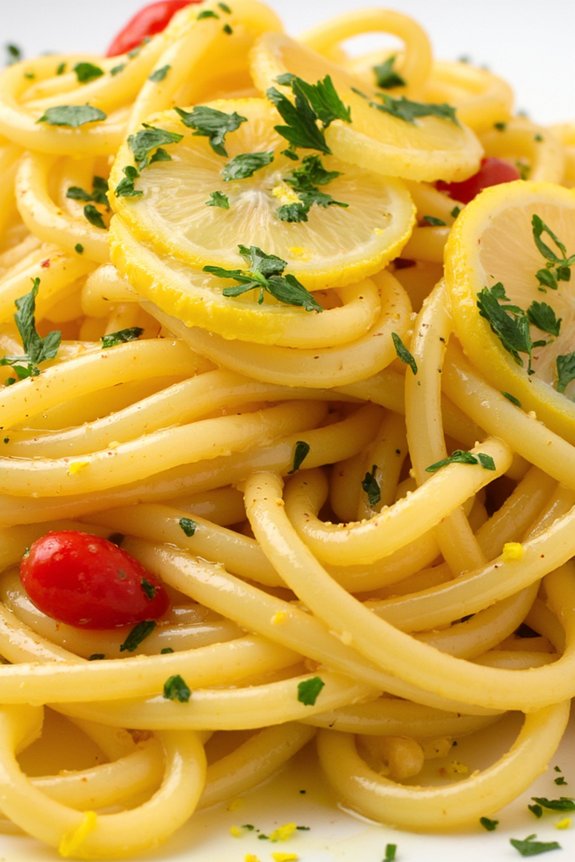
Spaghetti Aglio E Olio is a classic Italian dish that’s both simple and flavorful, making it a perfect choice for anyone looking for a dairy-free option. The essence of this recipe lies in its minimalistic approach, using just a handful of ingredients to create a dish that’s greater than the sum of its parts.
Originating from Naples, this dish is traditionally made with spaghetti, garlic, olive oil, and a hint of chili pepper, giving it a subtle heat that perfectly complements the rich, aromatic flavors of the garlic-infused oil.
Preparing Spaghetti Aglio E Olio is a quick and easy process, making it an ideal choice for a weeknight dinner or a light lunch. The key to mastering this dish is to guarantee that the garlic is perfectly cooked – neither burnt nor raw but gently golden and aromatic.
By following this recipe, you can create a delicious and satisfying meal that isn’t only dairy-free but also packed with the traditional flavors of Italian cuisine.
Ingredients (Serves 4-6):
- 1 pound (450g) spaghetti
- 1/2 cup (120ml) extra virgin olive oil
- 8 cloves garlic, thinly sliced
- 1 teaspoon red pepper flakes (adjust for spice preference)
- Salt, to taste
- Freshly ground black pepper, to taste
- 1/4 cup fresh parsley, finely chopped
- Zest of 1 lemon (optional)
Cooking Instructions:
- Cook the Spaghetti: Bring a large pot of salted water to a boil. Add the spaghetti and cook according to package instructions until al dente. Reserve 1 cup of pasta cooking water, then drain the spaghetti.
- Prepare the Garlic Oil: While the pasta is cooking, heat the olive oil in a large skillet over medium heat. Add the sliced garlic and red pepper flakes, stirring frequently. Cook until the garlic is golden and fragrant, about 2-3 minutes. Be careful not to burn the garlic, as it can turn bitter.
- Combine Pasta and Oil: Add the cooked spaghetti to the skillet with the garlic oil. Toss to coat the pasta evenly in the oil. If the pasta seems dry, add some of the reserved pasta cooking water, a little at a time, until it reaches your desired consistency.
- Season and Serve: Season the pasta with salt and freshly ground black pepper to taste. Add the chopped parsley and lemon zest (if using), and toss everything together until well combined.
- Plate and Enjoy: Serve the spaghetti aglio e olio immediately, making sure each serving has an even distribution of garlic and parsley. Enjoy with a side salad or crusty bread, if desired.
Extra Tips:
When making Spaghetti Aglio E Olio, it’s vital to use high-quality extra virgin olive oil, as it’s a primary flavor component of the dish.
Also, keep an eye on the garlic while cooking – it should be golden and aromatic but not burnt. If you find the dish too spicy, reduce the amount of red pepper flakes.
Additionally, the reserved pasta water is key to achieving a silky sauce, so don’t skip this step. Finally, for an extra burst of freshness, consider adding a splash of lemon juice before serving.
Dairy-Free Pesto Pasta
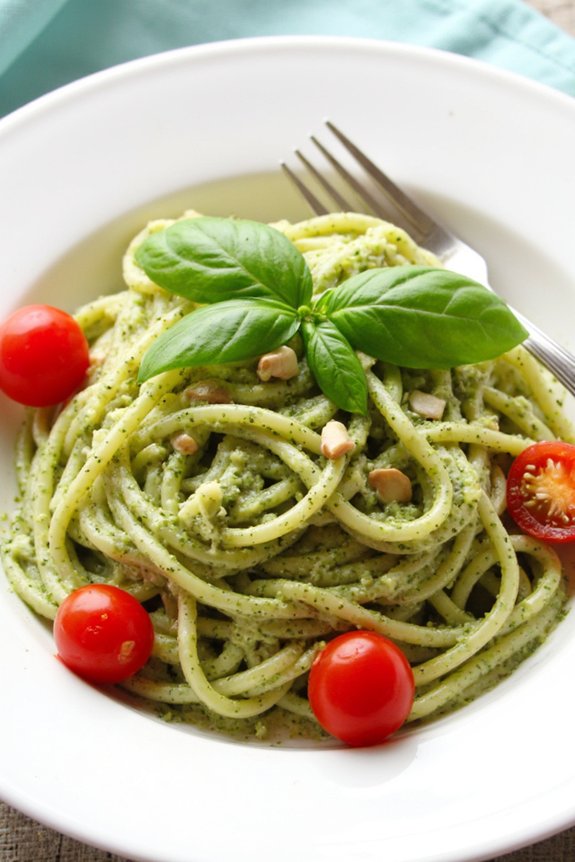
This delightful Dairy-Free Pesto Pasta offers a fresh and vibrant take on a classic Italian dish, perfect for those looking to avoid dairy without compromising on flavor. The key to this dish lies in the creamy, nutty pesto sauce, which is made without cheese but still bursts with the bold flavors of fresh basil, garlic, and nuts.
Paired with your favorite pasta, this recipe makes for a satisfying meal that’s both comforting and nutritious, ideal for a quick weeknight dinner or a leisurely weekend lunch.
The beauty of this Dairy-Free Pesto Pasta is in its simplicity and adaptability. By using quality ingredients like fresh basil leaves, raw nuts, and good olive oil, the pesto sauce becomes a versatile component that can elevate any pasta dish.
Whether you’re vegan, lactose intolerant, or simply exploring dairy-free options, this recipe won’t disappoint. The pasta can be served warm or cold, making it a great option for meal prep or a picnic outing.
Let’s explore the ingredients and steps needed to create this delicious, dairy-free masterpiece.
Ingredients (Serves 4-6):
- 1 pound (450g) of pasta (such as spaghetti, fettuccine, or penne)
- 2 cups fresh basil leaves, packed
- 1/2 cup raw pine nuts or walnuts
- 2 cloves garlic, peeled
- 1/2 cup extra virgin olive oil
- 1 tablespoon lemon juice
- Salt, to taste
- Black pepper, to taste
- Cherry tomatoes, halved (optional, for garnish)
- Fresh basil leaves, for garnish (optional)
Cooking Instructions:
- Cook the Pasta: Begin by bringing a large pot of salted water to a boil. Add the pasta and cook according to the package instructions until it’s al dente. Once cooked, drain the pasta and reserve about 1/2 cup of the pasta water. Set the pasta aside.
- Prepare the Pesto: In a food processor, combine the fresh basil leaves, raw pine nuts or walnuts, and garlic cloves. Pulse until the mixture is finely chopped. With the food processor running, gradually add the olive oil in a steady stream until the pesto is smooth and creamy.
- Season the Pesto: Add the lemon juice to the pesto for a touch of acidity, then season with salt and black pepper to taste. Blend again briefly to incorporate the seasoning.
- Combine the Pasta and Pesto: Transfer the cooked pasta to a large mixing bowl. Add the prepared pesto and toss until the pasta is evenly coated. If the pesto is too thick, gradually add some of the reserved pasta water to achieve the desired consistency.
- Garnish and Serve: If desired, garnish the Dairy-Free Pesto Pasta with halved cherry tomatoes and fresh basil leaves for added color and flavor. Serve immediately for a warm dish, or chill in the refrigerator if you prefer a cold pasta salad.
Extra Tips:
To enhance the flavor of your pesto, consider lightly toasting the nuts before blending them. This will bring out their natural oils and add a deeper, richer flavor to the sauce.
Be sure to taste and adjust the seasoning of the pesto to your preference, as the flavors can vary depending on the freshness of the basil and the type of nuts used.
If you’re looking for a bit of spice, a pinch of red pepper flakes can be added to the pesto for a subtle kick.
Finally, this dish pairs beautifully with a simple green salad or grilled vegetables, making for a well-rounded, dairy-free meal.
Creamy Tomato Basil Soup
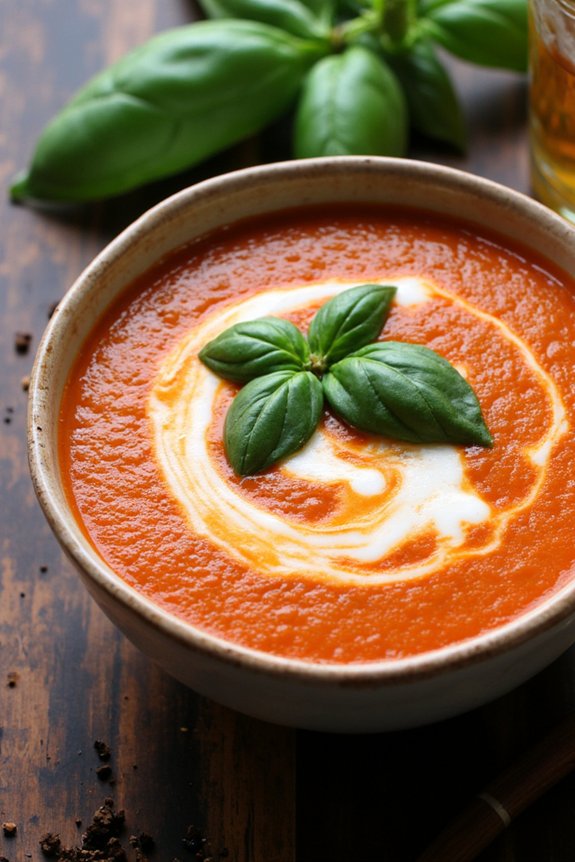
Indulge in the delightful flavors of this Italian-inspired creamy tomato basil soup, a perfect dairy-free alternative that doesn’t compromise on flavor or texture. This luscious soup combines the natural sweetness of ripe tomatoes with the aromatic fragrance of fresh basil, creating a comforting dish that can be enjoyed year-round.
Whether you’re looking for a light lunch or a cozy dinner option, this recipe is sure to satisfy your cravings without the need for any dairy products. To achieve the creaminess traditionally associated with tomato soup, this recipe uses a blend of coconut milk and cashews, providing a rich and velvety texture.
The addition of garlic and onion enhances the depth of flavor, while a touch of balsamic vinegar adds a hint of tanginess to balance the sweetness of the tomatoes. This recipe is designed to serve 4-6 people, making it an ideal choice for family meals or gatherings with friends.
Ingredients for Creamy Tomato Basil Soup (Serves 4-6):
- 2 tablespoons olive oil
- 1 medium onion, diced
- 3 cloves garlic, minced
- 2 cans (14 oz each) of whole peeled tomatoes
- 1 cup vegetable broth
- 1/2 cup full-fat coconut milk
- 1/4 cup raw cashews, soaked for at least 2 hours
- 1 tablespoon balsamic vinegar
- 1 teaspoon sugar
- Salt and pepper to taste
- 1/2 cup fresh basil leaves, chopped
- Additional basil leaves for garnish
Cooking Instructions:
- Prepare the Base: In a large pot, heat the olive oil over medium heat. Add the diced onion and minced garlic, sautéing until the onion is translucent and the garlic is fragrant, about 5 minutes.
- Add Tomatoes and Broth: Pour in the cans of whole peeled tomatoes, including the juices, and the vegetable broth. Stir to combine and bring the mixture to a simmer. Allow it to cook for about 15 minutes to let the flavors meld.
- Blend the Soup: Carefully transfer the tomato mixture to a blender. Add the soaked cashews and coconut milk. Blend until smooth and creamy. You may need to do this in batches depending on the size of your blender.
- Season the Soup: Return the blended soup to the pot and place it back on the stove over low heat. Stir in the balsamic vinegar, sugar, and chopped basil. Season with salt and pepper to taste. Allow the soup to warm through for another 5 minutes.
- Serve: Ladle the soup into bowls, garnish with additional fresh basil leaves, and serve hot. Enjoy the creamy, aromatic flavors with a side of crusty bread or a light salad.
Extra Tips:
For the best results, use ripe and high-quality tomatoes, as they greatly enhance the flavor of the soup. If fresh tomatoes are in season, you can substitute the canned tomatoes with about 2 pounds of chopped fresh tomatoes.
Soaking the cashews beforehand is essential for achieving a smooth texture, so don’t skip this step. If you prefer a spicier kick, consider adding a pinch of red pepper flakes. Finally, when blending hot liquids, always be cautious and make sure your blender lid is secure to avoid any spills or burns.
Eggplant Caponata
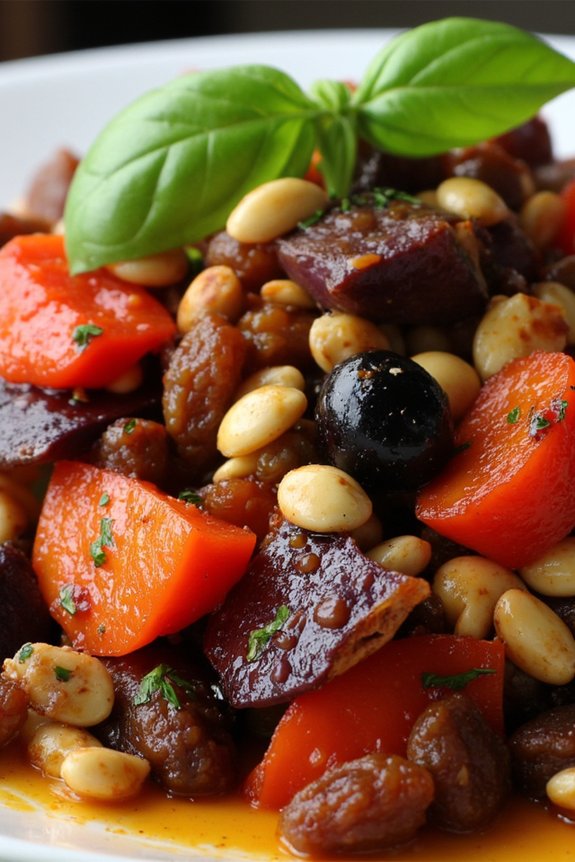
Eggplant Caponata is a classic Sicilian dish that’s both hearty and invigorating. It’s a versatile, dairy-free recipe perfect for any season and can be enjoyed as an appetizer, side dish, or even a main course when paired with crusty bread. The dish combines eggplant with a variety of vegetables and a sweet and tangy sauce, making it a favorite among those who appreciate Mediterranean flavors.
Its rich taste profile and colorful presentation make it a wonderful addition to any meal.
Preparing Eggplant Caponata is a straightforward process that brings out the best in simple ingredients. The key is to cook each component properly to develop deep, complementary flavors. This recipe serves 4-6 people and highlights the delicious harmony between the soft, roasted eggplant and the vibrant mix of vegetables, all brought together with a sweet and sour sauce. The end result is a beautiful dish that’s both comforting and sophisticated.
Ingredients:
- 2 medium eggplants, diced
- 1 large onion, chopped
- 2 celery stalks, diced
- 1 red bell pepper, diced
- 3 cloves garlic, minced
- 1/2 cup pitted green olives, sliced
- 1/3 cup capers, drained
- 1/4 cup pine nuts
- 1/4 cup raisins
- 1/2 cup tomato paste
- 1/4 cup red wine vinegar
- 3 tablespoons sugar
- 1/4 cup olive oil
- Salt and pepper to taste
- Fresh basil leaves for garnish
Cooking Instructions:
- Prepare the Eggplant: Begin by sprinkling the diced eggplants with salt and let them sit in a colander for about 20 minutes. This process helps to draw out any bitterness. Afterward, rinse the eggplants and pat them dry with a clean kitchen towel.
- Cook the Eggplant: In a large skillet, heat half of the olive oil over medium heat. Add the eggplant cubes and sauté until they’re golden brown and tender, about 10-12 minutes. Remove the eggplant from the skillet and set aside.
- Sauté the Vegetables: In the same skillet, add the remaining olive oil. Sauté the onions, celery, and red bell pepper until they’re soft and translucent, approximately 5-7 minutes. Add the minced garlic and cook for an additional 1-2 minutes until fragrant.
- Combine Ingredients: Return the cooked eggplant to the skillet with the sautéed vegetables. Add the olives, capers, pine nuts, and raisins. Stir in the tomato paste, ensuring it coats the vegetables evenly.
- Create the Sauce: In a small bowl, mix the red wine vinegar and sugar until the sugar dissolves. Pour this mixture over the vegetable medley in the skillet. Stir everything together, then reduce the heat to low.
- Simmer: Cover the skillet and let the caponata simmer for about 15-20 minutes, allowing all the flavors to meld together. Stir occasionally to prevent sticking.
- Season and Serve: Taste the caponata and adjust the seasoning with salt and pepper as needed. Remove from heat and let it cool slightly. Garnish with fresh basil leaves before serving.
Extra Tips:
For the best flavor, prepare the Eggplant Caponata a few hours before serving or even the day before. The longer it sits, the more the flavors develop and meld together, making it even more delicious.
This dish can be served warm, at room temperature, or chilled, depending on your preference. When selecting eggplants, look for ones that are firm and have a smooth, shiny skin. Avoid those with soft spots or blemishes.
Additionally, feel free to experiment with different types of olives or nuts to personalize the dish to your taste.
Chickpea Minestrone
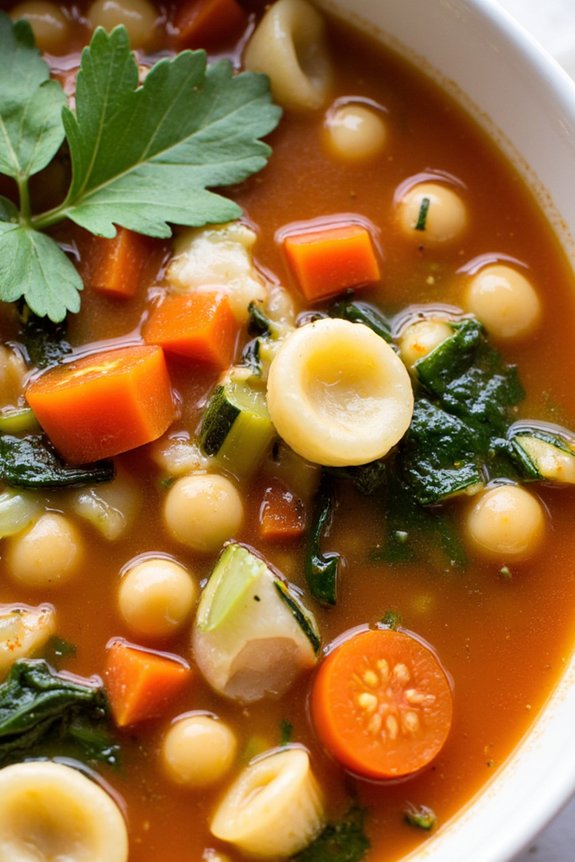
Chickpea Minestrone is a hearty and delicious Italian-inspired soup that’s both nutritious and comforting. This dairy-free recipe is perfect for those who are lactose intolerant or simply looking to enjoy a plant-based meal. The combination of chickpeas, fresh vegetables, and aromatic herbs creates a satisfying dish that’s ideal for lunch or dinner. Not only is it packed with flavor, but it’s also rich in protein and fiber, making it a wholesome choice for a balanced diet.
This version of minestrone uses chickpeas as the primary protein source, which adds a creamy texture to the broth without the need for dairy. The soup is loaded with an array of colorful vegetables, such as carrots, celery, and tomatoes, which provide a range of vitamins and minerals. With the addition of pasta and a medley of herbs, each spoonful offers a delightful burst of flavors. This dish is a wonderful way to enjoy a taste of Italy in your own kitchen.
Ingredients for 4-6 servings:
- 2 tablespoons olive oil
- 1 large onion, chopped
- 2 cloves garlic, minced
- 2 carrots, diced
- 2 celery stalks, diced
- 1 zucchini, diced
- 1 can (14.5 oz) diced tomatoes
- 1 can (15 oz) chickpeas, drained and rinsed
- 6 cups vegetable broth
- 1 cup small pasta shells
- 1 teaspoon dried oregano
- 1 teaspoon dried basil
- Salt and pepper to taste
- 2 cups fresh spinach leaves
- Fresh parsley, chopped (for garnish)
Cooking Instructions:
- Prepare the Vegetables: Begin by heating the olive oil in a large pot over medium heat. Add the chopped onion and garlic, and sauté for about 2-3 minutes until the onion becomes translucent.
- Add Vegetables: Incorporate the diced carrots, celery, and zucchini into the pot. Stir well and cook for an additional 5 minutes, allowing the vegetables to soften slightly.
- Add Tomatoes and Chickpeas: Pour in the canned diced tomatoes and chickpeas. Stir to combine all the ingredients thoroughly.
- Simmer the Broth: Add the vegetable broth, oregano, and basil to the pot. Increase the heat to high until the mixture begins to boil. Once boiling, reduce the heat to low, cover the pot, and let it simmer for 15 minutes.
- Cook the Pasta: Stir in the pasta shells and season with salt and pepper to taste. Allow the soup to continue simmering for another 10 minutes, or until the pasta is al dente.
- Finish with Spinach: Add the fresh spinach leaves to the pot, stirring gently until they wilt into the soup. This should take about 2 minutes.
- Garnish and Serve: Once the spinach is wilted, remove the pot from heat. Ladle the soup into bowls, garnish with freshly chopped parsley, and serve hot.
Extra Tips:
For a more robust flavor, consider adding a splash of balsamic vinegar or a pinch of red pepper flakes when simmering the broth. You can also customize the soup with seasonal vegetables or substitute the pasta with gluten-free options if necessary.
If you prefer a thicker consistency, mash a few of the chickpeas before adding them to the soup. This dish pairs beautifully with crusty bread for a complete meal. Enjoy your homemade Chickpea Minestrone fresh, or store leftovers in the refrigerator for up to three days.
Risotto Primavera
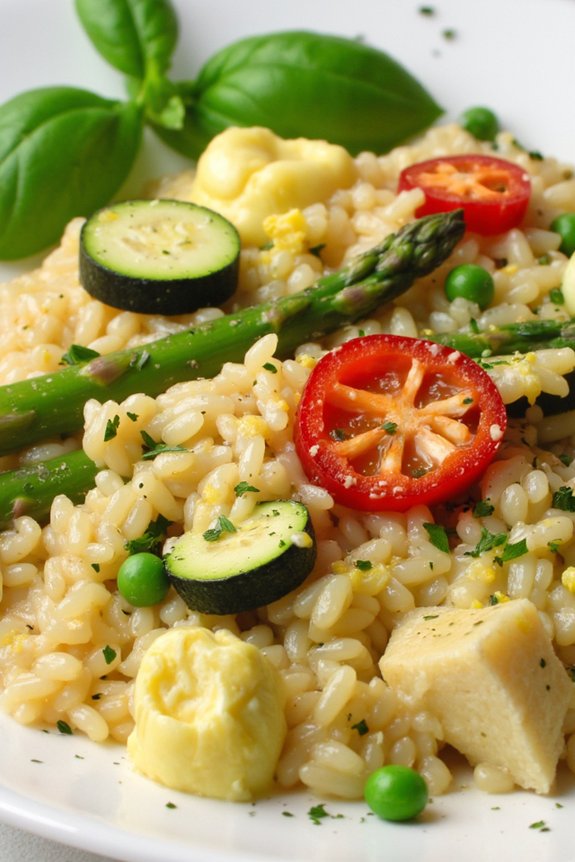
Risotto Primavera is a delightful and vibrant dairy-free Italian dish perfect for welcoming the flavors of spring. This creamy, vegetable-packed risotto is a great way to enjoy a wholesome meal without any dairy ingredients. The risotto’s base is made with arborio rice, which is slowly cooked to creamy perfection with vegetable broth. A colorful mix of fresh seasonal vegetables such as asparagus, peas, and bell peppers not only adds to the dish’s nutritional value but also makes it a feast for the eyes.
The fresh herbs and a hint of lemon zest further elevate the risotto, making it an invigorating and satisfying meal. This recipe serves 4-6 people and is ideal for a family dinner or a gathering with friends. The key to a successful risotto is patience, as the rice must be stirred consistently while gradually adding the broth to achieve the desired creamy texture. By using high-quality ingredients and taking the time to develop the flavors, you’ll create a dish that’s both nourishing and delicious, sure to impress everyone at the table.
Ingredients:
- 2 tablespoons olive oil
- 1 medium onion, finely chopped
- 2 garlic cloves, minced
- 1 1/2 cups arborio rice
- 1/2 cup white wine (optional)
- 6 cups vegetable broth, kept warm
- 1 cup asparagus, cut into 1-inch pieces
- 1 cup fresh or frozen peas
- 1 red bell pepper, diced
- 1 zucchini, diced
- 1 lemon, zested
- Salt and freshly ground black pepper, to taste
- 1/4 cup fresh basil leaves, chopped
- 1/4 cup fresh parsley, chopped
Instructions:
- Prepare the Vegetables: Begin by prepping the vegetables. Cut the asparagus, dice the red bell pepper and zucchini, and set them aside. If you’re using fresh peas, shell them and keep them ready.
- Sauté Onion and Garlic: In a large saucepan, heat the olive oil over medium heat. Add the chopped onion and sauté for about 3-4 minutes until it becomes translucent. Stir in the minced garlic and cook for an additional 1 minute until fragrant.
- Toast the Rice: Add the arborio rice to the saucepan and stir well to coat the rice with the oil. Cook for about 2 minutes, stirring constantly, until the rice grains are lightly toasted.
- Deglaze with Wine: If using, pour in the white wine and stir the rice until the wine is absorbed. This will add depth to the flavor of the risotto.
- Add Broth Gradually: Begin adding the warm vegetable broth, one ladleful at a time, stirring frequently. Allow the liquid to be absorbed before adding more. Continue this process for about 18-20 minutes until the rice is tender and creamy.
- Incorporate Vegetables: When the rice is nearly cooked, stir in the asparagus, peas, red bell pepper, and zucchini. Cook for an additional 5 minutes until the vegetables are tender but still vibrant.
- Season and Finish: Add the lemon zest, salt, and black pepper to taste. Stir in the chopped basil and parsley, mixing well to combine all the flavors.
- Serve: Remove the risotto from the heat and let it sit for a couple of minutes to thicken slightly. Serve hot, garnished with additional fresh herbs if desired.
Extra Tips:
For the best Risotto Primavera, use fresh, seasonal vegetables for ideal flavor and nutrition. If you prefer a richer texture, consider using a high-quality vegetable broth.
Stirring consistently is essential for releasing the starches from the rice, which gives the risotto its creamy consistency. If you want a touch of creaminess without dairy, try stirring in a spoonful of nutritional yeast or a dollop of dairy-free yogurt right before serving.
Adjust the seasoning according to your taste, and experiment with different herbs like mint or chives for a unique twist.
Grilled Vegetable Antipasto
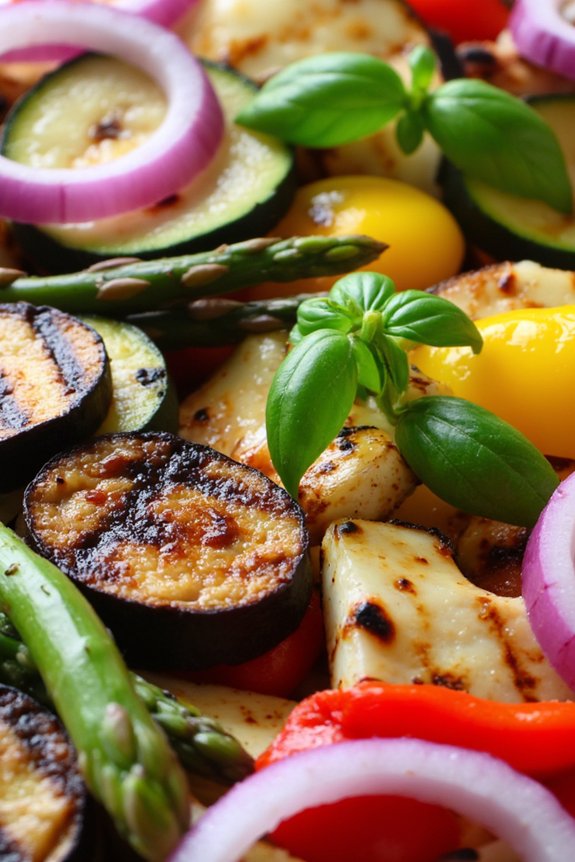
Grilled Vegetable Antipasto is a delightful and colorful dish that serves as a perfect starter for any meal. This Italian-inspired dish features an array of fresh vegetables, grilled to perfection, bringing out their natural sweetness and smoky flavor. The combination of vibrant vegetables not only pleases the eye but also tantalizes the taste buds.
This recipe is completely dairy-free, making it suitable for those following a plant-based diet or with lactose intolerance. Ideal for serving 4-6 people, this Grilled Vegetable Antipasto can be prepared in advance and served warm or at room temperature. The vegetables are lightly seasoned to enhance their natural flavors while maintaining a healthy profile.
Paired with a drizzle of balsamic glaze or a sprinkle of fresh herbs, this dish can be both elegant and rustic, suiting any dining occasion.
Ingredients:
- 1 large eggplant
- 2 zucchinis
- 2 red bell peppers
- 1 yellow bell pepper
- 1 large red onion
- 1 bunch of asparagus
- 1/4 cup olive oil
- 2 tablespoons balsamic vinegar
- 3 cloves garlic, minced
- Salt and pepper to taste
- Fresh basil leaves for garnish
Cooking Instructions:
- Prepare the Vegetables: Wash all the vegetables thoroughly. Cut the eggplant and zucchinis into 1/4-inch thick slices. Core and slice the bell peppers into wide strips. Peel and slice the red onion into rings. Trim the asparagus stalks.
- Marinate the Vegetables: In a large bowl, combine olive oil, balsamic vinegar, minced garlic, salt, and pepper. Add the sliced vegetables to the bowl, ensuring they’re evenly coated with the marinade. Allow them to sit for at least 15 minutes to absorb the flavors.
- Preheat the Grill: Heat your grill to medium-high heat. If using a grill pan, heat it over medium-high on the stovetop.
- Grill the Vegetables: Place the marinated vegetables on the grill in a single layer. Grill each type of vegetable for approximately 3-5 minutes per side, or until they’ve nice grill marks and are tender. Be mindful to turn them carefully to avoid breaking them.
- Arrange and Serve: Once grilled, arrange the vegetables on a large serving platter. Drizzle any remaining marinade over the top. Garnish with fresh basil leaves for an aromatic finish.
Extra Tips:
When grilling, make sure not to overcrowd the grill or grill pan as this will cause the vegetables to steam instead of getting the desired charred effect.
You can also experiment with adding other vegetables such as cherry tomatoes or mushrooms to the mix for added variety. If you prefer a spicier kick, consider adding a touch of red pepper flakes to the marinade.
Finally, for an added touch of freshness, squeeze a bit of lemon juice over the vegetables just before serving.
Lemon Garlic Shrimp Scampi
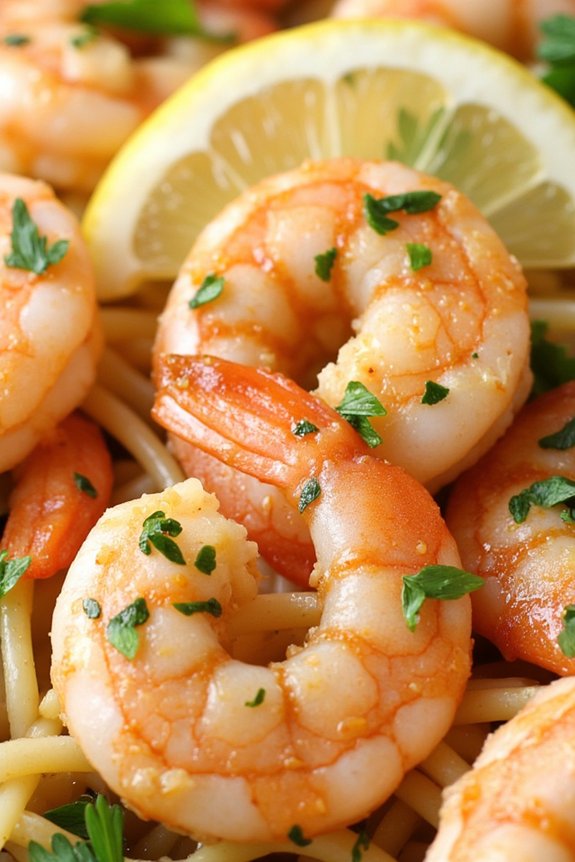
Lemon Garlic Shrimp Scampi is a delightful dairy-free twist on a classic Italian dish, perfect for those seeking a lighter, yet flavor-packed meal. This recipe combines succulent shrimp with the bright, tangy notes of lemon and the rich aroma of garlic, creating a dish that’s both invigorating and satisfying. The use of olive oil instead of butter guarantees that the dish remains dairy-free, while still providing a deliciously smooth texture and depth of flavor.
Ideal for a weeknight dinner or a special occasion, this Lemon Garlic Shrimp Scampi can be served over your choice of pasta, rice, or even zucchini noodles for a low-carb option. The recipe is straightforward, making it accessible for cooks of all skill levels, and it comes together quickly, allowing you to enjoy a gourmet meal without spending hours in the kitchen. This serving size is perfect for 4-6 people, ensuring everyone at the table gets to enjoy this delightful dish.
Ingredients:
- 1 ½ pounds large shrimp, peeled and deveined
- 4 tablespoons olive oil
- 6 cloves garlic, minced
- 1 teaspoon red pepper flakes
- ½ cup dry white wine
- Juice of 2 lemons
- Zest of 1 lemon
- Salt and pepper, to taste
- ¼ cup fresh parsley, chopped
- Cooked pasta or rice, for serving
Instructions:
- Prepare the Shrimp: Start by patting the shrimp dry with a paper towel to remove excess moisture. Season the shrimp with salt and pepper to taste, ensuring even coverage for enhanced flavor.
- Heat Olive Oil: In a large skillet, heat the olive oil over medium-high heat. Once the oil is hot, add the shrimp in a single layer. Cook for about 2 minutes on each side, or until they turn pink and opaque. Remove the shrimp from the skillet and set aside.
- Sauté Garlic: In the same skillet, lower the heat to medium and add the minced garlic and red pepper flakes. Sauté for about 1 minute, or until the garlic becomes fragrant and slightly golden, being careful not to burn it.
- Deglaze with Wine: Pour the white wine into the skillet, using a wooden spoon to scrape up any bits stuck to the bottom. Allow the wine to simmer for about 2-3 minutes, reducing slightly and intensifying the flavors.
- Add Lemon: Stir in the lemon juice and zest, mixing well to combine with the wine and garlic mixture. Let it simmer for another minute to allow the flavors to meld together.
- Return Shrimp to Skillet: Add the cooked shrimp back into the skillet, tossing them gently to coat with the sauce. Cook for an additional 1-2 minutes, ensuring the shrimp are heated through.
- Finish with Parsley: Remove the skillet from the heat and sprinkle the chopped parsley over the shrimp. Toss everything together to distribute the parsley evenly.
- Serve: Serve the Lemon Garlic Shrimp Scampi over your choice of cooked pasta or rice. Garnish with extra lemon wedges if desired.
Extra Tips:
When cooking shrimp, it’s important not to overcook them as they can become tough and rubbery. Keep a close eye on them and remove them from the heat as soon as they turn pink and opaque.
If you prefer a non-alcoholic version, you can substitute the white wine with chicken or vegetable broth for a similar depth of flavor. Additionally, feel free to adjust the level of red pepper flakes to suit your spice preference.
For a more vibrant presentation, consider adding a few slices of lemon to the dish before serving.
Tuscan White Bean Salad
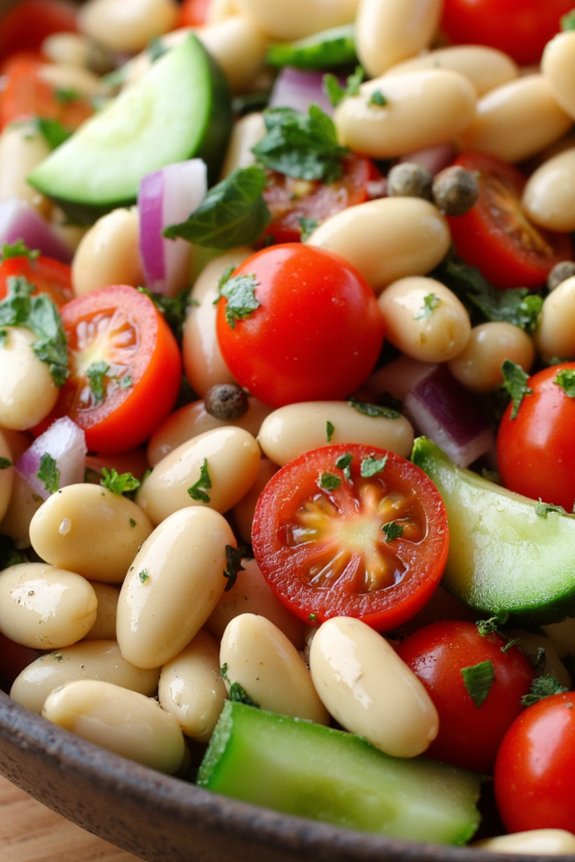
Tuscan White Bean Salad is a revitalizing and hearty dish that celebrates the simple yet vibrant flavors of Tuscany. This dairy-free recipe is perfect for a light lunch, a side dish for dinner, or as part of a larger spread of Italian-inspired dishes. The combination of creamy white beans, crisp vegetables, and aromatic herbs makes it both satisfying and nutritious.
Infused with olive oil and a touch of lemon, this salad is a delightful balance of textures and flavors, capturing the essence of rustic Italian cuisine. This salad comes together quickly, making it an excellent option for those who crave a wholesome meal with minimal preparation time.
It’s ideal for serving 4-6 people, providing a generous portion for each person. Whether you’re hosting a gathering or enjoying a quiet meal at home, the Tuscan White Bean Salad is sure to be a crowd-pleaser. This delightful salad can be enjoyed on its own, on a bed of greens, or alongside crusty bread for a complete meal experience.
Ingredients:
- 2 cans (15 ounces each) cannellini beans, drained and rinsed
- 1 small red onion, finely chopped
- 1 cup cherry tomatoes, halved
- 1 cucumber, diced
- 1/4 cup fresh parsley, chopped
- 1/4 cup fresh basil, chopped
- 2 tablespoons capers, drained
- 3 tablespoons extra-virgin olive oil
- 1 tablespoon red wine vinegar
- Juice of 1 lemon
- Salt and black pepper to taste
Instructions:
- Prepare the Ingredients: Begin by draining and rinsing the cannellini beans thoroughly. This will remove any excess sodium and preserve the beans’ natural flavor. Finely chop the red onion, halve the cherry tomatoes, and dice the cucumber. Chop the fresh parsley and basil to release their aromatic oils.
- Combine the Ingredients: In a large mixing bowl, combine the drained cannellini beans, chopped red onion, halved cherry tomatoes, diced cucumber, chopped parsley, chopped basil, and drained capers. Gently toss to mix the ingredients evenly.
- Make the Dressing: In a small bowl, whisk together the extra-virgin olive oil, red wine vinegar, and freshly squeezed lemon juice. Season the mixture with salt and black pepper to taste, adjusting the seasoning to your preference.
- Dress the Salad: Pour the dressing over the bean and vegetable mixture. Toss the salad gently to make sure that all the ingredients are well coated with the dressing. Allow the salad to sit for at least 10 minutes to let the flavors meld together.
- Serve: Transfer the salad to a serving dish or platter. Garnish with additional fresh basil leaves if desired. Serve immediately, or cover and refrigerate for up to an hour to allow the flavors to develop further.
Extra Tips:
For best results, use high-quality extra-virgin olive oil as it greatly enhances the flavor of the salad. If you prefer a more robust taste, consider adding a pinch of red pepper flakes for a slight kick.
This salad can be made ahead of time and stored in the refrigerator for up to two days; just be sure to give it a good toss before serving. Finally, if you want to make it a more filling meal, consider adding some grilled chicken or roasted vegetables.
Polenta With Mushroom Ragu
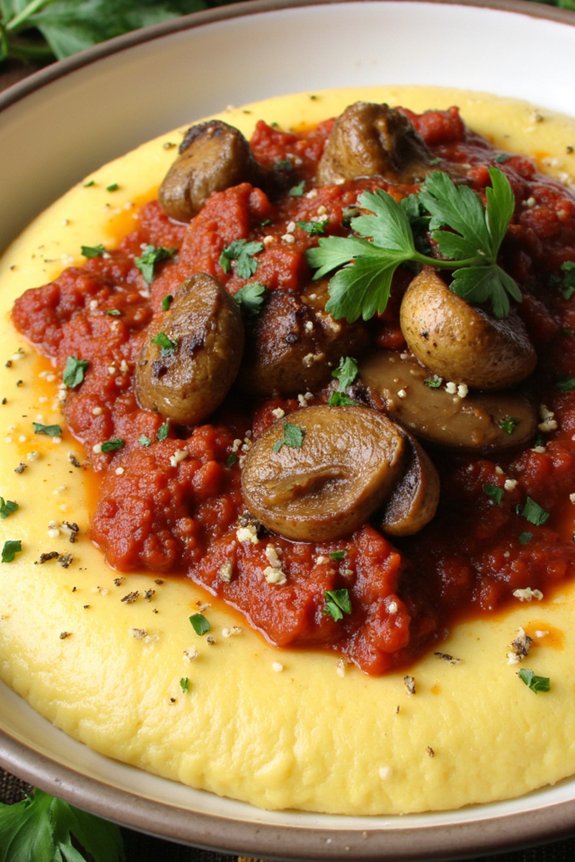
Polenta with Mushroom Ragu is a delightful Italian-inspired dish that isn’t only dairy-free but also incredibly flavorful and satisfying. This dish combines creamy polenta with a rich, savory mushroom ragu, creating a perfect balance of textures and tastes. The earthy mushrooms make for a hearty topping while the polenta provides a smooth and comforting base, making it an ideal meal for both weeknight dinners and special occasions.
Mushroom ragu is a versatile sauce that can be prepared in advance and served with a variety of bases, but when paired with polenta, it truly shines. Polenta, made from coarsely ground cornmeal, is naturally gluten-free and can be cooked to a creamy consistency that absorbs the flavors of the ragu beautifully. This recipe serves 4-6 people, making it perfect for family dinners or entertaining guests with a dish that’s both elegant and homey.
Ingredients:
- 1 cup polenta (coarse cornmeal)
- 4 cups water or vegetable broth
- 1 teaspoon salt
- 2 tablespoons olive oil
- 1 onion, finely chopped
- 3 garlic cloves, minced
- 1 pound mixed mushrooms (such as cremini, shiitake, or button), sliced
- 1 teaspoon dried thyme
- 1 teaspoon dried oregano
- 1/2 cup tomato paste
- 1/2 cup dry white wine (optional)
- Salt and pepper to taste
- Fresh parsley, chopped (for garnish)
Instructions:
- Prepare the Polenta: In a medium saucepan, bring 4 cups of water or vegetable broth to a boil. Add 1 teaspoon of salt. Slowly whisk in the polenta, ensuring there are no lumps. Reduce the heat to low and cook, stirring frequently, until the polenta is thick and creamy, about 30-40 minutes. If the polenta becomes too thick, add more water or broth as needed.
- Cook the Mushroom Ragu: While the polenta is cooking, heat the olive oil in a large skillet over medium heat. Add the chopped onion and sauté until translucent, about 5 minutes. Add the minced garlic and cook for another 1 minute until fragrant.
- Add the Mushrooms: Stir in the sliced mushrooms, thyme, and oregano. Cook until the mushrooms are browned and have released their moisture, about 10 minutes.
- Develop the Sauce: Add the tomato paste to the skillet, stirring to combine. Pour in the white wine (if using) and allow it to simmer for a few minutes until the alcohol has evaporated and the sauce has thickened slightly. Season with salt and pepper to taste.
- Serve: Spoon the creamy polenta onto plates or bowls, and top generously with the mushroom ragu. Garnish with chopped fresh parsley for a pop of color and added flavor.
Extra Tips:
For an even creamier polenta, you can whisk in a tablespoon of olive oil or a dairy-free butter alternative just before serving.
When selecting mushrooms, a mix of varieties will add more depth to the ragu’s flavor; however, feel free to use whatever mushrooms you have on hand.
If you prefer a bit of spice, add a pinch of red pepper flakes with the garlic.
Polenta can firm up as it cools, so if you prepare it ahead of time, simply reheat with a splash of water or broth to return it to the desired consistency.
Almond Biscotti
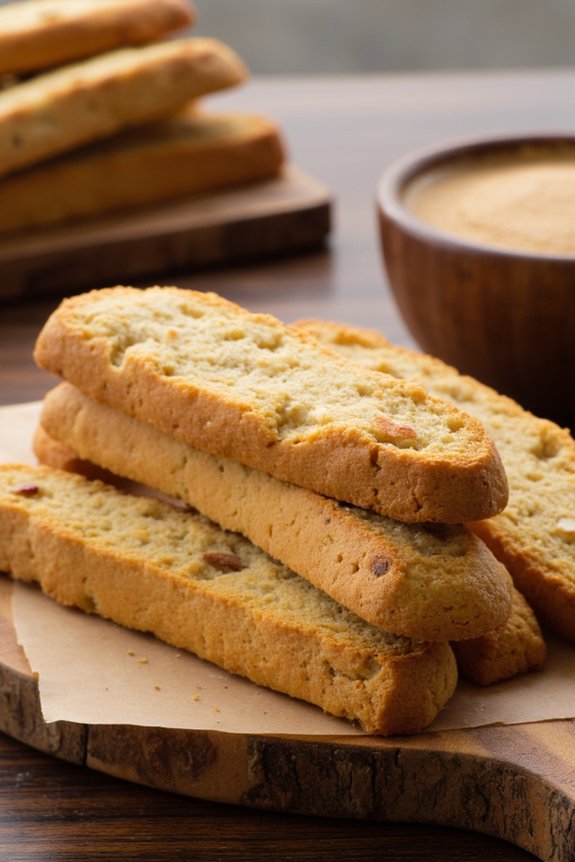
Almond Biscotti is a classic Italian cookie that’s perfectly crunchy, nutty, and deliciously fragrant. Traditionally enjoyed with a cup of coffee or a glass of sweet vin santo, these twice-baked cookies are wonderfully versatile. By making them dairy-free, this recipe caters to those who are lactose intolerant or simply prefer a plant-based diet, without compromising on the delightful taste and texture that biscotti are known for.
The use of almonds not only adds a rich flavor but also provides a boost of protein and healthy fats, making these cookies a delightful treat any time of day. This dairy-free version of Almond Biscotti uses almond milk and olive oil as substitutes for traditional butter and milk, guaranteeing that the cookies remain tender and flavorful.
The recipe is straightforward and perfect for those looking to explore Italian baking without the need for dairy products. Whether you serve them as a snack or as part of a dessert spread, these biscotti are sure to be a hit and a memorable part of any meal. The following recipe serves 4-6 people, making enough biscotti to share with friends and family.
Ingredients (serves 4-6):
- 2 cups all-purpose flour
- 1 cup granulated sugar
- 1 teaspoon baking powder
- 1/2 teaspoon salt
- 1/2 cup unsalted almonds, coarsely chopped
- 3 large eggs
- 1 teaspoon vanilla extract
- 1/2 teaspoon almond extract
- 1/4 cup almond milk
- 1/4 cup olive oil
Cooking Instructions:
- Preheat and Prepare: Preheat your oven to 350°F (175°C). Line a baking sheet with parchment paper or a silicone baking mat.
- Mix Dry Ingredients: In a large bowl, whisk together the all-purpose flour, granulated sugar, baking powder, and salt until well combined. Stir in the chopped almonds and set the mixture aside.
- Combine Wet Ingredients: In another bowl, whisk together the eggs, vanilla extract, almond extract, almond milk, and olive oil until smooth and well blended.
- Form the Dough: Gradually add the wet ingredients to the dry ingredients, mixing with a wooden spoon or spatula until a dough forms. The dough should be slightly sticky but manageable.
- Shape the Logs: Lightly flour your hands and divide the dough into two equal portions. Shape each portion into a log, approximately 12 inches long and 2 inches wide, and place them on the prepared baking sheet, leaving space between each log.
- First Bake: Bake the logs in the preheated oven for 25-30 minutes or until they’re lightly golden and firm to the touch. Remove them from the oven and let them cool for about 10 minutes.
- Slice the Biscotti: Using a serrated knife, carefully slice the logs diagonally into 1/2-inch thick slices. Arrange the slices cut-side down on the baking sheet.
- Second Bake: Return the sliced biscotti to the oven and bake for another 10-12 minutes, then flip them over and bake for an additional 10-12 minutes, or until they’re golden brown and crisp.
- Cool and Serve: Remove the biscotti from the oven and allow them to cool completely on a wire rack before serving.
Extra Tips:
When slicing the biscotti logs, use a gentle sawing motion with a serrated knife to prevent crumbling. If you prefer a softer biscotti, reduce the second bake time slightly. Confirm the biscotti are completely cool before storing them in an airtight container to keep them fresh and crunchy.
For a sweeter twist, you can dip half of each biscotti in dairy-free chocolate and let it set before serving. Enjoy your Almond Biscotti with a warm cup of tea or coffee for the perfect Italian-inspired treat.