

When it comes to creating delightful desserts, Italian cuisine offers a treasure trove of elegant and simple recipes that show less is more. Imagine presenting a classic Tiramisu or silky Panna Cotta at your next gathering. These treats are effortless to prepare yet undeniably impressive. With just a handful of quality ingredients, they transform into culinary masterpieces. Curious about how these Italian delights can elevate your baking repertoire with minimal fuss?
Tiramisu: A Classic Delight
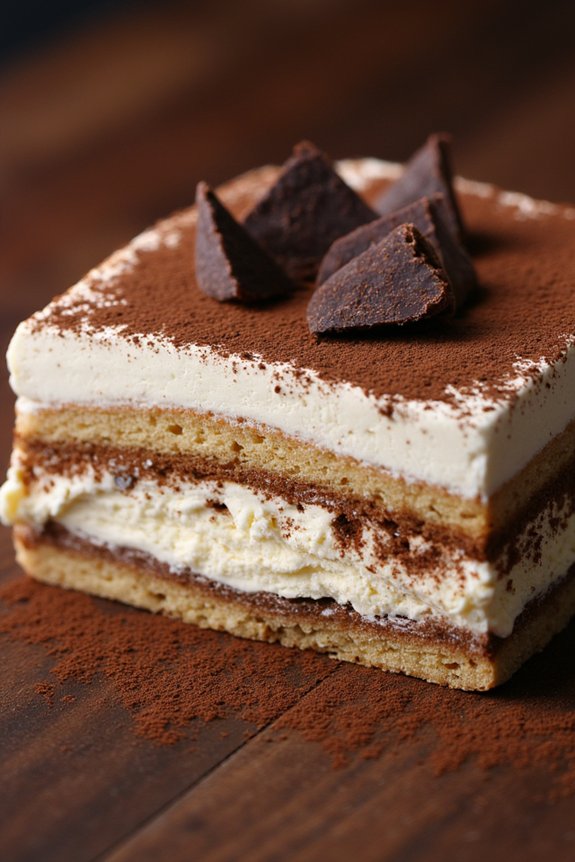
Tiramisu is a quintessential Italian dessert that has captured hearts worldwide with its creamy texture and rich flavors. Originating from the Veneto region, this “pick-me-up” treat is composed of layers of espresso-soaked ladyfingers, a luscious mascarpone cream, and a generous dusting of cocoa powder. Its unique combination of coffee, cocoa, and creamy mascarpone makes it a perfect ending to any meal, offering a burst of indulgence with every bite.
Whether you’re serving it at a dinner party or enjoying it as a personal treat, Tiramisu is a timeless dessert that brings a taste of Italy to your table.
Creating this classic dessert in your own kitchen is easier than you might think. By following a few simple steps, you can craft a Tiramisu that rivals any served in the finest Italian restaurants. The key to a successful Tiramisu lies in the quality of its ingredients and the patience to let the flavors meld together as it chills.
This recipe is designed to serve 4-6 people, making it ideal for sharing with friends and family. With a little time and effort, you can create a dessert that not only looks impressive but also delights the senses.
Ingredients (Serves 4-6):
- 4 large eggs, separated
- 1 cup granulated sugar
- 1 cup mascarpone cheese
- 1 ½ cups strong brewed espresso, cooled
- 2 tablespoons coffee liqueur (optional)
- 24 ladyfingers
- 2 tablespoons cocoa powder, for dusting
- Dark chocolate shavings, for garnish (optional)
Instructions:
- Prepare the Mascarpone Cream: Begin by whisking the egg yolks and half of the sugar (½ cup) in a large bowl until the mixture becomes pale and creamy. Add the mascarpone cheese and continue whisking until smooth and well combined.
- Whip the Egg Whites: In a separate clean bowl, beat the egg whites until soft peaks form. Gradually add the remaining ½ cup of sugar and continue to beat until the mixture forms stiff peaks.
- Combine the Mixtures: Gently fold the whipped egg whites into the mascarpone mixture. Take care to fold gently to maintain the airy texture of the cream.
- Prepare the Espresso Mixture: In a shallow dish, combine the cooled espresso and coffee liqueur (if using). Stir to mix well.
- Assemble the Tiramisu: Quickly dip each ladyfinger into the espresso mixture, being cautious that both sides are soaked but not soggy. Arrange a layer of soaked ladyfingers in the bottom of a 9×9 inch dish.
- Layer the Cream: Spread half of the mascarpone cream over the layer of ladyfingers. Smooth it out with a spatula.
- Repeat Layers: Add another layer of soaked ladyfingers over the mascarpone cream, followed by the remaining mascarpone mixture. Smooth the top layer.
- Chill and Serve: Cover the dish with plastic wrap and refrigerate for at least 4 hours, or preferably overnight, to allow the flavors to meld and the dessert to set.
- Finish with Cocoa and Chocolate: Just before serving, dust the top generously with cocoa powder. Garnish with dark chocolate shavings for an extra touch of elegance.
Extra Tips:
For the best results, use fresh, high-quality ingredients, particularly the mascarpone cheese and espresso, as they greatly influence the flavor and texture of the Tiramisu.
If you prefer a stronger coffee flavor, you can adjust the amount of espresso in the soaking mixture or add an extra tablespoon of coffee liqueur. Remember, patience is key—allowing the Tiramisu to chill thoroughly guarantees the layers set properly and the flavors blend beautifully.
If you have any leftovers, Tiramisu can be stored in the refrigerator for up to 2 days, though it’s best enjoyed fresh.
Panna Cotta: Silky and Smooth
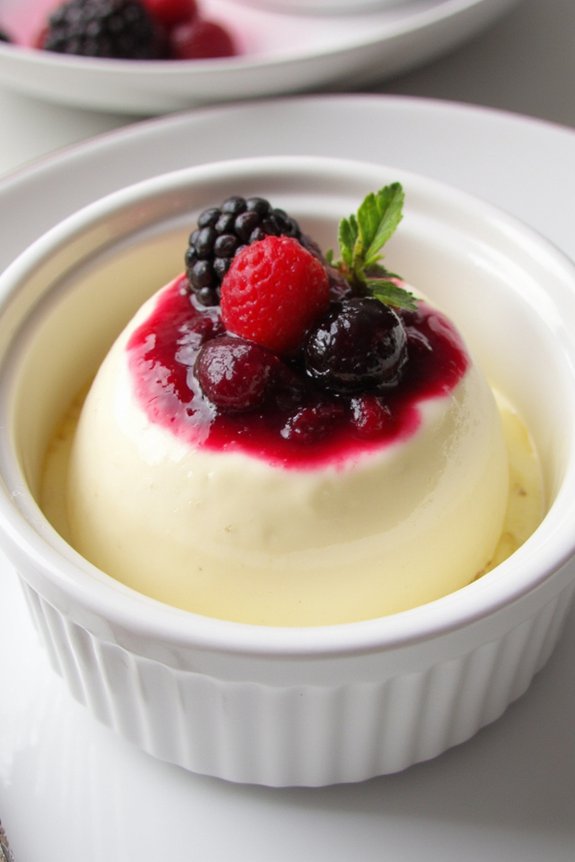
Panna Cotta, an Italian classic, is a beautifully simple dessert that translates to “cooked cream.” This elegant dish is celebrated for its silky texture and delicate flavor, often enhanced with a touch of vanilla and finished with a fresh fruit compote or a drizzle of caramel.
It’s an ideal choice for dinner parties or special occasions due to its sophisticated appearance and the ease of preparation. Despite its luxurious taste and presentation, Panna Cotta requires minimal ingredients and effort, making it accessible for both novice and experienced home cooks.
The secret to a perfect Panna Cotta lies in achieving the right balance of creaminess and setting. The use of gelatin is essential in obtaining that signature wobble without making the dessert too firm. Typically, it’s served chilled, making it a revitalizing treat during warmer months.
Its versatility allows for various flavor infusions, such as coffee, chocolate, or citrus, providing endless possibilities to cater to different tastes. Presented in individual portions, Panna Cotta not only looks elegant but also provides a delightful, indulgent end to a meal.
Ingredients (Serves 4-6):
- 2 cups heavy cream
- 1 cup whole milk
- 1/2 cup granulated sugar
- 1 tablespoon vanilla extract
- 2 1/2 teaspoons unflavored gelatin
- 3 tablespoons cold water
- Fresh berries or fruit compote (optional, for garnish)
Cooking Instructions:
- Bloom the Gelatin: In a small bowl, sprinkle the gelatin over the cold water and let it stand for about 5-10 minutes until it becomes a thick, gelatinous texture. This is known as blooming the gelatin and is vital for proper setting.
- Heat the Cream Mixture: In a medium saucepan, combine the heavy cream, whole milk, and granulated sugar. Heat the mixture over medium heat, stirring occasionally, until the sugar is completely dissolved and the mixture is hot but not boiling.
- Add Vanilla and Gelatin: Remove the saucepan from the heat and stir in the vanilla extract. Next, add the bloomed gelatin to the hot cream mixture, stirring until the gelatin is fully dissolved and incorporated.
- Pour into Molds: Carefully pour the mixture into individual ramekins or molds. Allow the panna cotta to cool to room temperature, then cover with plastic wrap and refrigerate for at least 4 hours or until set.
- Serve and Garnish: To serve, you can either unmold the panna cotta onto plates by briefly dipping the mold in warm water and inverting it, or serve it directly in the ramekins. Garnish with fresh berries or a fruit compote for added flavor and a pop of color.
Extra Tips:
When making Panna Cotta, verify that the gelatin is completely dissolved to avoid any grainy texture in the finished dessert. If you’re short on time, prepare the dessert a day in advance as it keeps well in the refrigerator for up to 2 days.
For a different flavor profile, consider infusing the cream with ingredients like lemon zest or espresso before straining them out. Always serve the Panna Cotta chilled for the best texture and taste.
Affogato: Coffee Meets Gelato

Affogato, an Italian classic, is a simple yet indulgent dessert that perfectly marries the robust flavors of espresso with the creamy texture of gelato. This delightful treat is as much about the experience as it’s about the taste, offering a sensory journey through its contrasting temperatures and textures.
Traditionally, affogato is made by pouring a shot of hot espresso over a scoop of gelato, typically vanilla, allowing the gelato to soften and partially melt, creating a luscious coffee-flavored cream.
This dessert is perfect for a dinner party or an evening indulgence, as it requires minimal preparation and showcases the quality of the ingredients used. Selecting a high-quality gelato and freshly brewed espresso is key to achieving the perfect affogato.
With just two main ingredients, affogato is a demonstration of the Italian culinary philosophy of simplicity and quality. Here is a recipe to make affogato for a serving size of 4-6 people.
Ingredients:
- 1 quart (approximately 4 cups) of high-quality vanilla gelato
- 6 shots of freshly brewed espresso
- Optional: Chocolate shavings, crushed amaretti cookies, or a drizzle of liqueur for garnish
Instructions:
- Prepare the Gelato: Take the gelato out of the freezer about 10-15 minutes before serving to let it soften slightly. This will make it easier to scoop and allow it to meld beautifully with the hot espresso.
- Brew the Espresso: Just before serving, brew 6 shots of espresso using your preferred method, whether it be a traditional espresso machine, stovetop Moka pot, or a high-quality espresso capsule machine. Confirm the espresso is hot and freshly brewed.
- Assemble the Affogato: Place a generous scoop of gelato into each dessert cup or glass. If serving 6, use smaller scoops; for 4, use larger ones.
- Pour the Espresso: Carefully pour one shot of hot espresso over each scoop of gelato. The heat will cause the gelato to melt slightly, creating a creamy, rich mixture.
- Garnish and Serve: If desired, top with chocolate shavings, a sprinkle of crushed amaretti cookies, or a light drizzle of a complementary liqueur such as amaretto or coffee liqueur. Serve immediately with spoons.
Extra Tips:
To make a truly memorable affogato, invest in high-quality gelato and freshly roasted coffee beans. The flavors of the gelato and espresso should be harmonious, so consider experimenting with different gelato flavors such as hazelnut or chocolate for a twist on the classic.
If you don’t have an espresso machine, strong coffee can be a substitute, but the intensity of espresso is preferred for the authentic affogato experience. For a touch of Italian authenticity, serve your affogato in small glass cups to showcase the beautiful contrast of the espresso and gelato.
Cannoli: Crispy and Creamy

Cannoli, a classic Italian dessert, hails from Sicily and perfectly encapsulates the island’s rich culinary heritage. This delightful treat is known for its contrasting textures, featuring a crispy shell filled with a creamy, sweet ricotta filling. When crafted with care, cannoli offer an exquisite balance of flavors and textures, making them a favorite amongst dessert lovers. The key to an exceptional cannoli lies in the quality of ingredients and the precision of technique, guaranteeing a perfect harmony between the crunchy shell and the luscious filling.
To make cannoli for a serving size of 4-6 people, you’ll need to prepare the dough for the shells as well as the creamy filling. The dough is rolled out thin and then wrapped around a mold before frying to achieve its iconic shape and crunch. The filling, traditionally made with ricotta cheese, is sweetened and sometimes enhanced with flavors like vanilla or citrus zest. Once the shells are filled, they should be served promptly to maintain their crispness and prevent them from becoming soggy.
Ingredients:
*For the Shells:*
- 2 cups all-purpose flour
- 1 tablespoon granulated sugar
- 1/4 teaspoon salt
- 3 tablespoons unsalted butter, chilled and diced
- 1 large egg
- 1/2 cup sweet Marsala wine
- Vegetable oil, for frying
For the Filling:
- 2 cups ricotta cheese, drained
- 1 cup powdered sugar
- 1 teaspoon vanilla extract
- 1/2 teaspoon cinnamon
- 1/4 cup mini chocolate chips
- 1/4 cup candied orange peel, finely chopped (optional)
Cooking Instructions:
- Prepare the Dough:
- In a large bowl, mix the flour, sugar, and salt. Add the chilled butter and use your fingers or a pastry blender to incorporate it until the mixture resembles coarse crumbs.
- In a separate bowl, whisk the egg and Marsala wine together. Add this mixture to the dry ingredients and mix until a dough forms.
- Knead the dough on a lightly floured surface until smooth and elastic, about 5 minutes. Wrap in plastic wrap and let it rest in the refrigerator for at least 1 hour.
- Roll and Shape the Shells:
- After the dough has rested, divide it into four pieces. Roll each piece out on a floured surface to about 1/8 inch thickness.
- Cut out circles using a round cutter (about 4 inches in diameter). Wrap each circle around a cannoli mold, sealing the edge with a little water.
- Fry the Shells:
- Heat the vegetable oil in a deep fryer or large pot to 350°F (175°C). Carefully fry the dough-wrapped molds in batches until golden brown, about 2-3 minutes each.
- Remove and drain on paper towels. Once cool enough to handle, gently slide the shells off the molds.
- Prepare the Filling:
- In a bowl, combine the drained ricotta, powdered sugar, vanilla extract, and cinnamon. Mix until smooth and creamy. Fold in the mini chocolate chips and candied orange peel, if using.
- Fill the Shells:
- Just before serving, use a pastry bag fitted with a large tip to pipe the ricotta filling into each shell, filling from each end to guarantee the center is well-filled.
Extra Tips:
For the best results, verify the ricotta cheese is well-drained to avoid a runny filling. You can do this by placing the ricotta in a cheesecloth-lined sieve over a bowl and letting it drain in the refrigerator overnight.
Additionally, be careful not to overfill the shells, as this can cause them to become soggy. If possible, fill the shells just before serving to maintain the perfect texture contrast. For an extra touch of authenticity, consider dusting the finished cannoli with powdered sugar or garnishing with additional chocolate chips or orange zest.
Zabaglione: A Luscious Treat

Zabaglione, also known as Zabaione, is a classic Italian dessert that’s both simple and luxurious. This velvety custard is traditionally made with just three ingredients: egg yolks, sugar, and sweet wine, usually Marsala. The mixture is gently cooked to create a smooth and frothy dessert that’s perfect for any occasion.
Often served warm, zabaglione can also be enjoyed cold, making it a versatile treat that highlights the rich flavors of its ingredients. This delightful dessert can be served on its own, or as an accompaniment to fresh fruits, such as berries, or over a light sponge cake. Its elegant presentation and decadent taste make it a favorite choice for special dinners and festive gatherings.
The following recipe will guide you in preparing zabaglione for 4-6 people, guaranteeing a delightful experience for your family and friends.
Ingredients for Zabaglione (serving size: 4-6 people):
- 6 large egg yolks
- 1/2 cup granulated sugar
- 1/2 cup Marsala wine
- Optional: fresh berries or sponge cake for serving
Cooking Instructions:
- Prepare a Double Boiler: Fill a saucepan with about 1 inch of water and bring it to a simmer over medium heat. Place a heatproof bowl on top of the saucepan, making sure the bottom of the bowl doesn’t touch the water.
- Combine Ingredients: In the heatproof bowl, whisk together the egg yolks and sugar until the mixture becomes pale and creamy. This will take about 2-3 minutes.
- Add Marsala Wine: Gradually whisk in the Marsala wine to the egg yolk mixture. Make sure it’s fully incorporated for a consistent flavor profile throughout the custard.
- Cook the Mixture: Place the bowl over the simmering water and continue to whisk vigorously. Cook the mixture for about 10-15 minutes, or until it thickens and doubles in volume. The zabaglione should have a thick, frothy consistency and be able to form soft peaks.
- Check Temperature: Use a thermometer to verify the mixture reaches at least 160°F (71°C) to safely cook the egg yolks.
- Serve: Once the zabaglione is ready, remove it from the heat and serve immediately in individual glasses or bowls. Top with fresh berries or serve over sponge cake, if desired.
Extra Tips:
When making zabaglione, it’s important to whisk continuously to prevent the eggs from scrambling. If you notice any lumps forming, remove the bowl from the heat and whisk vigorously to smooth the mixture.
For added flavor, consider experimenting with different types of sweet wines or liqueurs, such as Moscato or Grand Marnier, to suit your taste preferences. If you’re serving zabaglione cold, allow it to cool at room temperature before refrigerating it for up to two hours. This will give it time to set while maintaining its delightful texture.
Ricotta Cheesecake: Creamy Perfection
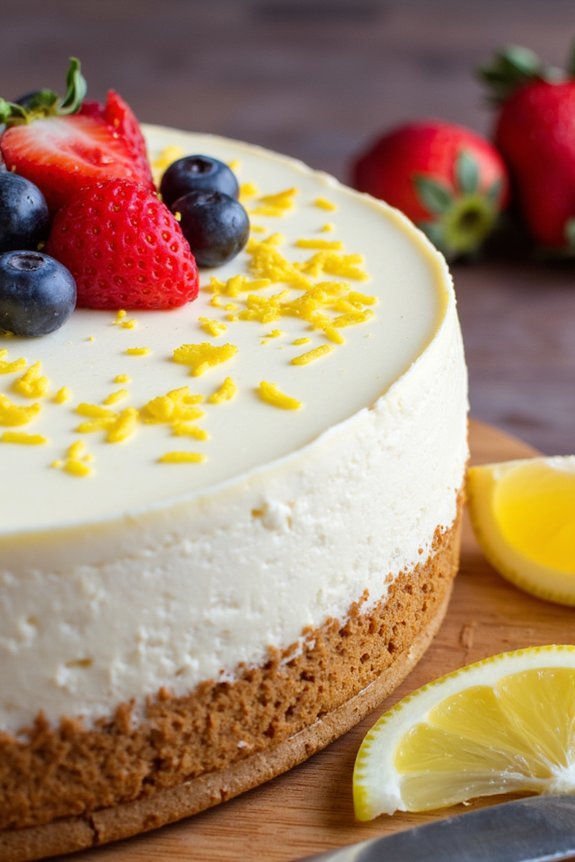
Ricotta Cheesecake is a delightful Italian dessert that embodies the essence of creamy perfection. Unlike traditional cheesecakes that use cream cheese, Ricotta Cheesecake offers a lighter, fluffier texture with a subtle tang, making it an irresistible treat for any occasion. The addition of ricotta cheese not only enhances the creaminess but also infuses the cake with a distinct richness that pairs beautifully with a hint of citrus and a touch of vanilla.
This elegant dessert is perfect for serving at dinner parties or as a sweet ending to a cozy family meal. The beauty of Ricotta Cheesecake lies in its simplicity and the ability to adapt to various flavors. While the classic version is delightful on its own, you can easily customize it with your favorite toppings such as fresh berries, a drizzle of honey, or a dusting of cinnamon.
Whether you’re a seasoned baker or a novice in the kitchen, this recipe is straightforward and rewarding, resulting in a cheesecake that’s sure to impress your guests with its creamy texture and delicate flavor profile.
Ingredients (Serving Size: 4-6 people):
- 1 cup graham cracker crumbs
- 1/4 cup unsalted butter, melted
- 2 tablespoons granulated sugar
- 2 cups ricotta cheese
- 1 cup mascarpone cheese
- 3/4 cup granulated sugar
- 3 large eggs
- 1 teaspoon vanilla extract
- Zest of 1 lemon
- Pinch of salt
Cooking Instructions:
- Prepare the Crust: Preheat your oven to 350°F (175°C). In a medium bowl, combine the graham cracker crumbs, melted butter, and 2 tablespoons of sugar. Stir until the mixture resembles wet sand. Press the mixture evenly into the bottom of a 9-inch springform pan to form the crust. Bake for 10 minutes, then remove from the oven and let it cool while you prepare the filling.
- Mix the Filling: In a large mixing bowl, combine the ricotta cheese, mascarpone cheese, and 3/4 cup of sugar. Beat with an electric mixer at medium speed until smooth and creamy. Add the eggs one at a time, mixing well after each addition. Stir in the vanilla extract, lemon zest, and a pinch of salt until fully incorporated.
- Assemble the Cheesecake: Pour the ricotta mixture over the prepared crust, spreading it evenly with a spatula. Tap the pan gently on the counter to release any air bubbles.
- Bake the Cheesecake: Place the springform pan on a baking sheet to catch any drips. Bake in the preheated oven for 50-60 minutes, or until the edges are set and the center is slightly jiggly. Turn off the oven, crack the door open, and let the cheesecake cool inside for 1 hour. This helps prevent cracking.
- Chill and Serve: Once the cheesecake is at room temperature, refrigerate it for at least 4 hours or overnight. Before serving, remove the sides of the springform pan and garnish with desired toppings such as fresh berries or a dusting of powdered sugar.
Extra Tips:
For the best results, make sure that all ingredients are at room temperature before mixing, as this will help create a smoother filling. If your ricotta cheese is particularly watery, consider draining it through a cheesecloth for an hour to remove excess moisture.
To achieve a perfectly smooth top, you can run a spatula over the surface before baking. Remember, patience is key with this cheesecake—allowing it to cool slowly and chill thoroughly will greatly improve its texture and flavor. Enjoy your creamy Ricotta Cheesecake!
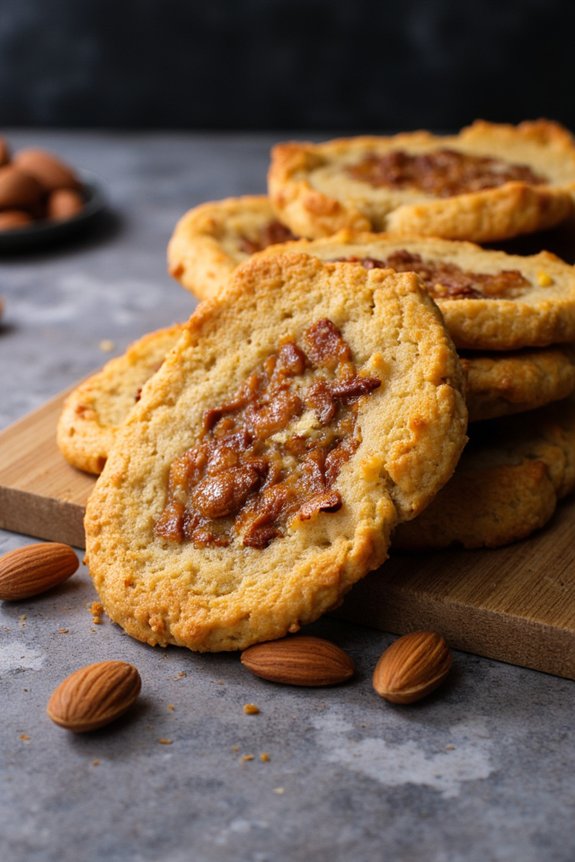
Biscotti: Crunchy and Flavorful
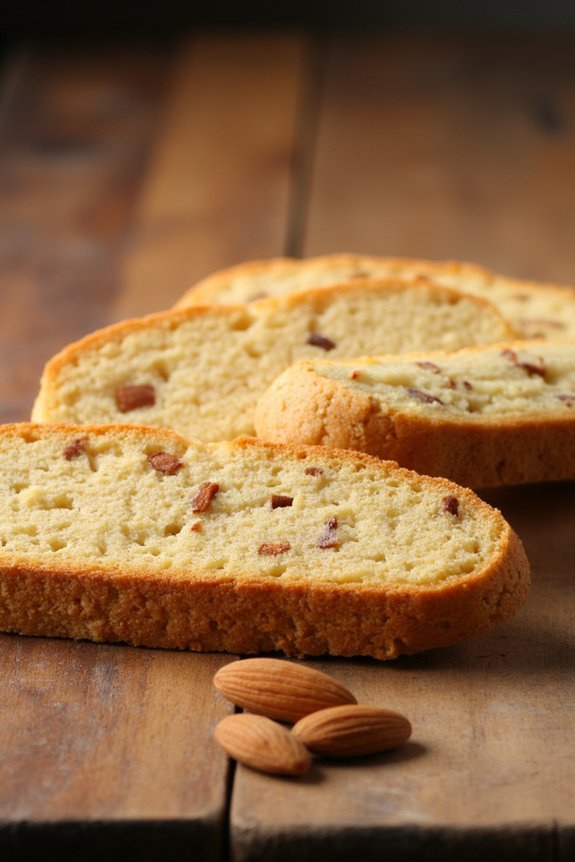
Biscotti, the quintessential Italian twice-baked cookies, are a delightful treat that perfectly pairs with a cup of coffee or a glass of vin santo. Known for their crunchy texture and rich flavor, these cookies have been a staple in Italian baking for centuries. The name “biscotti” is derived from the Latin word “biscoctus,” meaning “twice-cooked,” which gives them their distinctive crispiness.
Traditionally, biscotti are made with almonds, but modern variations include a variety of nuts and flavorings. This recipe highlights the classic almond version, delivering a satisfying crunch and a nutty, slightly sweet flavor that’s simply irresistible.
Ideal for a serving size of 4-6 people, these biscotti make for a perfect dessert or an indulgent snack. The process involves creating a simple dough, which is baked twice to achieve the signature texture. The first bake sets the shape of the logs, and the second bake gives the cookies their characteristic crispness.
Whether you’re serving these at a dinner party or enjoying them on a quiet afternoon, almond biscotti are sure to impress with their elegant simplicity and delightful taste.
Ingredients:
- 2 cups all-purpose flour
- 1 cup granulated sugar
- 1 teaspoon baking powder
- 1/2 teaspoon salt
- 3 large eggs
- 1 teaspoon vanilla extract
- 1 teaspoon almond extract
- 1 1/2 cups whole almonds, toasted and coarsely chopped
- Zest of 1 orange (optional)
Cooking Instructions:
- Prepare the Oven and Baking Sheet: Preheat your oven to 350°F (175°C). Line a baking sheet with parchment paper or a silicone baking mat to prevent sticking.
- Mix Dry Ingredients: In a medium bowl, whisk together the flour, sugar, baking powder, and salt. This guarantees that the baking powder is evenly distributed throughout the flour, which helps the biscotti rise evenly.
- Combine Wet Ingredients: In a large bowl, beat the eggs until pale and thick. Stir in the vanilla extract and almond extract. If you’re using orange zest, add it now for an extra layer of flavor.
- Form the Dough: Gradually add the dry ingredients to the wet ingredients, mixing until a dough forms. It may be sticky, but don’t worry—this is normal. Stir in the chopped almonds until evenly distributed.
- Shape the Dough: Divide the dough in half. On a lightly floured surface, shape each half into a log about 12 inches long and 2 inches wide. Place the logs on the prepared baking sheet, leaving space between them.
- First Bake: Bake in the preheated oven for 25-30 minutes, or until the logs are firm to the touch and lightly golden. Remove from the oven and let them cool on the baking sheet for about 10 minutes.
- Slice the Biscotti: Once slightly cooled, transfer the logs to a cutting board. Using a serrated knife, cut the logs diagonally into 1/2-inch thick slices.
- Second Bake: Arrange the slices cut side down back on the baking sheet. Bake for an additional 10-12 minutes, then flip the biscotti and bake for another 10-12 minutes, or until they’re golden brown and crisp.
- Cool Completely: Remove the biscotti from the oven and let them cool completely on a wire rack. They’ll continue to harden as they cool.
Extra Tips:
To achieve the best texture, verify that the almonds are well-toasted before adding them to the dough; this enhances their flavor and crunch.
When slicing the biscotti, use a gentle sawing motion with a serrated knife to prevent crumbling. If you prefer softer biscotti, reduce the second baking time by a few minutes.
For added indulgence, consider dipping one end of each biscotti in melted chocolate after they’ve cooled, then let them set before serving.
Store the biscotti in an airtight container at room temperature for up to two weeks, guaranteeing you always have a delightful accompaniment to your coffee or tea.
Amaretti Cookies: Almond Bliss
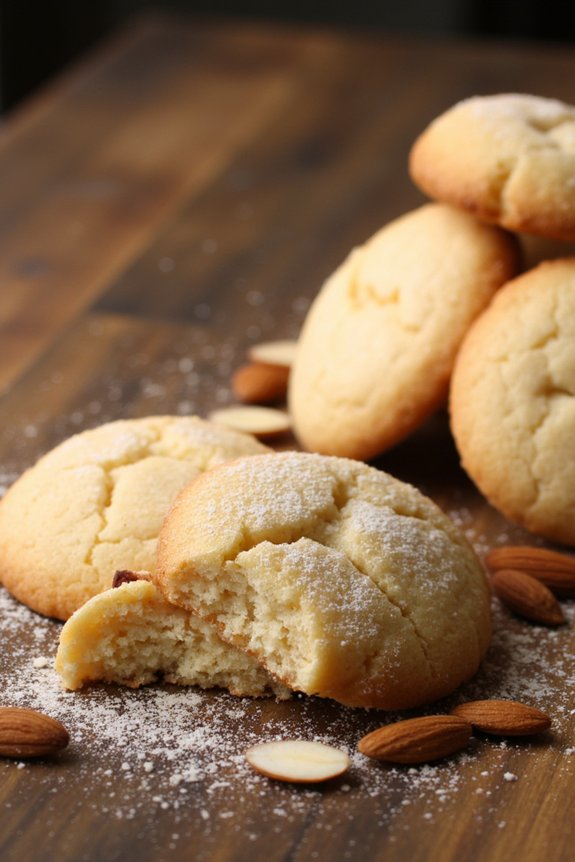
Amaretti cookies are a quintessential Italian treat known for their delightful almond flavor and heavenly texture. Originating from Italy, these cookies have captured the hearts (and taste buds) of dessert lovers worldwide with their perfect balance of crisp exterior and chewy, airy interior.
Whether enjoyed with a cup of espresso or as a sweet end to a meal, Amaretti cookies are a confirmation of the elegance and simplicity of Italian baking. Their rich aroma, derived from the blend of sweet almonds and a hint of almond extract, makes them an irresistible choice for any dessert table.
These cookies are incredibly versatile and can be enjoyed on their own or used as a base for other desserts, such as trifles or crumbled over gelato. Although traditionally made with apricot kernels, which contribute to their signature bittersweet flavor, this recipe uses blanched almonds, making it accessible and easy to prepare at home.
Perfect for serving 4-6 people, this recipe guarantees you have enough to share, though you may find them disappearing faster than expected once everyone gets a taste of their almond bliss.
Ingredients (Serves 4-6):
- 2 cups blanched almonds
- 1 cup granulated sugar
- 2 large egg whites
- 1 teaspoon almond extract
- Pinch of salt
- Confectioners’ sugar, for dusting
Cooking Instructions:
- Preheat the Oven: Begin by preheating your oven to 325°F (160°C) and line a baking sheet with parchment paper to prevent the cookies from sticking.
- Prepare the Almonds: In a food processor, pulse the blanched almonds until they’re finely ground. Be careful not to over-process them into almond butter. The consistency should resemble coarse sand.
- Mix Dry Ingredients: In a large mixing bowl, combine the ground almonds and granulated sugar. Stir until both ingredients are well combined.
- Whip the Egg Whites: In a separate bowl, whisk the egg whites with a pinch of salt until they hold stiff peaks. This will give the cookies their characteristic airy texture.
- Combine Wet and Dry: Gently fold the whipped egg whites and almond extract into the almond and sugar mixture. Use a spatula to carefully incorporate the ingredients, preserving as much air as possible in the mixture.
- Shape the Cookies: Using a teaspoon or a small cookie scoop, portion out small mounds of dough onto the prepared baking sheet. Leave about an inch of space between each cookie to allow for slight spreading.
- Dust with Sugar: Lightly dust the tops of the cookies with confectioners’ sugar. This adds a touch of sweetness and a delicate, crackled surface texture.
- Bake: Bake in the preheated oven for 15-20 minutes, or until the cookies are lightly golden on the outside but still soft in the center. Adjust the time as necessary, keeping a close watch towards the end to prevent over-baking.
- Cool and Serve: Once baked, remove the cookies from the oven and allow them to cool on the baking sheet for a few minutes before transferring to a wire rack to cool completely.
Extra Tips:
For the best texture, make sure the egg whites are at room temperature before whipping. This helps them achieve maximum volume.
If you want your Amaretti cookies to have a more pronounced almond flavor, consider using a combination of almond extract and a few drops of amaretto liqueur.
Be cautious with the amount of confectioners’ sugar; too much can alter the texture of the cookies. Finally, if you prefer a slightly crunchier cookie, extend the baking time by a few minutes, but keep a close eye to avoid burning.
Enjoy your Amaretti cookies with a cup of coffee or tea for an authentic Italian experience.
Semifreddo: A Frosty Indulgence
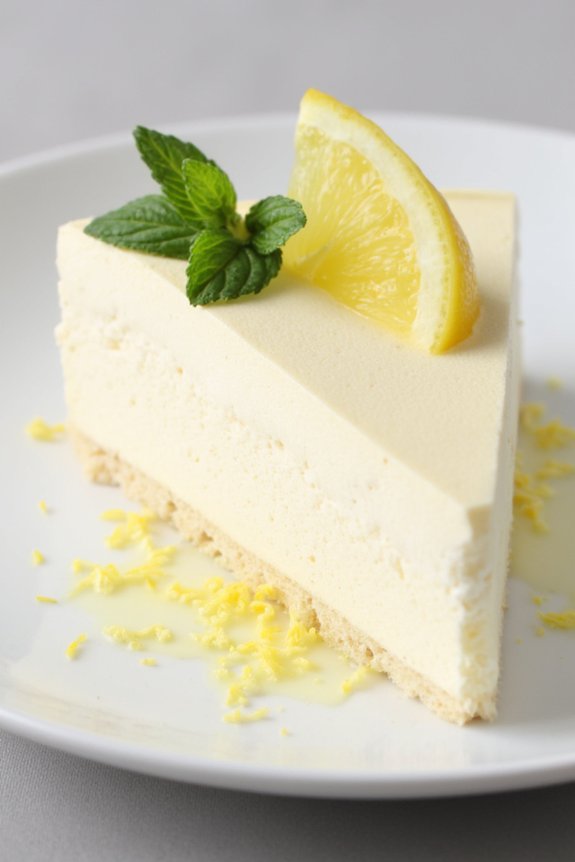
Semifreddo al Limone, with its luscious and creamy texture, is a delightful Italian dessert that perfectly balances sweetness and tanginess. This frozen treat is a delightful alternative to traditional ice cream and is incredibly easy to make at home. Infused with the bright, zesty flavors of lemon, Semifreddo al Limone is an elegant dessert that’s sure to impress your guests or provide a revitalizing end to any meal.
With its smooth and airy consistency, this semifreddo is a perfect indulgence on a warm day or a sophisticated conclusion to a festive dinner. The beauty of Semifreddo al Limone lies in its simplicity and the quality of its ingredients. Unlike traditional ice cream, semifreddo doesn’t require an ice cream maker; instead, it relies on whipped cream and egg whites to achieve its light, creamy texture.
This dessert combines the richness of cream with the vibrant zest of fresh lemons, creating a harmony of flavors that’s both invigorating and satisfying. Whether you’re a seasoned cook or a beginner in the kitchen, this recipe is straightforward and rewarding, making it an ideal choice for any occasion.
Ingredients for 4-6 Servings:
- 4 large eggs, separated
- 1 cup granulated sugar
- 1 tablespoon lemon zest
- 1/4 cup freshly squeezed lemon juice
- 2 cups heavy cream
- Pinch of salt
- Lemon slices and mint leaves for garnish (optional)
Cooking Instructions:
- Prepare the Eggs: In a large bowl, whisk the egg yolks with 1/2 cup of granulated sugar until the mixture is pale and creamy. Add the lemon zest and lemon juice, and continue to whisk until well combined.
- Whip the Cream: In a separate bowl, whisk the heavy cream until soft peaks form. Be cautious not to overwhip, as you want the cream to maintain a light and airy consistency.
- Beat the Egg Whites: In another clean bowl, add the egg whites and a pinch of salt. Whisk until soft peaks form. Gradually add the remaining 1/2 cup of sugar and continue to whisk until stiff peaks form.
- Combine Mixtures: Gently fold the whipped cream into the lemon and egg yolk mixture until just combined. Then, carefully fold in the beaten egg whites, ensuring you maintain as much airiness as possible in the mixture.
- Freeze the Semifreddo: Line a loaf pan with plastic wrap, leaving enough overhang to cover the top later. Pour the semifreddo mixture into the prepared pan, smoothing the top with a spatula. Cover with the overhanging plastic wrap and freeze for at least 6 hours or overnight until firm.
- Serve: Remove the semifreddo from the freezer and let it sit at room temperature for a few minutes before serving. Invert the loaf onto a serving platter, remove the plastic wrap, and slice. Garnish with lemon slices and mint leaves if desired.
Extra Tips:
For best results, use fresh, vibrant lemons to achieve the most flavorful semifreddo. Make sure that all your mixing bowls and whisks are completely clean and dry before starting, especially when beating the egg whites, to achieve the best volume.
If you prefer a sweeter taste, you can adjust the sugar to your liking. Remember that patience is key; allowing the semifreddo to freeze thoroughly will give you the perfect texture. Stored properly, semifreddo can be kept in the freezer for up to a week, making it a convenient dessert option for entertaining.
Lemon Granita: Refreshing Citrus

Lemon Granita is an exquisite Italian dessert that perfectly captures the essence of summer. This simple yet sophisticated treat is known for its invigorating citrus flavor and icy texture. Originally from the island of Sicily, granita is a semi-frozen dessert made from sugar, water, and a variety of flavorings—in this case, the zesty and revitalizing taste of fresh lemons.
A delightful palate cleanser or a cooling dessert, Lemon Granita is perfect for sunny afternoons or as a light conclusion to a hearty Italian meal.
Creating Lemon Granita involves a straightforward process that highlights the natural freshness of lemons. The key to a perfect granita is in the balance of sweet and tart flavors, achieved by combining lemon juice with sugar and water. The mixture is then frozen and scraped at regular intervals to form delicate, icy crystals.
This method results in a texture that’s both granular and slushy, a hallmark of authentic granita. With just a few ingredients and minimal effort, you can serve up a delightful Italian dessert that will impress your guests and provide a revitalizing finish to any meal.
Ingredients (Serves 4-6):
- 1 cup fresh lemon juice (about 4-6 lemons)
- 1 cup granulated sugar
- 2 cups water
- Zest of 2 lemons
- Fresh mint leaves (for garnish, optional)
Cooking Instructions:
- Prepare the Lemon Mixture: Begin by juicing enough lemons to yield 1 cup of fresh lemon juice. Strain the juice to remove any seeds and pulp. In a large mixing bowl, combine the lemon juice, lemon zest, granulated sugar, and water. Stir the mixture thoroughly until the sugar is completely dissolved.
- Freeze the Mixture: Pour the lemon mixture into a shallow baking dish or a large, wide container. Place the container in the freezer, allowing the mixture to begin freezing.
- Scrape to Form Crystals: After about 30 minutes, remove the dish from the freezer and use a fork to scrape the frozen edges towards the center. Return to the freezer. Repeat this scraping process every 30 minutes for about 3 hours. This guarantees the granita forms the desired icy texture with fine crystals.
- Serve the Granita: Once the granita has reached the perfect consistency, scoop it into chilled serving glasses or bowls. Garnish with fresh mint leaves for a pop of color and added aroma, if desired.
Extra Tips:
For the best results, always use fresh lemons to guarantee a vibrant, authentic taste. The zest is essential as it intensifies the lemon flavor. If you prefer a sweeter granita, adjust the sugar to your taste, but remember that the freezing process can dull sweetness.
For an extra touch of elegance, consider serving the granita in glass bowls or cups, which not only enhances presentation but also keeps the dessert cool longer. Enjoy your Lemon Granita on its own or pair it with a light biscotti for added texture.
Chocolate Salami: A Sweet Surprise
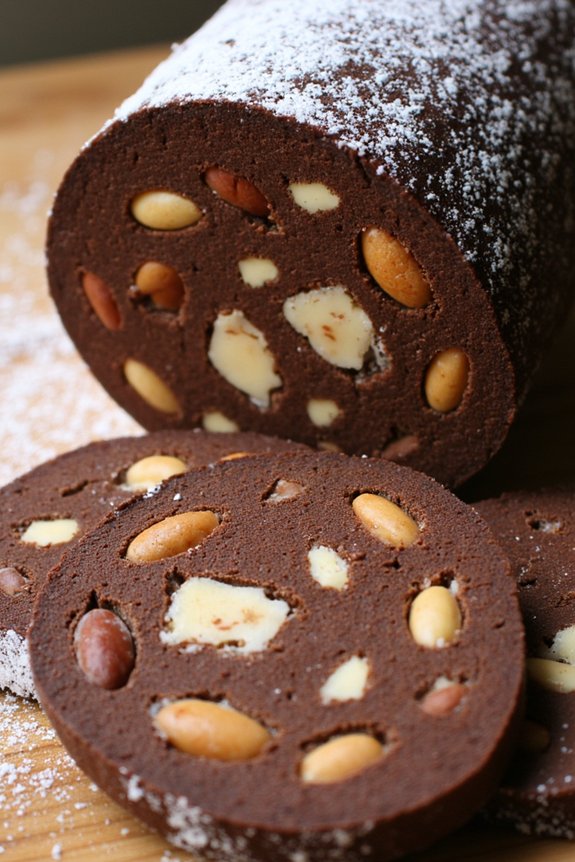
Chocolate Salami is an exquisite Italian dessert that beautifully marries the rich flavors of chocolate with the crunchy texture of biscuits, mimicking the appearance of a traditional salami. This no-bake dessert is an enduring favorite in Italian households, especially during festive occasions.
Its clever presentation makes it a delightful conversation starter at gatherings. Packed with nuts and occasionally a hint of liquor, Chocolate Salami offers a unique blend of textures and tastes that are both indulgent and satisfying.
The preparation of Chocolate Salami is surprisingly simple, requiring no actual cooking. Instead, it involves mixing, shaping, and cooling – making it a perfect dessert for those looking to impress without spending hours in the kitchen.
The recipe below provides a straightforward guide to creating this delightful confection for a serving size of 4-6 people. It’s sure to leave your guests in awe not only of its taste but also its ingenious presentation.
Ingredients:
- 200g of dark chocolate
- 100g of unsalted butter
- 100g of granulated sugar
- 1 teaspoon of vanilla extract
- 2 tablespoons of rum or brandy (optional)
- 1 large egg
- 200g of digestive biscuits or tea biscuits
- 50g of mixed nuts (such as almonds, hazelnuts, or walnuts)
- Powdered sugar for dusting
Instructions:
- Melt the Chocolate and Butter: Begin by breaking the dark chocolate into pieces and placing it in a heatproof bowl. Add the unsalted butter to the bowl. Set the bowl over a pot of simmering water, making sure the bowl doesn’t touch the water. Stir occasionally until the chocolate and butter melt completely, creating a smooth mixture. Remove from heat and let it cool slightly.
- Prepare the Biscuit and Nut Mixture: While the chocolate cools, take the digestive biscuits and place them in a large ziplock bag. Using a rolling pin, gently crush the biscuits into small pieces, but avoid turning them into fine crumbs; the texture is key. Coarsely chop the mixed nuts and combine them with the crushed biscuits in a large mixing bowl.
- Combine Wet Ingredients: In a separate bowl, beat the egg with granulated sugar until creamy. Stir in the vanilla extract and rum or brandy, if using. Gradually add the cooled chocolate mixture to the egg mixture, stirring continuously to avoid curdling the egg.
- Mix Everything Together: Pour the chocolate mixture over the crushed biscuits and nuts. Using a spatula, mix thoroughly until all the dry ingredients are well coated with the chocolate mixture.
- Shape the Salami: Lay out a large piece of parchment paper. Spoon the mixture onto the paper and use your hands to form it into a log shape, approximately 8-10 inches long. Roll the parchment tightly around the log, twisting the ends to seal it, much like a candy wrapper.
- Chill the Salami: Place the wrapped log in the refrigerator and chill for at least 2 hours, or until it becomes firm enough to slice.
- Serve: Once firm, unwrap the chocolate salami and roll it in powdered sugar to give it a realistic salami appearance. Slice into thick rounds and serve cold.
Extra Tips:
When preparing Chocolate Salami, it’s important to ascertain that the chocolate mixture isn’t too hot when combining it with the egg to prevent scrambling.
If you prefer a more adult version, the addition of rum or brandy will enhance the flavor profile, but it can be omitted if serving to children. For a different twist, try adding dried fruits like raisins or cranberries for extra sweetness.
Store any leftovers in the refrigerator, tightly wrapped, for up to a week. Enjoy this delightful blend of flavors and textures, and watch as your guests marvel at this sweet surprise!
Budino: Italian Pudding Pleasure
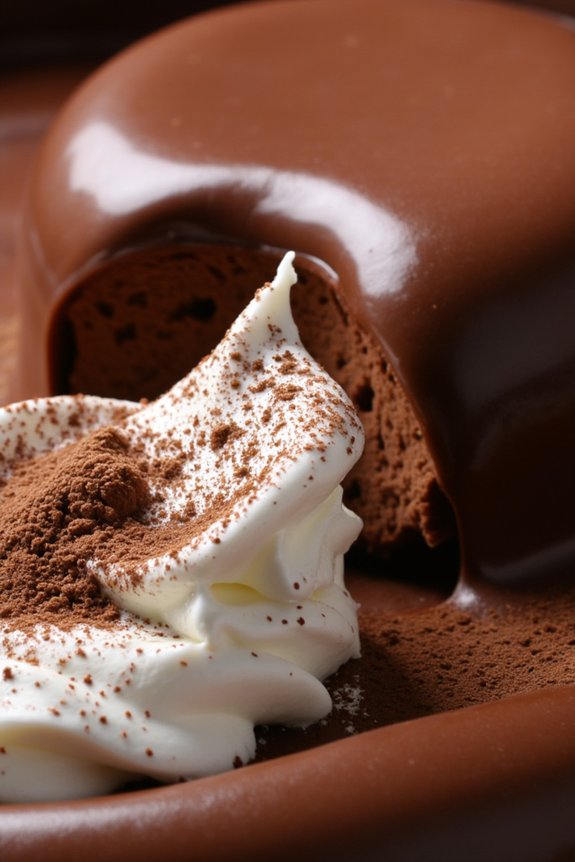
Budino al Cioccolato is a creamy, luscious Italian dessert that’s sure to delight the senses with its rich chocolate flavor and smooth texture. This Italian pudding is a perfect way to end a meal, offering a comforting yet sophisticated experience. Its name, “budino,” is derived from the word for pudding in Italian, and this dessert lives up to its name by being a silky, decadent treat.
Whether served warm or chilled, Budino al Cioccolato is bound to be a hit at any gathering. This dessert is relatively simple to prepare, relying on high-quality ingredients to achieve its signature taste and texture. The key to making an exceptional Budino al Cioccolato is using good quality chocolate, as it’s the primary flavor.
When combined with milk, cream, and other ingredients, the chocolate transforms into a velvety pudding that will have your guests swooning with every spoonful. This recipe will serve 4-6 people, making it ideal for a small dinner party or family gathering.
Ingredients:
- 1 cup whole milk
- 1 cup heavy cream
- 4 oz high-quality dark chocolate (70% cocoa), chopped
- 1/2 cup granulated sugar
- 3 tablespoons unsweetened cocoa powder
- 3 tablespoons cornstarch
- 1/4 teaspoon salt
- 1 teaspoon pure vanilla extract
- Whipped cream, for serving (optional)
- Chocolate shavings, for garnish (optional)
Instructions:
- Prepare the Mixture: In a medium saucepan, combine the whole milk and heavy cream. Place the saucepan over medium heat and bring the mixture to a simmer, stirring occasionally. Once it reaches a simmer, remove the pan from the heat and add the chopped dark chocolate. Stir until the chocolate is completely melted and the mixture is smooth.
- Mix the Dry Ingredients: In a separate bowl, whisk together the granulated sugar, cocoa powder, cornstarch, and salt until well combined. This step guarantees that the dry ingredients are evenly distributed, preventing lumps in the pudding.
- Combine and Cook: Gradually add the dry ingredient mixture to the chocolate mixture, whisking continuously to guarantee a smooth consistency. Return the saucepan to medium heat and cook, stirring constantly, until the mixture thickens and begins to bubble. This should take about 5-7 minutes.
- Add Vanilla: Once the pudding has thickened, remove it from the heat and stir in the vanilla extract. This will enhance the flavor of the chocolate and add a subtle aroma to the finished dish.
- Chill and Serve: Pour the pudding into individual serving dishes or a large bowl. If you prefer a chilled dessert, cover the surface with plastic wrap to prevent a skin from forming and refrigerate for at least 2 hours. Serve with a dollop of whipped cream and chocolate shavings if desired.
Extra Tips:
To guarantee the smoothest texture, make sure to continuously whisk the pudding while it’s cooking. This will prevent lumps and guarantee even thickening. Additionally, using high-quality chocolate is essential; it will greatly affect the flavor and richness of the budino.
If you want to experiment with flavors, consider adding a splash of espresso or a pinch of cinnamon to the pudding mixture for a unique twist. Finally, remember that Budino al Cioccolato is versatile and can be enjoyed warm or cold, so feel free to serve it according to your preference.
Sfogliatelle: Layered Pastry Delight
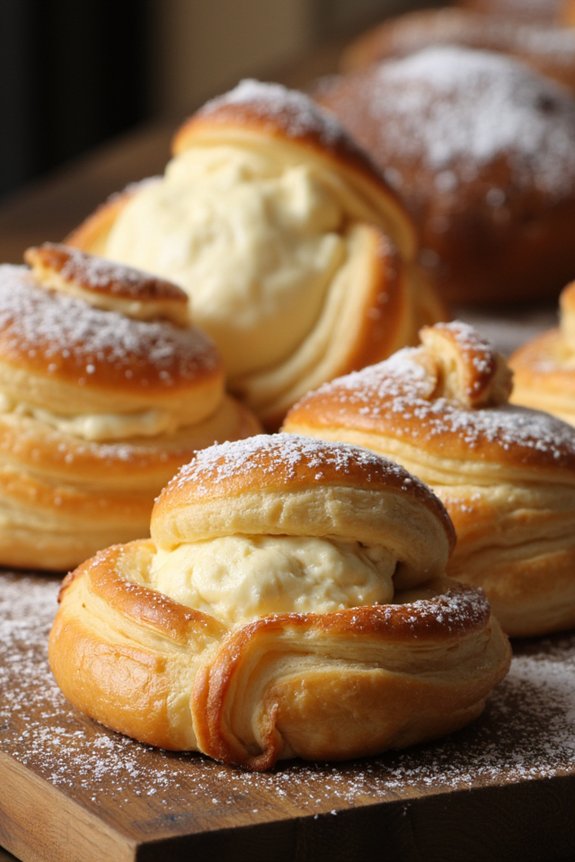
Sfogliatelle: Layered Pastry Delight is a classic Italian pastry that embodies the essence of elegance and craftsmanship. These shell-shaped pastries are known for their crispy, flaky exterior and rich, creamy filling. Originating from the Campania region, sfogliatelle are traditionally enjoyed with a cup of espresso or a glass of dessert wine. The name “sfogliatelle” translates to “small, thin layers,” aptly describing the intricate layers that make up the pastry shell.
While creating sfogliatelle requires patience and precision, the end result is a delightful treat that’s well worth the effort.
The beauty of sfogliatelle lies in its contrast of textures and flavors. The outer shell is made from a laminated dough similar to puff pastry, which is rolled and folded to create multiple thin layers that bake into a crisp, golden brown. Inside, the filling is a sweet, aromatic blend of ricotta cheese, semolina, sugar, and citrus zest, often flavored with vanilla or cinnamon.
When baked, the filling becomes creamy and fragrant, complementing the crunchy pastry in perfect harmony. This recipe serves 4-6 people, making it an ideal choice for a small gathering or a special family dessert.
Ingredients (Serves 4-6):
- 2 cups all-purpose flour
- 1/2 teaspoon salt
- 3/4 cup water
- 1/2 cup unsalted butter, softened
- 1 cup ricotta cheese
- 1/2 cup semolina flour
- 1/2 cup granulated sugar
- 1 large egg
- Zest of 1 orange
- 1 teaspoon vanilla extract
- 1/2 teaspoon ground cinnamon
- Powdered sugar, for dusting
Cooking Instructions:
- Prepare the Dough: In a large bowl, combine the all-purpose flour and salt. Gradually add the water, mixing until a rough dough forms. Knead the dough on a floured surface for about 10 minutes until smooth and elastic. Wrap in plastic wrap and refrigerate for at least 2 hours.
- Prepare the Filling: In a separate bowl, mix together the ricotta cheese, semolina flour, granulated sugar, egg, orange zest, vanilla extract, and cinnamon. Stir until smooth and well combined. Cover and refrigerate while you work on the dough.
- Roll Out the Dough: After chilling, divide the dough into two equal parts. Roll each piece into a thin, long rectangle on a lightly floured surface. The dough should be almost translucent.
- Create the Layers: Spread softened butter evenly over one rectangle of dough. Place the second rectangle on top, and then roll tightly into a log. Wrap the log in plastic wrap and refrigerate for at least 1 hour to firm up.
- Shape the Pastries: Preheat your oven to 375°F (190°C). Slice the dough log into 1/2-inch thick discs. Using your fingers, gently press and stretch each disc into an oval shape, creating a pocket.
- Fill the Pastries: Spoon about 1 tablespoon of the ricotta filling into the center of each dough oval. Carefully fold over the edges to enclose the filling, forming a seashell shape.
- Bake the Sfogliatelle: Place the filled pastries on a baking sheet lined with parchment paper. Bake for 20-25 minutes, or until golden brown and crisp.
- Finish and Serve: Allow the sfogliatelle to cool slightly before dusting with powdered sugar. Serve warm, enjoying the contrast of textures and flavors.
Extra Tips:
When preparing sfogliatelle, make sure that the dough is rolled as thinly as possible to achieve the characteristic layers. If the dough becomes too soft while working, chill it briefly to make handling easier.
Additionally, adjust the amount of filling according to your preference, but be careful not to overfill, as this may cause the pastries to burst during baking. For an added touch of authenticity, serve sfogliatelle with a shot of espresso or a glass of limoncello.
Cantucci: Almond Biscuit Perfection
Cantucci, also known as biscotti di Prato, are traditional Italian almond biscuits that are twice-baked, oblong-shaped, dry, and crunchy. Originating from the region of Tuscany, these delightful treats are typically served with Vin Santo, a sweet dessert wine, for dipping. The combination of these crisp, nutty biscuits with the aromatic wine creates a culinary experience that’s both simple and sophisticated.
These biscuits have a long shelf life due to their dry nature and are perfect for storing in a jar as a delightful snack or dessert pairing. The process of making cantucci involves creating a dough rich with whole almonds, shaped into logs, baked, and then sliced and baked again to achieve their characteristic crunch. The simplicity of the ingredients allows the natural flavors of the almonds to shine through, complemented by hints of vanilla and citrus zest.
Whether you’re enjoying them with coffee, tea, or wine, these biscuits offer a satisfying crunch and a burst of flavor in every bite.
Ingredients (Serves 4-6):
- 2 cups all-purpose flour
- 1 cup granulated sugar
- 1 teaspoon baking powder
- 1/4 teaspoon salt
- 3 large eggs
- 1 teaspoon vanilla extract
- 1 teaspoon almond extract
- Zest of 1 orange
- 1 1/4 cups whole almonds, lightly toasted
Instructions:
- Preheat the Oven: Start by preheating your oven to 350°F (175°C) and line a baking sheet with parchment paper to prevent sticking.
- Prepare the Dry Ingredients: In a large mixing bowl, combine the flour, sugar, baking powder, and salt. Stir these ingredients together until they’re evenly mixed.
- Mix the Wet Ingredients: In a separate bowl, whisk together the eggs, vanilla extract, almond extract, and orange zest until well combined.
- Combine Wet and Dry Mixtures: Gradually add the wet ingredients to the dry ingredients, stirring with a wooden spoon or spatula until a dough begins to form.
- Incorporate the Almonds: Add the toasted almonds to the dough and knead gently by hand until they’re evenly distributed throughout.
- Shape the Dough: Divide the dough into two equal portions. Shape each portion into a log approximately 12 inches long and 2 inches wide, and place them onto the prepared baking sheet, leaving space between the logs.
- First Bake: Bake the logs in the preheated oven for about 25-30 minutes, or until they’re golden brown and firm to the touch.
- Cool and Slice: Remove the logs from the oven and allow them to cool for about 10 minutes. Using a sharp knife, slice the logs diagonally into 1/2-inch thick slices.
- Second Bake: Arrange the slices cut-side down on the baking sheet and return them to the oven. Bake for another 10-12 minutes, then flip the slices and bake for an additional 10-12 minutes, until they’re golden and crisp.
- Final Cool Down: Transfer the cantucci to a wire rack to cool completely before serving or storing.
Extra Tips:
For the best flavor, toast the almonds lightly before adding them to the dough; this enhances their nutty profile. When slicing the baked logs, use a serrated knife to guarantee clean cuts without crumbling the biscuits. If you prefer a softer texture, reduce the second baking time slightly.
Ultimately, store the cantucci in an airtight container to maintain their crispness for weeks, making them an ideal treat to enjoy anytime.