

When the summer sun is blazing, the last thing we want is to turn up the heat in our kitchens.
That’s why I’ve rounded up these 10 delightful Italian no-bake dessert recipes that are perfect for keeping things cool and simple.
From a classic tiramisu to a zesty lemon panna cotta, these treats are all about indulgence without the fuss.
Join me as we explore these refreshing recipes together.
Classic Tiramisu
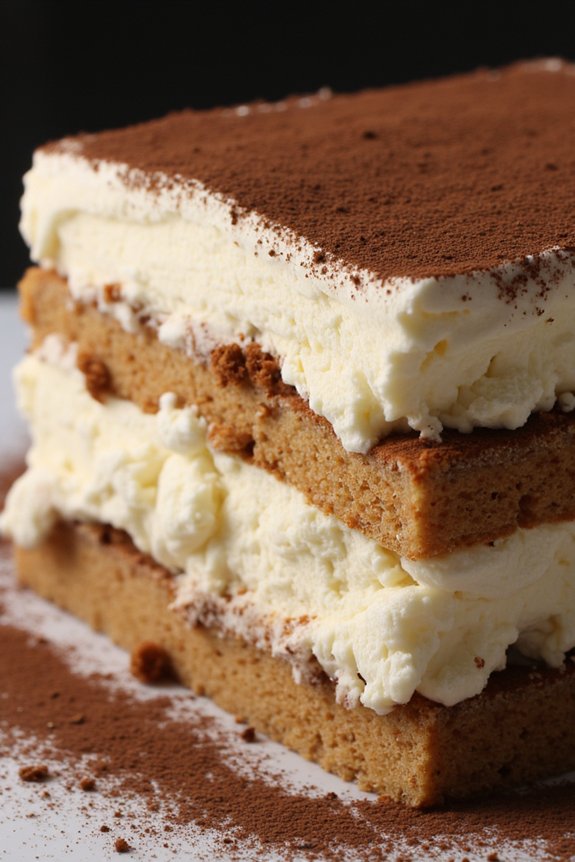
Classic Tiramisu is one of the most beloved Italian desserts, known for its rich flavors and delightful textures. This no-bake dessert typically features layers of coffee-soaked ladyfingers, a luscious mascarpone cream, and a dusting of cocoa powder. The combination of coffee, cheese, and chocolate creates an irresistible treat that’s both elegant and comforting.
Whether you’re hosting a dinner party or simply want to indulge in a sweet treat, Tiramisu is sure to impress.
The beauty of Classic Tiramisu lies in its simplicity and the balance of flavors. The key to making an authentic Tiramisu is to use high-quality ingredients, such as fresh mascarpone cheese and strong espresso. The dessert should be assembled a few hours in advance to allow the flavors to meld together, resulting in a silky smooth texture.
This recipe will guide you through creating a Tiramisu that serves 4-6 people, perfect for sharing with family or friends.
Ingredients for Classic Tiramisu (serves 4-6):
- 3 large eggs, separated
- 1 cup granulated sugar, divided
- 8 ounces mascarpone cheese
- 1 cup heavy cream
- 1 cup strong brewed espresso, cooled
- 1 tablespoon coffee liqueur (optional)
- 24 ladyfinger cookies
- Unsweetened cocoa powder, for dusting
- Dark chocolate shavings, for garnish (optional)
Cooking Instructions:
- Prepare the Egg Mixture: In a medium bowl, whisk the egg yolks with 1/2 cup of sugar until the mixture is pale and thick. This will take about 3-5 minutes. Add the mascarpone cheese to the yolk mixture and gently fold until well combined and smooth.
- Whip the Cream: In a separate bowl, whip the heavy cream until soft peaks form. Carefully fold the whipped cream into the mascarpone mixture, ensuring not to deflate the cream too much.
- Beat the Egg Whites: In another clean bowl, beat the egg whites until soft peaks form. Gradually add the remaining 1/2 cup of sugar and continue beating until stiff peaks form. Gently fold the egg whites into the mascarpone mixture, blending everything into a homogeneous mixture.
- Prepare the Coffee Mixture: In a shallow dish, combine the cooled espresso with the coffee liqueur (if using). Quickly dip each ladyfinger into the coffee mixture, ensuring they’re soaked but not overly saturated.
- Assemble the Tiramisu: In a 9×9 inch dish, arrange a layer of soaked ladyfingers at the bottom. Spread half of the mascarpone mixture over the ladyfingers. Repeat with another layer of coffee-soaked ladyfingers and the remaining mascarpone mixture.
- Chill the Dessert: Cover the dish with plastic wrap and refrigerate the Tiramisu for at least 4 hours, or preferably overnight, to allow the flavors to meld and the dessert to set properly.
- Serve and Garnish: Before serving, dust the top of the Tiramisu generously with unsweetened cocoa powder. Optionally, garnish with dark chocolate shavings for an extra touch of elegance.
Extra Tips:
When making Tiramisu, it’s essential to use fresh eggs, as the dish isn’t cooked. If you have concerns about using raw eggs, consider purchasing pasteurized eggs.
Additionally, make sure the espresso is cooled before dipping the ladyfingers to prevent them from becoming too soggy. For a more intense coffee flavor, you can add a bit more coffee liqueur to the espresso mix.
Finally, allowing the Tiramisu to rest in the fridge overnight will enhance the flavors and improve the texture, making it even more delightful to enjoy.
No-Bake Ricotta Cheesecake
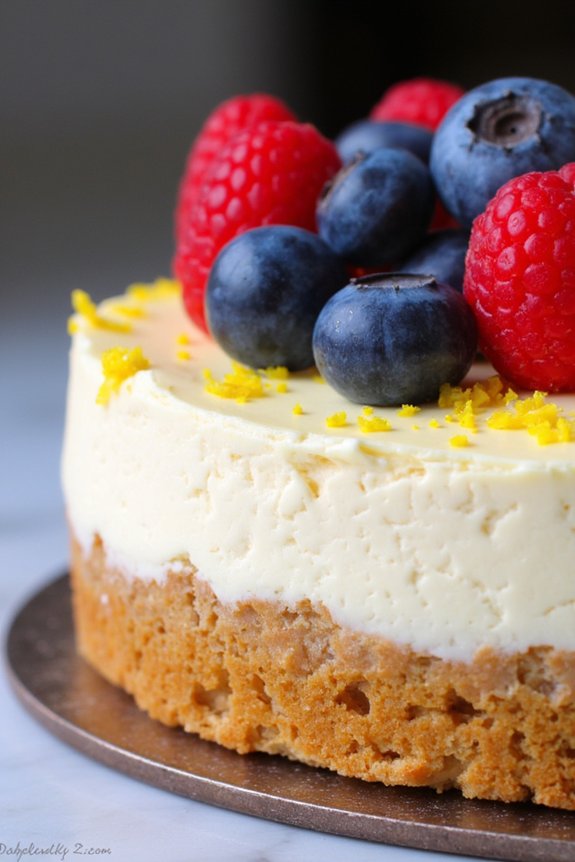
No-Bake Ricotta Cheesecake is a delightful Italian dessert that combines the creamy texture of ricotta cheese with the classic flavors of cheesecake, all without the need for an oven. This dessert is perfect for those warm summer days when you want something sweet but don’t want to heat up the kitchen.
The no-bake approach means that this cheesecake isn’t only easy to make but also quick to put together, making it an ideal choice for last-minute gatherings or when you crave something indulgent yet simple.
The ricotta cheese provides a light and airy texture that’s complemented by a buttery biscuit base, creating a perfect balance between richness and subtlety. This Italian twist on the traditional cheesecake is often flavored with lemon zest and vanilla, adding a revitalizing citrus note that pairs beautifully with the creamy filling.
Whether you choose to top it with fresh berries, drizzles of honey, or a dusting of cocoa powder, this No-Bake Ricotta Cheesecake is sure to be a crowd-pleaser at any occasion.
Ingredients for 4-6 servings:
- 1 1/2 cups crushed digestive biscuits or graham crackers
- 1/2 cup unsalted butter, melted
- 1 1/2 cups ricotta cheese
- 1/2 cup powdered sugar
- 1 teaspoon vanilla extract
- Zest of 1 lemon
- 1 cup heavy whipping cream
- Fresh berries or other toppings of choice for garnish
Instructions:
- Prepare the Base: Begin by crushing the digestive biscuits or graham crackers into fine crumbs. You can do this by placing them in a zip-top bag and using a rolling pin or by pulsing them in a food processor. Mix the crumbs with the melted butter until fully combined.
- Form the Crust: Press the crumb mixture firmly into the bottom of a 9-inch springform pan, spreading it evenly to form the crust. Use the back of a spoon or the bottom of a measuring cup to press it down firmly. Chill the crust in the refrigerator for at least 30 minutes to set.
- Make the Filling: In a large mixing bowl, combine the ricotta cheese, powdered sugar, vanilla extract, and lemon zest. Use a hand mixer or a stand mixer to beat the mixture until smooth and creamy.
- Whip the Cream: In a separate bowl, whip the heavy cream until it forms stiff peaks. Gently fold the whipped cream into the ricotta mixture, being careful not to deflate the cream.
- Assemble the Cheesecake: Pour the ricotta filling over the chilled crust, smoothing the top with a spatula. Cover the pan with plastic wrap and refrigerate for at least 4 hours, or overnight if possible, to allow the cheesecake to set properly.
- Serve and Garnish: Once set, remove the cheesecake from the springform pan and transfer it to a serving plate. Garnish with fresh berries or your choice of toppings before serving.
Extra Tips:
When making a no-bake cheesecake, it’s crucial to verify that the crust is packed tightly and chilled adequately to prevent crumbling when sliced.
If you find the ricotta cheese to be too grainy, you can smooth it out by processing it in a food processor before mixing it with the other ingredients. Additionally, for a more robust flavor, consider adding a tablespoon of lemon juice along with the zest.
To make slicing easier, run a knife under hot water before cutting each slice. This cheesecake can be stored in the refrigerator for up to three days, making it a great make-ahead dessert.
Lemon Panna Cotta
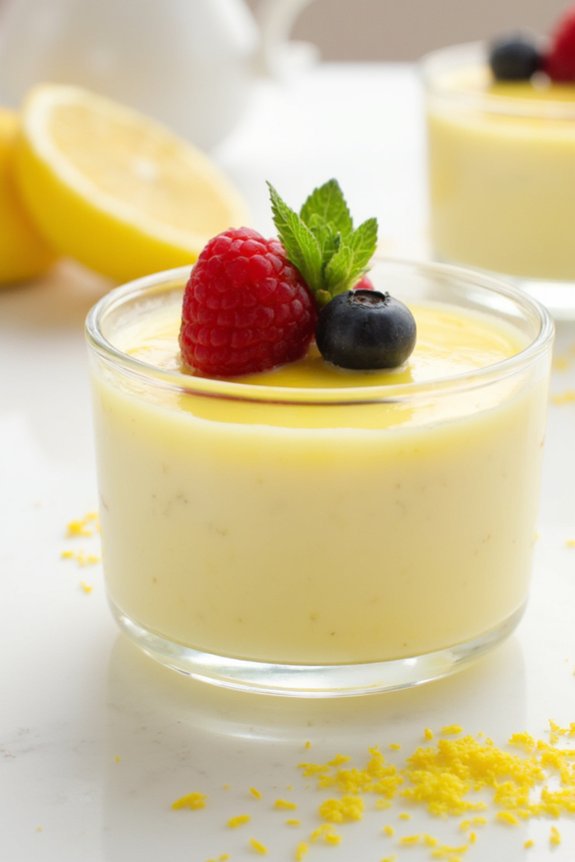
Lemon Panna Cotta is a revitalizing Italian dessert that’s both simple to make and delightfully delicious. This no-bake dessert features a silky smooth texture with a tangy lemon flavor that’s perfect for any occasion.
Panna cotta, which means “cooked cream” in Italian, is a dessert made from sweetened cream thickened with gelatin and molded. In this version, the addition of lemon adds a bright, citrusy note that pairs beautifully with the creamy base. It’s an elegant dessert that can be made in advance, making it an ideal choice for dinner parties or gatherings.
Despite its sophisticated appearance, Lemon Panna Cotta is surprisingly easy to prepare. The key to a perfect panna cotta lies in the balance of creaminess and the right amount of gelatin to guarantee it sets properly without becoming too firm.
By infusing the cream with lemon zest and juice, this dessert captures the essence of fresh lemons, making it a perfect palate cleanser after a rich meal. Serve it with a simple garnish of fresh berries or a sprig of mint to elevate its presentation.
Ingredients (Serves 4-6):
- 2 cups heavy cream
- 1 cup whole milk
- 1/2 cup granulated sugar
- Zest of 2 lemons
- 1/4 cup fresh lemon juice
- 2 1/2 teaspoons unflavored gelatin powder
- 1/4 cup cold water
- 1 teaspoon vanilla extract
Instructions:
- Prepare the Gelatin: In a small bowl, sprinkle the gelatin over the cold water and let it sit for about 5 minutes. This process, known as blooming, allows the gelatin to absorb the water and guarantees it will dissolve smoothly into the cream mixture.
- Heat the Cream Mixture: In a medium saucepan, combine the heavy cream, whole milk, and granulated sugar. Add the lemon zest, and place the saucepan over medium heat. Stir occasionally until the sugar is completely dissolved and the mixture is hot, but not boiling. This should take about 5 minutes.
- Incorporate the Gelatin: Remove the saucepan from the heat and add the bloomed gelatin. Stir until the gelatin is completely dissolved. This step is essential for achieving a smooth texture in the panna cotta.
- Add Lemon and Vanilla: Stir in the fresh lemon juice and vanilla extract. The lemon juice will give the panna cotta its distinctive tangy flavor, while the vanilla adds a hint of warmth to the dessert.
- Strain and Pour: For an ultra-smooth panna cotta, strain the mixture through a fine-mesh sieve into a large measuring cup or a pitcher. This will remove the lemon zest and any undissolved gelatin. Pour the mixture evenly into 4 to 6 ramekins or serving glasses.
- Chill and Set: Cover the ramekins with plastic wrap and refrigerate for at least 4 hours, or until the panna cotta is set. The chilling time allows the gelatin to firm up, giving the dessert its characteristic texture.
- Serve: Once set, serve the panna cotta directly in the ramekins, or gently run a knife around the edge of each ramekin and invert onto a plate to unmold. Garnish with fresh berries, a sprig of mint, or a drizzle of lemon syrup if desired.
Extra Tips: For the best flavor, use freshly squeezed lemon juice and fresh lemon zest. Be careful not to boil the cream mixture, as it can affect the texture of the panna cotta. If you prefer a sweeter dessert, adjust the sugar to your taste.
To guarantee easy unmolding, you can lightly grease the ramekins with a neutral oil before pouring in the panna cotta mixture. Finally, if you’re serving the panna cotta in glasses, try tilting them while chilling for a creative presentation.
Espresso Granita

Espresso Granita is a delightful Italian no-bake dessert that combines the robust flavors of espresso with the revitalizing texture of shaved ice. This dessert is perfect for warm days when you crave something cold yet rich in flavor. Originating from Sicily, granita is traditionally made with a variety of flavors, but espresso granita remains a favorite among coffee lovers.
Its simplicity and elegance make it an ideal dessert to prepare ahead of time for family gatherings or casual dinners. The key to a perfect Espresso Granita lies in the quality of the espresso used. Freshly brewed espresso with its intense aroma and taste is vital to achieve the desired depth of flavor.
The process involves freezing the espresso mixture and scraping it at intervals to form delicate ice crystals. This results in a dessert that’s both invigorating and energizing, capturing the essence of Italian coffee culture. Best served in chilled glasses, it can be topped with a dollop of whipped cream for added indulgence.
Ingredients (Serves 4-6)
- 2 cups freshly brewed espresso
- 1/2 cup granulated sugar
- 1 teaspoon vanilla extract
- Whipped cream, for topping (optional)
Cooking Instructions
- Brew the Espresso: Begin by brewing 2 cups of fresh espresso. If you don’t have an espresso machine, strongly brewed coffee can be a substitute but confirm it’s rich and robust.
- Dissolve the Sugar: While the espresso is still hot, add 1/2 cup of granulated sugar to it. Stir until the sugar is completely dissolved. This step is essential as it guarantees the granita is well-sweetened and the sugar doesn’t settle at the bottom.
- Add Vanilla: After dissolving the sugar, stir in 1 teaspoon of vanilla extract. The vanilla adds a subtle richness that complements the espresso’s bold flavor.
- Cool the Mixture: Allow the espresso mixture to cool to room temperature. This can take about 20-30 minutes. Cooling the mixture prevents it from forming large ice crystals too quickly.
- Freeze the Mixture: Pour the cooled espresso mixture into a shallow metal or glass dish. Place the dish in the freezer for about 30 minutes.
- Scrape to Form Crystals: After 30 minutes, remove the dish from the freezer and use a fork to scrape the partially frozen espresso into icy shards. Return the dish to the freezer.
- Repeat the Scraping: Every 30 minutes, remove the dish and scrape the mixture again with a fork, breaking up any large chunks. Repeat this process 3-4 times or until the granita is fully frozen into light, flaky crystals.
- Serve: Once the granita is ready, fluff it with a fork to loosen it. Serve in chilled glasses and top each serving with a dollop of whipped cream if desired.
Extra Tips
For the best results, confirm that the espresso is of high quality, as it greatly impacts the flavor of the granita. Adjust the sugar to taste, especially if your coffee is particularly strong or bitter.
If you prefer a smoother texture, you can reduce the freezing time between scrapes to 20 minutes. Additionally, you can experiment by adding a splash of your favorite liqueur to the mixture before freezing for an adult twist. Remember to serve the granita immediately after it’s ready to enjoy its fresh, icy texture.
Mascarpone and Berry Parfait
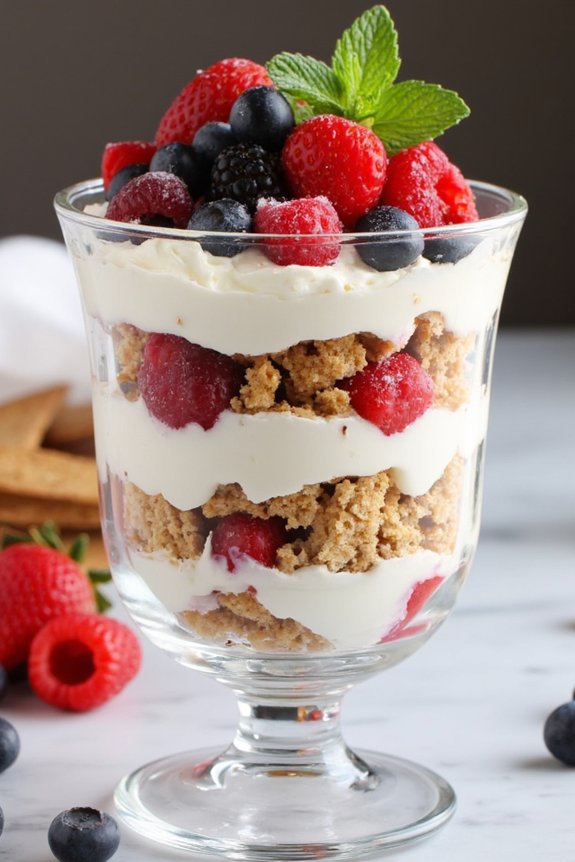
Indulge in the delightful layers of a Mascarpone and Berry Parfait, a quintessentially Italian no-bake dessert that’s as pleasing to the eye as it’s to the palate. This dessert is perfect for those seeking a quick yet impressive treat, combining the rich creaminess of mascarpone cheese with the vibrant flavors of fresh berries.
Its simplicity is matched only by its elegance, making it a fantastic choice for a dinner party finale or a luxurious midday snack. With its no-bake nature, this parfait is a stress-free dessert that requires minimal preparation. The invigorating taste of berries contrasts beautifully with the smooth mascarpone, and when layered with crumbled cookies, it offers a harmonious blend of textures.
Ideal for serving 4-6 people, this recipe will surely leave a lasting impression on your guests, making them crave for more.
Ingredients (serving size: 4-6 people):
- 1 ½ cups mascarpone cheese
- 1 cup heavy cream
- 1/3 cup powdered sugar
- 1 teaspoon vanilla extract
- 2 cups mixed fresh berries (such as strawberries, blueberries, raspberries)
- 1 tablespoon lemon juice
- 1 tablespoon honey
- 1 cup crumbled biscotti or graham crackers
- Fresh mint leaves for garnish (optional)
Instructions:
- Prepare the Cream Mixture: In a large mixing bowl, combine the mascarpone cheese, heavy cream, powdered sugar, and vanilla extract. Use an electric mixer to beat the ingredients on medium speed until the mixture is smooth and slightly thickened. This will create a rich, creamy base for the parfait.
- Prepare the Berries: In another bowl, combine the mixed berries with lemon juice and honey. Gently toss the berries to make certain they’re evenly coated. The lemon juice will enhance the flavor of the berries, while the honey adds a touch of sweetness.
- Layer the Parfait: Begin by placing a layer of crumbled biscotti or graham crackers at the bottom of each serving glass. Follow this with a layer of the mascarpone cream mixture. Add a generous spoonful of the berry mixture on top of the cream.
- Repeat Layers: Continue layering the ingredients by adding another layer of crumbled biscotti, mascarpone cream, and berries. Depending on the size of your serving glasses, you should be able to create two to three layers.
- Chill the Parfaits: Once the layers are complete, cover the parfaits with plastic wrap and refrigerate for at least 1 hour. This chilling time allows the flavors to meld together and the parfaits to set slightly.
- Garnish and Serve: Before serving, garnish each parfait with fresh mint leaves for an added touch of color and freshness. Serve the parfaits chilled for the best flavor and texture.
Extra Tips:
For a more personalized touch, feel free to experiment with the type of cookies used for the crumbled layer. Almond biscotti adds a delightful nutty flavor, while chocolate graham crackers can introduce a hint of cocoa.
Additionally, the berry mixture can be adjusted to taste; if you prefer a sweeter dessert, increase the amount of honey. Finally, for an extra hint of sophistication, consider adding a splash of your favorite liqueur to the mascarpone cream.
Chocolate Amaretto Truffles
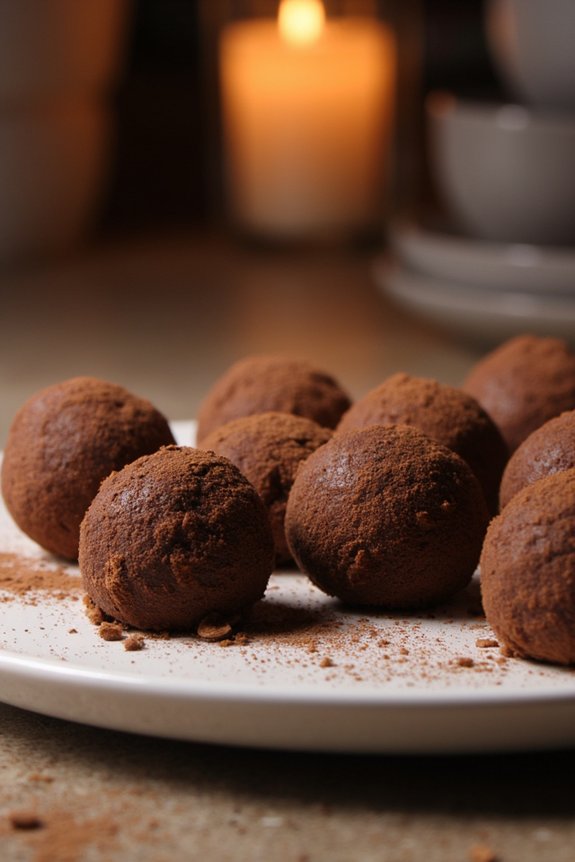
Chocolate Amaretto Truffles are a decadent and delightful Italian no-bake dessert that combines the rich flavors of chocolate and the unique taste of amaretto liqueur.
These bite-sized treats are perfect for any occasion, offering an indulgent blend of smooth, creamy chocolate and a hint of almond. With their elegant appearance and melt-in-your-mouth texture, they make a fantastic addition to any dessert table or a thoughtful homemade gift.
Creating Chocolate Amaretto Truffles is surprisingly simple and doesn’t require any baking, making it an exemplary recipe for those looking to prepare a sophisticated dessert without much hassle.
The truffles are made by blending high-quality chocolate with heavy cream and amaretto, then coated with a dusting of cocoa powder or rolled in chopped nuts for added texture. This recipe yields approximately 20-24 truffles, perfect for serving 4-6 people.
Ingredients:
- 8 ounces of semi-sweet chocolate, finely chopped
- 1/2 cup heavy cream
- 2 tablespoons amaretto liqueur
- 1 teaspoon vanilla extract
- A pinch of salt
- 1/2 cup unsweetened cocoa powder or 1/2 cup finely chopped almonds (for coating)
Instructions:
- Prepare the Chocolate: Place the finely chopped semi-sweet chocolate in a heatproof bowl. Verify the chocolate is evenly chopped to allow for smooth melting.
- Heat the Cream: In a small saucepan, heat the heavy cream over medium heat until it just begins to simmer. Avoid bringing it to a boil.
- Combine Ingredients: Pour the hot cream over the chopped chocolate. Let it sit for a minute to soften the chocolate, then gently stir until the chocolate is fully melted and the mixture is smooth.
- Add Flavors: Stir in the amaretto liqueur, vanilla extract, and a pinch of salt. Mix until all ingredients are thoroughly combined.
- Chill the Mixture: Cover the bowl and refrigerate the chocolate mixture for about 2 hours, or until it’s firm enough to scoop and shape.
- Shape the Truffles: Once the mixture is firm, use a small spoon or a melon baller to scoop out portions of the chocolate. Roll each portion between your palms to form smooth, round truffles.
- Coat the Truffles: Roll each truffle in unsweetened cocoa powder or finely chopped almonds, confirming they’re well coated.
- Serve or Store: Place the coated truffles in an airtight container and refrigerate until ready to serve. For best flavor, let them sit at room temperature for a few minutes before serving.
Extra Tips:
For ideal results, use high-quality chocolate, as it greatly impacts the truffles’ taste and texture.
If you prefer a sweeter truffle, consider using milk chocolate instead of semi-sweet. Feel free to experiment with different coatings such as crushed cookies or shredded coconut for variety.
Be sure to store these truffles in a cool place, as they can melt if left out in warm temperatures. Enjoy your homemade Chocolate Amaretto Truffles as a luxurious treat!
Nutella Semifreddo
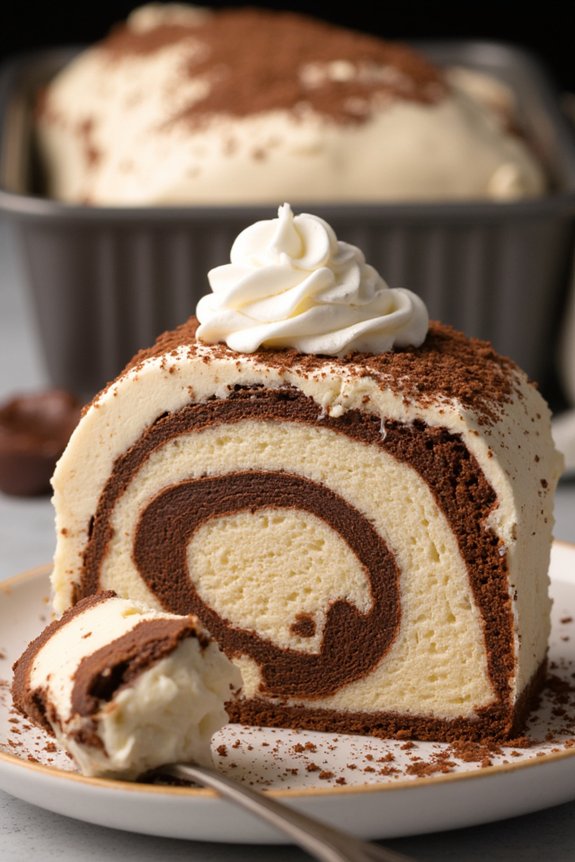
Indulge in the creamy and decadent delight of Nutella Semifreddo, an Italian no-bake dessert that promises to captivate your taste buds. This luscious treat combines the rich, chocolate-hazelnut flavors of Nutella with the smooth, airy texture of a semifreddo, making it a perfect dessert for any occasion.
Best of all, it requires no baking, allowing you to create a luxurious dessert with minimal effort and maximum satisfaction. Ideal for serving at dinner parties or family gatherings, Nutella Semifreddo is a crowd-pleaser that can be prepared in advance, giving you more time to enjoy the company of your guests.
The recipe yields a dessert that serves 4-6 people, guaranteeing that everyone gets to savor a generous portion. With its simple preparation and stunning presentation, this semifreddo is sure to become a favorite in your dessert repertoire.
Ingredients (Serves 4-6):
- 1 cup Nutella
- 2 cups heavy cream
- 3 large eggs
- 1/2 cup granulated sugar
- 1 teaspoon vanilla extract
- A pinch of salt
- 1/2 cup crushed hazelnuts (optional, for garnish)
- Whipped cream (optional, for serving)
Instructions:
- Preparation of Egg Mixture: Begin by separating the eggs, placing the yolks in one bowl and the whites in another. Add the granulated sugar to the yolks and beat using an electric mixer until the mixture is pale and thick. This will take about 3-4 minutes. Stir in the vanilla extract.
- Whip the Cream: In a separate bowl, whip the heavy cream with a pinch of salt until it forms soft peaks. Be careful not to overwhip, as the cream should be light and airy.
- Combine Nutella and Egg Yolks: Gently fold the Nutella into the egg yolk mixture until fully incorporated. Confirm there are no streaks for a smooth blend of flavors.
- Incorporate the Whipped Cream: Gradually fold the whipped cream into the Nutella mixture. This step is essential for maintaining the airy texture of the semifreddo. Use a spatula to fold carefully, ensuring a uniform mix.
- Whip Egg Whites: Clean your mixer beaters thoroughly and whip the egg whites until stiff peaks form. Gently fold these into the Nutella and cream mixture, enhancing the lightness of the semifreddo.
- Freeze the Mixture: Pour the completed mixture into a loaf pan lined with plastic wrap, smoothing the top with a spatula. Cover with plastic wrap and place in the freezer for at least 6 hours, or until fully set.
- Serve: When ready to serve, remove the semifreddo from the freezer and let it sit at room temperature for a few minutes. Turn it out onto a serving plate, remove the plastic wrap, and slice. Garnish with crushed hazelnuts and a dollop of whipped cream if desired.
Extra Tips:
For an extra touch of elegance, consider drizzling the servings with a bit of warm chocolate sauce or a dusting of cocoa powder before serving. If you prefer a nuttier texture, mix some chopped hazelnuts directly into the semifreddo mixture before freezing.
To confirm a perfect slice, dip your knife in hot water and dry it before cutting through the semifreddo. Remember, the semifreddo’s texture should be smooth and creamy, so handle it gently throughout the preparation process.
Almond Biscotti Gelato
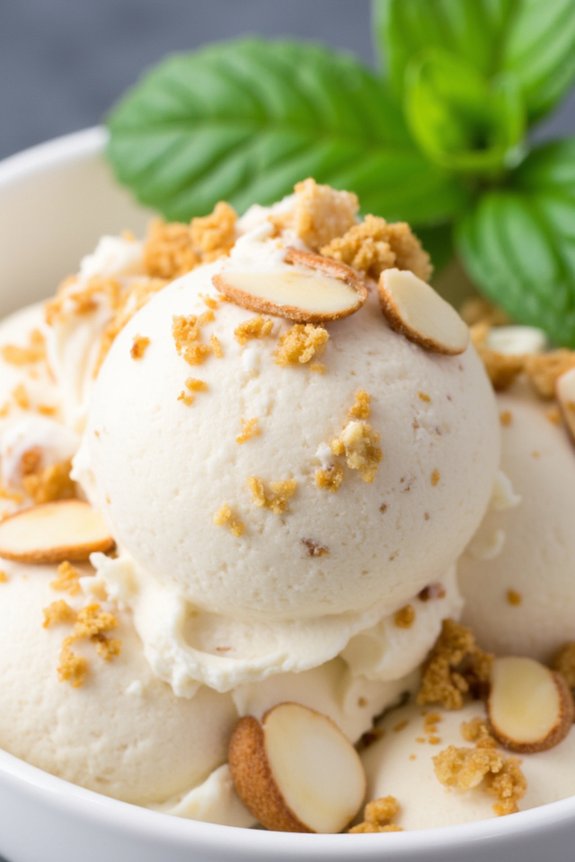
Almond Biscotti Gelato is a delightful no-bake dessert that combines the creamy texture of gelato with the crunchy goodness of almond biscotti. This Italian-inspired treat is perfect for those who crave something sweet yet sophisticated.
By using traditional Italian ingredients and flavors, this dessert will transport your taste buds straight to the heart of Italy. The richness of the gelato pairs perfectly with the nutty flavor of the biscotti, creating a harmonious balance that’s sure to impress your family and friends.
Preparing Almond Biscotti Gelato is surprisingly simple and doesn’t require any special equipment apart from a freezer. This makes it an ideal choice for those hot summer days when you want to avoid turning on the oven. The key to success lies in choosing high-quality ingredients, especially the almond biscotti, which should be fresh and flavorful.
Serve this gelato at your next dinner party or enjoy it as an indulgent treat for yourself.
Ingredients (Serving Size: 4-6 people):
- 2 cups heavy cream
- 1 cup whole milk
- 3/4 cup granulated sugar
- 1 teaspoon vanilla extract
- 1/2 teaspoon almond extract
- 1 cup crushed almond biscotti
- 1/2 cup sliced almonds
- 1/4 cup Amaretto liqueur (optional)
- Fresh mint leaves for garnish (optional)
Cooking Instructions:
- Prepare the Gelato Base: In a medium saucepan, combine the heavy cream, whole milk, and granulated sugar. Heat the mixture over medium heat, stirring continuously until the sugar is fully dissolved. Be careful not to let it boil.
- Flavor the Base: Once the sugar has dissolved, remove the saucepan from the heat. Stir in the vanilla and almond extracts. If you’re using Amaretto liqueur, add it at this stage. Allow the mixture to cool at room temperature.
- Cool and Chill: Once the mixture is cool, pour it into a large bowl and cover it with plastic wrap. Refrigerate for at least 2 hours, or until thoroughly chilled.
- Prepare the Biscotti: While the gelato base chills, crush the almond biscotti into small pieces. You can do this by placing the biscotti in a plastic bag and gently crushing them with a rolling pin.
- Freeze and Churn: After the gelato mixture is chilled, transfer it to an ice cream maker and churn according to the manufacturer’s instructions, usually about 20-25 minutes. Once it starts to thicken, add in the crushed biscotti and sliced almonds.
- Final Freeze: Transfer the gelato to a freezer-safe container. Press a piece of plastic wrap directly onto the surface of the gelato to prevent ice crystals from forming. Freeze for at least 4 hours, or until firm.
- Serve: Scoop the gelato into bowls and garnish with fresh mint leaves, if desired. Serve immediately and enjoy the perfect blend of creamy and crunchy textures.
Extra Tips:
For the best flavor, allow the gelato to sit at room temperature for about 5-10 minutes before serving. This will make scooping easier and enhance the overall taste.
If you’re looking for a non-alcoholic version, simply omit the Amaretto liqueur. Feel free to experiment with other flavors by adding a swirl of chocolate or caramel sauce during the final freeze for an added twist.
Pistachio Cannoli Dip
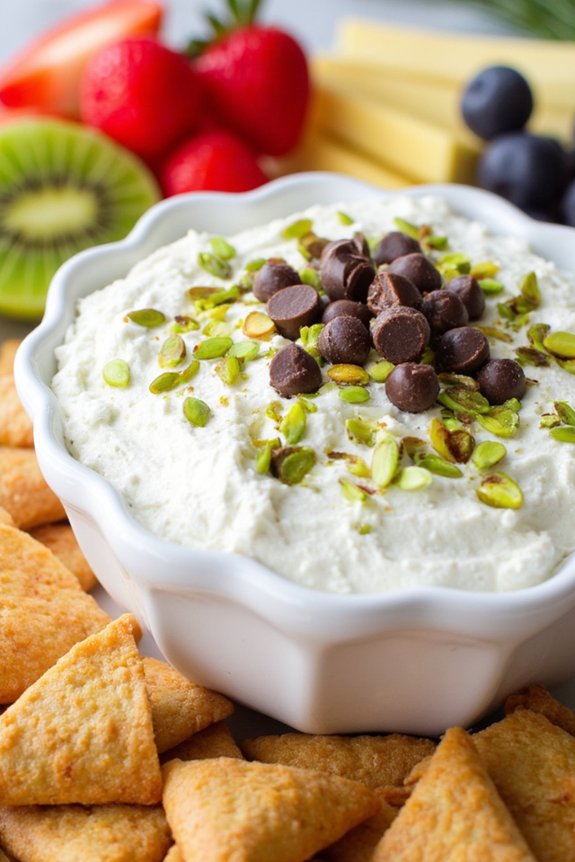
Indulge in the delightful flavors of Italy with this Pistachio Cannoli Dip, a no-bake dessert that promises to be the star of your next gathering. Combining the creamy texture of ricotta and mascarpone cheese with the nutty essence of pistachios, this dip is a modern take on the traditional Italian cannoli.
Perfect for those who love the taste of cannoli but want a simpler, mess-free option, this dip pairs wonderfully with an assortment of dippers, from crispy cannoli chips to fresh fruit slices.
This Pistachio Cannoli Dip isn’t only easy to make but also offers a rich, satisfying taste that will transport you to the heart of Italy with every bite. Whether you’re hosting a party or just want a sweet treat to enjoy with family, this recipe is sure to please.
The creamy dip is enhanced with a hint of vanilla and a sprinkle of chocolate chips, providing a perfect balance of flavors. Get ready to whip up this delicious dessert in no time and watch it disappear as soon as it hits the table!
Ingredients (serves 4-6):
- 1 cup ricotta cheese
- 1 cup mascarpone cheese
- 1 teaspoon vanilla extract
- 1/2 cup powdered sugar
- 1/2 cup shelled pistachios, finely chopped
- 1/2 cup mini chocolate chips
- Cannoli chips or waffle cone pieces, for serving
Instructions:
- Prepare the Cheese Base: In a medium-sized mixing bowl, combine the ricotta cheese and mascarpone cheese. Use a hand mixer or stand mixer to blend the cheeses until they’re smooth and creamy. This step guarantees a uniform and velvety base for your dip.
- Add Sweetness and Flavor: Add the vanilla extract and powdered sugar to the cheese mixture. Mix on medium speed until the ingredients are well incorporated. The powdered sugar will add the necessary sweetness, while the vanilla extract provides a hint of aromatic flavor that complements the rich cheeses.
- Incorporate the Pistachios and Chocolate: Gently fold in the chopped pistachios and mini chocolate chips using a spatula. Be careful not to overmix; you want to retain the texture and crunch of the pistachios and the chocolate chips in the dip.
- Chill the Dip: Transfer the mixture to a serving bowl and cover it with plastic wrap. Refrigerate the dip for at least 30 minutes before serving. Chilling the dip allows the flavors to meld together and the dip to firm up slightly, making it easier to serve.
- Serve and Enjoy: Once chilled, remove the dip from the refrigerator. Serve with cannoli chips, waffle cone pieces, or your choice of dippers. Enjoy the creamy, nutty, and chocolatey goodness of this indulgent dessert.
Extra Tips:
For the best results, use high-quality ricotta and mascarpone cheese, as their freshness and flavor will notably impact the final taste of the dip.
If you prefer a smoother texture, consider blending the ricotta cheese separately before mixing it with the mascarpone. Additionally, for a pop of color and extra flavor, you can garnish the dip with a few whole pistachios or a sprinkle of additional chocolate chips just before serving.
This dip can also be made a day in advance, making it a convenient option for party planning.
Limoncello Sorbet
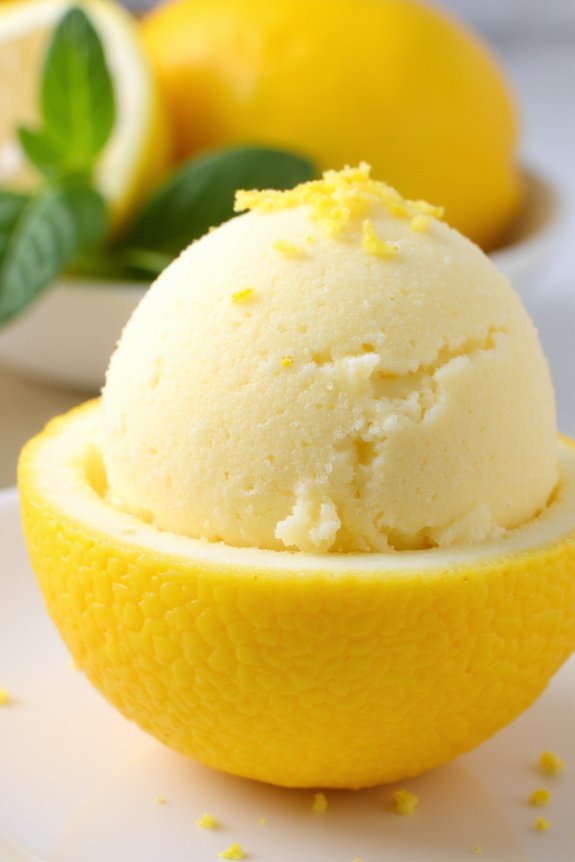
The beauty of Limoncello Sorbet lies in its simplicity. With just a few ingredients, you can create a stunning dessert that’s both elegant and delicious.
Whether you serve it in a frosted glass or a hollowed-out lemon for an elegant presentation, this sorbet is sure to impress your guests. The alcohol in the limoncello helps to keep the sorbet from freezing too hard, guaranteeing a perfectly scoopable texture straight from the freezer.
Ingredients (Serves 4-6):
- 1 cup water
- 1 cup sugar
- 1 cup limoncello
- 1 cup fresh lemon juice (about 4-5 lemons)
- Zest of 2 lemons
Instructions:
- Prepare the Simple Syrup: In a medium-sized saucepan, combine the water and sugar. Place the saucepan over medium heat, stirring occasionally, until the sugar completely dissolves. This should take about 5 minutes. Once dissolved, remove from heat and allow the syrup to cool to room temperature.
- Mix in Limoncello and Lemon: Once the syrup has cooled, stir in the limoncello, fresh lemon juice, and lemon zest. Mix well to guarantee that all the flavors are evenly distributed.
- Chill the Mixture: Pour the limoncello mixture into a shallow freezer-safe container. Cover it with a lid or plastic wrap and place it in the freezer. Allow it to freeze for about 4-5 hours, stirring with a fork every hour. This will help to break up any large ice crystals and guarantee a smooth sorbet texture.
- Serve: Once the sorbet is fully frozen and has a smooth consistency, scoop it into serving dishes. You can serve it in small bowls, martini glasses, or hollowed-out lemon halves for a unique presentation.
Extra Tips:
For a more intense lemon flavor, you can increase the amount of lemon zest in the recipe. Additionally, you can adjust the sweetness by modifying the sugar content to your taste preference.
If you prefer a non-alcoholic version, simply replace the limoncello with an equal amount of water, but be aware that the texture might be slightly firmer. Remember to store the sorbet in an airtight container to prevent it from absorbing any unwanted flavors from the freezer.
Enjoy your homemade Limoncello Sorbet as a delightful end to any meal!