

Italian desserts are a beautiful celebration of fresh, natural flavors, especially when fruit is the star. Picture a sunny afternoon with a refreshing Limoncello Sorbetto or a slice of Peach and Ricotta Crostata, each bite filled with the taste of summer. I’ve come across 14 vibrant recipes that truly capture Italy’s essence. Trust me, you’re in for a treat. Curious about turning seasonal fruits into unforgettable moments?
Classic Limoncello Sorbetto

Limoncello Sorbetto is a revitalizing and zesty Italian dessert that perfectly captures the essence of summer. This classic sorbetto is made with limoncello, a sweet and tangy lemon liqueur, which adds a delightful burst of citrus flavor to the frozen delight. The combination of fresh lemon juice and zest enhances the vibrant flavor profile, making it a perfect palate cleanser or a light dessert option after a hearty Italian meal.
With its smooth texture and invigorating taste, Limoncello Sorbetto is sure to become a favorite treat for those who enjoy the bold flavors of Italian cuisine.
Making Limoncello Sorbetto at home is surprisingly simple and requires just a few ingredients. The key to achieving the perfect texture and flavor lies in the balance of sweetness and acidity, which is accomplished by using high-quality limoncello and fresh lemons.
This revitalizing dessert is ideal for serving at gatherings or dinner parties, where it can be presented in elegant glasses or bowls, garnished with fresh mint leaves or lemon slices for an added touch of sophistication.
Ingredients for 4-6 servings:
- 1 cup of water
- 1 cup of granulated sugar
- 1 cup of freshly squeezed lemon juice (about 4-6 lemons)
- 2 tablespoons of lemon zest
- 1/2 cup of limoncello
- Fresh mint leaves (optional, for garnish)
- Lemon slices (optional, for garnish)
Cooking Instructions:
- Prepare the Simple Syrup: In a medium saucepan, combine the water and granulated sugar. Heat over medium heat, stirring frequently until the sugar is completely dissolved. Once dissolved, remove the pan from the heat and allow the syrup to cool to room temperature.
- Juice and Zest the Lemons: While the syrup cools, juice the lemons to obtain 1 cup of fresh lemon juice. Use a fine grater or zester to collect 2 tablespoons of lemon zest, avoiding the bitter white pith.
- Mix the Ingredients: In a large mixing bowl, combine the cooled simple syrup, lemon juice, lemon zest, and limoncello. Stir the mixture thoroughly until all ingredients are well incorporated.
- Freeze the Mixture: Pour the mixture into a shallow, freezer-safe container. Cover the container with a lid or plastic wrap and place it in the freezer. Allow it to freeze for about 4 hours, stirring every hour to break up ice crystals and maintain a smooth texture.
- Serve the Sorbetto: Once the sorbetto is fully frozen and has a smooth consistency, scoop it into serving glasses or bowls. Garnish with fresh mint leaves or lemon slices if desired, and serve immediately.
Extra Tips:
For the best results, use high-quality limoncello with a vibrant lemon flavor. If you prefer a slightly less sweet sorbetto, you can reduce the sugar by a quarter cup.
To achieve a smoother texture, you can use an ice cream maker instead of freezing in the container, following the manufacturer’s instructions. Additionally, verify your freezer is set to the coldest setting to speed up the freezing process and achieve the perfect sorbetto texture.
Enjoy this delightful dessert on a warm day for a revitalizing treat!
Fresh Fig and Almond Tart
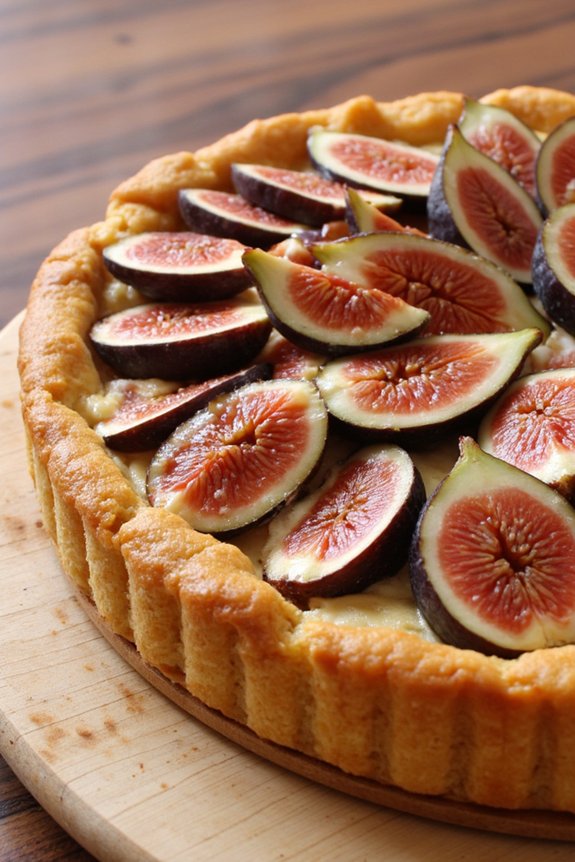
Fresh Fig and Almond Tart is a delightful Italian dessert that combines the rich, nutty flavor of almonds with the sweet, juicy taste of fresh figs. This tart is perfect for showcasing the natural sweetness of figs, which are in season from late summer to early fall. The combination of a buttery almond crust and a creamy almond filling makes for a dessert that’s both sophisticated and comforting, perfect for a special occasion or a casual family dinner.
To make this elegant dessert, you’ll start by preparing a simple almond-based dough that will serve as the crust. The dough is pressed into a tart pan and pre-baked to guarantee a crispy base. The almond filling, made with ground almonds, sugar, and eggs, is then poured over the crust. Fresh figs, halved or sliced, are artfully arranged on top before baking the tart to golden perfection. This Fresh Fig and Almond Tart is best served slightly warm or at room temperature, allowing the flavors to meld beautifully.
Ingredients (Serves 4-6)
- 1 ¼ cups all-purpose flour
- ½ cup almond flour
- ½ cup unsalted butter, chilled and cubed
- ¼ cup sugar
- 1 large egg
- 1 teaspoon vanilla extract
- ½ teaspoon salt
- ½ cup almond paste
- ½ cup granulated sugar
- 2 large eggs
- ½ cup unsalted butter, softened
- 10-12 fresh figs, halved or sliced
Cooking Instructions
- Prepare the Tart Crust: In a food processor, combine the all-purpose flour, almond flour, sugar, and salt. Add the chilled, cubed butter and pulse until the mixture resembles coarse crumbs. Add the egg and vanilla extract, and pulse again until the dough begins to come together.
- Chill the Dough: Turn the dough onto a lightly floured surface, shape it into a disc, wrap in plastic wrap, and refrigerate for at least 30 minutes.
- Pre-bake the Crust: Roll out the chilled dough to fit a 9-inch tart pan with a removable bottom. Press the dough into the pan, trimming any excess. Prick the bottom with a fork, line with parchment paper, and fill with pie weights. Preheat the oven to 350°F (175°C) and bake for 15 minutes. Remove weights and parchment, and bake for another 5 minutes until lightly golden.
- Prepare the Almond Filling: In a bowl, beat together the almond paste and granulated sugar until smooth. Add the softened butter and mix until creamy. Beat in the eggs one at a time.
- Assemble the Tart: Pour the almond filling into the pre-baked crust, spreading it evenly. Arrange the fig halves or slices on top of the filling in a decorative pattern.
- Bake the Tart: Bake in the preheated oven for 35-40 minutes, or until the filling is set and the top is golden brown. Allow cooling slightly before removing from the tart pan.
- Serve: Slice and serve the tart warm or at room temperature.
Extra Tips
When selecting figs for your tart, choose ones that are ripe but not overly soft. Ripe figs should yield slightly to pressure and have a sweet aroma. If your figs are very juicy, you may want to pat them dry with a paper towel before placing them on the tart to prevent excess moisture.
Additionally, consider brushing the finished tart with warmed apricot jam for added shine and sweetness.
Peach and Ricotta Crostata

Peach and Ricotta Crostata is a delightful Italian fruit dessert that melds the sweetness of ripe peaches with the creamy texture of ricotta cheese, all encased in a buttery, flaky crust. This rustic tart is perfect for late summer when peaches are at their peak, offering a revitalizing treat that balances lightness with indulgence.
The crostata is simple to prepare yet impressive in presentation, making it an ideal dessert for casual gatherings or as a sweet ending to a family dinner. The crostata’s charm lies in its simplicity. The dough, similar to pie crust, is easy to work with and provides a sturdy base for the luscious filling.
The peaches, sweetened just enough to enhance their natural flavor, pair beautifully with the subtle milkiness of ricotta. A hint of lemon zest adds brightness, while a sprinkle of sugar on top creates a slight caramelization during baking. This recipe yields a crostata that serves 4-6 people, making it perfect for sharing.
Ingredients:
- 1 ½ cups all-purpose flour
- ½ cup granulated sugar, divided
- ½ teaspoon salt
- ½ cup unsalted butter, chilled and cubed
- 1 large egg
- 1 tablespoon cold water
- 3 ripe peaches, peeled, pitted, and sliced
- 1 cup ricotta cheese
- 1 teaspoon vanilla extract
- Zest of 1 lemon
- 1 tablespoon cornstarch
- 1 egg yolk, beaten (for egg wash)
- Turbinado sugar for sprinkling (optional)
Instructions:
1. Prepare the Dough: In a large mixing bowl, combine the flour, ¼ cup of sugar, and salt. Add the chilled, cubed butter and mix with a pastry cutter or your fingers until the mixture resembles coarse crumbs.
In a small bowl, whisk together the egg and cold water, then add to the flour mixture. Mix until the dough comes together. Form into a disk, wrap in plastic wrap, and refrigerate for at least 30 minutes.
2. Make the Filling: In a medium bowl, combine the ricotta cheese, remaining ¼ cup of sugar, vanilla extract, and lemon zest. Mix until smooth and set aside.
3. Prepare the Peaches: In another bowl, toss the peach slices with cornstarch until evenly coated. This will help thicken the juices during baking.
4. Assemble the Crostata: Preheat your oven to 375°F (190°C). Roll out the chilled dough on a floured surface into a roughly 12-inch circle. Transfer the dough to a parchment-lined baking sheet.
Spread the ricotta mixture over the center of the dough, leaving a 2-inch border. Arrange the peaches on top of the ricotta filling.
5. Fold the Edges: Gently fold the edges of the dough over the filling, pleating as necessary to create a rustic edge. Brush the dough with the beaten egg yolk and sprinkle with turbinado sugar if desired.
6. Bake: Place the crostata in the preheated oven and bake for 35-40 minutes, or until the crust is golden brown and the filling is bubbling. Allow to cool slightly before serving.
Extra Tips:
To maintain a flaky crust, make sure the butter is well-chilled before incorporating it into the flour. If the dough becomes too warm while you’re working with it, pop it back into the refrigerator for a few minutes to firm up.
When selecting peaches, choose ones that are ripe but still firm to the touch for the best flavor and texture. If fresh peaches are unavailable, canned or frozen peaches can be used as a substitute, but be sure to drain them well.
Enjoy your Peach and Ricotta Crostata warm or at room temperature, perhaps with a scoop of vanilla ice cream for an extra special treat.
Strawberry and Mascarpone Semifreddo
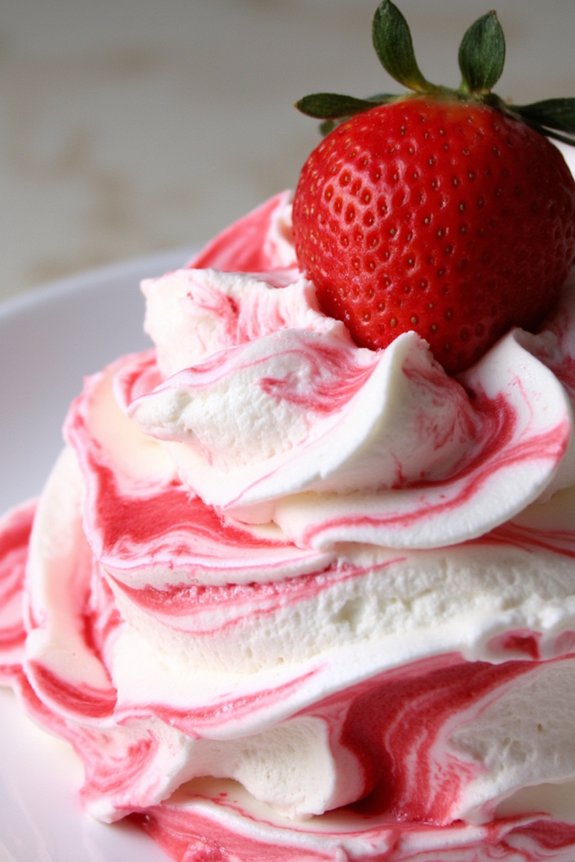
Strawberry and Mascarpone Semifreddo is a delightful Italian dessert that combines the creamy richness of mascarpone cheese with the fresh, sweet taste of strawberries. Semifreddo, meaning “half-frozen” in Italian, offers a light and airy texture that’s perfect for warm weather or as a revitalizing end to a meal.
This no-bake dessert is surprisingly simple to prepare, making it an ideal choice for both novice and experienced cooks who want to impress their guests with minimal effort.
This recipe for Strawberry and Mascarpone Semifreddo serves 4-6 people and is a wonderful make-ahead dessert, as it can be prepared in advance and stored in the freezer until ready to serve. The combination of strawberries and mascarpone creates a luscious, velvety treat that balances sweetness and creaminess beautifully, while the addition of a crunchy base or topping can add an exciting textural contrast.
Ingredients:
- 1 cup fresh strawberries, hulled and sliced
- 1/2 cup granulated sugar
- 1 tablespoon lemon juice
- 1 cup heavy cream
- 1 cup mascarpone cheese
- 1 teaspoon vanilla extract
- 1/4 cup powdered sugar
- Optional: 1/2 cup crushed biscotti or graham crackers for topping or base
Instructions:
- Prepare the Strawberry Mixture: In a medium-sized saucepan, combine the sliced strawberries, granulated sugar, and lemon juice. Cook over medium heat, stirring occasionally, until the strawberries break down and the mixture thickens slightly, about 8-10 minutes. Remove from heat and allow to cool completely.
- Whip the Cream: In a large mixing bowl, whip the heavy cream until soft peaks form. Be careful not to over-whip the cream, as it can turn into butter.
- Combine Mascarpone and Vanilla: In another bowl, mix the mascarpone cheese, vanilla extract, and powdered sugar until smooth and creamy. Confirm there are no lumps for a silky texture.
- Fold Ingredients Together: Gently fold the whipped cream into the mascarpone mixture using a spatula, being careful to maintain the airiness of the whipped cream. Once combined, swirl in the cooled strawberry mixture to create a marbled effect.
- Assemble the Semifreddo: Line a loaf pan with plastic wrap, leaving excess hanging over the edges for easy removal. If using a base, sprinkle crushed biscotti or graham crackers evenly at the bottom of the pan. Pour the semifreddo mixture into the prepared pan, smoothing the top with a spatula.
- Freeze the Semifreddo: Cover the top with the excess plastic wrap and place in the freezer for at least 4 hours, or until firmly set.
- Serve: To serve, remove the semifreddo from the pan by lifting it out with the plastic wrap. Slice with a warm knife (run it under hot water and dry it off between slices) and serve immediately, optionally garnished with additional fresh strawberries.
Extra Tips:
For the best flavor, choose ripe strawberries at their peak sweetness. If fresh strawberries aren’t available, you can use frozen strawberries, but be sure to thaw them completely and drain any excess liquid before using.
If you’re feeling adventurous, you can experiment with different fruit combinations such as raspberries or blueberries to customize your semifreddo. Additionally, adjusting the amount of sugar in the strawberry mixture allows you to control the overall sweetness to suit your taste.
Lemon and Olive Oil Cake

Lemon and olive oil cake is a delightful Italian dessert that combines the zesty freshness of lemons with the rich, fruity taste of olive oil. This moist and fragrant cake is perfect for any occasion, whether you’re enjoying it as a light dessert after dinner or as a sweet treat with your afternoon coffee.
The olive oil not only adds a unique depth of flavor but also contributes to the cake’s tender crumb, while the lemon zest and juice provide a revitalizing zing that balances the richness.
This cake is simple to make and requires only a few ingredients, yet it delivers a complex and sophisticated taste. It’s a great choice for those who appreciate the fusion of sweet and savory flavors, and it’s also a fantastic way to showcase the quality of a good extra virgin olive oil.
Serve it plain, dusted with powdered sugar, or with a dollop of whipped cream or a scoop of gelato for an extra indulgence.
Ingredients (Serves 4-6):
- 1 ½ cups all-purpose flour
- 1 teaspoon baking powder
- ½ teaspoon baking soda
- ¼ teaspoon salt
- ¾ cup granulated sugar
- ½ cup extra virgin olive oil
- 2 large eggs
- Zest of 2 lemons
- ¼ cup fresh lemon juice
- ½ cup whole milk
- 1 teaspoon vanilla extract
- Powdered sugar for dusting (optional)
Cooking Instructions:
- Preheat the Oven: Begin by preheating your oven to 350°F (175°C). Grease a 9-inch round cake pan with a bit of olive oil or line it with parchment paper to guarantee easy removal after baking.
- Mix Dry Ingredients: In a medium bowl, whisk together the flour, baking powder, baking soda, and salt. This will help to evenly distribute the leavening agents and salt throughout the flour.
- Combine Sugar and Olive Oil: In a large mixing bowl, combine the granulated sugar and olive oil. Use a hand mixer or stand mixer to beat the mixture on medium speed until it’s well combined and has a slightly lighter color.
- Add Eggs and Lemon Zest: Add the eggs one at a time, beating well after each addition. Then, add the lemon zest and continue to beat until the mixture is smooth and creamy.
- Incorporate Lemon Juice and Milk: With the mixer on low speed, add the lemon juice and vanilla extract. Gradually add the milk, mixing until just combined.
- Combine Wet and Dry Ingredients: Slowly add the dry ingredients to the wet mixture, mixing on low speed until just combined. Be careful not to overmix, as this can lead to a dense cake.
- Bake the Cake: Pour the batter into the prepared cake pan and smooth the top with a spatula. Bake in the preheated oven for 30-35 minutes, or until a toothpick inserted into the center of the cake comes out clean.
- Cool and Serve: Allow the cake to cool in the pan for about 10 minutes, then transfer it to a wire rack to cool completely. Once cool, dust the top with powdered sugar if desired, and serve.
Extra Tips:
For best results, use a high-quality extra virgin olive oil, as its flavor will be prominent in the cake. Confirm your lemons are fresh, as the zest and juice are key components that provide the cake’s bright flavor.
If you prefer a more pronounced lemon flavor, you can add a bit more zest or juice according to your taste. Be sure not to overbake the cake, as it can become dry; start checking for doneness a few minutes before the suggested baking time.
This cake keeps well at room temperature for a couple of days, but it can also be refrigerated for longer storage.
Pear and Amaretto Crumble

Indulge in the delightful flavors of Italy with this Pear and Amaretto Crumble, a dessert that blends the sweet succulence of ripe pears with the nutty, almond essence of Amaretto liqueur. This warm, comforting dish is perfect for a cozy evening, serving as a wonderful conclusion to any meal.
The crumble topping, with its crunchy texture and rich buttery flavor, contrasts beautifully with the soft, juicy pears beneath. Whether you’re hosting a dinner party or simply enjoying a quiet night in, this dessert is bound to impress both family and friends.
Originating from Italian culinary traditions, this dessert is both simple and elegant. The use of Amaretto, a sweet almond-flavored liqueur, adds a unique twist to the classic crumble, infusing it with a sophisticated aroma.
The pears, when baked, become tender and aromatic, releasing their natural juices that mingle with the Amaretto, creating a delectable syrup. The preparation is straightforward, making it an ideal choice even for novice bakers. Get ready to savor a taste of Italy in every bite with this delicious Pear and Amaretto Crumble.
Ingredients for 4-6 servings:
- 4 ripe pears, peeled, cored, and sliced
- 1/4 cup Amaretto liqueur
- 1 teaspoon vanilla extract
- 1/2 cup granulated sugar
- 1 teaspoon ground cinnamon
- 1 cup all-purpose flour
- 1/2 cup almond flour
- 1/2 cup unsalted butter, chilled and cubed
- 1/3 cup brown sugar
- 1/2 cup sliced almonds
- A pinch of salt
Instructions:
1. Preheat the Oven: Begin by preheating your oven to 350°F (175°C). This guarantees the oven is at the right temperature for even baking.
2. Prepare the Pear Filling: In a large mixing bowl, combine the sliced pears with Amaretto liqueur, vanilla extract, granulated sugar, and ground cinnamon. Toss the pears gently until they’re well coated with the mixture.
Transfer the pear mixture into a lightly greased baking dish, spreading it evenly.
3. Make the Crumble Topping: In another bowl, combine all-purpose flour, almond flour, chilled and cubed butter, brown sugar, and a pinch of salt. Use your fingers or a pastry cutter to blend the ingredients until the mixture resembles coarse crumbs.
Stir in the sliced almonds for added texture.
4. Assemble the Crumble: Sprinkle the crumble topping evenly over the pear mixture in the baking dish, making sure all pears are covered.
5. Bake the Crumble: Place the baking dish in the preheated oven and bake for 35-40 minutes, or until the topping is golden brown and the pears are tender when pierced with a fork.
6. Cool and Serve: Once baked, remove the crumble from the oven and allow it to cool for about 10 minutes. This will help the flavors to meld and make it easier to serve.
Serve warm, optionally with a scoop of vanilla ice cream or a dollop of whipped cream.
Extra Tips:
For an even more intense almond flavor, consider adding a handful of crushed Amaretti cookies to the crumble topping. If you prefer a less sweet dessert, adjust the sugar content to your liking.
For a gluten-free version, substitute the all-purpose flour with a gluten-free flour blend. Always choose ripe, sweet pears for the best flavor, and remember that the type of pear can affect the sweetness and texture of your dessert.
Bartlett or Anjou pears work particularly well.
Apricot and Pistachio Biscotti
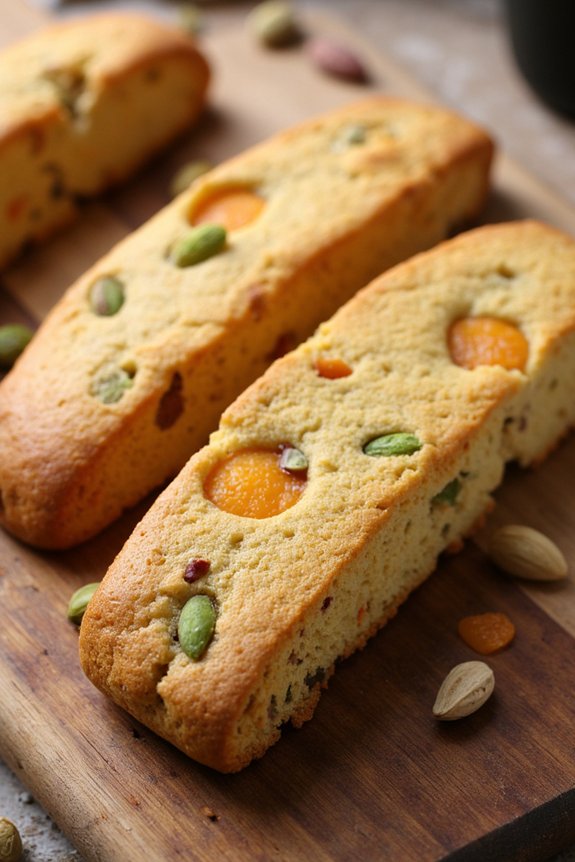
Biscotti, a delightful Italian cookie, is known for its crunchy texture and versatility. Among the many variations, Apricot and Pistachio Biscotti stands out with its vibrant flavors and perfect balance of sweetness and nuttiness. The dried apricots provide a chewy and tangy contrast to the crisp biscotti, while the pistachios add a subtle richness and a hint of saltiness.
These biscotti are perfect for dipping in your morning coffee or serving as an elegant dessert with a glass of Vin Santo. This recipe yields biscotti that are lightly sweetened and loaded with chunks of apricot and pistachio, making them a delightful treat that’s both satisfying and sophisticated.
With a preparation time of just over an hour, these biscotti are perfect for gifting or enjoying with family and friends. The following recipe serves 4-6 people, providing enough for a small gathering or to enjoy over a few days.
Ingredients:
- 1 3/4 cups all-purpose flour
- 1 teaspoon baking powder
- 1/2 teaspoon salt
- 1/2 cup granulated sugar
- 2 large eggs
- 1 teaspoon vanilla extract
- 1/2 teaspoon almond extract
- 1/2 cup dried apricots, chopped
- 1/2 cup unsalted pistachios, roughly chopped
Cooking Instructions:
- Preheat the Oven: Preheat your oven to 350°F (175°C). Line a baking sheet with parchment paper to prevent sticking.
- Mix Dry Ingredients: In a medium bowl, whisk together the flour, baking powder, and salt. This will guarantee that the baking powder is evenly distributed throughout the dough.
- Beat Wet Ingredients: In a large bowl, beat the sugar and eggs together using an electric mixer on medium speed until the mixture becomes thick and pale, about 2-3 minutes. Mix in the vanilla and almond extracts.
- Combine Wet and Dry Ingredients: Gradually add the dry ingredients to the wet mixture, mixing until just combined. Be careful not to overmix, as this can make the biscotti dense.
- Fold in Apricots and Pistachios: Gently fold in the chopped apricots and pistachios with a spatula until evenly distributed throughout the dough.
- Shape the Dough: Divide the dough in half and shape each half into a log about 10 inches long and 2 inches wide. Place the logs on the prepared baking sheet.
- First Bake: Bake in the preheated oven for 25-30 minutes, or until the logs are lightly golden and firm to the touch. Remove from the oven and let them cool for 10 minutes.
- Slice the Biscotti: Reduce the oven temperature to 325°F (160°C). Using a serrated knife, carefully slice the logs diagonally into 1/2-inch thick slices.
- Second Bake: Arrange the slices cut-side down on the baking sheet. Bake for an additional 10-12 minutes per side, until they’re crisp and golden. Allow them to cool completely on a wire rack before serving.
Extra Tips:
When chopping the apricots and pistachios, aim for a rough chop to guarantee that each slice of biscotti contains a generous amount of both ingredients. If you prefer a softer biscotti, reduce the second bake time slightly.
You can store the biscotti in an airtight container at room temperature for up to two weeks. They also make an excellent gift when wrapped in cellophane and tied with a ribbon. If you find the dough too sticky to work with, lightly dust your hands with flour while shaping the logs.
Enjoy your homemade Apricot and Pistachio Biscotti with a cup of espresso for a true Italian experience!
Blood Orange Granita

Blood Orange Granita is a revitalizing and vibrant Italian dessert that captures the essence of Mediterranean flavors. This delightful dish is perfect for a hot summer day, offering a sweet and tangy taste that invigorates the senses. The granita, with its icy texture, is a wonderful way to conclude a meal, providing a light and palate-cleansing experience. Blood oranges, with their deep red hue and distinctly sweet yet tart flavor, serve as the star ingredient, making this granita not only a treat for the taste buds but also a feast for the eyes.
Granita, originating from Sicily, is a semi-frozen dessert that can be made with various flavors, but the blood orange version is particularly popular for its bold color and flavor profile. Unlike sorbet, granita is known for its coarse texture, which is achieved through a meticulous freezing process. This dessert is surprisingly simple to make at home, requiring only a few ingredients and basic kitchen tools. The key to a perfect granita lies in the quality of the blood oranges and the careful technique used to achieve the right texture.
Ingredients for 4-6 servings:
- 4 cups fresh blood orange juice (about 10-12 blood oranges)
- 1/3 cup granulated sugar
- 1 tablespoon lemon juice
- 1 teaspoon orange zest
Cooking Instructions:
- Juice the Blood Oranges: Start by juicing enough blood oranges to yield 4 cups of fresh juice. Strain the juice through a fine mesh sieve to remove any pulp and seeds, guaranteeing a smooth liquid.
- Prepare the Mixture: In a medium saucepan, combine the blood orange juice, granulated sugar, lemon juice, and orange zest. Stir over medium heat until the sugar has completely dissolved. This should take about 2-3 minutes. Remove from heat and let the mixture cool to room temperature.
- Freeze the Mixture: Pour the cooled mixture into a shallow baking dish or pan. Place it in the freezer, guaranteeing it sits flat. Allow it to freeze for about 30 minutes.
- Scrape the Granita: After 30 minutes, use a fork to scrape the frozen edges of the mixture towards the center. Return the dish to the freezer and repeat this process every 30 minutes for about 3-4 hours, or until the entire mixture is frozen and has a light, flaky texture.
- Serve: Once the granita has reached the desired consistency, use a fork to fluff it. Serve immediately in chilled bowls or glasses for the best texture.
Extra Tips:
For the best results, use fresh, ripe blood oranges, as they provide the richest flavor and deepest color. If blood oranges are out of season or unavailable, you can substitute with regular oranges, though the flavor and color will differ slightly.
To enhance the presentation, consider garnishing your granita with a sprig of mint or a thin slice of blood orange. Additionally, if you prefer a sweeter dessert, adjust the sugar to taste after dissolving it in the juice mixture.
Grapes and Prosecco Jelly
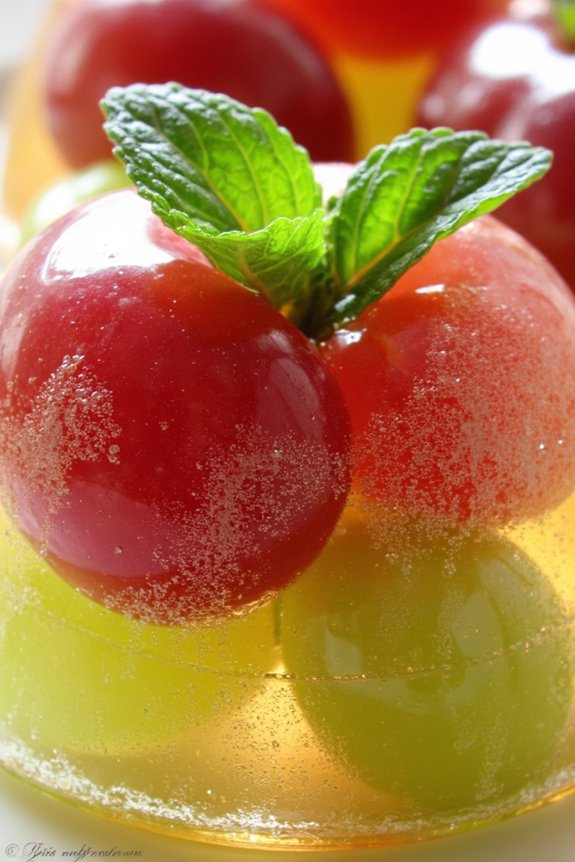
Indulge in the delightful elegance of Grapes and Prosecco Jelly, a rejuvenating Italian dessert that perfectly blends the natural sweetness of grapes with the sparkling zest of Prosecco. This dessert is a wonderful choice for those who appreciate the subtleties of fruit-infused treats.
Perfect for summer evenings or any festive occasion, Grapes and Prosecco Jelly offers a sophisticated taste with its revitalizing burst of flavors and delicate texture.
Creating this dessert involves simple steps that capture the essence of Italian cuisine – focusing on quality ingredients and uncomplicated preparation. The effervescent Prosecco not only infuses the jelly with its distinct flavor, but also adds a light, bubbly texture that beautifully complements the juicy grapes. This recipe serves 4-6 people, making it a great option for sharing with friends and family or enjoying as a special treat for yourself.
Ingredients (serves 4-6):
- 500 grams seedless grapes (preferably a mix of red and green)
- 500 ml Prosecco
- 50 grams granulated sugar
- 6 sheets of gelatin (or equivalent powder, as per package instructions)
- 1 tablespoon lemon juice
- Fresh mint leaves (for garnish)
Instructions:
- Prepare the Grapes: Begin by washing the grapes thoroughly under cold running water. Pat them dry with a clean kitchen towel, and remove any stems. Set the grapes aside.
- Bloom the Gelatin: Place the gelatin sheets in a bowl of cold water and let them soak for about 5 minutes. If using powdered gelatin, follow the packet instructions to bloom it properly.
- Heat the Prosecco Mixture: In a medium saucepan, combine the Prosecco and granulated sugar. Heat the mixture over medium heat, stirring gently until the sugar completely dissolves. Confirm the mixture doesn’t come to a boil, as this can affect the Prosecco’s delicate flavors.
- Incorporate the Gelatin: Remove the saucepan from the heat. Gently squeeze the excess water from the gelatin sheets and add them to the Prosecco mixture, stirring until they’re fully dissolved. If using powdered gelatin, stir it in until completely dissolved. Add the lemon juice for a touch of acidity.
- Assemble the Jelly: Arrange the grapes in individual serving glasses or a large serving dish. Carefully pour the Prosecco mixture over the grapes, ensuring they’re evenly coated and submerged.
- Chill and Set: Cover the glasses or dish with plastic wrap and refrigerate for at least 4 hours, or until the jelly is fully set. This chilling time allows the flavors to meld beautifully.
- Serve: Once set, garnish the jelly with fresh mint leaves for a revitalizing touch before serving.
Extra Tips:
When preparing Grapes and Prosecco Jelly, confirm that the Prosecco is of good quality to impart the best flavor to the dessert.
If you prefer a non-alcoholic version, substitute Prosecco with sparkling grape juice or a non-alcoholic sparkling wine. To make unmolding easier, lightly grease the serving glasses or dish with a neutral-tasting oil before adding the grapes and jelly mixture.
Additionally, for a more vibrant presentation, consider using a mix of red and green grapes or even adding a few berries for an extra burst of color and flavor.
Cherry Zabaglione
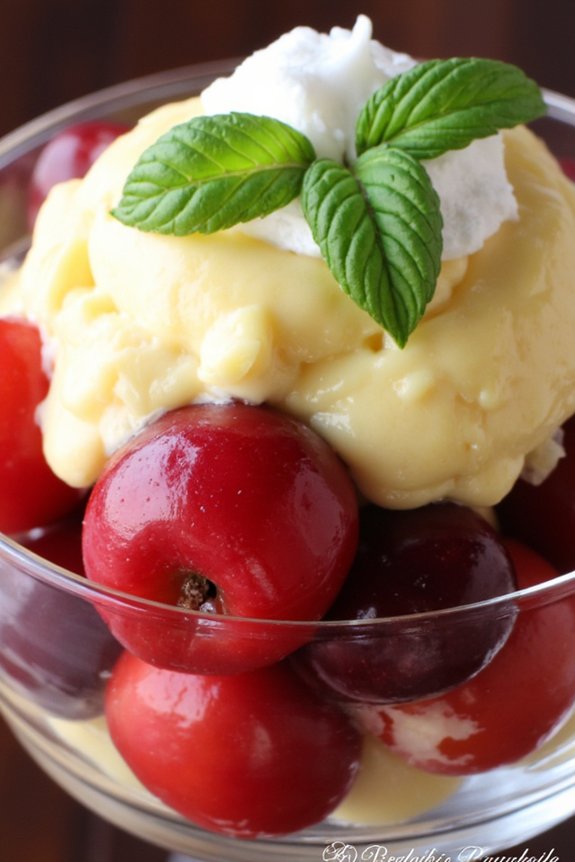
Cherry Zabaglione is a delightful Italian dessert that combines the rich, velvety texture of zabaglione with the sweet and slightly tart flavor of cherries. This luscious treat is perfect for any occasion, whether you’re hosting a dinner party or simply indulging in a sweet craving.
The zabaglione, a classic Italian custard-like dessert, is traditionally made with egg yolks, sugar, and Marsala wine. When paired with fresh cherries, it creates a harmonious blend of creamy and fruity flavors that’s both sophisticated and comforting.
This recipe for Cherry Zabaglione serves 4-6 people and is a perfect way to end a meal on a high note. The cherries provide a burst of freshness, while the zabaglione adds a layer of richness, making it an irresistible combination.
Whether you top it with whipped cream or enjoy it on its own, Cherry Zabaglione is sure to impress your guests with its delicious and elegant presentation.
Ingredients:
- 1 lb (450g) fresh cherries, pitted
- 4 large egg yolks
- 1/2 cup (100g) granulated sugar
- 1/2 cup (120ml) Marsala wine
- 1 teaspoon vanilla extract
- 1 cup (240ml) heavy cream, whipped (optional)
- Fresh mint leaves for garnish (optional)
Instructions:
- Prepare the Cherries: Start by washing and pitting the cherries. Place them in a bowl and set aside. If you prefer, you can also halve them for easier eating later.
- Set Up a Double Boiler: Fill a medium saucepan with about an inch of water and bring it to a gentle simmer. Place a heatproof bowl over the saucepan, making certain the bottom of the bowl doesn’t touch the water.
- Whisk the Yolks and Sugar: In the heatproof bowl, combine the egg yolks and granulated sugar. Whisk continuously until the mixture becomes pale and thick, about 3-4 minutes.
- Add the Marsala Wine: Gradually whisk in the Marsala wine and continue whisking over the simmering water. Keep whisking until the mixture thickens and becomes frothy, around 8-10 minutes. The zabaglione should have a light, fluffy texture.
- Incorporate the Vanilla Extract: Remove the bowl from the heat and whisk in the vanilla extract. This will enhance the flavor of the zabaglione, giving it a sweet aromatic finish.
- Combine with Cherries: Divide the pitted cherries among serving glasses or bowls. Spoon the zabaglione over the cherries, ensuring they’re well-covered.
- Chill (Optional): For a cooler dessert, allow the zabaglione to chill in the refrigerator for about 30 minutes. This step is optional if you prefer a warm dessert.
- Serve: Top with a dollop of whipped cream and garnish with fresh mint leaves if desired. Serve immediately for the best texture and flavor.
Extra Tips:
For the best results, make certain your egg yolks are at room temperature before starting, as this helps them whip up more easily.
If you don’t have Marsala wine, you can substitute it with another fortified wine like sherry or port, though it will slightly alter the flavor.
Be sure to whisk continuously while cooking the zabaglione to prevent the eggs from scrambling. If you notice the mixture getting too hot, simply lift the bowl from the heat for a few seconds while continuing to whisk.
Finally, remember that the zabaglione should be served shortly after preparation for the best taste and consistency.
Plum and Almond Biscotti
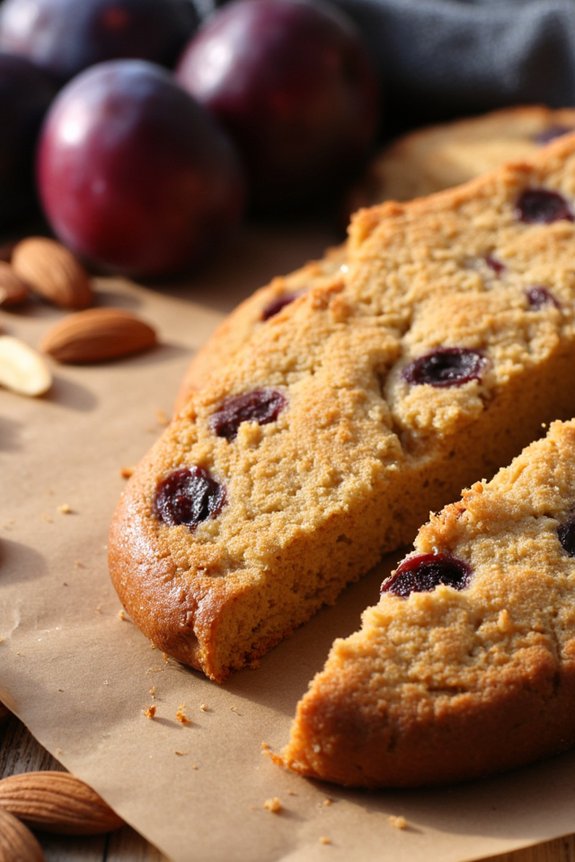
Plum and Almond Biscotti is a delightful Italian dessert that combines the sweet and slightly tart flavor of plums with the rich, nutty taste of almonds. This double-baked cookie is a perfect treat to accompany a cup of coffee or tea. The biscotti are crunchy yet slightly chewy due to the plums, making them a versatile dessert that can be enjoyed at any time of the day.
Whether you’re hosting a dinner party or simply want to indulge yourself, this recipe is certain to impress. Originating from Italy, biscotti are traditionally made with simple ingredients and are baked twice to achieve their characteristic crisp texture. This Plum and Almond Biscotti recipe is no exception, marrying the classic flavors with a modern twist of incorporating juicy plums.
The result is a delightful blend of textures and tastes that will leave you craving for more. Suitable for serving 4-6 people, these biscotti are perfect for sharing with family and friends.
Ingredients (serving size: 4-6 people):
- 2 cups all-purpose flour
- 1 teaspoon baking powder
- 1/4 teaspoon salt
- 3/4 cup granulated sugar
- 3 large eggs
- 1 teaspoon vanilla extract
- 1/2 teaspoon almond extract
- 1 cup almonds, coarsely chopped
- 1 cup dried plums (prunes), chopped
- Zest of 1 lemon
Instructions:
- Preheat the Oven: Begin by preheating your oven to 350°F (175°C). Line a baking sheet with parchment paper to prevent sticking and guarantee even baking.
- Mix Dry Ingredients: In a large mixing bowl, combine the flour, baking powder, and salt. Stir well to guarantee that the baking powder is evenly distributed throughout the flour.
- Prepare Wet Ingredients: In a separate bowl, beat the sugar and eggs together until the mixture becomes thick and pale, which should take about 3-4 minutes. Add in the vanilla and almond extracts, followed by the lemon zest, and mix until combined.
- Combine Mixtures: Gradually add the dry ingredients to the wet ingredients, mixing until a dough forms. The dough should be slightly sticky but manageable.
- Add Plums and Almonds: Fold in the chopped almonds and plums, ensuring they’re evenly distributed throughout the dough.
- Shape the Dough: Divide the dough in half and shape each half into a log about 12 inches long and 2 inches wide. Place the logs on the prepared baking sheet, leaving space between them as they’ll spread slightly during baking.
- First Bake: Bake in the preheated oven for 25-30 minutes, or until the logs are light golden brown. Remove from the oven and allow them to cool on the baking sheet for about 10 minutes.
- Slice the Biscotti: Once slightly cooled, transfer the logs to a cutting board. Using a serrated knife, slice the logs diagonally into 1/2-inch thick slices.
- Second Bake: Arrange the slices on the baking sheet, cut side down, and return them to the oven. Bake for an additional 10-12 minutes per side until the biscotti are golden and crisp.
- Cool and Serve: Allow the biscotti to cool completely on a wire rack. They’ll continue to harden as they cool. Serve with coffee, tea, or dessert wine.
Extra Tips: For the best results, verify that your plums are fresh and moist as this will enhance the chewiness of the biscotti. If your plums are too dry, you can soak them in warm water for 10 minutes before chopping.
Additionally, you may toast the almonds lightly in a skillet before adding them to the dough to enhance their flavor. Remember to use a sharp serrated knife for slicing the biscotti to avoid crumbling. Store any leftovers in an airtight container to maintain their crispness.
Raspberry and Lemon Tiramisu

Indulge in a revitalizing twist on a classic Italian dessert with this Raspberry and Lemon Tiramisu. This delightful variation combines the tartness of raspberries and the zesty flavor of lemon to create a light and fruity dessert perfect for any occasion. The creamy mascarpone layers are complemented by the tangy raspberry sauce, while the ladyfingers soak up the vibrant lemony syrup, creating a perfect balance of textures and flavors.
Whether you’re serving it at a dinner party or enjoying it as a special treat, this Raspberry and Lemon Tiramisu is sure to impress with its vibrant colors and invigorating taste.
This recipe serves 4 to 6 people and is relatively simple to prepare, making it an ideal choice for both novice and experienced cooks. With just a few key ingredients, you can create a show-stopping dessert that captures the essence of Italian cuisine with a modern twist.
The preparation requires some patience as the dessert needs to be refrigerated to allow the flavors to meld together, but the end result is well worth the wait. Gather your ingredients and get ready to commence on a culinary journey that brings a taste of Italy to your table.
Ingredients:
- 1 cup fresh raspberries
- 2 tablespoons sugar
- 1 tablespoon lemon juice
- 1 tablespoon lemon zest
- 1 cup heavy cream
- 1 cup mascarpone cheese
- 1/2 cup powdered sugar
- 1 teaspoon vanilla extract
- 1 cup brewed, cooled lemon tea
- 24 ladyfingers
- Additional raspberries and lemon zest for garnish
Instructions:
- Prepare the Raspberry Sauce: In a small saucepan over medium heat, combine the raspberries, sugar, and lemon juice. Stir occasionally until the raspberries break down and the mixture thickens slightly, about 5 minutes. Remove from heat and let it cool completely.
- Make the Lemon Cream: In a large mixing bowl, whisk together the mascarpone cheese, powdered sugar, lemon zest, and vanilla extract until smooth and creamy. In a separate bowl, whip the heavy cream until soft peaks form. Gently fold the whipped cream into the mascarpone mixture until well combined.
- Assemble the Tiramisu: Pour the brewed lemon tea into a shallow dish. Quickly dip each ladyfinger into the tea, making sure they’re soaked but not soggy. Line a 9×9-inch dish with a layer of soaked ladyfingers.
- Layer the Dessert: Spread half of the mascarpone mixture over the ladyfingers, followed by half of the raspberry sauce. Repeat with another layer of soaked ladyfingers, the remaining mascarpone mixture, and the rest of the raspberry sauce.
- Chill the Tiramisu: Cover the dish with plastic wrap and refrigerate for at least 4 hours or overnight to allow the flavors to meld and the dessert to firm up.
- Serve: Before serving, garnish the tiramisu with fresh raspberries and a sprinkle of lemon zest. Slice into squares and serve chilled.
Extra Tips:
To enhance the lemon flavor, consider adding a few drops of lemon extract to the mascarpone mixture. If fresh raspberries are unavailable, frozen raspberries can be used; just make sure they’re thawed and drained before making the sauce.
Be mindful not to over-soak the ladyfingers in the lemon tea, as they can become too soft and break apart. For a more intense raspberry flavor, add a layer of fresh raspberries in between the mascarpone layers. Enjoy this vibrant dessert with a cup of herbal tea or a glass of limoncello for an authentic Italian experience.
Apple and Cinnamon Strudel

Apple and Cinnamon Strudel is a classic Italian dessert that combines the sweet and spicy flavors of apples and cinnamon, wrapped in a deliciously flaky pastry. This dessert is perfect for a cozy family dinner or a festive gathering, bringing warmth and comfort with every bite.
With its origins tracing back to the Austro-Hungarian Empire, strudel has become a beloved treat across many European cuisines, including Italian, where it’s often enjoyed during the fall and winter months when apples are in season.
The key to a perfect Apple and Cinnamon Strudel lies in balancing the sweetness of the apples with the aromatic warmth of cinnamon, all encased in a thin, crisp pastry. Traditionally, this dessert is made with a delicate phyllo dough, which gives it its signature flaky texture. However, this recipe uses a more accessible and easy-to-handle puff pastry, making it suitable for home bakers of all skill levels.
Serve this delightful dessert warm, perhaps with a scoop of vanilla ice cream or a dollop of whipped cream, to elevate the experience.
Ingredients for 4-6 servings:
- 6 medium-sized apples (Granny Smith or Honeycrisp)
- 1 cup granulated sugar
- 1 tablespoon ground cinnamon
- 1/2 cup raisins (optional)
- 1/2 cup chopped walnuts (optional)
- 1 teaspoon vanilla extract
- 1 package (17.3 ounces) frozen puff pastry, thawed
- 1 egg, beaten
- 2 tablespoons unsalted butter, melted
- 2 tablespoons breadcrumbs
Cooking Instructions:
- Prepare the Apples: Preheat your oven to 375°F (190°C). Peel, core, and thinly slice the apples. In a large bowl, combine the apple slices with sugar, cinnamon, raisins, walnuts, and vanilla extract. Mix well to guarantee the apples are evenly coated with the sugar and spices.
- Prepare the Pastry: Roll out the thawed puff pastry on a lightly floured surface into a rectangle, about 12×16 inches. Brush the surface with melted butter and sprinkle breadcrumbs evenly over the top. The breadcrumbs will help absorb the apple juices during baking and prevent the pastry from getting soggy.
- Assemble the Strudel: Arrange the apple mixture along one of the longer edges of the pastry, leaving a 1-inch border. Carefully roll up the pastry over the filling, tucking in the sides as you go to seal the edges. Place the strudel seam side down on a parchment-lined baking sheet.
- Egg Wash and Bake: Brush the strudel with beaten egg to give it a golden, shiny finish. Make a few diagonal slits on top to allow steam to escape during baking. Bake in the preheated oven for 35-40 minutes, or until the pastry is golden brown and crispy.
- Serve: Allow the strudel to cool slightly before slicing. Serve warm with a side of vanilla ice cream or whipped cream.
Extra Tips:
For an extra layer of flavor, consider adding a splash of lemon juice to the apple mixture to balance the sweetness with a hint of tartness.
If you prefer a more traditional approach, you can use phyllo dough instead of puff pastry, but be prepared to layer and butter each sheet meticulously for that perfect flaky texture.
Finally, make sure the strudel is cooled slightly before cutting to prevent the filling from spilling out and to achieve cleaner slices. Enjoy your homemade Italian Apple and Cinnamon Strudel!
Blueberry and Ricotta Cheesecake
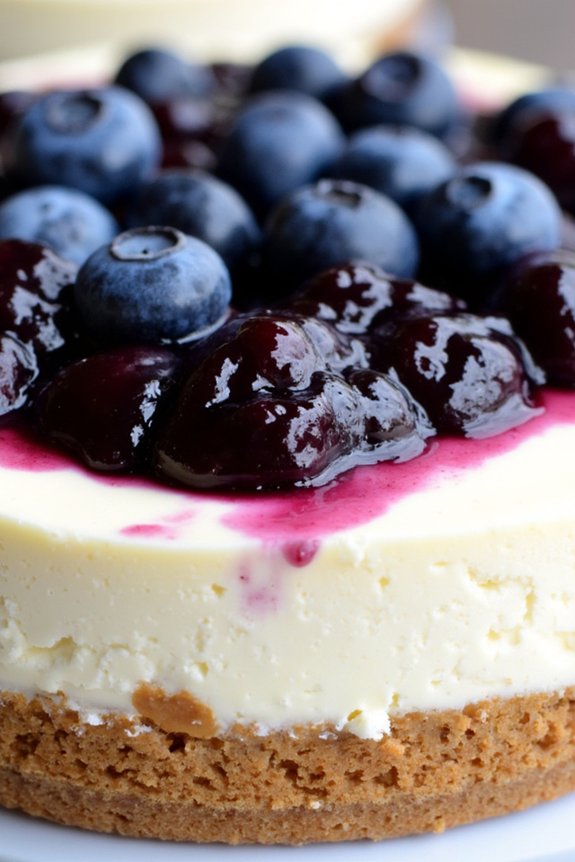
Indulge in the delightful fusion of creamy ricotta and fresh blueberries with this Italian-inspired Blueberry and Ricotta Cheesecake. This dessert pairs the subtle sweetness of ricotta cheese with the tartness of blueberries, creating a harmonious blend of flavors that will tantalize your taste buds. Perfect for any occasion, this cheesecake isn’t only a treat for the palate but also a feast for the eyes with its vibrant topping of fresh blueberries.
Crafting this cheesecake is a rewarding experience, and it’s simpler than you might think. With a base made from crushed graham crackers and a luscious filling of ricotta and cream cheese, it’s baked to perfection before being adorned with a stunning blueberry compote. This recipe is designed to serve 4-6 people, making it ideal for a small gathering or a cozy family dinner.
Ingredients (Serves 4-6):
- 1 cup graham cracker crumbs
- 1/4 cup unsalted butter, melted
- 1 1/2 cups ricotta cheese
- 1 cup cream cheese, softened
- 3/4 cup granulated sugar
- 2 large eggs
- 1 teaspoon vanilla extract
- 1 tablespoon lemon juice
- 1 cup fresh blueberries
- 1/4 cup water
- 2 tablespoons sugar
- 1 tablespoon cornstarch
Cooking Instructions:
- Preheat the Oven: Start by preheating your oven to 325°F (160°C). This will guarantee that the cheesecake bakes evenly.
- Prepare the Crust: In a medium bowl, combine the graham cracker crumbs and melted butter. Mix until the crumbs are well-coated with butter. Press this mixture firmly into the bottom of a 9-inch springform pan to form an even layer. Refrigerate while you prepare the filling.
- Mix the Filling: In a large mixing bowl, beat together the ricotta cheese, cream cheese, and sugar until smooth and creamy. Add the eggs one at a time, beating well after each addition. Stir in the vanilla extract and lemon juice until fully incorporated.
- Assemble the Cheesecake: Pour the filling over the prepared crust in the springform pan. Smooth the top with a spatula to guarantee an even surface.
- Bake: Place the cheesecake in the preheated oven and bake for 45-50 minutes, or until the center is set but still slightly jiggly. Once done, remove from the oven and let it cool at room temperature.
- Prepare the Blueberry Topping: While the cheesecake is cooling, make the blueberry topping. In a small saucepan, combine the blueberries, water, sugar, and cornstarch. Cook over medium heat, stirring frequently, until the mixture thickens and the blueberries break down slightly, about 5-7 minutes.
- Cool and Serve: Once the cheesecake has cooled, spread the blueberry topping evenly over the top. Refrigerate for at least 2 hours before serving to allow the flavors to meld and the topping to set.
Extra Tips:
For a perfect cheesecake, make sure all your ingredients are at room temperature before you start mixing. This helps in achieving a smooth and creamy texture.
When baking, avoid opening the oven door too often as this can cause the cheesecake to crack. If you notice any cracks, don’t worry! The blueberry topping will cover any imperfections beautifully.
Finally, always use fresh blueberries for the topping for the best flavor and visual appeal.