

When it comes to Italian desserts, nothing beats the creamy goodness of custards that simply melt in your mouth. From the traditional vanilla panna cotta to the refreshing limoncello semifreddo, these treats are truly magical. Each recipe offers its own delightful twist, perfect for adding a touch of elegance to any gathering. Join me as we explore Italy’s finest sweet indulgences. You won’t want to miss these comforting spoonfuls of joy!
Classic Vanilla Pannacotta
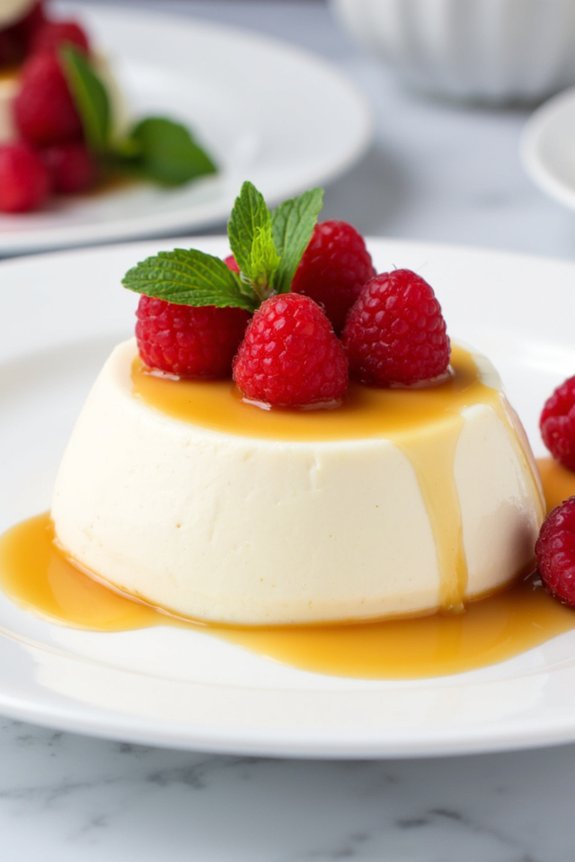
The Classic Vanilla Pannacotta is an iconic Italian dessert that translates to “cooked cream.” Known for its silky-smooth texture and rich vanilla flavor, it’s a perfect end to any meal. This delicate dessert is surprisingly easy to make, requiring minimal effort and a handful of simple ingredients.
Its versatility allows it to be served with various garnishes such as fresh berries, caramel sauce, or a sprinkle of chocolate shavings, making it a favorite among both home cooks and professional chefs.
The key to a successful pannacotta lies in achieving the perfect balance between creaminess and firmness. This is achieved by carefully measuring the gelatin, which provides the necessary structure while maintaining the dessert’s signature creaminess. The following recipe serves 4-6 people and will guide you through the process of creating this elegant dessert, guaranteeing a flawless result every time.
Ingredients:
- 2 cups heavy cream
- 1 cup whole milk
- 1/2 cup granulated sugar
- 1 vanilla bean (or 2 teaspoons pure vanilla extract)
- 2 1/2 teaspoons powdered gelatin
- 3 tablespoons cold water
Instructions:
- Prepare the Gelatin: Start by sprinkling the powdered gelatin over the cold water in a small bowl. Let it sit for about 5-10 minutes until it blooms and becomes spongy.
- Heat the Cream Mixture: In a medium saucepan, combine the heavy cream, whole milk, and granulated sugar. If using a vanilla bean, split it lengthwise and scrape out the seeds, adding both the seeds and pod to the cream mixture. Heat the mixture over medium heat, stirring occasionally until the sugar dissolves and the mixture is hot but not boiling.
- Incorporate the Gelatin: Remove the saucepan from the heat and discard the vanilla bean pod if used. Stir in the bloomed gelatin until it completely dissolves in the hot cream mixture. If using vanilla extract, add it now and stir well.
- Strain and Pour: To guarantee a silky-smooth texture, strain the mixture through a fine-mesh sieve into a large measuring cup or bowl with a spout. This will remove any undissolved gelatin or vanilla bean remnants.
- Chill the Pannacotta: Pour the strained mixture evenly into 4-6 ramekins or small serving glasses. Allow them to cool to room temperature before covering with plastic wrap and refrigerating for at least 4 hours, or until set.
- Serve: Once set, you can serve the pannacotta directly in the ramekins or gently unmold them onto dessert plates. Garnish with your choice of toppings such as fresh berries, caramel sauce, or a sprinkle of chocolate shavings.
Extra Tips:
When making pannacotta, it’s essential to avoid overheating the cream mixture as this can affect the final texture. If you accidentally allow it to come to a boil, let it cool slightly before adding the gelatin to prevent it from losing its gelling ability.
Additionally, when unmolding, dip the ramekin in warm water for a few seconds to help release the pannacotta. Always use high-quality vanilla and fresh cream for the best flavor.
Finally, prepare the dessert a day ahead to allow the flavors to develop fully, making it an ideal choice for entertaining.
Creamy Zabaglione With Marsala
Creamy Zabaglione With Marsala is a classic Italian custard dessert that’s known for its rich and velvety texture. This delectable treat is traditionally made with just a few simple ingredients, yet it delivers an incredibly luxurious flavor profile. Perfect for any special occasion or as a delightful conclusion to a family meal, Zabaglione is a versatile dessert that can be enjoyed on its own or paired with fresh fruits, biscotti, or even a dollop of whipped cream.
The key to a successful Zabaglione lies in the quality of the ingredients and the careful technique used to achieve the desired consistency. Originating from Italy, Zabaglione (or Zabaione) is a custard-like dessert made by whisking egg yolks, sugar, and a sweet wine, typically Marsala, over gentle heat until it becomes thick and creamy. The wine not only imparts a unique flavor but also contributes to the dessert’s light and airy texture.
This version of Zabaglione uses Marsala wine, which is a fortified wine from Sicily, to add depth and complexity to the dish. The result is a sophisticated dessert that’s both indulgent and invigorating, making it a favorite among dessert lovers.
Ingredients for 4-6 servings:
- 6 large egg yolks
- 1/2 cup granulated sugar
- 1/2 cup Marsala wine
- Fresh berries or biscotti (optional, for serving)
Cooking Instructions:
- Prepare a Double Boiler: Fill a medium saucepan with about an inch of water. Bring the water to a simmer over medium heat. Place a large, heatproof bowl over the saucepan, ensuring that the bottom of the bowl doesn’t touch the water.
- Whisk Ingredients: In the heatproof bowl, combine the egg yolks and sugar. Whisk vigorously until the mixture is pale and thick, about 3-4 minutes.
- Add Marsala Wine: Gradually whisk in the Marsala wine, continuing to whisk until all the ingredients are fully combined.
- Cook the Zabaglione: Place the bowl over the simmering water. Whisk the mixture constantly to prevent the eggs from scrambling. Continue whisking for about 10 minutes, or until the mixture triples in volume and becomes thick and creamy.
- Check Consistency: The Zabaglione is ready when it forms soft peaks and is thick enough to coat the back of a spoon.
- Serve Immediately: Remove the bowl from the heat and serve the Zabaglione warm. You can serve it in individual cups or glasses, garnished with fresh berries or biscotti if desired.
Extra Tips:
To guarantee the best results, use fresh, high-quality eggs and Marsala wine. It’s important to whisk continuously to prevent the eggs from curdling. If you don’t have a double boiler, you can use a makeshift one by placing a metal or glass bowl over a pot of simmering water.
Adjust the heat as necessary to maintain a gentle simmer, which helps achieve the smooth texture characteristic of a perfect Zabaglione. If you prefer a non-alcoholic version, substitute the Marsala wine with fruit juice or a non-alcoholic wine option. Enjoy this classic Italian dessert fresh, as it doesn’t store well once cooled.
Limoncello-Infused Semifreddo
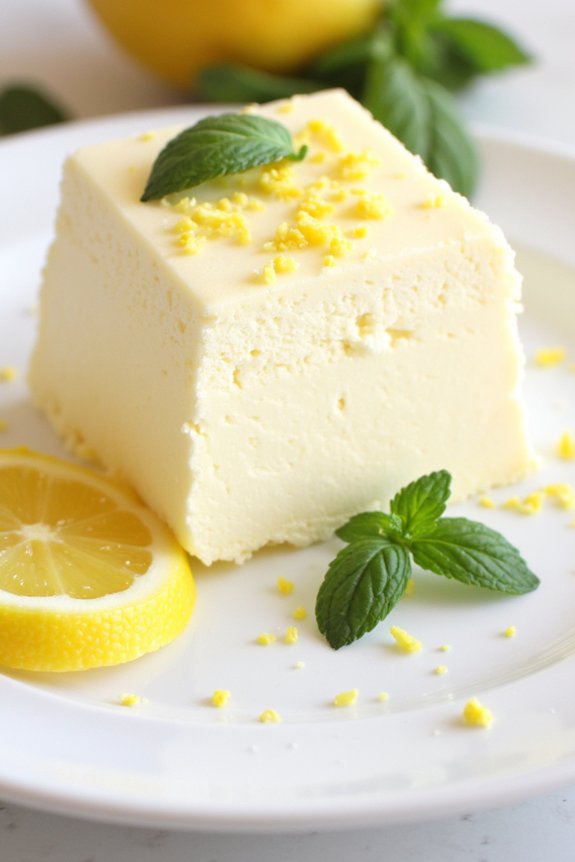
Limoncello-Infused Semifreddo is an exquisite Italian dessert that marries the invigorating zest of lemons with the creamy richness of a classic semifreddo. This frozen treat is perfect for summer gatherings or any occasion where you want to impress with a light yet indulgent dessert. The limoncello, a traditional Italian lemon liqueur, adds a distinct and aromatic citrus flavor, making this semifreddo a delightful balance of sweet, tart, and creamy textures.
This semifreddo is prepared with a combination of whipped cream, eggs, sugar, and limoncello, resulting in a luscious and airy dessert that doesn’t require churning like traditional ice cream. It’s served frozen yet maintains a soft, velvety texture that melts in your mouth. For an extra touch of elegance, serve it with a drizzle of limoncello and a sprinkle of lemon zest. This recipe serves 4-6 people, making it ideal for intimate gatherings or family dinners.
Ingredients:
- 1 cup heavy cream
- 3 large eggs, separated
- 2/3 cup granulated sugar
- 1/4 cup limoncello
- 1 teaspoon vanilla extract
- Zest of 2 lemons
- A pinch of salt
- Fresh lemon slices and mint leaves for garnish (optional)
Cooking Instructions:
- Prepare the Egg Mixture: In a heatproof bowl, combine the egg yolks and half of the granulated sugar. Place the bowl over a pot of simmering water, making sure the bottom of the bowl doesn’t touch the water. Whisk continuously for about 5 minutes until the mixture becomes pale and thickened. Remove from heat and whisk in the limoncello and vanilla extract. Set aside to cool slightly.
- Whip the Cream: In a separate large bowl, whip the heavy cream until soft peaks form. Gently fold the lemon zest into the whipped cream, being careful not to deflate the mixture.
- Beat the Egg Whites: In another clean bowl, beat the egg whites with a pinch of salt until soft peaks form. Gradually add the remaining sugar, beating until stiff peaks form.
- Combine All Mixtures: Gently fold the whipped cream into the cooled egg yolk mixture. Once combined, carefully fold in the beaten egg whites, making sure the mixture remains light and airy.
- Freeze the Semifreddo: Pour the mixture into a loaf pan lined with plastic wrap, smoothing the top with a spatula. Cover and freeze for at least 6 hours or overnight until firm.
- Serve the Semifreddo: To serve, remove the semifreddo from the freezer and let it sit at room temperature for a few minutes. Invert onto a serving plate, remove the plastic wrap, and slice. Garnish with fresh lemon slices and mint leaves if desired.
Extra Tips:
When making limoncello-infused semifreddo, verify that all your mixing bowls and utensils are completely clean and dry, especially when beating egg whites, as any trace of grease can hinder the formation of peaks.
For a more pronounced lemon flavor, consider adding a touch more lemon zest or a few drops of lemon juice to the cream. If you prefer a sweeter dessert, you can slightly increase the sugar in the egg yolk mixture.
Remember to plan ahead, as the semifreddo requires adequate time to freeze. Enjoy this deliciously invigorating dessert with a chilled glass of limoncello for the ultimate Italian experience!
Ricotta and Amaretto Custard Tart
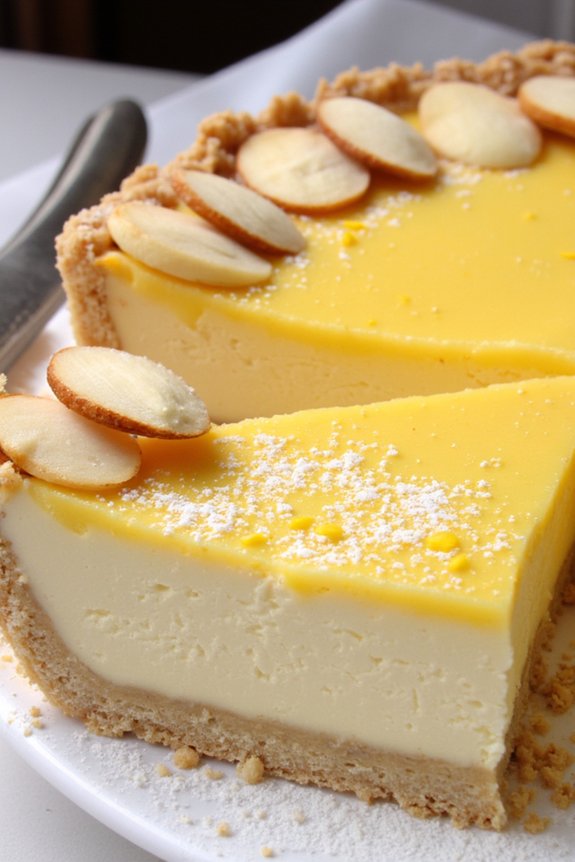
Indulge in the delightful flavors of Italy with this classic Ricotta and Amaretto Custard Tart. This dessert is a perfect blend of creamy ricotta cheese and the distinct, aromatic notes of amaretto liqueur, all encased in a crisp, buttery tart shell. The custard’s luscious texture paired with the subtle almond flavor creates an elegant dessert that’s perfect for dinner parties or simply treating yourself.
With its roots in Italian patisserie, this tart is a demonstration of the art of simple yet sophisticated desserts. This Ricotta and Amaretto Custard Tart is designed to serve 4-6 people, making it an ideal choice for intimate gatherings. The preparation involves creating a smooth custard base, baking it to perfection, and serving it either warm or chilled.
The hint of citrus zest complements the nutty undertones of the amaretto, while the pastry provides a delightful contrast to the creamy filling. The result is a dessert that’s as visually appealing as it’s delicious, sure to impress your guests and satisfy your taste buds.
Ingredients:
- 1 ½ cups ricotta cheese
- ½ cup granulated sugar
- 3 large eggs
- ¼ cup amaretto liqueur
- 1 teaspoon vanilla extract
- Zest of 1 lemon
- 1 pre-made pastry tart shell (9-inch)
- ¼ cup sliced almonds
- Powdered sugar for dusting (optional)
Cooking Instructions:
- Preheat the Oven: Preheat your oven to 350°F (175°C). This guarantees that your tart will bake evenly.
- Prepare the Custard: In a large mixing bowl, combine the ricotta cheese and sugar. Beat the mixture until smooth and creamy. Add the eggs one at a time, mixing well after each addition. Stir in the amaretto liqueur, vanilla extract, and lemon zest until all ingredients are fully incorporated.
- Fill the Tart Shell: Pour the ricotta mixture into the pre-made tart shell, spreading it evenly with a spatula. Make sure the filling is level to promote even baking.
- Add the Almonds: Sprinkle the sliced almonds evenly over the top of the custard. This will add a lovely crunchy texture to the finished tart.
- Bake the Tart: Place the tart on a baking sheet and transfer it to the preheated oven. Bake for 35-40 minutes, or until the custard is set and the top is lightly golden.
- Cool and Serve: Once baked, remove the tart from the oven and let it cool slightly. Dust with powdered sugar if desired before serving. You can serve it warm or refrigerate it for a chilled dessert.
Extra Tips:
When making the Ricotta and Amaretto Custard Tart, it’s crucial to use high-quality ricotta cheese for the best texture and flavor. If you prefer a smoother custard, you can blend the ricotta mixture with an immersion blender before pouring it into the tart shell.
Additionally, if you’re making your own tart shell, verify it’s fully baked before adding the custard to prevent a soggy bottom. Feel free to customize the tart by adding a handful of chocolate chips or fresh berries on top for an extra burst of flavor.
Chocolate Tiramisu Custard Cups
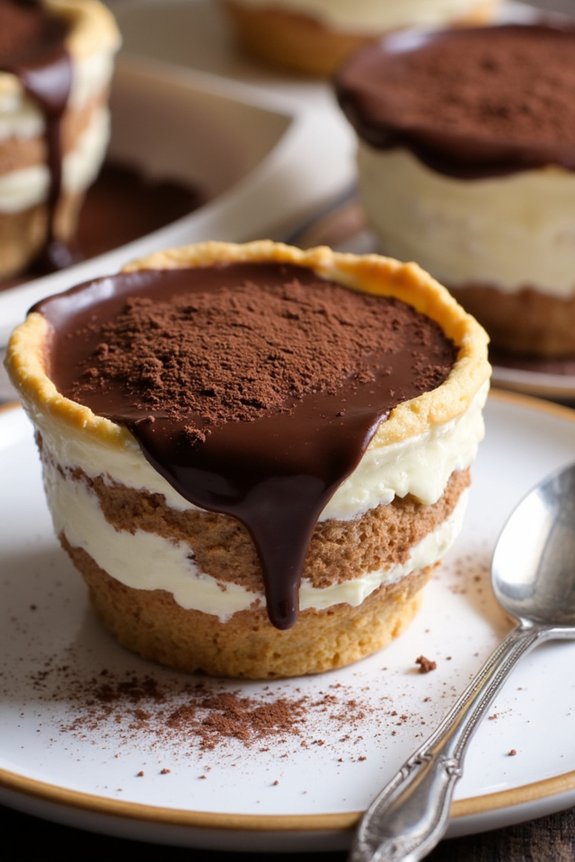
Chocolate Tiramisu Custard Cups are a delightful twist on the classic Italian dessert, combining the rich flavors of chocolate and coffee with the smooth, creamy texture of custard. This indulgent treat is perfect for dinner parties or special occasions, where you want to impress your guests with a sophisticated yet comforting dessert.
The individual serving cups make it easy to serve and enjoy, with each spoonful offering a harmonious balance of flavors. By layering the velvety chocolate custard with coffee-soaked ladyfingers, you’re creating a dessert that’s both visually appealing and deliciously satisfying.
This recipe is designed to serve 4-6 people, making it ideal for small gatherings. The key to success with Chocolate Tiramisu Custard Cups lies in using high-quality ingredients, such as fresh eggs, good-quality chocolate, and a robust espresso. The custard is enriched with a hint of liqueur, adding an extra layer of depth to the dessert.
The final touch of cocoa powder dusted on top not only enhances the chocolate flavor but also adds a touch of elegance to the presentation. With a bit of preparation and attention to detail, you’ll be able to create a stunning dessert that captures the essence of Italian cuisine.
Ingredients for 4-6 servings:
- 4 large egg yolks
- 1/2 cup granulated sugar
- 1/2 cup whole milk
- 1 cup heavy cream
- 8 ounces bittersweet chocolate, finely chopped
- 1 teaspoon vanilla extract
- 1/4 cup coffee liqueur (optional)
- 1 cup strong brewed espresso or coffee, cooled
- 12-16 ladyfinger cookies
- Unsweetened cocoa powder, for dusting
- Shaved chocolate or chocolate curls, for garnish (optional)
Instructions:
- Prepare the Custard: In a medium saucepan, whisk together the egg yolks and sugar until smooth. Gradually add the milk and cream, continuing to whisk until well combined. Place the saucepan over medium heat and cook, stirring constantly, until the mixture thickens slightly and coats the back of a spoon. Don’t let it boil.
- Melt the Chocolate: Remove the saucepan from the heat and add the chopped chocolate. Stir until the chocolate is completely melted and the mixture is smooth. Stir in the vanilla extract and coffee liqueur, if using. Let the custard cool to room temperature.
- Soak the Ladyfingers: Pour the cooled espresso or coffee into a shallow dish. Quickly dip each ladyfinger into the coffee, making sure they’re soaked but not too soggy.
- Assemble the Cups: In individual serving cups or glasses, layer the soaked ladyfingers in the bottom. Pour a layer of the chocolate custard over the ladyfingers. Repeat the layers until the cups are filled, finishing with a layer of custard on top.
- Chill: Cover the cups with plastic wrap and refrigerate for at least 4 hours, or overnight, to allow the flavors to meld and the custard to set properly.
- Serve: Before serving, dust the tops with unsweetened cocoa powder and garnish with chocolate shavings or curls if desired.
Extra Tips:
For best results, verify that the custard is completely cooled before assembling the cups to prevent the heat from melting the ladyfingers too much. If you prefer a stronger coffee flavor, you can add an additional tablespoon of espresso to the custard mixture.
Additionally, make sure to use a gentle hand when dipping the ladyfingers, as they can become overly soggy if left in the coffee for too long. Finally, these custard cups can be made a day in advance, allowing you more time to focus on other aspects of your meal preparation.
Almond Biscotti Custard Parfaits
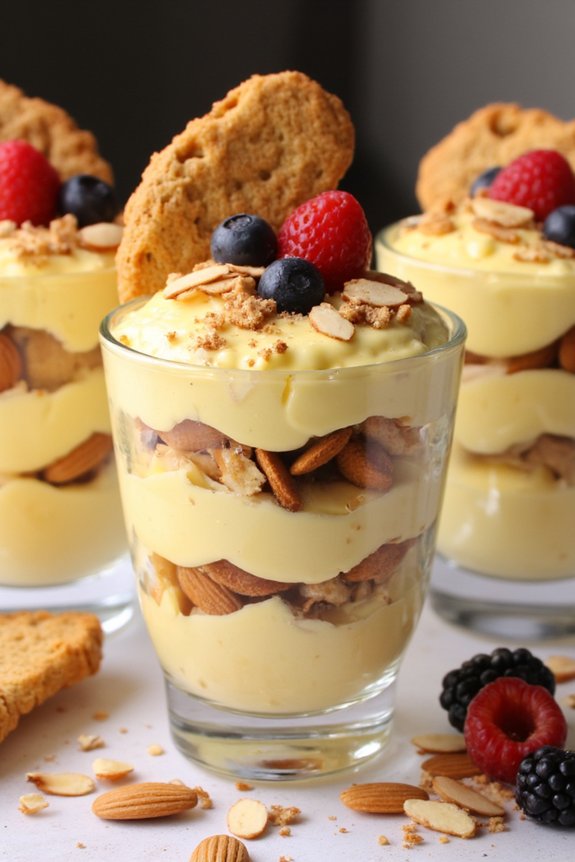
Almond Biscotti Custard Parfaits are a delightful fusion of creamy Italian custard layered with crunchy almond biscotti, making for a sophisticated yet simple dessert. This parfait combines the rich flavors of traditional Italian custard with the nutty, toasted essence of almond biscotti, creating a harmonious balance of textures and tastes.
Perfect for dinner parties or a treat to enjoy any day of the week, this dish is sure to impress with its elegant presentation and delectable flavor profile.
The beauty of this recipe lies in its simplicity and the ability to prepare components in advance, allowing you to assemble the parfaits just before serving to guarantee the biscotti remains crunchy. The custard is made with fresh ingredients, offering a velvety base that’s both rich and light. Layering this with almond biscotti and a hint of almond liqueur or extract elevates the dessert, providing a delightful crunch and an aromatic finish.
Serve these parfaits in clear glasses to showcase the beautiful layers, and garnish with a sprinkle of crushed almonds or a dollop of whipped cream for added elegance.
Ingredients (serving size: 4-6 people):
- 4 large egg yolks
- 1/2 cup granulated sugar
- 3 tablespoons cornstarch
- 2 cups whole milk
- 1 teaspoon pure vanilla extract
- 1/2 teaspoon almond extract or 1 tablespoon almond liqueur
- 1 cup heavy cream
- 12 almond biscotti, store-bought or homemade
- 1/4 cup sliced almonds, toasted
- Fresh berries (optional, for garnish)
Cooking Instructions:
- Prepare the Custard: In a medium saucepan, whisk together the egg yolks, granulated sugar, and cornstarch until smooth. Gradually add the milk, whisking continuously to prevent lumps.
- Cook the Custard: Place the saucepan over medium heat and cook the mixture, stirring constantly, until it thickens and begins to bubble. This should take about 6-8 minutes. Remove from heat and stir in the vanilla and almond extract or liqueur.
- Cool the Custard: Transfer the custard to a bowl and cover with plastic wrap, pressing it directly onto the surface of the custard to prevent a skin from forming. Allow it to cool to room temperature, then refrigerate for at least 2 hours or until chilled.
- Prepare the Whipped Cream: In a separate bowl, beat the heavy cream with an electric mixer until soft peaks form. Gently fold the whipped cream into the chilled custard until well combined.
- Assemble the Parfaits: Break the almond biscotti into large chunks. In each serving glass, layer a spoonful of the custard mixture, followed by a layer of biscotti pieces. Repeat the layers until the glasses are filled, finishing with a layer of custard.
- Garnish and Serve: Top each parfait with a sprinkle of toasted sliced almonds and, if desired, a few fresh berries. Serve immediately for the best texture contrast.
Extra Tips: For a more intense almond flavor, consider adding a few drops of almond extract to the whipped cream before folding it into the custard. If you prefer a softer texture, you can briefly dip the biscotti in a mixture of coffee or almond liqueur before layering.
This dessert can be made ahead of time; just keep the components separate until ready to serve to maintain the biscotti’s crunch.
Pistachio Custard Cannoli
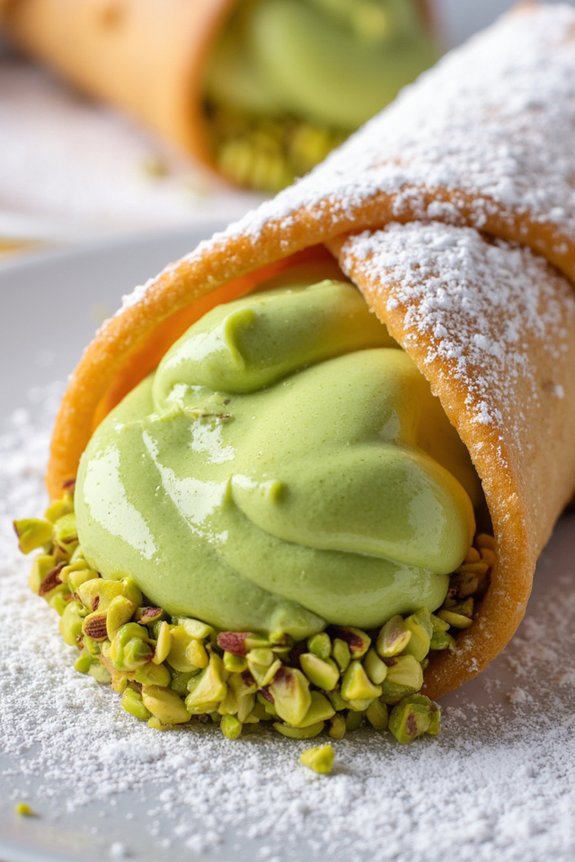
Pistachio Custard Cannoli is a delightful twist on the classic Italian dessert, combining the beloved crispy cannoli shell with a luscious pistachio-flavored custard filling. This dessert is perfect for those who enjoy a nutty and creamy treat with a touch of Italian flair. The pistachio custard filling is rich and smooth, offering a unique taste experience that pairs perfectly with the crunchy texture of the fried cannoli shells. A sprinkle of chopped pistachios on top completes the dessert, adding an extra layer of flavor and a beautiful presentation.
To prepare this delectable dessert, you’ll need to make both the pistachio custard and the cannoli shells. The custard requires careful attention to guarantee it achieves the perfect creamy consistency, while the shells need to be fried to a golden brown crisp. Once you have both components ready, filling the cannoli shells with the pistachio custard is a fun and easy task. The end result is a dessert that isn’t only visually appealing but also incredibly satisfying to taste.
Ingredients for 4-6 servings:
- 1 cup unshelled pistachios
- 3 cups whole milk
- 3/4 cup granulated sugar
- 4 large egg yolks
- 1/4 cup cornstarch
- 1 teaspoon vanilla extract
- 12 ready-made cannoli shells
- 1/2 cup chopped pistachios for garnish
- Powdered sugar for dusting
Cooking Instructions:
- Prepare the Pistachios: Begin by blanching the unshelled pistachios in boiling water for about 3 minutes. Drain and rub off the skins using a clean kitchen towel. Once peeled, finely grind the pistachios in a food processor.
- Make the Pistachio Custard: In a medium saucepan, combine the ground pistachios and whole milk. Heat gently over medium heat, stirring occasionally, until the mixture is steaming but not boiling. Remove from heat and let it infuse for about 15 minutes.
- Whisk the Egg Mixture: In a separate bowl, whisk together the granulated sugar, egg yolks, and cornstarch until smooth and pale. Slowly add the warm pistachio milk mixture to the egg mixture, whisking continuously to combine.
- Cook the Custard: Return the mixture to the saucepan and cook over low heat, stirring constantly, until the custard thickens and coats the back of a spoon, about 10 minutes. Remove from heat and stir in vanilla extract. Allow the custard to cool to room temperature, then refrigerate until chilled.
- Fill the Cannoli Shells: Once the custard is thoroughly chilled, spoon it into a piping bag. Pipe the pistachio custard into each cannoli shell, filling from both ends to guarantee even distribution.
- Garnish and Serve: Sprinkle the filled cannoli with chopped pistachios and dust with powdered sugar before serving. Enjoy them immediately for the best texture.
Extra Tips:
When making the custard, be sure to stir constantly to prevent the mixture from curdling or sticking to the bottom of the pan. If you don’t have a piping bag, a plastic sandwich bag with the corner snipped off works as a suitable substitute for filling the cannoli shells.
For an extra touch of flavor, consider adding a pinch of salt to the pistachio custard, which can enhance the nutty taste. Additionally, if you prefer homemade cannoli shells, prepare them ahead of time to focus on the custard preparation when ready to assemble the dessert.
Espresso Crème Brûlée

Espresso Crème Brûlée is an elegant Italian custard dessert that beautifully combines the rich flavors of espresso with the creamy texture of a classic crème brûlée. This sophisticated dessert is perfect for coffee lovers and makes for an impressive finale to any dinner party.
The smooth custard base is infused with a robust espresso flavor, and the signature caramelized sugar crust on top adds a delightful crunch that contrasts perfectly with the creamy custard beneath.
Creating Espresso Crème Brûlée may seem intimidating, but with a bit of patience and attention to detail, you can achieve a stunning result. The key is to carefully temper the eggs and slowly bake the custard to guarantee a silky texture.
Once baked, the custards are chilled to set, and just before serving, a layer of sugar is caramelized on top to form the iconic brûlée crust. This recipe yields 4-6 servings, making it an ideal treat for a small gathering.
Ingredients (Serves 4-6):
- 2 cups heavy cream
- 1/2 cup granulated sugar, plus extra for topping
- 4 large egg yolks
- 1 teaspoon vanilla extract
- 1/4 cup freshly brewed espresso (or strong coffee)
- Pinch of salt
Cooking Instructions:
1. Preheat and Prepare Custard Cups:
Preheat your oven to 325°F (160°C). Place 4-6 ramekins in a large baking dish or roasting pan. The ramekins should fit comfortably without touching.
2. Heat the Cream:
In a medium saucepan, combine the heavy cream and 1/2 cup of granulated sugar. Heat over medium heat until the sugar dissolves and the mixture is hot but not boiling. Remove from heat and stir in the brewed espresso and vanilla extract.
3. Prepare the Egg Mixture:
In a separate bowl, whisk together the egg yolks and a pinch of salt until well combined. Gradually pour a small amount of the hot cream mixture into the yolks, whisking constantly to temper the eggs and prevent them from curdling.
4. Combine and Strain:
Slowly add the rest of the cream mixture to the egg yolks, whisking continuously. Strain the mixture through a fine-mesh sieve into a large measuring cup or bowl to guarantee a smooth custard.
5. Fill Ramekins and Prepare Water Bath:
Divide the custard mixture evenly among the prepared ramekins. Pour hot water into the baking dish until it reaches halfway up the sides of the ramekins, creating a water bath that helps cook the custard evenly.
6. Bake the Custards:
Carefully transfer the baking dish to the preheated oven. Bake for 30-40 minutes, or until the custards are set around the edges but still slightly jiggly in the center. Remove from the oven and let the ramekins cool in the water bath for 10 minutes before transferring them to a wire rack to cool completely.
7. Chill:
Once cooled to room temperature, cover the ramekins with plastic wrap and refrigerate for at least 2 hours, or overnight, to allow the custard to set fully.
8. Caramelize the Sugar:
Just before serving, evenly sprinkle a thin layer of granulated sugar over each custard. Use a kitchen torch to melt the sugar until it forms a golden, caramelized crust. Alternatively, you can place the ramekins under a broiler for a few minutes, watching closely to prevent burning.
Extra Tips:
For the best results, guarantee the espresso is freshly brewed and strong, as it’s the star flavor in this dessert.
When caramelizing the sugar, aim for an even layer to achieve consistent caramelization. If using a broiler to caramelize, keep a close eye on the ramekins, as the sugar can burn quickly.
Finally, let the caramelized crust sit for a minute or two before serving to fully harden, providing that satisfying crack when you break through with a spoon. Enjoy your Espresso Crème Brûlée!
Sicilian Cassata With Custard Filling
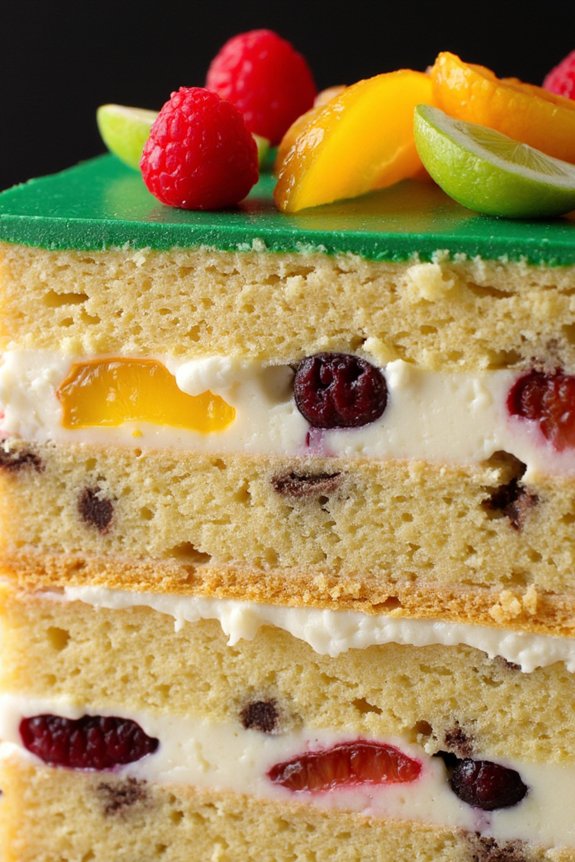
Sicilian Cassata With Custard Filling is a delightful Italian dessert that combines the rich flavors of sweet ricotta cheese, candied fruits, and a creamy custard filling, all encased in a light sponge cake. This traditional Sicilian dish is often reserved for special occasions, but its exquisite taste makes it a treat worth enjoying anytime.
The layers of cake soaked in liqueur, coupled with the luscious custard and ricotta mixture, create a symphony of flavors that’s hard to resist.
The history of cassata is deeply rooted in Sicilian culture, with influences from various civilizations that have occupied the island. The dessert’s vibrant appearance, typically adorned with colorful candied fruits, reflects the island’s rich and diverse heritage.
Making Sicilian Cassata with Custard Filling requires patience and attention to detail, as each component needs to be perfectly executed to achieve the desired balance of textures and flavors.
Ingredients (Serves 4-6):
- 1 sponge cake (about 9 inches in diameter)
- 1/2 cup of sweet liqueur (such as Marsala or Cointreau)
- 2 cups ricotta cheese
- 1 cup powdered sugar
- 1 teaspoon vanilla extract
- 1/2 cup mixed candied fruits, chopped
- 1/4 cup mini chocolate chips
- 1 cup custard or pastry cream
- 1/2 cup marzipan, colored green
- 1/2 cup candied fruit slices for decoration
Instructions:
- Prepare the Sponge Cake: Begin by slicing the sponge cake horizontally into two even layers. Place the bottom layer into a springform pan, and brush it generously with half of the sweet liqueur to moisten the cake.
- Make the Ricotta Filling: In a mixing bowl, combine the ricotta cheese, powdered sugar, and vanilla extract. Mix until smooth and creamy. Gently fold in the chopped candied fruits and mini chocolate chips until evenly distributed.
- Layer the Filling: Spread the ricotta mixture over the moistened cake layer in the springform pan. Ascertain the filling is evenly spread and smooth on top.
- Add the Custard Layer: Spread the custard or pastry cream evenly on top of the ricotta layer. Place the second layer of sponge cake on top and brush with the remaining liqueur.
- Chill the Cake: Cover the cake with plastic wrap and refrigerate for at least 4 hours or overnight to allow the flavors to meld and the cake to set.
- Decorate the Cassata: Roll out the green marzipan into a circle large enough to cover the top of the cake. Place it on top, pressing gently to adhere. Decorate with candied fruit slices, arranging them in an attractive pattern.
- Serve: Carefully remove the springform pan and transfer the cassata to a serving plate. Slice and serve chilled.
Extra Tips:
When preparing Sicilian Cassata With Custard Filling, ascertain that the ricotta cheese is well-drained to avoid a watery filling.
For an authentic touch, use high-quality candied fruits and be generous with the liqueur to achieve the traditional moistness of the cake.
Be patient with the chilling process, as it allows the flavors to develop fully. If marzipan is difficult to work with, you can slightly warm it with your hands to make it more pliable for covering the cake.
Fig and Honey Budino
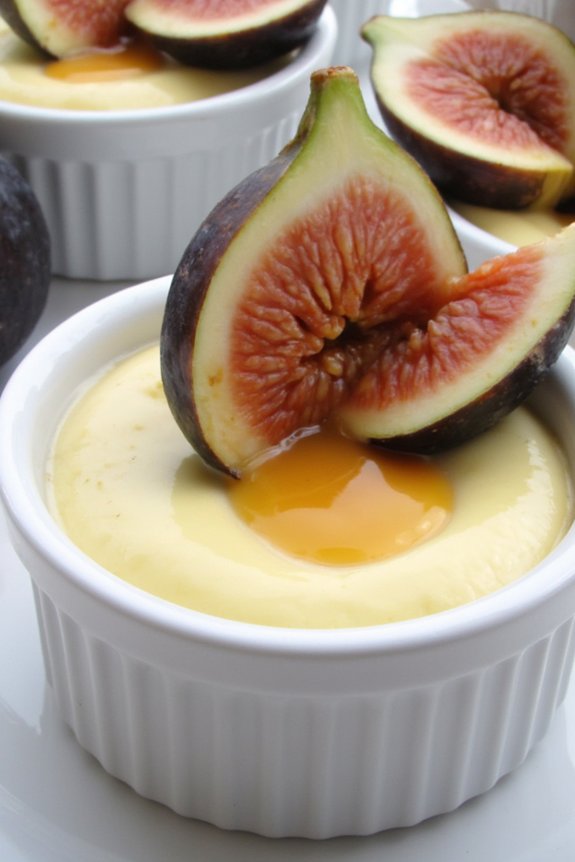
Indulge in the delightful flavors of Italy with this Fig and Honey Budino, a smooth and creamy Italian custard dessert that perfectly balances the natural sweetness of figs and honey. Budino, which means “pudding” in Italian, offers a luscious texture that melts in your mouth, making it an ideal dessert for any occasion.
This recipe brings a modern twist to the traditional Italian dessert, with the addition of fresh figs providing a fruity contrast to the rich custard. This recipe serves 4-6 people and is perfect for a dinner party or a special family meal. The preparation involves a few simple steps, and you’ll end up with a dessert that not only tastes exquisite but also looks stunning with the beautiful presentation of figs.
Whether you’re a seasoned cook or a beginner, this Fig and Honey Budino will be a delightful addition to your culinary repertoire.
Ingredients:
- 2 cups whole milk
- 1 cup heavy cream
- 1/2 cup honey
- 1 vanilla bean, split and scraped
- 4 large egg yolks
- 1/4 cup granulated sugar
- 1/4 cup cornstarch
- 1/4 teaspoon salt
- 6 fresh figs, quartered
- Additional honey for drizzling (optional)
Cooking Instructions:
- Prepare the Milk Mixture: In a medium saucepan, combine the whole milk, heavy cream, honey, and the seeds from the vanilla bean along with the pod. Heat the mixture over medium heat, stirring occasionally, until it just begins to simmer. Remove from heat and let it steep for 10 minutes to infuse the flavors.
- Whisk Egg Yolks and Sugar: In a large mixing bowl, whisk together the egg yolks, granulated sugar, cornstarch, and salt until well combined and pale in color.
- Temper the Eggs: Gradually pour the warm milk mixture into the egg yolk mixture, whisking constantly, to prevent the eggs from curdling. Once combined, return the mixture to the saucepan.
- Cook the Custard: Cook the mixture over medium heat, stirring constantly with a wooden spoon or heatproof spatula, until it thickens and comes to a gentle boil. This should take about 5-7 minutes. Once thickened, remove from heat and discard the vanilla bean pod.
- Chill the Budino: Pour the custard into individual serving dishes or ramekins. Press a piece of plastic wrap directly onto the surface of each to prevent a skin from forming. Refrigerate for at least 2 hours or until thoroughly chilled.
- Serve with Figs: Before serving, top each budino with quartered fresh figs. Drizzle with additional honey if desired for extra sweetness and a glossy finish.
Extra Tips:
When making the Fig and Honey Budino, make certain that you whisk the egg yolks and sugar until they’re light and fluffy, as this will help achieve a smooth custard texture.
It’s vital to temper the eggs slowly to avoid scrambling them, and constant stirring during cooking is critical to prevent the custard from sticking to the pan. For an added touch, consider sprinkling a pinch of sea salt over the figs before serving to enhance their flavor.
Enjoy your budino with a side of biscotti or a light dessert wine for a truly authentic Italian experience.
Orange Scented Bavarese
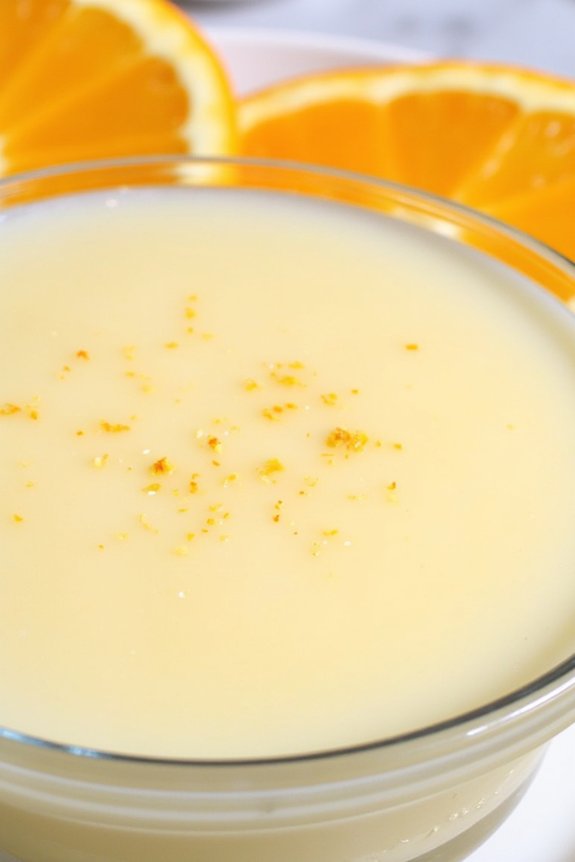
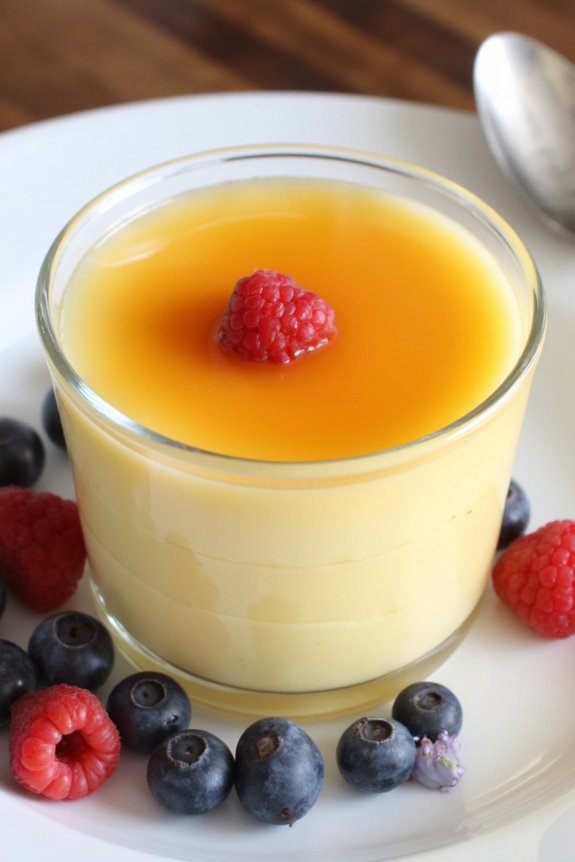
Orange Scented Bavarese is a delightful Italian custard dessert that brings together the creamy richness of custard with the zesty freshness of oranges. This elegant dessert is perfect for special occasions or as a revitalizing treat on a warm day. The vibrant citrus flavor and smooth texture make it a favorite among dessert enthusiasts who enjoy a sophisticated twist on classic sweets.
This recipe combines the traditional techniques of custard-making with a modern flair, allowing the orange aroma to infuse the dessert beautifully.
To create this exquisite dessert, you’ll need to prepare a custard base flavored with orange zest and juice, which is then mixed with whipped cream to achieve a light and airy texture. The bavarese is set with gelatin, giving it a firm yet delicate consistency that melts in your mouth.
Whether you’re an experienced cook or a novice, this recipe is straightforward and rewarding, resulting in a dessert that’s as pleasing to the eye as it’s to the palate. Let’s explore the details of creating this luscious Orange Scented Bavarese.
Ingredients (Serves 4-6):
- 1 cup whole milk
- 1 cup heavy cream
- 4 large egg yolks
- 1/2 cup granulated sugar
- 1 tablespoon orange zest
- 1/2 cup fresh orange juice
- 1 packet (about 2 teaspoons) unflavored gelatin
- 1/4 cup cold water
- 1 teaspoon vanilla extract
- A pinch of salt
Cooking Instructions:
- Prepare the Gelatin: In a small bowl, sprinkle the gelatin over the cold water and let it sit for about 5 minutes to bloom. This will guarantee it dissolves evenly in the custard.
- Heat the Milk and Cream: In a medium saucepan, combine the whole milk and heavy cream. Add the orange zest. Heat over medium heat until the mixture is hot but not boiling. Remove from heat and let it steep for about 10 minutes to infuse the flavors.
- Whisk the Egg Yolks and Sugar: In a separate bowl, whisk together the egg yolks, granulated sugar, and a pinch of salt until the mixture is pale and slightly thickened.
- Temper the Egg Mixture: Gradually add the warm milk mixture to the egg yolk mixture, whisking constantly to prevent the eggs from scrambling.
- Cook the Custard: Pour the mixture back into the saucepan and cook over low heat, stirring constantly with a wooden spoon until the custard thickens enough to coat the back of the spoon. Don’t let it boil. This should take about 5-7 minutes.
- Incorporate the Gelatin and Orange Juice: Remove the saucepan from the heat and strain the custard through a fine-mesh sieve into a clean bowl to remove the orange zest and any cooked egg bits. Stir in the bloomed gelatin until it dissolves completely. Add the fresh orange juice and vanilla extract, stirring to combine.
- Cool and Whip: Allow the custard to cool to room temperature, stirring occasionally. Once cooled, gently fold in the whipped cream until fully incorporated.
- Set the Bavarese: Pour the mixture into a mold or individual serving glasses. Cover and refrigerate for at least 4 hours or until fully set.
Extra Tips:
For a more intense orange flavor, you can add a few drops of orange extract or a splash of Grand Marnier.
Make sure not to rush the cooling process before adding the whipped cream, as a warm custard can deflate the cream, affecting the final texture.
If you prefer a firmer bavarese, slightly increase the amount of gelatin used. Serve the dessert with a garnish of fresh orange slices or a drizzle of chocolate sauce for an extra touch of elegance.