

As the temperature rises, there’s nothing quite like a refreshing Italian frozen dessert to cool things down. From creamy stracciatella gelato to the zesty chill of limoncello sorbetto, these treats are pure bliss. With flavors like juicy blood oranges and fragrant lemons, they’re perfect for any hot day. Join me as we explore these delightful Italian recipes. Let’s transform those warm afternoons with a touch of Italian sweetness.
Classic Stracciatella Gelato
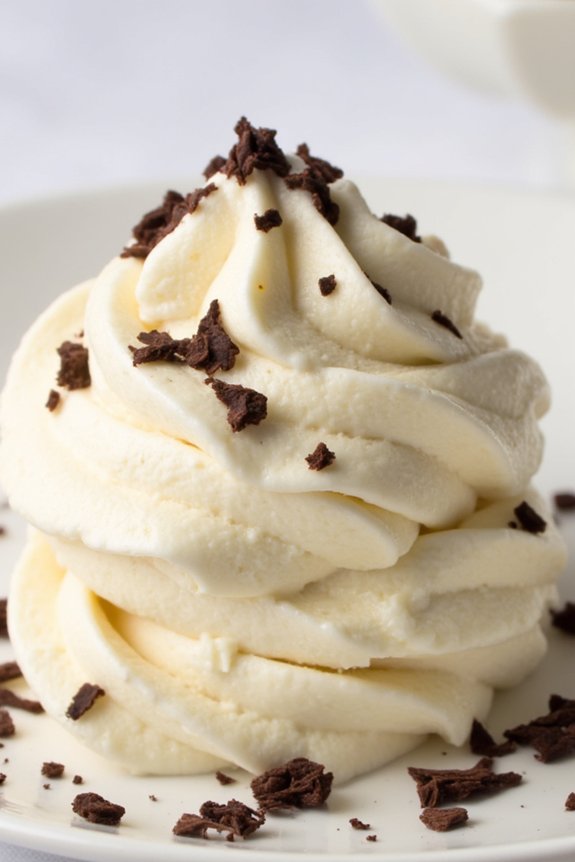
Stracciatella gelato is a beloved Italian frozen dessert that captures the essence of simplicity with its creamy base and delicate chocolate shavings. Originating from the northern region of Lombardy, this traditional gelato is a perfect blend of rich vanilla flavor and the subtle crunch of chocolate, creating a delightful contrast in every bite.
The term “stracciatella” refers to the “shredded” appearance of the chocolate, which is achieved by drizzling melted chocolate into the churning gelato, solidifying into fine strands.
This recipe will guide you through creating an authentic stracciatella gelato that serves 4-6 people. Using fresh ingredients like whole milk, heavy cream, and high-quality chocolate, you’ll be able to recreate the creamy texture and balanced flavors that are characteristic of this classic Italian treat. Whether you’re enjoying it on a warm summer day or as a special dessert, stracciatella gelato is sure to please your taste buds.
Ingredients:
- 2 cups whole milk
- 1 cup heavy cream
- 3/4 cup granulated sugar
- 1 teaspoon pure vanilla extract
- 4 large egg yolks
- 3 ounces dark chocolate (70% cacao or higher)
Cooking Instructions:
- Prepare the Base: In a medium saucepan, combine the whole milk, heavy cream, and half of the granulated sugar. Heat the mixture over medium heat, stirring occasionally, until it begins to steam but isn’t boiling.
- Whisk the Egg Yolks: In a separate bowl, whisk together the egg yolks and the remaining sugar until the mixture is pale and slightly thickened.
- Temper the Egg Mixture: Gradually add a ladleful of the hot milk mixture to the egg yolks while whisking constantly. This process is called tempering and prevents the eggs from curdling.
- Combine and Heat: Pour the tempered egg mixture back into the saucepan with the remaining milk mixture. Cook over low heat, stirring constantly with a wooden spoon, until the mixture thickens slightly and coats the back of the spoon, about 5-7 minutes. Be careful not to let it boil.
- Add Vanilla: Remove the saucepan from the heat and stir in the vanilla extract. Allow the mixture to cool to room temperature, then cover and refrigerate for at least 4 hours, or overnight for best results.
- Churn the Gelato: Once the mixture is thoroughly chilled, pour it into an ice cream maker and churn according to the manufacturer’s instructions, usually about 20-30 minutes, until it reaches a soft-serve consistency.
- Prepare the Chocolate: While the gelato is churning, melt the dark chocolate in a heatproof bowl over a pot of simmering water (double boiler method) or in the microwave in short bursts, stirring frequently.
- Create Stracciatella: In the final minutes of churning, drizzle the melted chocolate into the gelato in a thin stream. The chocolate will harden and break into tiny shards as it hits the cold gelato.
- Freeze the Gelato: Transfer the gelato to an airtight container and freeze for at least 2 hours to firm up before serving.
Extra Tips:
For the best stracciatella gelato, use high-quality ingredients, especially the chocolate, as it greatly impacts the flavor.
When drizzling the melted chocolate into the gelato, make sure it’s a thin stream to achieve the characteristic fine chocolate strands.
If you don’t have an ice cream maker, you can still make gelato by freezing the base in a shallow dish and stirring every 30 minutes to break up ice crystals until it reaches the desired consistency.
Enjoy your homemade stracciatella gelato with a sprinkle of extra chocolate shavings on top for added indulgence.
Limoncello Sorbetto
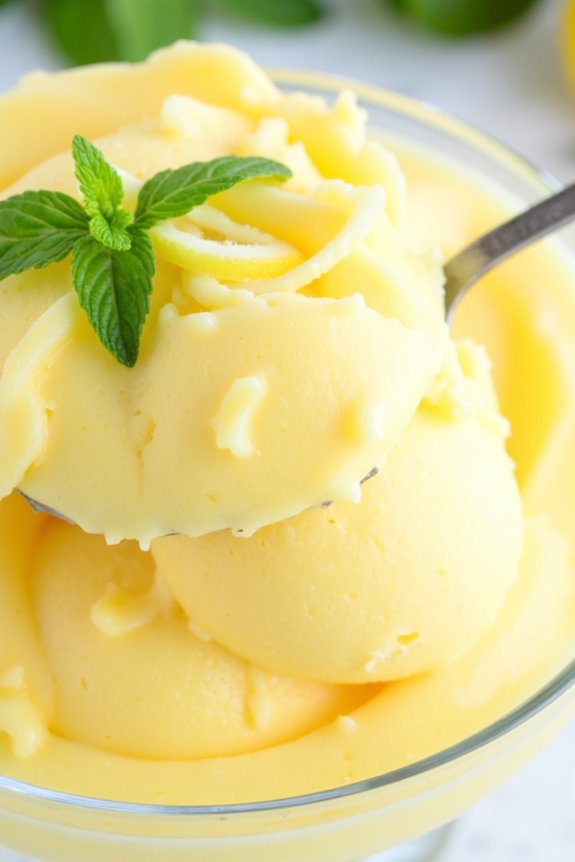
Limoncello Sorbetto is a revitalizing and delightful Italian frozen dessert that perfectly captures the zest and vibrancy of lemons. Originating from the Amalfi Coast, this sorbetto combines the tangy flavors of fresh lemon juice with the sweetness of limoncello liqueur, creating a dessert that’s both invigorating and satisfying. Ideal for hot summer days or as a palate cleanser between courses, Limoncello Sorbetto is a demonstration of the simplicity and elegance of Italian cuisine.
This recipe is designed to serve 4-6 people, making it perfect for a small gathering or family dinner. The sorbetto is easy to prepare and requires only a few ingredients, yet it delivers a burst of flavor that’s sure to impress your guests. The balance between the tartness of the lemon and the sweetness of the limoncello is key to achieving the perfect sorbetto. With just a few steps, you’ll have a homemade dessert that tastes like a scoop of sunshine.
Ingredients:
- 1 cup sugar
- 1 cup water
- 1 cup fresh lemon juice (about 4-5 lemons)
- 1/2 cup limoncello liqueur
- Zest of 2 lemons
- Pinch of salt
Instructions:
- Prepare the Simple Syrup: In a medium saucepan, combine the sugar and water. Heat over medium heat, stirring occasionally, until the sugar has completely dissolved. Once dissolved, remove from heat and let it cool to room temperature.
- Juice and Zest the Lemons: While the syrup is cooling, juice enough lemons to yield 1 cup of juice. Strain the juice through a fine-mesh sieve to remove any seeds and pulp. Zest two of the lemons and set aside.
- Mix the Ingredients: In a large mixing bowl, combine the cooled simple syrup, lemon juice, limoncello, lemon zest, and a pinch of salt. Stir well until all ingredients are fully incorporated.
- Chill the Mixture: Cover the bowl with plastic wrap and place it in the refrigerator for at least 2 hours, or until the mixture is thoroughly chilled. This step is essential for achieving the right texture in the sorbetto.
- Churn the Sorbetto: Once the mixture is chilled, pour it into an ice cream maker and churn according to the manufacturer’s instructions. This typically takes about 20-25 minutes. The sorbetto should have a smooth and thick consistency.
- Freeze the Sorbetto: Transfer the churned sorbetto into an airtight container and freeze for at least 4 hours, or until firm. This will help it set properly and allow the flavors to meld together.
Extra Tips:
For an extra burst of flavor, you can experiment with adding a few fresh mint leaves to the mixture before churning. Confirm the sorbetto mixture is very cold before churning, as this will result in a smoother texture.
If you don’t have an ice cream maker, you can place the mixture in a shallow dish in the freezer, stirring with a fork every 30 minutes until it reaches the desired consistency.
Serve the Limoncello Sorbetto in chilled glasses or bowls for a revitalizing treat, and garnish with a sprig of mint or a twist of lemon peel for an elegant presentation.
Pistachio Gelato Delight
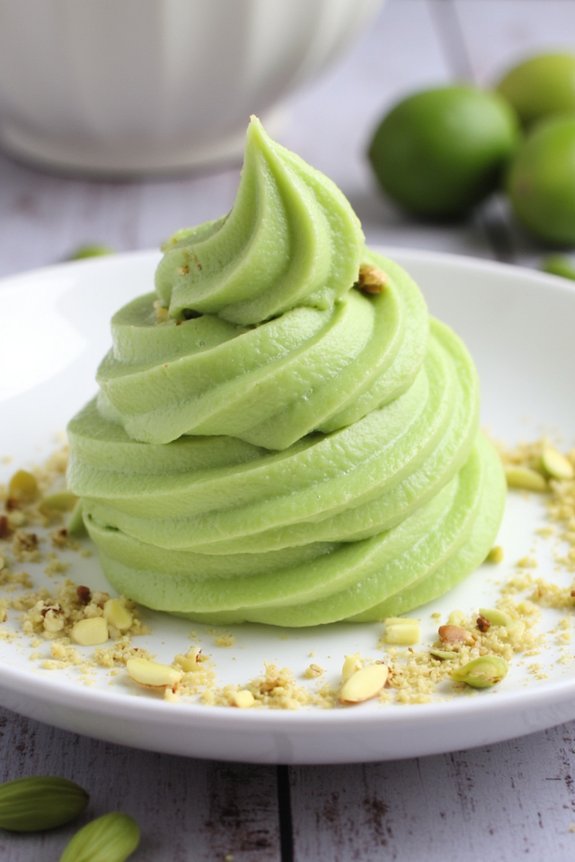
Pistachio Gelato Delight is an exquisite frozen dessert that captures the essence of Italian culinary tradition with its creamy texture and nutty flavor. This delightful gelato is perfect for warm days or as a sophisticated end to any meal. The distinctive taste of pistachios, combined with the richness of cream and milk, creates a balanced and smooth treat that’s both invigorating and indulgent.
Authentic pistachio gelato relies on high-quality pistachios, which lend their vibrant green hue and unique taste to the dessert, making it a feast for both the eyes and the palate.
Creating Pistachio Gelato Delight at home is a rewarding endeavor that allows you to appreciate the craftsmanship and care that goes into making this classic Italian dessert. The process involves making a custard base, infusing it with ground pistachios, and then churning it to achieve the perfect consistency.
With a few simple ingredients and some patience, you can enjoy homemade gelato that rivals those found in Italian gelaterias. Whether you’re serving it at a dinner party or enjoying it as a personal treat, this recipe will surely impress.
Ingredients for 4-6 Servings:
- 1 cup unsalted pistachios
- 2 cups whole milk
- 1 cup heavy cream
- ¾ cup granulated sugar
- 4 large egg yolks
- 1 teaspoon pure vanilla extract
- A pinch of salt
Cooking Instructions:
- Prepare the Pistachios: Begin by finely grinding the unsalted pistachios in a food processor until they’re almost a paste. Set this aside as it will be used to infuse the gelato base with its signature flavor and color.
- Create the Custard Base: In a medium saucepan, combine the whole milk, heavy cream, and half of the granulated sugar. Place the saucepan over medium heat and stir occasionally until the mixture begins to steam. Don’t let it boil.
- Mix the Egg Yolks and Sugar: In a separate bowl, whisk together the egg yolks, the remaining granulated sugar, and a pinch of salt until the mixture is pale and slightly thickened.
- Temper the Egg Yolks: Gradually add a ladleful of the hot milk mixture into the egg yolk mixture, whisking continuously to prevent the eggs from scrambling. Once tempered, pour the egg mixture back into the saucepan with the rest of the milk and cream.
- Cook the Custard: Stir the combined mixture over medium heat, using a wooden spoon or a heatproof spatula, until it thickens slightly and coats the back of the spoon. This should take about 5-7 minutes. Don’t let the mixture boil.
- Add Pistachios and Vanilla: Remove the saucepan from the heat and stir in the ground pistachios and vanilla extract until fully incorporated.
- Chill the Mixture: Transfer the custard into a clean bowl and cover it with plastic wrap, pressing it directly onto the surface to prevent a skin from forming. Refrigerate the mixture for at least 4 hours, or until it’s completely chilled.
- Churn the Gelato: Once chilled, pour the mixture into an ice cream maker and churn according to the manufacturer’s instructions until it reaches a soft-serve consistency.
- Freeze the Gelato: Transfer the churned gelato into an airtight container and freeze for at least 2 hours to allow it to firm up further before serving.
Extra Tips:
For an extra burst of flavor, consider toasting the pistachios lightly before grinding them to enhance their nuttiness. Confirm that your ice cream maker’s bowl is well-frozen to achieve the best consistency in your gelato.
If you prefer a smoother texture, strain the pistachio mixture through a fine mesh sieve before churning to remove any larger nut pieces. Remember, gelato is best enjoyed slightly softened, so allow it to sit at room temperature for a few minutes before serving.
Refreshing Watermelon Granita
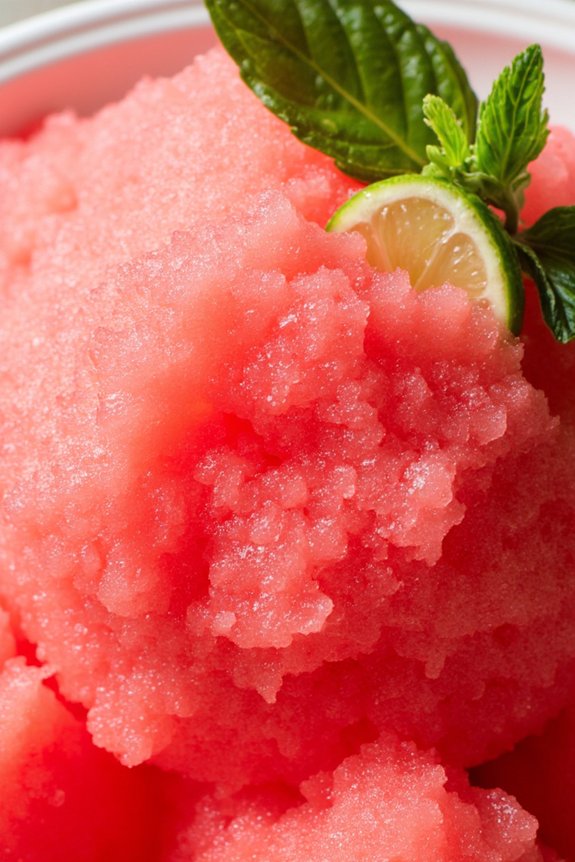
Watermelon Granita is a delightful Italian frozen dessert perfect for cooling off during hot summer days. This revitalizing treat is made by freezing blended watermelon juice and occasionally scraping it with a fork to create a light, flaky texture. The granita’s simplicity allows the natural sweetness of the watermelon to shine, making it an ideal dessert for both casual gatherings and elegant dinners.
Inspired by the traditional Sicilian granita, this watermelon version is both easy to prepare and stunningly delicious. The bright pink hue of the watermelon granita hints at its vibrant flavor, and a touch of lime juice adds a pleasant tartness that balances the sweetness.
Whether served in elegant glassware for a sophisticated presentation or in simple bowls for a relaxed vibe, Watermelon Granita is sure to impress. It’s a versatile dessert that can be customized with various garnishes such as fresh mint or a sprinkle of sea salt to enhance its flavor profile.
Ingredients (Serves 4-6):
- 4 cups watermelon, seedless and cubed
- 1/4 cup granulated sugar
- 1/4 cup water
- 2 tablespoons fresh lime juice
- Pinch of salt
Instructions:
- Prepare the Simple Syrup: In a small saucepan, combine the granulated sugar and water. Heat over medium heat, stirring occasionally, until the sugar has completely dissolved. Remove from heat and allow the simple syrup to cool to room temperature.
- Blend the Watermelon: Place the cubed watermelon in a blender. Add the cooled simple syrup, fresh lime juice, and a pinch of salt. Blend until the mixture is smooth and no chunks remain.
- Strain the Mixture: For an extra smooth granita, pour the blended watermelon mixture through a fine-mesh sieve into a shallow baking dish. Use a spatula to press down on the solids to extract as much juice as possible. Discard any remaining pulp.
- Freeze and Scrape: Place the baking dish in the freezer. After about 1 hour, use a fork to scrape the mixture, breaking up any ice crystals that have formed. Return the dish to the freezer, repeating the scraping process every 30 minutes for a total of 3-4 hours, or until the granita is fully frozen and has a flaky, icy texture.
- Serve: Once the granita is ready, fluff it with a fork once more before serving. Spoon the granita into chilled bowls or glasses, and garnish with fresh mint leaves or a lime wedge, if desired.
Extra Tips:
For the best results, choose a ripe and sweet watermelon, as the flavor will be the star of the dish. If you find your watermelon isn’t sweet enough, you can adjust the amount of sugar in the simple syrup to suit your taste.
Additionally, using a shallow baking dish will help the granita freeze more evenly and allow for easier scraping. If you prefer a more intense lime flavor, consider adding a bit of lime zest to the mixture before freezing.
Zesty Blood Orange Sorbetto
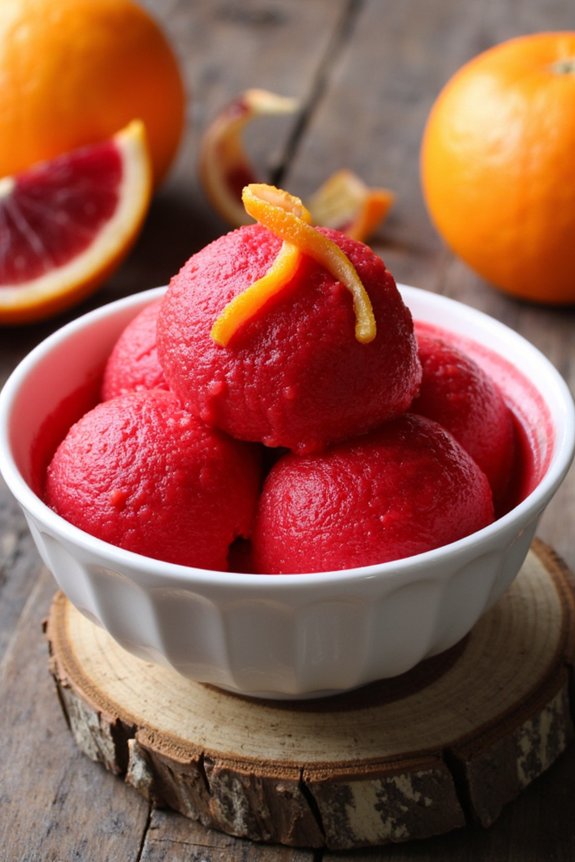
Zesty Blood Orange Sorbetto is a revitalizing and vibrant Italian frozen dessert that captures the essence of sun-kissed citrus in every bite. This sorbetto is perfect for those who crave a burst of tangy and sweet flavors, making it an ideal treat for warm days or as a palate cleanser between courses. The deep red hue of blood oranges not only adds visual appeal but also infuses the dessert with a unique taste that’s both sophisticated and invigorating.
With its simple preparation, Zesty Blood Orange Sorbetto is a delightful addition to any menu, offering a touch of Italian elegance to your dining experience. The beauty of this sorbetto lies in its minimalistic ingredient list, allowing the natural flavors of the blood oranges to shine through. By choosing ripe, juicy blood oranges, you’ll guarantee that your sorbetto is packed with flavor and sweetness.
Combined with just the right amount of sugar and a hint of lemon juice, this dessert is a proof of the idea that less is more. Whether you’re serving it at a casual family gathering or an upscale dinner party, Zesty Blood Orange Sorbetto is bound to impress with its bold flavor and striking color.
Ingredients for 4-6 servings:
- 1 ½ cups of freshly squeezed blood orange juice (about 6-8 blood oranges)
- ½ cup of granulated sugar
- 1 tablespoon of lemon juice
- Zest of one blood orange
- ¼ cup of water
Cooking Instructions:
- Juice the Blood Oranges: Begin by cutting the blood oranges in half and juicing them until you have 1 ½ cups of fresh juice. Strain the juice through a fine-mesh sieve to remove any pulp and seeds, guaranteeing a smooth texture for your sorbetto.
- Prepare the Sugar Syrup: In a small saucepan, combine the granulated sugar and water. Heat over medium heat, stirring constantly until the sugar has completely dissolved. Allow the syrup to cool to room temperature.
- Mix the Ingredients: In a mixing bowl, combine the freshly squeezed blood orange juice, cooled sugar syrup, lemon juice, and blood orange zest. Stir the mixture well to guarantee all ingredients are fully incorporated.
- Chill the Mixture: Cover the bowl with plastic wrap and place it in the refrigerator for at least 2 hours or until thoroughly chilled. This step is essential for achieving the right consistency when freezing.
- Churn the Sorbetto: Once chilled, pour the mixture into an ice cream maker and churn according to the manufacturer’s instructions until it reaches a smooth and creamy consistency. This typically takes about 20-25 minutes.
- Freeze the Sorbetto: Transfer the churned sorbetto into an airtight container and freeze for at least 4 hours, or until it firms up to your desired texture.
- Serve and Enjoy: Scoop the Zesty Blood Orange Sorbetto into bowls or cones and serve immediately, garnished with a twist of blood orange peel if desired.
Extra Tips:
When selecting blood oranges, look for ones that are heavy for their size, as this indicates juiciness. If you don’t have an ice cream maker, you can pour the mixture into a shallow dish, freeze it, and stir it every 30 minutes until it reaches a sorbet-like consistency.
For a more intense citrus flavor, consider infusing the sugar syrup with additional blood orange zest before cooling. Remember to taste the juice before adding sugar, as the sweetness of blood oranges can vary, allowing you to adjust the sugar level to your preference. Enjoy your homemade Italian frozen dessert!
Creamy Tiramisu Gelato
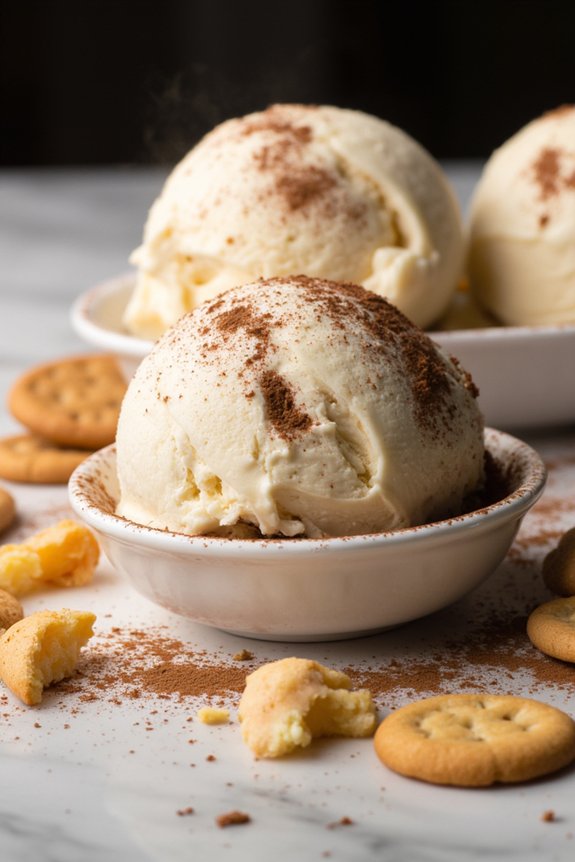
Creamy Tiramisu Gelato is a delightful Italian frozen dessert that combines the rich flavors of traditional tiramisu with the smooth, creamy texture of gelato. This delectable treat is perfect for those who love the taste of coffee, cocoa, and mascarpone cheese. The process of making this gelato involves creating a creamy custard base that’s infused with the essence of tiramisu, resulting in a luxurious dessert that’s certain to impress.
This recipe will guide you through the steps to create a luscious tiramisu gelato that serves 4-6 people, perfect for a family gathering or a dinner party. With the right ingredients and techniques, you’ll be able to enjoy a homemade gelato that rivals any Italian gelateria. The key to success lies in balancing the flavors and achieving the perfect consistency, which this recipe will help you master.
Ingredients:
- 1 cup whole milk
- 1 cup heavy cream
- 3/4 cup granulated sugar
- 5 large egg yolks
- 1/2 cup mascarpone cheese
- 1 teaspoon vanilla extract
- 2 tablespoons instant espresso powder
- 1/4 cup coffee liqueur (optional)
- 1/2 cup ladyfinger cookies, coarsely crumbled
- 2 tablespoons unsweetened cocoa powder
Instructions:
- Prepare the Base: In a medium saucepan, combine the whole milk, heavy cream, and half of the granulated sugar. Heat over medium heat, stirring occasionally, until the mixture is hot but not boiling.
- Whisk the Egg Yolks: In a separate bowl, whisk together the egg yolks and the remaining sugar until the mixture is pale and thick.
- Temper the Eggs: Slowly pour a ladleful of the hot milk mixture into the egg yolks while whisking constantly. This will temper the eggs and prevent them from curdling.
- Combine and Cook: Pour the tempered egg yolk mixture back into the saucepan with the remaining milk mixture. Cook over low heat, stirring constantly with a wooden spoon, until the mixture thickens and coats the back of the spoon. Don’t allow it to boil.
- Strain and Cool: Remove from heat and strain the custard through a fine-mesh sieve into a clean bowl to remove any cooked egg bits. Allow to cool slightly.
- Add Mascarpone and Flavorings: Stir in the mascarpone cheese, vanilla extract, espresso powder, and coffee liqueur (if using) until smooth and well combined.
- Chill the Mixture: Cover the custard with plastic wrap, pressing it directly onto the surface to prevent a skin from forming. Chill in the refrigerator until completely cold, at least 4 hours or overnight.
- Churn the Gelato: Once chilled, pour the mixture into an ice cream maker and churn according to the manufacturer’s instructions until it reaches a soft-serve consistency.
- Incorporate Ladyfingers and Cocoa: In the last few minutes of churning, add the crumbled ladyfinger cookies. Once churned, transfer half of the gelato to a container, sprinkle with cocoa powder, and layer the remaining gelato on top. Finish with another dusting of cocoa powder.
- Freeze to Set: Cover the gelato with a lid or plastic wrap and freeze for an additional 2-4 hours or until firm.
Extra Tips:
When making Creamy Tiramisu Gelato, confirm that all your ingredients are fresh and of high quality, particularly the mascarpone cheese, as it greatly influences the flavor.
For a stronger coffee flavor, you can increase the amount of espresso powder. If you don’t have an ice cream maker, you can still enjoy this gelato by freezing the mixture in a shallow container and stirring it every 30 minutes until it reaches a gelato-like consistency.
This method may take longer but still yields delicious results. Enjoy your homemade gelato with a sprinkle of cocoa powder or shaved chocolate for an extra indulgent touch.
Almond Amaretto Granita
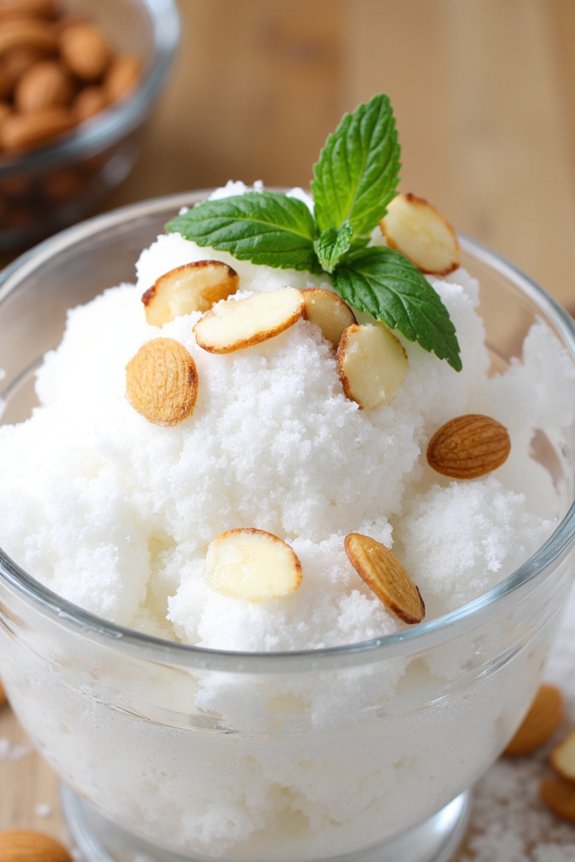
Almond Amaretto Granita is a delightful Italian frozen dessert that combines the rich flavors of almonds and amaretto liqueur into a revitalizing treat. This granita is perfect for warm weather, offering a slightly nutty and sweet flavor profile with a subtle hint of almond liquor that adds depth to the dessert.
It’s an easy-to-make dish that requires just a few ingredients and some patience as it freezes and transforms into icy crystals. Traditionally, granita is made by freezing a flavored liquid and scraping it with a fork to create a fluffy, snow-like texture. The Almond Amaretto Granita is no exception, and it brings a unique twist with its almond-enhanced flavor.
This recipe serves 4-6 people, making it ideal for small gatherings or family dinners. Enjoy this Italian frozen dessert as a palate cleanser between courses or as a sweet end to your meal.
Ingredients for 4-6 servings:
- 2 cups water
- 1 cup granulated sugar
- 1/2 cup amaretto liqueur
- 1/2 teaspoon almond extract
- 1/4 cup sliced almonds, lightly toasted
- Fresh mint leaves for garnish (optional)
Cooking Instructions:
- Prepare the Syrup: In a medium saucepan, combine 2 cups of water and 1 cup of granulated sugar. Place the saucepan over medium heat and stir frequently until the sugar has completely dissolved. This should take about 3-5 minutes. Once dissolved, remove the syrup from heat and let it cool to room temperature.
- Add Flavors: Once the syrup has cooled, stir in 1/2 cup of amaretto liqueur and 1/2 teaspoon of almond extract. Mix well to guarantee the flavors are evenly distributed throughout the syrup.
- Freeze the Mixture: Pour the mixture into a shallow baking dish or a large, shallow freezer-safe container. Place the container in the freezer for about 1 hour. After the first hour, use a fork to stir the mixture, breaking up any ice crystals that have formed. Return the container to the freezer.
- Scrape the Granita: Continue to freeze the mixture, scraping with a fork every 30 minutes, until you achieve a fluffy, snow-like texture. This process usually takes about 3-4 hours in total. The regular scraping is essential for creating the granita’s characteristic texture.
- Serve: Once the granita has reached the desired consistency, scoop it into serving glasses or bowls. Garnish with lightly toasted sliced almonds and fresh mint leaves, if desired, to add a revitalizing touch and a hint of color.
Extra Tips:
For the best texture, remember to scrape the granita regularly as it freezes. This prevents large ice crystals from forming and helps to achieve the perfect fluffy consistency.
If you find that the granita has hardened too much in the freezer, let it sit at room temperature for a few minutes before scraping it again. Additionally, using a shallow container will allow the mixture to freeze more evenly, making it easier to scrape.
If you prefer a stronger almond flavor, you can adjust the amount of almond extract to your taste. Enjoy this revitalizing dessert as a light and elegant finish to any meal.
Basil Infused Lemon Gelato
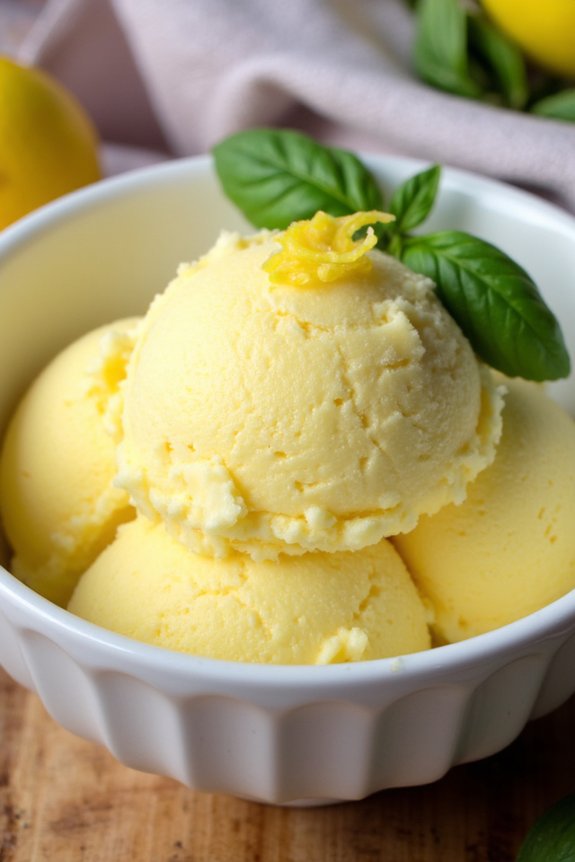
Basil Infused Lemon Gelato is a delightful Italian frozen dessert that marries the zesty tang of lemons with the aromatic freshness of basil. This unique combination not only refreshes your palate but also offers a sophisticated twist on traditional gelato flavors. Perfect for warm weather, this gelato is both a palate cleanser and a decadent treat.
The smooth, creamy texture of the gelato, contrasted with the vibrant kick from the lemon and the subtle herbal notes from basil, makes it an elevated dessert choice that’s sure to impress guests or satisfy a personal craving.
Making Basil Infused Lemon Gelato involves crafting a rich custard base, infusing it with fresh basil leaves, and brightening it with freshly squeezed lemon juice and zest. The process is methodical yet rewarding, as it allows the flavors to meld beautifully. This recipe is designed for serving 4 to 6 people, making it an ideal dessert for small gatherings or family dinners. By the time you serve it, the gelato will have a perfect balance of sweet, sour, and herby flavors.
Ingredients (Serves 4-6):
- 2 cups whole milk
- 1 cup heavy cream
- 1 cup granulated sugar
- 5 large egg yolks
- Zest of 2 lemons
- 1/2 cup freshly squeezed lemon juice
- 1 cup fresh basil leaves, packed
- A pinch of salt
Cooking Instructions:
- Prepare the Custard Base: In a medium saucepan, combine the milk, cream, and half of the sugar. Place over medium heat and stir occasionally until the mixture is hot but not boiling. Remove from heat.
- Infuse with Basil: Add the fresh basil leaves to the hot milk mixture, stirring gently. Cover the saucepan and let the basil steep for about 30 minutes to infuse its flavor into the milk.
- Whisk the Egg Yolks: In a separate bowl, whisk together the egg yolks with the remaining sugar and a pinch of salt until the mixture becomes pale and thick.
- Temper the Egg Mixture: Slowly pour the warm milk mixture into the egg yolks, whisking constantly to prevent the eggs from cooking. Once combined, return the mixture to the saucepan.
- Cook the Custard: Cook the mixture over medium-low heat, stirring constantly with a wooden spoon, until it thickens enough to coat the back of the spoon. Don’t let it boil.
- Strain and Cool: Strain the custard through a fine-mesh sieve into a clean bowl to remove the basil leaves and any cooked egg bits. Stir in the lemon zest and lemon juice.
- Chill the Mixture: Cover the custard with plastic wrap, pressing it directly onto the surface to prevent a skin from forming. Refrigerate until completely chilled, at least 4 hours or overnight.
- Churn the Gelato: Once chilled, pour the custard into an ice cream maker and churn according to the manufacturer’s instructions until it reaches a soft-serve consistency.
- Freeze the Gelato: Transfer the gelato to an airtight container and freeze for at least 2 hours before serving for a firmer texture.
Extra Tips:
For the best results, use fresh, vibrant basil leaves and ripe lemons for the most potent flavors. Additionally, ascertain that the custard is thoroughly chilled before churning to achieve a smoother texture.
If you don’t have an ice cream maker, you can still make this gelato by pouring the chilled mixture into a shallow pan, freezing it, and stirring every 30 minutes until it reaches the desired consistency. This method, while more labor-intensive, will still yield delicious results.
Enjoy your Basil Infused Lemon Gelato as a standalone dessert or pair it with fresh berries for added flair.
Fig and Honey Sorbetto
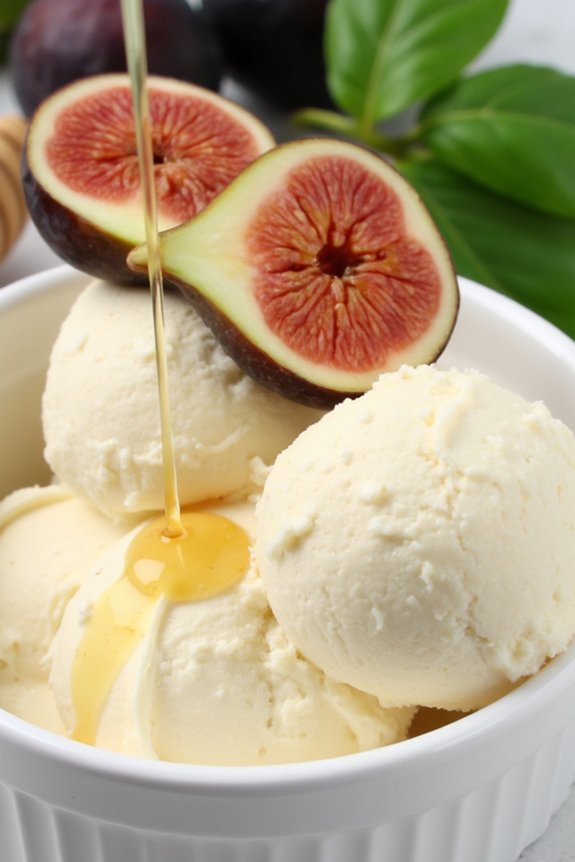
Fig and Honey Sorbetto is a delightful Italian frozen dessert that combines the natural sweetness of ripe figs with the floral notes of honey. This invigorating sorbetto is perfect for warm days when you crave something cool and light, yet still indulgent. The texture is smooth and creamy, while the flavor profile is elegantly simple, allowing the essence of the figs and honey to shine through.
Whether you’re serving it at a casual family gathering or a sophisticated dinner party, this sorbetto is sure to impress with its unique taste and velvety consistency.
Making Fig and Honey Sorbetto at home is surprisingly easy and requires only a few ingredients. The key to a delicious sorbetto lies in selecting fresh, ripe figs that are bursting with flavor. The honey not only sweetens the dessert but also enhances the richness of the figs, creating a harmonious blend that’s both invigorating and satisfying.
With a little preparation and patience, you can create this exquisite dessert that captures the essence of a sunny Italian afternoon.
Ingredients (Serves 4-6):
- 2 pounds ripe figs, stems removed and quartered
- 1 cup water
- 1/2 cup honey
- 1 tablespoon fresh lemon juice
- 1 tablespoon vodka (optional, for smoother texture)
Cooking Instructions:
- Prepare the Figs: Begin by washing the figs thoroughly and removing the stems. Quarter the figs and place them in a medium-sized saucepan.
- Cook the Mixture: Add the water and honey to the saucepan with the figs. Heat the mixture over medium heat, stirring occasionally, until the figs are soft and the honey is fully dissolved, about 10-15 minutes.
- Blend the Ingredients: Remove the saucepan from the heat and let the mixture cool slightly. Transfer the cooled mixture to a blender or food processor. Add the fresh lemon juice and vodka (if using). Blend until the mixture is smooth and no fig pieces remain.
- Strain the Mixture: Pour the blended mixture through a fine-mesh sieve into a large bowl to remove any remaining seeds or pulp, ensuring a smooth sorbetto. Use a spatula to press the mixture through the sieve if necessary.
- Chill the Mixture: Cover the bowl with plastic wrap and refrigerate the mixture for at least 2 hours, or until thoroughly chilled.
- Churn the Sorbetto: Once chilled, pour the mixture into an ice cream maker and churn according to the manufacturer’s instructions until it reaches a soft-serve consistency, usually around 20-25 minutes.
- Freeze the Sorbetto: Transfer the sorbetto to an airtight container and freeze for at least 2 hours, or until firm enough to scoop.
- Serve: Scoop the Fig and Honey Sorbetto into bowls or cups and enjoy immediately as an invigorating dessert.
Extra Tips:
For the best results, make sure to use figs that are ripe and flavorful, as they’re the star of this dish. If figs aren’t in season, consider using dried figs, but soak them in water overnight to rehydrate them before cooking.
The addition of vodka is optional but recommended, as it prevents large ice crystals from forming and results in a smoother texture. If you don’t have an ice cream maker, you can still make this sorbetto by placing the mixture in the freezer and stirring it vigorously every 30 minutes until it reaches the desired consistency.
This method requires a bit more effort but ensures that you can still enjoy this delightful dessert without specialized equipment.
Chocolate Hazelnut Gelato
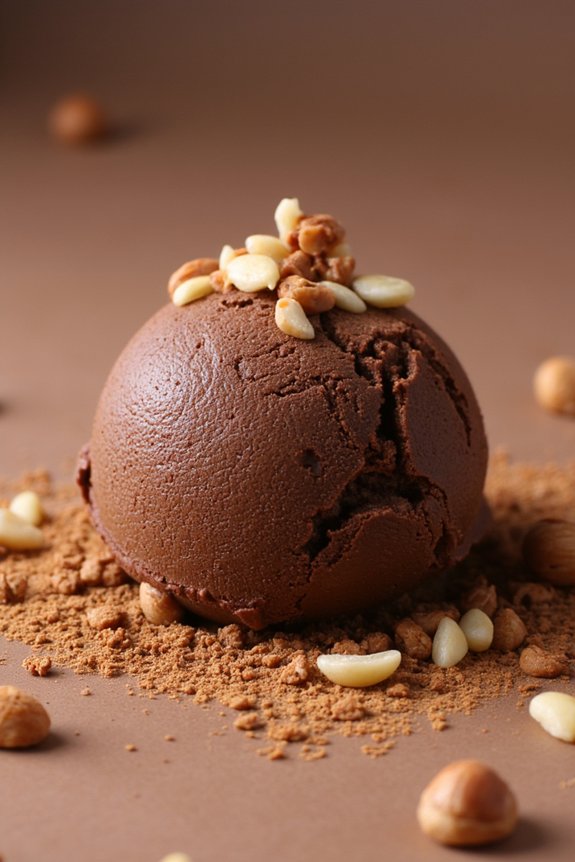
Chocolate Hazelnut Gelato is a decadent Italian frozen dessert that combines the rich flavors of chocolate with the nutty essence of hazelnuts. Originating from Italy, gelato is known for its dense and creamy texture, achieved by using more milk than cream and less air than traditional ice cream. This particular recipe elevates the classic gelato by infusing it with a delightful chocolate hazelnut spread, making it a favorite among chocolate lovers.
The key to a perfect Chocolate Hazelnut Gelato lies in balancing the flavors while maintaining the smooth texture that gelato is known for. This recipe serves 4-6 people and is perfect for an elegant dinner party or a simple family dessert. The combination of high-quality cocoa powder, chocolate hazelnut spread, and roasted hazelnuts creates a luxurious treat that’s both satisfying and indulgent, capturing the essence of Italian dessert culture.
Ingredients (Serves 4-6):
- 2 cups whole milk
- 1 cup heavy cream
- 3/4 cup granulated sugar
- 1/2 cup unsweetened cocoa powder
- 1/2 cup chocolate hazelnut spread
- 1 teaspoon pure vanilla extract
- 1/2 cup roasted hazelnuts, finely chopped
- 4 large egg yolks
- A pinch of salt
Cooking Instructions:
- Prepare the Base: In a medium saucepan, combine the whole milk, heavy cream, and half of the granulated sugar. Heat over medium heat, stirring occasionally, until the mixture is hot but not boiling.
- Mix Cocoa and Hazelnut: In a separate bowl, whisk together the cocoa powder and chocolate hazelnut spread until smooth. Gradually add this mixture to the warm milk and cream, whisking until fully incorporated.
- Whisk Egg Yolks and Sugar: In another bowl, whisk the egg yolks with the remaining sugar until the mixture is pale and thick. Slowly add a ladle of the hot milk mixture into the yolks, whisking constantly to temper the eggs.
- Combine and Cook: Pour the tempered egg yolk mixture back into the saucepan with the rest of the milk mixture. Cook over low heat, stirring constantly, until the mixture thickens and coats the back of a spoon, about 5-7 minutes.
- Add Flavorings: Remove the saucepan from the heat and stir in the vanilla extract and a pinch of salt. Allow the mixture to cool to room temperature, then refrigerate for at least 4 hours or overnight.
- Churn the Gelato: Once the mixture is thoroughly chilled, pour it into an ice cream maker and churn according to the manufacturer’s instructions. In the last few minutes of churning, add the finely chopped roasted hazelnuts.
- Freeze and Serve: Transfer the gelato to an airtight container and freeze for at least 2 hours before serving. This will allow the gelato to firm up to the ideal consistency.
Extra Tips:
When making Chocolate Hazelnut Gelato, using high-quality ingredients will greatly impact the final flavor. Choose a good quality chocolate hazelnut spread and cocoa powder for the best results.
If you don’t have an ice cream maker, you can still make this gelato by freezing the mixture in a shallow dish and stirring it every 30 minutes until it reaches the desired consistency.
Remember that gelato is best enjoyed fresh, so plan to consume it within a few days for best taste and texture.
Peach Bellini Granita

Peach Bellini Granita is a delightful Italian frozen dessert that captures the essence of a classic cocktail in a rejuvenating and icy form. This granita is perfect for those hot summer days when you need a cool treat that also tantalizes your taste buds with the flavors of ripe peaches and sparkling wine. The dessert is easy to make and involves minimal ingredients, allowing the natural sweetness of the peaches to shine through.
Whether you’re hosting a summer gathering or simply want to enjoy a special treat at home, Peach Bellini Granita is sure to impress.
The beauty of granita lies in its simplicity and texture, which is achieved by scraping the mixture as it freezes to create delicate ice crystals. This process guarantees that each spoonful is light and airy, providing a wonderful contrast to the intense peach flavor. The addition of sparkling wine brings a touch of sophistication and effervescence, making it a perfect choice for any occasion.
With just a little preparation, you can create this elegant dessert that pays homage to the traditional Italian granita while adding a modern twist with the flavors of the classic bellini cocktail.
Ingredients (Serves 4-6):
- 4 ripe peaches, peeled and pitted
- 1/2 cup sugar
- 1 cup sparkling wine (Prosecco or Champagne)
- 1 tablespoon lemon juice
- Fresh mint leaves for garnish (optional)
Instructions:
- Prepare the Peaches: Begin by peeling and pitting the ripe peaches. Cut them into small chunks and place them in a blender or food processor.
- Blend the Mixture: Add the sugar, sparkling wine, and lemon juice to the peaches in the blender. Blend the mixture until it’s smooth and well combined.
- Strain the Puree: Pour the blended mixture through a fine-mesh sieve into a shallow baking dish to remove any remaining solids and achieve a smooth texture.
- Initial Freeze: Place the baking dish in the freezer. After about 45 minutes, check the mixture. It should begin to freeze around the edges.
- Scrape the Granita: Using a fork, scrape the icy edges into the center of the dish. Return it to the freezer.
- Repeat the Process: Every 30 minutes, continue to scrape the mixture with a fork, breaking up any large ice crystals, until the entire mixture is frozen and has a fluffy texture. This will take about 3-4 hours.
- Serve: Once the granita is ready, fluff it with a fork again before serving. Spoon the granita into chilled glasses or bowls and garnish with fresh mint leaves if desired.
Extra Tips:
For peak flavor, use ripe, juicy peaches as they contribute greatly to the sweetness and overall taste of the granita. If peaches are out of season, you can substitute them with high-quality frozen peaches.
When choosing sparkling wine, a dry Prosecco or Champagne works best as it balances the sweetness of the peaches and sugar. Remember to serve the granita immediately after preparation to enjoy its invigorating texture at its best.
If you have leftovers, store them in the freezer and re-fluff with a fork before serving again.
Raspberry Ricotta Gelato
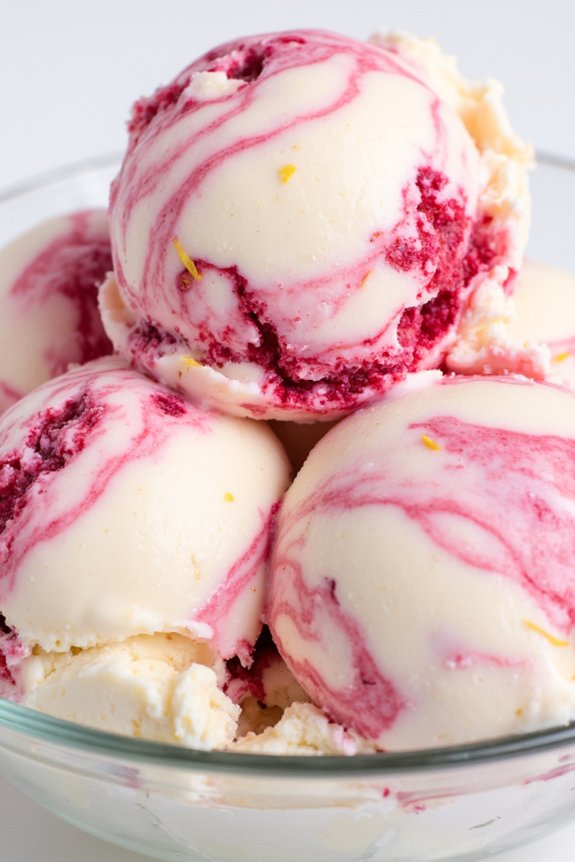
Raspberry Ricotta Gelato is a delightful fusion of creamy ricotta cheese and the sweet-tart flavor of raspberries, creating a revitalizing Italian frozen treat perfect for hot summer days.
This gelato is a beautiful blend of textures and tastes, with the smoothness of ricotta balancing the vibrant, juicy raspberries. The result is a dessert that’s both indulgent and invigorating, making it an ideal choice for entertaining guests or simply treating yourself.
Making Raspberry Ricotta Gelato at home is surprisingly straightforward and requires just a few simple ingredients. The key to achieving a creamy texture lies in the quality of the ricotta cheese and fresh raspberries.
This recipe is perfect for serving 4-6 people, allowing you to share this delicious treat with family and friends. The addition of a hint of lemon zest enhances the fruity notes of the raspberries, while sugar and cream provide the necessary sweetness and richness.
Ingredients:
- 2 cups fresh raspberries
- 1 cup ricotta cheese
- 1 cup heavy cream
- 1/2 cup granulated sugar
- 1 tablespoon lemon zest
- 1 teaspoon vanilla extract
- Pinch of salt
Cooking Instructions:
- Prepare the Raspberries: Start by washing the raspberries thoroughly and pat them dry with a paper towel. Place them in a small bowl and gently mash them with a fork or potato masher until they break down into a chunky puree.
- Mix Ricotta and Sugar: In a separate large mixing bowl, combine the ricotta cheese and granulated sugar. Use a whisk to blend until the sugar is fully dissolved and the mixture is smooth.
- Add Cream and Flavorings: Pour the heavy cream into the ricotta mixture, followed by the vanilla extract, lemon zest, and a pinch of salt. Stir the mixture gently until everything is well combined.
- Incorporate the Raspberries: Carefully fold the raspberry puree into the ricotta and cream mixture. Confirm the raspberries are evenly distributed, giving the gelato a beautiful marbled effect.
- Chill the Mixture: Cover the bowl with plastic wrap and place it in the refrigerator for at least 2 hours. This chilling process helps the flavors meld together and makes it easier to churn.
- Churn the Gelato: Once chilled, pour the mixture into an ice cream maker and churn according to the manufacturer’s instructions. This usually takes about 20-25 minutes until the gelato reaches a soft-serve consistency.
- Freeze for Firmness: Transfer the churned gelato into an airtight container and freeze for an additional 2-4 hours, or until it reaches the desired firmness.
Extra Tips:
For the best results, use high-quality, fresh ricotta cheese to guarantee a creamy texture and authentic flavor.
If fresh raspberries aren’t available, frozen raspberries can be used as a substitute, just make sure to thaw them completely and drain any excess liquid before mashing.
To prevent the gelato from becoming too hard in the freezer, allow it to sit at room temperature for a few minutes before serving. This will make scooping easier and enhance the overall enjoyment of the dessert.
Cantaloupe Sorbetto
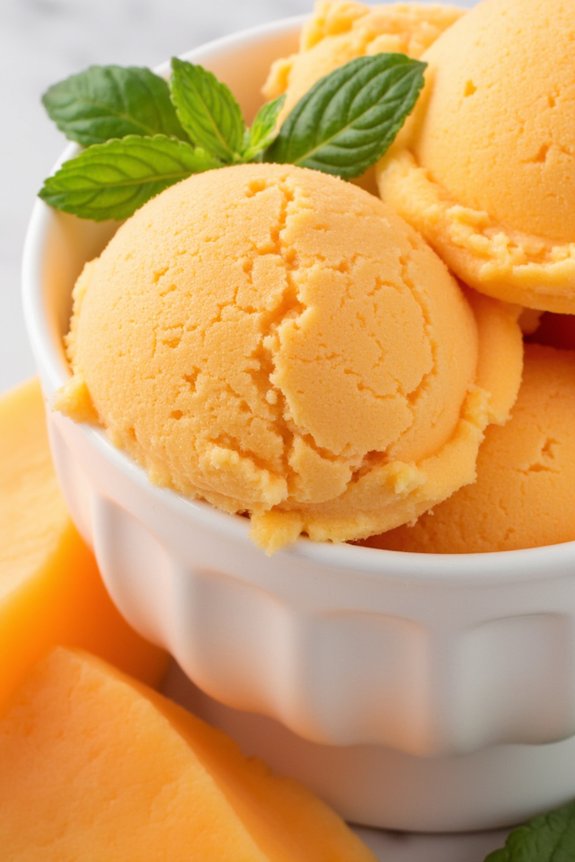
Cantaloupe Sorbetto is a revitalizing Italian frozen dessert that highlights the natural sweetness and delicate flavor of ripe cantaloupe. Perfect for a hot summer day, this sorbetto is light, fruity, and incredibly easy to make. The key to a successful Cantaloupe Sorbetto lies in selecting a perfectly ripe cantaloupe, as its sweetness will define the final flavor of the dessert.
With just a few simple ingredients and a bit of patience, you’ll have a delightful treat that’s both elegant and satisfying. This sorbetto is ideal for serving at casual gatherings or as a palate cleanser during a multi-course meal. Its vibrant color and smooth texture make it visually appealing, while the fresh melon taste is sure to impress.
Best of all, this dessert is naturally vegan and gluten-free, making it an inclusive choice for a variety of dietary preferences. With this easy-to-follow recipe, you can bring a taste of Italy into your home and enjoy a delightful, homemade frozen dessert that celebrates the essence of summer.
Ingredients (serving size: 4-6 people):
- 1 large ripe cantaloupe
- 1 cup granulated sugar
- 1/2 cup water
- 2 tablespoons freshly squeezed lemon juice
- 1 tablespoon vodka (optional, to improve texture)
- Pinch of salt
Cooking Instructions:
- Prepare the Cantaloupe: Start by cutting the cantaloupe in half and removing the seeds. Using a melon baller or a spoon, scoop out the flesh of the cantaloupe and transfer it to a blender or food processor. Blend until smooth and set aside.
- Make the Simple Syrup: In a small saucepan, combine the sugar and water. Heat over medium heat, stirring occasionally, until the sugar has completely dissolved. Remove from heat and allow to cool to room temperature.
- Combine Ingredients: In a large mixing bowl, combine the pureed cantaloupe, cooled simple syrup, lemon juice, and a pinch of salt. If using, add the tablespoon of vodka. Stir until all the ingredients are well incorporated.
- Chill the Mixture: Cover the bowl with plastic wrap and refrigerate the mixture for at least 2 hours, or until thoroughly chilled. This step is essential for ensuring a smooth texture when freezing.
- Freeze the Sorbetto: Pour the chilled mixture into an ice cream maker and churn according to the manufacturer’s instructions, usually about 20-25 minutes, until it reaches a soft-serve consistency.
- Final Freeze: Transfer the churned sorbetto to a lidded, freezer-safe container. Smooth the top with a spatula, cover, and freeze for at least 4 hours, or until firm.
- Serve: Before serving, let the sorbetto sit at room temperature for a few minutes to soften slightly. Scoop into bowls and enjoy.
Extra Tips:
For the best flavor, choose a cantaloupe that’s fragrant and slightly soft to the touch at the stem end. If you don’t have an ice cream maker, you can freeze the mixture in a shallow dish and stir it every 30 minutes until it reaches the desired consistency.
The addition of vodka is optional but helps prevent the sorbetto from becoming too icy. If serving at a formal event, garnish with fresh mint leaves for an added touch of elegance.
Espresso Affogato Delight
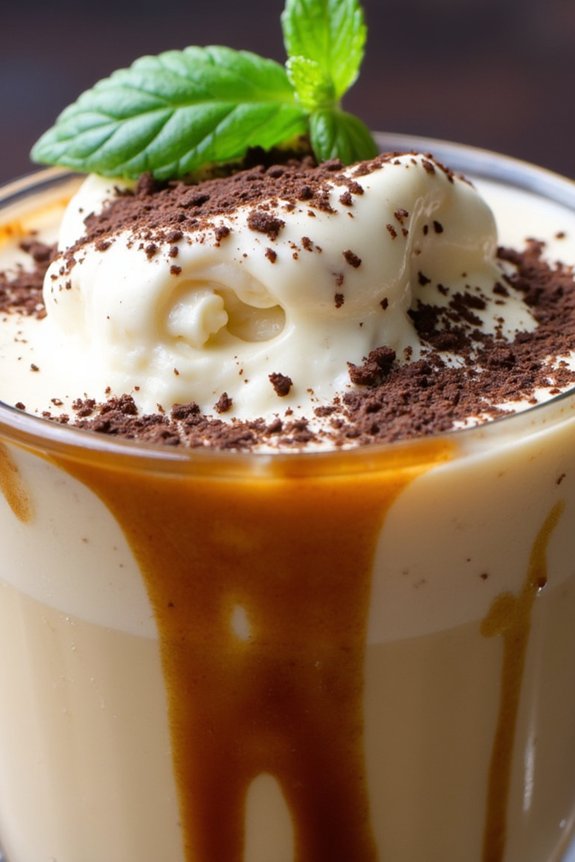
The beauty of Espresso Affogato Delight lies in its simplicity and the quality of its ingredients. By using only the best vanilla gelato and freshly brewed espresso, each bite offers a harmonious blend of flavors, with the bitterness of the coffee perfectly complementing the sweetness of the gelato. This recipe can easily be adjusted to serve 4-6 people, making it an excellent choice for entertaining guests or enjoying with family.
Ingredients (Serving Size: 4-6 people):
- 1 quart of high-quality vanilla gelato
- 6 shots of freshly brewed espresso
- Optional toppings: shaved dark chocolate, crushed amaretti cookies, or a splash of coffee liqueur
- Fresh mint leaves for garnish (optional)
Instructions:
- Prepare the Gelato: Begin by scooping generous portions of vanilla gelato into serving bowls or glasses. Aim for 1-2 scoops per person, depending on the size of your scoops and the serving size preference.
- Brew the Espresso: Use an espresso machine or a stovetop espresso maker to brew 6 shots of fresh espresso. Confirm the espresso is hot and strong for the best flavor.
- Assemble the Affogato: Once your espresso is ready, quickly pour one shot of the hot espresso over each serving of gelato. The hot espresso will start to melt the gelato slightly, creating a creamy coffee-infused dessert.
- Add Optional Toppings: If desired, sprinkle shaved dark chocolate or crushed amaretti cookies on top for added texture and flavor. Alternatively, you can add a splash of coffee liqueur for an adult twist.
- Garnish and Serve: Finish each serving with a fresh mint leaf for a pop of color, if using. Serve immediately while the espresso is still warm and the gelato retains its coolness.
Extra Tips:
For the best results, use high-quality vanilla gelato and freshly brewed espresso to guarantee a rich and authentic flavor. If you don’t have an espresso machine, a strong, dark roast coffee can be a suitable substitute.
Experiment with different toppings to find your perfect combination, but remember to serve the affogato quickly after pouring the espresso to maintain the contrast between hot and cold.