

When the sun is shining and summer days seem endless, there’s nothing quite like the refreshing flavors of Italian desserts to bring joy and cool relief. Think about enjoying a scoop of zesty Limoncello Sorbet or the creamy indulgence of Peach and Amaretto Gelato. These delightful treats, made with simple ingredients and bursting with vibrant taste, offer a little escape in each bite. Ready to discover more delicious ways to sweeten your summer? Let’s explore some bright Italian dessert recipes that are perfect for those warm, sunny days.
Limoncello Sorbet

Limoncello Sorbet is a revitalizing Italian dessert that captures the essence of summer with its vibrant citrus flavor. This sorbet is perfect for cooling down during the hot months, offering a delightful balance of sweet and tangy notes. The key ingredient, limoncello, is a traditional Italian lemon liqueur that infuses the sorbet with a distinct and invigorating taste.
When combined with fresh lemon juice, it creates a palate-cleansing treat that’s both sophisticated and easy to make. This recipe for Limoncello Sorbet serves 4-6 people and can be made with a few simple ingredients. The process is straightforward, requiring minimal preparation and allowing the natural flavors to shine through.
Whether served as a dessert following a meal or enjoyed as a revitalizing snack on a warm afternoon, this sorbet is sure to impress with its elegant simplicity and delightful flavor profile.
Ingredients:
- 1 cup of water
- 1 cup of granulated sugar
- 1 cup of limoncello
- 1/2 cup of freshly squeezed lemon juice
- Zest of 2 lemons
- Fresh mint leaves for garnish (optional)
Instructions:
- Prepare the Sugar Syrup: In a medium saucepan, combine the water and granulated sugar over medium heat. Stir continuously until the sugar is fully dissolved, creating a clear syrup. This should take about 5 minutes. Remove from heat and let it cool to room temperature.
- Mix the Ingredients: Once the sugar syrup has cooled, add the limoncello, freshly squeezed lemon juice, and lemon zest to the syrup. Stir the mixture well to guarantee all components are fully integrated.
- Chill the Mixture: Pour the mixture into a shallow dish or a bowl, cover it with plastic wrap, and place it in the refrigerator. Allow it to chill for at least 2 hours, or until it’s thoroughly cold.
- Freeze the Sorbet: Once the mixture is well chilled, pour it into an ice cream maker and churn according to the manufacturer’s instructions until it reaches a smooth, sorbet-like consistency. This typically takes about 20-25 minutes.
- Set the Sorbet: Transfer the churned sorbet into an airtight container and place it in the freezer for an additional 2-3 hours to allow it to firm up further.
- Serve: Scoop the limoncello sorbet into bowls or dessert cups. Garnish with fresh mint leaves if desired, and serve immediately for the best texture and flavor.
Extra Tips:
For the best results, use freshly squeezed lemon juice and high-quality limoncello, as these ingredients are essential for the flavor. If you don’t have an ice cream maker, you can still make this sorbet by placing the mixture in the freezer and stirring it every 30 minutes until it reaches the desired consistency. This will take longer but will still yield a delicious result.
Finally, if you prefer a less sweet sorbet, you can reduce the sugar slightly or add more lemon juice to taste.
Peach and Amaretto Gelato
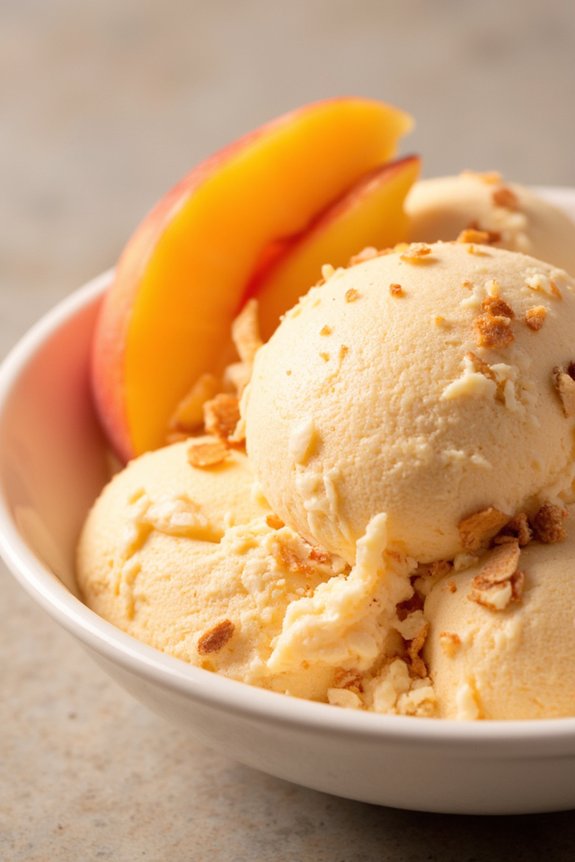
Peach and Amaretto Gelato is a delightful Italian summer dessert that combines the sweet and juicy flavor of ripe peaches with the aromatic almond essence of amaretto liqueur. This creamy and luscious gelato is perfect for cooling down on hot days and is a sophisticated treat that can impress your guests at any gathering.
The smooth texture of the gelato, paired with the natural sweetness of peaches and a hint of almond, creates a harmonious blend that captures the essence of summer in Italy.
Crafting this dessert at home is a rewarding experience, as it allows you to enjoy a fresh and homemade version without the need for artificial flavors or preservatives. Making gelato might seem intimidating, but with a few simple ingredients and some patience, you can achieve a consistency and flavor that rivals any gelateria.
The use of fresh peaches is essential as it provides a natural sweetness and bright color, while the amaretto liqueur adds a sophisticated twist that elevates the dessert to a gourmet level.
Ingredients for 4-6 servings:
- 4 ripe peaches, peeled and pitted
- 3/4 cup granulated sugar
- 1 tablespoon lemon juice
- 1 cup whole milk
- 1 cup heavy cream
- 1/4 cup amaretto liqueur
- 4 large egg yolks
- A pinch of salt
Cooking Instructions:
- Prepare the Peaches: Start by peeling and pitting the peaches. Cut them into small chunks and place them in a blender or food processor. Add the lemon juice and blend until smooth. You should have about 1 1/2 cups of peach puree.
- Create the Custard Base: In a medium saucepan, combine the whole milk and heavy cream. Heat over medium heat until small bubbles form around the edges, but don’t bring to a boil. Remove from heat.
- Mix the Egg Yolks: In a separate bowl, whisk together the egg yolks, sugar, and a pinch of salt until the mixture becomes pale and thick.
- Temper the Eggs: Gradually add the warm milk mixture to the egg mixture, whisking continuously to prevent the eggs from cooking. Once combined, pour the mixture back into the saucepan.
- Cook the Custard: Place the saucepan over medium heat and cook the mixture while stirring constantly with a wooden spoon. Cook until the custard thickens and coats the back of the spoon, about 5-7 minutes. Don’t allow it to boil.
- Combine with Peach Puree: Remove the custard from the heat and stir in the peach puree and amaretto liqueur. Mix until well combined.
- Chill the Mixture: Pour the mixture into a bowl and cover with plastic wrap, pressing it directly onto the surface to prevent a skin from forming. Refrigerate for at least 4 hours, or until thoroughly chilled.
- Churn the Gelato: Once chilled, pour the mixture into an ice cream maker and churn according to the manufacturer’s instructions. This usually takes about 20-25 minutes.
- Freeze the Gelato: Transfer the churned gelato to a lidded container and freeze for at least 2 hours or until firm enough to scoop.
Extra Tips:
For the best results, guarantee that the peaches are ripe and full of flavor, as this will directly impact the taste of your gelato. If you prefer a chunkier texture, you can reserve some diced peaches to fold into the gelato after churning.
Additionally, if you don’t have an ice cream maker, you can pour the mixture into a shallow dish and freeze it, stirring every 30 minutes until it reaches the desired consistency. This method will result in a slightly less creamy gelato but will still be delightful.
Tiramisu Semifreddo
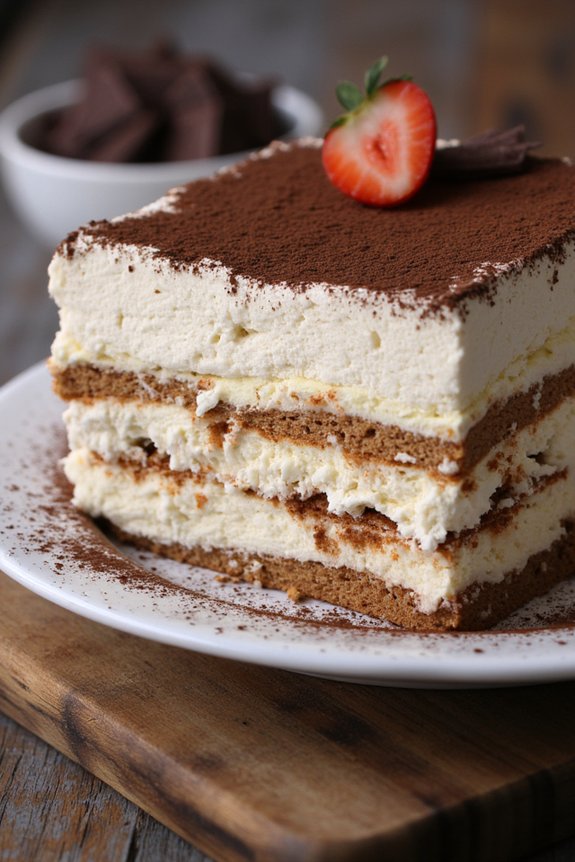
Tiramisu Semifreddo is a delightful twist on the classic Italian dessert, tiramisu. This frozen version combines the rich flavors of mascarpone cheese, espresso, and cocoa, all layered with ladyfinger biscuits, to create a revitalizing treat that’s perfect for warm summer days.
The semifreddo, meaning “half-cold” in Italian, maintains the creamy texture of traditional tiramisu but offers a lighter, airier bite, making it an excellent dessert to enjoy after a hearty Italian meal.
This no-bake dessert is easy to prepare and can be made well in advance, giving you more time to enjoy the company of family and friends. The key to a successful Tiramisu Semifreddo lies in balancing the flavors and textures, guaranteeing each bite is a harmonious blend of coffee-soaked biscuits and velvety mascarpone cream.
Whether you’re hosting a summer gathering or simply craving a sweet Italian indulgence, this recipe is sure to impress your guests with its elegant presentation and delectable taste.
Ingredients (serving size: 4-6 people):
- 4 large eggs, separated
- 3/4 cup granulated sugar
- 1 cup mascarpone cheese
- 1 cup heavy cream
- 1 teaspoon vanilla extract
- 1 cup strong espresso, cooled
- 3 tablespoons coffee liqueur (optional)
- 24-30 ladyfinger biscuits
- Unsweetened cocoa powder, for dusting
- Dark chocolate shavings, for garnish (optional)
Cooking Instructions:
- Prepare the Egg Mixture: In a large bowl, whisk the egg yolks with half of the sugar (3/8 cup) until the mixture becomes pale and creamy. This should take about 3-4 minutes.
- Add Mascarpone: Gently fold in the mascarpone cheese into the yolk mixture, making sure it’s well combined and smooth. Set aside.
- Whip the Cream: In a separate bowl, whip the heavy cream with the vanilla extract until soft peaks form. Carefully fold the whipped cream into the mascarpone mixture, maintaining the airy texture.
- Beat the Egg Whites: In another clean bowl, beat the egg whites until they form soft peaks. Gradually add the remaining sugar and continue to beat until the mixture is glossy and forms stiff peaks.
- Combine Mixtures: Gently fold the whipped egg whites into the mascarpone and cream mixture. Be careful not to deflate the mixture.
- Prepare the Espresso Mixture: Combine the cooled espresso and coffee liqueur (if using) in a shallow dish. Briefly dip each ladyfinger into the espresso mixture, ensuring they’re soaked but not soggy.
- Assemble the Semifreddo: Line a loaf pan with plastic wrap, allowing the wrap to hang over the edges. Begin layering by placing a layer of soaked ladyfingers at the bottom, followed by half of the mascarpone mixture. Repeat with another layer of ladyfingers and the remaining mascarpone mixture.
- Freeze: Cover the semifreddo with the overhanging plastic wrap and freeze for at least 4 hours, or until firm.
- Serve: Before serving, remove the semifreddo from the freezer and let it sit for a few minutes to soften slightly. Dust the top with cocoa powder and garnish with dark chocolate shavings if desired. Slice and serve chilled.
Extra Tips:
When making Tiramisu Semifreddo, confirm that all ingredients are fresh and at room temperature, especially the eggs, for best texture and flavor.
If you prefer a more intense coffee flavor, increase the espresso or coffee liqueur slightly, but be cautious not to overpower the delicate mascarpone cream.
For a creative twist, consider adding a layer of fresh berries or a hint of cinnamon to the mascarpone mixture for added depth and visual appeal.
Always remember to gently fold the mixtures to maintain the light and airy texture characteristic of a perfect semifreddo.
Ricotta and Lemon Cannoli

Ricotta and Lemon Cannoli is a delightful and invigorating Italian dessert that perfectly captures the essence of summer. This classic treat is a marriage of crunchy, lightly fried pastry shells filled with a creamy, sweet ricotta cheese mixture infused with zesty lemon. The balance of flavors and textures makes it a perfect conclusion to a summer meal.
Whether you’re hosting a dinner party or simply craving a sweet indulgence, these cannoli are sure to impress your guests and satisfy your sweet tooth.
Originating from Sicily, cannoli have been a staple of Italian pastry for centuries. This version adds a revitalizing twist with the addition of lemon, which enhances the creamy ricotta filling. The preparation involves making the dough for the shells, then piping in the delicious ricotta filling. While the process is somewhat involved, the result is a deliciously rewarding dessert that’s well worth the effort. This recipe serves 4-6 people, making it perfect for sharing with friends and family.
Ingredients:
- 1 3/4 cups all-purpose flour
- 1 tablespoon granulated sugar
- 1/2 teaspoon salt
- 2 tablespoons unsalted butter, chilled and cubed
- 1 large egg
- 1/4 cup white wine
- Vegetable oil, for frying
- 2 cups ricotta cheese, drained
- 1 cup powdered sugar
- 1 teaspoon vanilla extract
- Zest of 2 lemons
- 1/4 cup candied lemon peel, finely chopped (optional)
- 1/4 cup mini chocolate chips (optional)
- Powdered sugar, for dusting
Instructions:
1. Prepare the Dough for Shells:
In a medium bowl, mix together the flour, granulated sugar, and salt. Add the chilled butter and use your fingers or a pastry cutter to incorporate it into the flour until the mixture resembles coarse crumbs.
2. Form the Dough:
In a small bowl, beat the egg and wine together. Gradually add this to the flour mixture, stirring until a dough forms. Knead the dough on a floured surface for about 5 minutes until smooth. Wrap in plastic wrap and refrigerate for at least 1 hour.
3. Make the Filling:
In a large bowl, combine the ricotta cheese, powdered sugar, vanilla extract, lemon zest, and candied lemon peel (if using). Mix until smooth and creamy. Gently fold in the chocolate chips (if using). Cover and refrigerate until needed.
4. Roll Out and Cut the Dough:
On a lightly floured surface, roll out the dough to about 1/8-inch thickness. Use a 3-inch round cutter to cut out circles. Wrap each circle around a cannoli tube (or a similar shaped object), sealing the edges with a little water.
5. Fry the Shells:
In a deep pan, heat the vegetable oil to 350°F (180°C). Fry the dough-wrapped tubes in batches for about 2-3 minutes or until golden brown. Carefully remove and drain on paper towels. Once cool, gently slide the shells off the tubes.
6. Fill the Cannoli Shells:
Just before serving, fill a piping bag with the ricotta mixture and pipe into the cooled shells. Dust the filled cannoli with powdered sugar.
7. Serve:
Arrange the filled cannoli on a serving platter and enjoy immediately for the best texture.
Extra Tips:
Ensure that the ricotta cheese is well-drained to avoid a runny filling. You can place it in a fine-mesh sieve over a bowl and refrigerate for a few hours to let the excess liquid drain away.
Additionally, when frying the shells, be cautious of the oil temperature; too hot and the shells will burn, too cold and they’ll be greasy. If you don’t have cannoli tubes, you can fashion some out of aluminum foil. Ultimately, fill the shells just before serving to keep them crisp.
Fig and Honey Panna Cotta
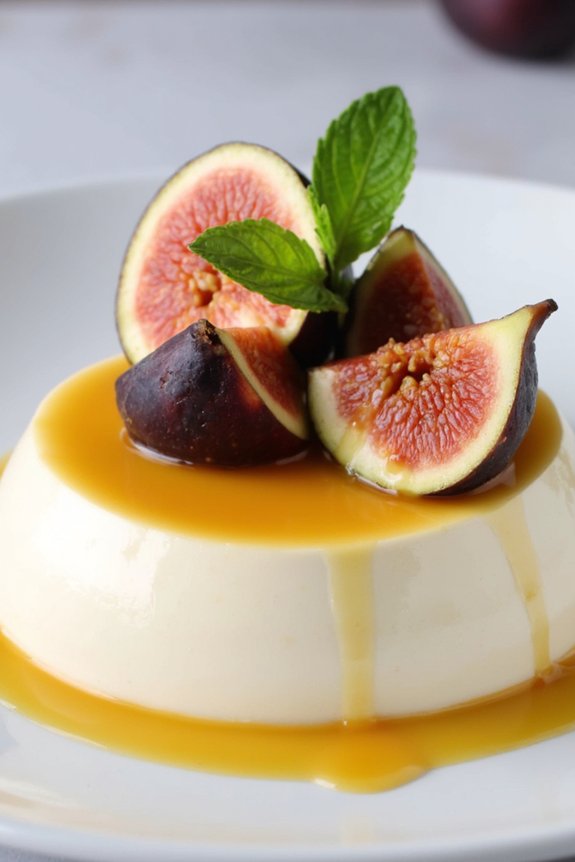
Panna cotta is a classic Italian dessert that’s both elegant and delicious. Its name literally translates to ‘cooked cream,’ and it’s known for its silky smooth texture. This version of panna cotta pairs the creamy base with the natural sweetness of figs and honey, creating a delightful summer dessert that’s sure to impress.
The figs add a rich, slightly earthy flavor that balances beautifully with the sweet honey and creamy panna cotta, making it a perfect ending to a warm summer evening meal. This Fig and Honey Panna Cotta is a must-try for anyone looking to bring a touch of Italy to their summer table.
With its simple preparation and delicate flavors, it’s a dessert that can be enjoyed by all. The recipe serves 4-6 people, making it ideal for small gatherings or family dinners. The panna cotta can be made ahead of time, allowing you to spend more time with your guests and less time in the kitchen. Below is the list of ingredients and step-by-step instructions to guide you in creating this delightful dessert.
Ingredients (Serves 4-6):
- 2 cups heavy cream
- 1 cup whole milk
- 1/2 cup honey
- 1 teaspoon vanilla extract
- 1 packet (about 2 1/4 teaspoons) unflavored gelatin
- 3 tablespoons cold water
- 6 fresh figs, sliced
- Fresh mint leaves, for garnish (optional)
Instructions:
- Prepare the Gelatin: In a small bowl, sprinkle the gelatin over 3 tablespoons of cold water. Let it sit for about 5 minutes to allow the gelatin to soften and bloom.
- Heat the Cream Mixture: In a medium saucepan, combine the heavy cream, whole milk, and honey. Place the saucepan over medium heat and stir until the honey is fully dissolved and the mixture is just about to simmer. Don’t let it boil.
- Dissolve the Gelatin: Remove the cream mixture from the heat. Add the bloomed gelatin and vanilla extract to the saucepan, stirring until the gelatin is completely dissolved.
- Strain the Mixture: Pour the mixture through a fine-mesh sieve into a large measuring cup or bowl. This step guarantees that any undissolved gelatin or milk solids are removed, giving your panna cotta a smooth texture.
- Pour into Molds: Divide the mixture evenly into ramekins or small glass dishes. Allow them to cool at room temperature for about 30 minutes.
- Chill the Panna Cotta: Cover the ramekins with plastic wrap and refrigerate for at least 4 hours, or until set. It can also be prepared a day in advance if needed.
- Prepare the Figs: Just before serving, slice the fresh figs. Top each panna cotta with figs, drizzle with a little extra honey, and garnish with mint leaves if desired.
- Serve: Carefully unmold onto serving plates, or serve directly in the ramekins.
Extra Tips:
For best results, confirm that you don’t allow the cream mixture to boil, as this can affect the texture of your panna cotta. If you find it challenging to unmold the panna cotta, briefly dip the bottom of the ramekins in warm water to help release them.
Additionally, you can experiment with different honey varieties to subtly alter the flavor profile; a floral honey can add an interesting depth, while a more robust honey might provide a richer sweetness. Enjoy your Fig and Honey Panna Cotta as a revitalizing, sweet end to any meal!
Sicilian Granita With Almonds
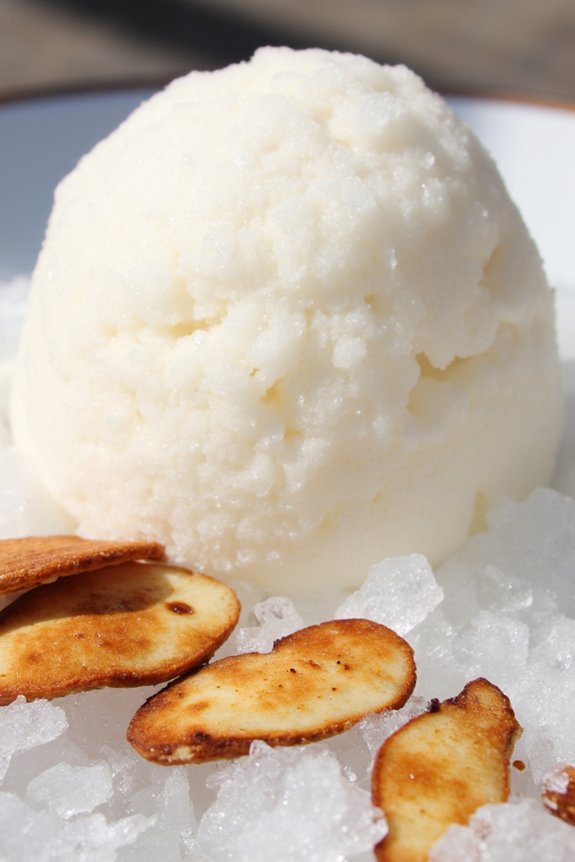
Sicilian Granita With Almonds is an iconic summer dessert from the sun-kissed island of Sicily. Celebrated for its invigorating and delicate flavor, this dessert combines the subtle sweetness of almonds with the icy texture of granita, making it perfect for hot summer days.
Traditionally, Sicilian granita is smoother than its granulated counterparts found in other parts of Italy, offering a more refined texture that melts delightfully on the palate. This almond granita is a simple yet exquisite treat that captures the essence of Sicilian culinary tradition.
The key to a perfect Sicilian Granita With Almonds lies in the quality of the ingredients. Freshly ground almonds or high-quality almond paste are essential to achieve that authentic Sicilian taste.
The preparation process is straightforward, but it does require some patience and attention to detail, as it involves frequent stirring during the freezing process to achieve the perfect texture. This dessert isn’t only a delicious way to end a meal but also an invigorating treat to enjoy throughout the day.
Ingredients (Serves 4-6):
- 1 cup almond paste
- 1 cup granulated sugar
- 4 cups water
- 1 teaspoon pure almond extract
- 1/4 cup toasted almond slices (for garnish)
Instructions:
- Prepare the Almond Mixture: Begin by combining the almond paste and sugar in a medium saucepan. Gradually add the water while stirring constantly to dissolve the sugar and almond paste completely. This mixture should be smooth and free of lumps.
- Heat the Mixture: Place the saucepan over medium heat and bring the mixture to a gentle simmer. Continue to stir occasionally to prevent sticking and confirm all ingredients are well-combined. Once it reaches a simmer, remove the saucepan from the heat.
- Add Almond Extract: Stir in the almond extract into the warm mixture. This will enhance the almond flavor, providing depth and richness to the granita.
- Cool the Mixture: Allow the mixture to cool to room temperature. Once cooled, transfer it to a shallow metal or glass baking dish, spreading it evenly.
- Freeze and Scrape: Place the baking dish in the freezer. After about 30 minutes, check the mixture and use a fork to scrape and stir, breaking up any frozen chunks. Repeat this scraping process every 30 minutes for about 3-4 hours until the granita is fully frozen and has a fluffy, crystalline texture.
- Serve: Once the granita has reached the desired texture, scoop it into serving glasses or bowls. Garnish with toasted almond slices for added crunch and flavor.
Extra Tips:
For the best results, use high-quality almond paste; homemade almond paste can also be an excellent option if you prefer to make it from scratch.
Be patient during the freezing process; frequent scraping is key to achieving the perfect granita texture. If you happen to over-freeze it, simply let it sit at room temperature for a few minutes and then scrape again.
Sicilian Granita With Almonds is best enjoyed immediately after preparation, but it can be stored in the freezer for a day or two. Just remember to scrape it again before serving to revive its texture.
Strawberry Basil Gelato
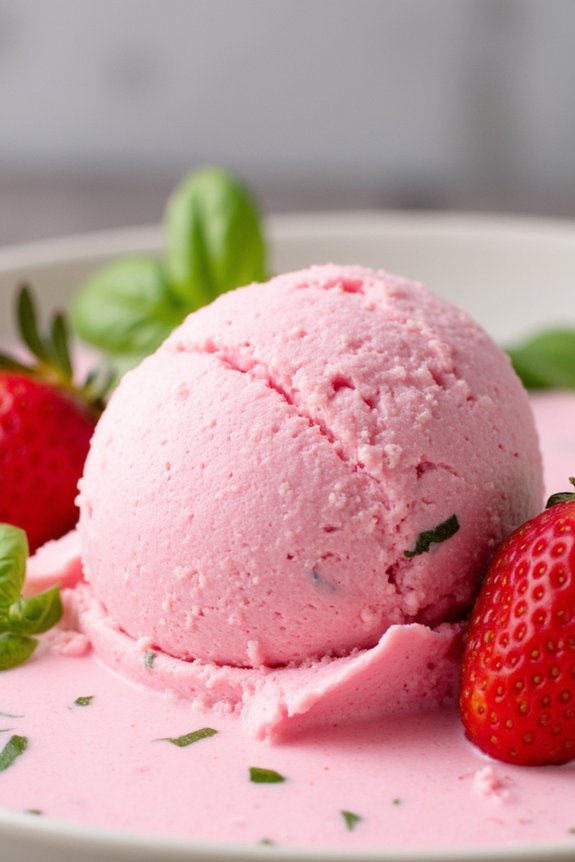
Indulge in the invigorating flavors of Italy with this delightful Strawberry Basil Gelato. Perfect for warm summer days, this gelato combines the sweetness of ripe strawberries with the aromatic freshness of basil, creating a harmonious balance that’s both sophisticated and satisfying. The creamy texture and vibrant taste make it an ideal dessert for family gatherings or a laid-back afternoon treat.
Gelato, a popular Italian dessert, is known for its dense and silky consistency, typically achieved by using more milk than cream and incorporating less air into the mixture. This Strawberry Basil Gelato recipe embraces these qualities, offering a rich yet light dessert experience. The hint of basil adds an unexpected twist, enhancing the natural sweetness of the strawberries and making each spoonful a delightful surprise.
Ingredients for 4-6 servings:
- 2 cups fresh strawberries, hulled and halved
- 1 cup whole milk
- 1 cup heavy cream
- 3/4 cup granulated sugar
- 1 tablespoon lemon juice
- 1/4 cup fresh basil leaves, chopped
- 4 large egg yolks
- A pinch of salt
Instructions:
- Prepare the Strawberries: In a blender, puree the fresh strawberries until smooth. Pass the puree through a fine-mesh sieve to remove seeds, ensuring a smooth consistency. Set aside.
- Infuse the Milk: In a medium saucepan, combine the whole milk, heavy cream, and chopped basil leaves. Heat over medium heat until the mixture is steaming but not boiling, allowing the basil to infuse the milk with its aroma. Remove from heat and let it steep for about 15 minutes.
- Make the Custard Base: In a separate bowl, whisk the egg yolks with the granulated sugar and a pinch of salt until the mixture becomes pale and slightly thickened. Slowly pour the warm milk mixture into the egg yolks, whisking continuously to prevent the eggs from curdling.
- Cook the Custard: Return the mixture to the saucepan and cook over low heat, stirring constantly with a wooden spoon until the custard thickens enough to coat the back of the spoon. Don’t let it boil.
- Combine and Chill: Remove the custard from heat and stir in the strawberry puree and lemon juice. Transfer the mixture to a bowl, cover with plastic wrap, pressing it directly onto the surface to prevent a skin from forming, and refrigerate for at least 4 hours or overnight.
- Churn the Gelato: Once chilled, pour the mixture into an ice cream maker and churn according to the manufacturer’s instructions until it reaches a soft-serve consistency.
- Freeze: Transfer the gelato to an airtight container and freeze for at least 2 hours to firm up before serving.
Extra Tips:
For the best flavor, choose strawberries at the peak of ripeness, as their natural sweetness will enhance the taste of the gelato. If you can’t find fresh basil, consider using a high-quality basil extract, but be sure to adjust the quantity to avoid overpowering the strawberry flavor.
When making the custard, patience is key—keep the heat low and stir constantly to achieve the perfect, creamy texture. Finally, if you prefer a smoother gelato, you can blend the basil leaves with the milk mixture for a more intense flavor infusion.
Zesty Lemon Ricotta Cake
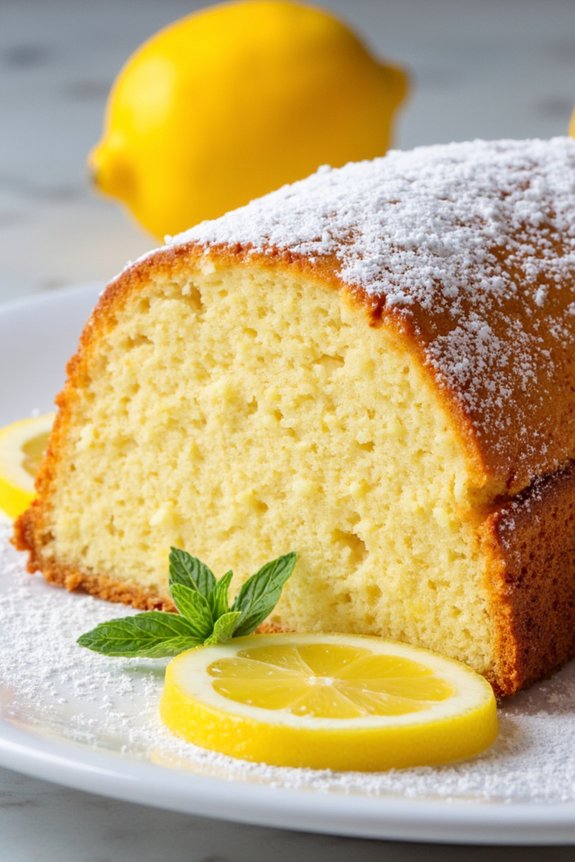
The Zesty Lemon Ricotta Cake is a delightful Italian dessert that captures the essence of summer with its invigorating citrus flavor and creamy texture. This cake is the perfect balance of tangy lemon and smooth ricotta, making it a light yet satisfying treat. It’s ideal for a summer gathering or as a sweet ending to an Italian-themed dinner.
The ricotta cheese adds a lovely moistness to the cake, while the lemon zest and juice infuse it with a bright, lively flavor that’s sure to please any palate. This cake isn’t only delicious but also simple to make, requiring minimal ingredients and effort. It’s a wonderful option for both novice bakers and seasoned chefs looking for a quick dessert that doesn’t compromise on flavor.
Serve it with a dusting of powdered sugar or a dollop of whipped cream for an extra touch of indulgence. With a serving size of 4-6 people, this Zesty Lemon Ricotta Cake is perfect for sharing with family and friends, guaranteeing everyone gets a taste of this delightful Italian classic.
Ingredients for 4-6 People:
- 1 ½ cups all-purpose flour
- 1 cup granulated sugar
- 1 stick (½ cup) unsalted butter, softened
- 3 large eggs
- 1 cup ricotta cheese
- 1 tablespoon lemon zest
- ¼ cup fresh lemon juice
- 1 teaspoon vanilla extract
- 1 tablespoon baking powder
- ½ teaspoon salt
- Powdered sugar, for dusting
Instructions:
- Preheat the Oven: Start by preheating your oven to 350°F (175°C). Grease and flour a 9-inch round cake pan to prevent the cake from sticking.
- Mix Dry Ingredients: In a medium bowl, whisk together the flour, baking powder, and salt. This guarantees that the baking powder is evenly distributed, which will help the cake rise evenly.
- Cream Butter and Sugar: In a separate large mixing bowl, cream the softened butter and granulated sugar together using an electric mixer on medium speed until the mixture is light and fluffy. This should take about 3-5 minutes.
- Incorporate Eggs and Ricotta: Add the eggs one at a time to the butter and sugar mixture, beating well after each addition. Then, mix in the ricotta cheese until fully combined.
- Add Lemon and Vanilla: Stir in the lemon zest, lemon juice, and vanilla extract. These ingredients will provide the cake with its zesty flavor.
- Combine Wet and Dry Ingredients: Gradually add the dry ingredients to the wet mixture, mixing just until combined. Be careful not to overmix, as this can make the cake dense.
- Bake the Cake: Pour the batter into the prepared cake pan, smoothing the top with a spatula. Bake in the preheated oven for 40-45 minutes, or until a toothpick inserted into the center of the cake comes out clean.
- Cool and Serve: Allow the cake to cool in the pan for about 10 minutes before transferring it to a wire rack to cool completely. Once cooled, dust with powdered sugar before serving.
Extra Tips:
For a more intense lemon flavor, consider adding a bit more lemon zest or a splash of lemon extract. If you prefer a slightly denser texture, you can substitute part of the flour with almond flour.
To guarantee even baking, rotate the cake pan halfway through the baking time. This cake pairs wonderfully with fresh berries or a dollop of cream, enhancing its summery appeal. Remember, the key to a moist cake isn’t overbaking, so keep a close eye on it as it nears the end of the baking time.
Melon and Prosciutto Salad With Burrata
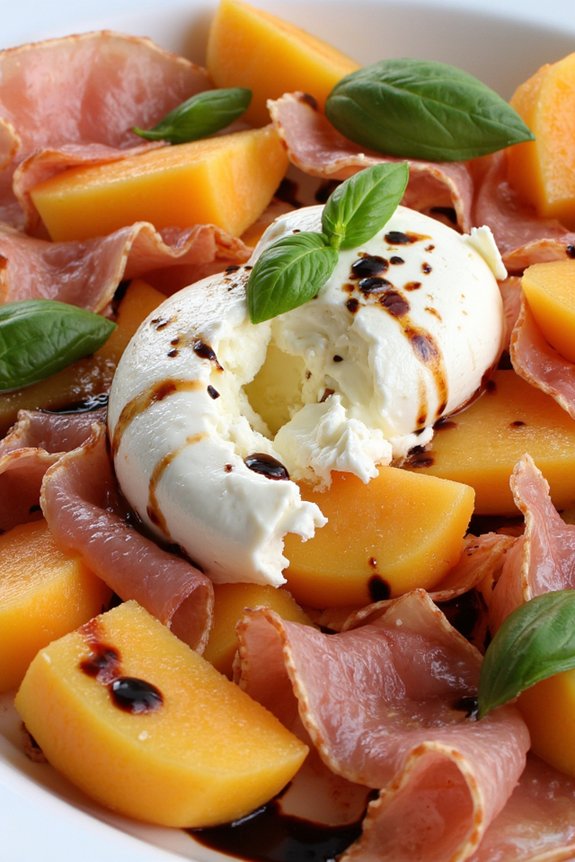
Melon and Prosciutto Salad With Burrata is a revitalizing and delightful Italian summer dish that perfectly balances sweet, savory, and creamy flavors. This salad is an ideal starter or a light main course, showcasing the harmonious combination of juicy melon, salty prosciutto, and rich burrata. The dish is beautifully garnished with fresh basil and a drizzle of balsamic reduction, making it not only a treat for the taste buds but also a feast for the eyes.
To prepare this salad, select ripe and fragrant melons, such as cantaloupe or honeydew, which provide the necessary sweetness to complement the savory prosciutto. Burrata, a creamy Italian cheese made from mozzarella and cream, adds a luxurious texture to the dish. Fresh basil leaves introduce a burst of aromatic freshness, while a balsamic reduction brings a hint of acidity and depth. The result is a vibrant and elegant salad that captures the essence of an Italian summer.
Ingredients for 4-6 servings:
- 1 ripe cantaloupe or honeydew melon
- 12 slices of prosciutto
- 2 balls of burrata cheese
- Fresh basil leaves (about 1 cup)
- 2 tablespoons of olive oil
- Salt and freshly ground black pepper to taste
- 1/2 cup balsamic reduction
Cooking Instructions:
- Prepare the Melon: Begin by cutting the melon in half and removing the seeds. Use a melon baller or a sharp knife to scoop out or slice the flesh into bite-sized pieces. Arrange the melon pieces on a large serving platter.
- Add the Prosciutto: Drape slices of prosciutto over the melon pieces. For a more elegant presentation, you can fold or gently twist the prosciutto slices before placing them on the platter.
- Place the Burrata: Gently tear the burrata balls into chunks and distribute them evenly over the melon and prosciutto. Be careful not to break the cheese too much, as you want the creamy center to remain intact.
- Garnish with Basil: Scatter fresh basil leaves over the salad. You can either leave them whole or tear them for a more rustic look.
- Season the Salad: Drizzle olive oil over the entire salad, and season with a pinch of salt and a few grinds of black pepper. Adjust the seasoning to taste, keeping in mind that the prosciutto is already salty.
- Finish with Balsamic Reduction: Finally, drizzle the balsamic reduction over the salad. This will add a sweet and tangy note that ties the flavors together beautifully.
Extra Tips:
When preparing Melon and Prosciutto Salad With Burrata, verify that the melon is at peak ripeness for the best flavor. You can use a combination of different melons for added color and taste, such as mixing cantaloupe with honeydew.
If you can’t find burrata, fresh mozzarella balls can be a suitable substitute, though they lack the creamy interior. To make your own balsamic reduction, simmer balsamic vinegar in a saucepan until it thickens and reduces by half.
This salad is best served immediately to enjoy the freshness and vibrant flavors.
Espresso Affogato

Espresso Affogato is a simple yet indulgent Italian dessert that combines the bold flavors of espresso with the creamy sweetness of gelato. This revitalizing treat is perfect for a warm summer evening or when you need a quick, elegant dessert to impress your guests. The word “affogato” means “drowned” in Italian, which perfectly describes this dish as you pour hot espresso over the cold gelato, creating a delightful mix of temperatures and textures.
The magic of Espresso Affogato lies in its simplicity and the quality of its ingredients. Using freshly brewed espresso and high-quality gelato will elevate this dessert to a luxurious experience. Traditionally, vanilla gelato is used, but you can experiment with different flavors like chocolate, hazelnut, or pistachio to add your twist. This recipe serves 4-6 people, making it a perfect choice for a small gathering or family dessert.
Ingredients (Serves 4-6):
- 1 quart of high-quality vanilla gelato
- 6 shots of freshly brewed espresso
- Optional: chocolate shavings or cocoa powder for garnish
Instructions:
- Prepare the Gelato: Remove the gelato from the freezer about 5-10 minutes before serving to allow it to soften slightly. This will make it easier to scoop and make sure it melts beautifully when the espresso is poured over it.
- Brew the Espresso: While the gelato is softening, brew 6 shots of espresso using an espresso machine or a stovetop espresso maker. Make sure the espresso is hot, as this will create the “drowning” effect when poured over the gelato.
- Scoop the Gelato: Place two generous scoops of gelato into each serving glass or bowl. The glasses should be large enough to accommodate the gelato and espresso without overflowing.
- Pour the Espresso: Carefully pour one shot of hot espresso over each serving of gelato. Pour slowly to make sure the gelato is evenly “drowned” in espresso.
- Garnish and Serve: If desired, sprinkle a few chocolate shavings or a dusting of cocoa powder over the top for an added touch. Serve immediately while the contrast between the hot espresso and cold gelato is at its best.
Extra Tips:
- For a more robust flavor, consider using a dark roast espresso, which complements the sweetness of the gelato nicely.
- If you don’t have an espresso machine, you can use a strong brewed coffee as a substitute, but the flavor will be slightly different.
- Customize your affogato by adding a splash of liqueur, such as amaretto or Baileys, for an adult version of this classic dessert.
- Serve the Espresso Affogato in clear glasses to beautifully showcase the melding of the espresso and gelato.
Chocolate Hazelnut Tartufo
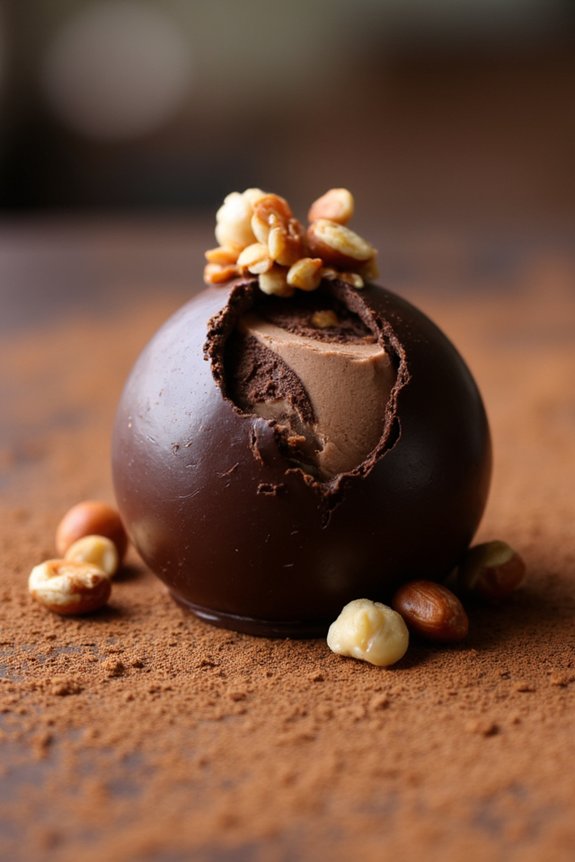
Chocolate Hazelnut Tartufo is a decadent Italian dessert that perfectly captures the flavors of a classic gelato with a rich and indulgent twist. Originating from Calabria, this treat is a delightful combination of creamy chocolate and hazelnut gelato, encased in a hard chocolate shell with a surprise center of luscious chocolate ganache or a whole hazelnut.
Traditionally served as a spherical dessert, the tartufo is a showstopper at any summer gathering, offering a luxurious bite that’s both invigorating and satisfying.
Making Chocolate Hazelnut Tartufo at home might seem intimidating, but with a bit of preparation and patience, you can recreate this Italian specialty in your own kitchen. The layered textures and flavors of the tartufo make it a unique dessert that will surely impress your guests.
Whether you’re looking to cool off on a hot summer day or end a meal on a sweet note, this recipe will guide you through the process of crafting an authentic Italian treat that’s as delicious as it’s beautiful.
Ingredients (Serves 4-6):
- 1 pint chocolate gelato
- 1 pint hazelnut gelato
- 1/2 cup chocolate ganache or 6 whole hazelnuts
- 1 cup dark chocolate (70% cocoa), chopped
- 3 tablespoons unsweetened cocoa powder
- 1/4 cup finely chopped hazelnuts
- 1 tablespoon vegetable oil
Cooking Instructions:
- Prepare the Gelato Balls: Line a baking sheet with parchment paper. Using an ice cream scoop, scoop a small ball of chocolate gelato and make a cavity in the center with your thumb. Fill the cavity with a spoonful of chocolate ganache or place a whole hazelnut inside. Cover the filling with more chocolate gelato, and roll into a ball. Repeat the process with the hazelnut gelato.
- Freeze the Gelato Balls: Place the gelato balls on the prepared baking sheet and freeze for at least 2 hours, or until they’re firm enough to handle without melting.
- Prepare the Chocolate Coating: In a heatproof bowl, melt the dark chocolate and vegetable oil over a pot of simmering water (double boiler method), stirring until smooth. Remove from heat and let it cool slightly.
- Coat the Gelato Balls: Remove the gelato balls from the freezer. Using a fork, dip each ball into the melted chocolate, making sure it’s completely covered. Allow any excess chocolate to drip off before placing it back onto the parchment-lined sheet.
- Add the Finishing Touches: While the chocolate coating is still wet, quickly roll each tartufo in the cocoa powder and finely chopped hazelnuts for an extra layer of flavor and texture.
- Final Freeze: Return the coated gelato balls to the freezer for another 30 minutes to allow the chocolate shell to harden completely.
Extra Tips:
When preparing Chocolate Hazelnut Tartufo, verify that your workspace is cool to prevent the gelato from melting too quickly. Keep your hands cold by occasionally dipping them in ice water before handling the gelato.
If you find the chocolate coating hardening too quickly, gently reheat it over the double boiler. Finally, serve the tartufo immediately after removing it from the freezer to enjoy the perfect texture contrast between the crisp shell and creamy interior.
Cherry and Almond Biscotti
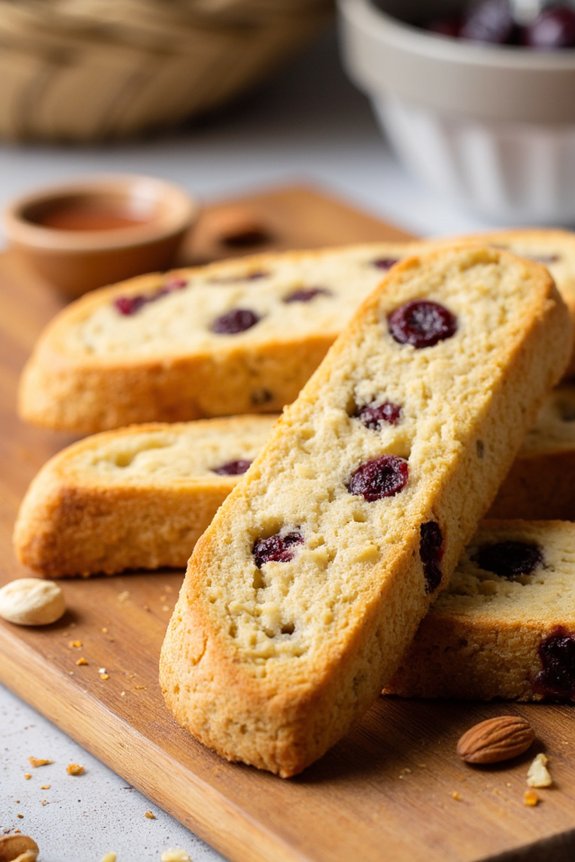
Cherry and Almond Biscotti is a delightful Italian summer dessert that combines the perfect balance of sweet cherries and nutty almonds. This twice-baked treat is ideal for serving with coffee or tea, and its crunchy texture makes it a favorite for those who enjoy a satisfying bite.
Originating from Italy, biscotti are known for their long shelf life and versatility, making them perfect for summer gatherings or gifting to friends and family. The addition of cherries provides a burst of flavor, while the almonds add a rich, earthy undertone that complements the sweetness.
Creating Cherry and Almond Biscotti is both an art and a science, requiring patience for the two baking stages that give these cookies their signature crispness. The dough is simple to make, using basic pantry ingredients, and the flavors can be adjusted to taste.
Whether you opt for fresh cherries or dried ones, the end result is a cookie that captures the essence of summer in every bite. This recipe serves 4-6 people, making it perfect for a small gathering or a week’s worth of treats for your family.
Ingredients for 4-6 servings:
- 2 cups all-purpose flour
- 1 cup granulated sugar
- 1 teaspoon baking powder
- 1/2 teaspoon salt
- 2 large eggs
- 1 teaspoon vanilla extract
- 1/2 teaspoon almond extract
- 1 cup dried cherries (or fresh, pitted and chopped)
- 1 cup sliced almonds, toasted
Cooking Instructions:
- Preheat the Oven: Begin by preheating your oven to 350°F (175°C). This guarantees that your biscotti will bake evenly once they’re ready to go in.
- Prepare the Dough: In a large bowl, whisk together the flour, sugar, baking powder, and salt. This dry mixture forms the base of your biscotti dough.
- Mix Wet Ingredients: In a separate bowl, beat the eggs, vanilla extract, and almond extract until well combined. Gradually add this mixture to the dry ingredients, stirring until a dough begins to form.
- Add Cherries and Almonds: Gently fold in the dried cherries and toasted almonds. Confirm they’re evenly distributed throughout the dough, which will add texture and flavor to every bite.
- Shape the Dough: Divide the dough into two equal halves. On a lightly floured surface, shape each half into a log approximately 12 inches long and 2 inches wide.
- First Bake: Place the logs on a parchment-lined baking sheet. Bake in the preheated oven for 25-30 minutes, or until the logs are firm to the touch and lightly golden.
- Cool and Slice: Allow the logs to cool for about 10 minutes. Using a serrated knife, slice the logs diagonally into 1/2-inch thick slices.
- Second Bake: Arrange the slices cut-side down on the baking sheet. Bake for an additional 10-15 minutes, flipping them halfway through, until they’re golden and crispy.
- Cool Completely: Remove the biscotti from the oven and let them cool completely on a wire rack. This cooling process is essential to achieving the perfect crunchy texture.
Extra Tips:
For a variation in flavor, consider adding a zest of lemon or orange to the dough for a citrusy twist. If you prefer a softer bite, reduce the second baking time slightly.
Always keep an eye on the biscotti during the second bake to prevent over-browning. Store your Cherry and Almond Biscotti in an airtight container to maintain their crispness for up to two weeks.
Enjoy this delightful summer treat with a fresh cup of espresso or a scoop of vanilla ice cream for an indulgent dessert.