

If you love Italian desserts but need to skip the gluten, you’re in for a treat. I’ve gathered some amazing gluten-free recipes that will let you enjoy those classic flavors without any worries. From luscious tiramisu to zesty lemon cake, there’s something for every sweet tooth. Each recipe is designed to bring out the rich, traditional tastes we all adore. Ready to explore these delightful options?
Gluten-Free Tiramisu
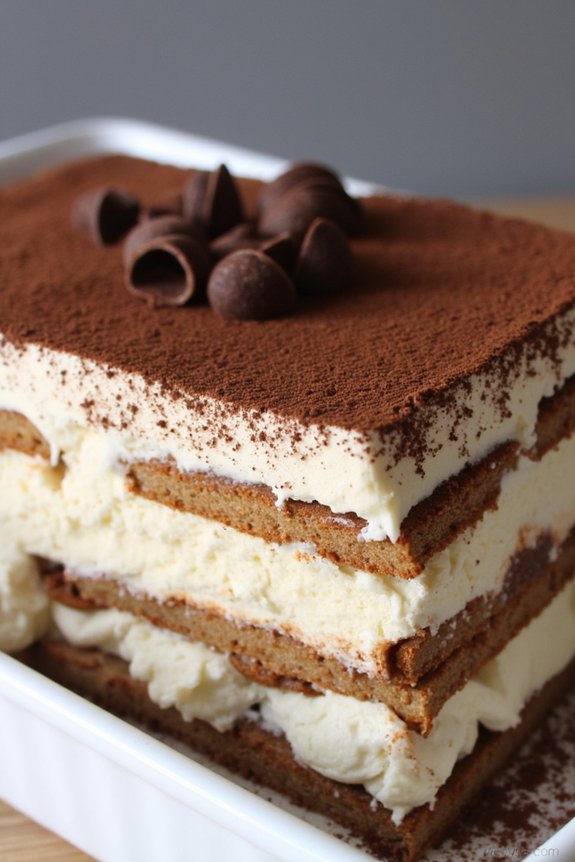
Tiramisu is a classic Italian dessert that’s beloved around the globe for its rich flavors and creamy texture. Traditionally made with layers of coffee-soaked ladyfingers and mascarpone cheese, the challenge lies in making this dessert gluten-free without compromising its authentic taste.
Fortunately, with the right ingredients and techniques, creating a delicious gluten-free tiramisu is entirely possible. This recipe is crafted to serve 4-6 people, perfect for a family gathering or a special dinner party.
The key to a successful gluten-free tiramisu lies in the details: using high-quality gluten-free ladyfingers and ensuring the mascarpone mixture is light yet rich. The balance of flavors—coffee, cocoa, and a hint of vanilla—should complement the creamy layers.
This dessert doesn’t require baking, making it a convenient option for preparing ahead of time. Once assembled, it needs to chill, allowing the flavors to meld together perfectly, resulting in a luxurious and indulgent treat.
Ingredients for 4-6 servings:
- 200g gluten-free ladyfingers
- 250g mascarpone cheese
- 3 large eggs, separated
- 100g granulated sugar
- 1 teaspoon vanilla extract
- 300ml strong brewed coffee, cooled
- 2 tablespoons coffee liqueur (optional)
- Unsweetened cocoa powder for dusting
- Dark chocolate shavings (optional, for garnish)
Cooking Instructions:
- Prepare the Coffee Mixture: Brew 300ml of strong coffee and let it cool to room temperature. Once cooled, stir in the coffee liqueur if using. Set aside.
- Make the Mascarpone Mixture: In a large mixing bowl, beat the egg yolks and sugar together until it becomes pale and creamy. Add the mascarpone cheese and vanilla extract, and continue to beat until smooth and well combined.
- Whip the Egg Whites: In a separate clean bowl, whisk the egg whites until they form stiff peaks. Gently fold the whipped egg whites into the mascarpone mixture. This step is vital for creating a light and airy texture.
- Assemble the Tiramisu: Quickly dip each gluten-free ladyfinger into the coffee mixture, ensuring they’re soaked but not soggy. Arrange a layer of soaked ladyfingers at the bottom of a rectangular dish.
- Layer the Ingredients: Spread half of the mascarpone mixture evenly over the ladyfingers. Repeat the layering process with another layer of coffee-soaked ladyfingers, followed by the remaining mascarpone mixture.
- Chill the Dessert: Cover the dish with plastic wrap and refrigerate for at least 4 hours, or overnight if possible. This allows the flavors to develop and the dessert to set properly.
- Finish and Serve: Just before serving, dust the top of the tiramisu with unsweetened cocoa powder. Optionally, sprinkle with dark chocolate shavings for added texture and flavor.
Extra Tips:
When making gluten-free tiramisu, it’s important to choose ladyfingers that have a good texture and flavor, as they form the backbone of the dessert. You can find gluten-free ladyfingers in specialty stores or online.
If you prefer a non-alcoholic version, simply omit the coffee liqueur without affecting the overall taste. For an extra touch, consider using freshly brewed espresso for a more intense coffee flavor.
Finally, allowing the tiramisu to chill overnight enhances its taste and texture, making it even more delectable when served.
Almond Flour Biscotti
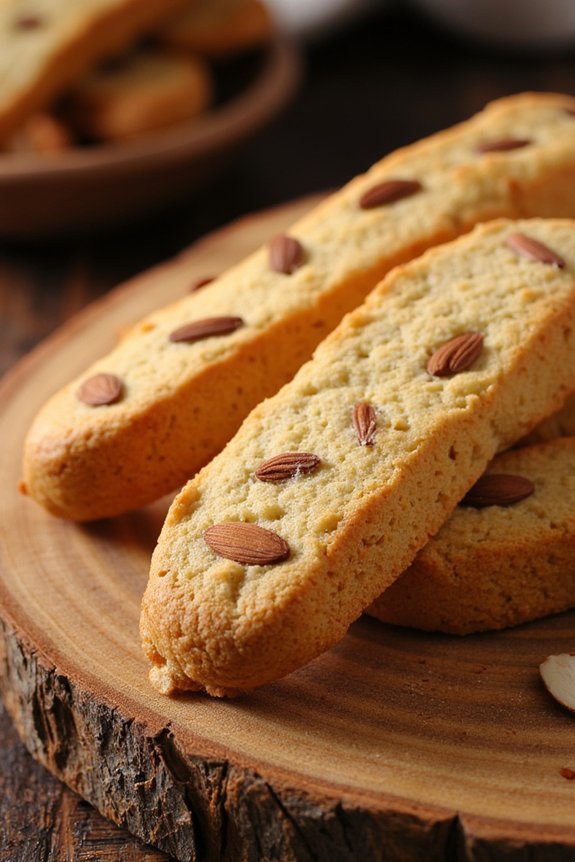
Indulge in the delightful world of Italian gluten-free dessert with this Almond Flour Biscotti recipe. Biscotti, meaning “twice-cooked” in Italian, is a classic crunchy cookie that pairs perfectly with a cup of coffee or tea. This version uses almond flour, making it not only gluten-free but also rich in nutty flavors that complement the traditional almond and vanilla notes.
With a crisp texture and a subtle sweetness, these biscotti are perfect for a light dessert or an afternoon snack. The beauty of almond flour biscotti lies in their versatility and ease of preparation. Whether you’re looking to impress guests with a homemade treat or simply craving something sweet, this recipe is your go-to. Not only is it gluten-free, but it’s also naturally low in carbohydrates, making it suitable for those following a keto-friendly diet.
The use of almond flour lends a tender crumb to the biscotti, while the addition of slivered almonds provides a delightful crunch with every bite.
Ingredients (Serves 4-6 people):
- 2 cups almond flour
- 1 teaspoon baking powder
- 1/4 teaspoon salt
- 1/2 cup granulated sugar
- 2 large eggs
- 1 teaspoon vanilla extract
- 1 teaspoon almond extract
- 1/2 cup slivered almonds
Instructions:
- Preheat the Oven: Begin by preheating your oven to 350°F (175°C). Line a baking sheet with parchment paper or a silicone baking mat to prevent sticking.
- Mix Dry Ingredients: In a large mixing bowl, combine the almond flour, baking powder, salt, and granulated sugar. Stir well to verify the baking powder is evenly distributed throughout the almond flour.
- Combine Wet Ingredients: In a separate bowl, whisk together the eggs, vanilla extract, and almond extract until well combined.
- Form the Dough: Gradually add the wet ingredients to the dry ingredients, stirring until a dough begins to form. Fold in the slivered almonds, making sure they’re evenly distributed throughout the dough.
- Shape the Biscotti: Transfer the dough onto the prepared baking sheet. Shape it into a log approximately 10 inches long and 3 inches wide. Flatten the top slightly with your hands.
- First Bake: Place the baking sheet in the preheated oven and bake for 25-30 minutes, or until the log is firm to the touch and lightly browned.
- Cool and Slice: Remove the biscotti log from the oven and allow it to cool for about 10 minutes. Using a sharp serrated knife, carefully slice the log into 1/2-inch thick slices.
- Second Bake: Lay the slices cut side down on the baking sheet. Return them to the oven and bake for an additional 10-12 minutes on each side, or until the biscotti are golden brown and crisp.
- Cool Completely: Remove the biscotti from the oven and transfer them to a wire rack to cool completely. They’ll become crunchier as they cool.
Extra Tips:
For the best results, make sure to use blanched almond flour, which has a finer texture compared to almond meal. When slicing the biscotti, use a gentle sawing motion to avoid crumbling.
If you prefer softer biscotti, reduce the second bake time slightly, or for extra crunch, increase it by a few minutes. Feel free to get creative by adding your favorite mix-ins, like dried cranberries or mini chocolate chips, for a personalized twist. Enjoy these almond flour biscotti with your favorite beverage for a delightful gluten-free treat.
Flourless Chocolate Cake
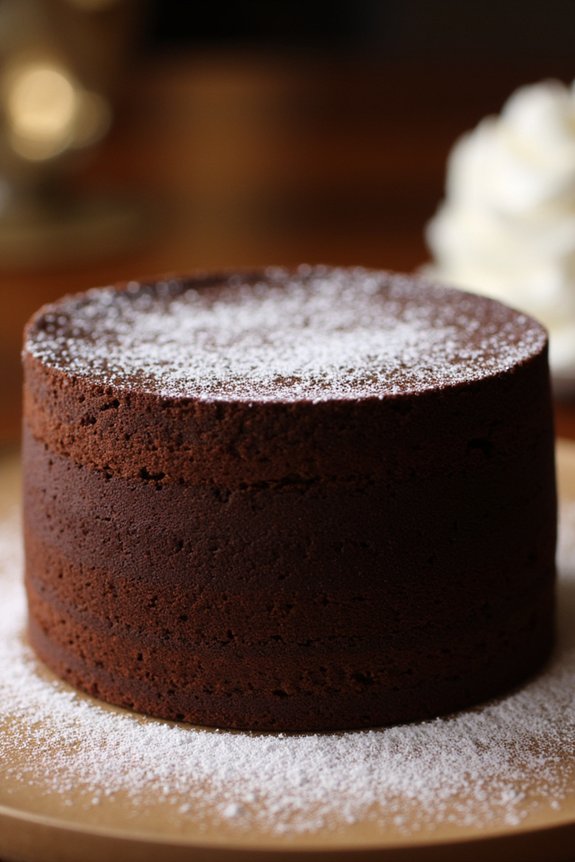
Flourless chocolate cake is a classic Italian dessert that’s rich, dense, and delectably indulgent. Perfect for those who are gluten intolerant or simply looking for a decadent treat, this cake relies on high-quality chocolate to deliver an intense flavor experience. The absence of flour not only makes the cake suitable for those with dietary restrictions but also enhances its fudgy texture, making each bite melt in your mouth.
Whether you’re hosting a dinner party, celebrating a special occasion, or just treating yourself, this cake is sure to impress.
This recipe is designed to serve 4-6 people and is relatively simple to prepare with a short list of ingredients. The key to success lies in using the best chocolate you can find, as it will be the star of your dessert. A rich dark chocolate with at least 70% cocoa content will give the cake a deep, complex flavor.
The cake is baked gently to maintain its soft and moist interior, creating a perfect balance with its slightly crisp outer layer. Serve it with a dusting of powdered sugar, a dollop of whipped cream, or a scoop of vanilla ice cream for a truly luxurious experience.
Ingredients (for 4-6 servings):
- 200g dark chocolate (70% cocoa)
- 100g unsalted butter
- 150g granulated sugar
- 4 large eggs
- 1 teaspoon vanilla extract
- A pinch of salt
- Optional: powdered sugar for dusting
Cooking Instructions:
- Preheat the Oven: Begin by preheating your oven to 180°C (350°F). Grease a 9-inch round cake pan and line the bottom with parchment paper to guarantee easy removal after baking.
- Melt Chocolate and Butter: In a heatproof bowl set over a pot of simmering water, melt the dark chocolate and unsalted butter together. Stir occasionally until the mixture is smooth and fully combined. Remove from heat and let it cool slightly.
- Combine Sugar and Eggs: In a separate large mixing bowl, combine the granulated sugar, eggs, and a pinch of salt. Using an electric mixer or a whisk, beat the mixture at medium speed until it becomes thick and pale in color, which should take about 5-7 minutes.
- Add Chocolate Mixture: Gently fold the melted chocolate and butter mixture into the egg mixture. Add the vanilla extract and continue folding until everything is well combined, being careful not to deflate the eggs.
- Bake the Cake: Pour the batter into the prepared cake pan and smooth the top with a spatula. Bake in the preheated oven for 25-30 minutes, or until the cake has set around the edges but still has a slight jiggle in the center.
- Cool and Serve: Allow the cake to cool in the pan for about 10 minutes, then run a knife around the edge and carefully invert it onto a serving plate. Let it cool completely. Dust with powdered sugar before serving if desired.
Extra Tips:
When baking a flourless chocolate cake, it’s essential to monitor the baking time closely to avoid overbaking, as this will cause the cake to lose its fudgy texture.
It’s better to err on the side of slightly underbaked as the cake will continue to cook from residual heat after it’s removed from the oven. Additionally, for an added flavor dimension, consider adding a teaspoon of espresso powder to the batter to enhance the chocolate flavor.
If storing leftovers, keep the cake covered at room temperature for up to two days, or refrigerate for up to five days to maintain its freshness.
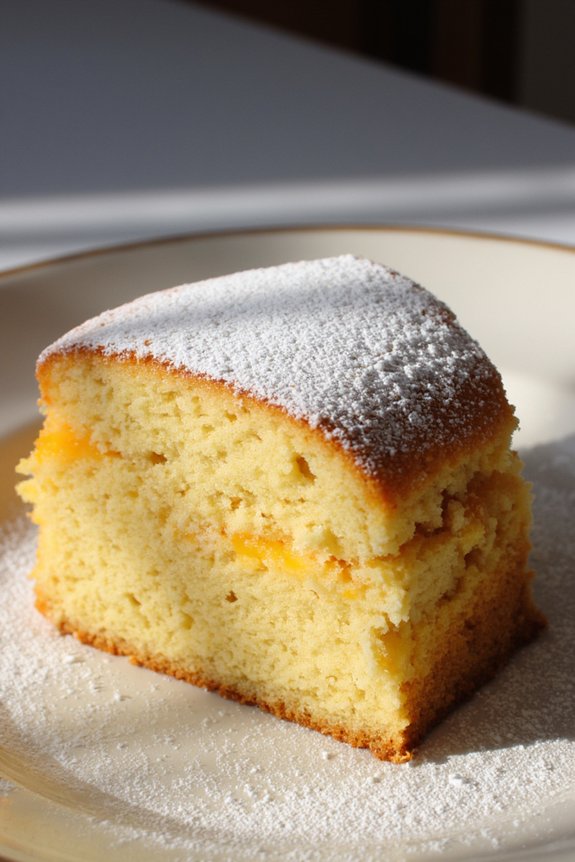
Polenta and Lemon Cake
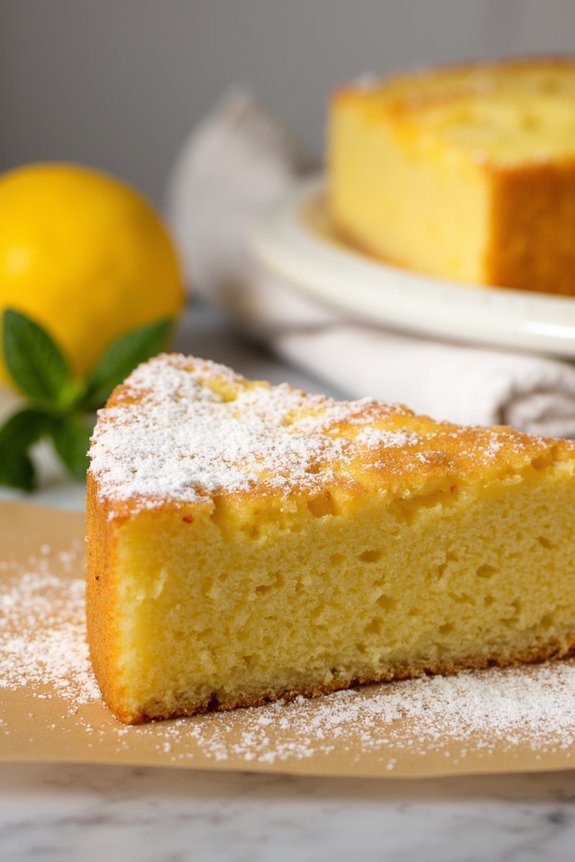
Polenta and Lemon Cake is a delightful Italian dessert that combines the rustic charm of polenta with the zesty flavor of lemon. This cake is naturally gluten-free, making it a perfect choice for those with dietary restrictions. The texture is slightly crumbly yet moist, thanks to the combination of ground almonds and polenta, while the lemon adds a rejuvenating twist. It’s an ideal treat for afternoon tea or a light finish to an Italian meal.
This cake is simple to make and doesn’t require any fancy equipment. The ingredients come together quickly, making it a convenient option for when you want to whip up something delicious without spending too much time in the kitchen. The cake can be served on its own or with a dollop of whipped cream or a scoop of vanilla ice cream for an extra touch of indulgence.
Here’s how you can make Polenta and Lemon Cake, serving 4-6 people.
Ingredients:
- 200g unsalted butter, softened
- 200g caster sugar
- 3 large eggs
- Zest of 2 lemons
- 125g ground almonds
- 150g fine polenta
- 1 ½ teaspoons baking powder (gluten-free)
- A pinch of salt
- 4 tablespoons lemon juice
Instructions:
- Preheat the Oven: Start by preheating your oven to 180°C (350°F). Grease a 9-inch round cake pan with butter and line the bottom with parchment paper to prevent the cake from sticking.
- Cream the Butter and Sugar: In a large mixing bowl, beat the softened butter and caster sugar together using an electric mixer until the mixture is light and fluffy. This should take about 3-5 minutes.
- Incorporate Eggs and Lemon Zest: Add the eggs one at a time, beating well after each addition. Stir in the lemon zest to infuse the cake with fresh citrus flavor.
- Mix Dry Ingredients: In a separate bowl, combine the ground almonds, polenta, baking powder, and a pinch of salt. Stir these dry ingredients into the wet mixture gradually, mixing until you have a smooth batter.
- Add Lemon Juice: Gently fold in the lemon juice, which will add moisture and enhance the lemony taste of the cake.
- Bake the Cake: Pour the batter into the prepared cake pan, smoothing the top with a spatula. Bake in the preheated oven for 40-45 minutes, or until a skewer inserted into the center comes out clean.
- Cool and Serve: Allow the cake to cool in the pan for about 10 minutes before transferring it to a wire rack to cool completely. Serve at room temperature, either on its own or with a dusting of icing sugar.
Extra Tips:
To guarantee your Polenta and Lemon Cake has the best texture, make sure not to overmix the batter once the dry ingredients are added; this can lead to a denser cake.
If you prefer a more intense lemon flavor, you can add a bit more lemon zest or even a touch of lemon extract. Additionally, for a more decorative presentation, consider garnishing the cake with thin lemon slices or a light drizzle of lemon glaze.
Store any leftovers in an airtight container at room temperature for up to three days.
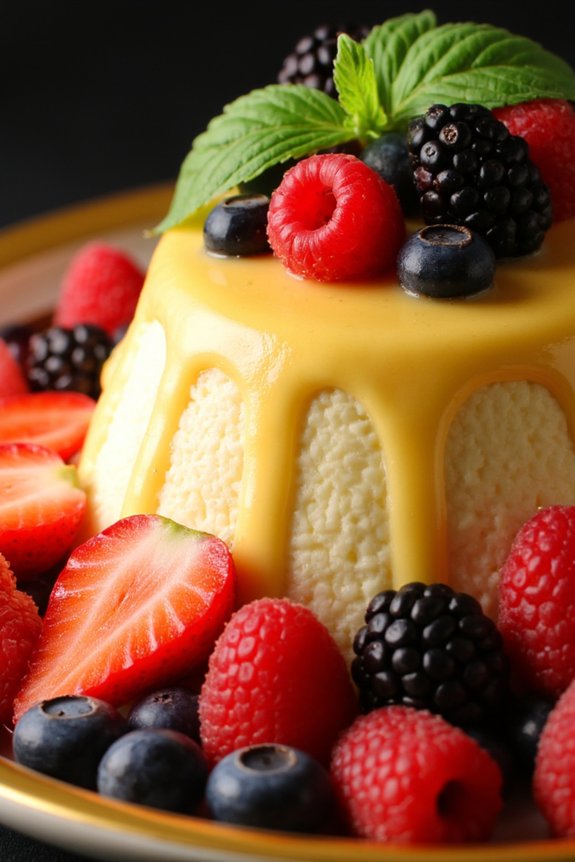
Panna Cotta With Berry Compote
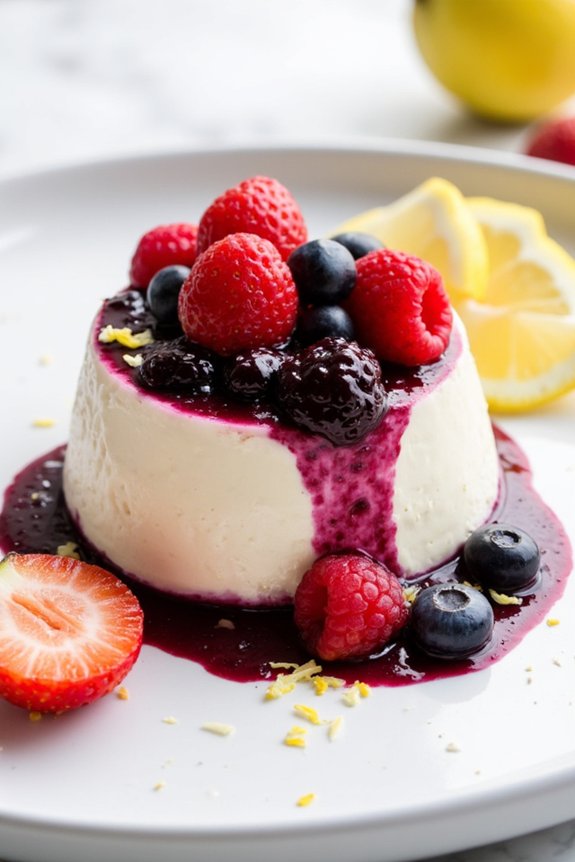
Panna Cotta is a classic Italian dessert that translates to “cooked cream” in English. It’s a delightful treat known for its silky smooth texture and rich, creamy flavor. This gluten-free dessert is perfect for those looking to indulge in a sweet treat without the worry of gluten.
When paired with a vibrant berry compote, it elevates the dessert with a burst of fruity freshness and a beautiful color contrast. The creamy panna cotta combined with the tartness of the berries creates a heavenly experience that will leave your taste buds craving more.
This recipe for Panna Cotta With Berry Compote is designed to serve 4-6 people, making it an ideal choice for a family gathering or a small dinner party. The dish is relatively simple to prepare and doesn’t require any complex techniques or special equipment.
With just a few easy-to-find ingredients, you can create a dessert that’s both elegant and delicious. The berry compote can be customized with your favorite berries, allowing for a personal touch that can suit your taste preferences.
Ingredients:
*For the Panna Cotta:*
- 2 1/2 cups heavy cream
- 1/2 cup granulated sugar
- 1 vanilla bean (or 1 teaspoon vanilla extract)
- 1 envelope (about 2 1/4 teaspoons) unflavored gelatin
- 3 tablespoons water
For the Berry Compote:
- 2 cups mixed berries (such as strawberries, raspberries, and blueberries)
- 1/4 cup granulated sugar
- 1 tablespoon lemon juice
- 1 teaspoon lemon zest
Cooking Instructions:
- Prepare the Gelatin: In a small bowl, sprinkle the gelatin over the 3 tablespoons of water and let it sit for about 5 minutes to bloom.
- Heat the Cream: In a medium saucepan, combine the heavy cream and granulated sugar. If using a vanilla bean, split it lengthwise and scrape the seeds into the pan, then add the pod as well. If using vanilla extract, add it later with the gelatin.
- Dissolve the Sugar: Heat the cream mixture over medium heat, stirring occasionally until the sugar is fully dissolved. Don’t let the mixture come to a boil.
- Add the Gelatin: Remove the saucepan from the heat. If using vanilla extract, stir it in now. Add the bloomed gelatin to the hot cream mixture and whisk until the gelatin is completely dissolved.
- Chill the Panna Cotta: Pour the cream mixture into ramekins or serving glasses. Allow them to cool to room temperature, then cover and refrigerate for at least 4 hours, or until set.
- Make the Berry Compote: While the panna cotta is setting, prepare the compote. In a small saucepan, combine the berries, sugar, lemon juice, and lemon zest. Cook over medium heat, stirring occasionally, until the berries break down and the mixture thickens slightly, about 5-7 minutes.
- Cool the Compote: Remove the compote from heat and let it cool. Once cooled, refrigerate until ready to serve.
- Assemble the Dessert: Once the panna cotta has set, top each serving with a generous spoonful of the berry compote. Serve chilled for the best flavor and texture.
Extra Tips:
When cooking the panna cotta, verify the cream mixture doesn’t boil, as this can affect the final texture. If you don’t have a vanilla bean, the vanilla extract works perfectly fine and is more budget-friendly.
The berry compote can be made a day in advance for more developed flavors, and you can even mix in a tablespoon of your favorite liqueur for an adult twist. If you’re short on time, use store-bought berry preserves as a quick alternative to the homemade compote.
Enjoy customizing this dessert to suit your style and the season’s freshest berries.
Ricotta and Honey Cheesecake
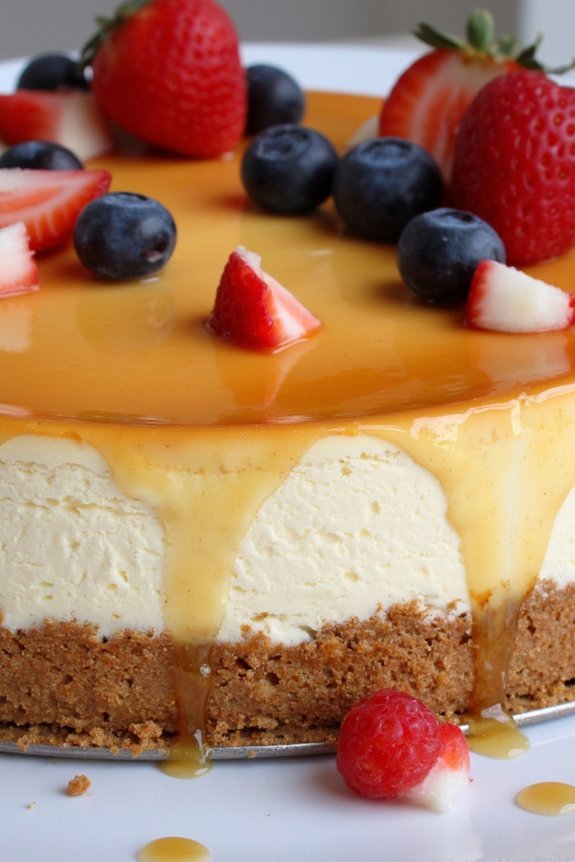
Ricotta and Honey Cheesecake is a delightful Italian dessert that’s both gluten-free and incredibly satisfying. This cheesecake combines the creamy texture of ricotta cheese with the natural sweetness of honey, offering a unique twist on the traditional cheesecake. The light and fluffy nature of ricotta perfectly complements the sweet and slightly tangy flavor of honey, making it a perfect choice for those looking to indulge without the heaviness often associated with traditional cheesecakes.
Whether you’re serving it at a dinner party or enjoying it as a mid-week treat, this dessert is sure to impress with its delicate flavors and beautiful presentation. This recipe serves 4-6 people and is perfect for anyone who needs to avoid gluten but still enjoys a rich and creamy dessert. The crust is made with gluten-free ingredients, guaranteeing that everyone at the table can enjoy this luxurious treat.
With its simple preparation and elegant outcome, Ricotta and Honey Cheesecake is a must-try recipe for lovers of Italian desserts. Now, let’s gather the ingredients and get started on this delicious creation.
Ingredients:
- 1 1/2 cups gluten-free graham cracker crumbs
- 1/4 cup unsalted butter, melted
- 2 cups ricotta cheese
- 1/2 cup cream cheese, softened
- 1/2 cup honey
- 3 large eggs
- 1 teaspoon vanilla extract
- Zest of 1 lemon
- Pinch of salt
Instructions:
- Prepare the Crust: Preheat your oven to 325°F (160°C). In a medium bowl, combine the gluten-free graham cracker crumbs with the melted butter. Mix until the crumbs are evenly moistened. Press the mixture firmly into the bottom of a 9-inch springform pan to form an even layer. Use the back of a spoon to compact the crust. Bake in the preheated oven for 10 minutes, then remove and allow it to cool while preparing the filling.
- Make the Filling: In a large mixing bowl, combine the ricotta cheese, cream cheese, and honey. Beat with an electric mixer on medium speed until the mixture is smooth and creamy. Add the eggs one at a time, beating well after each addition. Stir in the vanilla extract, lemon zest, and a pinch of salt. Blend until all ingredients are fully incorporated and the batter is smooth.
- Assemble the Cheesecake: Pour the ricotta mixture over the prepared crust in the springform pan. Smooth the top with a spatula to guarantee an even surface.
- Bake the Cheesecake: Place the cheesecake in the preheated oven and bake for about 45-50 minutes, or until the edges are set and the center is slightly wobbly. Avoid overbaking, as the cheesecake will continue to set as it cools.
- Cool and Serve: Remove the cheesecake from the oven and let it cool to room temperature. Once cooled, refrigerate for at least 4 hours or overnight to fully set. Before serving, carefully remove the sides of the springform pan. Drizzle additional honey over the top for an extra touch of sweetness, if desired.
Extra Tips: For the best results, confirm that all ingredients are at room temperature before starting the recipe. This will help them blend more smoothly and create a creamier texture.
When pressing the crust into the pan, use the bottom of a flat measuring cup to guarantee an even and compact layer. If you want a slightly different flavor profile, try adding a teaspoon of almond extract or a sprinkle of cinnamon to the filling.
Finally, for an elegant presentation, garnish with fresh berries or a dusting of powdered sugar right before serving.
Amaretti Cookies
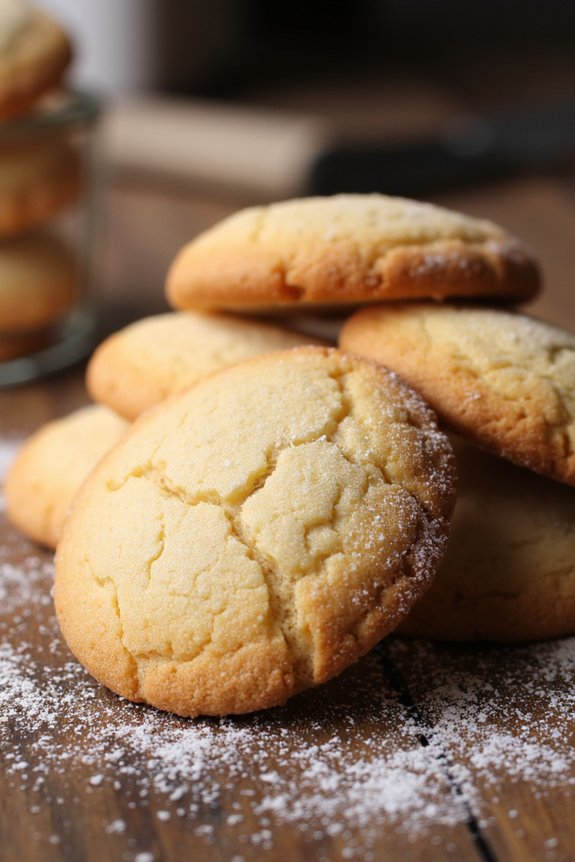
Amaretti cookies are a classic Italian treat that are naturally gluten-free, making them perfect for those with gluten sensitivities or simply anyone who loves these delightful almond-flavored cookies.
Traditionally made with almond flour, sugar, and egg whites, these cookies have a crispy exterior and a chewy, slightly soft interior that melts in your mouth. The rich taste of almonds coupled with the aromatic hint of vanilla or almond extract makes these cookies a favorite during holiday seasons and special occasions in Italy.
Whether you’re serving these cookies alongside tea or coffee, or simply enjoying them as a sweet snack on their own, Amaretti cookies are certain to please. This recipe yields approximately 24 cookies, making it an ideal serving size for 4-6 people. With simple ingredients and a straightforward method, you’ll find making these cookies as enjoyable as eating them.
Ingredients (Serves 4-6 people):
- 2 cups almond flour
- 1 cup granulated sugar
- 2 large egg whites
- 1 teaspoon pure almond extract
- 1/4 teaspoon pure vanilla extract
- 1/4 teaspoon salt
- Powdered sugar, for dusting
Cooking Instructions:
- Preheat the Oven: Start by preheating your oven to 325°F (165°C). Line a large baking sheet with parchment paper to prevent the cookies from sticking and to ease the cleaning process.
- Combine Dry Ingredients: In a medium-sized bowl, combine the almond flour, sugar, and salt. Mix well to ascertain that the dry ingredients are thoroughly combined.
- Beat Egg Whites: In a separate large bowl, beat the egg whites using an electric mixer on medium speed until they form soft peaks. This should take about 2-3 minutes. The egg whites should look foamy and hold their shape but still be soft.
- Add Extracts: Gently fold in the almond extract and vanilla extract into the egg whites. Be careful not to deflate the egg whites too much as this will affect the texture of the cookies.
- Combine Ingredients: Gradually fold the dry ingredients into the egg white mixture. Use a spatula to gently combine the ingredients until a sticky dough forms.
- Shape the Cookies: With slightly damp hands to prevent sticking, roll small portions of dough into 1-inch balls. Place the dough balls onto the prepared baking sheet, leaving about 2 inches between each cookie to allow for spreading.
- Dust with Powdered Sugar: Lightly dust the top of each cookie ball with powdered sugar for a sweet, decorative finish.
- Bake: Place the baking sheet in the preheated oven and bake for 20-25 minutes, or until the cookies are lightly golden on the edges and set in the center.
- Cool: Remove the cookies from the oven and allow them to cool on the baking sheet for about 5 minutes. Then transfer them to a wire rack to cool completely.
Extra Tips: For those who prefer a stronger almond flavor, you can replace the vanilla extract with more almond extract. If you like a chewier cookie, reduce the baking time slightly and ensure not to overbake them.
Amaretti cookies can be stored in an airtight container at room temperature for up to a week, maintaining their delightful texture and flavor. For added variety, consider dipping half of each cookie in melted chocolate and letting them set, adding a rich, indulgent twist.
Pistachio Gelato
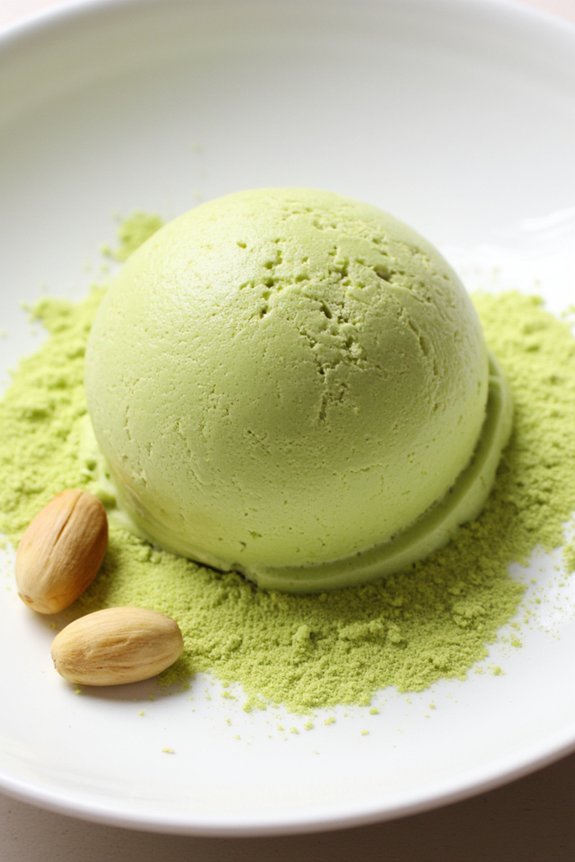
Pistachio Gelato is a delightful Italian dessert that offers a rich and creamy texture with the distinct flavor of pistachios. This gluten-free dessert is perfect for those who are looking to indulge in something sweet without compromising dietary restrictions.
Traditionally, gelato is known for its dense and smooth consistency, which is achieved by incorporating less air during the churning process compared to regular ice cream. This Pistachio Gelato recipe captures the essence of Italian gelato while guaranteeing that it’s safe for those with gluten sensitivities.
Making Pistachio Gelato at home allows you to control the quality of ingredients and tailor the sweetness to your liking. The key to a successful gelato lies in the use of high-quality pistachios, as they impart a natural and flavorful taste.
This recipe will guide you through the steps to create a batch of Pistachio Gelato that serves 4-6 people, making it perfect for a family gathering or a special occasion. With a little patience and the right technique, you’ll be able to enjoy a scoop (or two) of this creamy delight.
Ingredients (Serves 4-6):
- 1 cup unsalted pistachios, shelled
- 2 cups whole milk
- 1 cup heavy cream
- 3/4 cup granulated sugar
- 4 large egg yolks
- 1 teaspoon pure vanilla extract
- A pinch of salt
Cooking Instructions:
- Prepare the Pistachios:
- Begin by blanching the pistachios to remove their skins. Boil a small pot of water and add the pistachios for about 1-2 minutes. Drain them and rub them with a clean kitchen towel to remove the skins.
- Blend the Pistachios:
- Once the pistachios are peeled, transfer them to a food processor and blend until they form a fine paste. This will serve as the flavor base for your gelato.
- Heat the Milk and Cream:
- In a medium-sized saucepan, combine the whole milk and heavy cream. Heat the mixture over medium heat until it’s warm but not boiling. Stir occasionally to prevent it from scorching.
- Mix the Egg Yolks and Sugar:
- In a separate bowl, whisk together the egg yolks and granulated sugar until the mixture is pale and thick. This process helps to dissolve the sugar and incorporate air into the yolks.
- Temper the Egg Mixture:
- Slowly pour a small amount of the warm milk and cream mixture into the egg yolk mixture while whisking continuously. This tempers the eggs, preventing them from curdling when added to the hot liquid.
- Cook the Gelato Base:
- Pour the tempered egg mixture back into the saucepan with the remaining milk and cream. Cook over low heat, stirring constantly, until the mixture thickens and coats the back of a spoon. Don’t let it boil.
- Incorporate the Pistachio Paste:
- Remove the saucepan from heat and stir in the pistachio paste, vanilla extract, and a pinch of salt. Mix until the paste is fully incorporated and smooth.
- Chill the Mixture:
- Transfer the gelato base to a bowl and cover with plastic wrap, pressing it directly onto the surface to prevent a skin from forming. Refrigerate for at least 4 hours or until thoroughly chilled.
- Churn the Gelato:
- Once chilled, pour the mixture into an ice cream maker and churn according to the manufacturer’s instructions until it reaches a soft-serve consistency.
- Freeze for Firmness:
- Transfer the gelato to an airtight container and freeze for at least 2 hours to allow it to firm up before serving.
Extra Tips:
For the best flavor, use high-quality pistachios and avoid salted or roasted varieties, as they can alter the taste of the gelato.
If you have a nut allergy, consider substituting the pistachios with another nut or nut-free butter. Ascertain that your ice cream maker bowl is adequately frozen before use to achieve the best churning results.
Finally, store the gelato in a well-sealed container to prevent the formation of ice crystals. Enjoy your Pistachio Gelato within a week for the freshest taste.
Zabaione With Fresh Berries
Zabaione, also known as Zabaglione, is a classic Italian dessert that’s both elegant and delightfully simple. This sweet, frothy custard is made by whisking egg yolks with sugar and a splash of Marsala wine until thickened into a creamy, luxurious foam. Traditionally served warm, Zabaione is a versatile treat that pairs beautifully with fresh berries, making it an excellent gluten-free dessert option. The fresh berries provide a delightful contrast to the rich, velvety custard, offering a burst of flavor with each spoonful.
The beauty of Zabaione lies in its simplicity, relying on just a handful of quality ingredients to create a dessert that’s both sophisticated and satisfying. This recipe is perfect for a dinner party or a special occasion, as it can be prepared quickly and easily while still impressing your guests. With this recipe, you’ll create a luscious Zabaione with a serving size suitable for 4-6 people, ensuring everyone gets a generous taste of this Italian classic.
Ingredients for 4-6 People:
- 6 large egg yolks
- 1/2 cup granulated sugar
- 1/2 cup Marsala wine (or another wine like Moscato or a sweet white wine)
- 1 teaspoon vanilla extract
- 2 cups mixed fresh berries (such as strawberries, raspberries, blueberries, and blackberries)
- Optional: mint leaves for garnish
Cooking Instructions:
- Prepare the Berries: Wash and dry the fresh berries thoroughly. If you’re using strawberries, hull and slice them into quarters. Set aside until ready to serve.
- Set Up a Double Boiler: Fill a saucepan with a few inches of water and bring it to a simmer over medium heat. Place a heatproof bowl on top of the saucepan, ensuring that the bottom of the bowl doesn’t touch the water.
- Combine Ingredients: In the heatproof bowl, whisk together the egg yolks and sugar until the mixture is smooth and pale in color. This will take about 1-2 minutes of vigorous whisking.
- Add Marsala Wine: Gradually whisk in the Marsala wine and vanilla extract until fully incorporated.
- Cook the Zabaione: Continue whisking the mixture constantly over the simmering water. The goal is to prevent the eggs from scrambling while allowing the mixture to thicken. This process should take about 10-12 minutes, resulting in a thick, creamy custard that leaves a ribbon trail when the whisk is lifted.
- Serve Immediately: Once the Zabaione has reached the desired consistency, remove the bowl from the heat. Divide the fresh berries among serving dishes or glasses and spoon the warm Zabaione over the top. Garnish with mint leaves if desired.
Extra Tips:
When preparing Zabaione, it’s essential to maintain a steady whisking motion to prevent the eggs from curdling. If you prefer a non-alcoholic version, substitute the Marsala wine with a mixture of orange juice and lemon zest for a citrusy twist.
Additionally, Zabaione is best served immediately after preparation to enjoy its warm, airy texture. However, if you need to prepare it in advance, you can refrigerate the Zabaione and gently reheat it over a double boiler just before serving. Enjoy this delightful gluten-free dessert with a glass of your favorite wine for the ultimate Italian experience.
Flourless Almond and Orange Cake
Flourless Almond and Orange Cake is a delightful Italian dessert that combines the rich flavor of almonds with the zesty brightness of oranges. This cake isn’t only gluten-free but also incredibly moist and aromatic, making it a perfect treat for any occasion. The natural sweetness and nutty texture of the almonds complement the citrusy notes of fresh oranges, creating a harmonious balance of flavors that’s bound to impress your family and friends.
This dessert is surprisingly simple to make, requiring just a few ingredients that come together to create a luxurious cake. It’s a great option for those who are looking for a gluten-free dessert that doesn’t compromise on taste or texture. The cake’s dense yet tender crumb makes it an ideal companion for a cup of coffee or tea, or it can be served with a dollop of whipped cream or a scoop of vanilla ice cream for an extra indulgent experience.
Ingredients (Serves 4-6):
- 2 large oranges
- 6 large eggs
- 1 1/4 cups almond meal (finely ground almonds)
- 1 cup granulated sugar
- 1 teaspoon baking powder
- 1/4 teaspoon salt
- 1 teaspoon vanilla extract
- Powdered sugar (for dusting)
Cooking Instructions:
- Prepare the Oranges:
- Begin by washing the oranges thoroughly. Place them in a pot, cover with water, and bring to a boil. Reduce the heat and simmer for about 1 hour until the oranges are tender. Drain and allow them to cool completely.
- Preheat the Oven:
- Preheat your oven to 350°F (175°C). Grease and line a 9-inch (23 cm) round cake pan with parchment paper to facilitate easy removal of the cake.
- Blend the Oranges:
- Once the oranges have cooled, cut them into quarters and remove any seeds. Place the entire oranges, including the peel, into a food processor and blend until smooth to form a vibrant orange puree.
- Mix the Batter:
- In a large mixing bowl, whisk together the eggs, sugar, and vanilla extract until well combined and slightly frothy. Add the orange puree, almond meal, baking powder, and salt. Mix until all ingredients are fully incorporated and the batter is smooth.
- Bake the Cake:
- Pour the batter into the prepared cake pan, spreading it evenly. Bake in the preheated oven for 50-60 minutes, or until a skewer inserted into the center comes out clean. The top should be golden brown and firm to the touch.
- Cool and Serve:
- Allow the cake to cool in the pan for about 10 minutes before transferring it to a wire rack. Once completely cooled, dust with powdered sugar before serving.
Extra Tips:
For a more intense orange flavor, consider adding a teaspoon of orange zest to the batter. If you prefer a slightly sweeter cake, you can increase the sugar by up to 1/4 cup.
Be sure not to over-process the oranges to avoid bitterness from the pith. Finally, when serving the cake, you can also pair it with a citrus glaze or fresh berries to enhance its flavor profile.
This cake can be stored in an airtight container for up to three days, maintaining its moisture and flavor.
Chocolate Hazelnut Truffles
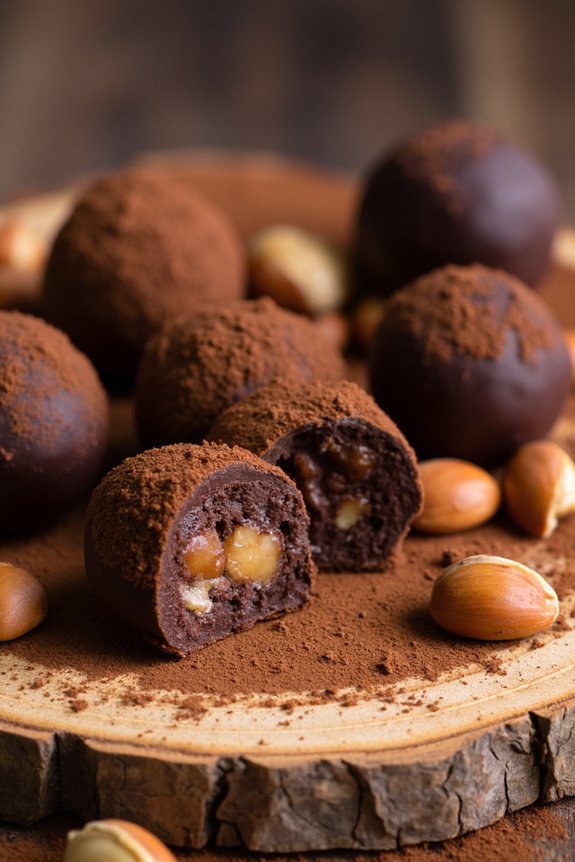
Chocolate Hazelnut Truffles are a delightful Italian gluten-free dessert that combines the rich flavors of chocolate and toasted hazelnuts. These bite-sized treats are perfect for satisfying your sweet tooth or impressing guests at a dinner party. Not only are they delicious, but they’re also surprisingly easy to make.
These truffles are made with simple ingredients, guaranteeing that those with gluten sensitivities can enjoy them without worry. The smooth, creamy texture of the chocolate paired with the crunch of hazelnuts creates a harmonious balance that’s irresistible.
Whether you’re a seasoned baker or a novice in the kitchen, these truffles are a fantastic choice for a homemade dessert. They can be customized by rolling them in different coatings such as cocoa powder, crushed hazelnuts, or even shredded coconut, making them as versatile as they’re tasty.
Here’s how you can make enough Chocolate Hazelnut Truffles to serve 4-6 people.
Ingredients:
- 1 cup of hazelnuts
- 8 ounces of dark chocolate, chopped
- 1/2 cup of heavy cream
- 2 tablespoons of unsalted butter
- 1/4 teaspoon of vanilla extract
- A pinch of salt
- 1/2 cup of cocoa powder (for coating)
Instructions:
- Toast the Hazelnuts: Preheat your oven to 350°F (175°C). Spread the hazelnuts evenly on a baking sheet and toast them in the oven for about 10 minutes, or until they’re fragrant and slightly golden. Allow them to cool, then rub them with a clean kitchen towel to remove most of the skins.
- Prepare the Chocolate Mixture: In a medium saucepan, combine the chopped dark chocolate, heavy cream, and butter. Heat the mixture over low heat, stirring constantly, until the chocolate and butter have completely melted and the mixture is smooth and glossy.
- Add Flavorings: Remove the chocolate mixture from the heat and stir in the vanilla extract and a pinch of salt. Mix until well combined.
- Incorporate Hazelnuts: Roughly chop the toasted hazelnuts and fold them into the chocolate mixture. Guarantee the hazelnuts are evenly distributed throughout the mixture.
- Chill the Mixture: Transfer the mixture to a shallow dish and refrigerate it for about 2 hours or until it’s firm enough to handle.
- Form the Truffles: Once the mixture is set, use a melon baller or a small spoon to scoop out portions of the chocolate mixture. Roll each portion into a small ball with your hands.
- Coat the Truffles: Place the cocoa powder in a shallow dish. Roll each truffle in the cocoa powder until fully coated. Shake off any excess cocoa powder.
- Serve and Store: Arrange the truffles on a serving plate or store them in an airtight container in the refrigerator until ready to serve. They can be kept for up to a week.
Extra Tips:
For the best flavor, use high-quality dark chocolate with at least 70% cocoa content. If you prefer a sweeter truffle, you can substitute milk chocolate for a portion of the dark chocolate.
To add an extra layer of flavor, consider adding a teaspoon of hazelnut liqueur, such as Frangelico, to the chocolate mixture. When forming the truffles, keep your hands cool to prevent the chocolate from melting too quickly.
If the mixture becomes too soft to handle, return it to the refrigerator for a few minutes before continuing.