

If you’re anything like me, you can’t resist the allure of a delicious dessert. Italian sweets hold a special place in my heart, especially those featuring ricotta. From crispy cannoli filled with creamy goodness to decadent ricotta cheesecakes, there’s something magical about these treats. Join me as we explore a selection of indulgent recipes that showcase the versatility of ricotta. Let’s get started on creating some sweet memories in the kitchen!
Classic Cannoli With Ricotta Filling
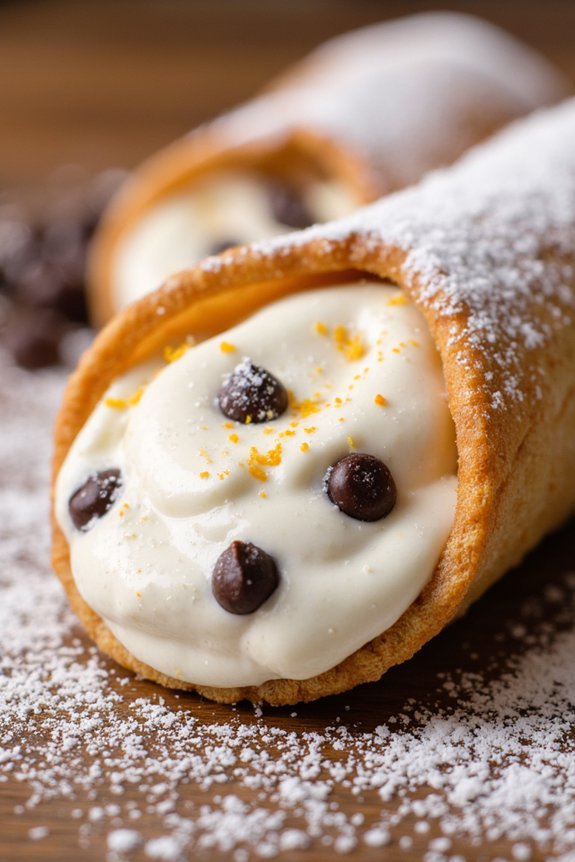
Cannoli are a traditional Italian dessert known for their crispy, tube-shaped shells filled with a luscious ricotta cheese mixture. Originating from the island of Sicily, cannoli have become a beloved treat worldwide, often enjoyed during special occasions or simply as a sweet indulgence.
Preparing classic cannoli with ricotta filling is a delightful culinary experience, allowing you to savor the authentic taste of Italy right in your own kitchen. With a perfect balance of creamy, sweet, and slightly tangy flavors encased in a crunchy shell, this dessert is a true reflection of the rich heritage of Italian pastry-making.
The key to crafting delectable cannoli lies in the quality of the ricotta filling and the crispness of the shells. It’s crucial to use fresh, high-quality ricotta cheese, which should be well-drained to prevent the filling from becoming too watery.
The shells, traditionally made with a hint of cinnamon and Marsala wine, need to be fried until golden brown and should be filled just before serving to guarantee they remain crisp. With a few simple ingredients and a bit of patience, you can create a batch of cannoli that will leave a lasting impression on your family and friends.
Ingredients for 4-6 servings:
- 1 1/2 cups ricotta cheese
- 1/2 cup powdered sugar
- 1/2 teaspoon vanilla extract
- 1/4 cup mini chocolate chips
- Zest of 1 orange
- 1 cup all-purpose flour
- 1 tablespoon sugar
- 1/2 teaspoon cinnamon
- 1/4 cup unsalted butter, chilled and cubed
- 1 egg yolk
- 1/4 cup Marsala wine
- Vegetable oil for frying
- Powdered sugar for dusting
Cooking Instructions:
1. Prepare the Ricotta Filling: Begin by placing the ricotta cheese in a fine-mesh strainer or cheesecloth over a bowl. Allow it to drain in the refrigerator for at least an hour to remove excess moisture.
Once drained, transfer the ricotta to a mixing bowl and add powdered sugar, vanilla extract, mini chocolate chips, and orange zest. Mix well until smooth and creamy. Cover and refrigerate the filling until ready to use.
2. Make the Cannoli Shell Dough: In a large bowl, combine the flour, sugar, and cinnamon. Add the chilled butter and, using your fingers, rub it into the flour mixture until it resembles coarse crumbs.
In a small bowl, whisk together the egg yolk and Marsala wine. Gradually add this mixture to the flour mixture, stirring until a dough forms. Knead the dough on a lightly floured surface until smooth. Wrap in plastic wrap and refrigerate for 30 minutes.
3. Roll Out and Shape the Dough: After chilling, divide the dough into two portions. Roll out each portion on a floured surface to a thickness of about 1/8 inch.
Using a 4-inch round cutter, cut out circles from the dough. Wrap each circle around a metal cannoli tube, sealing the edge with a dab of water.
4. Fry the Cannoli Shells: Heat vegetable oil in a deep saucepan to 350°F (175°C). Carefully lower the cannoli tubes into the hot oil and fry until golden brown, about 2-3 minutes.
Remove them with a slotted spoon and drain on paper towels. Allow the shells to cool slightly before gently sliding them off the tubes.
5. Fill the Cannoli Shells: Just before serving, fill a piping bag fitted with a wide tip with the ricotta filling. Pipe the filling into each end of the cannoli shells until full.
Dust with powdered sugar, and serve immediately for the best texture and flavor.
Extra Tips:
To guarantee the best results, make sure the ricotta is thoroughly drained to avoid a runny filling. Always fill the cannoli shells just before serving to keep them crisp.
If you’re short on time, you can purchase pre-made cannoli shells from Italian bakeries or specialty stores. For a fun twist, consider adding chopped pistachios or candied fruits to the filling.
Finally, handle the fried shells with care, as they’re delicate and can crack easily. Enjoy your homemade classic cannoli with ricotta filling fresh for the ultimate taste experience!
Italian Ricotta Cheesecake
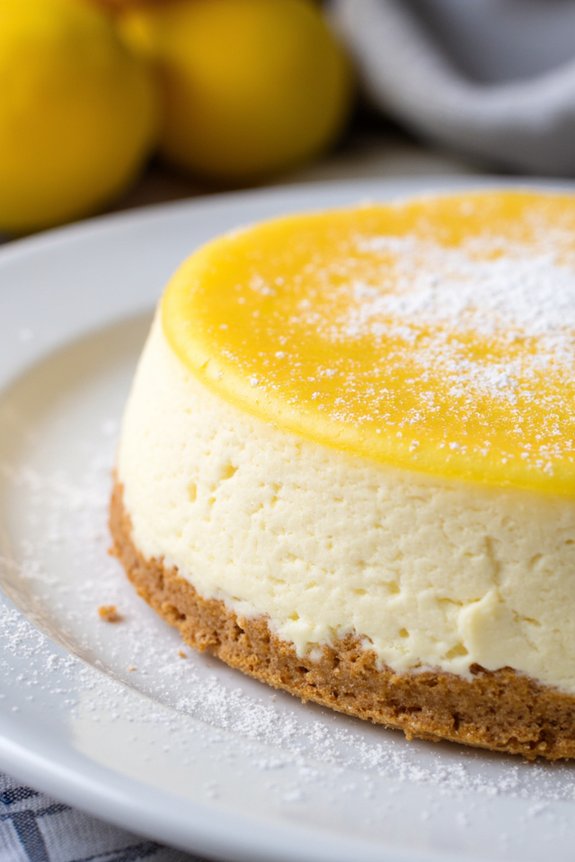
Italian Ricotta Cheesecake is a delightful and creamy dessert that embodies the rich culinary traditions of Italy. This cheesecake is lighter than its American counterpart, thanks to the use of ricotta cheese, which provides a smooth texture and a subtle sweetness. The addition of lemon zest and vanilla extract enhances the flavor profile, offering a revitalizing and aromatic experience with each bite.
Whether served as a finale to a hearty Italian meal or as a sweet indulgence on its own, this cheesecake is sure to impress with its unique taste and elegant presentation.
This Italian Ricotta Cheesecake recipe is perfect for serving 4-6 people and is ideal for those who appreciate the delicate balance of flavors and textures. The preparation involves creating a simple yet flavorful crust, followed by a creamy ricotta filling that bakes to perfection. The result is a luscious dessert that’s both visually appealing and delectable, making it a fantastic choice for entertaining guests or enjoying a quiet evening at home.
Ingredients (serving size: 4-6 people):
- 1 1/2 cups graham cracker crumbs
- 1/2 cup unsalted butter, melted
- 2 cups ricotta cheese
- 1 cup cream cheese, softened
- 3/4 cup granulated sugar
- 3 large eggs
- 1 teaspoon vanilla extract
- Zest of 1 lemon
- 2 tablespoons all-purpose flour
- 1/4 teaspoon salt
- Powdered sugar for dusting (optional)
Cooking Instructions:
- Preheat the Oven: Begin by preheating your oven to 350°F (175°C). This guarantees that the oven reaches the necessary temperature for even cooking right from the start.
- Prepare the Crust: In a medium-sized bowl, combine the graham cracker crumbs and melted butter. Mix until the crumbs are fully moistened. Press the mixture evenly into the bottom of a 9-inch springform pan to create the crust. Use the back of a spoon or a flat-bottomed glass to press it down firmly.
- Make the Ricotta Filling: In a large mixing bowl, combine the ricotta cheese, cream cheese, and granulated sugar. Use an electric mixer on medium speed to blend until smooth and creamy.
- Incorporate Eggs and Flavors: Add the eggs one at a time, mixing well after each addition. Then, stir in the vanilla extract, lemon zest, flour, and salt. Continue to mix until all ingredients are fully incorporated and the batter is smooth.
- Pour and Bake: Pour the ricotta mixture over the prepared crust in the springform pan. Smooth the top with a spatula if necessary. Place the pan in the preheated oven and bake for 55-60 minutes, or until the center is set and the top is lightly golden.
- Cool and Serve: Once baked, remove the cheesecake from the oven and allow it to cool at room temperature for about an hour. Then, refrigerate for at least 4 hours or overnight to let it set completely. Before serving, dust the top with powdered sugar if desired.
Extra Tips:
For the best texture and flavor, make sure that all your ingredients are at room temperature before beginning the preparation. This helps the cheeses blend smoothly, preventing lumps in the batter.
When baking, avoid opening the oven door frequently, as sudden changes in temperature can cause the cheesecake to crack. If you do notice cracks, a dusting of powdered sugar or a topping of fresh fruit can easily disguise them while adding extra flavor.
Ricotta and Lemon Cookies

Ricotta and Lemon Cookies are a delightful treat that combines the creaminess of ricotta cheese with the zesty freshness of lemon. These cookies are soft, moist, and have a cake-like texture that makes them irresistible. Perfect with a cup of tea or coffee, they can be enjoyed as a light dessert or a sweet snack anytime during the day. The combination of ricotta and lemon results in a unique flavor profile that’s both invigorating and comforting.
Making these cookies is quite straightforward, and they’re sure to impress your family and friends with their delicious taste and unique texture. They’re a perfect way to incorporate ricotta into your dessert repertoire, showcasing the versatility of this Italian cheese. Gather your ingredients and follow the instructions below to create a batch of these delightful cookies, which will serve 4-6 people.
Ingredients:
- 1 cup ricotta cheese
- 1 cup granulated sugar
- 1/2 cup unsalted butter, softened
- 1 large egg
- 2 tablespoons lemon zest (about 2 lemons)
- 2 tablespoons freshly squeezed lemon juice
- 1 teaspoon vanilla extract
- 2 cups all-purpose flour
- 1 tablespoon baking powder
- 1/2 teaspoon salt
- 1 cup powdered sugar (for glaze)
- 2-3 tablespoons lemon juice (for glaze)
Instructions:
- Preheat the Oven: Begin by preheating your oven to 350°F (175°C). Line two baking sheets with parchment paper to make sure the cookies don’t stick and set them aside.
- Cream Ingredients: In a large mixing bowl, combine the ricotta cheese, granulated sugar, and softened butter. Using an electric mixer, beat the mixture on medium speed until it’s smooth and creamy. This should take about 2-3 minutes.
- Mix Wet Ingredients: Add the egg, lemon zest, lemon juice, and vanilla extract to the creamed mixture. Continue beating until all the ingredients are well combined and you have a uniform batter.
- Combine Dry Ingredients: In a separate bowl, whisk together the flour, baking powder, and salt. Gradually add the dry ingredients to the wet mixture, stirring gently until just combined. Be careful not to overmix, as this can result in dense cookies.
- Scoop and Bake: Using a tablespoon or a cookie scoop, drop rounded tablespoons of dough onto the prepared baking sheets, spacing them about 2 inches apart. Bake in the preheated oven for 12-15 minutes, or until the edges are lightly golden. Allow the cookies to cool on the baking sheet for 5 minutes before transferring them to a wire rack to cool completely.
- Prepare the Glaze: While the cookies are cooling, prepare the lemon glaze. In a small bowl, whisk together the powdered sugar and lemon juice until smooth. Adjust the consistency by adding more lemon juice if necessary to achieve a drizzly texture.
- Glaze the Cookies: Once the cookies are completely cooled, drizzle the lemon glaze over them using a spoon. Allow the glaze to set for a few minutes before serving.
Extra Tips: When making Ricotta and Lemon Cookies, make sure that your butter is at room temperature to allow for easier creaming with the ricotta and sugar. Additionally, for a stronger lemon flavor, you can add an extra tablespoon of lemon zest to the batter or increase the amount of lemon juice in the glaze.
If you prefer a less sweet cookie, you can reduce the amount of sugar in the glaze. These cookies can be stored in an airtight container for up to three days, but they’re best enjoyed fresh. Enjoy experimenting with this recipe and savor the invigorating taste of lemon combined with the creamy texture of ricotta!
Sicilian Cassata Cake
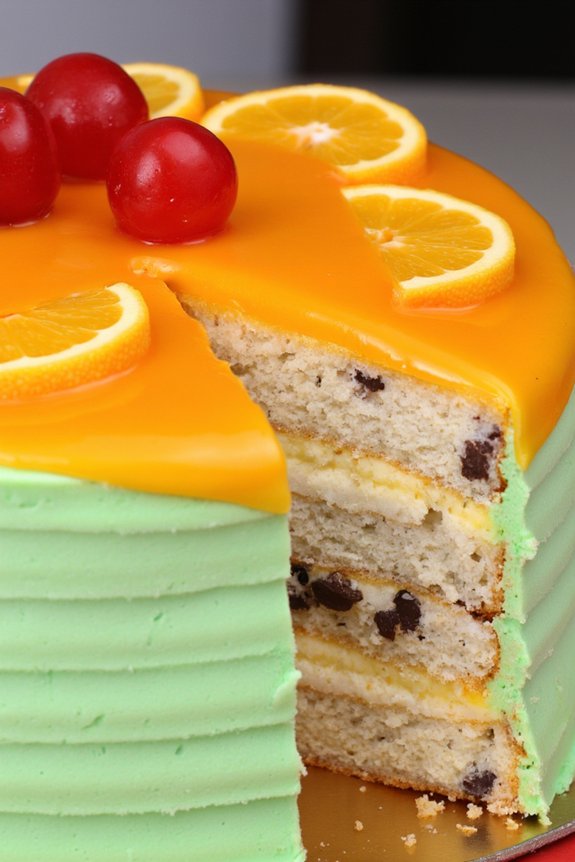
Sicilian Cassata Cake is a traditional Italian dessert that hails from the sun-soaked island of Sicily. This cake is a celebration of flavors and textures, combining a moist sponge cake with a rich ricotta filling, all wrapped in a marzipan shell and adorned with vibrant candied fruits. The origins of Cassata can be traced back to the Arab influence on Sicilian cuisine, and its name is believed to come from the Arabic word “qas’ah,” which refers to the bowl used to shape this delightful masterpiece.
Whether enjoyed during festive occasions or as a sweet indulgence, the Sicilian Cassata Cake is a delectable showcase of Sicily’s rich culinary heritage.
Creating a Sicilian Cassata Cake requires some time and effort, but the end result is a stunning centerpiece that’s sure to impress. The key to a successful Cassata is to guarantee that each component is prepared with care. The sponge cake should be light and airy, the ricotta filling should be creamy and perfectly sweetened, and the marzipan should be smooth and pliable.
This recipe serves 4-6 people, making it ideal for a small gathering or family meal. Prepare to transport your taste buds to the heart of Sicily with each heavenly bite.
Ingredients:
- 1 sponge cake (9-inch round)
- 2 cups ricotta cheese
- 1 cup powdered sugar
- 1 teaspoon vanilla extract
- 1/2 cup mini chocolate chips
- 1/4 cup candied citrus peels, chopped
- 1/4 cup maraschino cherries, chopped
- 1/2 cup marzipan
- Green food coloring
- 1/2 cup candied fruit for decoration
- 1/4 cup apricot jam
- 2 tablespoons water
Cooking Instructions:
- Prepare the Ricotta Filling: In a large mixing bowl, combine the ricotta cheese, powdered sugar, and vanilla extract. Mix until smooth and creamy. Fold in the mini chocolate chips, chopped candied citrus peels, and maraschino cherries. Set aside in the refrigerator to allow the flavors to meld.
- Assemble the Cake: Slice the sponge cake horizontally into three even layers. Place the bottom layer on a serving plate. Spread half of the ricotta filling evenly over the layer. Place the second layer on top and spread the remaining ricotta filling. Top with the final sponge cake layer.
- Prepare the Marzipan: Knead the marzipan until soft and pliable. Add a few drops of green food coloring and continue to knead until the color is evenly distributed. Roll out the marzipan into a thin sheet large enough to cover the entire cake.
- Cover the Cake: Gently drape the marzipan over the assembled cake, smoothing it out with your hands to guarantee a snug fit. Trim any excess marzipan from the bottom edges.
- Decorate the Cake: In a small saucepan, heat the apricot jam and water until melted and smooth. Brush the top and sides of the marzipan-covered cake with the apricot glaze. Decorate the cake with candied fruit, arranging them in an attractive pattern on top.
- Chill the Cake: Place the decorated cake in the refrigerator for at least 2 hours to allow the flavors to develop and the marzipan to set.
Extra Tips:
For the best results, use high-quality ricotta cheese and allow it to drain in a sieve for an hour before using to guarantee a thick and creamy filling. If you prefer a smoother ricotta texture, you can also pass it through a fine mesh sieve.
When working with marzipan, keep the surface dusted with a light layer of powdered sugar to prevent sticking. This cake can be made a day in advance, allowing the flavors to deepen overnight, but guarantee it’s stored in the refrigerator and covered to maintain freshness.
Ricotta Chocolate Chip Cake
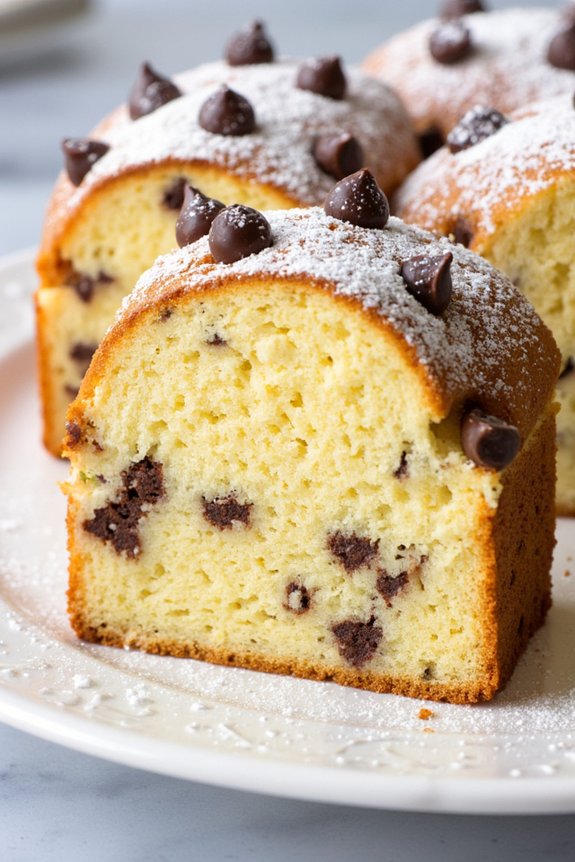
Indulge in the delightful flavors of an Italian Ricotta Chocolate Chip Cake, a perfect blend of creamy ricotta cheese and rich chocolate chips. This dessert is a wonderful way to end any meal, bringing a touch of Italian sweetness to your table. The ricotta adds a moist and tender texture to the cake, while the chocolate chips provide little bursts of decadence with every bite.
Whether you’re hosting a dinner party or simply looking for a special treat to enjoy with your family, this cake is bound to impress.
The Ricotta Chocolate Chip Cake is easy to prepare and requires just a few simple ingredients. It’s an ideal option for those who appreciate a homemade dessert that doesn’t require extensive baking skills. The cake is light, fluffy, and subtly sweet, making it a versatile choice for various occasions.
Serve it with a dusting of powdered sugar or a dollop of whipped cream for an added touch of elegance. Preparing this cake will bring a taste of Italy into your kitchen and leave your guests craving for more.
Ingredients for 4-6 servings:
- 1 ½ cups ricotta cheese
- 1 cup all-purpose flour
- ½ cup unsalted butter, softened
- ¾ cup granulated sugar
- 2 large eggs
- 1 teaspoon vanilla extract
- 1 teaspoon baking powder
- ¼ teaspoon salt
- ¾ cup mini chocolate chips
- Powdered sugar for dusting (optional)
Cooking Instructions:
- Preheat the Oven: Start by preheating your oven to 350°F (175°C). Grease and flour a 9-inch round cake pan to prevent sticking.
- Cream the Butter and Sugar: In a large mixing bowl, beat together the softened butter and granulated sugar until light and fluffy. This should take about 3-4 minutes using an electric mixer.
- Add Ricotta and Eggs: Mix in the ricotta cheese, followed by the eggs, one at a time. Make certain each egg is fully incorporated before adding the next. Stir in the vanilla extract.
- Combine Dry Ingredients: In a separate bowl, whisk together the flour, baking powder, and salt. Gradually add this dry mixture to the ricotta mixture, mixing until just combined.
- Fold in Chocolate Chips: Gently fold in the mini chocolate chips, ensuring they’re evenly distributed throughout the batter.
- Bake the Cake: Pour the batter into the prepared cake pan, smoothing the top with a spatula. Bake for 35-40 minutes, or until a toothpick inserted into the center comes out clean.
- Cool and Serve: Allow the cake to cool in the pan for about 10 minutes before transferring it to a wire rack to cool completely. Dust with powdered sugar before serving, if desired.
Extra Tips:
For the best results, make certain that all your ingredients are at room temperature before starting. This will help the batter mix more evenly and result in a smoother cake texture.
If you prefer a more pronounced chocolate flavor, consider using dark or semi-sweet chocolate chips. You can also experiment with adding a hint of orange zest or almond extract for a unique twist.
Lemon Ricotta Pound Cake
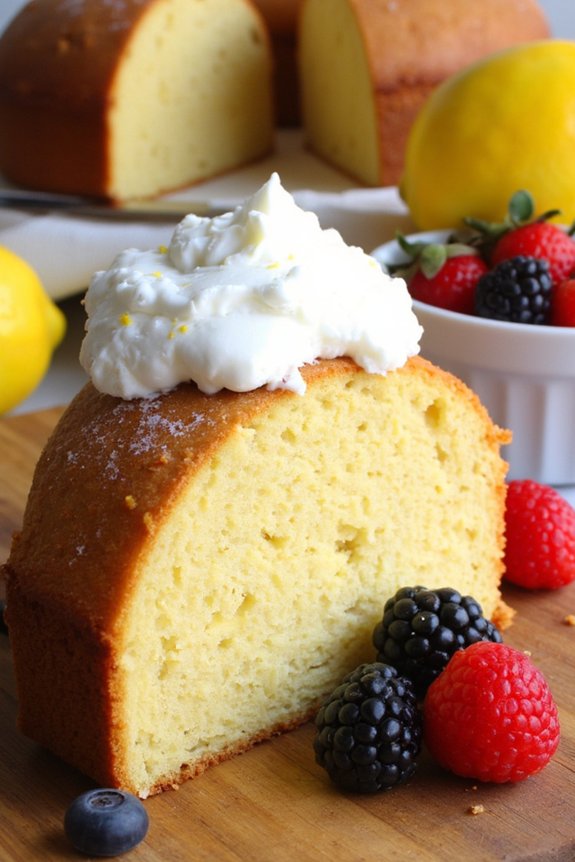
The beauty of a Lemon Ricotta Pound Cake lies in its simplicity and the ease with which it can be made. With just a few basic ingredients and minimal preparation time, you can whip up a dessert that tastes like it took hours to prepare.
The key to this cake’s success is using fresh, high-quality ingredients, especially the ricotta cheese and lemons. By following the steps outlined below, you’ll be able to create a cake that’s both delicious and visually appealing, with a hint of Italian flair.
Ingredients (Serves 4-6):
- 1 1/2 cups all-purpose flour
- 2 teaspoons baking powder
- 1/2 teaspoon salt
- 3/4 cup unsalted butter, softened
- 1 1/2 cups granulated sugar
- 3 large eggs
- 1 teaspoon vanilla extract
- 1 cup ricotta cheese
- Zest of 2 lemons
- 1/4 cup fresh lemon juice
Cooking Instructions:
- Preheat the Oven and Prepare the Pan: Preheat your oven to 350°F (175°C). Grease a 9×5 inch loaf pan with butter or nonstick spray, and line the bottom with parchment paper for easy removal later.
- Mix Dry Ingredients: In a medium bowl, whisk together the flour, baking powder, and salt. This will guarantee that the baking powder is evenly distributed throughout the flour.
- Cream Butter and Sugar: In a large mixing bowl, beat the softened butter and sugar together using an electric mixer on medium speed until light and fluffy, about 3-4 minutes. This step helps to incorporate air into the batter, resulting in a lighter cake.
- Add Eggs and Flavorings: Add the eggs one at a time to the butter and sugar mixture, beating well after each addition. Then, mix in the vanilla extract, ricotta cheese, lemon zest, and lemon juice until fully combined.
- Combine Wet and Dry Ingredients: Gradually add the dry ingredients to the wet ingredients, mixing on low speed just until combined. Be careful not to overmix, as this can result in a dense cake.
- Bake the Cake: Pour the batter into the prepared loaf pan and smooth the top with a spatula. Bake in the preheated oven for 50-60 minutes, or until a toothpick inserted into the center comes out clean.
- Cool and Serve: Allow the cake to cool in the pan for about 10 minutes, then transfer it to a wire rack to cool completely. Once cooled, slice and serve. For an extra treat, consider topping each slice with a dollop of whipped cream and some fresh berries.
Extra Tips:
For the best results, verify that all your ingredients are at room temperature before you begin baking. This helps them blend together more smoothly and evenly.
If you prefer a stronger lemon flavor, you can add an extra tablespoon of lemon zest to the batter. Additionally, if the top of the cake starts to brown too quickly while baking, you can loosely cover it with aluminum foil for the remaining bake time.
Enjoy your Lemon Ricotta Pound Cake with a cup of tea or coffee for a truly indulgent experience.
Ricotta Tiramisu
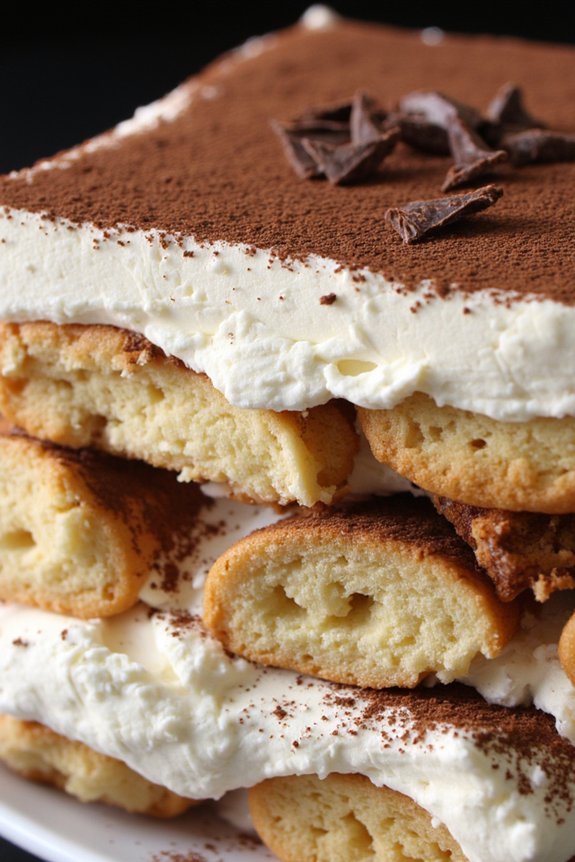
Ricotta Tiramisu is a delightful twist on the classic Italian dessert, offering a lighter and creamier texture without sacrificing the decadent flavors we all adore. Ricotta cheese adds a fresh and subtle richness that complements the traditional espresso-soaked ladyfingers and cocoa powder. This version of Tiramisu is perfect for those who love the classic dessert but are looking for a slightly healthier alternative or simply want to try something new.
This recipe serves 4-6 people, making it ideal for a cozy dinner party or a family gathering. You’ll appreciate how simple it’s to prepare, requiring no baking and minimal effort. The result is a luscious dessert that balances creamy ricotta with the boldness of coffee and chocolate flavors. Whether you’re an experienced cook or a novice in the kitchen, this Ricotta Tiramisu will impress your guests and quickly become a favorite in your dessert repertoire.
Ingredients:
- 1 cup ricotta cheese
- 1 cup mascarpone cheese
- 1/2 cup granulated sugar
- 1 teaspoon vanilla extract
- 2 cups strong brewed espresso or coffee, cooled
- 1/4 cup coffee liqueur (optional)
- 24-30 ladyfinger biscuits
- Unsweetened cocoa powder, for dusting
- Dark chocolate shavings, for garnish (optional)
Instructions:
- Prepare the Ricotta Mixture: In a large mixing bowl, combine the ricotta cheese, mascarpone cheese, granulated sugar, and vanilla extract. Use an electric mixer to beat the mixture until smooth and creamy. This should take about 3-5 minutes. Set aside.
- Prepare the Coffee Mixture: In a shallow dish, combine the cooled espresso or coffee with the coffee liqueur if using. Stir well to mix. This mixture will be used to soak the ladyfingers and give them their signature coffee flavor.
- Assemble the Tiramisu: Quickly dip each ladyfinger into the coffee mixture, making sure they’re soaked but not too soggy. Place a layer of soaked ladyfingers at the bottom of your serving dish or individual serving cups.
- Layer the Dessert: Spread half of the ricotta mixture over the layer of ladyfingers. Use a spatula to smooth it out evenly. Repeat the process with another layer of soaked ladyfingers followed by the remaining ricotta mixture.
- Chill and Set: Cover the dish with plastic wrap and refrigerate for at least 4 hours or overnight to allow the flavors to meld and the dessert to set properly.
- Serve: Before serving, dust the top with unsweetened cocoa powder. For an extra touch, add dark chocolate shavings. Serve chilled and enjoy!
Extra Tips:
To guarantee the best texture, make sure the ricotta cheese is well-drained before using. You can do this by placing it in a fine-mesh sieve over a bowl for a few hours or overnight in the refrigerator.
When dipping the ladyfingers in the coffee mixture, be quick to prevent them from becoming too soggy, which could result in a mushy dessert. For an added flavor dimension, consider adding a pinch of cinnamon to the cocoa powder dusting.
Finally, always serve Ricotta Tiramisu chilled for the best taste and texture.
Ricotta Zeppole
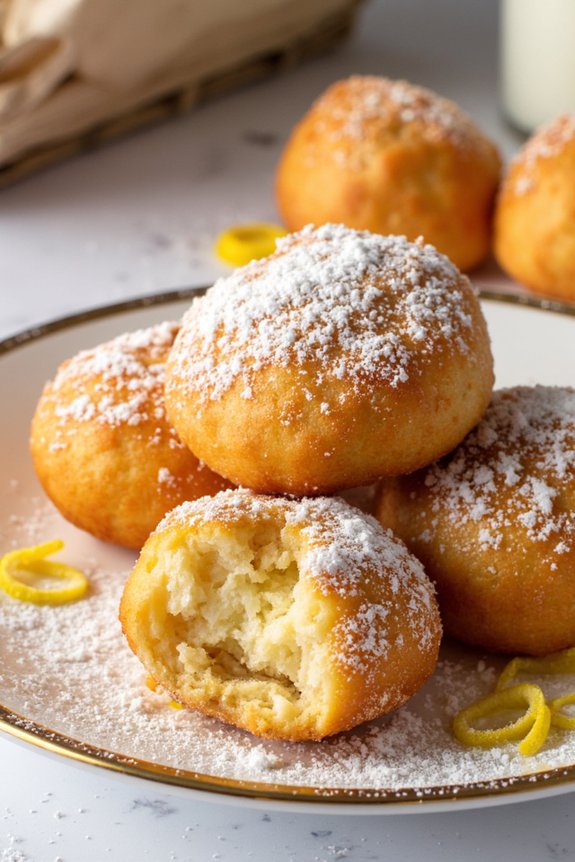
Ricotta Zeppole are delightful Italian doughnuts, perfect for any occasion and guaranteed to satisfy your sweet tooth. They’re crispy on the outside and soft on the inside, with a hint of lemon and the creamy richness of ricotta cheese. These traditional Italian treats are deep-fried to golden perfection and topped with a dusting of powdered sugar, making them an irresistible dessert.
Whether you’re serving them at a festive gathering or enjoying them with a cup of coffee, Ricotta Zeppole are a delicious way to celebrate the flavors of Italy.
Preparing Ricotta Zeppole is a fun and rewarding process that doesn’t require any special skills. The dough comes together quickly with just a few basic ingredients, and the frying process fills your kitchen with the tantalizing aroma of freshly made doughnuts.
Best of all, these zeppole are versatile enough to be customized with different toppings or fillings, allowing you to put your own spin on this classic dessert. With this recipe, you’ll be able to serve 4-6 people, making sure everyone gets a taste of these delightful treats.
Ingredients for Ricotta Zeppole (Serves 4-6):
- 1 cup ricotta cheese
- 2 large eggs
- 1/4 cup granulated sugar
- 1 teaspoon vanilla extract
- Zest of 1 lemon
- 1 cup all-purpose flour
- 1 tablespoon baking powder
- 1/4 teaspoon salt
- Vegetable oil, for frying
- Powdered sugar, for dusting
Cooking Instructions:
- Prepare the Dough: In a large mixing bowl, combine the ricotta cheese, eggs, granulated sugar, vanilla extract, and lemon zest. Mix until the ingredients are well incorporated and smooth.
- Combine Dry Ingredients: In another bowl, whisk together the all-purpose flour, baking powder, and salt. Gradually add the dry ingredients to the ricotta mixture, stirring gently to form a thick batter.
- Heat the Oil: Pour vegetable oil into a deep, heavy-bottomed pot or frying pan, filling it to about 2 inches deep. Heat the oil over medium heat until it reaches about 350°F (175°C). Use a thermometer to verify the oil maintains a consistent temperature.
- Fry the Zeppole: Using a spoon or a small cookie scoop, carefully drop spoonfuls of the batter into the hot oil, taking care not to overcrowd the pot. Fry the zeppole in batches, turning them occasionally, until they’re golden brown on all sides, about 3-4 minutes per batch.
- Drain and Cool: Use a slotted spoon to remove the zeppole from the oil and transfer them to a paper towel-lined plate to drain any excess oil. Allow them to cool slightly.
- Serve: Once the zeppole are cool enough to handle, dust them generously with powdered sugar. Serve them warm and enjoy!
Extra Tips:
For an extra burst of flavor, consider adding a pinch of cinnamon or nutmeg to the batter. If you prefer a filling, you can make a small incision in each zeppole and pipe in a sweet ricotta cream or your favorite fruit jam.
Ricotta and Almond Tart
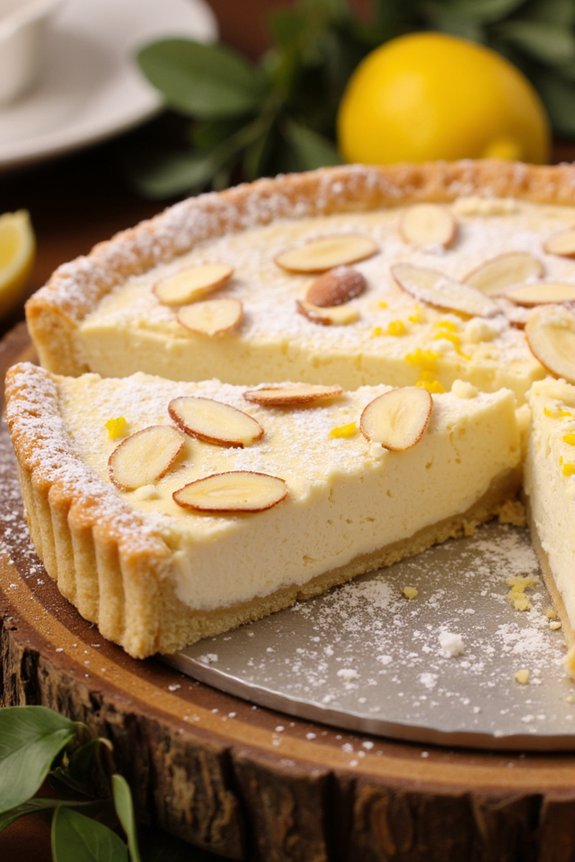
This Italian Ricotta and Almond Tart is a delightful dessert that combines the creamy texture of ricotta cheese with the nutty flavor of almonds, all encased in a buttery pastry crust. Perfect for a special occasion or a cozy family dinner, this tart offers a delicate balance of sweetness and nuttiness, making it an irresistible treat.
The subtle hints of lemon zest and vanilla in the filling complement the richness of the ricotta, while the almond topping adds a satisfying crunch. Preparing this tart is a straightforward process that results in a stunning dessert worthy of any dinner table.
With a few simple ingredients and some basic baking skills, you can create a dessert that looks and tastes like it came from a traditional Italian bakery. This recipe is designed to serve 4-6 people, making it an ideal choice for a small gathering or festive meal.
Ingredients (Serves 4-6):
- 1 1/2 cups all-purpose flour
- 1/2 cup unsalted butter, chilled and cut into small pieces
- 1/4 cup granulated sugar
- 1/4 teaspoon salt
- 2 large eggs
- 1 teaspoon vanilla extract
- 1 cup ricotta cheese
- 1/2 cup almond flour
- 1/2 cup powdered sugar
- 1 tablespoon lemon zest
- 1/4 cup sliced almonds
Cooking Instructions:
- Prepare the Pastry Dough: In a large mixing bowl, combine the all-purpose flour, granulated sugar, and salt. Add the chilled butter pieces and use a pastry cutter or your fingers to blend the butter into the flour mixture until it resembles coarse crumbs.
- Form the Dough: Add one egg and vanilla extract to the flour mixture. Mix until the dough comes together. Form the dough into a ball, wrap it in plastic wrap, and refrigerate for at least 30 minutes.
- Preheat the Oven: While the dough chills, preheat your oven to 350°F (175°C).
- Roll Out the Dough: On a lightly floured surface, roll out the chilled dough to fit a 9-inch tart pan. Transfer the dough to the pan, pressing it into the edges and trimming any excess. Prick the base with a fork to prevent bubbling.
- Blind Bake the Crust: Place parchment paper over the crust and fill it with pie weights or dried beans. Bake the crust in the preheated oven for 15 minutes. Remove the weights and parchment paper, and bake for an additional 5 minutes. Set aside to cool.
- Prepare the Ricotta Filling: In a medium bowl, whisk together the ricotta cheese, almond flour, powdered sugar, lemon zest, and the remaining egg until smooth and well combined.
- Fill the Tart: Pour the ricotta filling into the cooled pastry crust, spreading it evenly.
- Add Almond Topping: Sprinkle the sliced almonds over the top of the filling.
- Bake the Tart: Return the tart to the oven and bake for 25-30 minutes, or until the filling is set and the almonds are lightly golden.
- Cool and Serve: Allow the tart to cool in the pan for at least 15 minutes before removing it. Serve warm or at room temperature.
Extra Tips:
When preparing the pastry dough, make sure the butter is well-chilled; this will help achieve a flaky crust. If you find the dough is too sticky to handle, return it to the fridge for a few more minutes to firm up.
For a richer flavor, consider toasting the sliced almonds before adding them to the tart. This will enhance their nutty taste and add a delicious aroma to your dessert. Serve the tart with a dollop of whipped cream or a scoop of vanilla gelato for an extra touch of indulgence.
Chocolate Ricotta Mousse
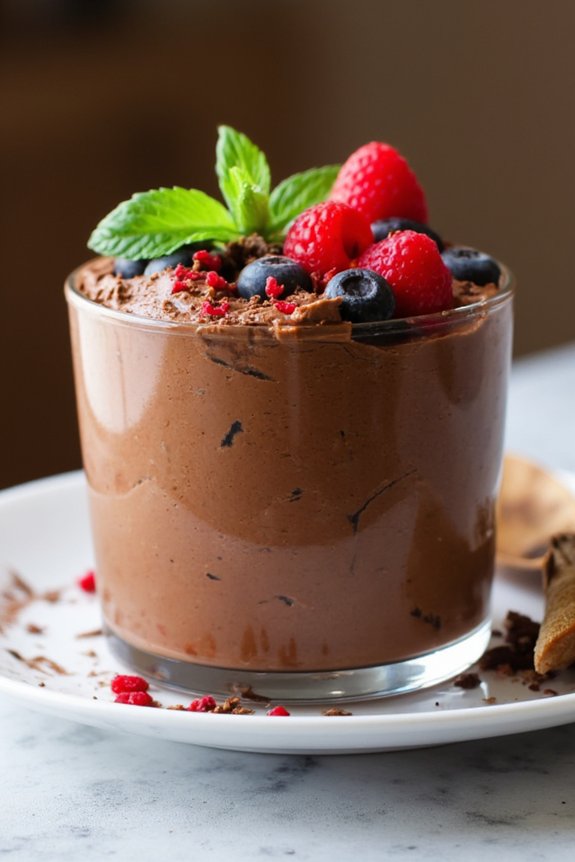
Chocolate Ricotta Mousse is a delightful Italian-inspired dessert that combines the creamy texture of ricotta cheese with the rich, indulgent flavor of chocolate. This mousse is perfect for those who love the classic combination of chocolate and cheese, offering a unique twist with its light and fluffy consistency.
It’s an elegant dessert choice for a dinner party or a cozy night in, and it can be prepared in advance, allowing you to spend more time with your guests.
The smooth and velvety nature of this mousse is achieved by carefully folding together whipped cream, ricotta cheese, and melted chocolate. The result is a luscious treat that melts in your mouth, leaving you with a satisfying chocolate finish.
This recipe is designed to serve 4-6 people, making it an ideal option for small gatherings or family desserts. By following the steps outlined below, you’ll be able to create a mouthwatering Chocolate Ricotta Mousse that everyone will love.
Ingredients:
- 1 cup ricotta cheese
- 1 cup heavy cream
- 1/2 cup powdered sugar
- 1 teaspoon vanilla extract
- 6 ounces dark chocolate, chopped
- A pinch of salt
- Optional: Fresh berries and mint leaves for garnish
Instructions:
- Prepare the Chocolate: Begin by placing the chopped dark chocolate in a heatproof bowl. Set the bowl over a pot of simmering water (double boiler method) and gently melt the chocolate, stirring occasionally until smooth. Once melted, remove from heat and let it cool slightly.
- Whip the Cream: In a separate mixing bowl, pour in the heavy cream. Using an electric mixer, beat the cream on medium-high speed until soft peaks form. Be careful not to over-whip, as this can turn the cream grainy.
- Combine Ricotta and Sugar: In another bowl, combine the ricotta cheese, powdered sugar, vanilla extract, and a pinch of salt. Mix until the ingredients are well incorporated and the ricotta is smooth and creamy.
- Fold in Chocolate: Slowly pour the slightly cooled melted chocolate into the ricotta mixture. Gently fold the chocolate into the ricotta using a spatula, making sure it’s evenly distributed.
- Incorporate Whipped Cream: Add the whipped cream to the ricotta and chocolate mixture. Carefully fold the cream in, making sure the mousse remains light and airy. Be gentle to maintain the fluffy texture.
- Chill the Mousse: Once fully combined, transfer the mousse into serving glasses or bowls. Cover with plastic wrap and refrigerate for at least 2 hours or until set.
- Serve: Before serving, optionally garnish with fresh berries and mint leaves for a touch of color and freshness.
Extra Tips:
When making Chocolate Ricotta Mousse, verify all your ingredients are at room temperature before starting to help them blend smoothly.
For an extra touch of flavor, consider adding a tablespoon of coffee liqueur or a pinch of cinnamon to the ricotta mixture. If you prefer a sweeter mousse, you can adjust the sugar quantity according to taste.
Remember to be gentle when folding the whipped cream into the mixture to maintain the mousse’s light and airy texture. Enjoy your elegant dessert creation!
Ricotta Semifreddo With Berries
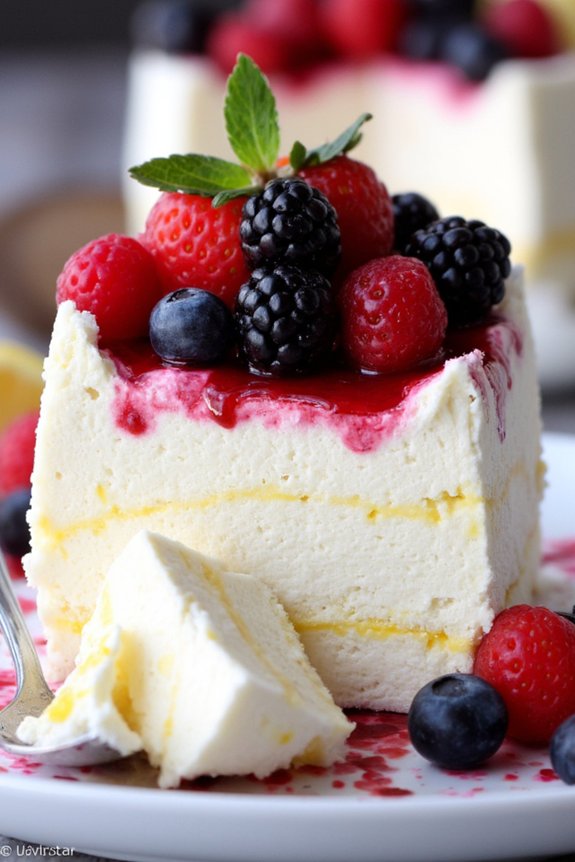
Ricotta Semifreddo With Berries is a delightful Italian dessert that combines the creamy texture of ricotta cheese with the invigorating taste of mixed berries. This semifreddo, meaning “half-cold” in Italian, is a type of frozen dessert that’s similar to ice cream but doesn’t require churning. It’s perfect for summer gatherings or as a light dessert after a hearty meal.
The inclusion of fresh berries adds a burst of color and a hint of tartness that perfectly complements the sweet, smooth ricotta mixture. This recipe is ideal for serving 4-6 people and can be prepared ahead of time, making it a convenient option for entertaining guests.
The key to the perfect Ricotta Semifreddo With Berries lies in gently folding the ingredients to maintain its airy texture and making sure the mixture is well-frozen for a satisfying, sliceable result. With a few simple steps, you can create a dessert that’s both elegant and easy to make, capturing the essence of traditional Italian flavors.
Ingredients
- 1 cup ricotta cheese
- 1 cup heavy cream
- 1/2 cup granulated sugar
- 1 teaspoon vanilla extract
- Zest of 1 lemon
- 2 cups mixed berries (such as strawberries, blueberries, raspberries)
- 2 tablespoons honey
- Fresh mint leaves for garnish
Instructions
- Prepare the Ricotta Mixture: In a large mixing bowl, combine the ricotta cheese, granulated sugar, lemon zest, and vanilla extract. Use a hand mixer or whisk to blend the ingredients until the mixture is smooth and creamy.
- Whip the Cream: In a separate bowl, whip the heavy cream until stiff peaks form. This will add lightness to the semifreddo, creating a softer texture when frozen.
- Combine Mixtures: Gently fold the whipped cream into the ricotta mixture. Be careful not to deflate the whipped cream; use a spatula to fold until no streaks remain and the mixture is uniform.
- Prepare the Berries: Rinse and pat dry the mixed berries. If using strawberries, hull and slice them. In a small bowl, drizzle the berries with honey and toss gently to coat.
- Assemble the Semifreddo: Line a loaf pan with plastic wrap, leaving enough overhang to cover the top later. Pour half of the ricotta mixture into the pan. Add a layer of half of the berries, then pour the remaining ricotta mixture over the top. Finish with the rest of the berries, pressing them slightly into the surface.
- Freeze the Semifreddo: Cover the top with plastic wrap and place the pan in the freezer for at least 4 hours, or until the semifreddo is firm enough to slice.
- Serve: To serve, remove the semifreddo from the freezer and let it sit for a few minutes to soften slightly. Use the plastic wrap to lift it out of the pan, then slice and serve with fresh mint leaves as a garnish.
Extra Tips
When making Ricotta Semifreddo With Berries, verify that the ricotta cheese is well-drained to prevent excess moisture from affecting the texture of the dessert.
For the best results, use fresh, ripe berries that are in season, as they’ll provide the most vibrant flavor. If you prefer a sweeter dessert, you can adjust the amount of sugar or honey to taste.
Additionally, freezing the semifreddo overnight will yield a firmer texture, making it easier to slice cleanly.