

As a food lover, I’ve curated a collection of savory Italian snack recipes that are always a hit. Picture the enticing aroma of classic arancini with sun-dried tomatoes or the fresh taste of caprese skewers. These snacks promise an authentic Italian experience right from your kitchen. Each recipe adds a unique twist to traditional flavors. One might just become your new favorite.
Classic Arancini With a Twist

Arancini, those delightful Italian rice balls, are a quintessential snack that embodies the warmth and heartiness of Italian cuisine. Traditionally, arancini are made using leftover risotto, stuffed with ragu or mozzarella, then breaded and fried to perfection. The “twist” in this recipe involves an unexpected burst of flavor: an infusion of sun-dried tomatoes and basil pesto within the creamy risotto. This contemporary take not only elevates the classic arancini but also introduces a fresh, zesty flavor profile that complements the crispy exterior perfectly.
This recipe is designed to serve 4-6 people, making it ideal for a family gathering or a small party. The combination of the rich, cheesy interior and the crunchy, golden-brown crust creates an irresistible snack that’s sure to impress. Whether you’re a seasoned cook or a beginner in the kitchen, this recipe will guide you through the process of making these delicious arancini with ease. So, gather your ingredients and let’s get started on creating these savory Italian delights with a modern twist.
Ingredients:
- 2 cups arborio rice
- 1/2 cup sun-dried tomatoes, finely chopped
- 1/4 cup basil pesto
- 1 cup mozzarella cheese, cubed
- 1/4 cup Parmesan cheese, grated
- 3 cups chicken or vegetable broth
- 1/2 cup white wine
- 1 small onion, finely chopped
- 2 cloves garlic, minced
- Salt and pepper to taste
- 2 eggs, beaten
- 1 cup all-purpose flour
- 2 cups breadcrumbs
- Vegetable oil, for frying
Cooking Instructions:
- Prepare the Risotto Base: In a large saucepan, heat a tablespoon of olive oil over medium heat. Add the chopped onion and garlic, sautéing until translucent. Stir in the arborio rice, making sure each grain is coated with oil.
- Cook the Risotto: Pour in the white wine and let it simmer until absorbed. Gradually add the broth, one ladle at a time, stirring frequently until the rice is al dente and creamy. This should take about 18-20 minutes. Season with salt and pepper.
- Add the Twist: Once the risotto is cooked, stir in the sun-dried tomatoes, basil pesto, and Parmesan cheese. Mix well to combine all the flavors. Allow the risotto to cool slightly before handling.
- Form the Arancini Balls: Take a small handful of the risotto mixture and flatten it slightly in your palm. Place a cube of mozzarella in the center and fold the risotto around it, forming a ball. Repeat until all the risotto is used.
- Bread the Arancini: Set up a breading station with three bowls: one with flour, one with beaten eggs, and one with breadcrumbs. Roll each rice ball first in flour, then dip in egg, and finally coat with breadcrumbs. Confirm an even coating for a crispy finish.
- Fry the Arancini: In a deep saucepan or fryer, heat vegetable oil to 350°F (175°C). Fry the arancini in batches, turning occasionally, until golden brown and crispy, about 3-4 minutes per batch. Remove with a slotted spoon and drain on paper towels.
Extra Tips:
When making arancini, it’s crucial to verify that the risotto is completely cooled before forming the balls to prevent them from falling apart. If you find the mixture too sticky, dampen your hands with water or lightly coat them with oil.
Additionally, for a healthier alternative, consider baking the arancini instead of frying. Simply preheat your oven to 400°F (200°C), place the breaded balls on a baking sheet lined with parchment paper, and bake for 20 minutes or until golden.
Flavorful Bruschetta Variations

Bruschetta is a classic Italian appetizer that’s both simple and delicious, often serving as a versatile canvas for a variety of flavors. One particularly delightful variation is Caprese Bruschetta with Balsamic Glaze, which combines the fresh taste of ripe tomatoes, creamy mozzarella, and fragrant basil, all drizzled with a sweet and tangy balsamic reduction. This rendition captures the essence of a traditional Caprese salad and elevates it with the added texture and flavor of toasted bread.
Ideal for gatherings or as a pre-dinner treat, this recipe serves 4-6 people and is sure to please your guests with its vibrant colors and burst of fresh flavors. The bruschetta can be prepared relatively quickly, making it an excellent choice for last-minute entertaining. The homemade balsamic glaze adds a gourmet touch that will impress even the most discerning palate.
Ingredients:
- 1 baguette, sliced into 1/2-inch rounds
- 4 ripe tomatoes, diced
- 12 ounces fresh mozzarella, diced
- 1 bunch fresh basil leaves, torn into pieces
- 2 cloves garlic, halved
- 3 tablespoons olive oil
- Salt and pepper to taste
- 1 cup balsamic vinegar
- 2 tablespoons honey
Instructions:
- Prepare the Balsamic Glaze: In a small saucepan over medium heat, combine the balsamic vinegar and honey. Bring the mixture to a gentle boil, then reduce the heat to low. Let it simmer until it thickens and reduces to about half its original volume, approximately 10-15 minutes. Stir occasionally. Once thickened, remove from heat and let it cool.
- Toast the Bread: Preheat your oven to 400°F (200°C). Arrange the baguette slices on a baking sheet. Brush each slice lightly with olive oil. Place the sheet in the oven and toast the bread for about 5-7 minutes or until golden brown. Remove from the oven and rub the cut side of the garlic cloves onto each slice for added flavor.
- Prepare the Tomato Mixture: In a medium bowl, combine the diced tomatoes, mozzarella, and basil. Drizzle with olive oil and season with salt and pepper. Toss gently to combine, ensuring the tomatoes and mozzarella are well-coated with the olive oil and seasoning.
- Assemble the Bruschetta: Spoon the tomato-mozzarella mixture onto each slice of toasted bread, distributing it evenly. Be generous, as the flavors meld beautifully with the crisp bread.
- Drizzle with Balsamic Glaze: Just before serving, drizzle the balsamic glaze over the bruschetta. You can use a spoon or a squeeze bottle to control the amount, ensuring each piece is lightly coated with the glaze.
Extra Tips:
For the best results, use fresh, ripe tomatoes and high-quality mozzarella to maximize flavor. If possible, prepare the balsamic glaze in advance to save time on the day of serving. The glaze can be stored in a sealed container in the refrigerator for up to a week.
When toasting the bread, keep an eye on it to prevent over-browning, as the ideal texture is crunchy on the outside but still slightly soft inside. This dish pairs well with a crisp white wine or a light red, enhancing the overall dining experience.
Savory Italian Stuffed Peppers

Savory Italian Stuffed Peppers are a delightful and hearty dish that combines the robust flavors of Italy with the comforting qualities of a classic stuffed pepper. This dish is perfect for those looking to enjoy a filling meal packed with the aromatic tastes of Italian herbs, savory meats, and wholesome grains.
Whether you’re preparing for a family dinner or entertaining guests, these stuffed peppers will surely impress with their vibrant presentation and rich taste.
The beauty of this dish lies in its versatility. You can easily customize the filling to suit your preferences or dietary needs, making it a wonderful option for both meat lovers and vegetarians. The peppers themselves act as a natural vessel, holding a delicious mixture that typically includes ingredients like ground beef, rice, tomatoes, and a medley of Italian seasonings.
Once baked, the peppers become tender and almost sweet, perfectly complementing the savory filling inside.
Ingredients for 4-6 servings:
- 6 large bell peppers (any color)
- 1 pound ground beef or Italian sausage
- 1 cup cooked rice
- 1 medium onion, finely chopped
- 2 cloves garlic, minced
- 1 can (14.5 ounces) diced tomatoes, drained
- 1 cup shredded mozzarella cheese
- 1/2 cup grated Parmesan cheese
- 2 tablespoons olive oil
- 2 teaspoons Italian seasoning
- Salt and pepper to taste
- Fresh basil leaves, for garnish (optional)
Cooking Instructions:
- Preheat and Prepare Peppers: Preheat your oven to 375°F (190°C). Cut the tops off the bell peppers and remove seeds and membranes. Lightly brush the outside of the peppers with olive oil.
- Cook the Filling: In a large skillet over medium heat, add 1 tablespoon of olive oil. Add the onion and garlic, sautéing until the onion is translucent. Add the ground beef or Italian sausage, cooking until browned. Drain any excess fat.
- Mix the Filling: In the same skillet, add the cooked rice, drained diced tomatoes, Italian seasoning, salt, and pepper. Stir to combine and cook for another 5 minutes. Remove from heat and let it cool slightly before mixing in the mozzarella cheese.
- Stuff the Peppers: Place the peppers upright in a baking dish. Spoon the filling mixture into each pepper, packing it down gently to fill completely.
- Bake the Peppers: Cover the baking dish with foil and bake in the preheated oven for 30 minutes. Remove the foil and sprinkle the Parmesan cheese over the tops of the peppers. Continue baking for an additional 10-15 minutes, or until the peppers are tender and the cheese is melted and bubbly.
- Serve and Garnish: Remove from the oven and let cool slightly. Garnish with fresh basil leaves before serving, if desired.
Extra Tips:
For an added layer of flavor, consider roasting the peppers slightly before stuffing them. This can enhance their sweetness and add a subtle smoky flavor.
If you prefer a vegetarian version, substitute the meat with a plant-based protein or additional vegetables such as mushrooms and zucchini. Additionally, you can experiment with different cheeses like provolone or fontina for a unique twist.
Be sure to taste the filling before stuffing to adjust seasoning as needed. Enjoy these Savory Italian Stuffed Peppers with a side of crusty bread or a fresh salad for a complete meal!
Delicious Caprese Skewers

Caprese skewers are a delightful Italian snack that combines the fresh flavors of juicy tomatoes, creamy mozzarella, and aromatic basil. These skewers aren’t only visually appealing but also incredibly easy to make, making them a perfect appetizer for any gathering.
The balance of flavors and textures in each bite is truly satisfying, capturing the essence of Italian cuisine in a simple yet elegant form. Ideal for serving 4 to 6 people, these skewers are perfect for a casual dinner party or a light snack.
The key to making the perfect Caprese skewers lies in using high-quality, fresh ingredients. Opt for ripe cherry tomatoes, fresh mozzarella balls (also known as bocconcini), and fragrant basil leaves. A drizzle of extra virgin olive oil and balsamic glaze enhances the flavors, bringing a touch of sophistication to this classic appetizer.
Ingredients (serves 4-6):
- 24 cherry tomatoes
- 24 fresh mozzarella balls (bocconcini)
- 24 fresh basil leaves
- 2 tablespoons extra virgin olive oil
- 1 tablespoon balsamic glaze
- Salt and freshly ground black pepper, to taste
- 12 bamboo or wooden skewers
Instructions:
- Prepare the Ingredients: Begin by washing the cherry tomatoes and basil leaves under cold water. Pat them dry with paper towels. Drain the mozzarella balls from their liquid and set aside.
- Assemble the Skewers: Take a skewer and start by threading one cherry tomato onto it, followed by a fresh basil leaf, and then a mozzarella ball. Repeat this sequence until you have two sets on each skewer. Make sure the ingredients are pushed close together to prevent any gaps.
- Season the Skewers: Lay the assembled skewers on a serving platter. Drizzle the extra virgin olive oil evenly over the skewers, making sure each piece is lightly coated. Follow with a drizzle of balsamic glaze for added sweetness and depth of flavor.
- Add Final Touches: Sprinkle a pinch of salt and freshly ground black pepper over the skewers to enhance the flavors. Adjust the seasoning according to your taste preference.
- Serve and Enjoy: Serve the Caprese skewers immediately as a fresh appetizer. They can also be prepared ahead of time and refrigerated for up to an hour before serving.
Extra Tips:
To elevate your Caprese skewers, consider adding a slice of prosciutto between the basil and mozzarella. This adds a savory element that complements the other flavors beautifully.
If you prefer a bit of heat, a sprinkle of red pepper flakes can provide a subtle kick. Remember, the key to this dish is freshness, so always use the best quality ingredients you can find.
Additionally, if you’re preparing them in advance, keep them covered in the fridge to maintain their freshness and flavor until you’re ready to serve.
Crispy Focaccia Bread Sticks
Crispy Focaccia Bread Sticks are a delightful and versatile Italian snack that are perfect for any occasion. These bread sticks are known for their crispy texture on the outside and soft, chewy interior. They’re often seasoned with aromatic herbs and a hint of sea salt, making them a flavorful addition to any meal or a stand-alone snack.
Whether served with a dipping sauce, alongside a plate of antipasto, or as an accompaniment to a hearty soup, these focaccia sticks are sure to be a hit.
Making Crispy Focaccia Bread Sticks at home is a rewarding experience that allows you to infuse your own personal touch into the recipe. Using simple pantry ingredients, you can create a batch of these delicious bread sticks within a couple of hours.
The key to achieving the perfect texture lies in the dough’s preparation and the baking process. With just a few steps, you’ll have a batch of golden-brown, crispy bread sticks ready to be enjoyed by family and friends.
Ingredients (serving size: 4-6 people):
- 2 cups all-purpose flour
- 1 teaspoon sugar
- 1 teaspoon salt
- 1 packet (2 1/4 teaspoons) active dry yeast
- 3/4 cup warm water (about 110°F)
- 3 tablespoons olive oil, divided
- 1 teaspoon dried rosemary
- 1 teaspoon dried oregano
- Coarse sea salt for sprinkling
Cooking Instructions:
- Prepare the Yeast Mixture: In a small bowl, combine the warm water and sugar, then sprinkle the yeast on top. Let it sit for about 5-10 minutes until it becomes frothy, indicating that the yeast is active.
- Mix the Dough: In a large mixing bowl, combine the flour and salt. Make a well in the center and pour in the yeast mixture and 2 tablespoons of olive oil. Stir the mixture until the dough begins to form.
- Knead the Dough: Transfer the dough onto a lightly floured surface. Knead it for about 8-10 minutes until it becomes smooth and elastic. If the dough is too sticky, add a little more flour, a tablespoon at a time.
- First Rise: Place the kneaded dough in a lightly oiled bowl, cover it with a damp cloth, and let it rise in a warm area for about 1 hour or until it has doubled in size.
- Prepare the Dough for Baking: Punch down the risen dough to release the air. Roll it out on a floured surface to form a rectangle approximately 1/2 inch thick. Using a sharp knife or pizza cutter, slice the dough into strips about 1 inch wide.
- Season the Bread Sticks: Place the cut dough strips onto a baking sheet lined with parchment paper. Brush them with the remaining tablespoon of olive oil, then sprinkle the dried rosemary, oregano, and coarse sea salt on top.
- Bake: Preheat your oven to 400°F (200°C). Bake the bread sticks for about 15-20 minutes or until they’re golden brown and crispy.
- Cool and Serve: Remove the bread sticks from the oven and let them cool slightly on a wire rack before serving them warm or at room temperature.
Extra Tips: For an extra burst of flavor, consider adding grated Parmesan cheese to the seasoning mix before baking. If you prefer a softer texture, reduce the baking time slightly.
These bread sticks can also be made in advance and stored in an airtight container for up to two days. Reheat them in a low oven to restore their crispiness before serving. For variations, try incorporating other herbs like thyme or basil into the dough or seasoning mix.
Baked Parmesan Zucchini Chips

Baked Parmesan Zucchini Chips are a delightful and healthy snack that brings a taste of Italy right to your kitchen. These chips are perfect for a light snack, appetizer, or even a side dish. The combination of fresh zucchini, savory parmesan cheese, and a hint of garlic creates a crispy and flavorful treat that will have everyone reaching for more.
Baking them instead of frying keeps them light and guilt-free, allowing you to enjoy the scrumptiousness without the added calories. This recipe is straightforward, requiring minimal ingredients and effort. The key to achieving the perfect crispiness lies in cutting the zucchini slices evenly and baking them at the right temperature.
Whether you’re serving them at a party or enjoying them on a cozy night in, Baked Parmesan Zucchini Chips are sure to be a hit. This recipe serves 4-6 people, so it’s ideal for sharing with family and friends.
Ingredients:
- 3 medium zucchinis
- 1 cup grated Parmesan cheese
- 1 cup panko breadcrumbs
- 1 teaspoon garlic powder
- Salt and pepper to taste
- 2 large eggs
- Olive oil spray
Instructions:
- Preheat the Oven: Begin by preheating your oven to 425°F (220°C). This guarantees that the oven is hot enough to crisp up the zucchini chips properly.
- Prepare the Zucchini: Wash the zucchinis thoroughly and slice them into 1/4-inch thick rounds. Try to make the slices as uniform as possible for even baking.
- Set Up Dredging Station: In one shallow bowl, whisk the eggs until blended. In another bowl, combine the Parmesan cheese, panko breadcrumbs, garlic powder, salt, and pepper.
- Coat the Zucchini: Dip each zucchini slice into the egg mixture, making sure it’s well-coated. Then, press it into the Parmesan mixture, ensuring both sides are covered with the breadcrumb mix.
- Arrange on Baking Sheet: Place the coated zucchini slices on a baking sheet lined with parchment paper. Leave a small space between each slice to allow even cooking.
- Bake the Chips: Lightly spray the zucchini slices with olive oil spray. Bake in the preheated oven for 20-25 minutes, or until they’re golden brown and crispy.
- Serve and Enjoy: Remove from the oven and let them cool slightly before serving. They can be enjoyed on their own or with a dipping sauce of your choice.
Extra Tips: For extra crispiness, you can flip the zucchini chips halfway through the baking time. If you prefer a spicier kick, add a pinch of cayenne pepper to the breadcrumb mixture.
These chips are best served fresh, but if you need to reheat them, place them back in the oven instead of using a microwave to maintain their crispy texture.
Traditional Italian Crostini

Crostini are one of Italy’s most beloved snacks, perfect for any gathering or as a delightful appetizer. These small toasted bread slices are traditionally topped with a variety of savory ingredients, providing a wonderful canvas for flavors to shine.
With origins rooted in the rural kitchens of Tuscany, crostini are a demonstration of the Italian philosophy of using simple, yet high-quality ingredients to create something truly delicious. Whether you serve them at a cocktail party or enjoy them as a light lunch, crostini are sure to impress with their versatility and taste.
The key to making authentic Italian crostini lies in the choice of bread and toppings. A good crostini starts with a crisp base, typically a baguette or a rustic Italian loaf, which is sliced and toasted to perfection. The toppings can range from creamy spreads and savory meats to fresh vegetables and aromatic herbs.
For this recipe, we’ll explore a classic combination of creamy ricotta, roasted cherry tomatoes, and fragrant basil, making it an ideal summer snack that can be prepared in advance for a serving size of 4-6 people.
Ingredients:
- 1 baguette or rustic Italian loaf
- 1 cup ricotta cheese
- 2 cups cherry tomatoes, halved
- 2 tablespoons olive oil
- Salt and pepper, to taste
- Fresh basil leaves, for garnish
Cooking Instructions:
- Preheat the Oven: Preheat your oven to 375°F (190°C). This will guarantee your bread and tomatoes roast evenly.
- Prepare the Bread: Slice the baguette into 1/2-inch thick slices. Arrange them on a baking sheet in a single layer.
- Toast the Bread: Drizzle the bread slices with 1 tablespoon of olive oil. Place the baking sheet in the preheated oven and bake for about 10 minutes or until the bread is golden and crisp. Remove from the oven and let cool slightly.
- Roast the Tomatoes: On another baking sheet, arrange the halved cherry tomatoes cut side up. Drizzle with the remaining 1 tablespoon of olive oil and season with salt and pepper. Roast in the oven for about 15 minutes, or until the tomatoes are soft and slightly caramelized.
- Assemble the Crostini: Spread a generous amount of ricotta cheese on each toasted bread slice. Top with a few roasted cherry tomatoes.
- Garnish and Serve: Garnish each crostini with fresh basil leaves. Serve immediately while the crostini are still warm.
Extra Tips:
For the best flavor, use fresh, high-quality ingredients. If possible, choose vine-ripened tomatoes and fresh whole-milk ricotta.
The bread should be sturdy enough to hold the toppings without becoming soggy, so opt for a day-old loaf if you can. Feel free to experiment with different toppings such as prosciutto, arugula, or sun-dried tomatoes to tailor the crostini to your personal taste preferences.
Enjoy your crostini with a glass of chilled white wine for a true Italian experience.
Hearty Italian Meatballs

Hearty Italian Meatballs are a classic comfort food that brings the warmth and richness of Italian cuisine into your kitchen. Made with a combination of ground meats, fresh herbs, and robust spices, these meatballs are perfect for serving as a snack or a main course. Their versatility allows them to be paired with pasta, nestled into a sub sandwich, or enjoyed on their own with a side of marinara sauce for dipping.
This recipe captures the essence of Italian home cooking, focusing on simple, high-quality ingredients that deliver big flavors. Perfect for a family gathering or a dinner party with friends, these meatballs are both satisfying and easy to prepare. They can be made ahead of time and kept warm in a slow cooker or reheated just before serving.
This recipe provides enough to serve 4-6 people, making sure everyone can enjoy these savory bites. Get ready to roll up your sleeves and plunge into the delicious world of Italian cuisine with these hearty meatballs.
Ingredients (Serves 4-6):
- 1 pound ground beef
- 1/2 pound ground pork
- 1/2 cup breadcrumbs
- 1/4 cup grated Parmesan cheese
- 1/4 cup chopped fresh parsley
- 2 cloves garlic, minced
- 1 teaspoon dried oregano
- 1 teaspoon salt
- 1/2 teaspoon black pepper
- 1/4 teaspoon red pepper flakes (optional)
- 2 large eggs
- 2 tablespoons olive oil
- 2 cups marinara sauce
Cooking Instructions:
- Preheat and Prepare: Preheat your oven to 400°F (200°C). Line a baking sheet with parchment paper or a silicone baking mat to prevent the meatballs from sticking.
- Mix Ingredients: In a large mixing bowl, combine the ground beef, ground pork, breadcrumbs, Parmesan cheese, parsley, garlic, oregano, salt, black pepper, and red pepper flakes. Mix until all ingredients are evenly distributed.
- Add Eggs: Crack the eggs into the meat mixture and use your hands to thoroughly incorporate them. The eggs will help bind the ingredients together, guaranteeing the meatballs hold their shape.
- Form Meatballs: With your hands, form the mixture into golf ball-sized meatballs, about 1 1/2 inches in diameter. Place the meatballs evenly spaced on the prepared baking sheet.
- Bake Meatballs: Drizzle the olive oil over the meatballs to help them brown. Place the baking sheet in the preheated oven and bake for 20-25 minutes, or until the meatballs are cooked through and lightly browned on the outside.
- Simmer in Sauce: While the meatballs are baking, heat the marinara sauce in a large skillet or saucepan over medium heat. Once the meatballs are done, transfer them into the simmering sauce and cook for an additional 10 minutes, allowing the flavors to meld together.
- Serve and Enjoy: Serve the meatballs hot, either on their own as a snack or alongside pasta, in a sandwich, or with a side of garlic bread.
Extra Tips:
For an even richer flavor, consider using a combination of ground meats like veal or lamb along with the beef and pork. If you prefer a spicier kick, increase the amount of red pepper flakes or add a pinch of cayenne pepper to the mix.
To make sure the meatballs are tender, avoid overmixing the ingredients, as this can result in a dense texture. Finally, the meatballs can be made ahead of time and frozen for up to three months; simply defrost and reheat in marinara sauce when ready to serve.
Cheese and Herb Stuffed Mushrooms

Cheese and Herb Stuffed Mushrooms are a delightful Italian-inspired appetizer that combines the earthy flavors of mushrooms with creamy cheese and aromatic herbs. This dish is perfect for gatherings or as a savory snack. The recipe comes together quickly and is bound to impress with its rich, savory flavors and elegant presentation.
The stuffed mushrooms are baked to perfection, offering a crispy, golden topping and a juicy, tender interior that bursts with flavor in every bite. These stuffed mushrooms are versatile and can be adapted to suit individual tastes. The choice of cheese and herbs can be customized to complement your palate, making this a go-to recipe for those who love to experiment in the kitchen.
Whether you’re preparing for a dinner party or simply want a cozy snack to enjoy at home, this recipe for Cheese and Herb Stuffed Mushrooms is certain to become a favorite.
Ingredients (Serves 4-6):
- 24 large button or cremini mushrooms
- 4 tablespoons olive oil
- 1 small onion, finely chopped
- 2 cloves garlic, minced
- 1 cup breadcrumbs
- 1/2 cup grated Parmesan cheese
- 1/2 cup cream cheese, softened
- 1/4 cup chopped fresh parsley
- 1/4 cup chopped fresh basil
- Salt and pepper, to taste
Cooking Instructions:
- Prepare the Mushrooms: Preheat your oven to 375°F (190°C). Clean the mushrooms with a damp cloth and gently remove the stems. Set the caps aside on a baking sheet, cavity side up. Finely chop the stems to use in the filling.
- Sauté the Aromatics: In a medium skillet, heat 2 tablespoons of olive oil over medium heat. Add the chopped onion and garlic, sautéing until the onion is translucent and fragrant, about 3-4 minutes. Add the chopped mushroom stems and cook for an additional 2 minutes.
- Make the Filling: In a large mixing bowl, combine the sautéed onion mixture with breadcrumbs, Parmesan cheese, cream cheese, parsley, and basil. Season with salt and pepper to taste. Mix until the ingredients are well-incorporated and the filling is creamy.
- Stuff the Mushrooms: Using a small spoon, fill each mushroom cap generously with the cheese and herb mixture. Press down slightly to confirm the filling adheres well.
- Bake the Stuffed Mushrooms: Drizzle the remaining olive oil over the stuffed mushrooms. Transfer the baking sheet to the preheated oven and bake for 20-25 minutes, or until the mushrooms are tender and the tops are golden brown.
- Serve and Enjoy: Remove the baked mushrooms from the oven and let them cool slightly before serving. Arrange them on a platter and garnish with additional chopped parsley if desired.
Extra Tips:
For the best flavor, choose fresh, firm mushrooms and avoid those with blemishes or soft spots. If you prefer a spicier kick, consider adding a pinch of red pepper flakes to the filling mixture.
This recipe can be prepared a few hours in advance and stored in the refrigerator until ready to bake, which is convenient for entertaining. Finally, feel free to experiment with different cheeses, such as mozzarella or goat cheese, to create unique flavor profiles.
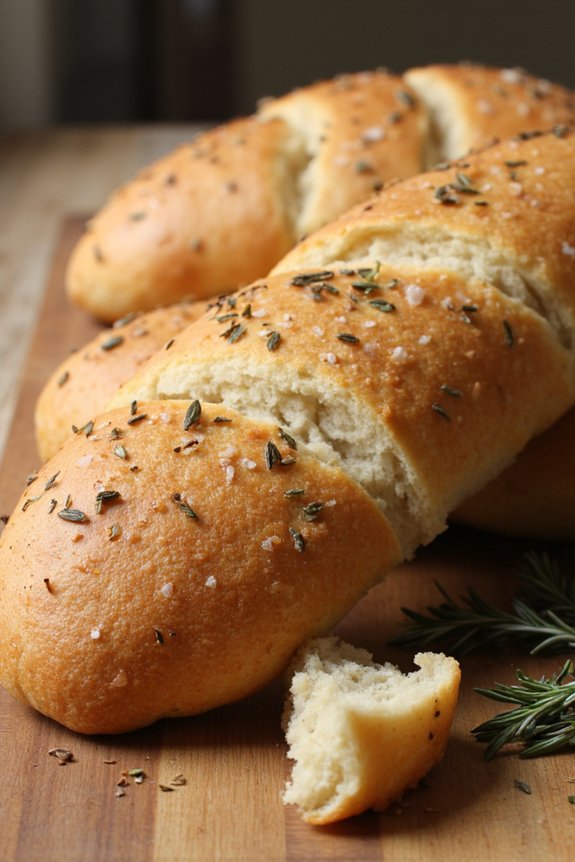
Homemade Italian Breadsticks

There’s something uniquely satisfying about biting into a freshly baked breadstick, especially when it’s homemade. Italian breadsticks, or “grissini” as they’re known in Italy, offer a delightful crunch and can be flavored with an assortment of herbs and spices to suit your taste. Perfect as an appetizer or a side dish, these savory sticks are a wonderful accompaniment to soups, salads, or your favorite Italian dishes.
Making Italian breadsticks at home is simpler than you might think, and with a few basic ingredients, you can create an authentic culinary experience right in your kitchen.
The process of making homemade Italian breadsticks involves preparing a simple yeast dough, which is then rolled out into thin sticks and baked until golden and crispy. The beauty of this recipe is its versatility; you can get creative with the addition of different toppings such as sesame seeds, poppy seeds, or a sprinkle of coarse sea salt.
Whether you’re an experienced baker or just starting out, this recipe will guide you through creating a batch of delicious breadsticks that are sure to impress your family and friends.
Ingredients (Serves 4-6):
- 1 cup warm water (about 110°F)
- 2 1/4 teaspoons active dry yeast
- 2 teaspoons sugar
- 3 cups all-purpose flour
- 1 teaspoon salt
- 2 tablespoons olive oil
- 1 tablespoon dried Italian herbs (such as oregano, basil, or thyme)
- 1 egg white (optional, for brushing)
- Sesame seeds or coarse sea salt (optional, for topping)
Cooking Instructions:
- Activate the Yeast: In a small bowl, combine the warm water, yeast, and sugar. Stir gently and let it sit for about 5-10 minutes until the mixture becomes frothy. This indicates that the yeast is active.
- Prepare the Dough: In a large mixing bowl, combine the flour and salt. Make a well in the center and pour in the yeast mixture and olive oil. Mix until a dough begins to form. If using a stand mixer, use the dough hook attachment to knead for about 5-7 minutes until the dough is smooth and elastic. If kneading by hand, turn the dough onto a floured surface and knead for about 10 minutes.
- First Rise: Place the dough in a lightly oiled bowl, cover with a damp cloth, and let it rise in a warm place for about 1 hour or until doubled in size.
- Shape the Breadsticks: Preheat your oven to 400°F (200°C). Punch down the risen dough and divide it into 12 equal pieces. Roll each piece into a thin stick, about 12 inches long. Arrange the breadsticks on a baking sheet lined with parchment paper.
- Add Toppings: If using, brush the breadsticks lightly with egg white and sprinkle with your choice of sesame seeds or coarse sea salt. This step adds flavor and a slightly shiny finish.
- Bake: Place the baking sheet in the preheated oven and bake for 15-20 minutes until the breadsticks are golden brown and crisp.
- Cool and Serve: Remove from the oven and let the breadsticks cool on a wire rack. Serve warm or at room temperature with your favorite dips or as an accompaniment to your meal.
Extra Tips:
For a more pronounced flavor, you can incorporate finely grated Parmesan cheese into the dough or sprinkle it on top before baking. If you prefer softer breadsticks, reduce the baking time slightly and check for your desired texture.
Additionally, if you don’t have Italian herbs, you can substitute with any dried herbs you prefer. Remember, the key to perfect breadsticks is ensuring the dough isn’t too sticky and allowing it adequate time to rise, which contributes to their light and airy texture.
Enjoy experimenting with different flavors and toppings to make this recipe your own!