

The first time I stepped into an Italian kitchen, the scent of roasted herbs and garlic wrapped around me like a cozy blanket. Those deep, comforting flavors were unforgettable, and I was determined to bring them to my own kitchen. These 10 rustic Italian oven recipes are a delightful way to do just that. From the rich taste of slow-roasted porchetta to the satisfying layers of eggplant Parmesan, each dish is a culinary story. Ready to transform your kitchen with these flavors? Let’s explore them together.
Classic Margherita Pizza

Immerse yourself in the rustic charm of Italian cuisine by crafting a Classic Margherita Pizza. This dish is a perfect symphony of fresh ingredients, where simplicity meets flavor in the most delightful way.
Originating from Naples, the Margherita pizza is a reflection of the beauty of minimalism in cooking. With its vibrant colors and exquisite taste, it’s a celebration of the Italian flag, featuring red tomatoes, white mozzarella cheese, and fresh green basil. The result is a crispy, golden-brown crust topped with a harmonious blend of tangy tomato sauce, creamy mozzarella, and aromatic basil leaves.
To achieve an authentic Margherita pizza, it’s crucial to use high-quality ingredients. The dough should be made from scratch and allowed to rise to achieve that perfect airy texture. The sauce should be crafted from ripe, sweet tomatoes, while the mozzarella should be fresh and melt beautifully over the pizza. A drizzle of extra virgin olive oil before serving elevates the flavors, making each bite a delightful experience.
This recipe yields enough for 4-6 people, allowing you to share a taste of Italy with friends and family.
Ingredients:
- 500g (4 cups) all-purpose flour
- 325ml (1 1/3 cup) warm water
- 7g (2 1/4 tsp) active dry yeast
- 1 tsp sugar
- 2 tsp salt
- 2 tbsp olive oil
- 400g (14 oz) canned whole tomatoes
- 250g (9 oz) fresh mozzarella cheese
- Fresh basil leaves
- Salt and pepper to taste
- Extra virgin olive oil for drizzling
Instructions:
- Prepare the Dough: In a small bowl, combine warm water, yeast, and sugar. Let it sit for about 5 minutes until the mixture becomes frothy. In a large mixing bowl, combine flour and salt. Make a well in the center and pour in the yeast mixture and olive oil. Mix until a dough forms.
- Knead the Dough: Transfer the dough onto a lightly floured surface and knead for about 10 minutes until it becomes smooth and elastic. Place the dough in a lightly oiled bowl, cover it with a damp cloth, and let it rise in a warm area for about 1-2 hours or until it doubles in size.
- Prepare the Sauce: While the dough is rising, prepare the tomato sauce. Drain the canned tomatoes and crush them by hand in a bowl. Season with salt and pepper to taste. Set aside.
- Preheat the Oven: Preheat your oven to 250°C (480°F) or as high as it will go, ideally with a pizza stone inside to preheat as well.
- Shape the Dough: Once the dough has risen, punch it down and divide it into two equal parts. Roll each part into a ball and let them rest for an additional 10 minutes. Then, on a floured surface, stretch or roll out each dough ball into a round shape about 12 inches in diameter.
- Assemble the Pizza: Place one dough round on a piece of parchment paper. Spread a thin layer of tomato sauce over the dough, leaving a small border around the edges. Tear mozzarella into pieces and scatter evenly over the sauce. Add fresh basil leaves on top.
- Bake the Pizza: Using a pizza peel or a baking sheet, slide the pizza (with the parchment paper) onto the preheated pizza stone. Bake for 8-10 minutes or until the crust is golden and the cheese is melted and bubbly.
- Finish and Serve: Remove the pizza from the oven and let it cool slightly. Drizzle with extra virgin olive oil before slicing and serving.
Extra Tips:
For the best results, use a pizza stone, as it helps achieve a crispy crust. If you don’t have a pizza stone, an upside-down baking sheet will work in a pinch.
Confirm your oven is preheated to the highest possible temperature before baking the pizza. Fresh mozzarella can release moisture, so if you prefer a less watery pizza, consider using low-moisture mozzarella.
Finally, feel free to adjust the amount of basil and olive oil according to your taste preferences. Enjoy your homemade taste of Italy!
Baked Eggplant Parmesan

Baked Eggplant Parmesan is a classic Italian dish that combines layers of tender eggplant, rich tomato sauce, and melted cheese to create a comforting and satisfying meal. This rustic recipe is perfect for those who appreciate the deep flavors of traditional Italian cooking and love the idea of a meal that can be prepped ahead and baked to perfection.
The key to this dish is in the preparation of the eggplant, which must be properly seasoned and cooked to achieve that melt-in-your-mouth texture that pairs beautifully with the savory tomato sauce and gooey cheese.
With its crispy edges and gooey center, Baked Eggplant Parmesan is a dish that’s both hearty and heartwarming. The combination of textures and flavors makes it a favorite for family gatherings or a cozy dinner at home.
This recipe serves 4-6 people and is a delightful way to enjoy a vegetarian meal that’s both filling and delicious. The use of fresh ingredients and a few simple techniques will guarantee that this dish becomes a staple in your Italian cooking repertoire.
Ingredients (Serving Size: 4-6 people):
- 2 large eggplants
- Salt
- 1 cup all-purpose flour
- 3 large eggs
- 1 cup breadcrumbs
- 1 cup grated Parmesan cheese
- 2 cups marinara sauce
- 2 cups shredded mozzarella cheese
- 1/4 cup olive oil
- Fresh basil leaves (for garnish)
Cooking Instructions:
1. Prepare the Eggplant: Slice the eggplants into 1/4-inch thick rounds. Lay them out in a single layer on a baking sheet and sprinkle both sides generously with salt. Let them sit for about 30 minutes to draw out excess moisture and bitterness.
After 30 minutes, rinse the slices under cold water and pat them dry with paper towels.
2. Coat the Eggplant: Preheat your oven to 375°F (190°C). Set up a dredging station with three shallow dishes: one with flour, one with beaten eggs, and one with a mixture of breadcrumbs and Parmesan cheese.
Dredge each eggplant slice first in flour, then in egg, and finally in the breadcrumb mixture, ensuring each slice is well-coated.
3. Bake the Eggplant: Drizzle olive oil onto a baking sheet. Arrange the coated eggplant slices in a single layer on the sheet.
Bake in the preheated oven for 25-30 minutes, flipping halfway through, until the eggplant is golden brown and crispy on the outside.
4. Assemble the Dish: In a large baking dish, spread a layer of marinara sauce on the bottom. Place a layer of baked eggplant slices over the sauce.
Spread a layer of marinara sauce over the eggplant and sprinkle with mozzarella cheese. Repeat layering until all ingredients are used, finishing with a layer of mozzarella on top.
5. Bake the Parmesan: Cover the baking dish with foil and bake in the preheated oven for 25 minutes.
Remove the foil and bake for an additional 10-15 minutes, or until the cheese is melted and bubbly. Allow the dish to cool slightly before serving.
6. Garnish and Serve: Garnish with fresh basil leaves before serving. Enjoy your rustic Baked Eggplant Parmesan with a side of crusty bread or a fresh salad.
Extra Tips:
For the best results, choose firm and glossy eggplants without any blemishes. Salting the eggplant is an essential step that shouldn’t be skipped as it enhances the flavor and texture of the dish.
If you prefer a spicier version, you can add a pinch of red pepper flakes to the marinara sauce. Also, feel free to experiment with different cheeses, such as provolone or fontina, for a slightly different flavor profile.
Always let the dish rest for a few minutes after baking to allow the layers to set, making it easier to serve.
Slow-Roasted Porchetta

Slow-Roasted Porchetta is a traditional Italian dish that embodies the rustic flavors of the countryside with its aromatic blend of herbs and perfectly crisped skin. This sumptuous roast, known for its savory and succulent taste, is often the centerpiece of Italian feasts. Its preparation involves marinating a boneless pork belly with a tantalizing mix of herbs and spices, rolling it to create a roulade, and then slow-roasting it to perfection. The result is a dish that boasts layers of flavor, tender meat, and that irresistible crackling skin that everyone loves.
Porchetta is a versatile dish that can be served in a variety of ways, whether as a main course with roasted vegetables and potatoes or sliced thinly for sandwiches. The key to a successful Porchetta lies in the balance of flavors and the technique of achieving the perfect texture. By slow-roasting, the flavors meld beautifully, and the meat becomes incredibly tender while the skin turns delectably crispy. This recipe for Slow-Roasted Porchetta is designed to serve 4-6 people, making it perfect for a family gathering or a special occasion.
Ingredients (serves 4-6):
- 3-4 pounds boneless pork belly, skin-on
- 1 tablespoon fennel seeds
- 1 tablespoon black peppercorns
- 2 tablespoons kosher salt
- 4 cloves garlic, minced
- 1 tablespoon fresh rosemary, chopped
- 1 tablespoon fresh thyme, chopped
- 1 tablespoon fresh sage, chopped
- Zest of 1 lemon
- 2 tablespoons olive oil
- 1 cup dry white wine
Cooking Instructions:
- Prepare the Pork Belly: Lay the pork belly skin-side down on a clean cutting board. Using a sharp knife, score the flesh in a crosshatch pattern, being careful not to cut all the way through. This will help the flavors penetrate the meat.
- Make the Herb Mixture: In a mortar and pestle, combine the fennel seeds and black peppercorns and crush them until they’re coarsely ground. Transfer to a bowl and add the kosher salt, minced garlic, rosemary, thyme, sage, lemon zest, and olive oil. Mix well to form a paste.
- Season the Pork: Rub the herb mixture evenly over the scored side of the pork belly, pressing it into the cuts. Roll the pork belly tightly into a roulade with the skin on the outside and secure it with kitchen twine at 1-inch intervals.
- Refrigerate: Cover the pork with plastic wrap and refrigerate for at least 12 hours or overnight. This allows the flavors to infuse deeply into the meat.
- Preheat the Oven: Preheat your oven to 300°F (150°C).
- Roast the Porchetta: Place the rolled pork belly on a rack in a roasting pan. Pour the white wine into the bottom of the pan. Roast for about 3 to 4 hours, or until the internal temperature reaches 160°F (71°C).
- Crisp the Skin: Increase the oven temperature to 450°F (230°C) and roast for an additional 20-30 minutes, or until the skin is crispy and golden brown.
- Rest the Meat: Remove the Porchetta from the oven and let it rest for 15-20 minutes before slicing. This allows the juices to redistribute, guaranteeing a moist and flavorful roast.
Extra Tips:
When preparing Porchetta, verify that the pork belly is uniformly thick to promote even cooking. If the skin is too soft, you can blot it dry with paper towels before roasting to help achieve a crispier finish.
Using a sharp knife to score the skin in a diamond pattern can also enhance the crackling effect. Leftover Porchetta can be refrigerated and makes excellent sandwiches the next day. Serve with a side of roasted potatoes or a fresh green salad for a complete meal.
Tuscan White Bean and Sausage Casserole
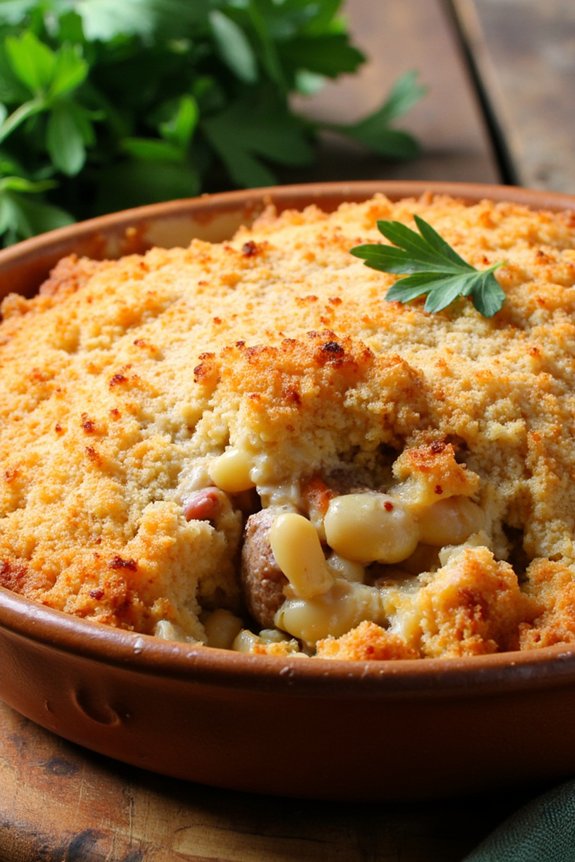
The Tuscan White Bean and Sausage Casserole is a hearty and flavorful dish that captures the essence of rustic Italian cooking. The combination of tender white beans, savory Italian sausage, and aromatic herbs creates a comforting meal perfect for any occasion. This casserole is baked to perfection, allowing the flavors to meld together beautifully. It’s an ideal choice for a family dinner or when you have guests over, as it serves 4-6 people and is sure to satisfy.
With the warmth of the oven bringing out the rich flavors, this casserole becomes a true Tuscan delight. The dish isn’t only delicious but also simple to prepare, making it an excellent choice for both novice and experienced cooks. The key to this recipe is using good quality ingredients, particularly the sausage and beans, guaranteeing the dish is as authentic as possible. Now, let’s explore the details and get cooking!
Ingredients (serves 4-6):
- 1 pound Italian sausage (sweet or spicy, based on preference)
- 2 tablespoons olive oil
- 1 medium onion, chopped
- 3 cloves garlic, minced
- 2 (15-ounce) cans of white beans (cannellini or great northern), drained and rinsed
- 1 (14.5-ounce) can of diced tomatoes, drained
- 1 cup chicken broth
- 1 teaspoon dried rosemary
- 1 teaspoon dried thyme
- Salt and pepper to taste
- 1 cup breadcrumbs
- 1/2 cup grated Parmesan cheese
- 2 tablespoons chopped fresh parsley for garnish
Cooking Instructions:
- Preheat Oven: Preheat your oven to 375°F (190°C) to get it ready for baking.
- Cook Sausage: In a large oven-safe skillet or Dutch oven, heat the olive oil over medium heat. Add the sausage, breaking it up with a spoon, and cook until browned and cooked through, about 8-10 minutes. Remove the sausage from the pan and set it aside.
- Sauté Aromatics: In the same skillet, add the chopped onion and sauté for about 5 minutes until translucent. Add the minced garlic and cook for an additional minute, stirring continuously to prevent burning.
- Combine Ingredients: Add the drained white beans, diced tomatoes, and cooked sausage back into the skillet. Stir in the chicken broth, rosemary, and thyme. Season with salt and pepper to taste. Mix well to guarantee all ingredients are evenly distributed.
- Simmer: Bring the mixture to a simmer, allowing it to cook for about 10 minutes. This helps the flavors meld together and reduces some of the liquid.
- Prepare Topping: In a small bowl, combine the breadcrumbs and grated Parmesan cheese. Sprinkle this mixture evenly over the top of the casserole.
- Bake: Transfer the skillet to the preheated oven. Bake for 25-30 minutes, or until the top is golden brown and the casserole is bubbly around the edges.
- Garnish and Serve: Remove the casserole from the oven and let it cool slightly. Garnish with chopped fresh parsley before serving to add a pop of color and freshness.
Extra Tips:
For the best flavor, try to use freshly grated Parmesan cheese and high-quality Italian sausage. If you prefer, you can substitute fresh herbs for dried ones, doubling the amount used to capture the full flavor.
Additionally, you can make this dish a day in advance; the flavors will continue to develop, making it even more delicious. When reheating, cover the dish with foil to prevent the breadcrumbs from burning. Enjoy your rustic Tuscan meal!
Herb-Crusted Baked Cod

Herb-Crusted Baked Cod is a delightful and healthy dish that embodies the rustic charm of Italian cuisine. This recipe takes tender cod fillets and envelops them in a fragrant mixture of fresh herbs and breadcrumbs, creating a crisp and flavorful crust. Perfect for a family dinner or a small gathering, this dish is bound to impress with its simplicity and elegance.
The combination of garlic, lemon, and a medley of herbs not only enhances the mild flavor of the cod but also brings a touch of the Mediterranean to your dining table.
This recipe is both easy to prepare and quick to cook, making it ideal for those busy weeknights when you desire something nutritious yet delicious. The key to achieving the perfect herb-crusted baked cod lies in the balance of ingredients, guaranteeing that each bite is filled with layers of flavor.
Pair this dish with a side of roasted vegetables or a fresh salad, and you have a complete meal that’s as wholesome as it’s satisfying.
Ingredients (Serves 4-6):
- 4-6 cod fillets (about 6 ounces each)
- 1 cup panko breadcrumbs
- 1/4 cup grated Parmesan cheese
- 2 tablespoons fresh parsley, chopped
- 2 tablespoons fresh basil, chopped
- 1 tablespoon fresh thyme, chopped
- 1 tablespoon lemon zest
- 2 cloves garlic, minced
- 1/2 teaspoon salt
- 1/4 teaspoon black pepper
- 3 tablespoons olive oil
- 1 lemon, cut into wedges
Cooking Instructions:
- Preheat Oven: Begin by preheating your oven to 400°F (200°C). This will guarantee that the cod cooks evenly and the herb crust becomes perfectly crispy.
- Prepare Baking Sheet: Line a baking sheet with parchment paper or lightly grease it with olive oil to prevent the cod from sticking.
- Mix Herb Crust: In a medium-sized bowl, combine the panko breadcrumbs, grated Parmesan cheese, chopped parsley, basil, thyme, lemon zest, minced garlic, salt, and black pepper. Stir well to confirm all ingredients are evenly distributed.
- Coat the Cod: Pat the cod fillets dry with paper towels, then brush each fillet with olive oil. This will help the herb mixture adhere to the fish. Gently press the herb mixture onto the top of each fillet, ensuring a generous and even coating.
- Bake the Cod: Place the coated cod fillets on the prepared baking sheet. Bake in the preheated oven for 12-15 minutes, or until the cod is opaque and flakes easily with a fork. The crust should be golden brown and crispy.
- Serve: Once cooked, remove the cod from the oven and let it rest for a minute. Serve immediately with lemon wedges on the side for an added burst of citrus flavor.
Extra Tips:
For the best results, use fresh herbs rather than dried ones to maximize flavor. If fresh herbs aren’t available, you can substitute with dried herbs by using one-third of the quantity called for fresh herbs.
When pressing the herb crust onto the cod, apply gentle pressure to confirm it sticks well. If you desire an extra crispy crust, consider drizzling a little more olive oil over the herb crust before baking.
Finally, keep an eye on the cod as it bakes, as cooking times can vary slightly depending on the thickness of the fillets.
Stuffed Bell Peppers With Italian Sausage
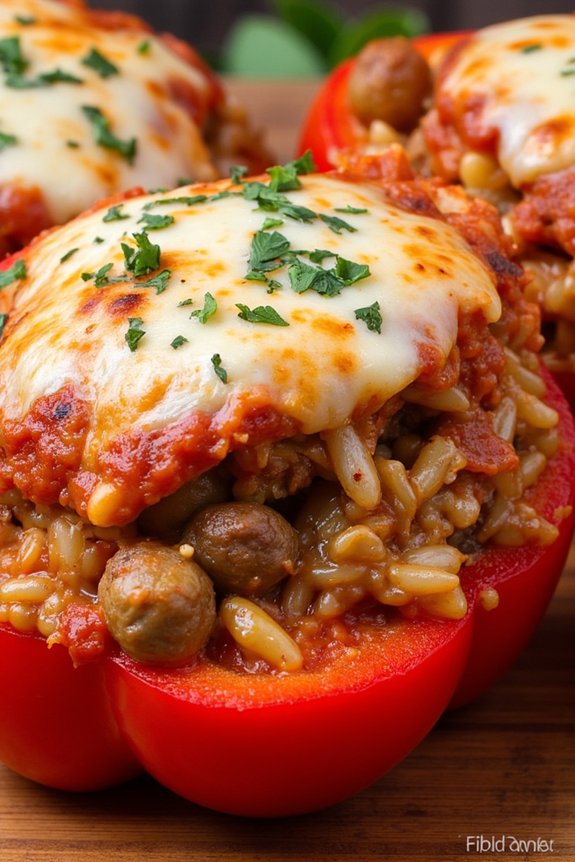
Rustic Italian Oven Recipes bring the heart of Italy’s culinary traditions to your kitchen, and Stuffed Bell Peppers With Italian Sausage is a perfect example of this rustic charm. This dish combines vibrant bell peppers with the savory goodness of Italian sausage, creating a meal that’s both colorful and full of flavor. The peppers are roasted to perfection, allowing their natural sweetness to complement the rich filling inside.
Ideal for a family dinner or a cozy gathering, this recipe will transport you straight to the Tuscan countryside with every bite. The combination of ingredients in this dish not only tantalizes your taste buds but also fills your home with an irresistible aroma as it bakes. The Italian sausage provides a hearty base, while the addition of herbs and spices adds layers of complexity to the dish.
The peppers serve as an edible vessel that holds all these flavors together, making each serving a complete meal. This recipe is designed to serve 4-6 people, perfect for enjoying around a table with loved ones.
Ingredients (Serves 4-6):
- 6 large bell peppers (red, yellow, or green)
- 1 pound Italian sausage (mild or spicy)
- 1 cup cooked rice
- 1 small onion, finely chopped
- 2 cloves garlic, minced
- 1 cup marinara sauce
- 1 cup shredded mozzarella cheese
- 1/4 cup grated Parmesan cheese
- 2 tablespoons olive oil
- 1 teaspoon dried oregano
- 1 teaspoon dried basil
- Salt and pepper to taste
Cooking Instructions:
- Prepare the Peppers: Preheat your oven to 375°F (190°C). Cut the tops off the bell peppers and remove the seeds and membranes. Place the peppers in a baking dish, drizzle with a little olive oil, and season with salt and pepper.
- Cook the Sausage: In a large skillet over medium heat, add the olive oil and sauté the onions until they’re translucent. Add the garlic and cook for another minute. Crumble the Italian sausage into the skillet and cook until browned and cooked through, breaking it up with a spoon as it cooks.
- Mix the Filling: In a large bowl, combine the cooked sausage mixture with the rice, half of the marinara sauce, mozzarella cheese, oregano, basil, and additional salt and pepper to taste. Stir until well mixed.
- Stuff the Peppers: Spoon the sausage and rice mixture into each prepared bell pepper, filling them generously. Pour the remaining marinara sauce over the stuffed peppers.
- Bake the Peppers: Cover the baking dish with foil and bake in the preheated oven for 30 minutes. Remove the foil, sprinkle the Parmesan cheese over the peppers, and return to the oven. Bake uncovered for an additional 15-20 minutes, or until the peppers are tender and the cheese is melted and golden.
- Serve: Allow the peppers to cool slightly before serving. Enjoy them hot, garnished with fresh basil if desired.
Extra Tips:
For a more complex flavor, consider using a mix of mild and spicy Italian sausage. If you prefer a vegetarian version, substitute the sausage with crumbled tofu or a plant-based sausage alternative.
To enhance the nutritional value, use brown rice or quinoa instead of white rice. Remember, the key to perfectly roasted peppers isn’t to rush the cooking time; allowing them to bake slowly guarantees they become tender without losing their shape.
Roasted Tomato and Basil Risotto
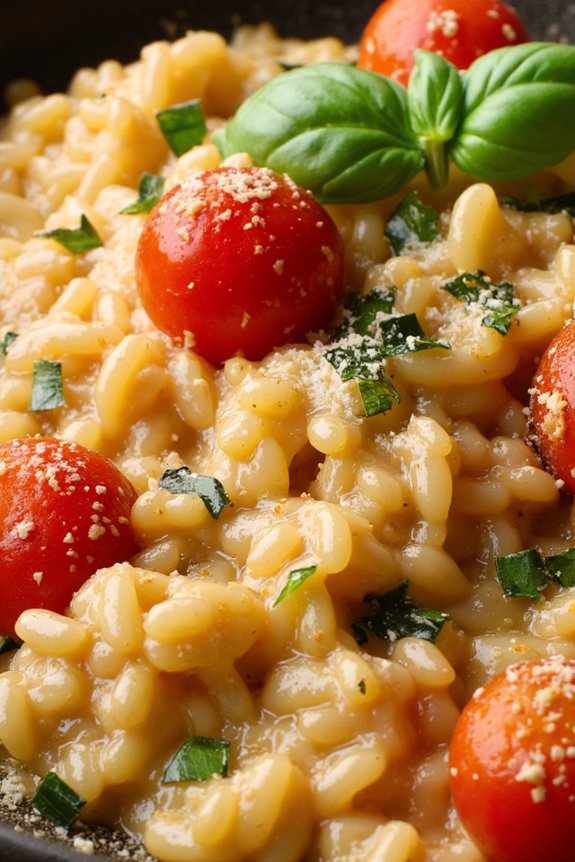
Roasted Tomato and Basil Risotto is a comforting and flavorful dish that captures the essence of rustic Italian cooking. The creamy texture of the risotto is beautifully complemented by the rich, sweet taste of roasted tomatoes and the fresh, aromatic notes of basil. This dish is perfect for a cozy dinner and can easily be made in your home kitchen with a few simple ingredients.
The process of making risotto requires some patience and attention, but the result is well worth the effort. By roasting the tomatoes, you enhance their natural sweetness and deepen their flavor, which pairs beautifully with the creamy Arborio rice. The addition of fresh basil not only adds a burst of color but also a revitalizing, herbal aroma that elevates the dish. This recipe serves 4-6 people, making it ideal for family dinners or small gatherings.
Ingredients for 4-6 servings:
- 1 1/2 cups Arborio rice
- 1 quart chicken or vegetable broth
- 1 cup dry white wine
- 2 cups cherry tomatoes, halved
- 2 tablespoons olive oil
- 1/2 cup grated Parmesan cheese
- 1 small onion, finely chopped
- 3 cloves garlic, minced
- 1/4 cup fresh basil leaves, chopped
- Salt and pepper to taste
- 2 tablespoons unsalted butter
Cooking Instructions:
- Preheat and Roast: Preheat your oven to 400°F (200°C). Place the halved cherry tomatoes on a baking sheet, drizzle with olive oil, and sprinkle lightly with salt and pepper. Roast in the oven for about 20-25 minutes until they’re slightly caramelized and tender. Set aside.
- Prepare Broth: In a saucepan, bring the chicken or vegetable broth to a gentle simmer. Keep it warm on the stove as you prepare the risotto.
- Sauté Aromatics: In a large skillet or heavy-bottomed pot, heat a tablespoon of olive oil over medium heat. Add the chopped onion and cook until translucent, about 5 minutes. Add the minced garlic and cook for an additional minute.
- Toast Rice: Add the Arborio rice to the skillet and stir to coat with the oil. Cook for 2-3 minutes until the rice grains become slightly translucent around the edges.
- Add Wine: Pour in the white wine and stir continuously until it’s mostly absorbed by the rice.
- Cook Risotto: Begin adding the warm broth to the rice, one ladle at a time, stirring frequently and waiting for each addition to be absorbed before adding the next. This process should take about 18-20 minutes, or until the rice is creamy and tender but still al dente.
- Finish with Flavor: Once the rice has reached the desired consistency, stir in the roasted tomatoes, Parmesan cheese, and butter. Mix well until the cheese and butter are melted and the risotto is smooth.
- Incorporate Basil: Remove from heat and gently fold in the chopped basil. Taste and adjust seasoning with salt and pepper if needed.
Extra Tips:
When making Roasted Tomato and Basil Risotto, it’s important to keep the broth warm as you gradually add it to the rice. This helps maintain an even cooking temperature and guarantees the rice absorbs the liquid properly, resulting in a creamy texture.
Stirring the rice frequently is vital to help release the starch, which gives risotto its signature creaminess. Additionally, feel free to experiment with adding other vegetables or proteins such as peas, mushrooms, or shrimp for variation.
Rustic Chicken Cacciatore

Chicken Cacciatore is a classic Italian dish that brings the rustic flavors of the countryside to your table. The word “cacciatore” means “hunter” in Italian, and this dish traditionally involves slow-cooking chicken with tomatoes, herbs, and vegetables—a method thought to be inspired by hunters preparing their catch. The result is a hearty, comforting meal that captures the essence of Italian home cooking.
With its rich, savory sauce and tender chicken, Rustic Chicken Cacciatore is perfect for gathering family and friends around the table. This recipe is designed for 4-6 people, making it ideal for a family dinner or a small gathering. The dish combines simple, fresh ingredients that meld together beautifully after simmering in the oven. The slow cooking process allows the flavors to deepen, resulting in a dish that’s both satisfying and full of robust taste.
Whether served over pasta, polenta, or crusty bread, this dish is an embodiment of the simplicity and depth of rustic Italian cuisine.
Ingredients:
- 6 bone-in, skin-on chicken thighs
- 1/2 cup all-purpose flour
- 2 tablespoons olive oil
- 1 large onion, thinly sliced
- 2 bell peppers (red and green), sliced
- 3 cloves garlic, minced
- 1/2 cup dry white wine
- 1 can (28 ounces) crushed tomatoes
- 1 cup chicken broth
- 1 teaspoon dried oregano
- 1 teaspoon dried thyme
- 1 bay leaf
- Salt and pepper to taste
- Fresh basil leaves, for garnish
Cooking Instructions:
- Prepare the Chicken: Preheat your oven to 350°F (175°C). Pat the chicken thighs dry with paper towels and season them with salt and pepper. Dredge each piece in flour, shaking off the excess.
- Brown the Chicken: Heat olive oil in a large ovenproof skillet or Dutch oven over medium-high heat. Add the chicken thighs skin-side down and cook until the skin is golden brown and crisp, about 5 minutes per side. Remove the chicken and set aside.
- Cook the Vegetables: In the same skillet, add the sliced onion and bell peppers. Sauté until the onions are translucent and the peppers are tender, about 5 minutes. Add the minced garlic and cook for another minute until fragrant.
- Deglaze the Pan: Pour the white wine into the skillet, scraping up any browned bits from the bottom. Allow the wine to simmer for about 2 minutes until it reduces slightly.
- Build the Sauce: Stir in the crushed tomatoes, chicken broth, oregano, thyme, and bay leaf. Bring the mixture to a gentle simmer, allowing the flavors to meld for about 3 minutes.
- Combine and Bake: Return the browned chicken thighs to the skillet, nestling them into the sauce. Cover the skillet and transfer it to the preheated oven. Bake for 45-50 minutes, or until the chicken is cooked through and tender.
- Finish and Serve: Remove the bay leaf from the sauce. Taste and adjust the seasoning with salt and pepper as needed. Garnish with fresh basil leaves before serving.
Extra Tips:
For additional depth of flavor, consider adding a handful of sliced mushrooms when cooking the onions and peppers. If you’re looking for a bit of heat, include a pinch of red pepper flakes with the herbs.
This dish can be prepared a day in advance, as the flavors continue to develop overnight, making it even more delicious when reheated. Serve your Rustic Chicken Cacciatore over pasta, creamy polenta, or with a side of crusty bread to soak up the rich sauce. Enjoy the comforting taste of Italian tradition with every bite!
Garlic and Rosemary Focaccia Bread

Garlic and Rosemary Focaccia Bread is a classic Italian treat that brings the rustic flavors of the Mediterranean right to your kitchen. This aromatic bread is perfect for serving as an appetizer, side dish, or even as a base for sandwiches. The combination of garlic and rosemary permeates the air as it bakes, creating an irresistible aroma that will have everyone gathering around the table.
With its golden, crispy crust and soft, chewy interior, this focaccia bread is a crowd-pleaser that’s both easy to make and delightful to eat. The process of making focaccia is quite straightforward, but it requires patience as the dough needs time to rise. This recipe is designed to serve 4-6 people, making it an ideal choice for a family meal or a small gathering.
The key to a successful focaccia lies in the olive oil, which not only adds flavor but also helps achieve that signature texture. Paired with a sprinkle of coarse sea salt, this bread is simple yet sophisticated, embodying the essence of Italian cuisine.
Ingredients for 4-6 servings:
- 500g all-purpose flour
- 1 packet (7g) active dry yeast
- 300ml warm water
- 2 teaspoons sugar
- 1 teaspoon salt
- 4 tablespoons extra-virgin olive oil, plus more for drizzling
- 3 cloves garlic, minced
- 2 tablespoons fresh rosemary, chopped
- Coarse sea salt, for sprinkling
Instructions:
- Prepare the Dough: In a large bowl, dissolve the sugar in warm water, then sprinkle the yeast on top. Allow it to sit for about 5-10 minutes until it becomes frothy, indicating that the yeast is active.
- Mix Ingredients: Add the flour and salt to the yeast mixture and mix until a dough begins to form. Pour in 2 tablespoons of the olive oil and continue mixing until the dough is smooth and elastic.
- First Rise: Place the dough in a lightly oiled bowl, cover it with a damp cloth, and let it rise in a warm place for about 1 to 1.5 hours, or until it has doubled in size.
- Prepare the Baking Sheet: Drizzle a baking sheet with 1 tablespoon of olive oil, spreading it evenly across the surface. Punch down the risen dough to release any air bubbles and transfer it to the prepared sheet.
- Shape the Dough: Use your fingers to gently stretch and press the dough into a rectangle or oval shape, about 1/2 inch thick. Make sure the dough is evenly distributed across the sheet.
- Second Rise: Cover the shaped dough with a damp cloth and let it rise again for about 30 minutes.
- Add Toppings: Preheat your oven to 220°C (430°F). Using your fingertips, make dimples all over the surface of the dough. Drizzle another tablespoon of olive oil over the top, sprinkle with minced garlic, rosemary, and a generous pinch of coarse sea salt.
- Bake the Focaccia: Place the baking sheet in the preheated oven and bake for 20-25 minutes, or until the focaccia is golden brown and crisp on the edges.
- Cool and Serve: Remove the focaccia from the oven and let it cool slightly on a wire rack before slicing. Drizzle with additional olive oil if desired before serving.
Extra Tips:
To guarantee your focaccia has the best texture, make sure not to skimp on the olive oil, both in the dough and on the surface. This will help create the signature crust and prevent the bread from drying out.
If you prefer a more intense flavor, infuse the olive oil with garlic and rosemary a few hours before using it. Additionally, feel free to experiment with other toppings like sun-dried tomatoes, olives, or caramelized onions for a personalized touch.
Wood-Fired Vegetable Medley

Experience the authentic flavors of Italy with a Wood-Fired Vegetable Medley, a rustic dish that harnesses the power of a traditional wood-fired oven to bring out the natural sweetness and depth of seasonal vegetables.
This recipe celebrates simplicity, relying on fresh produce and a few high-quality ingredients to create a side dish or vegetarian main that’s both hearty and satisfying. The wood-fired oven imparts a subtle smokiness that complements the caramelization of the vegetables, resulting in a dish that’s both rustic and gourmet.
Perfect for serving 4-6 people, this Wood-Fired Vegetable Medley is a versatile addition to any meal. It’s ideal for gatherings, offering a visually appealing and delicious option that can be prepared in advance and cooked quickly in the hot oven.
Whether you’re showcasing garden-fresh vegetables or exploring new seasonal produce, this recipe allows for creativity and adaptation, making it a staple in any rustic Italian cooking repertoire.
Ingredients:
- 2 medium zucchinis, sliced into rounds
- 2 red bell peppers, cut into strips
- 1 large eggplant, cubed
- 1 red onion, sliced
- 3 tablespoons olive oil
- 1 teaspoon salt
- 1/2 teaspoon black pepper
- 2 teaspoons dried Italian herbs (such as oregano, thyme, and basil)
- 4 cloves garlic, minced
- 1/4 cup freshly grated Parmesan cheese
- Fresh basil leaves for garnish
Instructions:
- Prepare the Oven: Start by preheating your wood-fired oven to a temperature of 450°F (230°C). This high heat is crucial for roasting the vegetables quickly while imparting a smoky flavor.
- Prepare the Vegetables: While the oven is heating, wash and prepare all vegetables as indicated in the ingredients list. Place them in a large bowl.
- Season the Vegetables: Drizzle the olive oil over the vegetables, then sprinkle with salt, black pepper, dried Italian herbs, and minced garlic. Toss the vegetables until they’re evenly coated with the oil and seasonings.
- Arrange the Vegetables: Spread the seasoned vegetables in a single layer on a large baking sheet or oven-safe dish. Make sure they aren’t overcrowded to allow even roasting.
- Roast the Vegetables: Place the baking sheet in the preheated wood-fired oven. Roast for about 15-20 minutes, or until the vegetables are tender and slightly charred, stirring halfway through to facilitate even cooking.
- Finish with Cheese: Remove the baking sheet from the oven and immediately sprinkle the grated Parmesan cheese over the hot vegetables, allowing it to melt slightly.
- Garnish and Serve: Transfer the roasted vegetables to a serving platter and garnish with fresh basil leaves. Serve warm as a side dish or a main course.
Extra Tips:
When using a wood-fired oven, keep an eye on the vegetables as they can cook more quickly due to the intense heat.
Different vegetables may have different cooking times; for example, harder vegetables like carrots may need a few extra minutes.
Feel free to experiment with different vegetables according to what’s in season or what you have on hand.
Finally, for a vegan version, simply omit the Parmesan cheese or replace it with a plant-based alternative.