

There’s something undeniably comforting about Italian chocolate desserts. Whether it’s the rich layers of a classic tiramisu or the creamy texture of a melt-in-your-mouth panna cotta, these treats are pure bliss. I’ve handpicked some delightful recipes that will surely satisfy your sweet cravings. Let’s uncover these charming creations together. Ready to indulge in some sweet Italian magic?
Decadent Chocolate Tiramisu
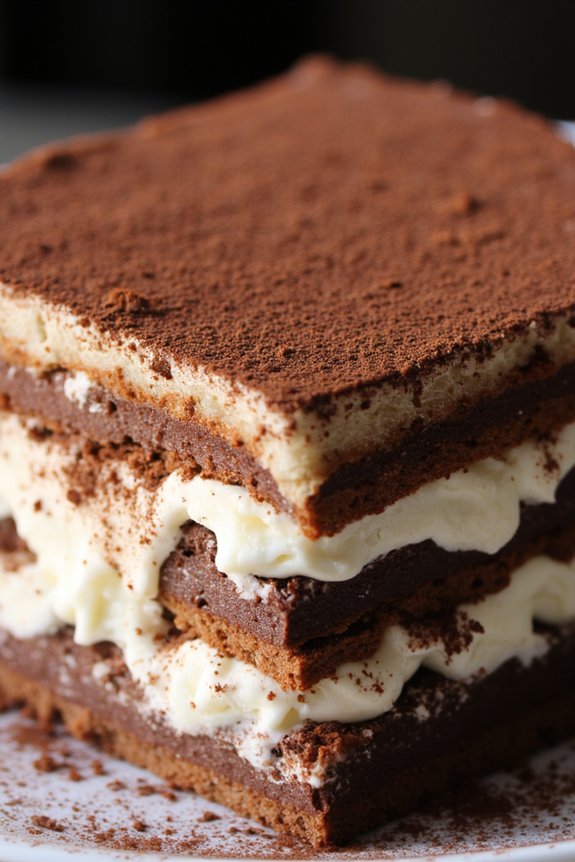
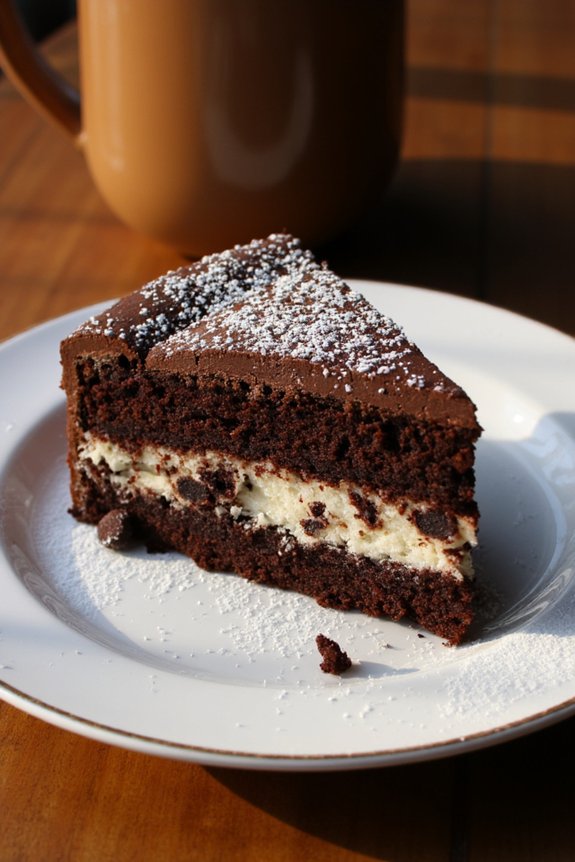
Decadent Chocolate Tiramisu is a luxurious twist on the classic Italian dessert, blending rich chocolate flavors with the creamy smoothness of traditional tiramisu. This dessert is perfect for chocolate lovers looking to indulge in a sumptuous treat that combines the best of chocolate and coffee in a single, delightful dish.
The layers of espresso-soaked ladyfingers, creamy mascarpone filling, and luscious chocolate make every bite a heavenly experience. Whether you’re hosting a dinner party or simply want to impress your loved ones, this recipe will certainly be a showstopper.
The beauty of this dessert lies in its simplicity and the quality of ingredients. Fresh mascarpone cheese, rich cocoa powder, and high-quality dark chocolate are essential to achieve the best results. Paired with freshly brewed espresso and a hint of coffee liqueur, this chocolate tiramisu captures the essence of Italian indulgence.
Assembling the tiramisu is straightforward, and the dish can be prepared in advance, allowing the flavors to meld beautifully in the refrigerator. Serve it chilled and savor the layered decadence of this delightful dessert.
Ingredients for 4-6 servings:
- 1 cup freshly brewed espresso, cooled
- 2 tablespoons coffee liqueur (optional)
- 1 cup mascarpone cheese
- 1 cup heavy cream
- 1/2 cup granulated sugar
- 1 teaspoon vanilla extract
- 24-30 ladyfingers
- 4 ounces dark chocolate, grated
- 1/4 cup unsweetened cocoa powder
- 2 tablespoons powdered sugar
Cooking Instructions:
- Prepare the Espresso Mixture: In a shallow dish, combine the cooled espresso with the coffee liqueur. Stir well and set aside to use for soaking the ladyfingers.
- Make the Mascarpone Mixture: In a mixing bowl, beat the mascarpone cheese until smooth. In a separate bowl, whip the heavy cream, granulated sugar, and vanilla extract until soft peaks form. Carefully fold the whipped cream into the mascarpone cheese until well combined, creating a smooth and creamy filling.
- Assemble the Tiramisu Layers: Quickly dip each ladyfinger into the espresso mixture, making sure they’re soaked but not overly soggy. Arrange a layer of soaked ladyfingers in the bottom of a serving dish. Spread half of the mascarpone mixture over the ladyfingers, smoothing it out with a spatula.
- Add Chocolate and Repeat Layers: Sprinkle half of the grated dark chocolate over the mascarpone layer. Repeat the process by adding another layer of espresso-soaked ladyfingers, followed by the remaining mascarpone mixture. Top with the rest of the grated chocolate.
- Chill the Tiramisu: Cover the dish with plastic wrap and refrigerate for at least 4 hours, preferably overnight, to allow the flavors to meld and the dessert to set.
- Finish with Cocoa and Serve: Before serving, dust the top of the tiramisu with unsweetened cocoa powder and powdered sugar for a decorative finish. Cut into squares and serve chilled.
Extra Tips:
For the best results, use high-quality ingredients, particularly for the chocolate and espresso. Confirm the ladyfingers are briefly dipped in the espresso mixture to prevent them from becoming too soggy.
Allowing the tiramisu to chill overnight enhances the flavors and texture, making it even more delicious. If you’re serving this dessert for a special occasion, consider garnishing with additional chocolate shavings or fresh berries for an extra touch of elegance.
Classic Italian Hot Chocolate
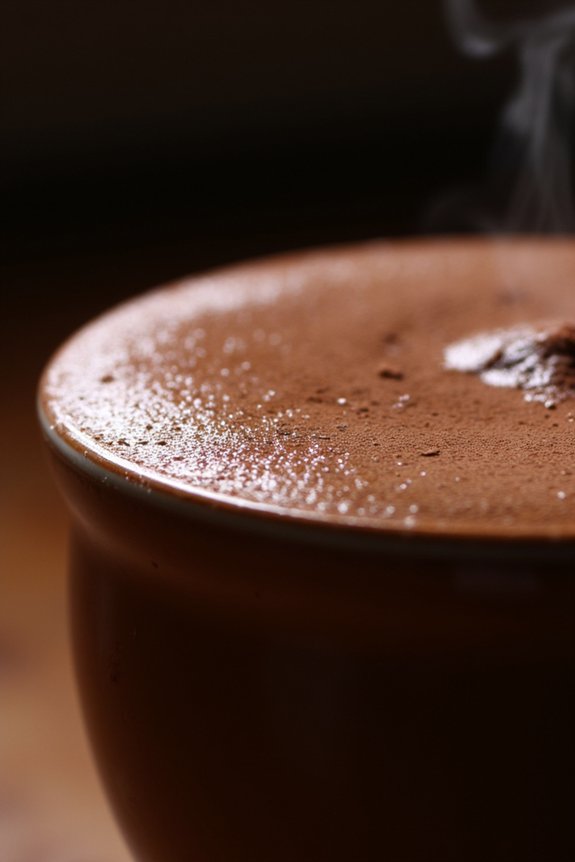
Italian hot chocolate, or “cioccolata calda,” is a rich and velvety beverage that’s a staple in Italian cafes during the colder months. Unlike the typical hot chocolate we’re familiar with, this version is thicker and more decadent, often described as a drinkable dessert.
The secret to its luscious texture lies in the use of high-quality dark chocolate and a touch of cornstarch, which thickens the drink to a pudding-like consistency. Perfect for sipping on a chilly day, this classic Italian hot chocolate will transport you straight to the cozy cafes of Rome or Milan with just one sip.
Prepare to indulge in this comforting treat that brings warmth and delight to any occasion. This recipe is designed to serve 4-6 people, making it ideal for a small gathering or a family treat. It involves simple ingredients that come together beautifully to create a luxurious and unforgettable beverage experience.
Whether you’re looking to impress guests or simply treat yourself, Italian hot chocolate is a must-try for any chocolate lover.
Ingredients:
- 3 cups whole milk
- 1/4 cup granulated sugar
- 1 tablespoon cornstarch
- 1/2 cup water
- 8 ounces high-quality dark chocolate (at least 70% cocoa), chopped
- 1 teaspoon pure vanilla extract
- A pinch of salt
Instructions:
- Prepare the Chocolate Mixture: In a small bowl, combine the cornstarch with the water, and stir until completely dissolved to create a slurry. This will help thicken the hot chocolate without forming lumps.
- Heat the Milk and Sugar: In a medium saucepan, heat the milk and sugar over medium heat. Stir occasionally to dissolve the sugar completely and prevent the milk from scorching at the bottom of the pan.
- Melt the Chocolate: Once the milk is hot (but not boiling), add the chopped dark chocolate to the saucepan. Stir continuously until the chocolate is completely melted and the mixture is smooth.
- Thicken the Hot Chocolate: Slowly pour the cornstarch slurry into the chocolate mixture, stirring constantly. Increase the heat slightly and continue stirring until the mixture begins to thicken to your desired consistency. It should be thick enough to coat the back of a spoon.
- Add Flavorings: Remove the saucepan from heat and stir in the vanilla extract and a pinch of salt. Mix well to combine all the flavors.
- Serve and Enjoy: Pour the hot chocolate into mugs and serve immediately. For an extra touch, top with whipped cream or a dusting of cocoa powder if desired.
Extra Tips:
For the best results, use high-quality dark chocolate with a cocoa content of at least 70%. This guarantees a deep, rich flavor and a smooth texture.
If you prefer a lighter hot chocolate, you can adjust the thickness by reducing the amount of cornstarch used. Additionally, feel free to experiment with flavors by adding a pinch of cinnamon or a drop of almond extract.
Italian hot chocolate is best enjoyed fresh, so make sure to serve it immediately after preparation. However, if you have leftovers, gently reheat them on the stove with a splash of milk to restore the creamy consistency.
Rich Chocolate Torta Caprese
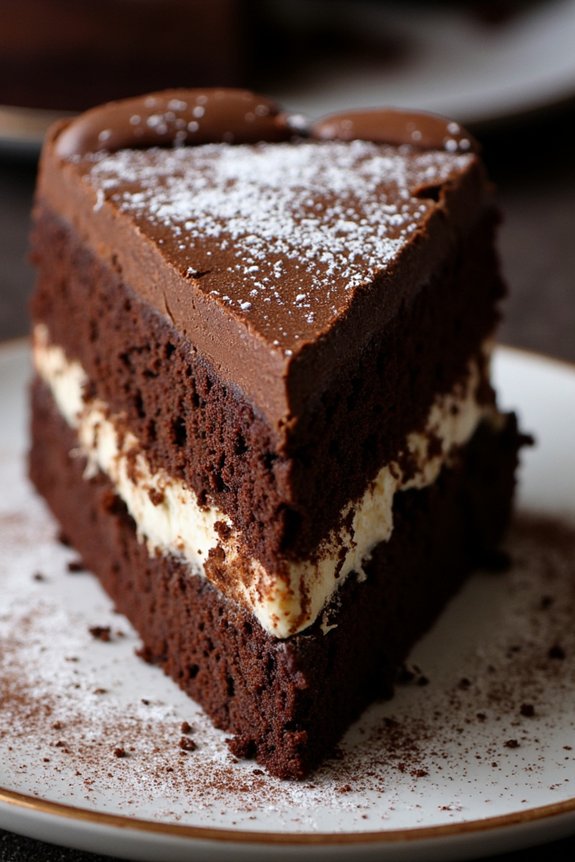
Rich Chocolate Torta Caprese is a classic Italian dessert that originates from the island of Capri. This decadent cake is renowned for its rich, chocolatey flavor and its wonderfully moist texture. Made without flour, this gluten-free delight is dense and fudgy, making it a favorite among chocolate lovers. The cake is traditionally topped with a light dusting of powdered sugar, making it as visually appealing as it’s delicious.
The secret to a perfect Torta Caprese lies in its simplicity and the quality of its ingredients. With just a handful of components, each one plays an essential role in achieving the cake’s iconic flavor and texture. Ground almonds replace flour, giving the cake its unique crumb, while high-quality dark chocolate and butter provide a luscious richness.
This dessert is perfect for any occasion, whether it’s a holiday feast or a simple family gathering, and is sure to impress with its intense chocolate flavor.
Ingredients (for 4-6 servings):
- 200g dark chocolate (70% cocoa)
- 200g unsalted butter
- 200g granulated sugar
- 200g ground almonds
- 4 large eggs
- 1 teaspoon vanilla extract
- A pinch of salt
- Powdered sugar, for dusting
Cooking Instructions:
- Preheat and Prepare: Preheat your oven to 170°C (340°F). Grease and line a 9-inch round cake pan with parchment paper to prevent sticking.
- Melt Chocolate and Butter: In a heatproof bowl, break the dark chocolate into small pieces and add the butter. Place the bowl over a pot of simmering water (double boiler method) and stir occasionally until both the chocolate and butter have melted and combined into a smooth mixture. Remove from heat and allow it to cool slightly.
- Prepare the Batter: In a large mixing bowl, whisk together the sugar and ground almonds. Add the melted chocolate mixture and stir until well combined.
- Mix in Eggs: Separate the egg whites from the yolks. Add the egg yolks and vanilla extract to the chocolate mixture, stirring until fully incorporated.
- Whip Egg Whites: In a clean bowl, beat the egg whites with a pinch of salt until stiff peaks form. This will help add volume and structure to the cake.
- Fold in Egg Whites: Gently fold the whipped egg whites into the chocolate mixture, being careful not to deflate the mixture. Use a spatula and fold until the whites are just incorporated.
- Bake: Pour the batter into the prepared cake pan, smoothing the top with a spatula. Bake in the preheated oven for 40-45 minutes or until the cake has set and a skewer inserted into the center comes out with a few moist crumbs.
- Cool and Serve: Allow the cake to cool in the pan for about 10 minutes, then transfer it to a wire rack to cool completely. Once cooled, dust the top with powdered sugar before serving.
Extra Tips:
For the best results, use high-quality dark chocolate with at least 70% cocoa content; this will guarantee the cake has a deep and rich chocolate flavor.
Be gentle when folding in the egg whites to retain as much air as possible, which helps the cake rise and achieve a light, yet dense texture.
If you prefer, you can also add a tablespoon of your favorite liqueur, such as Amaretto or Frangelico, to the batter for an extra layer of flavor.
Enjoy the Torta Caprese with a dollop of whipped cream or a scoop of vanilla ice cream for a truly indulgent experience.
Silky Chocolate Panna Cotta
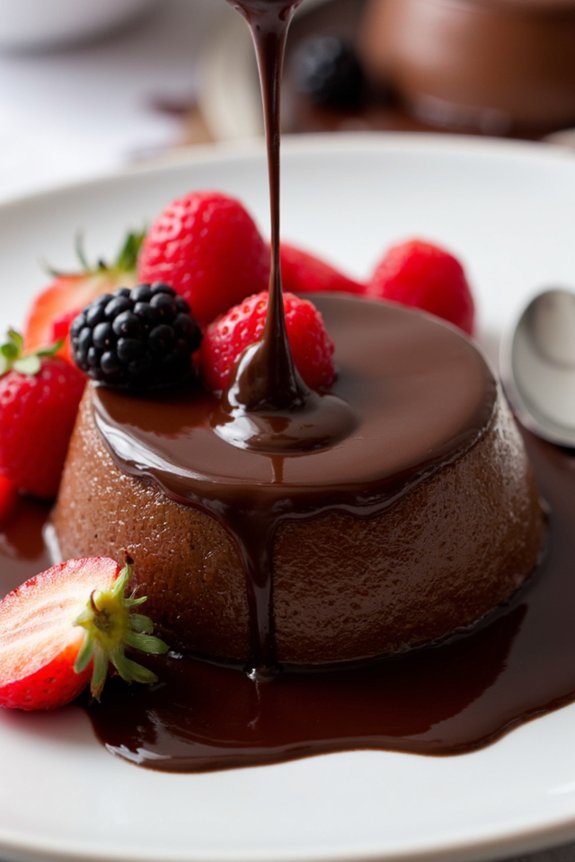
Silky Chocolate Panna Cotta is a decadent Italian dessert that’s perfect for any chocolate lover. This creamy delight is a combination of rich chocolate and smooth cream, setting into a luscious texture that’s bound to impress your guests.
Originating from Italy, panna cotta translates to “cooked cream,” and this dessert stays true to its name with its silky consistency and delicate flavor. It’s a wonderful way to end a meal, offering a satisfying sweetness that isn’t overwhelming.
This recipe is simple to prepare and can be made ahead of time, making it an excellent choice for dinner parties or gatherings. The key to the perfect Silky Chocolate Panna Cotta is using high-quality chocolate and guaranteeing your ingredients are well-blended to achieve that signature smoothness.
This dessert is best served chilled and can be garnished with fresh berries or a drizzle of chocolate sauce for an extra touch of elegance.
Ingredients (Serves 4-6):
- 2 cups heavy cream
- 1 cup whole milk
- 1/2 cup granulated sugar
- 1 teaspoon vanilla extract
- 2 teaspoons unflavored gelatin
- 3 tablespoons cold water
- 4 ounces high-quality dark chocolate, finely chopped
Cooking Instructions:
- Prepare the Gelatin: In a small bowl, sprinkle the gelatin over the cold water and let it sit for about 5 minutes until it blooms and becomes soft.
- Heat the Cream Mixture: In a medium saucepan, combine the heavy cream, whole milk, and granulated sugar. Heat the mixture over medium heat, stirring constantly, until the sugar is completely dissolved and the mixture is hot but not boiling.
- Add the Chocolate: Remove the saucepan from the heat and add the chopped dark chocolate. Stir until the chocolate is completely melted and the mixture is smooth.
- Incorporate the Gelatin: Add the bloomed gelatin to the chocolate mixture and stir until the gelatin is completely dissolved. This should only take a minute or two.
- Add Vanilla: Stir in the vanilla extract, guaranteeing it’s evenly mixed throughout the panna cotta mixture.
- Strain the Mixture: For an extra silky texture, pour the mixture through a fine mesh sieve into a large measuring cup or bowl to remove any undissolved gelatin or chocolate lumps.
- Pour into Molds: Divide the mixture evenly into your desired serving dishes or ramekins. Allow them to cool to room temperature.
- Chill: Once at room temperature, cover the dishes with plastic wrap and refrigerate for at least 4 hours, or until the panna cotta is set.
- Serve: To serve, you can optionally unmold the panna cotta onto dessert plates or serve directly in the dishes. Garnish with fresh berries, chocolate shavings, or a drizzle of chocolate sauce if desired.
Extra Tips:
When preparing Silky Chocolate Panna Cotta, guarantee that the chocolate is finely chopped to facilitate smooth melting.
Avoid overheating the cream mixture as this can alter the texture; it should be hot enough to melt the chocolate but not boiling. If you’re having trouble unmolding the panna cotta, dip the bottom of the mold in warm water for a few seconds to help it release.
Finally, always allow ample time for chilling as this dessert needs to set properly to achieve the desired silky texture.
Italian Chocolate Gelato
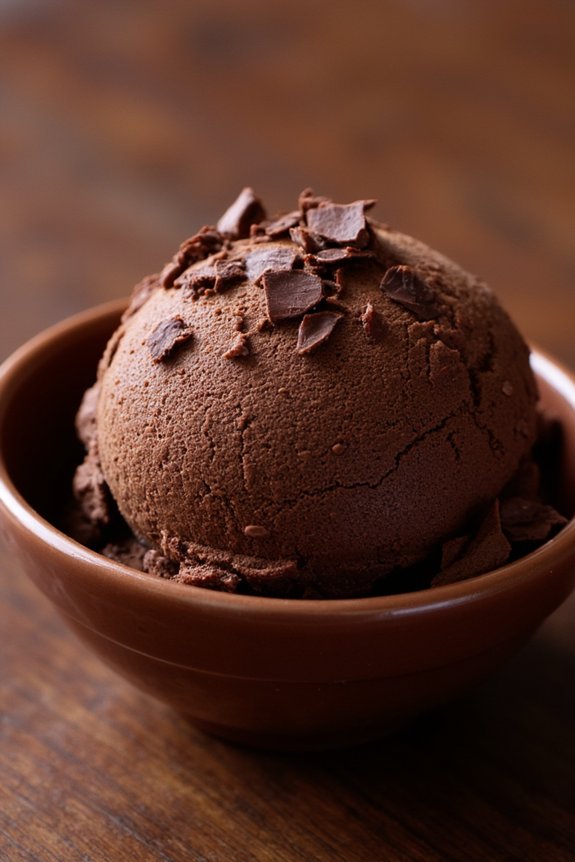
Indulge in the rich and creamy delight of Italian Chocolate Gelato, a quintessential dessert experience that captures the essence of Italy’s love affair with chocolate. This frozen treat is smooth, dense, and intensely flavorful, making it a must-try for any chocolate enthusiast. Unlike regular ice cream, gelato has a lower fat content and is churned at a slower speed, resulting in a velvety texture that melts effortlessly in your mouth.
Perfect for any occasion, this Italian Chocolate Gelato will transport you to the charming streets of Italy with every spoonful.
Creating Italian Chocolate Gelato at home is a rewarding experience that allows you to enjoy this luxurious dessert fresh from your own kitchen. The process involves a few simple steps and ingredients, but the result is a decadent gelato that rivals any store-bought version.
With quality chocolate, cocoa powder, and a hint of vanilla, this recipe is sure to become a staple in your dessert repertoire. Follow these instructions to make a batch that serves 4-6 people, and delight your family and friends with this Italian classic.
Ingredients (Serves 4-6):
- 2 cups whole milk
- 1 cup heavy cream
- 3/4 cup granulated sugar
- 1/2 cup unsweetened cocoa powder
- 3.5 ounces dark chocolate (70% cocoa), finely chopped
- 5 large egg yolks
- 1 teaspoon pure vanilla extract
- A pinch of salt
Cooking Instructions:
- Prepare the Base: In a medium saucepan, combine the whole milk, heavy cream, and 1/2 cup of the sugar. Place over medium heat and stir occasionally until the mixture is hot but not boiling.
- Mix Cocoa and Chocolate: In a separate bowl, whisk together the cocoa powder and chopped dark chocolate. Pour about 1 cup of the hot milk mixture over the cocoa and chocolate, whisking until smooth and the chocolate is fully melted.
- Blend Egg Yolks: In another bowl, whisk the egg yolks with the remaining 1/4 cup of sugar until the mixture is pale and slightly thickened. Gradually pour the cocoa-chocolate mixture into the egg yolks, whisking constantly to prevent the eggs from cooking.
- Cook the Custard: Return the egg yolk mixture to the saucepan with the remaining milk mixture. Cook over low heat, stirring constantly with a wooden spoon until the custard thickens enough to coat the back of the spoon. Don’t let it boil.
- Add Vanilla and Chill: Remove the custard from heat and stir in the vanilla extract and salt. Pour the mixture through a fine-mesh sieve into a clean bowl to remove any lumps. Cover the custard with plastic wrap, pressing it directly onto the surface, and refrigerate until it’s thoroughly chilled, at least 4 hours or overnight.
- Churn the Gelato: Once the custard is chilled, pour it into an ice cream maker and churn according to the manufacturer’s instructions until it reaches a soft-serve consistency.
- Freeze the Gelato: Transfer the gelato to an airtight container and freeze for at least 2 hours or until firm enough to scoop.
Extra Tips:
For the best results, use high-quality chocolate and cocoa powder, as these will greatly impact the flavor of your gelato. Verify that your custard base is completely chilled before churning to achieve the perfect texture.
If you don’t have an ice cream maker, you can still make this recipe by freezing the mixture in a shallow dish and stirring it every 30 minutes until it reaches the desired consistency.
Serve your gelato in chilled bowls or cones, and consider garnishing with chocolate shavings or a sprinkle of sea salt to enhance the chocolatey goodness. Enjoy your homemade Italian Chocolate Gelato as a delightful end to any meal!
Chocolate Almond Biscotti
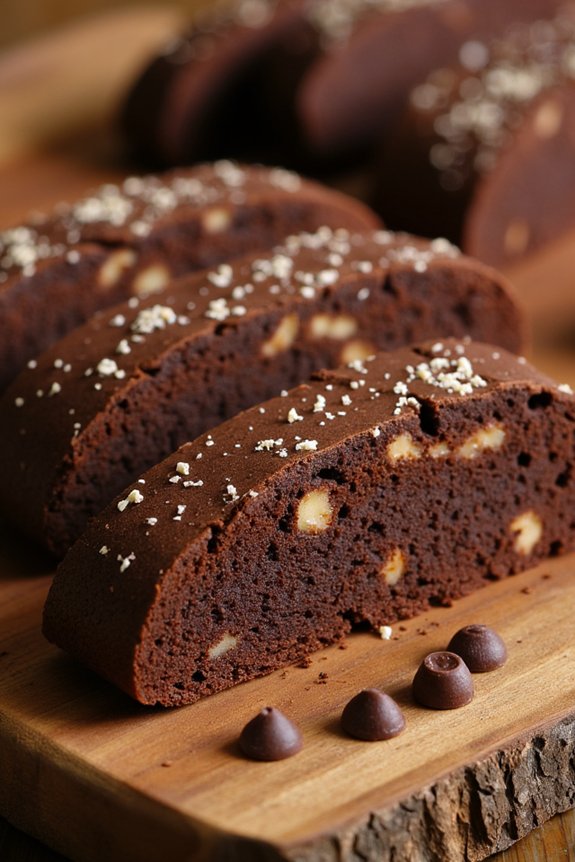
Indulge in the delightful flavors of Italy with this classic Chocolate Almond Biscotti recipe. Biscotti, an iconic Italian cookie, is known for its crunchy texture and is perfect for dunking in your morning coffee or evening dessert wine. This version incorporates rich chocolate and nutty almonds, creating a harmonious blend of flavors that will satisfy any sweet tooth.
Ideal for serving after a hearty Italian meal, these biscotti are simple to make and can be stored for several days, making them a convenient treat to have on hand. Perfect for gatherings or as a homemade gift, Chocolate Almond Biscotti is a versatile dessert that can be enjoyed year-round.
With its elegant appearance and mouthwatering taste, it’s sure to impress your guests. The recipe below yields a serving size of 4-6 people, providing enough to share or enough to keep on hand for whenever you need a little something sweet. Whether you’re a seasoned baker or new to the kitchen, this recipe offers straightforward steps to achieve biscotti perfection.
Ingredients for Chocolate Almond Biscotti (serves 4-6):
- 1 cup all-purpose flour
- 1/3 cup unsweetened cocoa powder
- 1 teaspoon baking powder
- 1/4 teaspoon salt
- 3/4 cup granulated sugar
- 2 large eggs
- 1 teaspoon vanilla extract
- 1 cup whole almonds, toasted and roughly chopped
- 1/2 cup chocolate chips (optional)
- 1 tablespoon of unsalted butter, melted
Cooking Instructions:
- Preheat the Oven: Start by preheating your oven to 350°F (175°C). Line a baking sheet with parchment paper or a silicone baking mat to prevent the biscotti from sticking.
- Mix Dry Ingredients: In a medium-sized bowl, whisk together the flour, cocoa powder, baking powder, and salt until well combined. This will confirm the dry ingredients are evenly distributed throughout the dough.
- Prepare Wet Ingredients: In a separate large bowl, beat the sugar and eggs together using a hand mixer or whisk until the mixture is thick and pale. This should take about 3-4 minutes. Stir in the vanilla extract.
- Combine Ingredients: Gradually add the dry ingredient mixture to the wet ingredients, mixing until just combined. The dough will be thick and slightly sticky. Fold in the chopped almonds and chocolate chips if using, ensuring they’re evenly distributed.
- Shape the Dough: Transfer the dough onto a lightly floured surface and divide it in half. Shape each piece into a log approximately 2 inches wide and 12 inches long. Place the logs onto the prepared baking sheet, leaving space between them.
- First Bake: Bake in the preheated oven for 25-30 minutes, or until the logs are firm to the touch. Remove from the oven and allow them to cool on the baking sheet for 10-15 minutes. Lower the oven temperature to 300°F (150°C).
- Slice and Second Bake: Once slightly cooled, carefully transfer the logs to a cutting board. Using a serrated knife, slice each log diagonally into 1/2-inch thick slices. Arrange the slices cut side down back on the baking sheet.
- Final Bake: Return the biscotti to the oven and bake for an additional 10-15 minutes, flipping halfway through, until they’re dry and crisp. Remove from the oven and let them cool completely on a wire rack.
Extra Tips:
For the best results, confirm that the almonds are thoroughly toasted before adding them to the dough to enhance their flavor. If you prefer a softer biscotti, reduce the second baking time slightly.
To make slicing easier, use a sharp serrated knife and make sure the logs are cooled enough to handle without crumbling. Biscotti can be stored in an airtight container for up to two weeks, making them a convenient snack or gift.
Additionally, feel free to experiment with different types of nuts or add-ins like dried fruits for a personalized touch.
Dark Chocolate Cannoli

Dark Chocolate Cannoli is a delectable Italian dessert that combines the rich and intense flavors of dark chocolate with the classic, crispy cannoli shell. This dessert is perfect for chocolate lovers who appreciate the balance of a crunchy exterior and a creamy, luscious filling.
Cannoli, originating from Sicily, is traditionally filled with sweetened ricotta cheese, but adding dark chocolate takes this treat to another level. Whether you’re serving it as an elegant dinner party dessert or indulging in a sweet afternoon snack, Dark Chocolate Cannoli is bound to impress.
Making Dark Chocolate Cannoli involves preparing a flavorful chocolate ricotta filling and then piping it into the fried pastry shells. The shells can be made from scratch or purchased from the store for convenience.
The filling is enriched with finely chopped dark chocolate and can be further enhanced with ingredients like vanilla extract or a hint of orange zest. Once filled, the ends of the cannoli can be dipped in additional chocolate or sprinkled with powdered sugar to create a stunning presentation. This recipe serves 4-6 people, guaranteeing that you have enough to satisfy your chocolate cravings or share with friends and family.
Ingredients for 4-6 Servings:
- 12 pre-made cannoli shells
- 1 ½ cups ricotta cheese, drained
- ½ cup mascarpone cheese
- ¾ cup powdered sugar
- 1 teaspoon vanilla extract
- 1 tablespoon finely grated orange zest
- 1 cup dark chocolate, finely chopped
- ½ cup dark chocolate chips (for dipping)
- Powdered sugar (for dusting)
Cooking Instructions:
- Prepare the Ricotta Filling: In a large mixing bowl, combine the ricotta cheese, mascarpone cheese, powdered sugar, vanilla extract, and orange zest. Mix until smooth and creamy. Confirm that the ricotta is well-drained to avoid a watery filling.
- Incorporate the Chocolate: Gently fold in the finely chopped dark chocolate into the ricotta mixture. This will add texture and a rich chocolate flavor to the filling.
- Chill the Filling: Cover the bowl with plastic wrap and refrigerate the filling for at least 30 minutes. This helps the mixture to set and makes it easier to pipe into the cannoli shells.
- Fill the Cannoli Shells: Using a piping bag fitted with a large round tip, carefully pipe the chilled chocolate ricotta filling into each end of the cannoli shells, confirming they’re completely filled.
- Decorate the Cannoli: Melt the dark chocolate chips in a microwave or double boiler. Dip each end of the filled cannoli into the melted chocolate. Place them on a parchment-lined tray and allow the chocolate to set.
- Final Touches: Just before serving, dust the cannoli with powdered sugar for a classic finish. This adds a touch of sweetness and enhances the visual appeal.
Extra Tips:
To guarantee the best texture for your cannoli, fill the shells just before serving to keep them crisp. If you prefer homemade shells, make sure they’re cooled completely before filling to prevent the ricotta mixture from melting.
For additional flavor, consider adding a pinch of cinnamon or nutmeg to the ricotta mixture. Always taste the filling before assembling to adjust the sweetness or chocolate intensity according to your preference.
Enjoy your Dark Chocolate Cannoli with a cup of espresso or a glass of dessert wine for an authentic Italian experience.
Luscious Chocolate Semifreddo
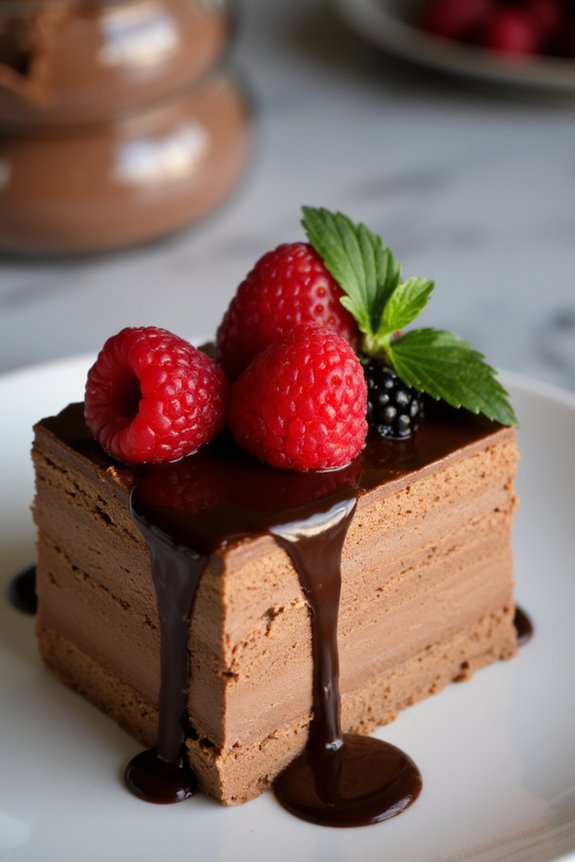
Chocolate Semifreddo is a classic Italian dessert that’s both elegant and incredibly easy to make. This frozen delight offers a creamy, mousse-like texture that melts in your mouth, leaving a rich chocolatey finish. Unlike traditional ice cream, semifreddo doesn’t require an ice cream maker, making it accessible for any home cook looking to impress their guests with minimal effort.
With its smooth consistency and decadent flavor, this semifreddo is perfect for any occasion, from a casual family dinner to a fancy dinner party.
This dessert is best prepared in advance, allowing you to focus on other aspects of your meal. The key to a perfect Chocolate Semifreddo is to use high-quality chocolate and fresh ingredients. As it sets in the freezer, the flavors meld together, creating a harmonious balance between the sweetness of the chocolate and the creaminess of the base.
Serve it in slices, topped with fresh berries or a drizzle of chocolate sauce for an added touch of elegance.
Ingredients (Serves 4-6):
- 200g dark chocolate (70% cacao)
- 4 large eggs, separated
- 150g granulated sugar
- 1 teaspoon vanilla extract
- 300ml heavy cream
- A pinch of salt
Cooking Instructions:
- Melt the Chocolate: Break the dark chocolate into small pieces and melt it gently in a heatproof bowl over a pot of simmering water. Stir occasionally until smooth, then remove from heat and let it cool slightly.
- Prepare the Egg Mixture: In a large bowl, whisk the egg yolks with half of the sugar and the vanilla extract until the mixture is pale and creamy. Gradually fold in the melted chocolate until well combined.
- Whip the Cream: In another bowl, whip the heavy cream until it holds soft peaks. Be careful not to over-whip, as this will affect the texture of the semifreddo.
- Beat the Egg Whites: In a separate clean, dry bowl, beat the egg whites with a pinch of salt until soft peaks form. Gradually add the remaining sugar and continue to beat until the mixture is glossy and holds stiff peaks.
- Combine the Mixtures: Gently fold the whipped cream into the chocolate mixture, making sure not to deflate the cream. Then, carefully fold in the beaten egg whites, mixing just until incorporated.
- Freeze the Semifreddo: Line a loaf pan with plastic wrap, leaving enough overhang to cover the top later. Pour the semifreddo mixture into the pan and smooth the top with a spatula. Cover with the overhanging plastic wrap and place in the freezer for at least 4-6 hours, or until firm.
- Serve: When ready to serve, remove the semifreddo from the freezer and let it sit at room temperature for a few minutes to soften slightly. Unwrap and slice with a warm knife. Serve on chilled plates and garnish with fresh berries or a drizzle of chocolate sauce if desired.
Extra Tips:
For best results, verify all your ingredients are at room temperature before you start, as this will help them blend more smoothly.
Use high-quality dark chocolate for a richer flavor, and if you prefer a sweeter semifreddo, opt for chocolate with a lower cacao percentage or adjust the sugar slightly.
Always use fresh eggs from a trusted source, as they’re consumed raw in this recipe.
Finally, be patient while folding the mixtures together; gentle handling will preserve the airiness essential for the perfect semifreddo texture.
Italian Chocolate Zabaglione
Italian Chocolate Zabaglione is a delightful twist on the classic Italian dessert, bringing together the rich flavors of chocolate with the smooth, creamy texture of traditional zabaglione. This elegant dessert is perfect for a romantic dinner or a sophisticated dinner party, offering a luxurious experience with each spoonful.
The marriage of chocolate and zabaglione creates a unique taste sensation that’s sure to impress your guests and leave them asking for more.
The key to achieving the perfect Italian Chocolate Zabaglione lies in carefully balancing the ingredients and mastering the gentle cooking technique required for zabaglione. This dessert is typically served warm, but it can also be enjoyed chilled, making it a versatile treat for any occasion.
With a few simple ingredients and a little patience, you can create this exquisite dessert in the comfort of your own kitchen.
Ingredients for 4-6 servings:
- 6 large egg yolks
- 1/3 cup granulated sugar
- 1/2 cup sweet Marsala wine
- 1/4 cup heavy cream
- 3 oz. dark chocolate, finely chopped
- 1 teaspoon vanilla extract
- Pinch of salt
- Chocolate shavings or cocoa powder (for garnish, optional)
Cooking Instructions:
- Prepare the Double Boiler: Fill a medium saucepan with about 2 inches of water and bring it to a simmer. Choose a heatproof bowl that fits snugly over the saucepan without touching the water.
- Mix the Base Ingredients: In the heatproof bowl, whisk together the egg yolks, sugar, Marsala wine, and a pinch of salt until the mixture is smooth and well combined.
- Cook the Zabaglione: Place the bowl over the simmering water, ensuring it doesn’t touch the water. Continuously whisk the mixture until it thickens and becomes pale and creamy. This should take about 8-10 minutes. The mixture should be thick enough to coat the back of a spoon.
- Incorporate Chocolate and Cream: Once the zabaglione base is ready, remove it from the heat. Stir in the chopped chocolate until fully melted and the mixture is smooth. Add the heavy cream and vanilla extract, mixing thoroughly.
- Serve: Divide the chocolate zabaglione among serving glasses or bowls. You can serve it warm immediately or chill it in the refrigerator for a cold dessert. Garnish with chocolate shavings or a dusting of cocoa powder before serving, if desired.
Extra Tips:
When making Italian Chocolate Zabaglione, it’s important to maintain a low and steady heat to prevent the egg yolks from curdling. Constant whisking is essential to achieve the desired creamy consistency.
If you don’t have Marsala wine, you can substitute it with another sweet wine or even a little brandy to keep the flavor profile intact. For a more intense chocolate flavor, consider using high-quality dark chocolate with a cocoa content of at least 70%.
Experiment with different garnishes such as fresh berries or whipped cream for added texture and flavor.
Chocolate Ricotta Cake
Chocolate Ricotta Cake is a delightful Italian dessert that combines the creamy richness of ricotta cheese with the deep, indulgent flavor of chocolate. This cake is a perfect balance of light and dense, making it a versatile treat for any occasion, whether it’s a casual family dinner or a sophisticated evening gathering.
The velvety texture of the cake, paired with the intense chocolate notes, creates an irresistible dessert that’s sure to impress your guests and become a favorite in your recipe collection. Originating from Italy, Chocolate Ricotta Cake is a reflection of the culinary tradition of using simple, fresh ingredients to create something truly special.
The ricotta cheese adds a unique creaminess and moisture to the cake, setting it apart from other chocolate desserts. This recipe serves 4-6 people, making it ideal for a small gathering or for enjoying a few slices over a couple of days. Whether you’re an experienced baker or a novice in the kitchen, this recipe is straightforward and rewarding, promising a delicious outcome every time.
Ingredients:
- 1 cup (250g) ricotta cheese
- 3/4 cup (150g) granulated sugar
- 4 large eggs
- 1 teaspoon vanilla extract
- 1/2 cup (60g) all-purpose flour
- 1/2 cup (60g) unsweetened cocoa powder
- 1 teaspoon baking powder
- 1/4 teaspoon salt
- 1/2 cup (115g) unsalted butter, melted and cooled
- 1 cup (175g) dark chocolate chips or chopped dark chocolate
- Powdered sugar, for dusting (optional)
Instructions:
- Preheat the Oven: Start by preheating your oven to 350°F (175°C). Grease a 9-inch springform pan with butter or non-stick spray, and line the bottom with parchment paper for easy removal.
- Mix Ricotta and Sugar: In a large mixing bowl, combine the ricotta cheese and granulated sugar. Use an electric mixer on medium speed to beat the mixture until it’s smooth and creamy, about 2-3 minutes.
- Add Eggs and Vanilla: Add the eggs one at a time, beating well after each addition to confirm they’re fully incorporated. Stir in the vanilla extract.
- Combine Dry Ingredients: In a separate bowl, sift together the flour, cocoa powder, baking powder, and salt. This guarantees there are no lumps and the ingredients are evenly distributed.
- Incorporate Dry Ingredients with Wet: Gradually add the dry ingredients to the ricotta mixture, mixing on low speed until just combined. Be careful not to overmix as this can result in a dense cake.
- Add Butter and Chocolate: Gently fold in the melted butter and chocolate chips using a spatula. Confirm the chocolate is evenly distributed throughout the batter.
- Bake the Cake: Pour the batter into the prepared springform pan, smoothing the top with a spatula. Bake in the preheated oven for 35-40 minutes, or until a toothpick inserted into the center comes out clean or with a few moist crumbs.
- Cool and Serve: Allow the cake to cool in the pan for about 15 minutes, then remove the sides of the springform pan. Transfer the cake to a wire rack to cool completely. Once cooled, dust with powdered sugar if desired before serving.
Extra Tips:
When making Chocolate Ricotta Cake, verify that all your ingredients, especially the ricotta cheese and eggs, are at room temperature. This will help them blend more easily and evenly, resulting in a smoother batter and a more uniform bake.
Additionally, for a richer flavor, use high-quality dark chocolate and cocoa powder. If you prefer a slightly sweeter cake, you can increase the sugar quantity by a couple of tablespoons or adjust according to taste.
Finally, this cake can be stored in an airtight container in the refrigerator for up to 3 days, which allows the flavors to meld and even improve over time.
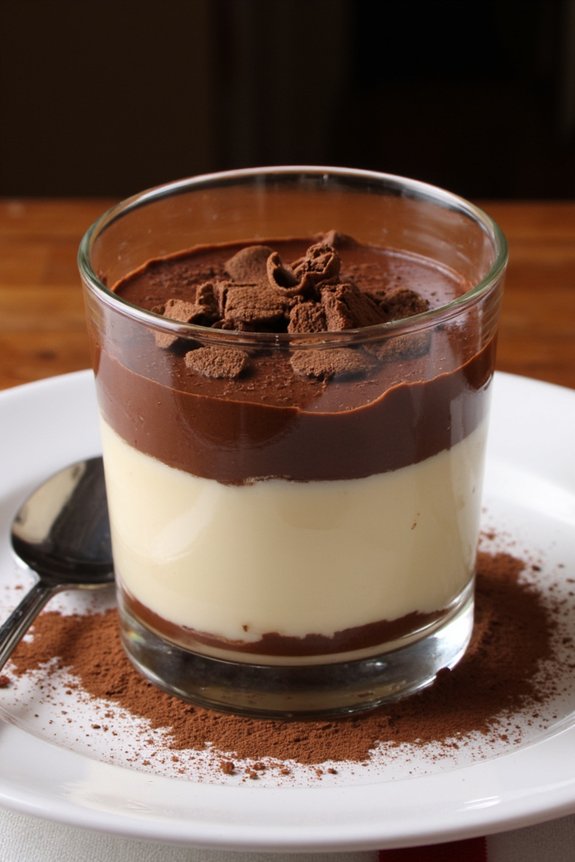
Chocolate Hazelnut Budino

Indulge in a luscious Chocolate Hazelnut Budino, a classic Italian dessert that will delight your taste buds with its rich, velvety texture and the perfect balance of chocolate and hazelnut flavors.
This traditional Italian pudding is a wonderful way to end a meal, offering a sophisticated yet comforting treat that’s sure to impress your family and friends. The smooth, creamy consistency of the budino is achieved by combining high-quality chocolate with hazelnut paste, creating a harmonious blend that’s both decadent and satisfying.
The Chocolate Hazelnut Budino is an ideal dessert for any occasion, whether it’s a casual family dinner or a more formal gathering. The process of making this dessert is straightforward, but it does require some attention to detail to guarantee the perfect texture and flavor.
To make the experience even more delightful, consider pairing the budino with a dollop of freshly whipped cream or a scoop of vanilla ice cream. Prepare to be captivated by this exquisite dessert that brings a taste of Italy straight to your table.
Ingredients for 4-6 servings:
- 1 cup of whole milk
- 1 cup of heavy cream
- 1/2 cup of granulated sugar
- 1/4 cup of hazelnut paste
- 4 ounces of high-quality dark chocolate, chopped
- 3 large egg yolks
- 1 tablespoon of cornstarch
- 1 teaspoon of pure vanilla extract
- Pinch of salt
- Whipped cream or vanilla ice cream (optional, for serving)
Cooking Instructions:
- Prepare the Base Mixture: In a medium saucepan, combine the whole milk, heavy cream, and granulated sugar. Place the saucepan over medium heat and stir the mixture occasionally until it begins to steam. Be careful not to let it come to a boil.
- Incorporate Hazelnut and Chocolate: Once the milk mixture is steaming, add the hazelnut paste and chopped dark chocolate. Stir continuously until the chocolate has completely melted and the mixture is smooth and well combined.
- Create the Egg Mixture: In a separate bowl, whisk together the egg yolks, cornstarch, vanilla extract, and a pinch of salt until the mixture is smooth and slightly thickened.
- Temper the Egg Mixture: Slowly pour a small amount of the hot chocolate mixture into the egg mixture while whisking constantly. This will temper the eggs and prevent them from curdling when added to the hot liquid.
- Combine All Mixtures: Gradually add the tempered egg mixture back into the saucepan with the remaining chocolate mixture, whisking constantly to guarantee a smooth consistency.
- Thicken the Budino: Continue cooking the mixture over medium heat, whisking constantly, until it thickens to a pudding-like consistency. This should take about 5-7 minutes. Be sure to scrape the bottom and sides of the pan to prevent scorching.
- Chill the Budino: Once thickened, remove the saucepan from the heat and pour the budino into individual serving dishes. Cover each dish with plastic wrap, pressing it directly onto the surface of the budino to prevent a skin from forming. Refrigerate for at least 2 hours, or until completely chilled.
- Serve the Dessert: Before serving, remove the plastic wrap and top the budino with a dollop of whipped cream or a scoop of vanilla ice cream, if desired. Enjoy this delightful Italian dessert chilled.
Extra Tips:
When preparing Chocolate Hazelnut Budino, it’s essential to use high-quality chocolate for the best flavor. The hazelnut paste should be smooth and well-incorporated to avoid any graininess in the texture.
It’s also important to temper the eggs carefully to prevent them from curdling. If you notice any lumps forming during the cooking process, you can strain the mixture through a fine-mesh sieve before chilling.
Finally, serving the budino with a contrasting element like whipped cream or ice cream enhances the overall experience by adding a light, airy component to the rich, dense pudding.
Chocolate Amaretti Cookies
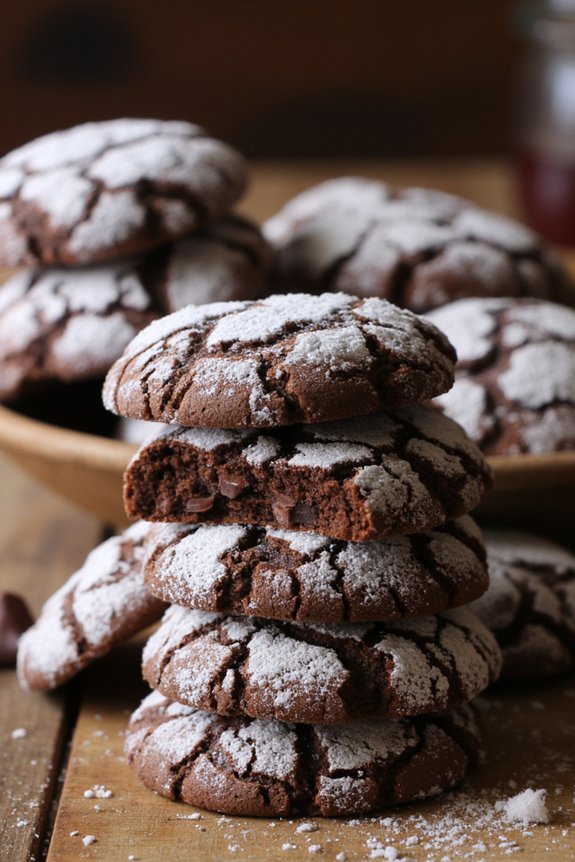
Chocolate Amaretti Cookies are an exquisite Italian dessert that combines the rich flavors of chocolate with the delicate, nutty essence of almond cookies. These delightful treats are perfect for any occasion, offering a blend of textures from the chewy center to the slightly crisp exterior.
Whether you’re making them for a festive gathering or just to enjoy with a cup of coffee, these cookies are guaranteed to impress with their sophisticated taste and simple preparation.
Originating from Italy, Amaretti cookies are traditionally made with ground almonds, sugar, and egg whites. In this chocolate variation, cocoa powder and chocolate chips are added to elevate the flavor profile, creating a decadent and indulgent dessert.
This recipe yields enough cookies to serve 4-6 people, making it an ideal choice for small parties or family gatherings.
Ingredients (Serves 4-6):
- 2 cups almond flour
- 1 cup granulated sugar
- 1/4 cup unsweetened cocoa powder
- 1/2 teaspoon baking powder
- 1/4 teaspoon salt
- 4 large egg whites
- 1 teaspoon almond extract
- 1 teaspoon vanilla extract
- 1/2 cup mini chocolate chips
- 1/2 cup powdered sugar (for rolling)
Cooking Instructions:
- Preheat the Oven: Begin by preheating your oven to 325°F (165°C). Line two baking sheets with parchment paper to prevent the cookies from sticking during baking.
- Mix Dry Ingredients: In a large mixing bowl, combine the almond flour, granulated sugar, cocoa powder, baking powder, and salt. Stir well to ascertain all dry ingredients are evenly distributed.
- Prepare Wet Ingredients: In a separate bowl, lightly beat the egg whites until they become frothy. Add the almond and vanilla extracts, and mix until combined.
- Combine Ingredients: Gradually add the wet mixture to the dry ingredients. Stir until a thick dough forms. Fold in the mini chocolate chips, ensuring they’re evenly distributed throughout the dough.
- Shape the Cookies: Scoop tablespoon-sized portions of the dough and roll each one into a ball. Coat each ball lightly in powdered sugar and place them on the prepared baking sheets, spacing them about 2 inches apart.
- Bake the Cookies: Place the baking sheets in the preheated oven and bake for 15-18 minutes, or until the cookies are firm to the touch but still soft in the center. They should have developed slight cracks on the surface.
- Cool and Serve: Allow the cookies to cool on the baking sheets for about 5 minutes before transferring them to a wire rack to cool completely. Serve them at room temperature with coffee or dessert wine.
Extra Tips:
For the best results, verify your egg whites are at room temperature before beating, as this will help them achieve the right frothy consistency.
If you prefer a more intense chocolate flavor, consider adding a teaspoon of espresso powder to the dry ingredients.
Additionally, if you want a slightly crunchier texture, leave the cookies in the oven for an extra minute or two, but be careful not to overbake them.
To store, keep the cookies in an airtight container at room temperature for up to a week. Enjoy!