

There’s something truly special about Italian bread that makes it a staple in so many kitchens. From the comforting smell of a warm focaccia to the delightful texture of a fresh ciabatta, these breads are a must-try. Whether you’re planning a cozy family dinner or a festive gathering, these 11 golden Italian bread recipes will elevate your meal. Get ready to explore some delicious options that are sure to please everyone at the table. Let’s discover these mouthwatering recipes together!
Classic Ciabatta Bread

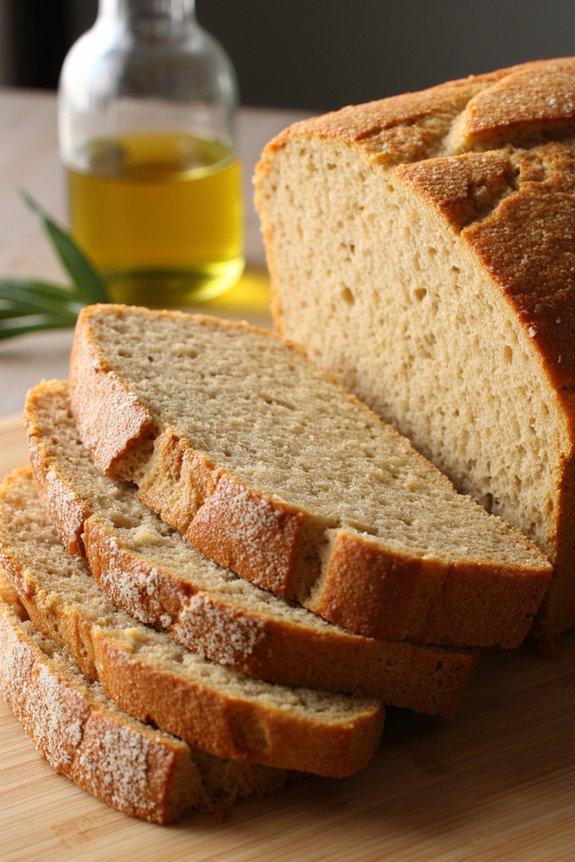
Ciabatta bread, with its crisp crust and porous interior, is a traditional Italian bread that has captured the hearts of bread lovers worldwide. Originating from the Veneto region, this rustic loaf is cherished for its chewy texture and rich flavor, making it the perfect companion for soups, salads, or simply enjoyed with a drizzle of olive oil.
The name “ciabatta” means slipper in Italian, referring to the bread’s flattened, oval shape, reminiscent of the comfortable footwear.
Crafting the perfect ciabatta starts with a high hydration dough, which yields the bread’s characteristic open crumb structure. Patience is key, as the dough requires several rises to develop its full flavor. This recipe provides a straightforward approach to making ciabatta bread at home, yielding two loaves that will serve 4-6 people. With the right ingredients and a bit of time, you can bring a taste of Italy to your kitchen with this delightful bread.
Ingredients:
- 4 cups all-purpose flour
- 1 1/2 cups lukewarm water
- 1 teaspoon salt
- 1 teaspoon sugar
- 1 teaspoon active dry yeast
- 2 tablespoons olive oil
Instructions:
- Prepare the Sponge: In a large mixing bowl, combine 1 cup of flour, 1 cup of lukewarm water, and yeast. Stir until well mixed, then cover the bowl with plastic wrap and let it sit at room temperature for 3-4 hours or until it becomes bubbly and doubles in size.
- Make the Dough: Add the remaining flour, salt, sugar, olive oil, and the remaining 1/2 cup of water to the sponge. Mix until a sticky dough forms.
- Knead the Dough: Turn the dough onto a lightly floured surface. Knead it for about 10 minutes until it becomes smooth but still sticky. Alternatively, use a stand mixer with a dough hook for about 5-7 minutes on medium speed.
- First Rise: Place the dough in a lightly oiled bowl and cover it with plastic wrap or a damp cloth. Let it rise at room temperature until it doubles in size, about 1-2 hours.
- Shape the Loaves: Gently punch down the dough and turn it out onto a floured surface. Divide it in half and shape each piece into a flat oval, about 12 inches long and 4 inches wide. Avoid handling the dough too much to maintain the airy structure.
- Second Rise: Transfer the shaped loaves onto a baking sheet lined with parchment paper. Cover them with a damp cloth and let them rise for another 30-45 minutes until slightly puffy.
- Preheat the Oven: While the dough is rising, preheat your oven to 425°F (220°C). Place an empty baking pan on the bottom rack of the oven.
- Bake the Bread: Once the loaves have risen, place the baking sheet in the oven. Carefully pour a cup of hot water into the empty baking pan to create steam. Bake for 20-25 minutes, or until the crust is golden brown and sounds hollow when tapped.
- Cool the Bread: Remove the loaves from the oven and let them cool on a wire rack for at least 30 minutes before slicing.
Extra Tips: For an even more flavorful ciabatta, consider preparing the sponge the night before and letting it rest in the refrigerator overnight. This slow fermentation allows the dough to develop a deeper flavor.
Additionally, resist the urge to add more flour during kneading; a wet dough is essential for the bread’s unique texture. Finally, using steam in the oven is essential for achieving a crusty exterior, so don’t skip that step!
Rustic Italian Focaccia
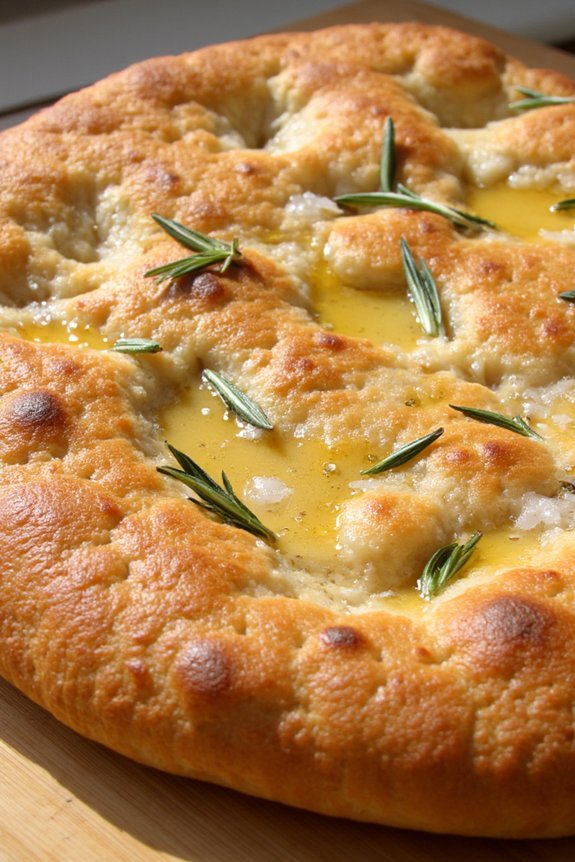
Focaccia is a classic Italian bread that’s beloved for its simplicity and versatility. This Rustic Italian Focaccia is characterized by its golden crust, airy texture, and the aromatic flavors imparted by olive oil and herbs. Originating from the Liguria region, focaccia has become a staple in Italian cuisine and is often enjoyed as an appetizer, side dish, or sandwich base.
The beauty of focaccia lies in its ability to be customized with various toppings, making it a delightful addition to any meal. Making focaccia at home is a rewarding experience that allows you to appreciate the artisanal nature of bread-making. While it does require some patience to allow the dough to rise, the process itself is straightforward and beginner-friendly.
This recipe will guide you through creating a traditional Rustic Italian Focaccia that’s perfect for serving 4-6 people. Whether you choose to enjoy it as is or topped with your favorite ingredients, this focaccia is sure to become a family favorite.
Ingredients (for 4-6 servings):
- 4 cups all-purpose flour
- 1 1/2 cups warm water
- 2 teaspoons salt
- 2 teaspoons sugar
- 2 1/4 teaspoons active dry yeast (1 packet)
- 1/4 cup olive oil, plus extra for drizzling
- 1 tablespoon coarse sea salt
- 1 tablespoon fresh rosemary leaves
Cooking Instructions:
- Activate the Yeast: In a small bowl, combine the warm water, sugar, and active dry yeast. Stir gently and let it sit for about 5-10 minutes until it becomes frothy. This step guarantees that the yeast is alive and will help the dough rise properly.
- Prepare the Dough: In a large mixing bowl, combine the flour and salt. Create a well in the center and pour in the yeast mixture and olive oil. Mix until a sticky dough forms. You can use a wooden spoon or your hands for this step.
- Knead the Dough: Transfer the dough to a lightly floured surface and knead for about 10 minutes until it becomes smooth and elastic. If the dough is too sticky, sprinkle a little more flour as needed.
- First Rise: Place the kneaded dough in a lightly oiled bowl, cover it with a damp cloth or plastic wrap, and let it rise in a warm place for about 1-2 hours, or until it has doubled in size.
- Prepare the Baking Sheet: Once the dough has risen, punch it down to release the air. Grease a 9×13 inch baking sheet with olive oil. Transfer the dough to the baking sheet and use your fingers to gently stretch and spread it evenly across the pan.
- Second Rise: Cover the dough again and let it rise for another 30-40 minutes in a warm place. This second rise will contribute to the focaccia’s airy texture.
- Add Toppings: Preheat your oven to 400°F (200°C). Use your fingers to create dimples all over the surface of the dough. Drizzle generously with olive oil and sprinkle with coarse sea salt and rosemary leaves.
- Bake: Bake the focaccia in the preheated oven for about 20-25 minutes, or until the top is golden brown and the bread sounds hollow when tapped. Remove it from the oven and allow it to cool slightly before slicing and serving.
Extra Tips:
For an even more flavorful focaccia, consider adding toppings such as cherry tomatoes, olives, caramelized onions, or grated parmesan cheese. If you prefer a more traditional texture, make sure the dough isn’t too dry by maintaining its stickiness during the kneading process.
Additionally, using good quality olive oil will enhance the overall taste of the focaccia. Remember, patience is key when allowing the dough to rise, so give it the time it needs to develop its full flavor and texture.
Traditional Pane Toscano
Pane Toscano is a traditional Italian bread known for its unique flavor and crusty texture. This rustic bread hails from Tuscany and is distinctively salt-free, which historically allowed for its enjoyment with the region’s famously savory cured meats and cheeses. The lack of salt is said to enhance the flavors of these accompaniments, making Pane Toscano a perfect vessel for a variety of delicious toppings.
Making Pane Toscano at home may take some time, but the process is rewarding, as it fills your kitchen with the comforting aroma of freshly baked bread.
In order to achieve the authentic texture and flavor of Pane Toscano, the dough is made using a starter known as a “biga.” This pre-ferment adds depth and complexity to the bread’s flavor. Once the biga is ready, it’s mixed with additional flour and water to form a smooth dough, which is then allowed to rise before baking. The end result is a chewy, crusty loaf that pairs beautifully with olive oil, cheeses, or simply enjoyed on its own.
Ingredients (Serving Size: 4-6 people):
- 2 cups all-purpose flour
- 1 cup whole wheat flour
- 1 ½ cups water
- ½ teaspoon active dry yeast
- ½ teaspoon sugar
- 1 tablespoon olive oil (for greasing)
- Cornmeal or semolina flour (for dusting)
Instructions:
- Prepare the Biga: In a mixing bowl, combine 1 cup of all-purpose flour, ½ cup of water, and a pinch of yeast. Stir until a thick paste forms. Cover the bowl with plastic wrap and let it sit at room temperature for 12-24 hours until it becomes bubbly and slightly risen.
- Mix the Dough: In a large bowl, add the remaining 1 cup of all-purpose flour, 1 cup of whole wheat flour, the remaining ½ teaspoon of yeast, and ½ teaspoon of sugar. Add the biga and 1 cup of water. Mix until a rough dough forms.
- Knead the Dough: Transfer the dough to a floured surface. Knead the dough for about 10 minutes until it’s smooth and elastic. If the dough is too sticky, add a little more flour as needed.
- First Rise: Lightly oil a large bowl with olive oil. Place the dough in the bowl, turning it to coat in the oil. Cover with a damp cloth or plastic wrap and let it rise in a warm place for 1-2 hours, or until it has doubled in size.
- Shape the Loaf: Punch down the dough gently to release the air. Shape it into a round loaf and place it on a baking sheet dusted with cornmeal or semolina flour.
- Second Rise: Cover the loaf with a damp cloth and let it rise again for about 1 hour, or until it has puffed slightly.
- Preheat the Oven: Preheat your oven to 425°F (220°C). Place a baking stone or an inverted baking sheet in the oven to heat.
- Bake the Bread: Slash the top of the loaf with a sharp knife. Transfer the loaf to the hot baking stone or sheet. Bake for 30-35 minutes until the bread is golden brown and sounds hollow when tapped on the bottom.
- Cool the Bread: Remove the loaf from the oven and let it cool on a wire rack before slicing.
Extra Tips:
When making Pane Toscano, the fermentation time of the biga can be adjusted to fit your schedule, but allowing it to ferment for a full 24 hours will yield the best flavor.
If you find the bread too bland due to the absence of salt, try pairing it with salty toppings or dips, which will complement the bread’s natural flavor profile.
Additionally, using a baking stone or preheated baking sheet helps achieve a better crust, so don’t skip this step. Enjoy your Pane Toscano with a drizzle of quality olive oil for an authentic Italian experience.
Savory Olive and Herb Fougasse
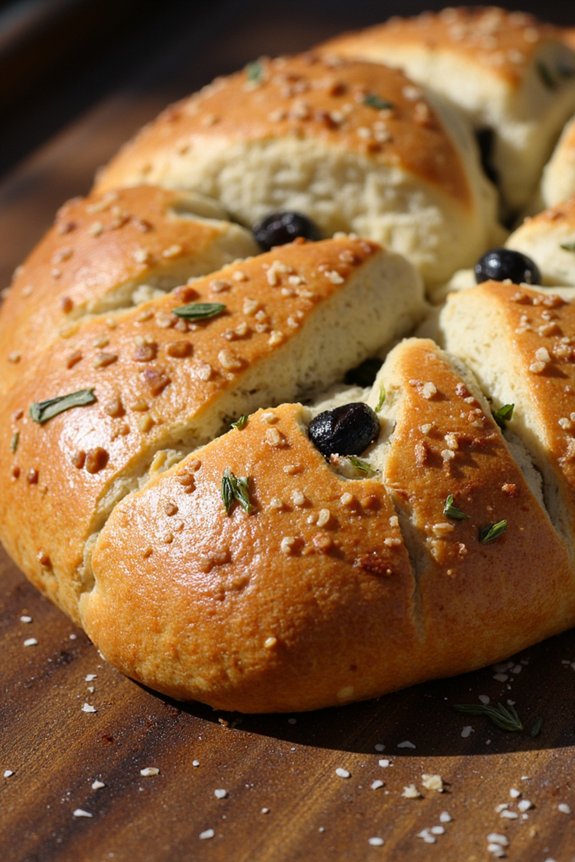
Fougasse is a traditional French bread that’s often shaped to resemble an ear of wheat. This Italian-inspired version is infused with olives and aromatic herbs, creating a savory delight that’s as beautiful as it’s delicious.
Ideal as a side for a Mediterranean meal or as a standalone snack, this bread’s crusty exterior and soft, flavorful interior make it a crowd-pleaser. The combination of briny olives and fragrant herbs brings a taste of the Mediterranean to your table, perfect for a family gathering or a special dinner party.
Preparing this Savory Olive and Herb Fougasse requires a bit of patience and care, as with most artisanal breads, but the results are more than worth the effort. This recipe yields a serving size suitable for 4-6 people, making it a versatile addition to any meal.
The process involves mixing, proofing, shaping, and baking the dough, with each step contributing to the bread’s unique texture and flavor. By following these instructions, you’ll create a stunning centerpiece that will impress your guests and tantalize your taste buds.
Ingredients (Serves 4-6):
- 500g all-purpose flour
- 10g salt
- 10g sugar
- 7g active dry yeast
- 300ml warm water
- 60ml olive oil
- 100g pitted black olives, chopped
- 2 tablespoons fresh rosemary, chopped
- 2 tablespoons fresh thyme, chopped
- 1 egg (for egg wash)
- Coarse sea salt (for topping)
Cooking Instructions:
- Mix the Dough: In a large mixing bowl, combine the all-purpose flour, salt, and sugar. In a separate bowl, dissolve the yeast in warm water and let it sit for about 5 minutes until it becomes frothy. Add the yeast mixture and olive oil to the dry ingredients and mix until a dough forms.
- Knead the Dough: Turn the dough out onto a floured surface and knead for about 10 minutes until smooth and elastic. The dough should be slightly sticky but manageable.
- First Rise: Place the dough in a lightly oiled bowl, cover it with a damp cloth, and let it rise in a warm place for 1.5 to 2 hours, or until it has doubled in size.
- Incorporate Olives and Herbs: Once risen, gently punch down the dough and transfer it back to the floured surface. Flatten it slightly and spread the chopped olives, rosemary, and thyme evenly over the dough. Fold the dough over to encase the fillings and knead gently to distribute them evenly.
- Shape the Fougasse: Preheat your oven to 220°C (430°F). Roll the dough into a rough oval shape, about 1cm thick. Transfer it to a parchment-lined baking sheet. Using a sharp knife, make several diagonal cuts in the dough to create a leaf-like pattern, gently stretching the cuts to open them up.
- Second Rise: Cover the shaped dough with a cloth and let it rest for another 30 minutes.
- Prepare for Baking: Beat the egg and brush it over the dough for a glossy finish. Sprinkle coarse sea salt over the top for added flavor.
- Bake the Fougasse: Place the baking sheet in the preheated oven and bake for 20-25 minutes, or until the fougasse is golden brown and sounds hollow when tapped on the bottom.
- Cool and Serve: Remove from the oven and let it cool on a wire rack for at least 10 minutes before serving.
Extra Tips:
For a more intense flavor, consider using a combination of black and green olives. You can also experiment with different herbs such as oregano or basil for a unique twist.
If you don’t have fresh herbs on hand, dried herbs can be used, but remember to use them sparingly as they’re more concentrated. Keeping the dough slightly sticky will help in achieving that perfect texture, so avoid adding too much extra flour while kneading.
Finally, if you have a baking stone, using it instead of a baking sheet can help achieve a crispier crust.
Authentic Grissini Breadsticks

Grissini, the classic Italian breadsticks, are a delightful addition to any meal. Originating from the region of Piedmont in Italy, these thin and crisp breadsticks are often served as an appetizer or snack. Their crunchy texture and subtle flavor make them perfect for pairing with a variety of dips, cheeses, and cured meats.
Making grissini at home isn’t only simple but also allows you to infuse them with your favorite herbs and spices for a personalized touch. This recipe will guide you through the process of making authentic grissini breadsticks that serve 4-6 people. With just a few ingredients, you’ll be able to create these delightful sticks of bread that are sure to impress your guests.
Whether you’re serving them at a dinner party or enjoying them as a casual snack, these homemade grissini will bring a taste of Italy to your table.
Ingredients:
- 2 cups all-purpose flour
- 1 teaspoon salt
- 1 teaspoon sugar
- 1 packet (2 1/4 teaspoons) active dry yeast
- 3/4 cup warm water (about 110°F)
- 2 tablespoons olive oil
- Extra flour for dusting
- Cornmeal for dusting (optional)
- Olive oil for brushing
- Coarse sea salt, rosemary, or sesame seeds for topping (optional)
Instructions:
- Prepare the Yeast Mixture: In a small bowl, dissolve the sugar in the warm water. Sprinkle the yeast over the top and let it sit for about 5-10 minutes until frothy. This indicates that the yeast is active and ready to use.
- Mix the Dough: In a large mixing bowl, combine the flour and salt. Create a well in the center and add the frothy yeast mixture and olive oil. Mix together until a dough starts to form.
- Knead the Dough: Transfer the dough onto a lightly floured surface and knead for about 8-10 minutes until it becomes smooth and elastic. If the dough is too sticky, add a little more flour as needed.
- First Rise: Place the dough in a lightly oiled bowl, turning it to coat the surface with oil. Cover the bowl with a damp cloth or plastic wrap and let it rise in a warm place for about 1 hour, or until it has doubled in size.
- Preheat the Oven: While the dough is rising, preheat your oven to 400°F (200°C). Line two baking sheets with parchment paper and lightly dust with cornmeal if using.
- Shape the Breadsticks: Once the dough has risen, punch it down to release any air. Divide the dough into small pieces, about the size of a golf ball. Roll each piece into a long, thin stick about 12 inches in length. Place the breadsticks on the prepared baking sheets, leaving some space between each one.
- Second Rise: Cover the shaped breadsticks with a damp cloth and let them rest for about 15 minutes. This will allow them to rise slightly more before baking.
- Bake the Grissini: Brush each breadstick lightly with olive oil and sprinkle with your choice of coarse sea salt, rosemary, or sesame seeds. Bake in the preheated oven for 15-20 minutes, or until golden brown and crisp.
- Cool and Serve: Remove the breadsticks from the oven and let them cool on a wire rack. Serve them warm or at room temperature.
Extra Tips:
To guarantee your grissini are perfectly crisp, make sure to roll the dough as thinly as possible. You can experiment with adding different herbs and spices directly into the dough for added flavor.
If you prefer a softer texture, reduce the baking time slightly. Additionally, storing the grissini in an airtight container will help maintain their crispness for a few days. Enjoy experimenting with different toppings and flavors to make these breadsticks your own!
Homemade Pane Pugliese
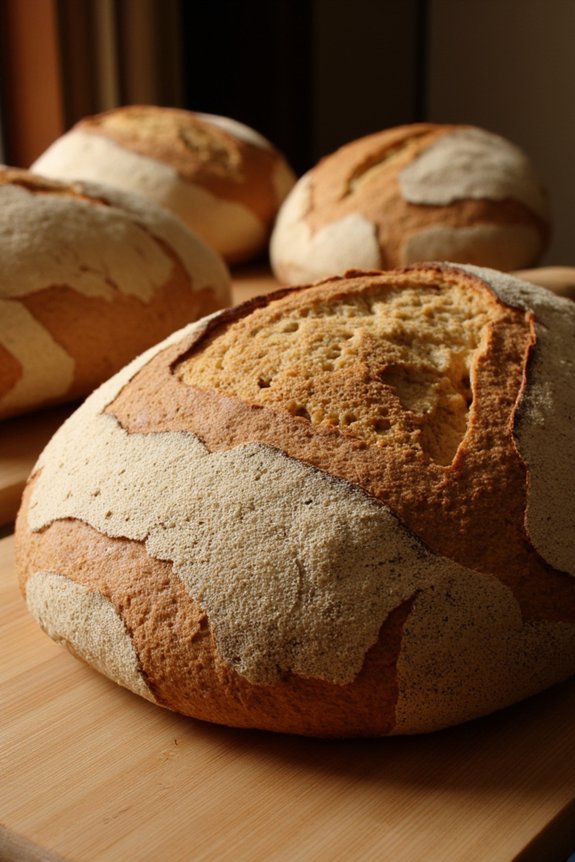
Pane Pugliese is a traditional Italian bread that hails from the Puglia region in Southern Italy. Known for its rustic appearance and chewy texture, this bread is perfect for those who appreciate the art of baking. Its distinct flavor comes from a slow fermentation process, which enhances the natural flavors of the simple ingredients used.
Making Pane Pugliese at home can be a rewarding experience, allowing you to enjoy a fresh loaf with a crispy crust and soft interior. The process of making Pane Pugliese involves creating a biga, which is a type of pre-ferment that adds depth and complexity to the bread’s flavor. This bread is perfect for pairing with olive oil, soups, or as a base for bruschetta.
With a bit of patience and some basic baking skills, you can bring the authentic taste of Italy to your kitchen. This recipe serves 4-6 people, making it ideal for family gatherings or sharing with friends.
Ingredients:
- 500g bread flour
- 350ml water
- 10g salt
- 5g instant yeast
- 100g biga (made 12-16 hours in advance using 100g flour, 60ml water, and a pinch of yeast)
Cooking Instructions:
- Prepare the Biga: In a small bowl, mix 100g of bread flour with 60ml of water and a pinch of yeast. Stir until a sticky dough forms. Cover the bowl with plastic wrap and let it ferment at room temperature for 12-16 hours, or until it becomes bubbly and aromatic.
- Mix the Dough: In a large mixing bowl, combine the remaining 400g of bread flour with 5g of instant yeast and 350ml of water. Add the prepared biga and mix until combined. Let the mixture rest for 20 minutes to allow the flour to absorb the water.
- Knead and Add Salt: After resting, add 10g of salt to the dough. Knead the dough on a lightly floured surface for about 10 minutes until it’s smooth and elastic. You can also use a stand mixer with a dough hook attachment for this step.
- First Rise: Place the kneaded dough in a lightly oiled bowl, cover it with a damp cloth, and let it rise in a warm place for about 1.5 to 2 hours, or until it has doubled in size.
- Shape the Dough: Gently deflate the risen dough and shape it into a round loaf. Place it on a parchment-lined baking sheet or in a proofing basket, seam side up. Cover it and let it rise again for about 45 minutes to 1 hour.
- Preheat the Oven: While the dough is proofing, preheat your oven to 220°C (430°F). If using a baking stone, place it in the oven to heat up as well.
- Bake the Bread: Once the dough has finished its final rise, score the top with a sharp knife to allow for expansion. Place it in the oven and bake for 30-35 minutes, or until the crust is golden brown and the bread sounds hollow when tapped on the bottom.
- Cool the Bread: Remove the bread from the oven and let it cool on a wire rack for at least 30 minutes before slicing. This allows the interior to set properly.
Extra Tips:
For the best results, use high-quality bread flour as it has a higher protein content, which helps in developing the gluten structure necessary for a chewy texture. If you don’t have a baking stone, an upside-down baking sheet can work as a substitute.
Additionally, to create steam in your oven (which contributes to a better crust), place a pan of hot water on the bottom rack while baking. Remember, patience is key with Pane Pugliese, so allow sufficient time for fermentation and rising to achieve the best flavor and texture.
Italian Rosemary and Sea Salt Schiacciata

Italian Rosemary and Sea Salt Schiacciata is a delightful Tuscan flatbread that’s both simple to make and bursting with flavor. This rustic bread has a crispy crust and a soft, airy interior, making it perfect for accompanying a variety of meals or enjoyed on its own. The aromatic rosemary and coarse sea salt give the schiacciata its distinctive taste, while the olive oil used in the recipe provides a rich and savory flavor.
This bread is an ideal introduction to Italian baking for those who wish to explore the diverse world of Italian breads. The beauty of schiacciata lies in its versatility and ease of preparation. Unlike more complex breads, this flatbread requires minimal kneading and can be prepared in a relatively short amount of time.
Whether you’re hosting a dinner party or simply want to create a delicious homemade bread, this Italian Rosemary and Sea Salt Schiacciata is sure to impress. The following recipe serves 4-6 people, making it perfect for sharing with friends and family.
Ingredients:
- 500g all-purpose flour
- 1 packet (7g) active dry yeast
- 300ml warm water
- 1 teaspoon sugar
- 2 teaspoons salt
- 4 tablespoons extra-virgin olive oil, divided
- 2 tablespoons fresh rosemary, chopped
- 1-2 teaspoons coarse sea salt
Instructions:
- Prepare the Yeast Mixture: In a small bowl, combine the warm water and sugar, then sprinkle the active dry yeast over the top. Stir gently and let it sit for about 5-10 minutes until the mixture becomes frothy, indicating that the yeast is active.
- Make the Dough: In a large mixing bowl, combine the flour and salt. Make a well in the center and pour in the yeast mixture along with 2 tablespoons of olive oil. Mix the ingredients until they form a rough dough.
- Knead the Dough: Transfer the dough onto a lightly floured surface and knead for about 8-10 minutes until it becomes smooth and elastic. If the dough is too sticky, sprinkle a little more flour as needed.
- First Rise: Place the dough in a lightly greased bowl, cover it with a damp cloth, and let it rise in a warm place for about 1 hour or until it has doubled in size.
- Prepare the Baking Sheet: Preheat your oven to 220°C (428°F) and lightly grease a baking sheet or line it with parchment paper.
- Shape the Dough: Once the dough has risen, punch it down to release the air. Transfer it to the prepared baking sheet and gently stretch it to fit the sheet, about 1-1.5 cm thick.
- Second Rise: Cover the dough with a damp cloth and let it rise again for about 20-30 minutes.
- Add Toppings: After the second rise, use your fingers to make dimples all over the surface of the dough. Drizzle the remaining 2 tablespoons of olive oil over the top, sprinkle with chopped rosemary, and finish with a generous sprinkle of coarse sea salt.
- Bake the Schiacciata: Place the baking sheet in the preheated oven and bake for 20-25 minutes or until the bread is golden brown and crisp on the edges.
- Cool and Serve: Allow the schiacciata to cool slightly on a wire rack before slicing and serving. Enjoy warm or at room temperature.
Extra Tips: For a more intense flavor, consider infusing the olive oil with garlic or additional herbs before using it in the recipe. If you prefer a softer crust, cover the schiacciata with a clean cloth immediately after baking to trap the steam.
This bread can also be customized by adding other toppings such as olives, sun-dried tomatoes, or different herbs to suit your taste preferences.
Soft and Fluffy Panettone

Panettone is a classic Italian bread that’s traditionally enjoyed during the Christmas season. This sweet bread is known for its soft, fluffy texture and rich flavor, often enhanced with dried fruits and citrus zest. Making panettone from scratch is a rewarding process that fills your kitchen with delightful aromas and results in a show-stopping centerpiece for your holiday table.
Although it requires some patience due to the rising times, the end product is worth every minute. This recipe will guide you through creating a delicious panettone that serves 4-6 people. You’ll need to start the day before to allow the dough to properly rise and develop its signature airy texture.
With a few simple ingredients and some careful preparation, you’ll be able to achieve a professional-quality loaf at home. Follow these instructions to make this traditional Italian favorite that will impress your family and friends.
Ingredients:
- 4 cups all-purpose flour
- 1/2 cup granulated sugar
- 1/2 cup unsalted butter, softened
- 1 cup warm milk
- 3 large eggs
- 1 packet (2 1/4 tsp) active dry yeast
- 1 teaspoon salt
- 1 teaspoon vanilla extract
- Zest of 1 orange
- Zest of 1 lemon
- 1/2 cup raisins
- 1/2 cup candied citrus peel
- 1/4 cup slivered almonds (optional)
- 1 tablespoon vegetable oil (for greasing)
Instructions:
- Prepare the Starter: In a small bowl, combine 1/2 cup of warm milk with the yeast and 1 tablespoon of sugar. Stir well and let it sit for about 5-10 minutes until it becomes frothy, indicating the yeast is active.
- Mix the Dough: In a large mixing bowl, combine the flour, remaining sugar, and salt. Make a well in the center, then add the yeast mixture, eggs, softened butter, vanilla extract, and the remaining warm milk. Mix until a sticky dough forms.
- Knead the Dough: Transfer the dough to a lightly floured surface and knead for about 10 minutes until it becomes smooth and elastic. If the dough is too sticky, gradually add a little more flour as needed.
- First Rise: Place the dough in a greased bowl, cover it with a damp cloth or plastic wrap, and let it rise in a warm place for about 2 hours, or until it doubles in size.
- Add Fruits and Zest: Once the dough has risen, punch it down gently, and then knead in the orange zest, lemon zest, raisins, candied citrus peel, and slivered almonds until evenly distributed.
- Shape the Dough: Shape the dough into a ball and place it in a panettone mold or a deep, round baking dish lined with parchment paper.
- Second Rise: Cover the dough again and let it rise for another 1-2 hours, or until it reaches the top of the mold.
- Preheat and Bake: Preheat your oven to 350°F (175°C). Bake the panettone for about 40-45 minutes. If the top browns too quickly, cover it with aluminum foil halfway through baking.
- Cool and Serve: Once baked, allow the panettone to cool completely before removing it from the mold. Slice and serve as desired.
Extra Tips:
For best results, make sure all your ingredients are at room temperature before starting, as this helps the dough rise more efficiently. If you don’t have a panettone mold, you can use a tall, round baking dish or a large, clean coffee can lined with parchment paper.
Additionally, if you want to enhance the flavor, soak the raisins in rum or orange juice overnight before adding them to the dough. Finally, store any leftover panettone in an airtight container to keep it fresh for several days.
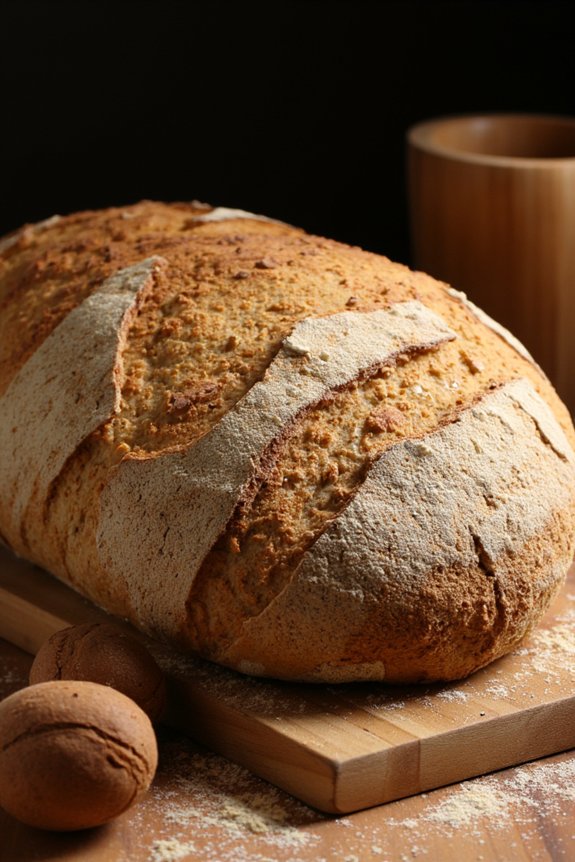
Crusty Semolina Bread
Crusty Semolina Bread is a delightful Italian loaf that boasts a golden, crunchy exterior and a soft, chewy interior. This bread is perfect for pairing with olive oil, dipping in soups, or simply enjoying on its own. Its distinct flavor comes from semolina flour, which is made from durum wheat and lends a rich, nutty taste. Semolina’s high protein content helps give the bread its structure and texture, making it an excellent choice for those who appreciate homemade artisanal bread.
Creating this bread at home allows you to experience the joy of baking and the satisfaction of enjoying a fresh, warm loaf straight from the oven. The process involves mixing, kneading, and allowing the dough to rise, all of which contribute to the development of the bread’s flavor and texture. While it may take some time and patience, the end result is well worth the effort.
This recipe serves 4-6 people, making it ideal for a family meal or a small gathering with friends.
Ingredients:
- 3 cups semolina flour
- 1 1/2 cups all-purpose flour
- 2 teaspoons salt
- 2 teaspoons active dry yeast
- 1 1/2 cups warm water (about 110°F)
- 2 tablespoons olive oil
- 1 tablespoon sugar
Instructions:
- Activate the Yeast: In a small bowl, combine the warm water and sugar, stirring until the sugar is dissolved. Sprinkle the active dry yeast over the top and let it sit for about 5-10 minutes, or until it becomes frothy. This indicates that the yeast is active and ready to use.
- Mix the Dough: In a large mixing bowl, combine the semolina flour, all-purpose flour, and salt. Create a well in the center and pour in the activated yeast mixture and olive oil. Using a wooden spoon or your hands, mix the ingredients together until a rough dough forms.
- Knead the Dough: Transfer the dough onto a floured surface and knead it for about 8-10 minutes, or until it becomes smooth and elastic. If the dough is too sticky, add a little more all-purpose flour, one tablespoon at a time.
- First Rise: Place the kneaded dough in a lightly oiled bowl, turning it once to coat all sides with oil. Cover the bowl with a damp cloth or plastic wrap, and let it rise in a warm, draft-free place for about 1-1.5 hours, or until it has doubled in size.
- Shape the Dough: Once risen, punch down the dough to release any air bubbles. Turn it out onto a floured surface and shape it into a round or oval loaf, tucking the edges under to create surface tension.
- Second Rise: Place the shaped dough onto a parchment-lined baking sheet or in a well-floured banneton (proofing basket). Cover with a damp cloth and let it rise again for about 30-45 minutes, or until it has puffed up slightly.
- Preheat and Bake: While the dough is rising, preheat your oven to 425°F (220°C). If using a baking stone, place it in the oven to preheat as well. Once the dough is ready, make a few shallow slashes on the surface with a sharp knife. Place the bread in the oven and bake for 25-30 minutes, or until the crust is golden brown and the loaf sounds hollow when tapped on the bottom.
- Cool the Bread: Remove the bread from the oven and let it cool on a wire rack for at least 20 minutes before slicing. This allows the internal structure to set and enhances the texture.
Extra Tips:
To guarantee the best texture, avoid adding too much extra flour during kneading, as this can make the bread dense. If your kitchen is cool, you can create a warm environment for the dough to rise by turning on the oven for a few minutes, then turning it off and placing the covered dough inside with the door slightly ajar.
Additionally, spraying water into the oven right before baking can create steam, resulting in a crispier crust. Enjoy your freshly baked Crusty Semolina Bread with a drizzle of olive oil or a spread of your favorite topping!
Italian Garlic and Cheese Bread
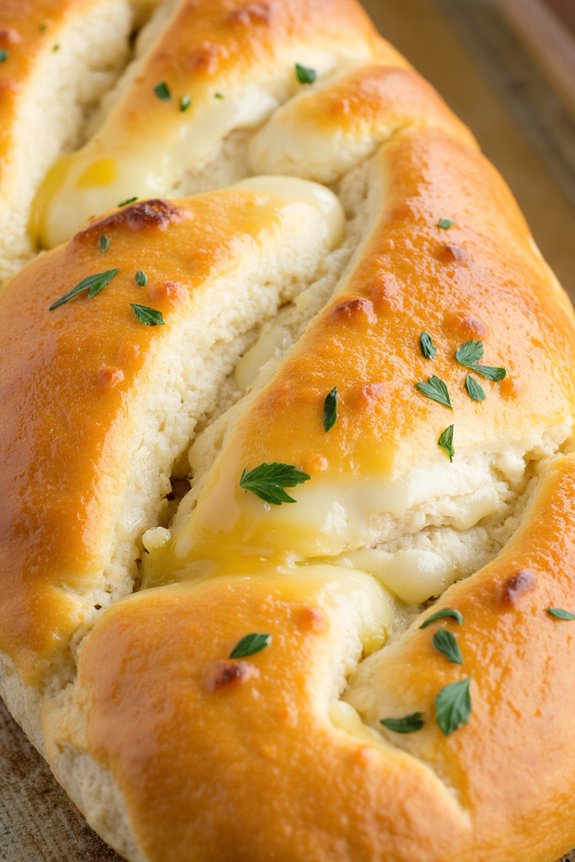
Italian Garlic and Cheese Bread is a deliciously savory dish that combines the rich flavors of garlic and cheese with the comforting texture of freshly baked bread. This bread is perfect as a side dish for pasta, soups, or salads, or even enjoyed on its own as a hearty snack. The delightful aroma of baked garlic and melted cheese wafting through your kitchen is sure to make this dish a family favorite.
This recipe is designed to serve 4-6 people, making it ideal for family dinners or small gatherings. The combination of crispy crust and soft, cheesy interior makes it irresistible. By following the simple steps below, you’ll be able to create a bakery-quality Italian Garlic and Cheese Bread right in your own kitchen.
Ingredients:
- 1 loaf of Italian bread or ciabatta
- 1/2 cup unsalted butter, softened
- 4 cloves garlic, minced
- 1 cup shredded mozzarella cheese
- 1/2 cup grated Parmesan cheese
- 2 tablespoons fresh parsley, chopped
- 1 teaspoon dried oregano
- Salt and pepper to taste
Cooking Instructions:
- Preheat and Prepare: Preheat your oven to 375°F (190°C). Line a baking sheet with parchment paper for easy cleanup.
- Prepare the Bread: Slice the loaf of Italian bread in half lengthwise. Place the halves, cut side up, onto the prepared baking sheet.
- Make the Garlic Butter: In a small bowl, combine the softened butter, minced garlic, chopped parsley, dried oregano, salt, and pepper. Mix well until all ingredients are thoroughly combined.
- Spread the Mixture: Using a spatula or butter knife, generously spread the garlic butter mixture evenly over the cut sides of the bread.
- Add the Cheese: Sprinkle the shredded mozzarella and grated Parmesan cheeses evenly over the top of the garlic-buttered bread.
- Bake the Bread: Place the baking sheet in the preheated oven and bake for 10-15 minutes, or until the cheese is melted and bubbly, and the edges of the bread are golden brown.
- Serve: Remove the bread from the oven and let it cool slightly before slicing. Serve warm as a side dish or appetizer.
Extra Tips:
For an extra burst of flavor, consider adding a sprinkle of red pepper flakes to the garlic butter mixture for a subtle kick.
If you prefer a softer bread, wrap the bread in aluminum foil before baking to prevent the crust from becoming too crispy.
Additionally, this recipe can be easily customized by using different types of cheese or adding toppings like sliced tomatoes or olives.
Enjoy your homemade Italian Garlic and Cheese Bread fresh out of the oven for the best taste and texture.
Delicious Piadina Flatbread

Piadina is a traditional Italian flatbread originating from the Romagna region. Known for its simplicity and versatility, piadina is a soft and pliable bread that can be filled with a variety of ingredients, from prosciutto and cheese to fresh vegetables and spreads. This flatbread is perfect for a quick lunch or a light dinner, and its ease of preparation makes it a favorite for home cooks.
The dough is typically rolled out thin and cooked on a hot griddle or a flat pan, resulting in a bread that’s both slightly crispy on the outside and tender on the inside.
Making piadina at home requires only a few basic ingredients and can be a fun activity for the whole family. The recipe involves mixing flour, salt, and baking soda with a fat—traditionally lard, but olive oil or butter can be used as well—to enrich the dough.
Once the dough is prepared, it’s divided into portions, rolled out, and then cooked to perfection. This recipe provides a foundation that can be customized with your favorite fillings, allowing you to enjoy a taste of Italy from the comfort of your own kitchen.
Ingredients (Serves 4-6)
- 500g all-purpose flour
- 10g salt
- 1/2 teaspoon baking soda
- 100g lard (or substitute with olive oil or butter)
- 200ml warm water
Cooking Instructions
- Mix Dry Ingredients: In a large mixing bowl, combine the flour, salt, and baking soda. Stir until the ingredients are evenly distributed.
- Incorporate Fat: Add the lard (or olive oil/butter) to the dry ingredients. Use your fingers to rub the fat into the flour mixture until it resembles coarse crumbs.
- Add Water: Gradually add the warm water to the mixture, stirring with a wooden spoon or your hands until a dough begins to form. The dough should be soft but not sticky.
- Knead the Dough: Transfer the dough to a lightly floured surface and knead for about 5-7 minutes until smooth and elastic. If the dough is too sticky, add a little more flour as needed.
- Rest the Dough: Cover the dough with a clean kitchen towel and let it rest for about 30 minutes. This will help relax the gluten, making it easier to roll out.
- Divide and Roll: Divide the dough into 4-6 equal portions, depending on the desired size of your piadina. Roll each portion into a ball and then flatten into a disc. Roll each disc out to a thickness of about 2-3 mm using a rolling pin.
- Cook the Piadina: Heat a griddle or a non-stick frying pan over medium-high heat. Cook each piadina for about 2-3 minutes on each side, or until golden brown spots appear. Adjust the heat as necessary to prevent burning.
- Serve: Remove from the pan and keep warm under a cloth. Fill with your choice of ingredients such as prosciutto, cheese, arugula, or roasted vegetables. Fold or roll up and serve immediately.
Extra Tips
For the best results, verify your griddle or pan is properly preheated before cooking the piadina. If the dough sticks during rolling, dust it lightly with flour.
When filling your piadina, avoid overstuffing to keep it easy to fold and eat. Experiment with different fillings to find your favorite combination, and consider using fresh herbs or spices in the dough for an extra burst of flavor.
If you’re substituting lard with olive oil or butter, note that the texture may vary slightly, but the piadina will still be delicious.