

Spring has arrived, and it’s time to celebrate the season’s fresh produce with delicious Italian recipes. I’ve curated a list of 13 dishes that highlight the vibrant flavors of spring, like the creamy Artichoke and Lemon Risotto and the refreshing Spring Pea and Mint Pesto Pasta. Each recipe offers a taste of Italy with a modern twist. Let’s explore how these simple ingredients can transform into extraordinary meals that delight the senses. Get ready to be inspired by the freshness of spring!
Artichoke and Lemon Risotto
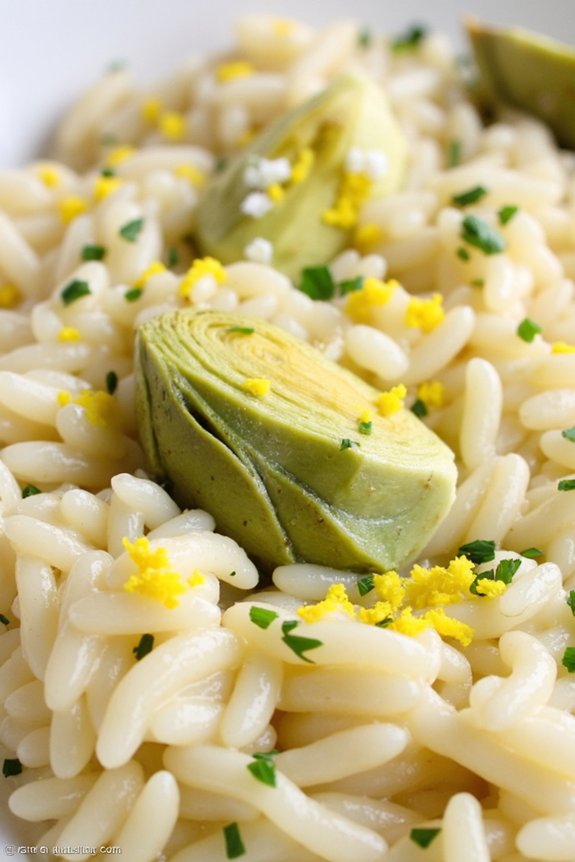
Artichoke and Lemon Risotto is a delightful spring dish that combines the fresh flavors of tender artichokes and zesty lemon with the creamy texture of risotto. This dish is perfect for celebrating the arrival of spring, with its vibrant flavors and light, yet satisfying composition. The natural sweetness of the artichokes pairs beautifully with the tartness of the lemon, while the Arborio rice absorbs the flavors and creates a rich, creamy base.
This recipe is ideal for a family dinner or a small gathering of friends, offering a taste of Italy’s seasonal bounty.
Preparing Artichoke and Lemon Risotto requires a bit of patience, as the key to a perfect risotto lies in its slow cooking process, which allows the rice to gradually absorb the flavors and develop its creamy texture. However, the effort is well worth it, as this dish will reward you with a comforting and flavorful meal.
With a few simple ingredients and some careful attention during the cooking process, you can bring the essence of an Italian spring to your table.
Ingredients (for 4-6 servings):
- 2 tablespoons olive oil
- 1 small onion, finely chopped
- 2 cloves garlic, minced
- 1 ½ cups Arborio rice
- ½ cup dry white wine
- 5 cups vegetable broth, kept warm
- 2 cups canned or fresh artichoke hearts, quartered
- Zest and juice of 1 lemon
- ½ cup grated Parmesan cheese
- 2 tablespoons unsalted butter
- Salt and pepper to taste
- Fresh parsley, chopped (for garnish)
Cooking Instructions:
- Prepare the Base: In a large saucepan, heat the olive oil over medium heat. Add the finely chopped onion and sauté until translucent, about 3-4 minutes. Stir in the minced garlic and cook for an additional minute until fragrant.
- Cook the Rice: Add the Arborio rice to the saucepan, stirring constantly for about 2 minutes until the rice is lightly toasted. This step is essential as it helps the rice absorb the liquid evenly during cooking.
- Deglaze with Wine: Pour in the white wine and stir until it’s completely absorbed by the rice. This deglazes the pan and adds a depth of flavor to the risotto.
- Add Broth Gradually: Begin adding the warm vegetable broth, one ladleful at a time, stirring continuously. Wait until each addition is mostly absorbed before adding the next. This process will take about 18-20 minutes.
- Incorporate Artichokes and Lemon: When the rice is almost al dente, stir in the artichoke hearts, lemon zest, and lemon juice. Continue cooking and stirring until the rice is tender and creamy.
- Finish the Dish: Remove the saucepan from heat. Stir in the Parmesan cheese and butter, mixing until well combined. Season with salt and pepper to taste.
- Serve: Garnish with freshly chopped parsley before serving the risotto warm.
Extra Tips:
When preparing Artichoke and Lemon Risotto, be sure to use a good quality Arborio rice, as its high starch content is vital for achieving the creamy texture characteristic of a perfect risotto.
Keep the broth warm to help maintain an even cooking temperature and to facilitate the absorption process. Adjust the consistency of the risotto to your preference by adding more broth if needed.
Finally, feel free to experiment by adding additional ingredients such as peas or asparagus for added texture and flavor.
Spring Pea and Mint Pesto Pasta

Spring Pea and Mint Pesto Pasta is a vibrant and invigorating dish that captures the essence of Italian spring with its fresh ingredients and bright flavors. This recipe combines the sweetness of spring peas with the aromatic freshness of mint to create a pesto that’s both unique and utterly delicious. Perfect for a light lunch or a delightful dinner, this pasta dish is a celebration of the season’s best produce.
The creamy texture of the peas blends beautifully with the nutty Parmesan and toasted pine nuts, while the mint adds a surprising yet harmonious note. Tossed with al dente pasta, this dish is both satisfying and uplifting. Whether you’re cooking for your family or hosting a dinner party, this Spring Pea and Mint Pesto Pasta is sure to impress with its simplicity and vibrant taste.
Ingredients (serves 4-6):
- 1 lb (450g) pasta of your choice (e.g., spaghetti, penne, or fusilli)
- 2 cups fresh or frozen peas
- 1 cup fresh mint leaves, packed
- 1/2 cup grated Parmesan cheese
- 1/3 cup toasted pine nuts
- 2 cloves garlic
- 1/2 cup extra-virgin olive oil
- Salt and pepper to taste
- Zest of 1 lemon
- Juice of 1 lemon
Instructions:
- Cook the Pasta: Bring a large pot of salted water to a boil. Add the pasta and cook according to package instructions until al dente. Reserve one cup of pasta water and then drain the pasta.
- Prepare the Peas: If using fresh peas, blanch them in boiling water for about 2 minutes, then transfer them to an ice bath to stop the cooking. If using frozen peas, simply thaw them.
- Make the Pesto: In a food processor, combine the peas, mint leaves, Parmesan cheese, toasted pine nuts, and garlic. Pulse until the mixture is well combined but still slightly chunky.
- Add the Oil and Season: With the food processor running, slowly drizzle in the olive oil until the pesto reaches your desired consistency. Season with salt, pepper, lemon zest, and lemon juice to taste.
- Combine Pasta and Pesto: In a large bowl, combine the cooked pasta with the pea and mint pesto. Toss well to verify the pasta is thoroughly coated. If the pasta seems too dry, add some reserved pasta water to reach the desired consistency.
- Serve: Transfer the pasta to serving bowls and garnish with additional Parmesan cheese and a few mint leaves if desired.
Extra Tips:
When making the pesto, be careful not to over-process the mixture; a slightly coarse texture adds a nice contrast to the smooth pasta.
Adjust the consistency of the pesto by adding more olive oil or pasta water as needed. For added flavor, consider adding a pinch of red pepper flakes or a few fresh basil leaves.
Remember that fresh mint can vary in intensity, so start with a little and add more to taste. This dish is best served immediately but can also be enjoyed cold as a pasta salad.
Asparagus and Ricotta Frittata

Asparagus and Ricotta Frittata is a delightful Italian spring dish that perfectly captures the essence of fresh, seasonal produce. This dish is both light and satisfying, making it an ideal option for a weekend brunch or a simple weeknight dinner. The tender asparagus spears combined with creamy ricotta cheese create a harmonious balance of flavors and textures.
The frittata is baked to perfection, resulting in a fluffy and golden-brown top that’s as appealing to the eyes as it’s to the palate. This frittata isn’t only delicious but also incredibly versatile. You can enjoy it hot out of the oven or at room temperature, making it a great option for picnics or potlucks.
The ease of preparation and its rustic charm make Asparagus and Ricotta Frittata a favorite among many. Whether you’re a seasoned cook or a beginner in the kitchen, this recipe is simple to follow and will yield impressive results that are sure to satisfy your family and friends.
Ingredients (Serves 4-6):
- 8 large eggs
- 1/2 cup whole milk
- 1/2 cup ricotta cheese
- 1 bunch asparagus, trimmed and cut into 1-inch pieces
- 1/2 cup grated Parmesan cheese
- 1 small onion, finely chopped
- 2 tablespoons olive oil
- Salt and pepper to taste
- Fresh basil leaves, for garnish
Cooking Instructions:
- Preheat the Oven: Begin by preheating your oven to 375°F (190°C) to guarantee it’s hot enough to cook the frittata evenly.
- Prepare the Egg Mixture: In a large bowl, whisk together the eggs, milk, ricotta cheese, and grated Parmesan until smooth. Season with salt and pepper to taste.
- Cook the Vegetables: Heat the olive oil in an oven-safe skillet over medium heat. Add the chopped onion and cook until translucent, about 3-4 minutes. Add the asparagus pieces and sauté for another 4-5 minutes until they’re tender but still crisp.
- Combine Ingredients: Pour the egg mixture over the cooked vegetables in the skillet. Gently stir to combine the ingredients evenly.
- Bake the Frittata: Transfer the skillet to the preheated oven and bake for 20-25 minutes, or until the frittata is set and the top is golden brown.
- Garnish and Serve: Remove the frittata from the oven and let it cool slightly. Garnish with fresh basil leaves before slicing and serving.
Extra Tips:
To make certain your frittata doesn’t stick to the pan, make sure to use a generous amount of olive oil when cooking the vegetables. Additionally, you can experiment with adding other seasonal ingredients such as cherry tomatoes or spinach for added flavor and color.
If you don’t have an oven-safe skillet, you can transfer the mixture to a greased baking dish before baking. Remember, the key to a fluffy frittata isn’t to overbake it; keep an eye on it towards the end of the cooking time to achieve that perfect texture.
Italian Spring Vegetable Minestrone

As the first blooms of spring emerge, there’s no better way to celebrate the season than with a warm, nourishing bowl of Italian Spring Vegetable Minestrone. This vibrant, hearty soup is a classic Italian dish that highlights the bounty of fresh vegetables available during the spring months. Packed with a medley of seasonal produce like tender asparagus, sweet peas, and vibrant spinach, this minestrone is both satisfying and healthy.
The combination of these fresh vegetables with aromatic herbs, a rich broth, and a touch of pasta makes for a comforting meal that’s perfect for any day of the week. Italian Spring Vegetable Minestrone isn’t only delicious but also incredibly versatile. It’s an ideal dish for using up any vegetables you have on hand and can easily be adapted to whatever is in season.
This recipe provides a perfect balance of flavors and textures, with the vegetables providing a fresh crunch and the pasta adding a satisfying bite. Serve it as a light lunch or dinner, or enjoy it as a starter to a larger Italian feast. Whichever way you choose to serve it, this minestrone is sure to become a favorite springtime dish.
Ingredients for 4-6 servings:
- 2 tablespoons olive oil
- 1 medium onion, diced
- 2 cloves garlic, minced
- 2 medium carrots, diced
- 2 celery stalks, diced
- 1 small zucchini, diced
- 1 cup asparagus tips, cut into 1-inch pieces
- 1 cup fresh or frozen peas
- 1 cup fresh spinach leaves
- 1 (14.5-ounce) can diced tomatoes, with juice
- 6 cups vegetable broth
- 1 cup small pasta (such as ditalini or elbow)
- 1 teaspoon dried thyme
- 1 teaspoon dried oregano
- Salt and pepper, to taste
- Freshly grated Parmesan cheese, for serving
- Fresh basil leaves, for garnish
Cooking Instructions:
- Prepare the Vegetables: Begin by preparing all the vegetables. Dice the onion, carrots, celery, and zucchini. Cut the asparagus tips into 1-inch pieces. If using fresh peas, shell them, or if frozen, measure out 1 cup. Wash and drain the spinach leaves.
- Sauté the Aromatics: In a large pot or Dutch oven, heat the olive oil over medium heat. Add the diced onion and sauté for about 5 minutes until it becomes translucent. Stir in the minced garlic and cook for an additional 1 minute until fragrant.
- Cook the Base Vegetables: Add the diced carrots and celery to the pot. Cook, stirring occasionally, for about 5 minutes until the vegetables begin to soften.
- Add Remaining Vegetables and Broth: Stir in the diced zucchini, asparagus, and peas. Pour in the can of diced tomatoes with their juice and the vegetable broth. Add the thyme and oregano. Bring the mixture to a simmer.
- Simmer the Soup: Reduce the heat to low and let the soup simmer for about 20 minutes, allowing the flavors to meld together and the vegetables to become tender.
- Cook the Pasta: While the soup simmers, bring a separate pot of salted water to a boil. Cook the pasta according to the package instructions until al dente. Drain and set aside.
- Finish the Soup: Add the cooked pasta and spinach leaves to the pot of soup. Stir well and let the spinach wilt for about 2-3 minutes.
- Season and Serve: Taste the soup and season with salt and pepper to your liking. Serve hot, garnished with freshly grated Parmesan cheese and fresh basil leaves.
Extra Tips:
For an even richer flavor, consider adding a Parmesan rind to the soup while it simmers and removing it before serving. This adds a subtle depth to the broth.
If you prefer a thicker soup, you can mash some of the cooked vegetables with a potato masher before adding the pasta and spinach. Additionally, to make the minestrone more substantial, feel free to add a can of drained and rinsed cannellini beans.
This dish can also be made ahead of time and stored in the refrigerator for up to three days; just reheat gently before serving.
Lemon and Basil Chicken Piccata

Lemon and Basil Chicken Piccata is a delightful Italian dish that brings together the invigorating flavors of lemon and basil with tender, savory chicken. This dish is perfect for spring, as it uses simple, fresh ingredients that are readily available during this season.
The light, tangy lemon sauce, combined with the aromatic basil, makes this chicken piccata an appealing addition to any spring meal. It’s a dish that’s both elegant and comforting, making it ideal for family dinners or entertaining guests.
This recipe serves 4-6 people, making it perfect for a small gathering. The chicken is lightly floured and pan-fried to a golden brown, then simmered in a zesty lemon-butter sauce. Fresh basil is added at the end to infuse the dish with its aromatic flavor. Serve it with a side of pasta or a fresh salad for a complete meal that captures the essence of spring.
Ingredients:
- 4-6 boneless, skinless chicken breasts
- Salt and pepper, to taste
- 1 cup all-purpose flour
- 2 tablespoons olive oil
- 4 tablespoons unsalted butter, divided
- 1 cup chicken broth
- 1/3 cup freshly squeezed lemon juice
- 1/4 cup capers, drained
- 1/2 cup fresh basil leaves, chopped
- Lemon slices, for garnish
Instructions:
- Prepare the Chicken: Begin by seasoning the chicken breasts with salt and pepper on both sides. Lightly coat each breast in flour, shaking off any excess.
- Cook the Chicken: In a large skillet, heat the olive oil and 2 tablespoons of butter over medium-high heat. Once the butter has melted and the pan is hot, add the chicken breasts. Cook for about 4-5 minutes on each side, or until golden brown and cooked through. Remove the chicken from the skillet and set aside.
- Make the Sauce: In the same skillet, add the chicken broth, lemon juice, and capers. Bring the mixture to a simmer, scraping up any browned bits from the bottom of the pan for added flavor. Let the sauce reduce slightly, about 3-4 minutes.
- Combine and Garnish: Return the chicken to the skillet, spooning the sauce over the top. Add the remaining 2 tablespoons of butter and the chopped basil. Allow the butter to melt and the basil to infuse its flavor into the sauce. Simmer for an additional minute or two.
- Serve: Transfer the chicken to a serving platter, pour the sauce over the top, and garnish with lemon slices. Serve immediately.
Extra Tips:
To guarantee your Lemon and Basil Chicken Piccata is tender and flavorful, make sure not to overcook the chicken breasts. If they’re too thick, consider pounding them to an even thickness before cooking.
For a richer sauce, you can add a splash of white wine to the skillet along with the chicken broth and lemon juice. If you prefer a thicker sauce, whisk in a teaspoon of cornstarch dissolved in a little water to the simmering sauce.
This dish pairs beautifully with a crisp white wine and can be complemented with a side of angel hair pasta or roasted vegetables.
Roasted Radish and Arugula Salad
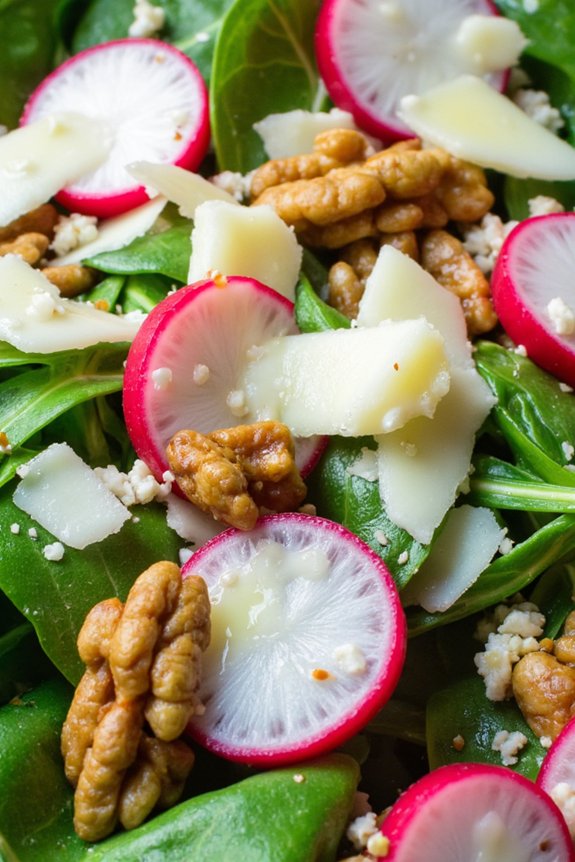
Roasted Radish and Arugula Salad is a delightful and new dish that perfectly encapsulates the vibrant flavors of springtime in Italy. The peppery taste of arugula blends beautifully with the mild, slightly sweet flavor of roasted radishes. This salad isn’t only visually appealing with its bright green and pink hues, but it’s also packed with nutrients and flavor.
The roasting process brings out the natural sweetness of radishes, which pairs excellently with the nutty and slightly bitter arugula. This salad is ideal for a light lunch or as a side dish to complement a spring meal. With a simple yet sophisticated dressing made from lemon juice and olive oil, the salad maintains a clean and invigorating taste.
The addition of Parmesan shavings adds a touch of richness, while toasted walnuts provide a satisfying crunch. Whether you’re enjoying a sunny day in your garden or hosting a spring dinner party, this Roasted Radish and Arugula Salad is sure to impress.
Ingredients (serves 4-6):
- 2 bunches of radishes, trimmed and halved
- 2 tablespoons olive oil
- Salt and black pepper to taste
- 5 ounces of fresh arugula
- 1/2 cup walnuts, toasted and roughly chopped
- 1/4 cup shaved Parmesan cheese
- 1 lemon, juiced
- 3 tablespoons extra-virgin olive oil
Instructions:
- Preheat and Prepare: Preheat your oven to 400°F (200°C). While the oven is heating, wash the radishes thoroughly, trim the ends, and cut them in half.
- Season and Roast Radishes: Place the halved radishes on a baking sheet. Drizzle with 2 tablespoons of olive oil and season with salt and black pepper. Toss the radishes until they’re evenly coated, and then spread them out in a single layer. Roast in the preheated oven for 15-20 minutes, or until they’re tender and slightly caramelized.
- Prepare the Dressing: While the radishes are roasting, make the dressing. In a small bowl, combine the lemon juice and 3 tablespoons of extra-virgin olive oil. Whisk together until well combined. Season with a pinch of salt and pepper to taste.
- Assemble the Salad: In a large salad bowl, combine the fresh arugula, toasted walnuts, and shaved Parmesan cheese. Once the radishes are done roasting, let them cool slightly, then add them to the salad bowl.
- Dress and Toss: Pour the lemon-olive oil dressing over the salad. Gently toss all ingredients together until the salad is thoroughly coated with the dressing.
- Serve: Transfer the salad to a serving platter or individual plates. Serve immediately while the radishes are still warm, or allow to cool to room temperature.
Extra Tips:
When roasting the radishes, make sure they’re spread out in a single layer on the baking sheet to guarantee even cooking. You can experiment with additional toppings such as crumbled goat cheese or sliced almonds for variation.
If you prefer a stronger flavor, add a clove of minced garlic to the dressing. This salad is best enjoyed fresh, but you can store leftovers in an airtight container in the refrigerator for up to a day.
Stuffed Zucchini Blossoms

Stuffed Zucchini Blossoms are a delightful Italian treat, perfect for spring when zucchini flowers are in abundance. These delicate blossoms are filled with a creamy ricotta mixture, lightly battered, and then fried to golden perfection. The result is a light, crispy appetizer that showcases the fresh flavors of the season.
Whether you’re planning a dinner party or simply want to enjoy a taste of Italy in your own kitchen, stuffed zucchini blossoms are certain to impress.
Preparing this dish requires a gentle touch, as the blossoms are fragile and need to be handled with care. The key is to find fresh zucchini blossoms, which can often be sourced from farmers’ markets or specialty grocery stores.
Once you have your blossoms, the rest of the dish comes together quickly. The ricotta filling is seasoned with herbs and parmesan, providing a rich, savory contrast to the delicate flowers. When fried, the blossoms develop a crispy exterior that complements the creamy filling inside.
Ingredients (Serves 4-6):
- 12-16 zucchini blossoms
- 1 cup ricotta cheese
- 1/4 cup grated parmesan cheese
- 1 egg
- 1 tablespoon chopped fresh basil
- 1 tablespoon chopped fresh parsley
- Salt and pepper to taste
- 1 cup all-purpose flour
- 1 cup sparkling water or cold beer
- Vegetable oil for frying
- Lemon wedges, for serving
Cooking Instructions:
- Prepare the Blossoms: Gently wash the zucchini blossoms under cold water and pat them dry with a paper towel. Carefully remove the stamens from inside each blossom without tearing the petals.
- Make the Filling: In a mixing bowl, combine the ricotta cheese, grated parmesan, egg, basil, parsley, salt, and pepper. Mix well until all ingredients are thoroughly combined.
- Stuff the Blossoms: Using a small spoon or piping bag, fill each blossom with the ricotta mixture. Be careful not to overfill, as this can cause the blossoms to split. Twist the petals gently to close the blossom around the filling.
- Prepare the Batter: In a separate bowl, whisk together the flour and sparkling water (or beer) until smooth. The batter should have the consistency of heavy cream.
- Heat the Oil: In a large skillet, pour in enough vegetable oil to cover the bottom of the pan by about 1 inch. Heat the oil over medium-high heat until it reaches 350°F (175°C).
- Fry the Blossoms: Dip each stuffed blossom into the batter, allowing any excess to drip off, then carefully place it into the hot oil. Fry in batches to avoid overcrowding the pan. Cook until the blossoms are golden brown on all sides, about 3-4 minutes per batch.
- Drain and Serve: Remove the fried blossoms from the oil and place them on a plate lined with paper towels to drain any excess oil. Serve immediately with lemon wedges on the side.
Extra Tips:
When making stuffed zucchini blossoms, it’s important to work quickly and gently to maintain the integrity of the flowers. The sparkling water or beer in the batter helps create a light, crispy coating, so keep it chilled until just before using.
If you find the batter too thick, add a little more liquid until the desired consistency is achieved. Always test the oil temperature with a small drop of batter before frying the blossoms to confirm it’s hot enough.
If you don’t have sparkling water or beer, regular water can be used, but the batter may not be as airy. Enjoy these blossoms as soon as they’re fried for the best texture and flavor.
Spinach and Ricotta Tortellini

Spinach and Ricotta Tortellini is a classic Italian dish that combines delicate pasta with a creamy, flavorful filling. Perfect for a springtime meal, this dish brings together fresh spinach and ricotta cheese, creating a harmonious blend that’s both delicious and satisfying. The tortellini are traditionally served with a light sauce, allowing the taste of the filling to shine through.
While the preparation may seem intimidating at first, with a little patience and practice, anyone can master the art of making these delightful pasta parcels. This recipe is designed to serve 4-6 people, making it an ideal option for a family gathering or a small dinner party. The process involves making fresh pasta dough, preparing the spinach and ricotta filling, and carefully folding each tortellini by hand.
Though it requires some time and effort, the end result is a restaurant-quality dish that’s sure to impress your guests. With its rich flavors and inviting presentation, Spinach and Ricotta Tortellini is a perfect addition to any Italian-inspired menu.
Ingredients (serves 4-6):
- 2 cups all-purpose flour
- 3 large eggs
- 1 tablespoon olive oil
- 1/2 teaspoon salt
- 10 ounces fresh spinach
- 1 cup ricotta cheese
- 1/4 cup grated Parmesan cheese
- 1/4 teaspoon nutmeg
- Salt and pepper to taste
- 2 tablespoons unsalted butter
- 1/4 cup heavy cream
- Fresh basil or parsley for garnish (optional)
Cooking Instructions:
- Prepare the Pasta Dough: On a clean surface, make a mound with the flour and create a well in the center. Crack the eggs into the well, add olive oil and salt. Gradually mix the flour into the eggs using a fork until a dough begins to form. Knead the dough for about 10 minutes until smooth and elastic. Wrap in plastic wrap and let it rest for at least 30 minutes.
- Make the Filling: While the dough rests, blanch the spinach in boiling water for 1 minute, then immediately transfer to an ice bath. Drain and squeeze out excess water. Chop finely and mix with ricotta, Parmesan, nutmeg, salt, and pepper until well combined.
- Roll Out the Dough: Divide the rested dough into four pieces. Using a pasta machine or rolling pin, roll each piece into a thin sheet about 1/16 inch thick.
- Form the Tortellini: Cut the dough into 3-inch squares. Place a teaspoon of the filling in the center of each square. Fold the square into a triangle, pressing the edges to seal. Bring the corners of the triangle together to form a ring and press to seal.
- Cook the Tortellini: Bring a large pot of salted water to a boil. Add the tortellini and cook for 3-4 minutes or until they float to the surface. Remove with a slotted spoon.
- Prepare the Sauce: In a large skillet, melt the butter over medium heat. Add the heavy cream and cook until slightly thickened. Add the cooked tortellini and gently toss to coat.
- Serve: Transfer the tortellini to a serving platter, garnish with fresh basil or parsley if using, and serve immediately.
Extra Tips:
When making the pasta dough, it’s essential to knead it thoroughly to develop the gluten, which gives the pasta its desired elasticity. If the dough feels too sticky, sprinkle with a little more flour. If it’s too dry, add a few drops of water.
For a richer filling, you can add a touch of lemon zest or garlic to the spinach and ricotta mixture. When sealing the tortellini, make sure there are no air pockets inside, as these can cause the pasta to burst during cooking. For an added touch, a sprinkle of freshly grated Parmesan cheese over the finished dish will enhance the flavors beautifully.
Grilled Eggplant Caprese
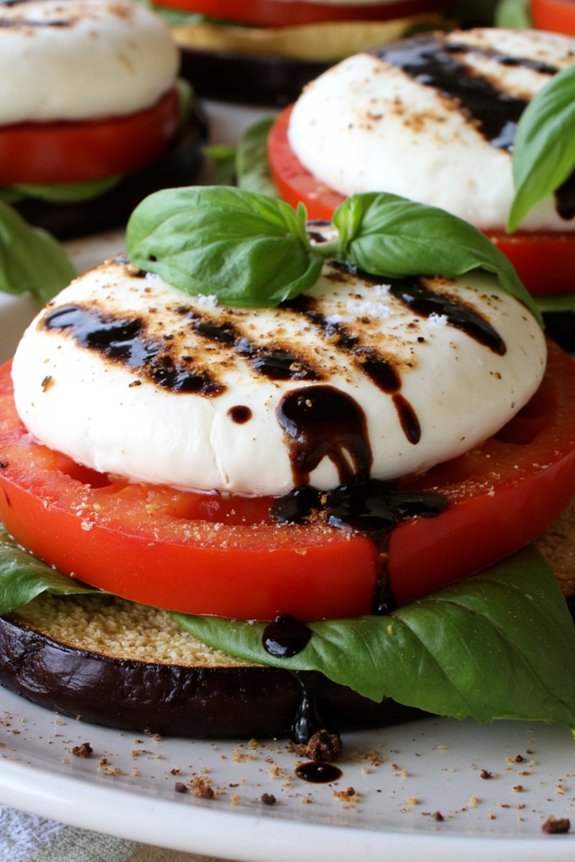
Grilled Eggplant Caprese is a delightful twist on the classic Italian Caprese salad, perfect for springtime gatherings or a simple yet elegant meal. The dish combines the smoky, rich flavors of grilled eggplant with the fresh, creamy taste of mozzarella, sweet tomatoes, and fragrant basil.
This version adds depth and warmth to the traditional Caprese, making it ideal for those breezy spring evenings when you crave something light yet satisfying.
The key to a successful Grilled Eggplant Caprese is using fresh, high-quality ingredients. The eggplant should be firm and smooth, the mozzarella soft and milky, and the tomatoes ripe and juicy. Basil leaves, with their distinct aroma, add a vibrant touch to the dish, while a drizzle of balsamic glaze brings all the flavors together.
This recipe serves 4-6 people and can be prepared in under an hour, making it a convenient and impressive addition to your springtime menu.
Ingredients for 4-6 servings:
- 2 large eggplants
- Salt (for sweating the eggplant)
- Olive oil
- 4 large ripe tomatoes
- 1 pound fresh mozzarella cheese
- Fresh basil leaves
- Balsamic glaze
- Salt and freshly ground black pepper
Cooking Instructions:
- Prepare the Eggplant: Begin by slicing the eggplants into 1/2-inch thick rounds. Lay them out on a baking sheet and sprinkle each slice generously with salt. Allow the eggplant to sit for about 20-30 minutes. This process, known as sweating, helps to remove excess moisture and any bitterness from the eggplant.
- Rinse and Dry: After the eggplant has sweated, rinse each slice thoroughly under cold water to remove the salt. Pat them dry with a clean kitchen towel or paper towels.
- Grill the Eggplant: Preheat your grill or grill pan over medium-high heat. Brush both sides of each eggplant slice with olive oil. Grill the slices for about 3-4 minutes on each side, or until they’re tender and have nice grill marks.
- Prepare the Tomatoes and Mozzarella: While the eggplant is grilling, slice the tomatoes and mozzarella into 1/4-inch thick rounds.
- Assemble the Caprese: On a large serving platter, layer the grilled eggplant slices with the tomato and mozzarella slices. Tuck fresh basil leaves between the layers.
- Season and Serve: Drizzle the assembled Caprese with balsamic glaze and a light sprinkle of salt and freshly ground black pepper. Serve immediately while the eggplant is still warm.
Extra Tips:
When grilling the eggplant, verify your grill is adequately preheated to prevent sticking; a well-heated grill will also create those beautiful char marks that enhance the dish’s visual appeal.
If you don’t have a grill, a grill pan or even a non-stick skillet can work in a pinch. For added flavor, consider infusing the olive oil with garlic or adding a splash of lemon juice to the finished dish for a bright, zesty touch.
Spring Herb and Parmesan Polenta

Spring Herb and Parmesan Polenta is a delightful dish that perfectly encapsulates the freshness of the season. This creamy polenta is infused with the vibrant flavors of spring herbs and enriched with the nutty flavor of Parmesan cheese, providing a comforting yet sophisticated meal.
It’s a versatile dish that can be served as a main course or as a delectable side dish to accompany a variety of meats and vegetables. The smooth texture of the polenta, combined with the aromatic herbs and the rich undertones of Parmesan, creates a delicious harmony of flavors.
It’s an ideal recipe for those looking to embrace the season’s fresh produce and enjoy a wholesome, satisfying meal. Suitable for a serving size of 4-6 people, this recipe is sure to impress your family and friends.
Ingredients:
- 1 cup polenta (coarse cornmeal)
- 4 cups water
- 1/2 cup grated Parmesan cheese
- 2 tablespoons unsalted butter
- 1/4 cup mixed fresh spring herbs (such as basil, parsley, chives, and mint), finely chopped
- Salt to taste
- Freshly ground black pepper to taste
Cooking Instructions:
- Prepare the Polenta Base: In a large saucepan, bring 4 cups of water to a gentle boil. Gradually whisk in the polenta, ensuring there are no lumps. Reduce the heat to low and continue stirring frequently to prevent the polenta from sticking to the bottom of the pan.
- Cook the Polenta: Allow the polenta to simmer gently for 30-35 minutes, stirring occasionally. The polenta should become thick and creamy. If it becomes too thick, you can add a little more water to reach the desired consistency.
- Incorporate the Parmesan and Butter: Once the polenta has reached a smooth, creamy texture, stir in the grated Parmesan cheese and unsalted butter. Continue to stir until the cheese and butter are fully melted and incorporated into the polenta, which will enhance its richness and flavor.
- Add the Spring Herbs: Remove the saucepan from the heat and gently fold in the finely chopped spring herbs. Stir well to distribute the herbs evenly throughout the polenta, infusing it with their fresh aroma. Season with salt and freshly ground black pepper to taste.
- Serve: Transfer the polenta to a serving dish or individual plates, and serve immediately while it’s still warm and creamy. You can garnish with additional herbs or a sprinkle of Parmesan cheese for an extra touch of flavor.
Extra Tips: For an even creamier texture, you can substitute some of the water with milk or cream when cooking the polenta. Feel free to experiment with different combinations of herbs to suit your personal taste.
If you have leftovers, spread the polenta into a shallow dish, let it cool and solidify, then cut it into pieces to grill or fry for a delicious twist.
Fava Bean and Pecorino Salad

Welcome the spring season with a delightful Italian dish that captures the essence of fresh and vibrant flavors: Fava Bean and Pecorino Salad. This dish is a celebration of the simplicity and elegance found in Italian cuisine, where high-quality ingredients shine on their own. The earthy flavor of fava beans pairs beautifully with the sharp, salty taste of Pecorino cheese, while a touch of olive oil and lemon juice brings all the components together. Perfect as a light lunch or a starter, this salad is sure to impress with its bright colors and invigorating taste.
Fava Bean and Pecorino Salad isn’t only delicious but also highly nutritious. Fava beans are rich in protein, fiber, and essential nutrients, making them a fantastic addition to your diet. Pecorino cheese, made from sheep’s milk, adds a distinctive flavor and creamy texture that complements the beans perfectly. This dish is a fantastic way to make use of seasonal produce, as fava beans are at their best during the spring months.
Easy to prepare and incredibly satisfying, this salad will quickly become a favorite in your repertoire of Italian spring recipes.
Ingredients for 4-6 servings:
- 1 pound fresh fava beans, shelled
- 3 ounces Pecorino Romano cheese, shaved or grated
- 1/4 cup extra-virgin olive oil
- 2 tablespoons freshly squeezed lemon juice
- Salt and freshly ground black pepper, to taste
- 1/4 cup fresh mint leaves, torn
- Optional: crusty bread for serving
Cooking Instructions:
- Prepare the Fava Beans: Begin by removing the fava beans from their pods. Once shelled, blanch them in boiling water for about 3 minutes. Drain and immediately transfer them to an ice bath to stop the cooking process. This will help maintain their bright green color.
- Peel the Fava Beans: Once cooled, gently pinch each bean to remove the outer skin. This step is vital for achieving the tender texture that makes this salad so appealing.
- Combine Ingredients: In a large mixing bowl, combine the peeled fava beans with the shaved Pecorino cheese. Add the extra-virgin olive oil and lemon juice, then season with salt and freshly ground black pepper to taste.
- Add Fresh Mint: Gently fold in the torn mint leaves, ensuring they’re evenly distributed throughout the salad. The mint adds an invigorating herbal note that enhances the overall flavor of the dish.
- Serve: Transfer the salad to a serving platter or individual plates. If desired, serve with crusty bread on the side to soak up the delicious dressing.
Extra Tips:
When selecting fava beans, look for pods that are firm and bright green without any blemishes. Fresh fava beans are the star of this dish, so their quality will greatly impact the final result.
If fresh fava beans are unavailable, you can use frozen ones, but be sure to thaw them thoroughly before use. Pecorino cheese can vary in saltiness, so taste the salad before adding additional salt.
Finally, this salad is best enjoyed fresh, so prepare it shortly before serving to preserve the vibrant flavors and textures.
Lemon Ricotta Tart

Lemon Ricotta Tart is a delightful Italian dessert that perfectly encapsulates the vibrant flavors of spring. This tart strikes a balance between the creamy, rich texture of ricotta cheese and the zesty punch of lemon, all encased in a buttery, flaky crust. It’s a perfect way to end a meal or to accompany a cup of coffee or tea. The freshness of the lemon brightens the palate, while the ricotta adds a luscious creaminess that makes each bite irresistible.
This tart isn’t only delicious but also visually stunning, making it an ideal centerpiece for any spring gathering. Its golden crust and light, airy filling topped with a dusting of powdered sugar or lemon zest will certainly impress your guests. Furthermore, this recipe is straightforward enough for beginner bakers yet refined enough for seasoned chefs, allowing everyone to enjoy the process and the final result.
Now, let’s plunge into how you can make this delightful Lemon Ricotta Tart for 4-6 servings.
Ingredients:
- 1 cup all-purpose flour
- 1/4 cup sugar
- 1/2 teaspoon salt
- 1/2 cup unsalted butter, chilled and diced
- 3 tablespoons cold water
- 1 cup ricotta cheese
- 1/3 cup sugar
- 2 large eggs
- Zest of 2 lemons
- Juice of 1 lemon
- 1 teaspoon vanilla extract
- Powdered sugar, for dusting
Instructions:
- Prepare the Tart Crust: In a large bowl, combine the all-purpose flour, sugar, and salt. Add the chilled, diced butter and use a pastry cutter or your fingers to blend the mixture until it resembles coarse crumbs. Gradually add cold water, one tablespoon at a time, and mix until the dough comes together. Form the dough into a disk, wrap it in plastic wrap, and refrigerate for at least 30 minutes.
- Preheat the Oven: While the dough is chilling, preheat your oven to 375°F (190°C).
- Roll Out the Dough: Once chilled, roll the dough out on a lightly floured surface to fit a 9-inch tart pan. Transfer the dough to the tart pan, pressing it into the edges and trimming any excess. Prick the bottom with a fork to prevent bubbling.
- Blind Bake the Crust: Line the crust with parchment paper and fill with pie weights or dried beans. Bake for 15 minutes, then remove the weights and parchment and bake for another 5 minutes until lightly golden. Set aside to cool.
- Prepare the Filling: In a medium bowl, whisk together the ricotta cheese, sugar, eggs, lemon zest, lemon juice, and vanilla extract until smooth and well combined.
- Fill and Bake the Tart: Pour the ricotta mixture into the cooled crust, spreading evenly. Bake for 30-35 minutes or until the filling is set and slightly golden on top.
- Cool and Serve: Allow the tart to cool to room temperature. Dust with powdered sugar before serving, if desired.
Extra Tips:
For the best flavor, use fresh lemons for both the zest and juice – it really makes a difference. If you find the crust difficult to handle, refrigerate it for a few more minutes to firm up. Always taste your ricotta filling before baking; if you prefer a sweeter tart, you can adjust the sugar to your liking.
This tart can be served warm or chilled, and it pairs beautifully with fresh berries or a dollop of whipped cream for added indulgence.
Strawberry and Balsamic Bruschetta

Celebrate the arrival of spring with a delightful twist on the classic bruschetta. The Strawberry and Balsamic Bruschetta combines the sweetness of fresh strawberries with the tangy depth of balsamic glaze, all layered over crispy toasted bread. This rejuvenating appetizer is perfect for spring gatherings or as a light snack. The vibrant colors and flavors create a dish that’s as pleasing to the eyes as it’s to the palate.
This recipe is simple to prepare yet sophisticated enough to impress your guests. The key is to use fresh, ripe strawberries and quality balsamic vinegar to achieve the perfect balance of sweet and tangy. The addition of creamy ricotta cheese adds a rich texture that complements the juicy strawberries. This dish serves 4-6 people, making it ideal for small gatherings or family meals.
Ingredients for 4-6 servings:
- 1 baguette, sliced into 1/2 inch thick rounds
- 1 cup fresh strawberries, hulled and diced
- 2 tablespoons balsamic vinegar
- 1 tablespoon honey
- 1 cup ricotta cheese
- Fresh basil leaves, torn
- Salt and pepper to taste
- Olive oil for brushing
Cooking Instructions:
- Prepare the Balsamic Strawberries: In a medium bowl, combine the diced strawberries, balsamic vinegar, and honey. Stir gently to coat the strawberries evenly. Allow them to marinate for at least 15 minutes to enhance their flavors.
- Toast the Baguette Slices: Preheat your oven to 400°F (200°C). Arrange the baguette slices on a baking sheet, and brush each with olive oil. Season with a pinch of salt and pepper. Toast in the oven for about 5-7 minutes, or until the edges are golden and the bread is crisp.
- Assemble the Bruschetta: Once the bread is toasted, spread a generous layer of ricotta cheese on each slice. Top with a spoonful of the balsamic strawberry mixture. Confirm each piece gets a good balance of strawberries and liquid.
- Garnish and Serve: Finish each bruschetta with a few torn basil leaves for a fresh, aromatic touch. Serve immediately while the bread is still warm for the best texture and flavor.
Extra Tips:
For an extra burst of flavor, consider reducing the balsamic vinegar on a stovetop until it thickens into a syrup before adding it to the strawberries. This will intensify the balsamic’s sweetness and tang.
Additionally, if you prefer a different cheese, goat cheese can be used as an alternative to ricotta for a more tangy taste. Always taste the strawberries before using them to adjust the sweetness and acidity to your liking, confirming the best flavor balance in your bruschetta.