

The holidays are a time for sweet indulgence and Italian desserts bring a special touch to the season. Picture the aroma of freshly baked Panettone or the creamy layers of Tiramisu. These treats are more than just sweets; they are a celebration of Italian tradition. Each dessert brings warmth and joy to the table. Let’s explore what makes these festive delights so special.
Classic Panettone
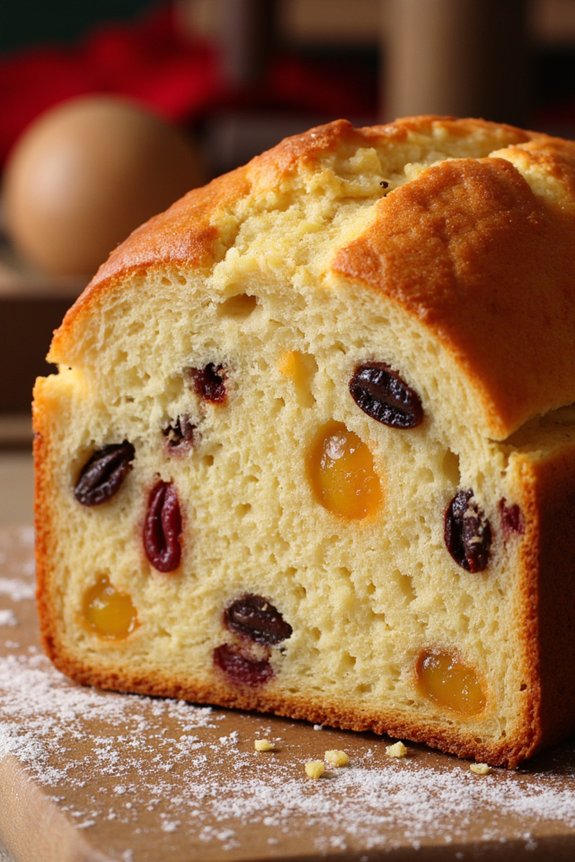
Panettone is a traditional Italian Christmas bread that’s both flavorful and festive, known for its soft, fluffy texture and rich taste. Originating from Milan, this delightful dessert is often enjoyed during the holiday season and makes an excellent centerpiece for any Christmas table.
While it might seem intimidating to make at home due to its intricate process, the effort is truly rewarding. The key to a perfect panettone lies in the careful fermentation of the dough, which gives it its signature lightness and airy texture.
The addition of candied fruits and raisins provides a burst of sweetness in every bite, while the buttery richness of the bread balances the flavors beautifully. This classic recipe is designed to serve 4-6 people, making it ideal for a family gathering or a festive holiday party. By following these steps, you’ll be able to create a delicious homemade panettone that can rival even the finest bakery versions.
Ingredients (Serves 4-6):
- 500g all-purpose flour
- 100g sugar
- 1 teaspoon salt
- 3 large eggs
- 100g unsalted butter, softened
- 200ml warm milk
- 15g active dry yeast
- 1 teaspoon vanilla extract
- Zest of 1 lemon
- 150g mixed candied fruits
- 75g raisins
- 1 tablespoon rum (optional)
- 1 tablespoon honey
- 1 egg yolk (for glaze)
Cooking Instructions:
- Prepare the yeast mixture: In a small bowl, dissolve the active dry yeast in 100ml of warm milk and add 1 tablespoon of sugar. Let it sit for about 10 minutes until it becomes foamy.
- Mix the dough: In a large mixing bowl, combine the flour, remaining sugar, and salt. Make a well in the center and add the eggs, softened butter, vanilla extract, lemon zest, and the yeast mixture. Gradually add the remaining milk and mix until a dough forms.
- Knead the dough: Transfer the dough to a floured surface and knead for about 10 minutes until it becomes smooth and elastic. You can also use a stand mixer with a dough hook for this step.
- First rise: Place the dough in a lightly greased bowl, cover it with a damp cloth, and let it rise in a warm place for about 2 hours, or until it has doubled in size.
- Prepare the fruits: While the dough is rising, soak the raisins in rum (if using) for about 30 minutes. Drain the raisins and mix them with the candied fruits.
- Incorporate the fruits: Punch down the risen dough and knead in the mixed fruits until evenly distributed throughout the dough.
- Shape and second rise: Shape the dough into a ball and place it into a paper panettone mold or a high-sided cake pan lined with parchment paper. Cover and let it rise again in a warm place for about 1 hour, or until it has doubled.
- Preheat the oven: Preheat your oven to 180°C (350°F).
- Glaze and bake: In a small bowl, beat the egg yolk with honey and brush it over the top of the risen dough. Bake in the preheated oven for 35-40 minutes, or until the top is golden brown and a skewer inserted into the center comes out clean.
- Cool and serve: Let the panettone cool on a wire rack before slicing and serving.
Extra Tips:
To guarantee your panettone has the perfect texture, patience is key. Make sure to allow enough time for both rises, as this is what gives the bread its characteristic lightness.
If you want to enhance the flavor, try adding a small amount of orange zest along with the lemon zest. Additionally, using good quality candied fruits and soaking the raisins in rum can elevate the taste considerably.
If you don’t have a special panettone mold, you can use a deep cake tin, but be sure to line it with parchment paper to allow the dough to rise properly.
Enjoy your homemade panettone as a festive treat, either on its own or with a dollop of mascarpone cheese.
Traditional Pandoro
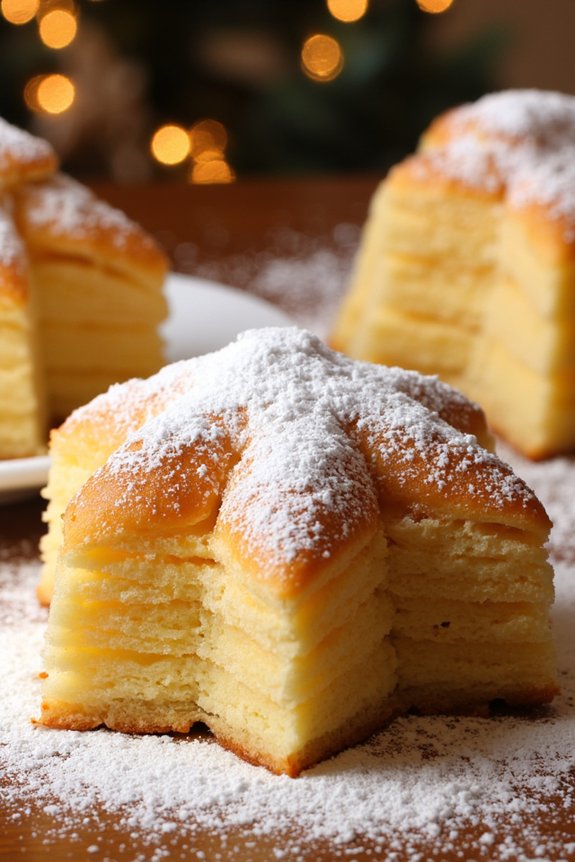
Pandoro is a classic Italian Christmas dessert that’s both festive and delicious. Originating from Verona, this star-shaped cake is known for its soft, buttery texture and sweet vanilla aroma. Its name, which translates to “golden bread,” reflects its beautiful golden color achieved through the use of eggs and butter.
Traditionally, Pandoro is served dusted with powdered sugar, resembling the snow-capped peaks of the Italian Alps. It’s a perfect centerpiece for any holiday table, offering a delightful balance of flavor and texture that’s bound to impress your family and friends.
Creating a Traditional Pandoro at home can be a rewarding experience, allowing you to indulge in the authentic flavors of Italian Christmas. Though it requires some time and patience due to its multi-step preparation and rising processes, the end result is well worth the effort.
With a few key ingredients and the right technique, you can enjoy a homemade Pandoro that rivals those found in Italian bakeries. Here is a detailed recipe for serving 4-6 people.
Ingredients:
- 4 cups all-purpose flour
- 1 cup granulated sugar
- 1/2 cup unsalted butter, softened
- 4 large eggs
- 1 egg yolk
- 1/4 cup warm water
- 1 packet (about 2 1/4 teaspoons) active dry yeast
- 1 teaspoon vanilla extract
- 1/2 teaspoon salt
- Zest of 1 lemon
- Powdered sugar for dusting
Instructions:
- Prepare the Yeast Mixture: In a small bowl, dissolve the active dry yeast in 1/4 cup of warm water. Let it sit for about 10 minutes until it becomes frothy.
- Make the Dough: In a large mixing bowl, combine the flour, sugar, and salt. Create a well in the center and add the yeast mixture, eggs, egg yolk, vanilla extract, and lemon zest. Mix until the ingredients are well incorporated.
- Knead the Dough: Transfer the dough to a lightly floured surface and knead for about 10 minutes until smooth and elastic. Gradually add in the softened butter, kneading until fully incorporated.
- First Rise: Place the dough in a lightly greased bowl, cover it with a damp cloth, and let it rise in a warm place for about 2 hours, or until it has doubled in size.
- Shape the Dough: Once the dough has risen, punch it down to release the air. Knead it briefly, then shape it into a round ball.
- Second Rise: Grease a Pandoro mold and place the dough inside. Cover with a damp cloth and let it rise again in a warm place for about 1 hour, or until it has doubled in size.
- Bake the Pandoro: Preheat your oven to 350°F (175°C). Place the mold on the middle rack and bake for about 35-40 minutes, or until a skewer inserted into the center comes out clean.
- Cool and Dust: Allow the Pandoro to cool slightly in the mold before turning it out onto a wire rack. Once completely cooled, dust generously with powdered sugar before serving.
Extra Tips:
To guarantee the best results, make sure all your ingredients are at room temperature before starting. This helps the dough to rise more effectively.
When kneading the dough, be patient and take your time to achieve a smooth and elastic texture. If you find the dough too sticky, lightly flour your hands and surface, but avoid adding too much flour to prevent drying out the dough.
Finally, for a special touch, you can infuse the powdered sugar with a bit of vanilla or cinnamon before dusting the Pandoro. Enjoy this delightful Italian tradition with your loved ones this holiday season!
Decadent Tiramisu
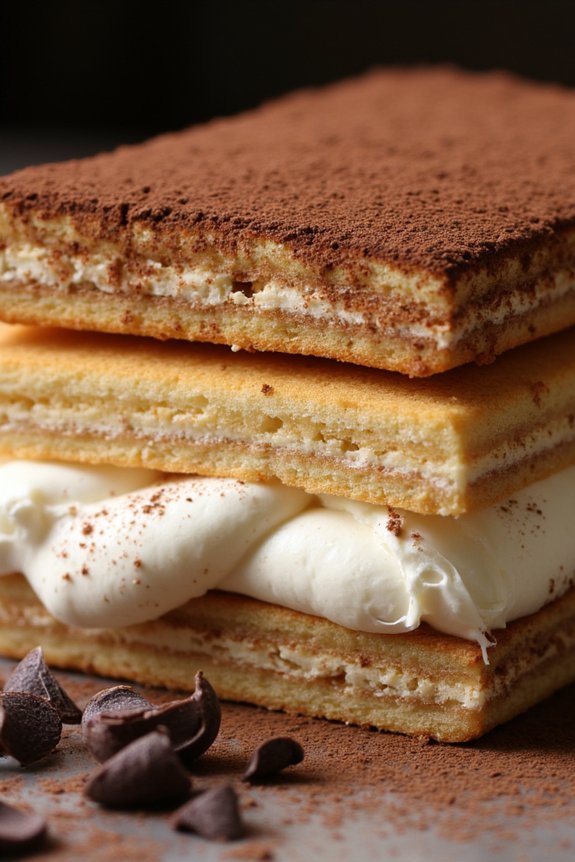
Tiramisu, a classic Italian dessert, is a perfect treat for your festive Christmas gatherings. This decadent, creamy dessert layers delicate ladyfingers soaked in espresso with a rich mascarpone cream, creating a delightful balance of flavors and textures.
Originating from the Veneto region, tiramisu has become a beloved dessert worldwide, known for its indulgent qualities and relatively simple preparation. When made with high-quality ingredients, this dessert offers a luxurious experience that’s bound to impress your guests.
To create the perfect tiramisu for 4-6 people, you’ll need to start with fresh, authentic ingredients. The bold taste of espresso complements the smooth mascarpone and the dusting of cocoa powder adds a touch of bitterness, enhancing the overall taste.
The dish is best prepared a day in advance, giving the flavors time to meld together, resulting in a harmonious and irresistible dessert. Follow the instructions carefully to achieve the rich and creamy texture that defines a perfect tiramisu.
Ingredients:
- 6 large eggs, separated
- 3/4 cup granulated sugar
- 1 cup mascarpone cheese
- 1 1/2 cups heavy cream
- 2 cups strong espresso, cooled
- 1/2 cup coffee liqueur (optional)
- 24-30 ladyfingers (savoiardi biscuits)
- Unsweetened cocoa powder, for dusting
- Dark chocolate shavings (optional)
Instructions:
- Prepare the Mascarpone Mixture: In a large mixing bowl, whisk the egg yolks and sugar together until the mixture becomes thick and pale. Gently fold in the mascarpone cheese, guaranteeing a smooth and creamy consistency.
- Whip the Cream: In a separate bowl, whip the heavy cream until it forms stiff peaks. Carefully fold the whipped cream into the mascarpone mixture, maintaining the light texture.
- Beat the Egg Whites: In another clean bowl, beat the egg whites until soft peaks form. Gently fold the egg whites into the mascarpone and cream mixture. The result should be a light and airy cream.
- Prepare Espresso Mixture: Combine the cooled espresso with the coffee liqueur in a shallow dish. Dip each ladyfinger into the espresso mixture, confirming they’re soaked but not soggy.
- Assemble the Tiramisu: In a rectangular dish, arrange a layer of soaked ladyfingers at the bottom. Spread half of the mascarpone mixture over the ladyfingers, smoothing it out with a spatula. Repeat the process with another layer of soaked ladyfingers and the remaining mascarpone mixture.
- Chill and Set: Cover the dish with plastic wrap and refrigerate the tiramisu for at least 6 hours, or overnight. This allows the flavors to meld and the dessert to set properly.
- Serve: Before serving, dust the top of the tiramisu generously with cocoa powder. For an added touch, sprinkle dark chocolate shavings over the top. Serve chilled.
Extra Tips:
For the best results, use fresh, high-quality ingredients, especially when it comes to the mascarpone cheese and espresso. If you prefer a stronger coffee flavor, you can increase the amount of espresso or add more coffee liqueur.
Confirm the ladyfingers are evenly soaked to avoid dry spots in the dessert. Finally, allowing the tiramisu to rest overnight is essential for the flavors to develop fully, so plan ahead to give your dessert the time it needs to reach its full potential.
Festive Torrone
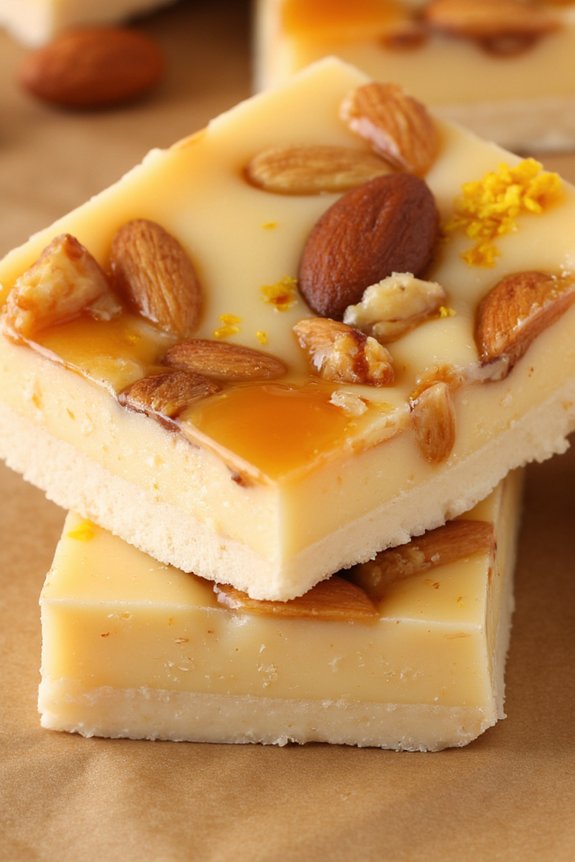
Torrone is a traditional Italian nougat candy, often enjoyed during the Christmas season. It’s a delightful combination of honey, sugar, egg whites, and nuts, with a hint of citrus zest to give it a festive flair. This chewy, sweet treat is a staple in Italian households and brings a touch of joy and warmth to the holiday table.
Making torrone at home is a rewarding process that fills your kitchen with the comforting aroma of roasted nuts and warm honey. Creating this festive torrone requires patience and precision, as the mixture needs to reach the perfect temperature and consistency to set correctly.
Traditionally, torrone is made with almonds, but you can also use a combination of nuts like hazelnuts or pistachios to suit your taste. Whether you serve it as part of a dessert platter or package it as a homemade gift, this recipe is sure to impress your family and friends with its authentic Italian flavor.
Ingredients for 4-6 Servings:
- 2 cups whole almonds
- 1 cup hazelnuts
- 1 1/2 cups honey
- 1 1/2 cups sugar
- 2 large egg whites
- 1/4 teaspoon salt
- Zest of 1 lemon
- Zest of 1 orange
- Edible rice paper sheets
Cooking Instructions:
- Prepare the Nuts: Preheat your oven to 350°F (175°C). Spread the almonds and hazelnuts on a baking sheet. Roast them in the oven for about 10 minutes, or until they’re golden and aromatic. Remove from the oven and allow them to cool.
- Prepare the Torrone Mixture: In a large saucepan, combine honey and sugar. Cook over medium heat, stirring occasionally, until the mixture reaches 250°F (121°C) on a candy thermometer.
- Whip the Egg Whites: While the honey mixture is cooking, beat the egg whites and salt in a stand mixer until soft peaks form.
- Combine the Mixtures: Once the honey mixture reaches the desired temperature, slowly pour it into the whipped egg whites, with the mixer running on low speed. Increase the speed to medium-high and continue beating until the mixture is thick and glossy.
- Add Zest and Nuts: Gently fold in the lemon and orange zest, followed by the roasted nuts, making sure they’re evenly distributed throughout the nougat.
- Line the Pan: Line a baking dish with edible rice paper sheets. Pour the nougat mixture into the pan, spreading it evenly with a spatula. Place another sheet of rice paper on top, pressing lightly to guarantee a smooth surface.
- Set and Slice: Allow the torrone to cool completely at room temperature, which may take several hours. Once set, remove it from the pan and cut it into desired serving sizes.
Extra Tips: When making torrone, it’s vital to monitor the temperature of the honey-sugar mixture closely, as this will affect the final texture of the candy. A digital candy thermometer is an essential tool for this recipe.
Additionally, make sure that your mixing bowl and beaters are free from any grease, as even a small amount can prevent the egg whites from whipping properly. For a unique twist, you can experiment with different nut combinations or add a touch of vanilla or almond extract for added flavor.
Mouthwatering Cannoli
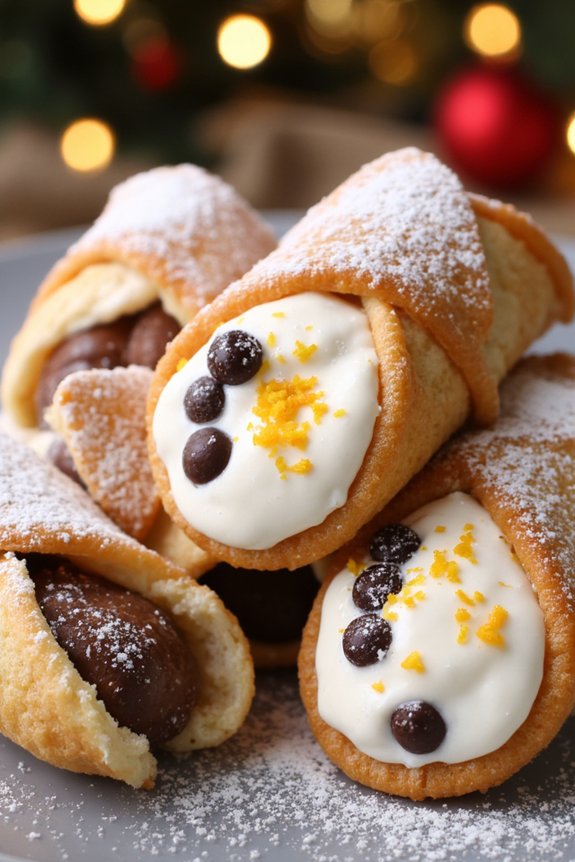
Cannoli are a classic Italian dessert that brings a touch of festive cheer to any holiday gathering. Originating from Sicily, these delightful pastries consist of crispy, fried shells filled with a creamy, sweet ricotta mixture. Cannoli make a perfect addition to your Christmas dessert table, offering a rich and indulgent treat that’s both satisfying and elegant.
Whether you’re serving them to guests or enjoying them with family, cannoli are sure to capture the essence of Italian holiday spirit.
Creating homemade cannoli can be a rewarding endeavor, allowing you to infuse traditional flavors with your own creative twist. The key to perfect cannoli lies in achieving a balance between a crispy shell and a smooth, flavorful filling. With this recipe, you’ll learn how to prepare the shells from scratch, as well as whip up a delicious ricotta filling that can be customized with your favorite ingredients like chocolate chips, citrus zest, or candied fruit.
This recipe serves 4-6 people, making it ideal for a small holiday gathering or a festive family meal.
Ingredients:
- 1 1/2 cups all-purpose flour
- 2 tablespoons granulated sugar
- 1/2 teaspoon ground cinnamon
- 1/4 teaspoon salt
- 2 tablespoons unsalted butter, chilled and cubed
- 1 large egg, beaten
- 1/4 cup dry white wine or Marsala
- Vegetable oil (for frying)
- 1 cup ricotta cheese, drained
- 1/2 cup powdered sugar
- 1 teaspoon vanilla extract
- 1/4 cup mini chocolate chips
- Optional: zest of 1 orange or lemon
- Optional: additional powdered sugar for dusting
Instructions:
- Prepare the Dough: In a large mixing bowl, combine the flour, granulated sugar, cinnamon, and salt. Add the chilled cubed butter and rub it into the flour mixture using your fingers until it resembles coarse crumbs. Stir in the beaten egg and wine (or Marsala) until a dough forms.
- Knead and Rest the Dough: Turn the dough out onto a lightly floured surface and knead for about 5 minutes until it becomes smooth and elastic. Wrap the dough in plastic wrap and let it rest for at least 1 hour at room temperature, allowing the gluten to relax.
- Roll and Cut the Dough: Once rested, divide the dough into two portions. Roll out each portion as thinly as possible using a rolling pin or pasta machine. Use a 4-inch round cookie cutter to cut out circles from the dough.
- Shape and Fry the Shells: Heat vegetable oil in a deep fryer or large saucepan to 350°F (175°C). Wrap each dough circle around a metal cannoli form, sealing the edges with a bit of water. Fry the shells in batches for 1-2 minutes or until golden brown. Remove and drain on paper towels. Carefully remove from the forms while still warm.
- Prepare the Filling: In a medium bowl, combine the ricotta cheese, powdered sugar, and vanilla extract. Stir in the mini chocolate chips and orange or lemon zest if using.
- Fill the Cannoli: Once the shells are cooled, use a piping bag to fill each shell with the ricotta mixture. Fill from both ends to ensure even distribution.
- Serve: Dust the filled cannoli with additional powdered sugar before serving for a festive presentation.
Extra Tips:
To guarantee the crispiest cannoli shells, make sure the dough is rolled out as thinly as possible before frying. If you don’t have metal cannoli forms, you can use wooden dowels or even a makeshift form from aluminum foil.
It’s best to fill the cannoli shortly before serving to prevent the shells from becoming soggy. Additionally, feel free to experiment with different fillings by adding chopped nuts, dried fruits, or even a touch of liqueur to personalize your cannoli to your taste.
Delightful Struffoli
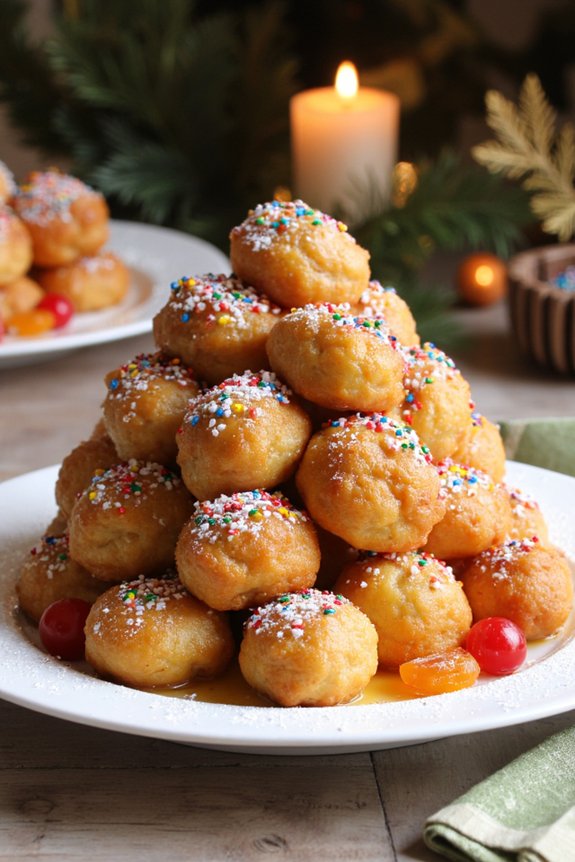
Struffoli is a beloved Italian Christmas dessert that fills homes with joy and a sweet aroma during the holiday season. This delightful dessert features small, fried dough balls that are lightly coated in honey and adorned with colorful sprinkles and candied fruit. Originating from the southern regions of Italy, particularly Naples, Struffoli not only tantalizes the taste buds but also adds a vibrant touch to festive holiday tables.
These sweet little morsels are traditionally served in a mound, symbolizing abundance and unity, making them a perfect centerpiece for any holiday celebration.
Making Struffoli is a fun and rewarding experience, bringing family and friends together in the kitchen. The process involves creating a simple dough, shaping it into tiny balls, frying them to golden perfection, and finally drenching them in aromatic honey. The dish can be customized with your choice of garnishes such as citrus zest, nuts, or colorful nonpareils, allowing you to add your personal festive flair.
Whether you’re a seasoned chef or a novice in the kitchen, Struffoli is an easy and delightful way to embrace Italian Christmas traditions.
Ingredients for 4-6 servings:
- 3 cups all-purpose flour
- 4 large eggs
- 2 tablespoons granulated sugar
- 2 tablespoons unsalted butter, softened
- 1 teaspoon vanilla extract
- 1/4 teaspoon salt
- Zest of 1 lemon
- Vegetable oil, for frying
- 1 cup honey
- 1/4 cup powdered sugar
- Assorted colorful sprinkles
- Candied fruit pieces (optional)
Cooking Instructions:
- Prepare the Dough: In a large mixing bowl, combine the flour, sugar, lemon zest, and salt. Create a well in the center and add the eggs, softened butter, and vanilla extract. Mix the ingredients until a dough forms. Knead the dough on a lightly floured surface until it’s smooth and elastic, about 5-7 minutes.
- Shape the Dough: Divide the dough into smaller portions. Roll each portion into a long rope about 1/2-inch in diameter. Cut the ropes into small pieces, roughly the size of a marble. Roll each piece between your palms to form smooth balls.
- Fry the Dough Balls: Heat vegetable oil in a deep frying pan or pot to 350°F (175°C). Fry the dough balls in batches, making sure not to overcrowd the pan. Fry until golden brown and crispy, about 2-3 minutes per batch. Use a slotted spoon to transfer the fried balls to a paper towel-lined plate to drain excess oil.
- Coat with Honey: In a large saucepan over low heat, warm the honey until it becomes runny. Add the fried dough balls to the honey, stirring gently to guarantee each one is fully coated.
- Assemble and Decorate: Arrange the honey-coated balls into a mound or wreath on a serving platter. Sprinkle generously with powdered sugar, colorful sprinkles, and candied fruit pieces for decoration.
Extra Tips:
To guarantee your Struffoli balls are perfectly crispy, make sure the oil is at the right temperature before frying. If the oil is too cold, the dough will absorb too much oil and become greasy. If it’s too hot, the outside will brown too quickly while the inside remains undercooked.
It’s also important to let the fried dough balls cool slightly before coating them with honey to prevent them from becoming soggy. Feel free to experiment with different garnishes like chopped nuts or a dash of cinnamon for an extra festive touch. Enjoy this Italian delight with a cup of espresso or sweet Italian wine to fully embrace the holiday spirit.
Rich Chocolate Salami
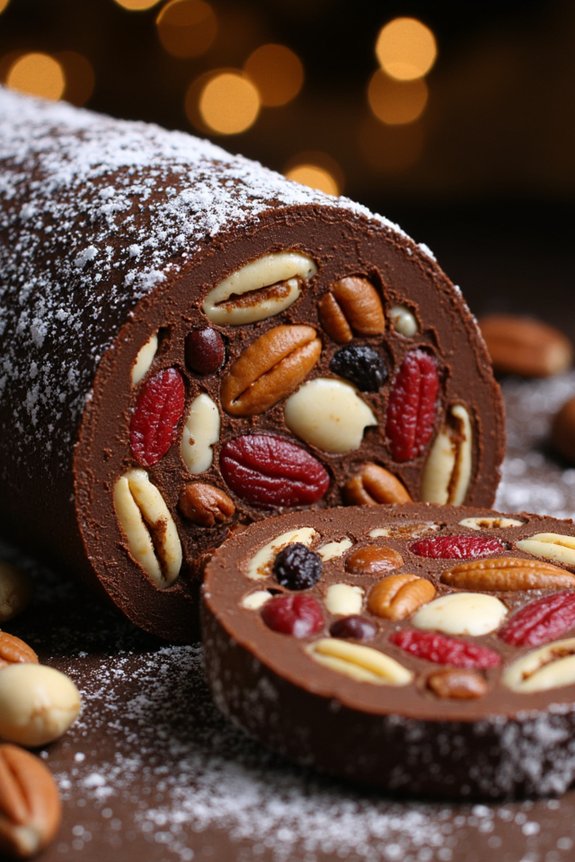
Rich Chocolate Salami is a delightful and festive Italian dessert that adds a touch of whimsy to any Christmas celebration. This no-bake treat isn’t only delicious but also visually impressive, resembling a traditional salami sausage. As you slice through the rich dark chocolate exterior, you’ll discover a beautiful mosaic of nuts, biscuits, and dried fruits that create a harmonious blend of flavors and textures. Perfect as an after-dinner indulgence or a sweet gift for loved ones, Chocolate Salami is sure to become a cherished holiday tradition.
This dessert is incredibly simple to prepare, requiring minimal ingredients and equipment. It’s ideal for those who want to impress their guests without spending hours in the kitchen. The Rich Chocolate Salami can be made ahead of time and stored in the refrigerator, allowing the flavors to meld together beautifully. With a little creativity, you can customize the ingredients to suit your tastes, making it a versatile addition to any festive dessert table.
Ingredients (Serves 4-6):
- 200g dark chocolate (70% cocoa)
- 100g unsalted butter
- 100g digestive biscuits
- 80g chopped nuts (such as almonds, hazelnuts, or walnuts)
- 80g dried fruits (such as raisins, cranberries, or apricots)
- 50g powdered sugar
- 2 tablespoons cocoa powder
- 1 teaspoon vanilla extract
- A pinch of salt
- Optional: 1 tablespoon rum or coffee liqueur
- Extra powdered sugar for dusting
Instructions:
- Prepare the Base: Begin by breaking the digestive biscuits into small pieces, about the size of a pea. Place them in a large mixing bowl. Add the chopped nuts and dried fruits to the bowl, ensuring they’re evenly distributed.
- Melt the Chocolate Mixture: In a small saucepan over low heat, melt the dark chocolate and unsalted butter together, stirring continuously to prevent burning. Once fully melted and smooth, remove from heat and stir in the cocoa powder, vanilla extract, a pinch of salt, and the optional rum or coffee liqueur.
- Combine Ingredients: Pour the melted chocolate mixture over the dry ingredients in the mixing bowl. Use a spatula to mix everything together thoroughly, ensuring all the pieces are well coated with chocolate.
- Form the Salami Shape: Lay out a large piece of cling film on a flat surface. Spoon the chocolate mixture onto the cling film, shaping it into a log about 8-10 inches long. Roll the cling film tightly around the log, twisting the ends to seal it securely. This will help form the classic salami shape.
- Chill: Place the wrapped log in the refrigerator for at least 3 hours, or until it’s firm to the touch. This allows the chocolate to set and the flavors to meld.
- Finish and Serve: Once the salami is firm, remove it from the refrigerator. Roll it in powdered sugar to give it the appearance of traditional salami. Slice it into thin rounds and serve on a platter.
Extra Tips:
For the best flavor, use high-quality dark chocolate with at least 70% cocoa content. If you prefer a sweeter dessert, you can substitute some of the dark chocolate with milk chocolate.
Feel free to experiment with different combinations of nuts and dried fruits to suit your personal taste. If you want a more pronounced rum flavor, soak the dried fruits in rum for a few hours before adding them to the mixture.
Chocolate Salami can be stored in the refrigerator for up to two weeks, making it an excellent make-ahead dessert for the holiday season.
Citrus-Scented Ricciarelli
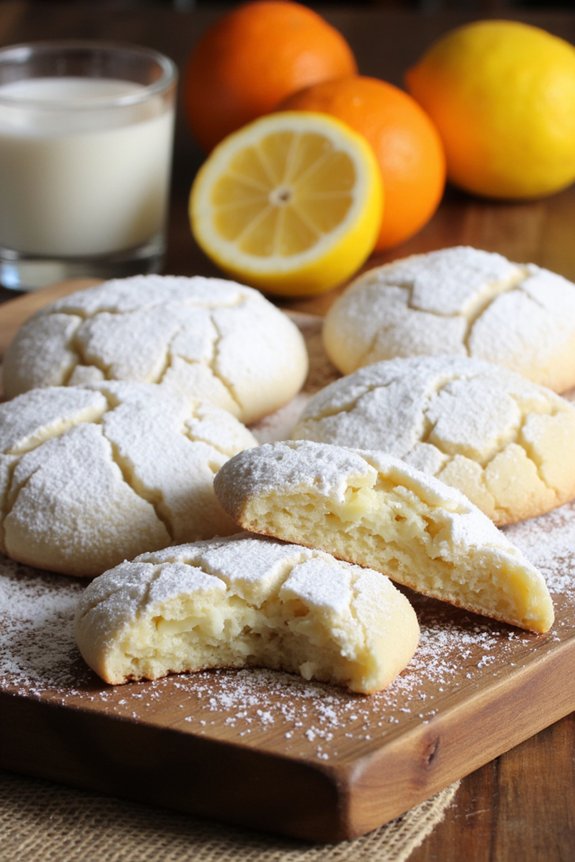
Citrus-Scented Ricciarelli are a delightful Italian Christmas dessert, known for their soft, chewy texture and aromatic citrusy flavor. Traditionally from the Tuscan region, these almond cookies are dusted with powdered sugar, making them a perfect festive treat.
Ricciarelli are distinct for their rich almond taste, enhanced by the addition of citrus zest, which adds a reviving twist to the classic recipe. This recipe serves 4-6 people, making it ideal for sharing with family and friends during the holiday season.
Making these cookies involves creating a simple dough from almond flour and egg whites, infused with the zest of oranges or lemons. The dough is then shaped into small lozenges or oval shapes and coated with a generous layer of powdered sugar before baking. The result is a batch of cookies that aren’t only delicious but also visually appealing, with their cracked, snowy tops reminiscent of a winter wonderland.
Ingredients for Citrus-Scented Ricciarelli (Serves 4-6):
- 2 cups almond flour
- 1 cup granulated sugar
- Zest of 1 large orange
- Zest of 1 lemon
- 2 large egg whites
- 1 teaspoon almond extract
- 1/4 teaspoon salt
- 1/2 cup powdered sugar (for dusting)
Cooking Instructions:
- Preheat and Prepare: Preheat your oven to 325°F (165°C). Line a baking sheet with parchment paper to prevent the cookies from sticking and to guarantee even baking.
- Mix Dry Ingredients: In a large mixing bowl, combine the almond flour, granulated sugar, orange zest, lemon zest, and salt. Mix well until all the ingredients are evenly distributed.
- Whip Egg Whites: In a separate bowl, beat the egg whites until soft peaks form. This will help give the cookies their characteristic chewy texture.
- Combine Mixtures: Gently fold the beaten egg whites into the almond flour mixture. Add the almond extract and continue to fold until a sticky dough forms.
- Shape Cookies: Dust your hands with powdered sugar to prevent sticking. Take small portions of the dough and shape them into lozenge or oval forms, about 2 inches in length. Place them onto the prepared baking sheet, leaving space between each cookie.
- Dust and Bake: Generously dust the shaped cookies with powdered sugar. Bake in the preheated oven for 15-20 minutes or until the edges are lightly golden, and the tops are cracked.
- Cool and Serve: Allow the cookies to cool on the baking sheet for a few minutes before transferring them to a wire rack to cool completely. Serve at room temperature.
Extra Tips:
For the best results, verify that your almond flour is fresh and finely ground, as this will affect the texture of the cookies.
Feel free to experiment with different types of citrus zest, such as lime or tangerine, to vary the flavor. If you prefer a stronger almond flavor, consider adding a few drops of amaretto liqueur to the dough.
Finally, store the cookies in an airtight container to keep them fresh for up to a week. Enjoy these Citrus-Scented Ricciarelli with a cup of espresso or a glass of dessert wine for a truly Italian Christmas experience.
Almond Biscotti Bliss
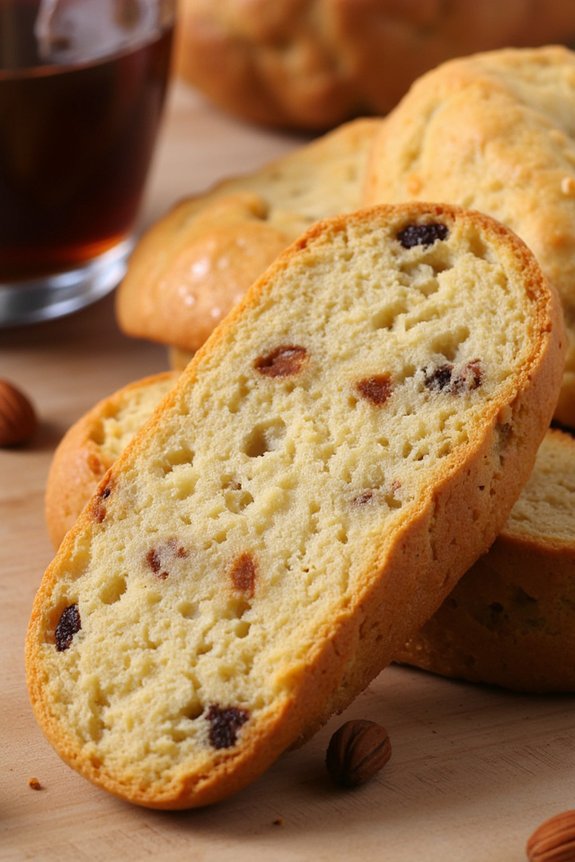
Almond Biscotti Bliss is a delightful Italian treat that brings a festive touch to your holiday dessert table. These twice-baked cookies are crunchy, nutty, and perfect for dipping into a steaming cup of coffee or a glass of sweet dessert wine. Traditionally flavored with almonds, a hint of vanilla, and a touch of anise, these biscotti are a versatile addition to any Christmas celebration.
With their golden color and enticing aroma, Almond Biscotti Bliss will certainly become a favorite amongst family and friends during the holidays.
Making biscotti at home is a rewarding process that fills your kitchen with the warm and inviting scent of baking. Not only are they fun to make, but these biscotti also store well, making them a great gift idea for loved ones. Whether you’re a seasoned baker or a novice in the kitchen, this Almond Biscotti Bliss recipe is simple to follow and delivers delicious results.
With a batch size perfect for serving 4-6 people, these biscotti will guarantee everyone gets a taste of Italian Christmas cheer.
Ingredients for 4-6 servings:
- 2 cups all-purpose flour
- 1 cup granulated sugar
- 1 teaspoon baking powder
- 1/4 teaspoon salt
- 3 large eggs
- 1 teaspoon pure vanilla extract
- 1/2 teaspoon almond extract
- 1 cup whole almonds, toasted and coarsely chopped
- 1 tablespoon anise seeds (optional)
- 1 egg white (for brushing)
Cooking Instructions:
- Prepare the Oven and Baking Sheet: Preheat your oven to 350°F (175°C). Line a baking sheet with parchment paper or a silicone baking mat to prevent sticking.
- Mix Dry Ingredients: In a large bowl, whisk together the flour, sugar, baking powder, and salt until well combined.
- Combine Wet Ingredients: In a separate medium bowl, beat the eggs, vanilla extract, and almond extract together until they’re light and slightly frothy.
- Form the Dough: Gradually add the wet ingredients to the dry ingredients, stirring until a dough forms. Fold in the almonds and anise seeds (if using) until evenly distributed throughout the dough.
- Shape the Log: Transfer the dough onto a lightly floured surface. Divide it in half and shape each portion into a log approximately 12 inches long and 2 inches wide. Place the logs on the prepared baking sheet, leaving space between them.
- First Bake: Brush the logs with the beaten egg white to give them a glossy finish. Bake in the preheated oven for 25-30 minutes or until golden brown and firm to the touch. Remove from the oven and let them cool on the baking sheet for 10 minutes.
- Slice the Biscotti: Reduce the oven temperature to 325°F (160°C). Using a serrated knife, carefully slice each log diagonally into 1/2-inch-thick slices.
- Second Bake: Arrange the slices cut side down on the baking sheet. Bake for an additional 15-20 minutes, flipping halfway through, until the biscotti are dry and crisp. Allow them to cool completely on a wire rack before serving or storing.
Extra Tips:
When making Almond Biscotti Bliss, verify the almonds are well-toasted to enhance their flavor. You can toast them in a dry skillet over medium heat until they’re fragrant and lightly browned.
If you desire a softer texture, reduce the second baking time slightly. To maintain freshness, store the biscotti in an airtight container at room temperature for up to two weeks.
For a festive touch, consider drizzling melted chocolate over the cooled biscotti or adding a sprinkle of powdered sugar before serving.
Heavenly Panna Cotta
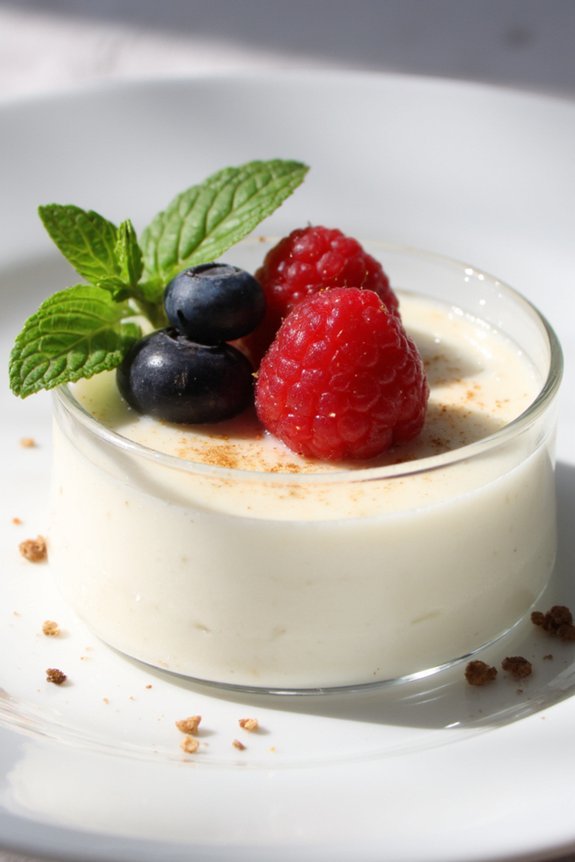
Indulge in the creamy delight of Heavenly Panna Cotta, a classic Italian dessert that’s sure to impress your holiday guests. This velvety dessert is known for its smooth texture and delicate flavor, making it a perfect ending to a festive meal.
Panna Cotta, which translates to “cooked cream” in Italian, is a simple yet elegant treat that can be easily prepared ahead of time, allowing you to focus on other aspects of your holiday feast. With just a handful of ingredients, this dessert captures the essence of Italian culinary tradition, offering a balance of sweetness and creaminess that will leave your taste buds dancing.
For this recipe, we’ll be serving 4-6 people, guaranteeing everyone gets to experience the lusciousness of this dessert. The key to a perfect Panna Cotta lies in achieving the right consistency, which is firm enough to hold its shape but soft enough to melt in your mouth.
By following our step-by-step instructions, you’ll be able to create a dessert that isn’t only delicious but visually appealing, making it a centerpiece of your holiday dessert table. Let’s explore the ingredients and the process of creating this Heavenly Panna Cotta.
Ingredients (Serves 4-6):
- 2 cups heavy cream
- 1/2 cup whole milk
- 1/2 cup granulated sugar
- 1 vanilla bean (or 1 teaspoon vanilla extract)
- 2 teaspoons powdered gelatin
- 3 tablespoons cold water
- Fresh berries or fruit compote (for garnish)
Instructions:
- Prepare the Gelatin: In a small bowl, sprinkle the powdered gelatin over 3 tablespoons of cold water. Allow it to sit for about 5 minutes until it blooms, which means it will absorb the water and swell up. This step is fundamental for achieving the perfect texture.
- Heat the Cream Mixture: In a medium saucepan, combine the heavy cream, whole milk, and granulated sugar. If using a vanilla bean, split it open and scrape the seeds into the mixture, then add the pod as well. If using vanilla extract, you’ll add it later. Heat the mixture over medium heat, stirring occasionally, until the sugar dissolves and small bubbles form around the edges. Don’t allow it to boil.
- Mix in the Gelatin: Once the cream mixture is hot, remove it from the heat. Stir in the bloomed gelatin until it completely dissolves. If using vanilla extract, add it now and stir well to combine.
- Strain and Pour: For a silky smooth Panna Cotta, strain the mixture through a fine-mesh sieve into a pouring jug or bowl, discarding the vanilla pod. Divide the mixture evenly among 4-6 serving dishes, such as ramekins or small cups.
- Chill and Set: Cover the dishes with plastic wrap and refrigerate for at least 4 hours, or until the Panna Cotta is set and firm to the touch. This chilling time allows the gelatin to work its magic, giving the dessert its characteristic texture.
- Serve: Once set, remove the Panna Cotta from the fridge. You can serve them directly in the dishes or unmold them by briefly dipping the bottoms of the dishes in hot water to loosen. Garnish with fresh berries or a fruit compote for added flavor and visual appeal.
Extra Tips: For a more intense vanilla flavor, consider infusing the cream mixture with the vanilla bean overnight in the refrigerator before proceeding with the recipe. If you prefer a lighter version, substitute half of the heavy cream with half-and-half.
Confirm that the gelatin is fully dissolved in the cream mixture to avoid lumps in the final dessert. Finally, experiment with different garnishes like shaved chocolate or caramel sauce to complement the creamy texture of the Panna Cotta.
Zesty Limoncello Cake
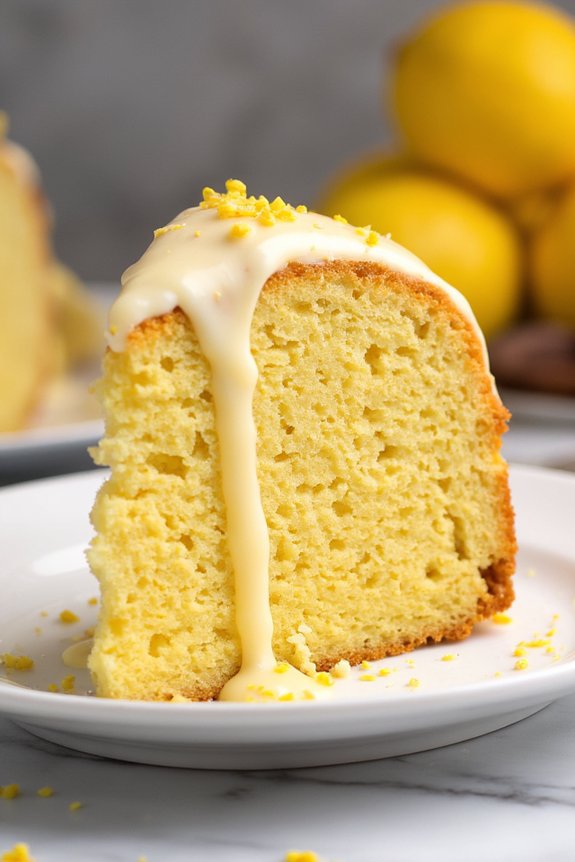
Zesty Limoncello Cake is a delightful Italian dessert that brings a touch of sunshine to your holiday table. This festive cake features the vibrant flavor of Limoncello, a quintessential Italian lemon liqueur, which adds a citrusy zing to every bite. The cake is moist and fluffy, with a beautiful balance of sweetness and tartness, making it a revitalizing end to any holiday feast.
Perfect for sharing with family and friends, this cake is sure to become a cherished tradition. The Limoncello Cake isn’t only delicious but also visually appealing with its golden hue and zesty aroma. The preparation involves infusing the cake with Limoncello and embellishing it with a luscious glaze that enhances its citrus flavor.
This recipe serves 4-6 people and is ideal for those who appreciate the blend of sweet and tart in their desserts. Whether enjoyed with a cup of espresso or a glass of dessert wine, this cake is a festive treat that captures the essence of Italian holiday baking.
Ingredients:
- 1 ½ cups all-purpose flour
- 1 ½ teaspoons baking powder
- ¼ teaspoon salt
- ½ cup unsalted butter, softened
- 1 cup granulated sugar
- 3 large eggs
- ½ cup Limoncello liqueur
- ½ cup whole milk
- 1 tablespoon lemon zest
- 1 teaspoon vanilla extract
For the glaze:
- 1 cup powdered sugar
- 2 tablespoons Limoncello liqueur
- 1 tablespoon lemon juice
Cooking Instructions:
- Preheat the Oven: Preheat your oven to 350°F (175°C). Grease a 9-inch round cake pan with butter and lightly dust it with flour, guaranteeing even coverage to prevent sticking.
- Mix Dry Ingredients: In a medium-sized bowl, whisk together the flour, baking powder, and salt. This will help distribute the baking powder evenly throughout the flour.
- Cream Butter and Sugar: In a large mixing bowl, beat the softened butter and granulated sugar together using an electric mixer on medium speed until the mixture is light and fluffy, approximately 3-4 minutes.
- Add Eggs: Crack the eggs one at a time into the butter-sugar mixture, beating well after each addition. This guarantees the mixture remains smooth and well-incorporated.
- Incorporate Wet Ingredients: Gradually add the Limoncello, milk, lemon zest, and vanilla extract to the mixture. Mix on low speed until all the ingredients are combined.
- Combine with Dry Ingredients: Slowly add the dry ingredients to the wet mixture, mixing on low speed until just combined. Be careful not to overmix, as this can result in a dense cake.
- Bake the Cake: Pour the batter into the prepared cake pan, spreading it evenly. Bake in the preheated oven for 30-35 minutes, or until a toothpick inserted in the center comes out clean.
- Prepare the Glaze: While the cake is baking, prepare the glaze by whisking together powdered sugar, Limoncello, and lemon juice in a small bowl until smooth.
- Cool and Glaze: Allow the cake to cool in the pan for about 10 minutes, then transfer it to a wire rack. While the cake is still warm, drizzle the glaze over the top, allowing it to set before serving.
Extra Tips:
When making the Zesty Limoncello Cake, verify that your ingredients, especially the eggs and butter, are at room temperature. This helps them blend more seamlessly, resulting in a smoother batter.
If you prefer a stronger lemon flavor, you can add a bit more lemon zest or substitute half of the milk with fresh lemon juice. For a decorative touch, sprinkle some additional lemon zest over the glazed cake before serving.
This cake pairs beautifully with fresh berries or a dollop of whipped cream for an even more indulgent experience.
Indulgent Amaretti Cookies

Amaretti cookies are a classic Italian treat, perfect for adding a touch of indulgence to your Christmas celebrations. With their crisp exterior and chewy interior, these almond-flavored cookies are sure to become a festive favorite. Traditionally made with almond flour, sugar, and egg whites, Amaretti are gluten-free and boast a delightful balance of sweet and nutty flavors.
They aren’t only simple to make but also make for a wonderful homemade gift or a delightful addition to your holiday dessert table.
The origins of Amaretti cookies date back to the late Renaissance period in Italy, and they’ve remained popular ever since. These cookies are often enjoyed with a cup of espresso or a small glass of dessert wine, making them a versatile dessert option. While there are many variations, this recipe sticks to the traditional method, guaranteeing you can achieve that perfect texture and flavor.
Follow the steps below to create a batch of approximately 24 cookies, serving 4-6 people.
Ingredients:
- 2 cups almond flour
- 1 cup granulated sugar
- 2 large egg whites
- 1 tablespoon almond extract
- 1 teaspoon vanilla extract
- 1/4 teaspoon salt
- 1/2 cup powdered sugar (for rolling)
Instructions:
- Preheat and Prepare: Begin by preheating your oven to 325°F (160°C). Line two baking sheets with parchment paper to prevent the cookies from sticking.
- Mix Dry Ingredients: In a large mixing bowl, whisk together the almond flour, granulated sugar, and salt until evenly combined.
- Beat Egg Whites: In a separate bowl, beat the egg whites with an electric mixer on medium speed until they form soft peaks. This should take about 2-3 minutes.
- Combine Mixtures: Gently fold the beaten egg whites into the dry ingredients using a spatula. Add in the almond and vanilla extracts, and continue folding until the dough is smooth and well incorporated.
- Shape Cookies: Using your hands, roll small portions of the dough into 1-inch balls. Roll each ball in the powdered sugar to coat completely.
- Arrange and Bake: Place the coated dough balls onto the prepared baking sheets, leaving about 2 inches of space between each cookie. Bake in the preheated oven for 15-18 minutes, or until the cookies are lightly golden on the edges.
- Cool and Serve: Allow the cookies to cool on the baking sheets for about 5 minutes before transferring them to a wire rack to cool completely. Serve and enjoy!
Extra Tips:
For the best results, verify that your egg whites are at room temperature before beating as this helps them achieve the correct volume.
If you prefer a stronger almond flavor, you can add a few drops of almond extract to the powdered sugar used for coating.
Be mindful not to overbake the cookies; they should be slightly soft in the center when removed from the oven. If you prefer a crunchier texture, bake them for an additional 2-3 minutes.
Amaretti cookies store well in an airtight container for up to a week, making them a fantastic make-ahead option for holiday gatherings.
Creamy Zabaione
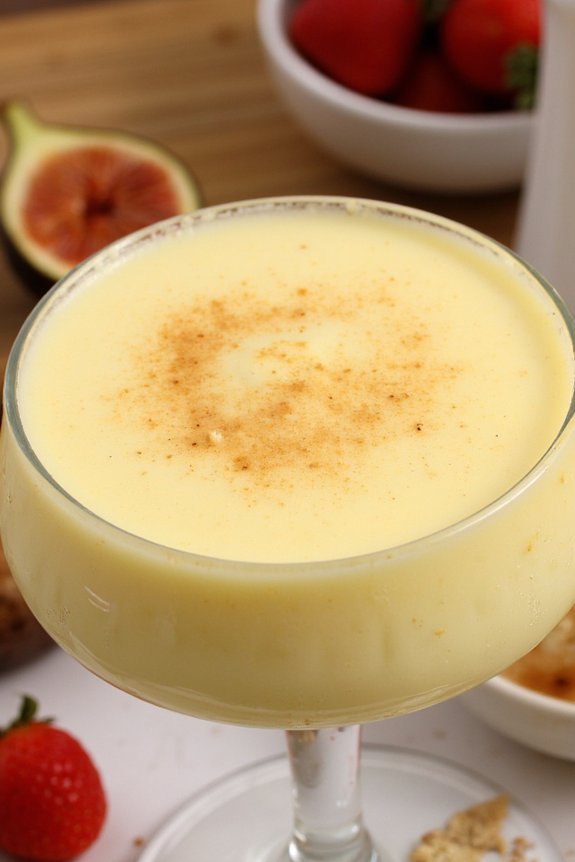
Zabaione, also known as Zabaglione in Italian, is a classic Italian dessert that’s both simple and luxurious. This delightful concoction is a creamy, frothy custard made from egg yolks, sugar, and Marsala wine. Often served warm, it makes for the perfect comforting treat during the festive season. Its silky texture and rich flavors are sure to impress your guests, offering a taste of Italy’s sweet traditions on your holiday table.
Traditionally, Zabaione is served with biscotti or fresh fruit, providing a delightful contrast of flavors and textures. The key to a perfect Zabaione is to whisk it to the right consistency over a gentle heat, making sure it turns out smooth and airy. Whether you serve it in elegant glasses or bowls, this dessert is a demonstration of the beauty of simplicity in Italian cuisine.
Now, let’s explore the ingredients and steps required to create this festive treat for 4-6 people.
Ingredients:
- 6 large egg yolks
- 1/2 cup granulated sugar
- 1/2 cup Marsala wine
- 1 teaspoon vanilla extract
- Fresh fruit or biscotti for serving (optional)
Instructions:
- Prepare a Double Boiler Setup: Fill a medium-sized saucepan with about one inch of water. Bring the water to a simmer over medium heat. Place a heatproof bowl over the saucepan, ensuring it doesn’t touch the water.
- Combine Ingredients: In the heatproof bowl, whisk together the egg yolks and sugar until the mixture is pale and slightly thickened.
- Add Marsala Wine: Gradually whisk in the Marsala wine and vanilla extract, ensuring the mixture remains smooth and free of lumps.
- Cook the Zabaione: Place the bowl over the simmering water and continually whisk the mixture. This step is vital as you want to avoid cooking the eggs too fast, which can cause them to scramble. Whisk constantly for about 10-15 minutes until the mixture is thick, frothy, and has tripled in volume.
- Check Consistency: The Zabaione is ready when it forms soft peaks and coats the back of a spoon. Be patient during this process to achieve the perfect texture.
- Serve Immediately: Once the Zabaione is ready, remove it from the heat and serve it warm in glasses or small bowls. Garnish with fresh fruit or serve alongside biscotti if desired.
Extra Tips:
When making Zabaione, using fresh eggs is essential for achieving the best flavor and consistency. Be sure to whisk vigorously and continuously to incorporate air, which gives the dessert its signature light and airy texture.
If you prefer a non-alcoholic version, substitute the Marsala with a fruit juice like orange or grape. Remember that Zabaione is best served immediately after preparation while it’s warm and frothy; it doesn’t store well, so plan to enjoy it fresh for the best experience.
Rustic Crostata Di Frutta
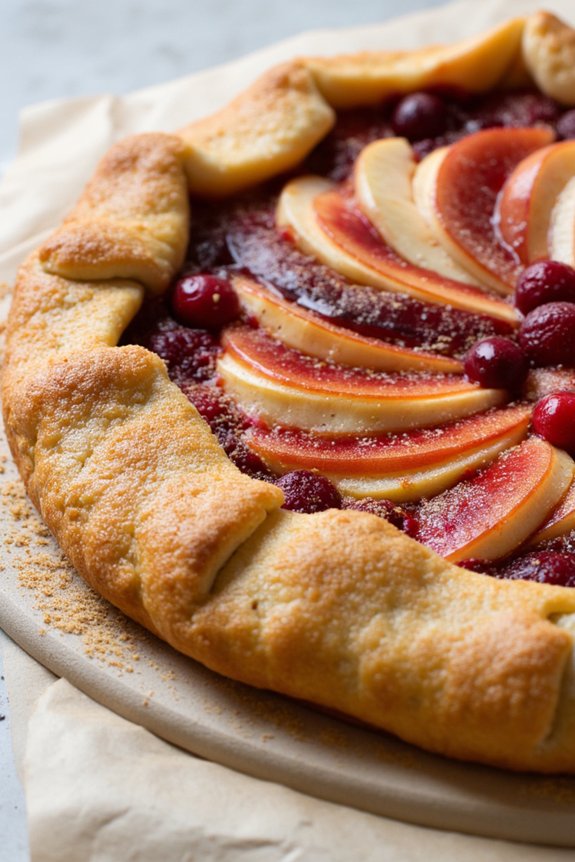
Rustic Crostata Di Frutta is a delightful and traditional Italian dessert that embodies the essence of a festive Christmas. This classic open-faced tart features a buttery and flaky crust filled with an array of colorful, seasonal fruits. The beauty of a crostata lies in its simplicity and rustic charm, making it the perfect dessert to share with family and friends during the holiday season.
With its inviting aroma and vibrant presentation, Rustic Crostata Di Frutta is certain to become a cherished favorite at your Christmas table. The versatility of this dessert allows you to use a variety of fruits, depending on what’s available and in season. Whether you opt for a mix of apples, pears, and cranberries for a wintery feel or incorporate citrus fruits for a fresh twist, the crostata is sure to impress.
The combination of the sweet, juicy fruit filling and the crisp, golden crust creates a harmony of flavors and textures that will be a hit with everyone. Serve it warm with a scoop of vanilla ice cream or a dollop of whipped cream for an indulgent treat that captures the spirit of the holidays.
Ingredients (Serves 4-6)
- 1 1/2 cups all-purpose flour
- 1/4 cup granulated sugar
- 1/4 teaspoon salt
- 1/2 cup unsalted butter, chilled and cubed
- 1 large egg, lightly beaten
- 2 tablespoons ice water
- 3 apples, peeled, cored, and sliced
- 2 pears, peeled, cored, and sliced
- 1/2 cup fresh cranberries
- 1/4 cup brown sugar
- 1 teaspoon ground cinnamon
- 1/2 teaspoon vanilla extract
- 1 tablespoon lemon juice
- 1 tablespoon cornstarch
- 1 egg, beaten (for egg wash)
- 2 tablespoons turbinado sugar (optional, for sprinkling)
Instructions
- Prepare the Dough: In a large bowl, combine the all-purpose flour, granulated sugar, and salt. Add the chilled, cubed butter and use a pastry cutter or your fingers to work the butter into the flour mixture until it resembles coarse crumbs. Add the beaten egg and ice water, mixing until the dough just comes together.
- Chill the Dough: Shape the dough into a disk, wrap it in plastic wrap, and refrigerate for at least 1 hour to allow it to firm up.
- Preheat the Oven: Preheat your oven to 375°F (190°C).
- Prepare the Filling: In a large bowl, combine the sliced apples, pears, and cranberries. Add the brown sugar, ground cinnamon, vanilla extract, lemon juice, and cornstarch. Toss the mixture until the fruit is well coated.
- Roll Out the Dough: On a lightly floured surface, roll out the chilled dough into a rough circle, about 12 inches in diameter and 1/8 inch thick. Transfer the dough to a parchment-lined baking sheet.
- Assemble the Crostata: Spoon the fruit filling onto the center of the dough, leaving a 2-inch border around the edges. Fold the edges of the dough over the filling, pleating as necessary to create a rustic look.
- Apply the Egg Wash and Sugar: Brush the edges of the dough with the beaten egg and sprinkle the turbinado sugar over the crust and fruit, if desired.
- Bake the Crostata: Place the crostata in the preheated oven and bake for 40-45 minutes, or until the crust is golden brown and the fruits are tender and bubbling.
- Cool and Serve: Allow the crostata to cool slightly on the baking sheet before transferring it to a wire rack. Serve warm with a scoop of vanilla ice cream or a dollop of whipped cream, if desired.
Extra Tips
For the best results, verify that your butter is well chilled before incorporating it into the dough. This will help create a flaky and tender crust. Feel free to experiment with different fruit combinations based on what’s in season or to your personal taste.
If the fruit mixture releases too much juice while baking, don’t worry — the cornstarch will help thicken it. Finally, handle the dough as little as possible to avoid overworking it, which can result in a tough crust. Enjoy this festive and rustic dessert as a centerpiece for your holiday gatherings!