

When it comes to Italian cuisine, side dishes are the unsung heroes that bring a meal together with their vibrant flavors and simple elegance. Think of the fresh burst of a Caprese salad drizzled with balsamic or the comforting warmth of creamy polenta with Parmesan. Garlic and herb roasted potatoes or sautéed spinach with garlic can add a delightful touch to any main course. These easy Italian side dishes promise to make your meals both inviting and satisfying. Ready to explore more?
Caprese Salad With Balsamic Drizzle
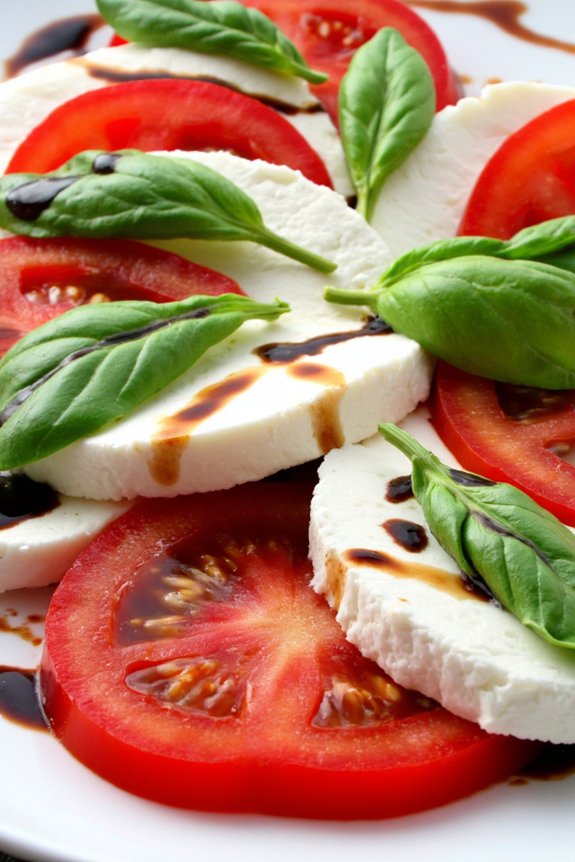
Caprese Salad With Balsamic Drizzle is a quintessential Italian side dish that captures the flavors of summer with its fresh ingredients and simple preparation. This classic dish showcases the harmonious combination of juicy ripe tomatoes, creamy mozzarella cheese, and fragrant fresh basil. The addition of a balsamic drizzle elevates the salad, adding a sweet and tangy flavor that complements the rich ingredients.
Whether served as a starter or alongside a main course, this vibrant salad is sure to impress with its beautiful presentation and delightful taste. Perfect for gatherings and family meals, this Caprese Salad recipe serves 4-6 people. It’s a versatile dish that can be prepared in advance, making it a convenient option for entertaining.
The key to a perfect Caprese Salad lies in the quality of its ingredients, so be certain to use the freshest tomatoes, mozzarella, and basil you can find. The balsamic drizzle can be homemade for an extra touch of personalization, or a high-quality store-bought balsamic reduction can be used for convenience.
Ingredients for 4-6 servings:
- 4 large ripe tomatoes
- 1 pound fresh mozzarella cheese
- 1 bunch fresh basil leaves
- 1/4 cup extra virgin olive oil
- Salt, to taste
- Freshly ground black pepper, to taste
- 1/2 cup balsamic vinegar
- 1 tablespoon honey (optional, for the balsamic drizzle)
Cooking Instructions:
- Prepare the Balsamic Drizzle: In a small saucepan, combine the balsamic vinegar and honey. Bring to a gentle boil over medium heat, then reduce the heat to low and let simmer until the mixture reduces to about half its original volume and thickens to a syrupy consistency, approximately 10-15 minutes. Stir occasionally, and then set aside to cool.
- Slice the Tomatoes and Mozzarella: While the balsamic reduction is cooling, slice the tomatoes and fresh mozzarella cheese into even, 1/4-inch thick slices. Try to keep the thickness uniform to guarantee a balanced flavor in each bite.
- Assemble the Salad: On a large serving platter, alternate slices of tomato and mozzarella, slightly overlapping them. Tuck fresh basil leaves in between each tomato and cheese slice. Arrange the slices in a circular or linear pattern for an appealing presentation.
- Season the Salad: Drizzle the extra virgin olive oil evenly over the sliced tomatoes, mozzarella, and basil. Sprinkle with salt and freshly ground black pepper to taste.
- Add the Balsamic Drizzle: Once the balsamic reduction has cooled to a warm or room temperature, drizzle it over the salad. For an elegant presentation, use a spoon to create thin, even streams of balsamic glaze across the salad.
Extra Tips:
For the best Caprese Salad, choose tomatoes that are firm yet ripe, as they offer a sweet and juicy flavor profile. Fresh mozzarella is essential, providing a soft and creamy texture that pairs perfectly with the tomatoes.
If you prefer a thicker balsamic glaze, allow it to reduce further, but keep in mind that it will thicken more as it cools. This salad is best enjoyed fresh, so assemble it just before serving to maintain the vibrant color and crispness of the ingredients.
Garlic and Herb Roasted Potatoes
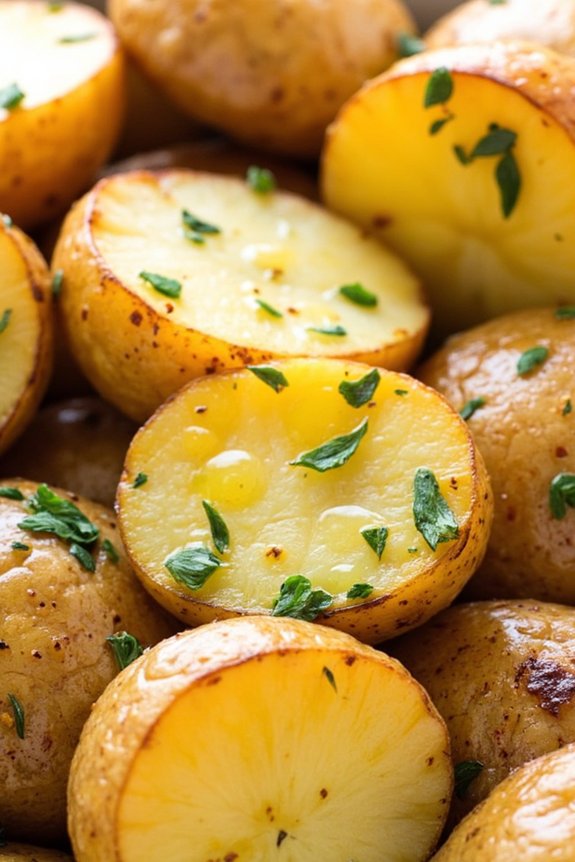
Garlic and Herb Roasted Potatoes are a classic Italian side dish that perfectly complements any main course. This simple yet flavorful recipe highlights the earthy flavors of fresh herbs and the aromatic punch of garlic, all enveloping perfectly roasted potatoes. The crispy exterior and fluffy interior of the potatoes make them a delightful addition to any meal, whether it’s a casual weeknight dinner or a festive gathering.
The combination of herbs and garlic creates a savory profile that’s both comforting and elegant. This dish is incredibly versatile and can be tailored to your personal taste preferences. By adjusting the types of herbs or the amount of garlic, you can create a unique twist on this traditional recipe.
The key to achieving the perfect roasted potatoes lies in the balance of seasonings and the roasting technique, which guarantees a crispy crust and tender inside. This recipe serves 4-6 people, making it ideal for sharing with family and friends.
Ingredients:
- 2 pounds of small to medium-sized potatoes (Yukon Gold or red potatoes work well)
- 4 cloves of garlic, minced
- 3 tablespoons olive oil
- 1 tablespoon fresh rosemary, chopped
- 1 tablespoon fresh thyme, chopped
- 1 tablespoon fresh parsley, chopped
- Salt to taste
- Black pepper to taste
Cooking Instructions:
- Preheat the Oven: Preheat your oven to 425°F (220°C). This temperature is ideal for achieving crispy potatoes without burning them.
- Prepare the Potatoes: Wash the potatoes thoroughly under cold water to remove any dirt. Pat them dry with a kitchen towel. Cut each potato into quarters or halves, depending on their size, ensuring uniform pieces for even cooking.
- Season the Potatoes: In a large mixing bowl, combine the cut potatoes with olive oil, minced garlic, chopped rosemary, thyme, parsley, salt, and black pepper. Toss the potatoes until they’re evenly coated with the oil and herbs.
- Arrange on Baking Sheet: Spread the seasoned potatoes out in a single layer on a large baking sheet. Make sure they aren’t overcrowded to allow even roasting.
- Roast the Potatoes: Place the baking sheet in the preheated oven and roast the potatoes for 30-35 minutes. Halfway through cooking, give the potatoes a good stir or flip them to guarantee they roast evenly.
- Check for Doneness: The potatoes are done when they’re golden brown and crispy on the outside and tender on the inside. You can test this by inserting a fork into a potato piece; it should slide in easily.
- Serve: Remove the baking sheet from the oven and let the potatoes cool slightly. Transfer them to a serving dish and garnish with additional fresh parsley if desired.
Extra Tips:
For the best results, choose potatoes that are similar in size to ensure even cooking. If you prefer a more intense garlic flavor, you can add extra minced garlic or even roast whole cloves alongside the potatoes.
It’s important not to overcrowd the baking sheet, as this will cause the potatoes to steam rather than roast, preventing them from becoming crispy. For an added touch, sprinkle some grated Parmesan cheese over the potatoes before serving for a cheesy finish.
Classic Italian Bruschetta
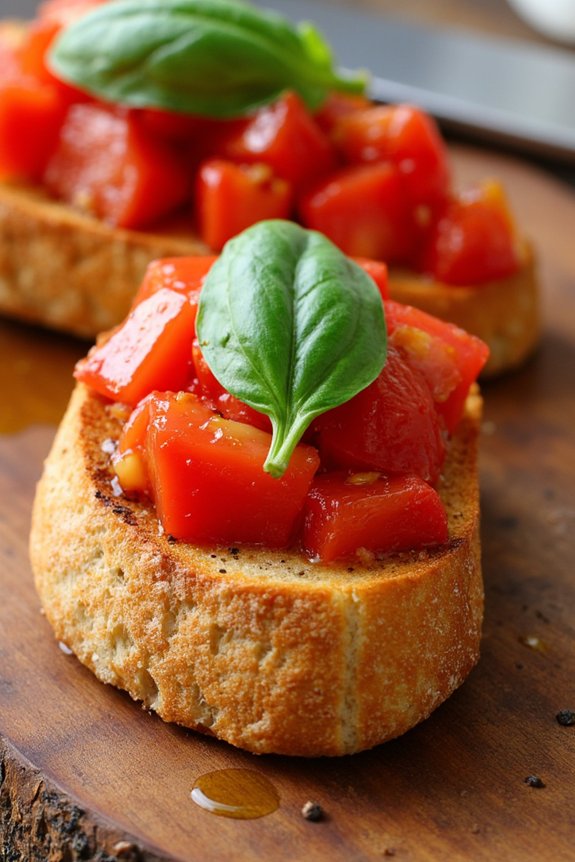
Bruschetta is a quintessential Italian side dish that perfectly embodies the simplicity and freshness of Italian cuisine. Originating from central Italy, this dish highlights the use of high-quality, fresh ingredients to create a delightful appetizer or side. The foundation of bruschetta is a slice of rustic, toasted bread, typically topped with a mixture of ripe tomatoes, fresh basil, and garlic, all drizzled with olive oil and a hint of balsamic vinegar.
This dish isn’t only easy to prepare, but it also offers a burst of vibrant flavors that can be enjoyed as a starter or as part of a larger Italian meal. Ideal for a casual gathering or a sophisticated dinner party, classic Italian bruschetta is a crowd-pleaser that brings together the essence of Italy in each bite. The combination of crusty bread with juicy tomatoes and aromatic herbs creates a harmonious balance of textures and tastes.
Whether you’re serving it as a light snack or as a complement to a main course, bruschetta’s simplicity and elegance make it a versatile addition to any menu. This recipe serves 4-6 people, providing ample portions for sharing among family and friends.
Ingredients:
- 1 loaf of rustic Italian bread or French baguette
- 4 ripe tomatoes, diced
- 2 cloves garlic, minced
- 1/4 cup fresh basil leaves, chopped
- 1/4 cup extra-virgin olive oil
- 1 tablespoon balsamic vinegar
- Salt and freshly ground black pepper to taste
Instructions:
- Prepare the Bread: Preheat your oven to 400°F (200°C). Slice the bread into 1/2-inch thick slices. Arrange the slices on a baking sheet and brush both sides lightly with olive oil.
- Toast the Bread: Place the baking sheet in the preheated oven and toast the bread for about 5-7 minutes on each side, or until golden brown and crispy.
- Prepare the Tomato Topping: While the bread is toasting, combine the diced tomatoes, minced garlic, chopped basil, olive oil, balsamic vinegar, salt, and pepper in a mixing bowl. Stir the ingredients gently to verify they’re well mixed and the flavors are combined.
- Assemble the Bruschetta: Once the bread is toasted, remove it from the oven and let it cool slightly. Spoon a generous amount of the tomato mixture onto each slice of toasted bread, ensuring the topping is evenly distributed.
- Serve: Arrange the assembled bruschetta on a serving platter. Optionally, drizzle a little extra olive oil over the top and garnish with additional fresh basil leaves for an extra touch of color and flavor.
Extra Tips:
For the best bruschetta, use vine-ripened tomatoes at the peak of their season for maximum flavor. If you prefer a bit of heat, consider adding a pinch of red pepper flakes to the tomato topping. Additionally, rubbing a cut clove of garlic directly onto the warm toasted bread before adding the tomato mixture can add an extra layer of garlic flavor.
Creamy Polenta With Parmesan

Creamy Polenta With Parmesan is a delightful Italian side dish that’s both comforting and versatile. Perfect for accompanying roasted meats or sautéed vegetables, this dish is a staple in Italian cuisine. The smooth texture of the polenta combined with the richness of parmesan cheese creates a savory and luscious side that can elevate any meal.
Preparing polenta might seem intimidating at first, but with a little patience and attention to detail, you can achieve a perfectly creamy consistency.
The key to a successful Creamy Polenta With Parmesan lies in the quality of the ingredients and the method of cooking. Using freshly grated parmesan cheese and good-quality polenta will make a noticeable difference in the flavor and texture of the dish.
By following a slow and steady cooking process, you’ll guarantee that the polenta remains smooth and free of lumps, allowing the cheese to melt seamlessly into the mixture. This recipe serves 4-6 people.
Ingredients:
- 4 cups of water
- 1 teaspoon of salt
- 1 cup of polenta (coarse cornmeal)
- 3 tablespoons of unsalted butter
- 1 cup of freshly grated Parmesan cheese
- Salt and pepper to taste
- Optional: 1/2 cup of heavy cream for extra creaminess
Cooking Instructions:
- Boil the Water: In a large saucepan, bring the 4 cups of water to a boil. Add 1 teaspoon of salt to the water, which will help season the polenta as it cooks.
- Add the Polenta: Gradually whisk in the polenta in a steady stream to prevent lumps from forming. Reduce the heat to low and continue to whisk until the polenta begins to thicken, which should take about 5 minutes.
- Simmer and Stir: Cover the saucepan and let the polenta simmer, stirring frequently for about 30 to 40 minutes. Make sure to scrape the sides and bottom of the pan to prevent sticking. The polenta is done when it’s thick and pulls away from the sides of the pan easily.
- Incorporate the Butter and Cheese: Remove the saucepan from the heat. Stir in the unsalted butter until fully melted and incorporated. Then, gradually add the freshly grated Parmesan cheese, stirring continuously until the cheese is melted and the polenta is creamy.
- Adjust the Seasoning: Taste the polenta and add salt and pepper as needed. If you want an even creamier texture, stir in the optional heavy cream at this stage.
- Serve Immediately: Transfer the creamy polenta to a serving dish. It can be served as is, or you can top it with additional Parmesan cheese for extra flavor.
Extra Tips:
For best results, use a heavy-bottomed saucepan to guarantee even cooking and prevent the polenta from burning.
If the polenta becomes too thick, you can add a little more water or milk to reach your desired consistency. Stirring frequently is essential to achieving a smooth texture, so don’t skip this step.
If you want to add extra flavor, consider incorporating garlic, herbs, or even a splash of white wine during cooking.
Sautéed Spinach With Garlic
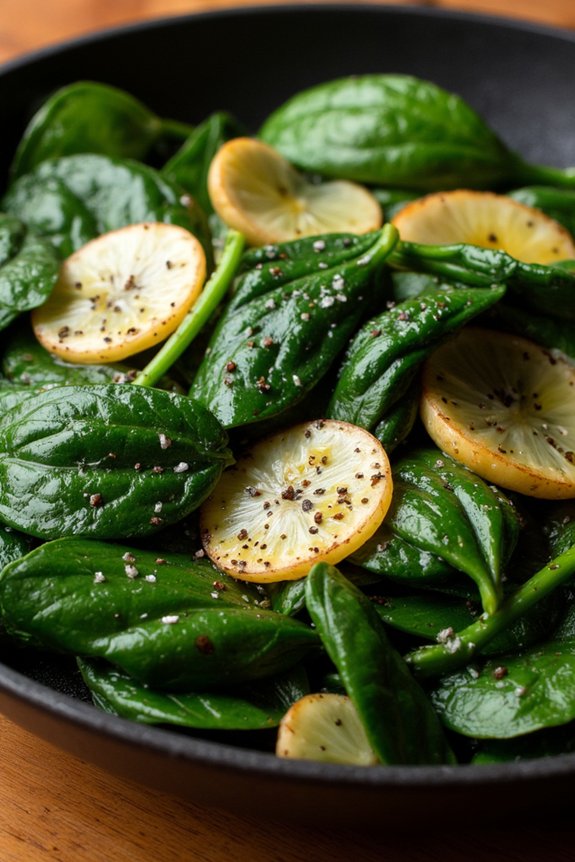
Sautéed Spinach With Garlic is a classic Italian side dish that’s both simple to make and bursting with flavor. This dish combines the earthy taste of fresh spinach with the rich aroma of sautéed garlic, creating a perfect accompaniment to any meal.
It’s a versatile side that complements a variety of main courses, from pasta to grilled meats, and is an excellent way to incorporate more greens into your diet. The preparation process is quick and straightforward, making it an ideal choice for both busy weeknight dinners and special occasions.
One of the key aspects of this dish is the use of fresh ingredients. Fresh spinach leaves, when cooked properly, maintain their vibrant green color and tender texture, while the garlic infuses the dish with its distinct, yet subtle aroma.
This recipe serves 4-6 people, making it perfect for a small dinner gathering or a family meal. The simplicity of the ingredients allows the natural flavors to shine through, while a touch of olive oil and a hint of seasoning elevate the dish to a new level of deliciousness.
Ingredients for 4-6 people:
- 2 tablespoons olive oil
- 3 cloves garlic, thinly sliced
- 2 pounds fresh spinach, washed and dried
- Salt, to taste
- Black pepper, to taste
- 1 tablespoon lemon juice (optional)
Cooking Instructions:
- Prepare the Ingredients: Begin by washing and thoroughly drying the spinach leaves. Thinly slice the garlic cloves and set aside. If you prefer, you can also measure out the lemon juice at this point.
- Heat the Olive Oil: In a large skillet or sauté pan, heat the olive oil over medium heat. Allow the oil to warm up, but make certain it doesn’t start to smoke.
- Sauté the Garlic: Add the thinly sliced garlic to the hot olive oil. Cook for about 1-2 minutes, stirring frequently, until the garlic becomes fragrant and begins to turn golden brown. Be careful not to burn the garlic, as this will impart a bitter taste.
- Add the Spinach: Gradually add the spinach to the pan. You may need to do this in batches, allowing some of the spinach to wilt before adding more. Stir continuously to guarantee even cooking.
- Season the Spinach: Once all the spinach is in the pan and has wilted, season it with salt and black pepper to taste. Stir well to distribute the seasoning evenly.
- Finish the Dish: If desired, drizzle the lemon juice over the sautéed spinach for a zesty finish. Stir to combine, then remove the pan from heat.
- Serve Immediately: Transfer the sautéed spinach with garlic to a serving dish and serve immediately while hot. This dish is best enjoyed fresh.
Extra Tips:
For the best results, use fresh spinach rather than frozen, as it has a better texture and flavor. Make sure to dry the spinach thoroughly after washing to avoid excess moisture, which can cause the spinach to steam rather than sauté.
If you prefer a bit of heat, consider adding a pinch of red pepper flakes along with the garlic. For an added touch of flavor, consider garnishing the dish with freshly grated Parmesan cheese or toasted pine nuts just before serving.
Marinated Artichokes and Olives
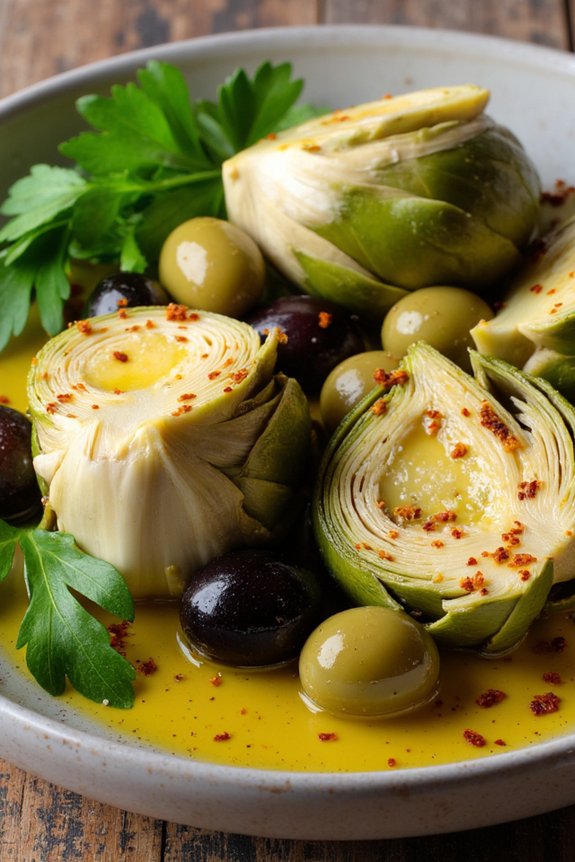
Marinated Artichokes and Olives is a classic Italian side dish that brings together the distinctive flavors and textures of tender artichokes and briny olives. This dish is perfect for serving alongside grilled meats, fish, or as part of an antipasto platter. The tangy and herbaceous marinade infuses the vegetables with a depth of flavor that’s both invigorating and satisfying.
Easy to prepare ahead of time, this dish allows the flavors to meld together beautifully, making it an ideal option for entertaining or a casual family meal.
The key to a successful Marinated Artichokes and Olives dish lies in selecting high-quality ingredients. Opt for fresh or well-preserved artichokes and a mix of green and black olives for a balanced taste profile. The marinade, made with olive oil, vinegar, and a blend of Italian herbs, elevates the dish with its aromatic complexity.
While this side dish can be enjoyed immediately after preparation, allowing it to marinate for a few hours or overnight will enhance its flavor.
Ingredients (Serves 4-6):
- 2 cans (14 oz each) of artichoke hearts, drained and quartered
- 1 cup mixed green and black olives, pitted
- 1/4 cup extra virgin olive oil
- 2 tablespoons red wine vinegar
- 1 tablespoon lemon juice
- 2 cloves garlic, minced
- 1 teaspoon dried oregano
- 1 teaspoon dried thyme
- 1/4 teaspoon red pepper flakes (optional)
- Salt and freshly ground black pepper, to taste
- 2 tablespoons fresh parsley, chopped
Instructions:
- Prepare the Artichokes and Olives: Begin by thoroughly draining the canned artichoke hearts. Pat them dry with a paper towel to remove any excess moisture. Place the artichoke quarters in a large mixing bowl along with the mixed olives.
- Make the Marinade: In a separate bowl, whisk together the olive oil, red wine vinegar, lemon juice, and minced garlic until well combined. Add in the dried oregano, dried thyme, red pepper flakes (if using), salt, and freshly ground black pepper. Stir to combine all the ingredients.
- Combine and Marinate: Pour the marinade over the artichokes and olives in the mixing bowl. Toss gently to guarantee that the vegetables are evenly coated with the marinade. Cover the bowl with plastic wrap or transfer the mixture to an airtight container.
- Marinate and Chill: Place the marinated artichokes and olives in the refrigerator for at least 2 hours, preferably overnight. This allows the flavors to meld and intensify.
- Serve: Before serving, allow the dish to come to room temperature for about 20 minutes. Sprinkle with freshly chopped parsley for a burst of color and freshness. Serve as a side dish or part of an antipasto platter.
Extra Tips:
When selecting olives, consider using a blend of your favorite varieties, such as Kalamata or Castelvetrano, to add different textures and flavors to the dish.
If you prefer fresh artichokes over canned, prepare them by trimming and steaming until tender before marinating. For an added layer of flavor, you can include a tablespoon of capers in the marinade.
Adjust the seasoning according to your taste preference, and feel free to experiment with different herbs like basil or rosemary for a unique twist.
Italian-Style Green Beans
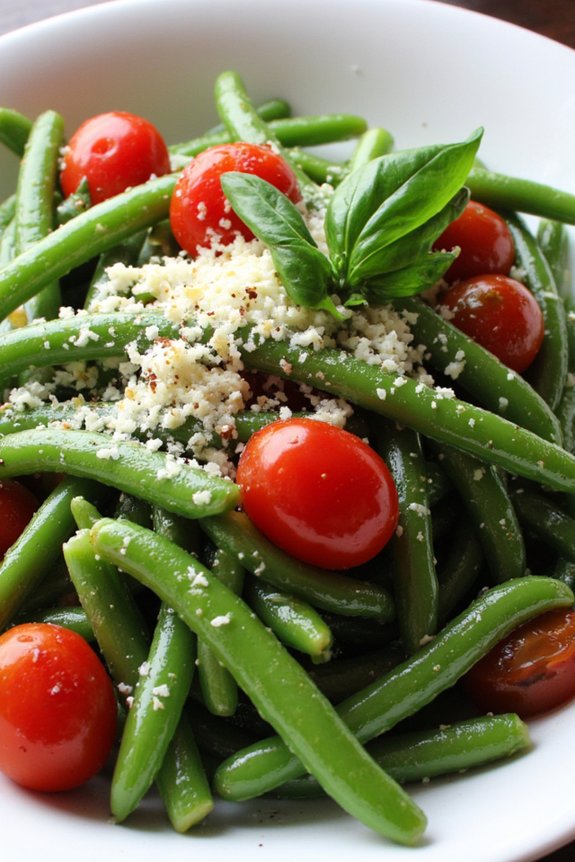
Transport your taste buds to Italy with this delicious and easy-to-make side dish of Italian-Style Green Beans. This recipe combines the vibrant flavors of fresh green beans with the aromatic notes of garlic, olive oil, and tomatoes. Perfect as a side dish for pasta, chicken, or fish, these green beans are sure to be a hit at your next dinner party or family gathering.
The simplicity of this dish allows the natural flavors of the ingredients to shine, making it a healthy and flavorful addition to any meal. Using fresh ingredients is key to achieving the best flavor in this dish. The green beans should be crisp and bright green, and the tomatoes should be ripe and juicy.
The use of extra virgin olive oil enhances the dish’s rich and robust character, while a sprinkle of Parmesan cheese adds a creamy and nutty finish. This recipe serves 4-6 people, making it ideal for both small and larger gatherings.
Ingredients:
- 1 pound fresh green beans, trimmed
- 2 tablespoons extra virgin olive oil
- 3 cloves garlic, minced
- 1 cup cherry tomatoes, halved
- 1/4 teaspoon red pepper flakes
- Salt and freshly ground black pepper to taste
- 1/4 cup grated Parmesan cheese
- 2 tablespoons freshly chopped basil or parsley
Cooking Instructions:
- Prepare the Green Beans: Begin by washing the green beans thoroughly in cold water. Trim the ends, and if desired, cut them into smaller, bite-sized pieces.
- Blanch the Green Beans: Bring a large pot of salted water to a boil. Add the green beans and blanch them for about 3-4 minutes until they’re tender yet still crisp. Drain the beans and immediately transfer them to a bowl of ice water to stop the cooking process. Drain again and set aside.
- Cook the Aromatics: In a large skillet, heat the olive oil over medium heat. Add the minced garlic and sauté for about 1 minute until it becomes fragrant, being careful not to let it burn.
- Add Tomatoes and Seasonings: Add the halved cherry tomatoes to the skillet along with the red pepper flakes. Cook for 3-4 minutes until the tomatoes begin to soften and release their juices.
- Combine with Green Beans: Add the blanched green beans to the skillet, tossing them gently with the tomato mixture. Season with salt and freshly ground black pepper to taste. Cook for an additional 2-3 minutes until the beans are heated through.
- Finish with Cheese and Herbs: Remove the skillet from the heat and sprinkle the grated Parmesan cheese over the green beans. Garnish with freshly chopped basil or parsley before serving.
Extra Tips:
When cooking Italian-Style Green Beans, consider using a high-quality extra virgin olive oil for the best flavor. If you prefer a spicier dish, increase the amount of red pepper flakes.
To save time, you can prepare the green beans and tomatoes in advance and store them in the refrigerator until you’re ready to cook. For an added depth of flavor, consider adding a splash of balsamic vinegar or a squeeze of fresh lemon juice just before serving.
Enjoy this versatile side dish warm or at room temperature, making it perfect for any occasion.
Lemon and Herb Risotto
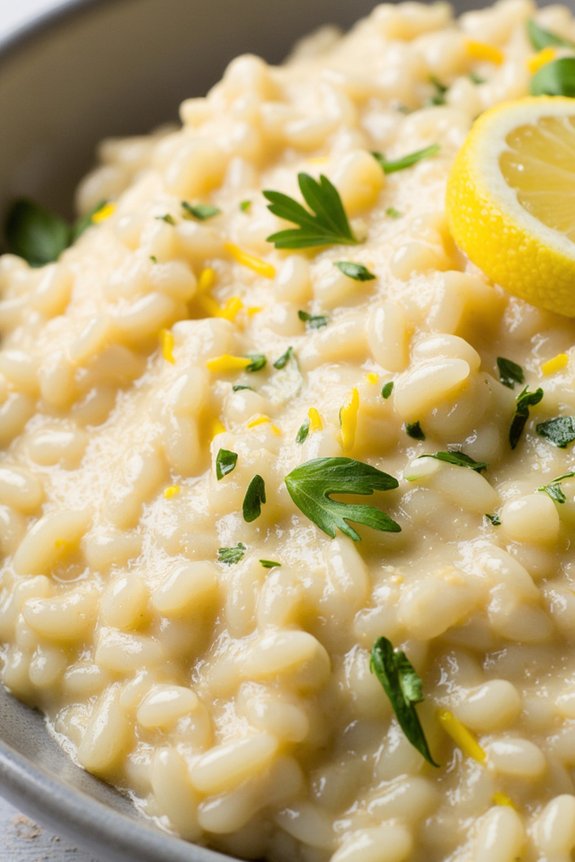
Lemon and Herb Risotto is a creamy and flavorful Italian side dish that perfectly complements a variety of main courses. This dish is known for its rich texture, bright lemony notes, and aromatic herbs that enhance the natural creaminess of the Arborio rice. It’s an ideal choice for both casual dinners and special occasions, offering a sophisticated yet comforting addition to your meal.
Preparing Lemon and Herb Risotto involves a gentle and attentive cooking process that allows the rice to absorb the flavors gradually. By adding chicken or vegetable broth incrementally, the rice becomes tender yet retains its slight bite, which is characteristic of a well-made risotto. The final touch of lemon zest and fresh herbs such as parsley, thyme, and basil adds a rejuvenating and vibrant finish to this delightful dish.
Ingredients (Serves 4-6):
- 2 tablespoons olive oil
- 1 small onion, finely chopped
- 2 cloves garlic, minced
- 1 ½ cups Arborio rice
- ½ cup dry white wine
- 4 cups chicken or vegetable broth, warmed
- Zest of 1 lemon
- ¼ cup freshly squeezed lemon juice
- ½ cup grated Parmesan cheese
- 2 tablespoons unsalted butter
- 2 tablespoons chopped fresh parsley
- 1 tablespoon chopped fresh thyme
- Salt and freshly ground black pepper to taste
Cooking Instructions:
- Prepare the Aromatics: In a large pan over medium heat, add olive oil. Once hot, add the finely chopped onion and sauté until translucent, about 3-4 minutes. Add the minced garlic and cook for another minute until fragrant.
- Toast the Rice: Stir in the Arborio rice and toast it for about 2 minutes, making sure all grains are well-coated with oil. This helps to release the starches that give risotto its creamy texture.
- Deglaze with Wine: Pour in the white wine and cook, stirring frequently, until the wine is mostly absorbed by the rice.
- Add Broth Gradually: Begin adding the warmed broth, a ladleful at a time, stirring frequently. Allow each addition of broth to be absorbed before adding the next. This process should take about 18-20 minutes, with the rice becoming creamy and tender.
- Incorporate Lemon and Cheese: Once the rice is al dente, stir in the lemon zest, lemon juice, Parmesan cheese, and butter. Mix well until the cheese and butter are melted and fully incorporated.
- Season and Serve: Season the risotto with salt and freshly ground black pepper to taste. Stir in the chopped parsley and thyme, reserving a bit for garnish. Serve immediately, garnished with the remaining herbs.
Extra Tips:
When making risotto, it’s important to use a wide, heavy-bottomed pan to ensure even cooking of the rice. Keep the broth warm throughout the cooking process to maintain a consistent temperature, which helps the rice absorb the liquid more efficiently.
Adjust the seasoning to your preference, and feel free to experiment with different herbs to suit your taste. Remember, the key to creamy risotto is patience and constant stirring, allowing the rice to slowly release its starches. Enjoy your Lemon and Herb Risotto as a delightful accompaniment to your favorite Italian entrées!
Grilled Asparagus With Lemon Zest
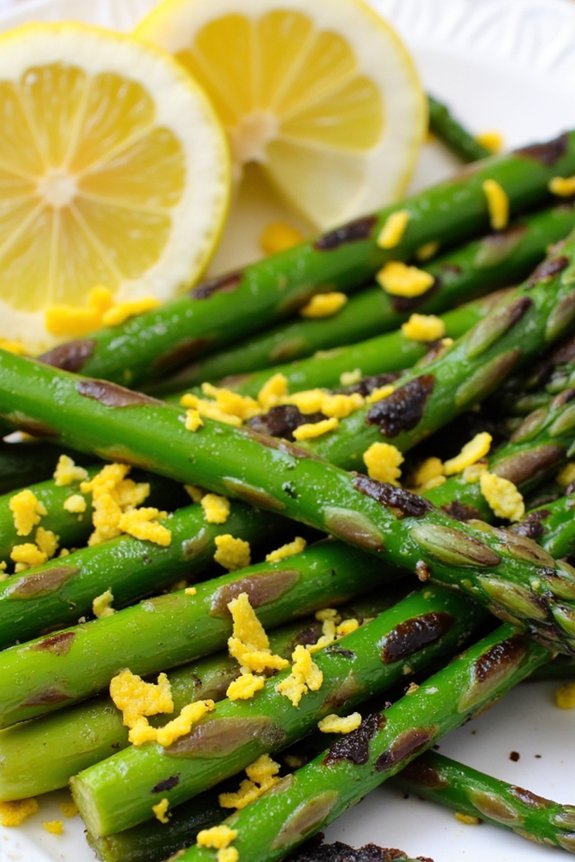
Grilled Asparagus With Lemon Zest is a delightful Italian side dish that perfectly complements a variety of main courses, adding a vibrant and zesty flavor to your meal. The marriage of fresh asparagus with the bright notes of lemon zest creates a rejuvenating and savory experience for your taste buds.
This dish isn’t only quick and easy to prepare, but it also brings a touch of elegance to your dining table with its simple yet sophisticated flavors.
The beauty of this dish lies in its simplicity and the quality of ingredients used. Selecting fresh, firm asparagus and a juicy lemon will make all the difference in the final outcome. Grilling the asparagus brings out its natural sweetness, while the lemon zest adds a burst of citrusy refreshment.
This recipe is perfect for a serving size of 4-6 people, making it an excellent choice for family gatherings or intimate dinner parties.
Ingredients for Grilled Asparagus With Lemon Zest:
- 2 pounds of fresh asparagus, trimmed
- 2 tablespoons of olive oil
- 1 lemon, zested
- Salt, to taste
- Black pepper, to taste
- Optional: 1 tablespoon of grated Parmesan cheese
Cooking Instructions:
- Prepare the Asparagus: Rinse the asparagus under cold water and trim the tough ends. You can do this by bending each spear until it snaps naturally, which usually happens at the point where the tender part meets the woody end.
- Season the Asparagus: In a large bowl, toss the trimmed asparagus with olive oil, making sure each spear is well-coated. Sprinkle salt and black pepper according to your taste preferences.
- Preheat the Grill: Heat your grill to medium-high temperature. If using a stovetop grill pan, preheat it over medium-high heat as well.
- Grill the Asparagus: Place the asparagus spears on the grill in a single layer. Cook for about 4-6 minutes, turning occasionally, until they’re tender and have nice grill marks. The asparagus should be crisp-tender and vibrant green.
- Add the Zest: Once the asparagus is grilled to perfection, remove it from the heat and transfer it to a serving platter. Immediately sprinkle the lemon zest over the hot asparagus, allowing the heat to release the zest’s aromatic oils.
- Serve and Garnish: Optional – for an added touch of flavor, sprinkle the grilled asparagus with grated Parmesan cheese. Serve immediately while warm.
Extra Tips: For the best results, choose asparagus spears that are uniform in thickness to guarantee even cooking. If you’re using a charcoal grill, make certain the coals are white-hot before placing the asparagus on the grill for that perfect char.
You can also experiment by adding a pinch of red pepper flakes for a hint of heat. If you prefer a more intense lemon flavor, consider adding a squeeze of fresh lemon juice just before serving.
This dish can be served hot or at room temperature, making it a versatile addition to any meal.
Balsamic Glazed Roasted Vegetables
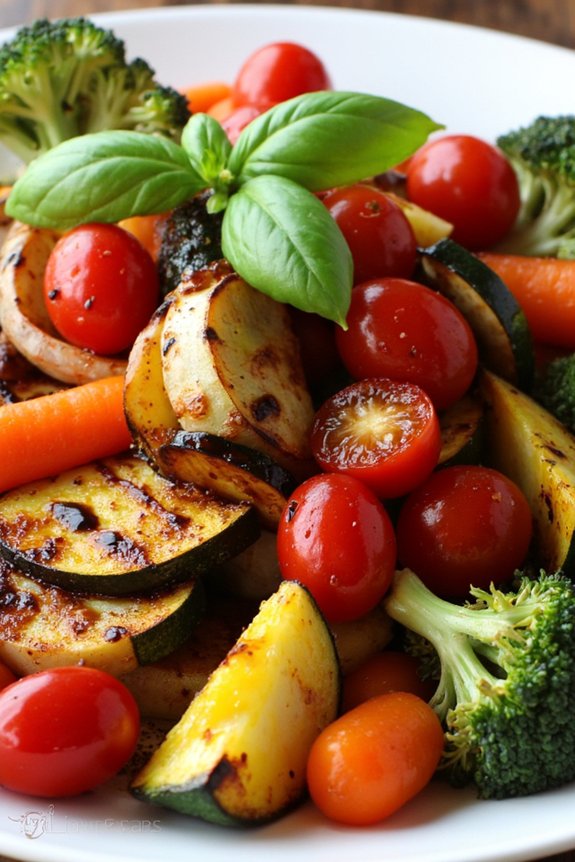
Balsamic Glazed Roasted Vegetables is a delicious and vibrant Italian side dish that complements any meal with its rich flavors and colorful presentation. This dish brings together a medley of seasonal vegetables, each lovingly roasted to perfection, and then drizzled with a sweet and tangy balsamic glaze. The roasting process enhances the natural sweetness of the vegetables while the balsamic glaze adds a depth of flavor that’s simply irresistible.
Whether you’re serving it alongside a hearty pasta dish or a succulent roast, this side will certainly steal the spotlight at your dining table. Ideal for family gatherings or a cozy dinner at home, this recipe isn’t only tasty but also incredibly easy to prepare. It requires minimal effort and delivers maximum flavor, making it a go-to option for both busy weeknights and leisurely weekend meals.
With its combination of vibrant colors and enticing aromas, Balsamic Glazed Roasted Vegetables are sure to impress your guests and satisfy your taste buds. Whether you’re a novice cook or a seasoned chef, this dish is a delightful way to incorporate more vegetables into your diet while enjoying the classic taste of Italian cuisine.
Ingredients (Serves 4-6):
- 2 cups cherry tomatoes
- 1 zucchini, sliced into half-moons
- 1 yellow bell pepper, chopped
- 1 red onion, cut into wedges
- 1 cup baby carrots
- 2 cups broccoli florets
- 3 tablespoons olive oil
- Salt and pepper to taste
- 1/3 cup balsamic vinegar
- 2 tablespoons honey
- 2 garlic cloves, minced
- 1 teaspoon dried oregano
- Fresh basil leaves for garnish
Cooking Instructions:
- Preheat the Oven: Start by preheating your oven to 400°F (200°C). This temperature is ideal for roasting vegetables, making sure they become tender and caramelized without burning.
- Prepare the Vegetables: Wash and prepare all the vegetables. Slice the zucchini into half-moons, chop the bell pepper, and cut the onion into wedges. Keep the cherry tomatoes and baby carrots whole, and separate the broccoli into florets.
- Season the Vegetables: Place all the prepared vegetables onto a large baking sheet. Drizzle with olive oil, and sprinkle with salt, pepper, and dried oregano. Toss everything together until the vegetables are evenly coated.
- Roast the Vegetables: Spread the vegetables out in a single layer on the baking sheet. Roast in the preheated oven for about 25-30 minutes, or until the vegetables are tender and slightly caramelized, stirring halfway through cooking to promote even roasting.
- Make the Balsamic Glaze: While the vegetables are roasting, prepare the balsamic glaze. In a small saucepan over medium heat, combine the balsamic vinegar, honey, and minced garlic. Stir the mixture and bring it to a simmer. Continue to simmer for about 5 minutes, or until the glaze has reduced and thickened slightly.
- Combine and Serve: Once the vegetables are done roasting, remove them from the oven and transfer to a serving dish. Drizzle the balsamic glaze over the top. Toss gently to combine, allowing the glaze to coat all the vegetables. Garnish with fresh basil leaves before serving.
Extra Tips:
When making Balsamic Glazed Roasted Vegetables, consider the size of your vegetable pieces for even roasting; larger pieces may require more time. Feel free to substitute or add other vegetables based on your preference or what’s in season, such as asparagus or butternut squash.
To avoid overcrowding the baking sheet, which can lead to steaming rather than roasting, you may need to use two baking sheets if needed. Additionally, if you prefer a more subtle glaze, reduce the amount of honey to adjust the sweetness to your liking.
Finally, for an extra burst of flavor, consider adding a sprinkle of Parmesan cheese before serving.
Cheesy Garlic Bread

Cheesy Garlic Bread is a timeless Italian side dish that perfectly complements any meal, especially pasta dishes. Its crispy, golden crust paired with a gooey, cheesy topping infused with the rich flavors of garlic and herbs makes it an irresistible treat.
Whether you’re hosting a dinner party or looking for a comforting addition to your weeknight dinner, this recipe is sure to be a crowd-pleaser. The combination of melted cheese and aromatic garlic butter on freshly baked bread creates a delightful harmony of flavors and textures.
To guarantee your Cheesy Garlic Bread is a standout, it’s important to use high-quality ingredients. A good quality Italian or French loaf provides the ideal base with its firm texture and light, airy crumb.
The garlic butter, made with fresh garlic, butter, and herbs, should be generously spread across the bread to allow the flavors to seep in as it bakes. Finally, the choice of cheese is vital; a blend of mozzarella and Parmesan offers both creaminess and a hint of sharpness.
This recipe serves 4-6 people and promises to be a highlight of your meal.
Ingredients:
- 1 loaf of Italian or French bread
- 1/2 cup (1 stick) unsalted butter, softened
- 4 cloves garlic, minced
- 2 tablespoons fresh parsley, chopped
- 1/2 teaspoon salt
- 1/4 teaspoon black pepper
- 1 cup shredded mozzarella cheese
- 1/4 cup grated Parmesan cheese
Cooking Instructions:
- Preheat the Oven: Preheat your oven to 375°F (190°C). This will guarantee that the bread bakes evenly and achieves a crispy crust.
- Prepare the Garlic Butter: In a small bowl, combine the softened butter, minced garlic, chopped parsley, salt, and black pepper. Mix thoroughly until all ingredients are well incorporated.
- Slice the Bread: Slice the loaf of bread in half horizontally, creating two long halves. Place them cut side up on a baking sheet lined with parchment paper.
- Spread the Garlic Butter: Generously spread the garlic butter mixture over each half of the bread, guaranteeing an even coating across the surface. This will infuse the bread with rich, garlicky flavor as it bakes.
- Add the Cheese: Sprinkle the shredded mozzarella evenly over the top of the buttered bread halves. Follow with a dusting of grated Parmesan for an extra layer of flavor.
- Bake the Bread: Place the baking sheet in the preheated oven and bake for about 10-12 minutes, or until the cheese is melted and bubbly, and the edges of the bread are golden brown.
- Broil for Crispiness: For an extra crispy top, switch the oven to broil mode for an additional 1-2 minutes. Keep a close eye to prevent burning.
- Serve: Remove the bread from the oven and let it cool for a minute or two. Slice into pieces and serve warm alongside your favorite main dish.
Extra Tips:
When making Cheesy Garlic Bread, consider using a serrated knife for slicing the bread to maintain its shape and prevent squishing.
If you prefer a spicier kick, add a pinch of red pepper flakes to the garlic butter mixture. For a more robust flavor, experiment with different cheese combinations such as adding cheddar or provolone.
Leftover garlic bread can be stored in an airtight container and reheated in the oven for a quick snack or side dish. Enjoy this cheesy delight as a perfect accompaniment to your Italian meal!
Zucchini Fritters With Marinara Sauce

Zucchini fritters with marinara sauce are a delightful Italian side dish that brings together the fresh flavors of zucchini and the rich, robust taste of marinara sauce. These fritters are crispy on the outside and tender on the inside, making them a perfect complement to any main dish or a satisfying appetizer on their own.
The addition of marinara sauce adds a tangy and savory element that enhances the overall taste, offering a delicious contrast to the mild, slightly sweet flavor of the zucchini.
These fritters aren’t only easy to make but also a great way to use up an abundance of zucchini, especially during peak season. The recipe uses simple ingredients that are likely already in your pantry, and it can be whipped up in under an hour.
Perfect for a family meal or a gathering with friends, zucchini fritters with marinara sauce are sure to be a hit at the table. Below, you’ll find the ingredients and step-by-step instructions to prepare this dish for 4-6 people.
Ingredients:
- 4 medium zucchinis, grated
- 1 teaspoon salt
- 1 cup all-purpose flour
- 1/4 cup grated Parmesan cheese
- 1 teaspoon baking powder
- 2 large eggs, beaten
- 2 cloves garlic, minced
- 1/4 cup chopped fresh parsley
- 1/2 teaspoon black pepper
- Olive oil, for frying
- 2 cups marinara sauce
Cooking Instructions:
- Prepare the Zucchini: Begin by grating the zucchinis into a large bowl. Sprinkle the grated zucchini with 1 teaspoon of salt and let it sit for about 10 minutes. This will help draw out excess moisture.
- Squeeze Out Moisture: After 10 minutes, use a clean kitchen towel or cheesecloth to squeeze the zucchini, removing as much liquid as possible. This step is vital to guarantee the fritters aren’t soggy.
- Mix the Batter: In a separate large bowl, combine the all-purpose flour, grated Parmesan cheese, and baking powder. Add the beaten eggs, minced garlic, chopped parsley, and black pepper to the flour mixture. Stir until well combined.
- Combine Ingredients: Add the squeezed zucchini to the batter mixture and stir until all ingredients are well incorporated.
- Heat the Oil: In a large skillet, heat enough olive oil to cover the bottom over medium heat. The oil should be hot but not smoking.
- Form and Cook Fritters: Using a spoon, drop about 2 tablespoons of the zucchini mixture into the skillet, flattening slightly with the back of the spoon to form a patty. Cook in batches to avoid overcrowding the pan.
- Fry the Fritters: Cook each fritter for 3-4 minutes on each side, or until golden brown and crispy. Remove the fritters from the skillet and drain them on paper towels to remove excess oil.
- Warm the Marinara Sauce: While the fritters are cooking, heat the marinara sauce in a small saucepan over low heat until warmed through.
- Serve: Serve the zucchini fritters warm, accompanied by the marinara sauce on the side for dipping or drizzling over the top.
Extra Tips:
To guarantee your zucchini fritters are perfectly crispy, make sure to thoroughly squeeze out the moisture from the grated zucchini. If the batter seems too wet, you can add a little more flour to help bind the ingredients.
These fritters can be made ahead and reheated in the oven to retain their crispiness. For a flavor twist, consider adding a pinch of red pepper flakes to the marinara sauce for a little heat. Enjoy your delicious Italian side dish!
Italian Chopped Salad
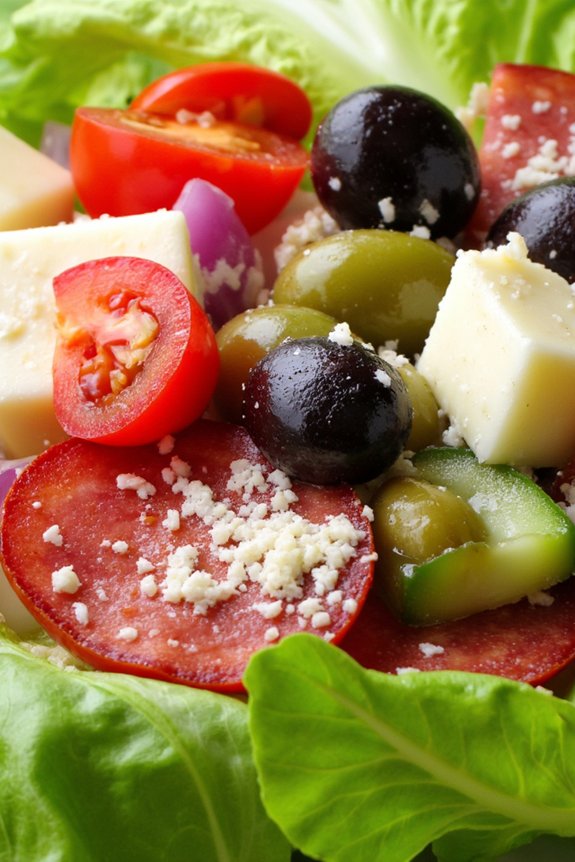
An Italian Chopped Salad is a vibrant and invigorating dish, perfect as a side for any Italian meal. It’s a medley of fresh vegetables, savory cured meats, and creamy cheese, all tossed in a tangy vinaigrette. This salad not only brings a burst of color to your table but also a variety of textures and flavors that are sure to please everyone’s palate.
Whether you’re serving it at a family dinner or a festive gathering, this Italian Chopped Salad is bound to be a hit.
The beauty of this salad lies in its flexibility and the quality of its ingredients. It’s a fantastic way to use seasonal produce and can easily be adjusted to suit your taste preferences. The combination of crisp lettuce, juicy tomatoes, crunchy cucumbers, and salty olives creates a harmonious balance, while the addition of meats like salami or prosciutto adds a satisfying richness.
Topped with a sprinkle of Parmesan cheese and a drizzle of homemade dressing, this salad is both nourishing and indulgent.
Ingredients for 4-6 Servings:
- 1 head of romaine lettuce, chopped
- 1 cup cherry tomatoes, halved
- 1 cucumber, diced
- 1 red bell pepper, diced
- 1/2 red onion, thinly sliced
- 1/2 cup black olives, sliced
- 1/2 cup green olives, sliced
- 1/2 cup salami, diced
- 1/2 cup provolone cheese, diced
- 1/4 cup grated Parmesan cheese
- 3 tablespoons red wine vinegar
- 1/4 cup extra virgin olive oil
- 1 teaspoon dried oregano
- Salt and pepper to taste
Cooking Instructions:
- Prepare the Vegetables: Begin by washing and drying all your vegetables. Chop the romaine lettuce into bite-sized pieces and place it in a large salad bowl. Halve the cherry tomatoes, dice the cucumber and red bell pepper, and thinly slice the red onion. Add these ingredients to the bowl.
- Add Olives and Meats: Slice both the black and green olives and add them to the salad. Dice the salami into small cubes and add them to the mix. This will give the salad a nice salty and savory edge.
- Include Cheese: Cube the provolone cheese and sprinkle it over the salad. Then, grate the Parmesan cheese and add it to the salad as well for an extra cheesy flavor.
- Make the Dressing: In a small bowl or a jar, combine the red wine vinegar, extra virgin olive oil, dried oregano, salt, and pepper. Whisk or shake the mixture well until emulsified.
- Dress the Salad: Pour the dressing over the salad just before serving. Toss everything together gently to guarantee the dressing coats all the ingredients evenly.
- Serve: Transfer the salad to a serving dish or serve directly from the salad bowl. Make sure each serving includes a bit of every component for a balanced flavor.
Extra Tips:
For the best results, use fresh, high-quality ingredients, as they make a significant difference in flavor. If you prefer a milder onion flavor, soak the sliced onions in ice water for about ten minutes before adding them to the salad.
Feel free to customize the salad by adding other ingredients like artichoke hearts or pepperoncini for extra zest. If you’re preparing the salad in advance, keep the dressing separate and toss it just before serving to prevent the lettuce from wilting.
This salad pairs beautifully with a variety of Italian main dishes, making it a versatile addition to your culinary repertoire.