

Italian dishes always seem to steal the spotlight at potlucks, don’t they? Their rich flavors and comforting textures have a way of drawing everyone in. Whether it’s a refreshing Caprese salad with creamy avocado or a cheesy baked ziti, these dishes never fail to warm the soul. As you plan your next gathering, look forward to the moment when your Italian creations are the first to disappear. Ready to explore these crowd-pleasers?
Classic Caprese Salad With a Twist

The Classic Caprese Salad is a timeless Italian dish known for its simplicity and vibrant flavors. This version, however, adds a delightful twist by incorporating balsamic reduction and fresh basil pesto, giving it an extra layer of depth and richness. Perfect for a potluck, this salad isn’t only a feast for the taste buds but also a visual delight with its colorful layers of fresh mozzarella, ripe tomatoes, and fragrant basil.
In this recipe, the traditional Caprese Salad is elevated with the addition of avocado slices and a sprinkle of pine nuts, providing a creamy texture and nutty flavor that complements the classic elements beautifully. This dish serves 4-6 people and is sure to be the star of your next gathering. The fresh ingredients and simple preparation make it a quick yet impressive dish that showcases the best of Italian cuisine.
Ingredients:
- 3 large ripe tomatoes, sliced
- 2 large fresh mozzarella balls, sliced
- 2 ripe avocados, sliced
- 1 cup fresh basil leaves
- 1/4 cup pine nuts
- 4 tablespoons balsamic reduction
- 4 tablespoons fresh basil pesto
- Salt and freshly ground black pepper to taste
- Extra virgin olive oil for drizzling
Instructions:
- Prepare the Ingredients: Begin by washing and slicing the tomatoes into thick rounds. Slice the mozzarella into similar-sized rounds and peel, pit, and slice the avocados.
- Layer the Salad: On a large serving platter, arrange the tomato slices, mozzarella slices, and avocado slices in an alternating pattern. Confirm that the slices slightly overlap each other for a visually appealing presentation.
- Add the Basil: Tuck fresh basil leaves between the layers of tomato, mozzarella, and avocado. Scatter a few extra leaves on top for added flavor and garnish.
- Sprinkle the Pine Nuts: Lightly toast the pine nuts in a dry skillet over medium heat until golden brown. Let them cool slightly before sprinkling them over the salad.
- Drizzle with Dressings: Drizzle the balsamic reduction and fresh basil pesto over the salad. Be generous with the pesto to guarantee each bite is packed with flavor.
- Season and Serve: Finish with a drizzle of extra virgin olive oil, and season with salt and freshly ground black pepper to taste. Serve immediately or refrigerate for up to an hour before serving.
Extra Tips:
For the best flavors, use high-quality ingredients such as fresh buffalo mozzarella and vine-ripened tomatoes. You can make your own balsamic reduction by simmering balsamic vinegar until it thickens, or use store-bought for convenience.
If you prefer a spicier kick, add a pinch of red pepper flakes. This dish is highly versatile, so feel free to experiment with different herbs or add a handful of arugula for a peppery note.
Cheesy Baked Ziti
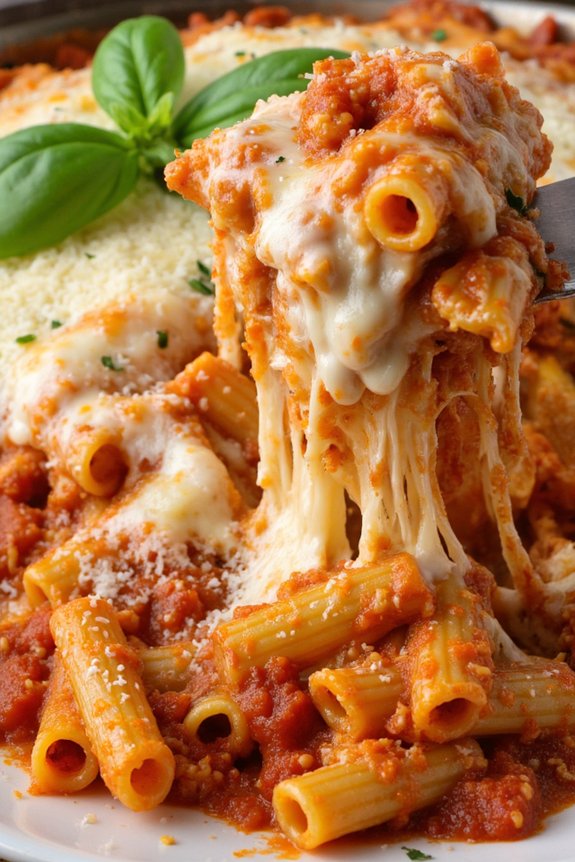
Cheesy Baked Ziti is a classic Italian-American comfort food that’s perfect for any potluck or family gathering. This hearty dish is a delightful combination of al dente pasta smothered in rich marinara sauce, layered with creamy ricotta cheese, and topped with a generous amount of gooey melted mozzarella. The dish isn’t just a feast for the taste buds but also a visual treat with its bubbling cheese and perfectly browned top.
Whether you’re preparing for a weeknight dinner or a festive celebration, Cheesy Baked Ziti is a reliable crowd-pleaser that’s both easy to prepare and satisfying to eat.
The beauty of this dish lies in its simplicity and the harmonious blend of flavors. The creamy ricotta balances the tangy marinara, while the mozzarella adds a delightful cheesy pull with every bite. This dish can be prepared ahead of time and baked when ready to serve, making it a convenient choice for busy hosts.
With just a few ingredients and minimal effort, you can whip up a delicious and fulfilling meal that feels like a warm hug. Follow these instructions to make a serving size that caters to 4-6 people.
Ingredients:
- 1 pound of ziti pasta
- 24 ounces of marinara sauce
- 1 cup of ricotta cheese
- 2 cups of shredded mozzarella cheese
- 1/2 cup of grated Parmesan cheese
- 1 tablespoon of olive oil
- 2 cloves of garlic, minced
- 1 teaspoon of dried oregano
- 1 teaspoon of dried basil
- Salt and pepper to taste
- Fresh basil for garnish (optional)
Cooking Instructions:
- Preheat and Prep: Start by preheating your oven to 375°F (190°C). Grease a 9×13 inch baking dish with olive oil to prevent the ziti from sticking.
- Cook the Pasta: In a large pot of salted boiling water, cook the ziti according to the package instructions until it’s al dente. Drain the pasta and set it aside.
- Prepare the Sauce: In a medium saucepan, heat olive oil over medium heat. Add the minced garlic and sauté until fragrant, about 1 minute. Stir in the marinara sauce, oregano, basil, salt, and pepper. Let it simmer for 5 minutes to blend the flavors.
- Mix and Layer: In a large bowl, combine the cooked ziti with the marinara sauce, making sure every piece of pasta is coated. In the prepared baking dish, spread half of the ziti mixture. Evenly dollop half of the ricotta cheese over the pasta. Sprinkle with 1 cup of mozzarella cheese and half of the Parmesan cheese. Repeat the layers with the remaining pasta, ricotta, and cheeses.
- Bake: Cover the baking dish with aluminum foil and bake in the preheated oven for 20 minutes. Remove the foil and bake for an additional 10-15 minutes, or until the cheese is melted and slightly browned.
- Garnish and Serve: Once baked, remove the dish from the oven and let it cool for a few minutes. Garnish with fresh basil if desired before serving.
Extra Tips:
For a more robust flavor, consider adding cooked ground beef or sausage to the marinara sauce. You can also play around with different cheese combinations, such as incorporating provolone or fontina.
If you prefer a spicier dish, add a pinch of red pepper flakes to the sauce. Finally, for a vegetarian option, load the ziti with sautéed vegetables like spinach, mushrooms, or bell peppers.
Enjoy the versatility of Cheesy Baked Ziti and make it your own!
Italian Stuffed Bell Peppers
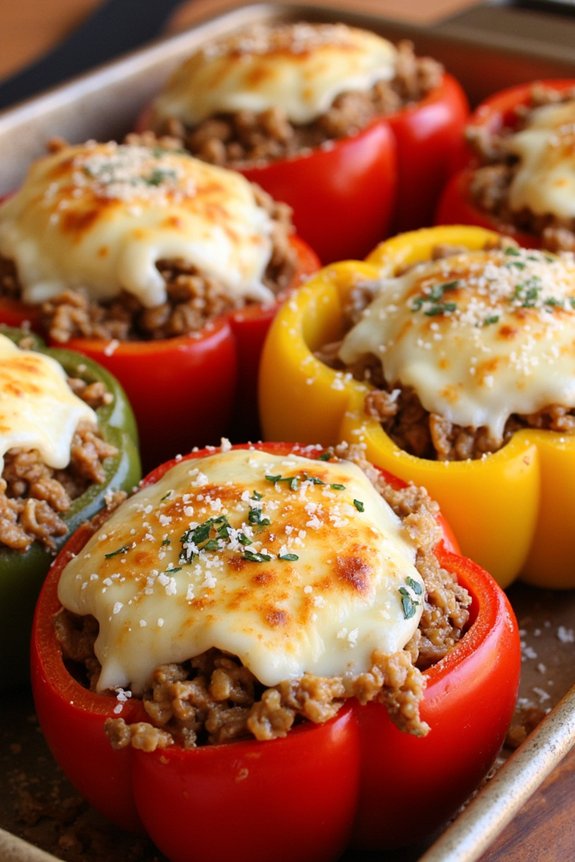
Italian Stuffed Bell Peppers are a delightful combination of vibrant bell peppers filled with a savory Italian-inspired mixture. This dish brings together the freshness of bell peppers with the richness of a hearty filling, making it perfect for a potluck or family gathering.
The filling typically includes seasoned ground meat, rice, and a medley of Italian herbs and spices, all topped with melted cheese to create a comforting yet flavorful dish. Not only is this recipe delicious, but it’s also adaptable to fit various dietary preferences. You can easily make it vegetarian by swapping the meat for a plant-based alternative or adding more vegetables.
The bright colors of the bell peppers make this dish as visually appealing as it’s tasty, guaranteeing it’s a hit at any gathering. This recipe serves 4-6 people.
Ingredients:
- 6 large bell peppers
- 1 pound ground beef (or turkey)
- 1 cup cooked rice
- 1 medium onion, diced
- 2 cloves garlic, minced
- 1 cup marinara sauce
- 1 teaspoon dried oregano
- 1 teaspoon dried basil
- 1/2 teaspoon salt
- 1/4 teaspoon black pepper
- 1 cup shredded mozzarella cheese
- 1/4 cup grated Parmesan cheese
- 2 tablespoons olive oil
Instructions:
- Preheat the Oven: Preheat your oven to 375°F (190°C) to guarantee it’s ready for baking the stuffed peppers.
- Prepare the Peppers: Cut the tops off the bell peppers and remove the seeds and membranes. Lightly brush the outside of the peppers with olive oil and place them upright in a baking dish.
- Cook the Filling: Heat olive oil in a large skillet over medium heat. Add the diced onion and minced garlic, sautéing until the onion is translucent. Add the ground beef, cooking until it’s browned and cooked through. Drain any excess fat.
- Mix the Filling: In a large bowl, combine the cooked meat mixture with the cooked rice, marinara sauce, oregano, basil, salt, and black pepper. Stir until well combined.
- Stuff the Peppers: Spoon the filling evenly into each prepared bell pepper, pressing down slightly to pack it in. Top each pepper with a generous amount of shredded mozzarella cheese.
- Bake the Peppers: Cover the baking dish with aluminum foil and bake in the preheated oven for 25 minutes. Remove the foil and sprinkle grated Parmesan cheese on top of the peppers. Bake for an additional 10-15 minutes, or until the cheese is melted and bubbly.
- Serve: Allow the peppers to cool slightly before serving. Enjoy them warm as a main course or as a delicious side dish.
Extra Tips:
For a more colorful presentation, use a variety of red, yellow, and green peppers. If you prefer a little kick, consider adding a pinch of red pepper flakes to the filling.
Feel free to experiment with different cheeses such as provolone or fontina for a unique flavor. If you’re making this dish ahead of time, you can assemble the peppers and refrigerate them before baking. Simply add a few extra minutes to the baking time to guarantee they’re heated through.
Creamy Pesto Pasta Salad
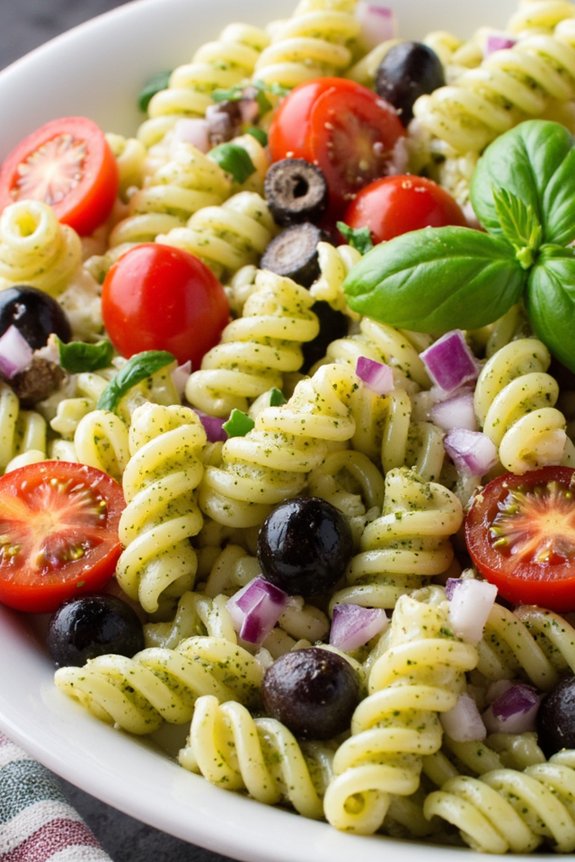
Looking for a dish that combines the fresh flavors of Italy with a creamy twist? This Creamy Pesto Pasta Salad is the perfect addition to any potluck or gathering.
It’s a delightful blend of al dente pasta, vibrant pesto, and a silky creaminess that envelops each bite. The addition of colorful vegetables not only adds to the visual appeal but also provides a revitalizing crunch, making it a wholesome dish that’s sure to impress.
The beauty of this pasta salad lies in its simplicity and versatility. Whether you’re serving it as a side dish or a main course, it pairs wonderfully with a variety of proteins or stands alone as a vegetarian delight.
The ingredients are easy to find and the preparation is straightforward, ensuring you spend less time in the kitchen and more time enjoying your meal. Serve it chilled for a revitalizing taste or at room temperature for more intense flavors.
Ingredients (Serves 4-6):
- 12 oz (340g) rotini or fusilli pasta
- 1 cup (240ml) store-bought or homemade pesto
- 1/2 cup (120ml) mayonnaise
- 1/2 cup (120ml) sour cream
- 1/4 cup (60ml) grated Parmesan cheese
- 1 cup cherry tomatoes, halved
- 1/2 cup black olives, sliced
- 1/2 cup red bell pepper, diced
- 1/4 cup red onion, finely chopped
- Salt and pepper to taste
- Fresh basil leaves for garnish (optional)
Instructions:
- Cook the Pasta: Begin by bringing a large pot of salted water to a boil. Add the rotini pasta and cook according to the package instructions until al dente. Drain the pasta and rinse it under cold water to stop the cooking process and cool it down for the salad.
- Prepare the Creamy Dressing: In a large mixing bowl, combine the pesto, mayonnaise, sour cream, and grated Parmesan cheese. Stir until well-blended and smooth. This will form the creamy base for your pasta salad.
- Mix the Ingredients: Add the cooked and cooled pasta to the bowl with the creamy pesto dressing. Toss to coat the pasta evenly. Next, add the cherry tomatoes, black olives, red bell pepper, and red onion. Gently fold the ingredients together until everything is well combined.
- Season and Serve: Taste the pasta salad and season with salt and pepper as needed. Transfer to a serving dish and garnish with fresh basil leaves if desired. Chill in the refrigerator for at least 30 minutes before serving to enhance the flavors.
Extra Tips:
For a more robust flavor, consider making your own pesto using fresh basil, garlic, pine nuts, Parmesan cheese, and olive oil.
If you prefer a lighter version, substitute Greek yogurt for sour cream. Feel free to customize the salad by adding grilled chicken, shrimp, or even mozzarella balls for added protein and texture.
If preparing in advance, store the pasta salad in an airtight container in the refrigerator for up to two days, but reserve some dressing to refresh it up just before serving.
Easy Margherita Flatbread

Easy Margherita Flatbread is a delightful and straightforward dish that brings the classic flavors of a Margherita pizza to a lighter, more casual format. Ideal for potlucks, this flatbread is quick to prepare, making it a perfect option when you need something delicious without the hassle. The combination of fresh tomatoes, mozzarella, and basil on a crispy flatbread base creates a burst of flavor that will impress your guests.
Whether you’re hosting or contributing to a gathering, this dish offers a taste of Italy that’s both satisfying and easy to share.
The beauty of the Easy Margherita Flatbread lies in its simplicity and the quality of its ingredients. The fresh basil leaves add an aromatic touch, while the ripe tomatoes provide a juicy contrast to the creamy mozzarella. The flatbread serves as the perfect canvas, allowing the ingredients to shine without overpowering their natural flavors.
With just a few easy steps, you can create a dish that’s both visually appealing and scrumptious, making it an ideal choice for any potluck event.
Ingredients for Easy Margherita Flatbread (Serving Size: 4-6 people)
- 2 pre-made flatbreads or naan breads
- 2 cups shredded mozzarella cheese
- 2 large ripe tomatoes, thinly sliced
- 1/4 cup fresh basil leaves
- 2 tablespoons extra-virgin olive oil
- 1 teaspoon garlic powder
- Salt and freshly ground black pepper to taste
- Balsamic glaze (optional)
Cooking Instructions
- Preheat the Oven: Begin by preheating your oven to 425°F (220°C). This will guarantee that your flatbread becomes crispy and the cheese melts evenly.
- Prepare the Flatbreads: Place the flatbreads on a large baking sheet. Drizzle each flatbread with about one tablespoon of extra-virgin olive oil, spreading it evenly with a brush or your fingers.
- Season the Base: Sprinkle the garlic powder over the oiled flatbreads. This will infuse the bread with a subtle garlic flavor, enhancing the overall taste of the flatbread.
- Arrange the Toppings: Evenly distribute the sliced tomatoes over each flatbread, followed by the shredded mozzarella cheese. Confirm that the toppings are spread out to cover the entire surface of the flatbreads.
- Bake: Place the baking sheet in the preheated oven. Bake for 10-12 minutes, or until the cheese is melted and bubbly, and the edges of the flatbread are golden brown.
- Add Fresh Basil: Remove the flatbreads from the oven and immediately scatter the fresh basil leaves over the top. The residual heat will slightly wilt the basil, releasing its aroma.
- Season and Serve: Sprinkle a pinch of salt and freshly ground black pepper over the flatbreads. If desired, drizzle with balsamic glaze for added sweetness and a touch of acidity. Slice the flatbreads into pieces and serve warm.
Extra Tips
For a truly authentic taste, try using fresh mozzarella, which you can tear into pieces and distribute over the flatbread instead of shredded cheese. Additionally, confirm the tomatoes are ripe but firm to prevent the flatbread from becoming soggy.
If you prefer a more robust flavor, consider adding a sprinkle of red pepper flakes for a bit of heat. Finally, if you’re preparing this dish ahead of time, wait to add the fresh basil until just before serving to maintain its vibrant color and fresh taste.
Italian Antipasto Skewers
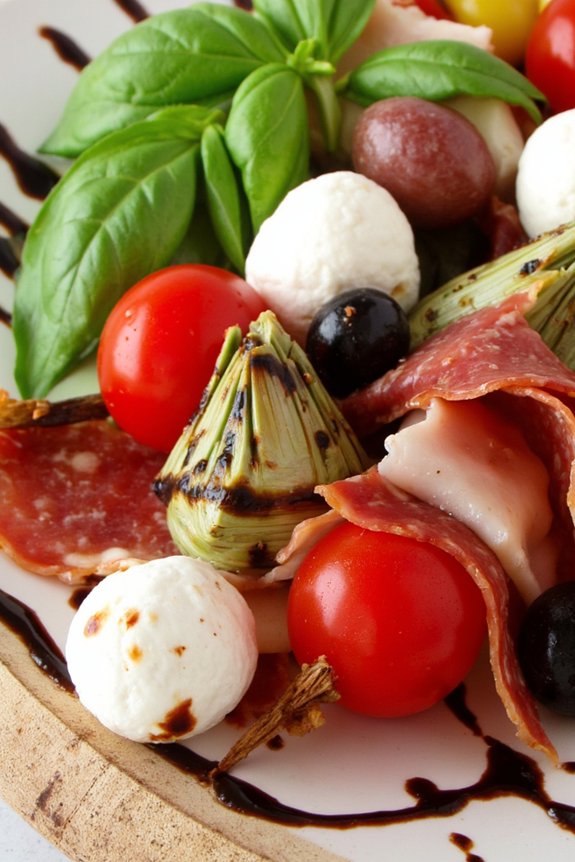
Italian Antipasto Skewers are a delightful and visually appealing appetizer perfect for any potluck. Rich in bold flavors and a variety of textures, these skewers combine the essence of a traditional Italian antipasto platter into a convenient and portable format. The combination of marinated vegetables, cured meats, and cheeses creates a symphony of flavors that perfectly complement each other, making it a hit among guests.
Not only are these skewers easy to assemble, but they’re also versatile enough to accommodate a variety of ingredients based on personal preference or availability. Creating Italian Antipasto Skewers is a great way to bring a taste of Italy to your gathering without spending hours in the kitchen. With minimal cooking required, this dish allows you to focus more on presentation and enjoying the company of your guests.
The following recipe is designed to serve 4-6 people, making it an ideal choice for small gatherings or as a part of a larger spread. Whether you’re a seasoned cook or a beginner, these skewers will impress your guests with their vibrant colors and robust flavors.
Ingredients for 4-6 servings:
- 12 cherry tomatoes
- 12 small mozzarella balls (bocconcini)
- 12 basil leaves
- 12 slices of salami or prosciutto
- 12 marinated artichoke hearts
- 12 black or green olives
- 12 skewers
- 2 tablespoons of olive oil
- 1 tablespoon of balsamic glaze
- Salt and pepper to taste
Instructions:
- Prepare the Ingredients: Begin by draining the marinated artichoke hearts and mozzarella balls. Pat them dry with a paper towel to remove excess moisture. This will help the skewers maintain their structure and prevent them from becoming soggy.
- Assemble the Skewers: Take a skewer and start by threading one cherry tomato onto it. Follow with a basil leaf, then a mozzarella ball, a slice of salami or prosciutto folded in half, an artichoke heart, and an olive. Repeat this sequence until all skewers are assembled. Make sure to leave a bit of space between each ingredient to allow for easy handling and to enhance the visual appeal.
- Season the Skewers: Once all skewers are assembled, place them on a large serving platter. Drizzle the olive oil evenly over the skewers, ensuring each component gets a slight coat. Sprinkle a pinch of salt and pepper across the skewers to enhance the flavors.
- Add the Finishing Touch: Finally, drizzle a small amount of balsamic glaze over the skewers. This will add a sweet and tangy dimension to the dish that complements the savory elements beautifully.
- Serve and Enjoy: The skewers are ready to be served immediately. Arrange them neatly on a platter and garnish with any remaining basil leaves for an added touch of freshness and color.
Extra Tips:
For an added layer of flavor, consider marinating the mozzarella balls in olive oil, garlic, and herbs for a few hours before assembling the skewers. This will infuse them with additional flavor and enhance the overall taste of the dish.
If you prefer a vegetarian option, simply omit the cured meats and add extra vegetables or a variety of cheeses. These skewers can be prepared a few hours in advance and stored in the refrigerator, making them a convenient option for potlucks. Just be sure to bring them to room temperature before serving to fully appreciate the flavors.
Savory Ricotta and Spinach Lasagna

Savory Ricotta and Spinach Lasagna is a classic Italian dish that’s perfect for a potluck. It features layers of tender pasta sheets, creamy ricotta cheese, savory spinach, and a rich tomato sauce, all topped with melted mozzarella cheese. This dish isn’t only delicious but also looks beautiful when served, making it a great centerpiece for your potluck table.
With its comforting flavors and satisfying texture, it’s a crowd-pleaser that’s sure to impress your guests. This recipe for Savory Ricotta and Spinach Lasagna serves 4-6 people, making it ideal for gatherings. The combination of fresh spinach and creamy ricotta cheese creates a delightful balance of richness and healthfulness.
The preparation process is straightforward, guaranteeing that even novice cooks can create this delicious dish with ease. Let’s plunge into the ingredients and steps to create this mouthwatering lasagna.
Ingredients:
- 9 lasagna noodles
- 1 tablespoon olive oil
- 1 medium onion, chopped
- 2 cloves garlic, minced
- 10 ounces fresh spinach
- 1 cup ricotta cheese
- 1 egg
- 1/4 cup grated Parmesan cheese
- 3 cups marinara sauce
- 2 cups shredded mozzarella cheese
- Salt and pepper to taste
Cooking Instructions:
- Prepare the Noodles: Preheat your oven to 375°F (190°C). Cook the lasagna noodles according to the package instructions until al dente. Drain and set aside.
- Make the Spinach Filling: In a large skillet, heat the olive oil over medium heat. Add the chopped onion and cook until it becomes translucent, about 5 minutes. Add the minced garlic and cook for another minute. Stir in the spinach and cook until wilted. Remove from heat and let it cool slightly.
- Mix the Ricotta: In a medium bowl, combine the ricotta cheese, egg, and Parmesan cheese. Stir in the cooled spinach mixture and season with salt and pepper to taste.
- Assemble the Lasagna: Spread a thin layer of marinara sauce on the bottom of a 9×13-inch baking dish. Place three lasagna noodles on top. Spread half of the ricotta and spinach mixture over the noodles, then add a layer of sauce and a third of the mozzarella cheese. Repeat the layers, finishing with a layer of noodles, sauce, and the remaining mozzarella cheese on top.
- Bake: Cover the dish with aluminum foil and bake in the preheated oven for 25 minutes. Remove the foil and bake for an additional 15 minutes, or until the cheese is bubbly and golden brown. Let the lasagna cool for about 10 minutes before serving.
Extra Tips:
For peak flavor, use high-quality marinara sauce or make your own if time permits. If you prefer a spicier dish, add a pinch of red pepper flakes to the spinach mixture.
To make sure the lasagna holds together well when serving, allow it to rest for a few minutes after baking. Additionally, feel free to add layers of sliced mushrooms or zucchini for added texture and flavor. Enjoy your Savory Ricotta and Spinach Lasagna!
Hearty Tuscan Bean Soup
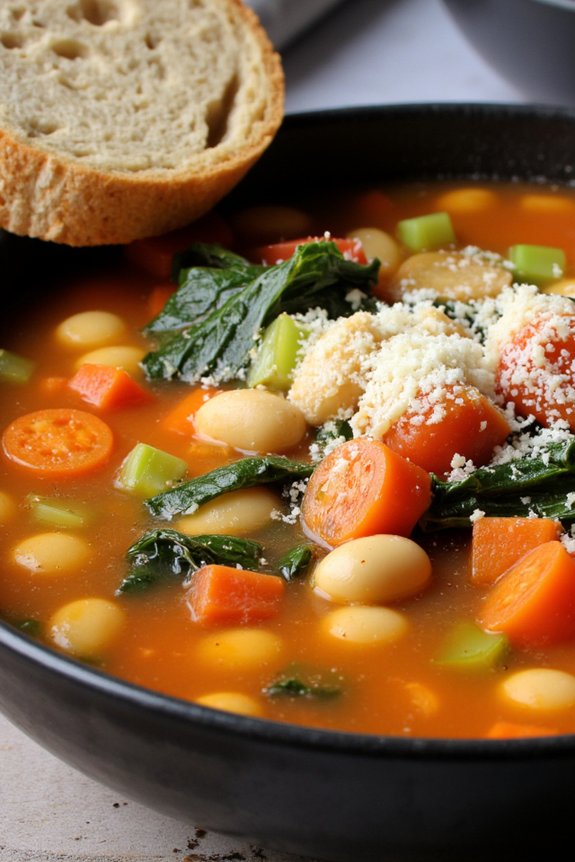
Hearty Tuscan Bean Soup is a classic Italian dish that’s perfect for potlucks or any casual gathering. This comforting soup is packed with nutritious white beans, vibrant vegetables, and aromatic herbs, creating a delightful medley of flavors that’s both filling and satisfying. It’s an excellent choice for feeding a crowd as it can be made in advance and is sure to please both vegetarians and meat-lovers alike.
Originating from the Tuscany region of Italy, this rustic soup showcases the simplicity and depth of Italian cuisine. It’s traditionally made with cannellini beans, but you can use any white beans you have on hand. The soup is hearty, with a rich broth that’s flavored with garlic, rosemary, and a hint of tomato. Serve it with crusty bread for a complete meal that’s perfect for cooler weather or whenever you need a comforting bowl of warmth.
Ingredients (Serves 4-6)
- 2 tablespoons olive oil
- 1 onion, chopped
- 2 carrots, diced
- 2 celery stalks, diced
- 3 cloves garlic, minced
- 1 teaspoon dried rosemary
- 1 teaspoon dried thyme
- 2 cups vegetable broth
- 2 cans (15 ounces each) cannellini beans, drained and rinsed
- 1 can (14.5 ounces) diced tomatoes
- 2 cups kale, chopped
- Salt and pepper to taste
- Grated Parmesan cheese for serving (optional)
- Crusty bread for serving
Cooking Instructions
- Prepare the Vegetables: Begin by heating the olive oil in a large pot over medium heat. Add the chopped onion, diced carrots, and diced celery. Sauté them for about 5 minutes until they start to soften.
- Add Garlic and Herbs: Stir in the minced garlic, rosemary, and thyme. Cook for an additional minute until the garlic is fragrant.
- Simmer the Soup: Pour in the vegetable broth, cannellini beans, and diced tomatoes. Stir everything together and bring the mixture to a gentle boil.
- Cook the Vegetables: Once boiling, reduce the heat to low, cover the pot, and let the soup simmer for about 20 minutes. This will allow all the flavors to meld together beautifully.
- Add the Kale: After 20 minutes, stir in the chopped kale. Continue to simmer the soup for another 10 minutes or until the kale is tender.
- Season the Soup: Taste the soup and season with salt and pepper according to your preference.
- Serve: Ladle the soup into bowls and top with grated Parmesan cheese if desired. Serve with slices of crusty bread on the side for dipping.
Extra Tips
For an even richer flavor, consider adding a Parmesan rind to the soup while it simmers. It will infuse the soup with a subtle cheesy depth.
If you prefer a thicker consistency, you can mash some of the beans directly in the pot using a potato masher. This will help thicken the broth naturally.
For a little heat, add a pinch of red pepper flakes when sautéing the vegetables.
This soup also stores well in the refrigerator for up to three days, making it a great option for meal prep or leftovers. Enjoy your Hearty Tuscan Bean Soup with a glass of red wine for an authentic Italian experience.
Lemon Garlic Shrimp Scampi
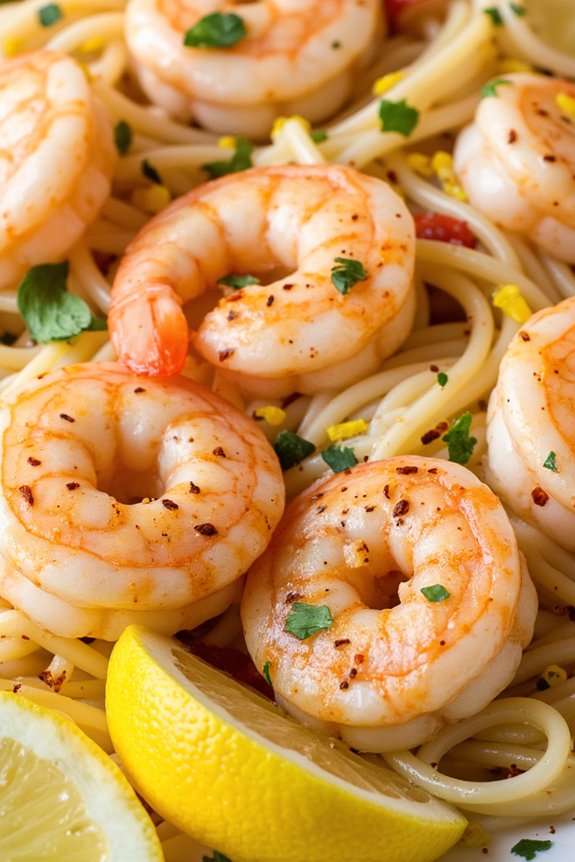
Lemon Garlic Shrimp Scampi is a delightful Italian dish that combines the rich flavors of garlic and lemon with tender shrimp, creating a perfect balance of zest and savoriness. This dish isn’t only quick and easy to prepare but also impressively elegant, making it an ideal choice for a potluck. The combination of fresh shrimp sautéed in a buttery garlic sauce, with a hint of lemon, is sure to captivate the taste buds of your guests, leaving them craving for more.
Whether served over pasta, rice, or alongside crusty bread, this dish is versatile and satisfying. The beauty of Lemon Garlic Shrimp Scampi lies in its simplicity and the fresh ingredients that make it shine. The lemon juice adds a tangy brightness that complements the richness of the butter and the aromatic garlic.
The dish comes together quickly, making it perfect for those who want to spend less time in the kitchen and more time enjoying the company of friends and family. With just a handful of ingredients and minimal preparation, you can create a restaurant-quality dish that will be the highlight of any potluck gathering.
Ingredients (Serves 4-6):
- 1 ½ pounds large shrimp, peeled and deveined
- 8 ounces linguine or spaghetti
- 3 tablespoons olive oil
- 4 tablespoons unsalted butter
- 4 cloves garlic, minced
- ½ cup dry white wine
- 1 lemon, juiced and zested
- ½ teaspoon red pepper flakes (optional)
- Salt and freshly ground black pepper, to taste
- 2 tablespoons fresh parsley, chopped
- Lemon wedges, for serving
Instructions:
- Prepare the Pasta: Begin by cooking the linguine or spaghetti according to the package instructions until al dente. Once cooked, drain the pasta and set it aside, reserving about 1 cup of the pasta water for later use.
- Sauté the Garlic: In a large skillet, heat the olive oil and 2 tablespoons of butter over medium heat. Add the minced garlic and sauté for 1-2 minutes until it becomes fragrant, being careful not to let it brown.
- Cook the Shrimp: Add the shrimp to the skillet in a single layer. Season with salt, pepper, and red pepper flakes if using. Cook for 1-2 minutes on each side until the shrimp turn pink and opaque. Remove the shrimp from the pan and set aside.
- Deglaze the Pan: Pour the white wine into the skillet, scraping up any bits from the bottom of the pan. Allow the wine to simmer for about 2 minutes until it reduces slightly.
- Combine Ingredients: Add the remaining 2 tablespoons of butter, lemon juice, and zest to the skillet, stirring to combine. Return the shrimp to the pan, along with the cooked pasta. Toss everything together, adding reserved pasta water as needed to create a light, creamy sauce.
- Finish and Serve: Stir in the chopped parsley and adjust seasoning with additional salt and pepper if needed. Transfer the Lemon Garlic Shrimp Scampi to a serving dish, garnish with lemon wedges, and serve immediately.
Extra Tips:
When making Lemon Garlic Shrimp Scampi, freshness is key. Use fresh shrimp if possible, as it will greatly enhance the dish’s flavor. If fresh shrimp isn’t available, frozen shrimp will do, but be sure to thaw them thoroughly before cooking.
For an added depth of flavor, consider using a good quality dry white wine. If wine isn’t preferred, you can substitute it with chicken broth for a non-alcoholic option. Finally, be mindful of not overcooking the shrimp, as they can become rubbery. Serve the dish immediately after preparation to enjoy its vibrant flavors at their peak.
Mini Meatball Sliders

Mini Meatball Sliders are a crowd-pleaser at any potluck or gathering. These bite-sized delights combine juicy meatballs with flavorful marinara sauce, all nestled within soft slider buns. Perfectly portioned, they’re easy to handle and allow your guests to enjoy a taste of Italy without needing utensils, making them an ideal choice for a casual get-together or a formal event alike.
The key to making these sliders irresistible lies in the balance of flavors and textures. The meatballs are seasoned to perfection, infused with Italian herbs, garlic, and Parmesan cheese, then baked to golden brown perfection. Once cooked, they’re smothered in rich marinara sauce and topped with melted mozzarella cheese. Serve these sliders warm, and watch them disappear from the serving platter in no time!
Ingredients (Serves 4-6):
- 1 pound ground beef
- 1/4 cup breadcrumbs
- 1/4 cup grated Parmesan cheese
- 1/4 cup milk
- 1 egg
- 2 cloves garlic, minced
- 1 tablespoon Italian seasoning
- Salt and pepper to taste
- 1 cup marinara sauce
- 6 slider buns
- 1 cup shredded mozzarella cheese
- 2 tablespoons olive oil
- Fresh basil leaves for garnish (optional)
Cooking Instructions:
- Preheat the Oven: Start by preheating your oven to 375°F (190°C). This guarantees that the oven is at the right temperature when you’re ready to bake the meatballs.
- Prepare the Meatball Mixture: In a large mixing bowl, combine the ground beef, breadcrumbs, Parmesan cheese, milk, egg, minced garlic, Italian seasoning, salt, and pepper. Mix everything together until well combined. Be careful not to overmix as this can make the meatballs tough.
- Shape the Meatballs: Using your hands, form small meatballs, about the size of a golf ball. This should yield approximately 18-24 meatballs.
- Bake the Meatballs: Place the meatballs on a baking sheet lined with parchment paper. Drizzle with olive oil to help them brown. Bake in the preheated oven for 20 minutes, or until they’re cooked through and golden brown.
- Heat the Marinara Sauce: While the meatballs are baking, heat the marinara sauce in a saucepan over low heat until warm.
- Assemble the Sliders: Once the meatballs are done, remove them from the oven. Cut the slider buns in half and place a spoonful of marinara sauce on the bottom half of each bun. Top with a meatball, a sprinkle of mozzarella cheese, and more marinara sauce. Place the top half of the bun on each slider.
- Melt the Cheese: Place the assembled sliders on the baking sheet. Return them to the oven for 5 minutes, or until the cheese has melted.
- Serve: Remove the sliders from the oven, garnish with fresh basil leaves if desired, and serve warm.
Extra Tips:
For extra flavor, consider adding a pinch of red pepper flakes to the marinara sauce for some heat. If you want to prepare in advance, you can make the meatballs a day ahead and refrigerate them. Just reheat before assembling the sliders.
Additionally, try using different types of cheese like provolone or fontina for a unique twist. If you have more guests, simply double the recipe to accommodate them. Enjoy your potluck with these delectable Mini Meatball Sliders!
Tiramisu Trifle Cups

Tiramisu Trifle Cups are a delightful twist on the classic Italian dessert, perfect for a potluck or any gathering. This recipe combines the rich flavors of coffee, creamy mascarpone, and delicate ladyfingers into an easy-to-serve, individual dessert. Ideal for serving 4-6 people, these trifle cups are visually appealing and can be prepared in advance, making them a convenient choice for entertaining.
The layers of coffee-soaked ladyfingers, creamy mascarpone mixture, and a dusting of cocoa powder create a harmonious blend of flavors that will delight your guests. Each cup is a delicious journey of textures and tastes, from the smooth creaminess of the mascarpone to the slight crunch of chocolate shavings on top.
This recipe allows you to enjoy all the classic flavors of tiramisu in a portable, easy-to-serve format. Plus, the individual servings mean less mess and more enjoyment for your guests as they relish their own personal dessert cup.
Ingredients (Serves 4-6):
- 1 cup strong brewed coffee, cooled
- 2 tablespoons coffee liqueur (optional)
- 1 cup mascarpone cheese
- 1 cup heavy cream
- 1/4 cup granulated sugar
- 1 teaspoon vanilla extract
- 16-18 ladyfingers
- Unsweetened cocoa powder, for dusting
- Chocolate shavings, for garnish
Instructions:
- Prepare the Coffee Mixture:
- Brew a cup of strong coffee and allow it to cool. If you like, stir in the coffee liqueur for an extra depth of flavor. Set aside.
- Make the Mascarpone Cream:
- In a large mixing bowl, combine the mascarpone cheese, heavy cream, granulated sugar, and vanilla extract. Use an electric mixer to beat the mixture until soft peaks form and the cream is smooth and thick.
- Layer the Ingredients:
- Briefly dip each ladyfinger into the coffee mixture, ensuring they’re moistened but not soggy. Break them in half if necessary to fit the cups or glasses you’re using.
- Place a layer of coffee-soaked ladyfingers at the bottom of each serving cup.
- Spoon a generous layer of the mascarpone cream over the ladyfingers.
- Repeat the Layers:
- Continue layering with another set of coffee-dipped ladyfingers followed by another layer of mascarpone cream. Depending on the size of your cups, you might’ve room for a third layer.
- Finish with Cocoa and Chill:
- Dust the top layer generously with unsweetened cocoa powder. Cover the cups with plastic wrap and refrigerate for at least 2 hours to allow the flavors to meld.
- Garnish and Serve:
- Before serving, add a sprinkle of chocolate shavings on top of each trifle cup for an elegant finish. Serve chilled and enjoy!
Extra Tips:
To enhance the flavors, consider preparing these trifle cups the night before your event. This allows the coffee and mascarpone to infuse into the ladyfingers, resulting in a more flavorful and cohesive dessert.
If you prefer a stronger coffee flavor, adjust the soaking time of the ladyfingers, but be careful not to let them become too soggy. Additionally, for a non-alcoholic version, simply omit the coffee liqueur, and the tiramisu will still be delicious.