

When I think of Italian cuisine in spring, I picture vibrant, fresh flavors that are both simple and satisfying. Picture savoring a creamy Lemon Ricotta Pasta with Peas or a savory Asparagus and Prosciutto Risotto. Each dish offers a delightful balance of taste and texture, perfect for any occasion. Ready to see how these recipes can bring the essence of Italian spring to your table? Let’s explore these culinary delights together.
Lemon Ricotta Pasta With Peas

Lemon Ricotta Pasta With Peas is a delightful Italian spring dish that brings together the fresh flavors of lemon, creamy ricotta, and sweet peas. This dish is perfect for a light yet satisfying meal, offering a burst of freshness and a creamy texture that pairs wonderfully with pasta.
The combination of ingredients not only makes it visually appealing but also guarantees that every bite is filled with vibrant taste, making it an ideal choice for a spring gathering or a casual dinner.
This recipe is incredibly easy to prepare, making it suitable for both novice and experienced cooks. The bright lemon flavor is balanced by the smoothness of ricotta cheese, while the peas add a pop of color and sweetness.
It’s a versatile dish that can be served as a main course or as a side dish alongside grilled meats or fish. Plus, it comes together in under 30 minutes, making it a quick option for weeknight dinners. This recipe serves 4-6 people.
Ingredients:
- 1 pound pasta (such as fettuccine or spaghetti)
- 1 cup ricotta cheese
- Zest and juice of 2 lemons
- 1 cup fresh or frozen peas
- 1/4 cup grated Parmesan cheese
- 2 tablespoons olive oil
- 2 cloves garlic, minced
- Salt and pepper to taste
- Fresh basil leaves, for garnish
Instructions:
- Cook the Pasta: Begin by bringing a large pot of salted water to a boil. Add the pasta and cook according to the package instructions until al dente. Reserve about 1 cup of the pasta water before draining the pasta.
- Prepare the Ricotta Mixture: While the pasta is cooking, in a large mixing bowl, combine the ricotta cheese, lemon zest, lemon juice, salt, and pepper. Stir until well combined and smooth.
- Sauté the Garlic and Peas: In a large skillet, heat the olive oil over medium heat. Add the minced garlic and sauté for about 1 minute, until fragrant. Add the peas and cook for an additional 2-3 minutes, until they’re bright green and tender.
- Combine the Ingredients: Add the cooked pasta to the skillet with the peas and garlic. Pour in the ricotta mixture and gently toss to combine everything. If the sauce seems too thick, gradually add some reserved pasta water until you reach the desired consistency.
- Finish with Cheese and Herbs: Sprinkle the grated Parmesan cheese over the pasta and toss again. Adjust the seasoning with additional salt and pepper if needed. Garnish with fresh basil leaves before serving.
Extra Tips:
For an extra burst of flavor, consider adding a pinch of red pepper flakes to the garlic and peas while sautéing. This will introduce a subtle heat that complements the creamy and lemony flavors.
If you prefer a richer dish, you can add a splash of heavy cream to the ricotta mixture. Additionally, if fresh peas aren’t available, frozen peas work perfectly fine; just be sure to thaw them before cooking.
To enhance the presentation, serve the pasta with a sprinkle of lemon zest and a few extra basil leaves on top.
Asparagus and Prosciutto Risotto

Asparagus and Prosciutto Risotto is a delightful Italian dish perfect for embracing the fresh flavors of spring. The creamy, velvety texture of the risotto pairs beautifully with the crispness of asparagus and the savory, slightly salty taste of prosciutto. This dish isn’t only a feast for the taste buds but also a visual delight with its vibrant green asparagus spears and delicate slices of prosciutto. Ideal for a dinner party or a cozy family meal, this risotto captures the essence of Italian cuisine with its simple yet sophisticated flavors.
Cooking a perfect risotto requires patience and attention to detail, as each ingredient plays a vital role in creating a harmonious dish. The risotto rice should be cooked slowly, allowing it to absorb the flavors of the broth and wine while achieving a creamy consistency without becoming mushy. Asparagus and prosciutto are added towards the end of cooking, ensuring they retain their texture and vibrant colors. This recipe will guide you through the process to create an authentic Italian risotto that will impress your family and friends.
Ingredients (Serves 4-6):
- 2 tablespoons olive oil
- 1 onion, finely chopped
- 2 cloves garlic, minced
- 1 ½ cups Arborio rice
- ½ cup dry white wine
- 4 cups chicken or vegetable broth
- 1 bunch asparagus, trimmed and cut into 1-inch pieces
- 4 ounces prosciutto, thinly sliced
- ½ cup grated Parmesan cheese
- 2 tablespoons unsalted butter
- Salt and pepper to taste
- Fresh parsley, chopped (optional, for garnish)
Instructions:
- Prepare the Broth: In a saucepan, heat the chicken or vegetable broth over medium heat until it’s hot but not boiling. Keep it warm on a low simmer as you’ll need it throughout the risotto cooking process.
- Sauté Aromatics: In a large pan, heat the olive oil over medium heat. Add the finely chopped onion and cook until it becomes translucent, about 3-4 minutes. Stir in the minced garlic and cook for another minute until fragrant.
- Toast the Rice: Add the Arborio rice to the pan and stir well to coat the rice with the oil. Cook for about 2-3 minutes until the edges of the rice grains appear translucent.
- Deglaze with Wine: Pour in the white wine and stir continuously until the wine has mostly evaporated, allowing the rice to absorb the flavors.
- Add Broth Gradually: Begin adding the warm broth, one ladle at a time, stirring frequently. Wait until each ladleful of broth is almost absorbed before adding the next. This process should take about 18-20 minutes.
- Cook the Asparagus: When the rice is about halfway cooked, approximately 10 minutes into adding the broth, stir in the asparagus pieces. Continue adding broth and stirring until the rice is creamy and cooked to al dente.
- Incorporate Prosciutto and Cheese: Once the rice is cooked, remove the pan from heat. Stir in the butter, Parmesan cheese, and thinly sliced prosciutto. Season with salt and pepper to taste, considering the saltiness of the prosciutto and Parmesan.
- Serve: Allow the risotto to rest for a minute before serving. Garnish with freshly chopped parsley if desired, and serve hot.
Extra Tips:
For the best risotto, use Arborio or Carnaroli rice, which are specifically designed for risotto due to their ability to absorb liquid and release starch. Be mindful of the temperature of the broth; it should be warm to prevent shocking the rice, which can hinder cooking.
Stirring the risotto frequently is essential as it helps release the starches, contributing to its creamy texture. Finally, adjust the seasoning at the end, as the saltiness of the prosciutto and Parmesan can vary, and you want to avoid an overly salty dish.
Enjoy your Asparagus and Prosciutto Risotto with a light salad or crusty bread for a complete meal.
Spring Vegetable Minestrone

Spring Vegetable Minestrone is a vibrant and hearty Italian soup that captures the essence of spring with its fresh and colorful vegetables. This dish is perfect for those looking to enjoy a light yet satisfying meal, brimming with the flavors of the season. The combination of fresh spring vegetables and aromatic herbs creates a symphony of flavors that are both comforting and invigorating.
This minestrone isn’t only delicious but also a nutritious choice, as it’s packed with vitamins and minerals from the array of vegetables used. Traditionally, minestrone is a thick soup made with vegetables, often with the addition of pasta or rice. This spring variation takes advantage of the seasonal produce available, such as asparagus, peas, and leeks.
By incorporating these ingredients, the soup becomes not only a healthy option but also a celebration of the fresh bounty that spring has to offer. Whether enjoyed as a starter or a main dish, Spring Vegetable Minestrone is sure to delight your taste buds and bring a bit of Italian sunshine to your table.
Ingredients for 4-6 servings:
- 2 tablespoons olive oil
- 1 medium onion, diced
- 2 garlic cloves, minced
- 1 leek, white and light green parts only, sliced
- 2 carrots, diced
- 2 celery stalks, diced
- 1 zucchini, diced
- 1 cup fresh or frozen peas
- 1 cup asparagus, trimmed and cut into 1-inch pieces
- 1 can (14 oz) diced tomatoes
- 4 cups vegetable broth
- 1 cup cooked pasta, such as ditalini or small shells
- 1 teaspoon dried thyme
- 1 teaspoon dried oregano
- Salt and pepper to taste
- 1/4 cup fresh basil, chopped
- 1/4 cup grated Parmesan cheese (optional)
- Lemon wedges for serving
Cooking Instructions:
- Prepare the Vegetables: Begin by dicing the onion, carrots, and celery. Slice the leek, and mince the garlic. Trim and cut the asparagus into 1-inch pieces and dice the zucchini.
- Sauté Aromatics: In a large pot, heat the olive oil over medium heat. Add the diced onion, leek, and minced garlic. Sauté for about 5 minutes until the onion becomes translucent and fragrant.
- Add Vegetables: Stir in the diced carrots, celery, and zucchini. Cook for another 5 minutes, allowing the vegetables to soften slightly.
- Incorporate Broth & Tomatoes: Pour in the vegetable broth and the can of diced tomatoes (with their juices). Stir in the dried thyme and oregano, and season with salt and pepper to taste.
- Simmer the Soup: Bring the mixture to a boil, then reduce the heat and let it simmer for about 15 minutes. This allows the flavors to meld and the vegetables to cook through.
- Add Peas and Asparagus: Stir in the peas and asparagus. Continue to simmer for an additional 5 minutes until the asparagus is tender but still bright green.
- Finish with Pasta & Basil: Add the cooked pasta to the pot, stirring to combine. Let it heat through for a couple of minutes. Finally, stir in the fresh basil.
- Serve: Ladle the minestrone into bowls. Garnish with grated Parmesan cheese if desired, and serve with lemon wedges on the side for an extra burst of vitality.
Extra Tips:
For the best flavor, use fresh, in-season vegetables whenever possible. Feel free to substitute or add other spring vegetables such as spinach or green beans. If you prefer a heartier soup, consider adding canned beans like cannellini or chickpeas.
Adjust the seasoning to your liking, and remember that the soup’s flavor will intensify as it sits, making it ideal for leftovers. If you plan to store the soup, consider keeping the pasta separate and adding it when reheating to prevent it from absorbing too much liquid and becoming mushy.
Caprese Salad With Balsamic Glaze

Caprese Salad with Balsamic Glaze is a classic Italian dish that embodies the vibrant flavors of spring. This invigorating salad combines the creamy richness of fresh mozzarella cheese, the juicy sweetness of ripe tomatoes, and the aromatic essence of fresh basil leaves. The dish is further elevated by a drizzle of thick and tangy balsamic glaze, which adds a delightful depth of flavor and a beautiful presentation.
Perfect as an appetizer or a light meal, Caprese Salad with Balsamic Glaze is a demonstration of the simplicity and elegance of Italian cuisine.
This salad isn’t only visually stunning but also incredibly easy to prepare, making it a perfect choice for a quick and delicious meal that can be enjoyed throughout the spring season. With just a few quality ingredients, you can create a dish that’s both satisfying and healthy.
By selecting the freshest tomatoes, high-quality mozzarella, and fragrant basil leaves, you’ll be able to enhance the natural flavors of each component, resulting in a harmonious and delightful culinary experience.
Ingredients (Serves 4-6):
- 4 large ripe tomatoes
- 1 pound fresh mozzarella cheese
- 1 bunch fresh basil leaves
- 1/2 cup balsamic vinegar
- 1 tablespoon honey
- 2 tablespoons extra-virgin olive oil
- Salt to taste
- Freshly ground black pepper to taste
Instructions:
- Prepare the Balsamic Glaze:
- In a small saucepan, combine the balsamic vinegar and honey. Heat over medium heat, stirring occasionally, until the mixture comes to a gentle boil.
- Reduce the heat to low and let it simmer for about 10-15 minutes, or until the glaze thickens and reduces by half. Once done, remove it from the heat and let it cool.
- Slice the Ingredients:
- While the balsamic glaze is cooling, slice the tomatoes and mozzarella cheese into approximately 1/4-inch thick rounds.
- Carefully separate the basil leaves from the stems, discarding the stems and keeping the leaves whole.
- Assemble the Salad:
- On a large serving platter or individual plates, alternate and layer the tomato slices, mozzarella slices, and basil leaves.
- Drizzle the assembled salad with the balsamic glaze. Use a spoon to control the amount you add, ensuring each layer is evenly coated.
- Finish with Seasoning:
- Drizzle the extra-virgin olive oil over the entire salad, then sprinkle with salt and freshly ground black pepper to taste.
Extra Tips:
When selecting ingredients for your Caprese Salad with Balsamic Glaze, opt for vine-ripened tomatoes and the freshest mozzarella for the best flavor and texture.
If you prefer a thicker glaze, allow the balsamic vinegar to simmer a bit longer, but be cautious not to over-reduce it. Remember to let the glaze cool before drizzling it over the salad, as this will help it cling better to the ingredients.
For a more intense flavor, you can add a few pinches of sea salt flakes instead of regular salt. Enjoy this dish immediately after preparation for the freshest taste.
Lemon and Herb Grilled Chicken

As the gentle warmth of spring envelops Italy, it’s the perfect time to savor fresh, vibrant flavors that celebrate the season. Lemon and Herb Grilled Chicken is a quintessential Italian spring dish that combines the zesty brightness of lemon with the earthy aroma of fresh herbs. This dish is light yet satisfying, making it an ideal choice for a sunny afternoon meal shared with family and friends.
The chicken is marinated to perfection, allowing the flavors to deeply infuse, resulting in a meal that’s both aromatic and invigorating. The key to this dish is its simplicity and the use of fresh ingredients. The lemon imparts a tangy zest that complements the savory depth of herbs like rosemary, thyme, and basil.
When grilled, the chicken develops a beautifully charred exterior while remaining juicy and tender on the inside. This Lemon and Herb Grilled Chicken pairs wonderfully with a crisp salad or a side of roasted vegetables, making it a versatile addition to any springtime spread.
Ingredients (serving size: 4-6 people):
- 4-6 boneless, skinless chicken breasts
- 2 lemons (zest and juice)
- 3 tablespoons olive oil
- 3 cloves garlic, minced
- 1 tablespoon fresh rosemary, chopped
- 1 tablespoon fresh thyme, chopped
- 1 tablespoon fresh basil, chopped
- Salt and pepper, to taste
Cooking Instructions:
- Prepare the Marinade: In a large mixing bowl, combine the lemon zest, lemon juice, olive oil, minced garlic, rosemary, thyme, basil, salt, and pepper. Mix well to verify all ingredients are evenly distributed.
- Marinate the Chicken: Place the chicken breasts in the bowl with the marinade, making sure each piece is well-coated. Cover the bowl with plastic wrap or a lid and refrigerate for at least 2 hours, or overnight for more intense flavor.
- Preheat the Grill: About 30 minutes before you’re ready to cook, preheat your grill to medium-high heat. This guarantees that the chicken will cook evenly and develop a nice char on the outside.
- Grill the Chicken: Remove the chicken breasts from the marinade and place them on the grill. Cook each side for about 6-7 minutes, or until the internal temperature reaches 165°F (75°C). Avoid moving the chicken too much to allow for nice grill marks to form.
- Rest the Chicken: Once cooked, remove the chicken from the grill and let it rest for about 5 minutes. This allows the juices to redistribute within the meat, verifying a moist and flavorful bite.
- Serve: Slice the chicken and serve it with your choice of side dish. Garnish with additional fresh herbs and lemon wedges for added zest and presentation.
Extra Tips: For the best flavor, choose organic lemons and fresh herbs, as they typically offer more robust flavors. If you don’t have fresh herbs, dried ones can be substituted, but use them sparingly as they’re more concentrated.
When grilling, verify your grill grates are clean and lightly oiled to prevent sticking. If you want an extra punch of flavor, consider adding a teaspoon of Dijon mustard to the marinade. This dish can also be served cold, making it perfect for picnics or outdoor gatherings.
Zesty Shrimp Scampi

Shrimp Scampi is a classic Italian dish that combines succulent shrimp with a garlicky, buttery sauce, infused with the zest of fresh lemons and a hint of white wine. This vibrant dish is perfect for spring, offering a tantalizing combination of flavors that are both invigorating and satisfying.
The zesty addition of lemon not only enhances the flavor but also adds a touch of brightness, making it an ideal choice for a light yet flavorful meal. Serve it over a bed of linguine or with a side of crusty bread to soak up the delicious sauce.
This recipe serves 4-6 people and is perfect for a family dinner or a small gathering with friends. The key to a successful Shrimp Scampi lies in the quality of the ingredients; fresh shrimp, high-quality butter, and fragrant garlic are essential to achieve a rich and flavorful dish.
The white wine adds depth, while the parsley provides a fresh, herbal note that complements the zesty lemon. The dish comes together quickly, making it an excellent option for a weeknight meal or an elegant dinner party.
Ingredients:
- 1 1/2 pounds large shrimp, peeled and deveined
- 8 tablespoons unsalted butter
- 4 cloves garlic, minced
- 1/2 cup dry white wine
- 1/4 teaspoon red pepper flakes
- Juice and zest of 1 lemon
- 1/4 cup fresh parsley, chopped
- Salt and freshly ground black pepper, to taste
- 1 pound linguine or spaghetti (optional)
Cooking Instructions:
- Prep the Ingredients: Begin by peeling and deveining the shrimp if not already done. Mince the garlic, chop the parsley, and zest the lemon. If you’re serving with pasta, bring a large pot of salted water to a boil.
- Cook the Shrimp: In a large skillet or sauté pan, melt 4 tablespoons of butter over medium heat. Add the shrimp in a single layer and cook for about 2 minutes on each side, or until they just turn pink and opaque. Remove the shrimp from the pan and set aside.
- Make the Sauce: In the same skillet, add the minced garlic and red pepper flakes to the remaining butter. Sauté for about 1 minute, being careful not to burn the garlic. Pour in the white wine and lemon juice, then bring to a simmer and let cook for 2-3 minutes until slightly reduced.
- Combine and Finish: Return the shrimp to the pan, along with the lemon zest and chopped parsley. Toss everything together to coat the shrimp in the sauce. Season with salt and pepper to taste. Let it cook for another minute until the shrimp are heated through.
- Serve: If using pasta, cook the linguine or spaghetti according to package instructions until al dente. Drain and add to the skillet, tossing to combine with the shrimp and sauce. Alternatively, serve the shrimp scampi with crusty bread on the side to soak up the sauce.
Extra Tips:
When making Zesty Shrimp Scampi, it’s important not to overcook the shrimp, as they can quickly become rubbery. They should be cooked just until they turn pink.
If you prefer a thicker sauce, you can add a touch of cornstarch mixed with water to the sauce while simmering. For a more intense lemon flavor, consider adding a bit more lemon zest or a splash of lemon juice just before serving.
Additionally, if you don’t have white wine, you can substitute chicken broth, but the depth of flavor might differ. Pair this dish with a crisp white wine like Sauvignon Blanc or Pinot Grigio for a delightful dining experience.
Spinach and Ricotta Stuffed Shells
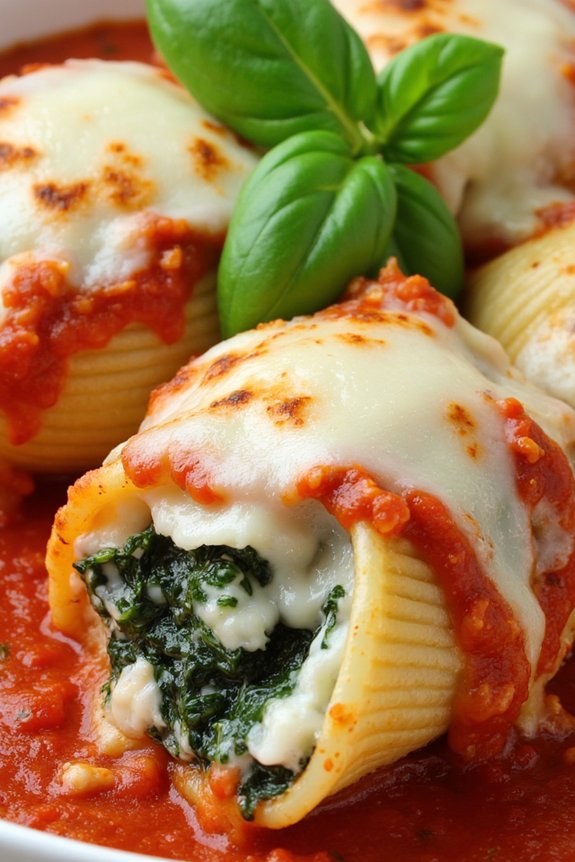
Spinach and Ricotta Stuffed Shells are a delightful Italian spring recipe that combines the creamy textures of ricotta cheese with the earthy flavors of fresh spinach, all encased in tender pasta shells. This dish is perfect for a family meal, offering a comforting and satisfying experience with every bite.
The combination of cheeses, herbs, and a vibrant tomato sauce makes this dish a true celebration of Italian culinary tradition. Whether you’re hosting a dinner party or simply want to indulge in a hearty meal, spinach and ricotta stuffed shells are sure to impress.
Preparing this dish involves filling large pasta shells with a rich mixture of ricotta, spinach, and herbs, then covering them with marinara sauce and a generous sprinkle of mozzarella cheese. After baking in the oven, the shells emerge hot and bubbling, with a golden crust of cheese on top.
This recipe serves 4-6 people, making it ideal for family gatherings or a cozy dinner with friends. It’s not only delicious but also visually appealing, with its vibrant green and red hues, making it a perfect dish to welcome the freshness of spring.
Ingredients for 4-6 servings:
- 20-24 large pasta shells
- 2 cups ricotta cheese
- 1 cup cooked spinach, drained and chopped
- 1/2 cup grated Parmesan cheese
- 1 large egg
- 1 teaspoon minced garlic
- 1 teaspoon dried oregano
- 1/2 teaspoon nutmeg
- Salt and freshly ground black pepper, to taste
- 2 cups marinara sauce
- 1 1/2 cups shredded mozzarella cheese
- Fresh basil leaves, for garnish
Cooking Instructions:
- Preheat the Oven: Begin by preheating your oven to 375°F (190°C).
- Cook the Pasta Shells: Bring a large pot of salted water to a boil. Add the pasta shells and cook them until they’re al dente, typically about 9 minutes. Drain and set aside to cool slightly.
- Prepare the Filling: In a large mixing bowl, combine the ricotta cheese, cooked spinach, Parmesan cheese, egg, minced garlic, oregano, nutmeg, salt, and pepper. Mix until all ingredients are well incorporated.
- Stuff the Shells: Carefully fill each pasta shell with the ricotta and spinach mixture using a spoon or piping bag. Be generous with the filling, ensuring each shell is well-stuffed.
- Assemble the Dish: Spread a thin layer of marinara sauce on the bottom of a 9×13 inch baking dish. Arrange the stuffed shells in the dish in a single layer. Pour the remaining marinara sauce over the tops of the shells.
- Top with Cheese: Sprinkle the shredded mozzarella evenly over the shells, ensuring each one is covered.
- Bake: Cover the dish with aluminum foil and bake in the preheated oven for 25 minutes. Remove the foil and bake for an additional 10-15 minutes, or until the cheese is bubbly and golden brown.
- Garnish and Serve: Once out of the oven, let the dish cool for a few minutes before garnishing with fresh basil leaves. Serve hot and enjoy!
Extra Tips:
For a more intense flavor, consider using a mix of fresh and frozen spinach for the filling. Make sure to squeeze out as much moisture as possible from the spinach to avoid a watery filling.
If you prefer a spicier dish, add a pinch of red pepper flakes to the ricotta mixture. You can also prepare the stuffed shells a day ahead and store them in the fridge, baking them just before serving.
This dish pairs beautifully with a crisp green salad and a glass of white wine.
Artichoke and Parmesan Frittata

Artichoke and Parmesan Frittata is a delightful Italian spring recipe that marries the earthiness of artichokes with the rich, savory flavor of Parmesan cheese. This dish is perfect for a leisurely brunch or a light dinner, offering a delightful balance of flavors and textures.
The frittata is a versatile dish that can be enjoyed hot or at room temperature, making it a great option for entertaining or preparing ahead of time. The addition of fresh herbs enhances the dish, bringing a touch of brightness and freshness that’s characteristic of springtime cooking.
Preparing an Artichoke and Parmesan Frittata isn’t only simple but also a great way to showcase seasonal ingredients. Artichokes, when in season, are tender and flavorful, perfectly complementing the creamy and slightly nutty Parmesan.
The eggs bind everything together, creating a fluffy and satisfying dish that’s sure to impress. Whether you’re a seasoned cook or a novice in the kitchen, this frittata is a straightforward recipe that delivers on taste and presentation.
Ingredients (Serves 4-6):
- 8 large eggs
- 1/2 cup grated Parmesan cheese
- 1/4 cup milk
- 1 can (14 oz) artichoke hearts, drained and quartered
- 2 tablespoons olive oil
- 1 small onion, finely chopped
- 2 cloves garlic, minced
- 1/4 cup fresh parsley, chopped
- Salt and pepper to taste
Cooking Instructions:
- Prepare the Egg Mixture: In a large bowl, whisk together the eggs, Parmesan cheese, and milk until well combined. Season with a pinch of salt and pepper, then set aside. This mixture will form the base of your frittata, providing the creamy texture.
- Cook the Vegetables: Heat the olive oil in a large, ovenproof skillet over medium heat. Add the chopped onion and cook until it becomes translucent, about 3-4 minutes. Add the minced garlic and cook for another minute, making sure the garlic doesn’t burn.
- Add Artichokes: Stir in the quartered artichoke hearts and cook for 2-3 minutes, allowing them to heat through and absorb flavors from the onion and garlic. This step is essential for infusing the artichokes with the aromatic base.
- Combine Mixtures: Pour the egg mixture into the skillet with the vegetables. Gently stir to distribute the ingredients evenly. Cook on the stovetop for about 5 minutes, until the edges start to set but the center remains slightly runny.
- Bake the Frittata: Preheat your oven to 350°F (175°C). Transfer the skillet to the oven and bake for 10-15 minutes, or until the frittata is fully set and lightly golden on top. Baking guarantees even cooking and a fluffy texture.
- Garnish and Serve: Remove the frittata from the oven and sprinkle with chopped fresh parsley. Allow it to cool slightly before slicing and serving. This resting time helps the flavors meld together.
Extra Tips:
For an extra burst of flavor, consider adding a sprinkle of red pepper flakes or a handful of fresh spinach to the egg mixture before baking.
If using fresh artichokes, be sure to properly clean and prepare them before adding to the recipe. Finally, make sure your skillet is ovenproof to avoid any mishaps when transferring from stovetop to oven. Enjoy your frittata with a fresh green salad or crusty bread for a complete meal.
Saffron Risotto With Spring Vegetables

Saffron Risotto With Spring Vegetables is a delightful Italian dish that celebrates the vibrant flavors of spring with its array of fresh vegetables and the rich, aromatic touch of saffron. This creamy risotto is perfect for a family dinner or a special occasion, allowing you to enjoy the seasonal bounty in a sumptuous way.
The combination of tender asparagus, sweet peas, and delicate zucchini gives the risotto a invigorating and bright character, while the saffron provides a subtle yet luxurious depth of flavor that elevates the dish to a new level.
To achieve the perfect Saffron Risotto With Spring Vegetables, patience is key. The process of slowly stirring the risotto allows the rice to release its starches, resulting in a creamy consistency without the use of cream. The addition of Parmesan cheese at the end adds a savory richness that complements the saffron and vegetables beautifully. This recipe is designed to serve 4-6 people, making it an excellent choice for a small gathering with family or friends.
Ingredients:
- 1 1/2 cups Arborio rice
- 1/4 teaspoon saffron threads
- 2 tablespoons olive oil
- 1 small onion, finely chopped
- 2 cloves garlic, minced
- 1/2 cup dry white wine
- 5 cups vegetable stock, kept warm
- 1 cup asparagus, trimmed and cut into 1-inch pieces
- 1 cup fresh peas (or frozen if fresh aren’t available)
- 1 small zucchini, diced
- 1/2 cup grated Parmesan cheese
- Salt and pepper to taste
- 2 tablespoons butter
- Fresh parsley, chopped, for garnish
Cooking Instructions:
1. Prepare the Saffron Infusion:
Place the saffron threads in a small bowl and add 2 tablespoons of warm water. Let it steep while you prepare the other ingredients. This will help release the color and flavor of the saffron.
2. Sauté the Aromatics:
In a large heavy-bottomed pan, heat the olive oil over medium heat. Add the chopped onion and garlic, and sauté until the onion is translucent and fragrant, about 3-4 minutes.
3. Toast the Rice:
Add the Arborio rice to the pan and stir continuously for 2-3 minutes, ensuring each grain is well-coated with oil. This step helps toasting the rice, which enhances the nutty flavor of the dish.
4. Deglaze with Wine:
Pour in the white wine and stir until it has mostly evaporated. This process deglazes the pan and adds acidity that balances the richness of the risotto.
5. Cook the Risotto:
Begin adding the warm vegetable stock, one ladle at a time, stirring constantly. Allow the liquid to be absorbed before adding the next ladle. Continue this process until the rice is creamy and al dente, about 18-20 minutes.
6. Add the Vegetables:
When the rice is nearly done, stir in the asparagus, peas, and zucchini. Cook until the vegetables are tender yet still vibrant in color, about 5 minutes.
7. Finish with Saffron and Cheese:
Stir in the saffron infusion, butter, and Parmesan cheese. Season with salt and pepper to taste. Continue stirring until the cheese is melted and the butter is fully incorporated.
8. Serve:
Remove from heat and let it sit for a minute before serving. Garnish with freshly chopped parsley for a burst of freshness.
Extra Tips:
For the best results, use a ladle to add the stock gradually to the rice, which allows the rice to release its starches, resulting in a creamy risotto. Constant stirring is essential to prevent the rice from sticking to the bottom of the pan and to achieve the desired creamy texture.
Adjust the seasoning towards the end of cooking, as the Parmesan cheese will add a salty note to the risotto. If you prefer a richer flavor, you can substitute chicken stock for vegetable stock. Finally, serve the risotto immediately for the best texture and taste.
Lemon Basil Pesto Pasta

Lemon Basil Pesto Pasta is a rejuvenating and vibrant dish that perfectly encapsulates the essence of springtime in Italy. This dish combines the zesty brightness of lemon with the aromatic sweetness of fresh basil, creating a pesto that sings with flavor. Paired with your favorite pasta, this recipe is a delightful way to enjoy a taste of the season.
The creamy texture of the pasta, coated with this homemade pesto, provides a comforting yet invigorating dining experience. Whether you’re hosting a spring brunch or simply enjoying a quiet meal at home, Lemon Basil Pesto Pasta is sure to brighten your table and your taste buds.
The beauty of this dish lies in its simplicity and the freshness of its ingredients. Making your own pesto allows you to control the balance of flavors, ensuring each bite is a harmonious blend of lemon, basil, garlic, and Parmesan. The addition of lemon juice and zest not only enhances the flavor but also helps to preserve the vibrant green color of the basil.
This recipe serves 4-6 people, making it ideal for a family meal or a small gathering with friends. Serve it with a crisp salad or some crusty bread, and you have a complete meal that celebrates the arrival of spring.
Ingredients:
- 1 pound (450g) pasta of choice (e.g., linguine or spaghetti)
- 2 cups packed fresh basil leaves
- 1/2 cup grated Parmesan cheese
- 1/2 cup extra-virgin olive oil
- 1/3 cup pine nuts
- 2 cloves garlic, minced
- Zest and juice of 1 large lemon
- Salt and freshly ground black pepper to taste
Cooking Instructions:
- Cook the Pasta: Begin by bringing a large pot of salted water to a boil. Add the pasta and cook according to package instructions until al dente. Reserve 1 cup of pasta water, then drain the pasta and set aside.
- Toast the Pine Nuts: While the pasta is cooking, heat a small skillet over medium heat. Add the pine nuts and toast them, stirring frequently, until they’re golden brown and fragrant, about 3-5 minutes. Be careful not to burn them. Remove from heat and let them cool.
- Prepare the Pesto: In a food processor, combine the basil leaves, toasted pine nuts, garlic, Parmesan cheese, lemon zest, and lemon juice. Pulse until the mixture is finely chopped. With the processor running, slowly drizzle in the olive oil until the pesto reaches your desired consistency. Season with salt and pepper to taste.
- Combine Pasta and Pesto: In a large bowl, combine the cooked pasta with the pesto. Toss until the pasta is evenly coated. If the pasta seems dry, add some of the reserved pasta water, a little at a time, until the desired consistency is reached.
- Serve and Enjoy: Divide the pasta among serving plates. Garnish with additional Parmesan cheese, a sprinkle of lemon zest, and freshly ground black pepper if desired. Serve immediately.
Extra Tips:
To maintain the bright green color of the pesto, blanch the basil leaves in boiling water for a few seconds, then immediately transfer them to an ice bath before processing. This step is optional but can help achieve a more vibrant pesto.
Additionally, feel free to customize your pesto by adding other herbs like parsley or mint for a unique twist. If you have leftover pesto, store it in an airtight container with a thin layer of olive oil on top to prevent browning, and refrigerate for up to a week.
Grilled Eggplant Caponata

Grilled Eggplant Caponata is a delightful and flavorful Italian dish that brings the essence of spring onto your plate. This dish is a vibrant medley of grilled eggplants, tomatoes, bell peppers, olives, and capers, all melded together with a tangy-sweet vinaigrette. It’s a perfect appetizer or side dish that can be served warm or at room temperature, making it an ideal choice for spring gatherings or a casual family dinner.
The grilling process adds a smoky depth to the eggplants, enhancing the overall flavor profile of the caponata. This dish isn’t only delicious but also healthy and incredibly versatile. You can enjoy it with crusty bread, serve it over pasta, or even use it as a topping for grilled meats or fish.
The combination of fresh vegetables, herbs, and a hint of vinegar creates a balance of flavors that awaken the taste buds and celebrate the season’s bounty. Below is a detailed recipe for making Grilled Eggplant Caponata that serves 4-6 people.
Ingredients:
- 2 medium eggplants, cut into 1/2-inch rounds
- 1 red bell pepper, diced
- 2 medium tomatoes, diced
- 1 small red onion, chopped
- 2 cloves garlic, minced
- 1/4 cup green olives, pitted and sliced
- 2 tablespoons capers, drained
- 1/4 cup red wine vinegar
- 1/4 cup extra-virgin olive oil
- 1 tablespoon sugar
- Salt and pepper to taste
- Fresh basil leaves, for garnish
Cooking Instructions:
- Prepare the Eggplants: Preheat your grill to medium-high heat. Brush the eggplant rounds with olive oil and season them with salt and pepper. This will help prevent sticking and add flavor during grilling.
- Grill the Eggplants: Place the eggplant rounds on the grill and cook for about 4-5 minutes per side, or until they’re tender and have nice grill marks. Remove the eggplants from the grill and let them cool slightly.
- Chop the Eggplants: Once the grilled eggplants are cool enough to handle, chop them into bite-sized pieces. Transfer the chopped eggplants to a large mixing bowl.
- Combine Vegetables: Add the diced red bell pepper, tomatoes, red onion, minced garlic, olives, and capers to the bowl with the eggplant. Gently toss everything together to combine.
- Make the Dressing: In a small bowl, whisk together the red wine vinegar, extra-virgin olive oil, and sugar until well combined. Pour the dressing over the vegetable mixture and toss to coat.
- Season and Serve: Taste the caponata and adjust the seasoning with salt and pepper as needed. Allow the flavors to meld together for at least 30 minutes before serving. Garnish with fresh basil leaves before serving.
Extra Tips:
When grilling the eggplants, make sure to oil your grill grates well to prevent sticking. You can also add a hint of smokiness by using a charcoal grill or adding a few wood chips to a gas grill.
Feel free to customize your caponata by adding other vegetables like zucchini or mushrooms. If you prefer a slightly softer texture, you can sauté the onions and peppers before mixing them with the other ingredients.
This dish can be made ahead of time and stored in the refrigerator for up to three days, allowing the flavors to further develop.
Tuscan White Bean Salad

Tuscan White Bean Salad is a revitalizing and flavorful dish that embodies the essence of Italian spring cuisine. This salad combines creamy white beans with fresh vegetables and aromatic herbs, offering a delightful balance of textures and flavors. The simplicity of its ingredients allows each component to shine, making it a perfect dish for a light lunch or as a side at a springtime gathering.
With its vibrant colors and zesty dressing, this salad isn’t only a treat to the taste buds but also visually appealing, making it a delightful addition to any dining table.
This salad is quick to prepare and doesn’t require cooking, making it an ideal choice for those who are looking for a nutritious meal without spending too much time in the kitchen. The combination of olive oil, lemon juice, and herbs creates a dressing that enhances the natural flavors of the beans and vegetables.
Served chilled, Tuscan White Bean Salad is both revitalizing and satisfying, perfect for enjoying on a warm day. Whether you’re a fan of Italian cuisine or simply looking for a new salad recipe to try, this dish is sure to become a favorite.
Ingredients (Serves 4-6):
- 2 cans (15 oz each) of cannellini beans, rinsed and drained
- 1 small red onion, finely chopped
- 1 cucumber, diced
- 1 cup cherry tomatoes, halved
- 1/4 cup fresh parsley, chopped
- 1/4 cup fresh basil, chopped
- 1/4 cup extra-virgin olive oil
- 3 tablespoons lemon juice
- 1 clove garlic, minced
- Salt and pepper to taste
Cooking Instructions:
- Prepare the Beans: Begin by rinsing and draining the canned cannellini beans thoroughly under cold water. This will remove any excess sodium and improve the texture of the beans.
- Chop the Vegetables: Finely chop the red onion, dice the cucumber, and halve the cherry tomatoes. Make sure that the pieces are all around the same size for an even distribution of ingredients in each bite.
- Mix the Salad: In a large mixing bowl, combine the cannellini beans, red onion, cucumber, cherry tomatoes, parsley, and basil. Toss the ingredients gently to combine them well.
- Prepare the Dressing: In a small bowl, whisk together the extra-virgin olive oil, lemon juice, minced garlic, salt, and pepper. Adjust the seasoning to taste, ensuring a balanced flavor.
- Dress the Salad: Pour the dressing over the bean and vegetable mixture. Toss the salad gently to ensure that all the ingredients are well-coated with the dressing.
- Chill and Serve: Cover the salad with plastic wrap or transfer it to a serving dish with a lid and refrigerate for at least 30 minutes to allow the flavors to meld. Serve chilled and enjoy!
Extra Tips:
For added flavor, consider incorporating additional herbs such as oregano or thyme, or adding a pinch of red pepper flakes for a subtle kick. If you prefer a bit more crunch, you can toss in some toasted pine nuts or slivered almonds.
This salad can also be prepared a day in advance, allowing the flavors to develop further. Just make sure to store it in an airtight container in the refrigerator to maintain its freshness. Additionally, if fresh basil or parsley isn’t available, you can substitute with dried herbs, but reduce the quantity as dried herbs are more potent than fresh ones.
Arugula and Parmesan Pizza

Spring is the perfect time to enjoy fresh and vibrant flavors, and this Arugula and Parmesan Pizza embodies the essence of the season. With its crisp, peppery arugula and rich, nutty Parmesan, this pizza delivers a delightful mix of textures and tastes. The fresh arugula provides a peppery bite that complements the creamy mozzarella and savory Parmesan cheese, while a thin, crispy crust adds a satisfying crunch to every bite.
This Arugula and Parmesan Pizza is perfect for a family meal or a gathering with friends, serving 4-6 people. It’s a straightforward recipe that transforms simple ingredients into something extraordinary. The preparation is quick, making it an excellent choice for a weeknight dinner or a casual springtime lunch.
Ingredients for 4-6 servings:
- 1 pound pizza dough
- 1 cup marinara sauce
- 2 cups shredded mozzarella cheese
- 1/2 cup freshly grated Parmesan cheese
- 2 cups fresh arugula
- 1 tablespoon olive oil
- Salt and pepper to taste
- 1 teaspoon red pepper flakes (optional)
- Cornmeal or flour (for dusting)
Cooking Instructions:
1. Preheat Oven and Prepare Dough:
Preheat your oven to 475°F (245°C). If using a pizza stone, place it in the oven to heat up. On a lightly floured surface, roll out the pizza dough to your desired thickness, aiming for a round shape. Transfer the dough to a pizza peel or a baking sheet dusted with cornmeal or flour to prevent sticking.
2. Assemble the Pizza:
Spread a thin layer of marinara sauce over the dough, leaving a small border around the edges for the crust. Evenly sprinkle the shredded mozzarella cheese over the sauce. Next, sprinkle half of the grated Parmesan cheese over the mozzarella.
3. Bake the Pizza:
Carefully transfer the pizza onto the preheated pizza stone or place the baking sheet in the oven. Bake for 10-12 minutes, or until the crust is golden brown and the cheese is bubbly and slightly browned.
4. Add Arugula and Finish:
Once baked, remove the pizza from the oven. In a small bowl, toss the fresh arugula with olive oil, salt, and pepper. Spread the arugula evenly over the hot pizza. Sprinkle the remaining Parmesan cheese over the arugula, and, if desired, add a pinch of red pepper flakes for a bit of heat.
5. Serve:
Slice the pizza and serve immediately while it’s hot and the arugula is fresh and crisp.
Extra Tips:
For an even crispier crust, consider pre-baking the pizza dough for a few minutes before adding the toppings. This can help prevent the crust from becoming soggy, especially if you prefer a thicker layer of sauce.
Additionally, feel free to experiment with different types of cheese, such as fontina or asiago, to add more complexity to the flavor profile. If you’re using store-bought pizza dough, let it come to room temperature before rolling it out to make it more pliable and easier to shape.
Enjoy this pizza with a glass of chilled white wine or a revitalizing spring salad for a complete meal.
Lemon and Thyme Roasted Sea Bass
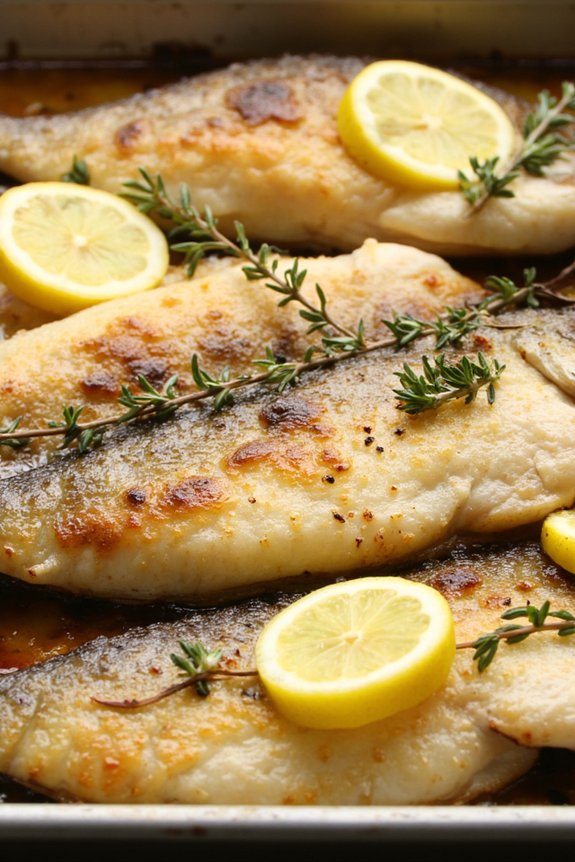
Lemon and Thyme Roasted Sea Bass is a delightful dish that perfectly encapsulates the fresh and vibrant flavors of spring. This recipe highlights the delicate taste of sea bass, enhanced by the zesty notes of lemon and the aromatic scent of thyme. As the fish roasts, these ingredients meld together, creating a sumptuous and fragrant dish that’s both light and satisfying.
Perfect for a springtime gathering or a special family meal, this dish brings a touch of elegance to your dining table. This recipe is designed to serve 4-6 people, making it an ideal choice for a small dinner party or a lovely family dinner. The simplicity of the preparation allows the natural flavors of the fresh ingredients to shine, while the roasting process guarantees the sea bass is cooked to perfection with a beautifully crispy skin.
With minimal preparation and cooking time, Lemon and Thyme Roasted Sea Bass is a wonderful way to celebrate the season’s bounty without spending hours in the kitchen.
Ingredients (serving size: 4-6 people):
- 2 whole sea bass, cleaned and scaled
- 2 lemons, thinly sliced
- 4 cloves of garlic, minced
- A small bunch of fresh thyme
- Olive oil
- Salt and freshly ground black pepper
- 1 tablespoon of butter, optional
Cooking Instructions:
- Preheat the Oven: Start by preheating your oven to 400°F (200°C). This will guarantee that the oven is at the right temperature for roasting the fish to perfection.
- Prepare the Sea Bass: Rinse the sea bass under cold water and pat dry with paper towels. Make 3 diagonal slashes on each side of the fish to allow the flavors to penetrate better.
- Season the Fish: Rub the inside and outside of the sea bass with olive oil, garlic, salt, and freshly ground black pepper. Place the lemon slices and sprigs of thyme inside the cavity of each fish.
- Arrange in Baking Dish: Lay the prepared sea bass on a large baking dish. Drizzle some additional olive oil over the fish and place any remaining lemon slices and thyme around the fish in the dish.
- Roast in the Oven: Place the dish in the preheated oven and roast the sea bass for about 20-25 minutes, or until the fish is cooked through and the skin is golden and crispy. If desired, add a tablespoon of butter halfway through roasting for extra richness.
- Check for Doneness: The fish is done when it easily flakes with a fork and the internal temperature reaches 145°F (63°C).
- Serve: Once cooked, carefully transfer the sea bass to a serving platter. Garnish with additional fresh thyme and a squeeze of lemon juice for extra brightness.
Extra Tips: When choosing sea bass, opt for the freshest available — it should have clear eyes and a fresh sea smell. If whole sea bass is unavailable, fillets can be used, but adjust the cooking time as they’ll cook faster.
Additionally, always let the fish rest for a couple of minutes after removing it from the oven to allow the juices to redistribute within the fish, guaranteeing a moist and flavorful result. Serve the dish with a side of roasted vegetables or a fresh green salad to complement the flavors beautifully.