

Looking for some delightful Italian lunch ideas that are both simple and satisfying?
Picture a fresh Caprese salad with juicy tomatoes and creamy mozzarella or a quick pesto pasta full of flavor.
These dishes are perfect for bringing a touch of Italy to your midday meal and might just become your new favorites.
Let’s explore some bright and easy Italian recipes that will transform your lunch routine.
Get ready for a delicious journey!
Classic Caprese Salad
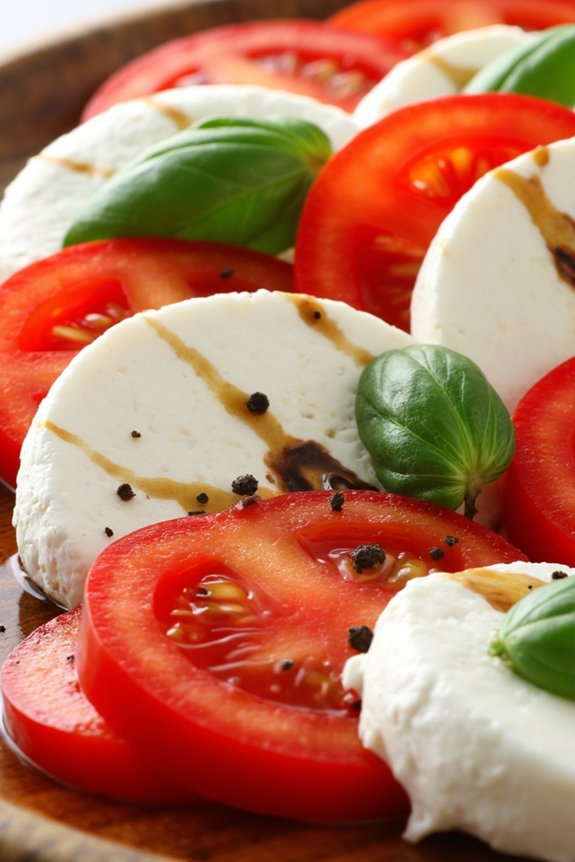
Classic Caprese Salad is a quintessential Italian dish that embodies the freshness of summer with its vibrant colors and simple ingredients. Originating from the island of Capri, this salad is a celebration of fresh produce, combining ripe tomatoes, creamy mozzarella, and aromatic basil leaves. The key to a perfect Caprese salad lies in the quality of its ingredients, making it vital to use the freshest tomatoes, the finest mozzarella, and the most fragrant basil you can find.
This salad is a perfect addition to any meal, whether as a starter or a light lunch, and can be prepared in just a few minutes. Its simplicity is its charm, allowing the natural flavors of the ingredients to shine through without much fuss. Traditionally, Caprese salad is drizzled with olive oil and seasoned with salt and pepper, but you can also add a splash of balsamic vinegar for an extra zing. This recipe serves 4-6 people, making it ideal for family gatherings or a small dinner party.
Ingredients for 4-6 servings:
- 4 large ripe tomatoes
- 1 pound fresh mozzarella cheese
- 1 bunch fresh basil leaves
- 1/4 cup extra virgin olive oil
- Salt, to taste
- Freshly ground black pepper, to taste
- Optional: Balsamic vinegar glaze
Cooking Instructions:
- Prepare the Tomatoes: Start by washing the tomatoes under cold water. Pat them dry with a clean kitchen towel. Slice the tomatoes into 1/4-inch thick slices. Confirm that the slices are even for a uniform presentation.
- Slice the Mozzarella: Drain any excess water from the mozzarella cheese. Slice the cheese into 1/4-inch thick pieces. Similar to the tomatoes, try to keep the slices even.
- Assemble the Salad: On a large serving platter, arrange the tomato and mozzarella slices in an alternating pattern, slightly overlapping them. Insert fresh basil leaves between the slices. You can either tear the basil leaves for a more rustic look or leave them whole for a cleaner presentation.
- Season the Salad: Drizzle the extra virgin olive oil evenly over the assembled salad. Season generously with salt and freshly ground black pepper to enhance the flavors.
- Optional Balsamic Drizzle: If using, lightly drizzle balsamic vinegar glaze over the salad. This step is optional but adds a sweet tangy contrast to the creamy mozzarella and juicy tomatoes.
- Serve Immediately: For the best flavor, serve the Caprese salad immediately at room temperature. This guarantees that the cheese is soft and the olive oil is fragrant.
Extra Tips: When selecting tomatoes, opt for vine-ripened ones at the peak of their season for maximum flavor. Similarly, choose buffalo mozzarella if available, as it offers a richer taste compared to regular mozzarella. If you prefer a more intense flavor, consider using heirloom tomatoes, which offer a range of colors and tastes.
Finally, remember that fresh basil is essential for this dish; dried basil won’t provide the same aromatic quality. Enjoy your Classic Caprese Salad as a reflection of Italian simplicity and elegance!
Quick and Satisfying Pesto Pasta
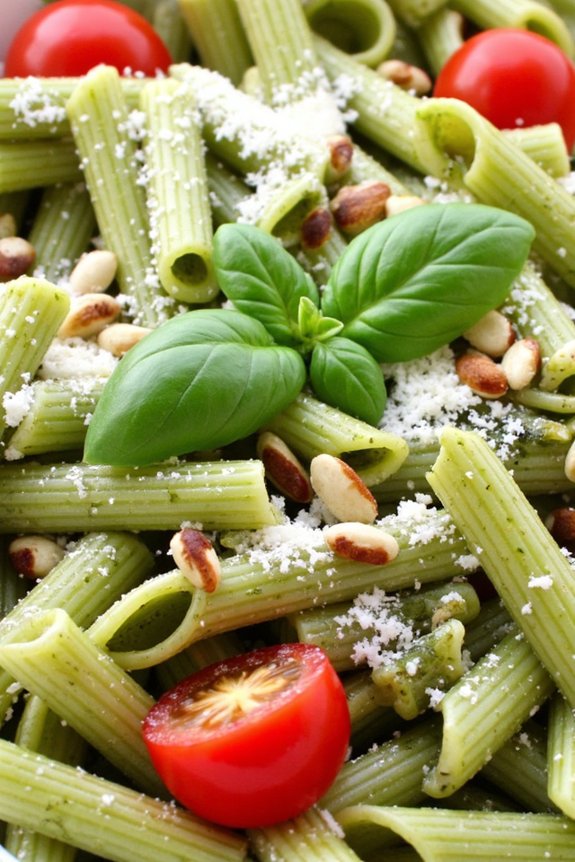
Quick and Satisfying Pesto Pasta is a delightful Italian dish that’s perfect for those who crave a flavorful meal without spending too much time in the kitchen. This recipe combines the fresh taste of basil pesto with perfectly cooked pasta, creating a harmonious balance of flavors that’s both vibrant and comforting. Ideal for a quick lunch or a light dinner, this dish is sure to become a favorite in your culinary repertoire.
The beauty of Quick and Satisfying Pesto Pasta lies in its simplicity and versatility. With just a handful of ingredients, you can whip up a delicious meal that pleases both the eyes and the palate. The key is using high-quality pesto, either homemade or store-bought, to guarantee the best possible taste. This recipe serves 4-6 people, making it perfect for family meals or small gatherings with friends.
Ingredients
- 1 pound (450g) pasta of your choice (spaghetti, fusilli, or penne)
- 1 cup (about 240ml) basil pesto
- 1/4 cup (60ml) extra-virgin olive oil
- 1/4 cup (30g) grated Parmesan cheese, plus extra for serving
- 1/4 cup (40g) toasted pine nuts
- Salt, to taste
- Freshly ground black pepper, to taste
- Optional: Cherry tomatoes, halved
- Optional: Fresh basil leaves, for garnish
Cooking Instructions
- Cook the Pasta: Begin by bringing a large pot of salted water to a boil over high heat. Add the pasta and cook according to the package instructions until al dente. Reserve about 1 cup of the pasta cooking water, then drain the pasta and return it to the pot.
- Prepare the Pesto Sauce: While the pasta is cooking, combine the basil pesto, extra-virgin olive oil, and 1/4 cup of Parmesan cheese in a small bowl. Stir until the mixture is smooth and well combined.
- Mix Pasta and Pesto: Pour the pesto mixture over the cooked pasta. Add the reserved pasta water, a little at a time, and toss the pasta until it’s evenly coated with the pesto sauce. The pasta water helps to thin the sauce and allows it to cling to the noodles.
- Season and Serve: Season the pasta with salt and freshly ground black pepper to taste. If desired, add halved cherry tomatoes for a burst of freshness and color. Transfer the pasta to a serving dish, sprinkle with toasted pine nuts and additional Parmesan cheese, and garnish with fresh basil leaves.
Extra Tips
For an extra burst of flavor, consider adding a squeeze of fresh lemon juice to the pesto sauce before mixing it with the pasta. This will enhance the brightness of the dish.
If you prefer a creamier texture, you can stir in a tablespoon or two of heavy cream or ricotta cheese into the pesto sauce.
To save time, you can prepare the pesto sauce in advance and store it in the refrigerator until ready to use.
Refreshing Italian Tuna Salad
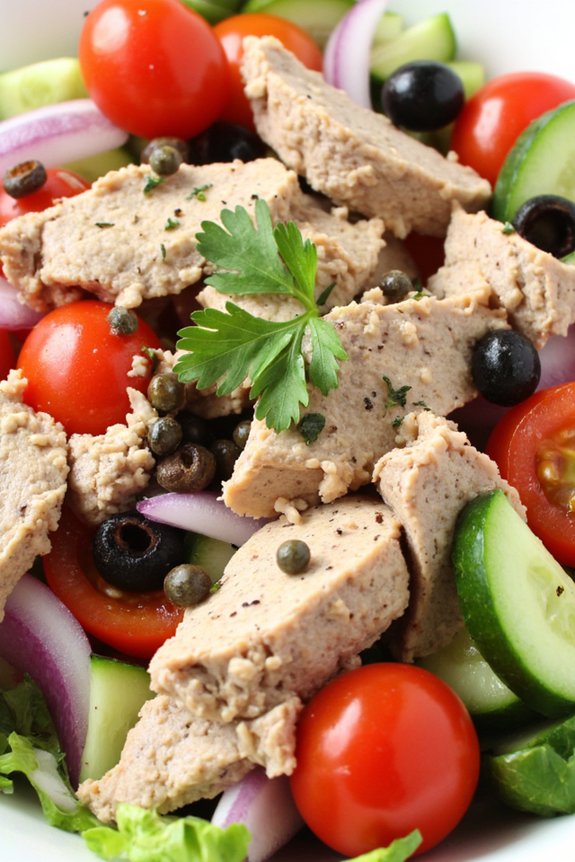
If you’re looking for a light and healthy Italian lunch option, a revitalizing Italian Tuna Salad is a perfect choice. This salad combines the robust flavors of Italy with the heartiness of tuna, creating a dish that’s both satisfying and packed with nutrients. The use of fresh vegetables such as cherry tomatoes, cucumbers, and red onions adds a delightful crunch, while the addition of olives brings a salty punch. The salad is beautifully balanced with a zesty lemon vinaigrette that ties all the flavors together seamlessly.
Not only is this Italian Tuna Salad quick to prepare, but it also provides a versatile and nourishing meal option that can be enjoyed as a main dish or a side. Ideal for serving 4-6 people, this salad is perfect for a family lunch or a casual gathering with friends. The combination of protein-rich tuna and fresh vegetables makes it a well-rounded dish that can be enjoyed on its own or paired with some crusty Italian bread for added texture and flavor.
Ingredients for 4-6 servings:
- 2 cans (5 oz each) of tuna in olive oil, drained
- 1 pint cherry tomatoes, halved
- 1 English cucumber, diced
- 1 small red onion, thinly sliced
- 1/2 cup pitted black olives, sliced
- 1/4 cup fresh parsley, chopped
- 2 tablespoons capers, rinsed and drained
- 1/4 cup extra virgin olive oil
- 2 tablespoons fresh lemon juice
- 1 teaspoon Dijon mustard
- Salt and pepper to taste
Cooking Instructions:
- Prepare the Vegetables: Begin by washing the cherry tomatoes and cucumbers thoroughly. Halve the cherry tomatoes and dice the cucumber into bite-sized pieces. Thinly slice the red onion and set these vegetables aside in a large mixing bowl.
- Combine the Tuna and Vegetables: Open the cans of tuna and drain the olive oil. Add the tuna to the bowl with the prepared vegetables. Gently break apart any large chunks of tuna with a fork to guarantee even distribution throughout the salad.
- Add Olives and Capers: Slice the black olives and add them to the bowl along with the rinsed capers. These ingredients will add a briny flavor that complements the tuna and fresh vegetables.
- Make the Dressing: In a small bowl, whisk together the extra virgin olive oil, fresh lemon juice, and Dijon mustard until well combined. Season the dressing with salt and pepper to taste.
- Dress the Salad: Pour the lemon vinaigrette over the tuna and vegetable mixture. Toss gently to guarantee all ingredients are well coated with the dressing.
- Finish with Fresh Herbs: Chop the fresh parsley and sprinkle it over the salad. Give the salad one final toss to incorporate the parsley evenly.
- Serve and Enjoy: Transfer the salad to a serving platter or individual plates. Serve immediately to enjoy the fresh flavors at their peak.
Extra Tips:
For the best flavor, use high-quality canned tuna packed in olive oil, as this adds richness to the salad. Feel free to adjust the amount of lemon juice and olive oil in the dressing to suit your taste preferences.
If you prefer a spicier kick, consider adding a pinch of red pepper flakes to the dressing. This salad can be made a few hours in advance and stored in the refrigerator, allowing the flavors to meld together. Just be sure to give it a good toss before serving. Enjoy this dish with a side of crusty Italian bread or alongside a simple pasta dish for a complete Italian meal.
Simple Margherita Flatbread
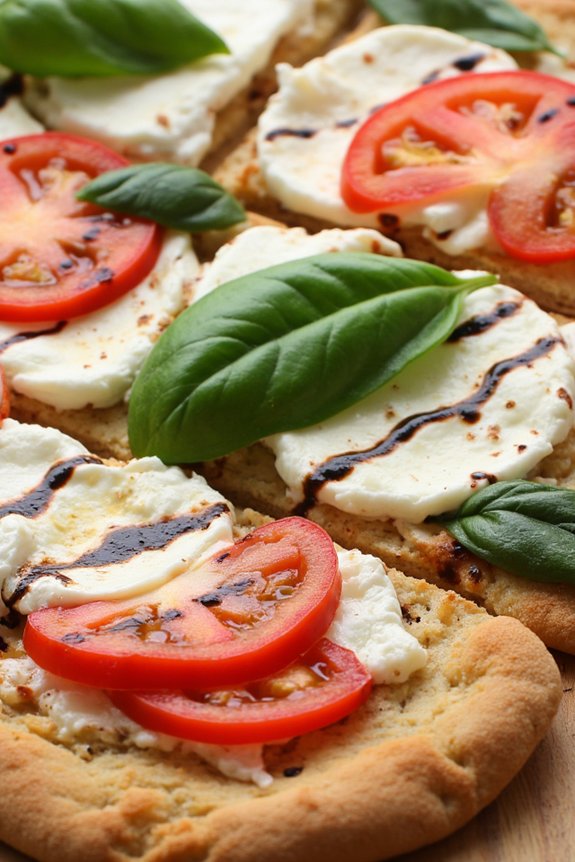
The Simple Margherita Flatbread is a quintessential Italian lunch recipe that brings together the classic flavors of fresh tomatoes, creamy mozzarella cheese, and fragrant basil. This dish is perfect for those who crave the taste of a traditional Margherita pizza but want a quicker and lighter alternative.
With a crisp flatbread base and a topping of vibrant ingredients, this recipe is sure to impress both family and friends. Whether it’s a weekday lunch or a weekend gathering, this flatbread is easy to prepare and certain to satisfy.
In this recipe, you’ll learn how to make a delightful Margherita flatbread that serves 4-6 people. The preparation time is minimal, making it an ideal choice for those who want a delicious meal without spending hours in the kitchen.
The ingredients are simple, yet each plays a vital role in creating the authentic flavors of Italy. With a few steps, you’ll have a beautiful flatbread that’s not only visually appealing but also bursting with fresh and savory tastes.
Ingredients (Serves 4-6):
- 2 large flatbreads
- 2 cups shredded mozzarella cheese
- 3 large tomatoes, thinly sliced
- 1/4 cup extra virgin olive oil
- Salt and freshly ground black pepper, to taste
- 1 bunch of fresh basil leaves
- 1 teaspoon dried oregano (optional)
- Balsamic glaze, for drizzling (optional)
Cooking Instructions:
- Preheat the Oven: Begin by preheating your oven to 425°F (220°C). This guarantees that your flatbread will bake evenly and achieve a nice, crispy texture.
- Prepare the Flatbreads: Place the flatbreads on a large baking sheet lined with parchment paper or a silicone baking mat to prevent sticking.
- Assemble the Flatbread: Drizzle each flatbread lightly with extra virgin olive oil, spreading it evenly over the surface. Arrange the tomato slices over the flatbreads, making sure they’re evenly distributed.
- Add the Cheese and Herbs: Evenly distribute the shredded mozzarella cheese over the tomatoes. If desired, sprinkle a small amount of dried oregano over the cheese for added flavor.
- Bake the Flatbreads: Place the baking sheet in the preheated oven and bake for 10-12 minutes, or until the cheese is melted and bubbly, and the edges of the flatbread are golden brown.
- Finish with Fresh Basil: Once out of the oven, top the flatbreads with fresh basil leaves. Tear the leaves into smaller pieces if they’re large.
- Optional Drizzle: For an extra touch, drizzle a bit of balsamic glaze over the finished flatbreads before serving.
Extra Tips:
To achieve a perfectly crispy base, make sure to preheat your oven and use a baking sheet that allows good air circulation.
If you prefer a bit more flavor, consider adding a clove of minced garlic to the olive oil before drizzling it on the flatbread. For those who enjoy a spicy kick, a light sprinkle of red pepper flakes can be added along with the oregano.
Fresh basil should be added after baking to maintain its vibrant color and flavor. Adjust the amount of salt to your taste, keeping in mind that the cheese will also add saltiness.
Enjoy your Simple Margherita Flatbread while it’s warm for the best experience.
Flavorful Bruschetta Trio
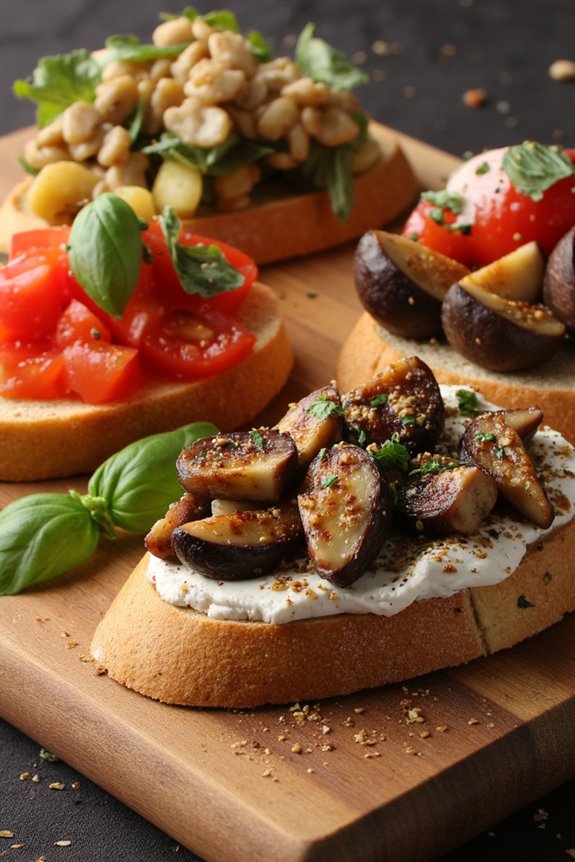
Bruschetta is a classic Italian appetizer that celebrates fresh ingredients and bold flavors. The Bruschetta Trio we’re creating today isn’t just a delight to the senses but also a showcase of the versatility of Italian cuisine. This trio features three variations: the traditional tomato and basil, a savory mushroom and garlic, and a sweet fig and goat cheese. Each brings its own unique taste and texture, making it perfect for lunch gatherings or as a starter for a larger Italian meal.
The beauty of bruschetta lies in its simplicity and the quality of its ingredients. To make sure each bite is a burst of flavor, use ripe tomatoes, fresh basil, and a good quality extra virgin olive oil. For the mushroom bruschetta, opt for a mix of wild mushrooms if available, and for a touch of sweetness, choose fresh figs that are in season. The goat cheese adds a creamy contrast that balances the sweetness of the figs beautifully. This recipe serves 4-6 people, making it ideal for a small gathering or family meal.
Ingredients for 4-6 servings:
Tomato Basil Bruschetta:
- 6 ripe tomatoes
- 1 bunch fresh basil
- 2 cloves garlic
- 1/4 cup extra virgin olive oil
- Salt and pepper to taste
Mushroom Garlic Bruschetta:
- 1 pound mixed mushrooms
- 2 cloves garlic
- 1/4 cup extra virgin olive oil
- Salt and pepper to taste
- 1 tablespoon fresh thyme (optional)
Fig and Goat Cheese Bruschetta:
- 6 fresh figs
- 1/4 cup goat cheese
- 1 tablespoon honey
- 1/4 cup chopped walnuts (optional)
Bread:
– 1 loaf of crusty Italian bread or baguette
Instructions:
- Prepare the Bread:
- Preheat your oven to 400°F (200°C).
- Slice the Italian bread or baguette diagonally into 1/2 inch thick slices. Arrange the slices on a baking sheet.
- Drizzle lightly with olive oil and toast in the oven for 5-7 minutes or until golden brown. Remove from the oven and set aside.
- Tomato Basil Bruschetta:
- Dice the tomatoes and place them in a bowl.
- Mince the garlic and add it to the tomatoes.
- Tear the basil leaves into small pieces and mix with the tomatoes and garlic.
- Drizzle with olive oil, season with salt and pepper, and mix well. Set aside for flavors to meld.
- Mushroom Garlic Bruschetta:
- Clean and slice the mushrooms.
- In a skillet, heat olive oil over medium heat. Add minced garlic and sauté for 1 minute until fragrant.
- Add the mushrooms, season with salt and pepper, and cook until the mushrooms are tender and golden brown. Stir in fresh thyme if using.
- Fig and Goat Cheese Bruschetta:
- Slice the figs into quarters.
- Spread a small dollop of goat cheese on each toasted bread slice.
- Place a fig slice on top, drizzle with honey, and sprinkle with chopped walnuts if desired.
- Assemble the Bruschetta:
- Spoon the tomato basil mixture onto a portion of the toasted bread slices.
- Top another portion with the sautéed mushrooms.
- Finish with the fig and goat cheese combination on the remaining toasts.
- Serve immediately and enjoy!
Extra Tips:
When preparing bruschetta, always use the freshest ingredients you can find, as the flavor profile depends heavily on their quality. If you have the time, let the tomato basil mixture sit for 15-30 minutes to allow the flavors to meld.
For an added touch, rub the toasted bread slices with a cut clove of garlic before topping them. Experiment with different types of mushrooms or try adding a splash of balsamic glaze to the fig bruschetta for a tangy twist.
Creamy Mushroom Risotto
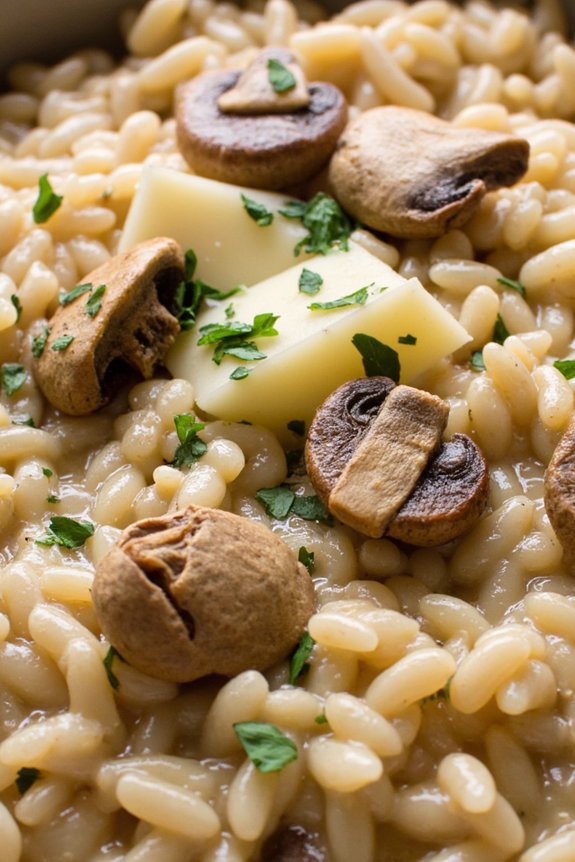
Creamy Mushroom Risotto is a classic Italian dish that offers a delightful blend of flavors and textures. The creamy consistency of the risotto paired with the earthy richness of mushrooms makes it a comforting meal perfect for any lunch gathering. This dish isn’t only delicious but also a great way to showcase the versatility of Italian cuisine in your own kitchen.
With the right ingredients and a touch of patience, you can create a restaurant-quality risotto that will impress your family and friends.
To achieve the perfect Creamy Mushroom Risotto, it’s important to use high-quality Arborio rice, as it absorbs the flavors of the broth while releasing its natural starches, creating a creamy texture without the need for cream. Fresh mushrooms add a robust flavor, while a hint of Parmesan cheese provides a savory finish.
This recipe serves 4-6 people, making it ideal for a family meal or a small gathering with friends.
Ingredients for 4-6 servings:
- 1 1/2 cups Arborio rice
- 8 cups chicken or vegetable broth
- 1 cup dry white wine
- 2 tablespoons olive oil
- 1 medium onion, finely chopped
- 3 cloves garlic, minced
- 1 pound mixed mushrooms (such as cremini, shiitake, or button), sliced
- 1/2 cup grated Parmesan cheese
- 2 tablespoons unsalted butter
- Salt and pepper to taste
- Fresh parsley, chopped (for garnish)
Cooking Instructions:
- Prepare the Broth: Begin by heating the chicken or vegetable broth in a saucepan over medium heat. Keep it warm but not boiling, as you’ll need to add it gradually to the rice.
- Sauté the Ingredients: In a large pan or skillet, heat the olive oil over medium heat. Add the chopped onion and sauté until it becomes translucent, about 3-4 minutes. Stir in the minced garlic and cook for another minute until fragrant.
- Cook the Mushrooms: Add the sliced mushrooms to the pan and cook until they release their moisture and begin to brown, about 5-7 minutes. Season with a pinch of salt and pepper.
- Toast the Rice: Add the Arborio rice to the pan and cook, stirring frequently, until the edges of the rice become translucent, about 2-3 minutes. This step is essential for enhancing the flavor of the rice.
- Deglaze with Wine: Pour the white wine into the pan and stir until it’s mostly absorbed by the rice. This process adds depth to the flavor profile of the dish.
- Add the Broth Gradually: Begin adding the warm broth to the rice, one ladle at a time, stirring constantly. Wait until the liquid is mostly absorbed before adding more. Continue this process until the rice is creamy and cooked al dente, which should take about 18-20 minutes.
- Finish the Risotto: Once the rice is cooked to your liking, remove the pan from heat. Stir in the butter and grated Parmesan cheese until melted and fully incorporated. Adjust seasoning with additional salt and pepper if needed.
- Garnish and Serve: Transfer the Creamy Mushroom Risotto to serving plates or bowls and garnish with freshly chopped parsley. Serve immediately to enjoy its perfect creamy consistency.
Extra Tips:
When preparing this risotto, it’s important to maintain a steady stirring motion. This helps release the starches from the rice, contributing to the creamy texture.
If you prefer a more intense mushroom flavor, consider using a combination of dried and fresh mushrooms, rehydrating the dried ones in warm water before cooking. Additionally, be mindful of the salt content, especially if using salted broth, to avoid an overly salty dish. Always taste and adjust the seasoning towards the end of the cooking process.
Italian-Style Veggie Panini
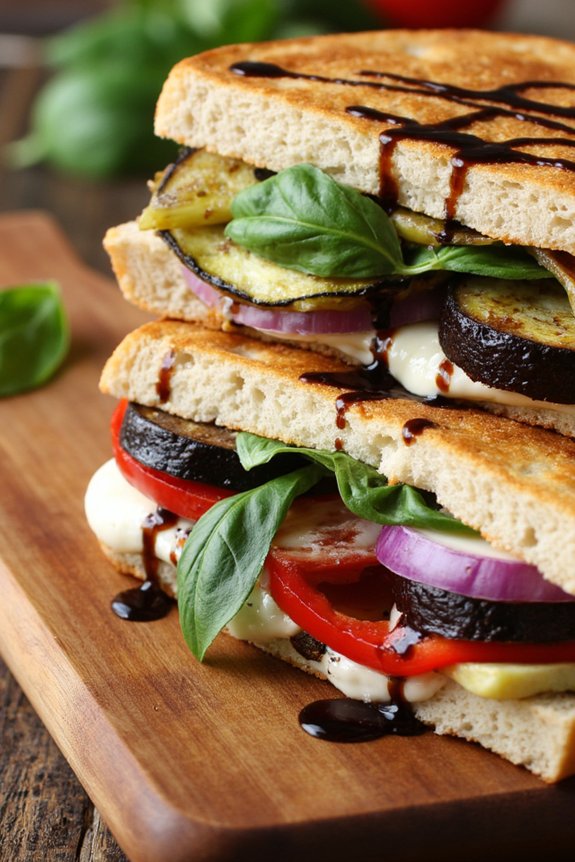
Italian-Style Veggie Panini is a delightful and hearty sandwich that brings together the best of Italian flavors in a healthy and delicious way. This panini is perfect for a quick lunch or a light dinner, and it can easily be adapted to suit your taste preferences.
Packed with roasted vegetables, fresh basil, and creamy mozzarella, this panini offers a perfect balance of flavors and textures. The crispy, golden bread encases the vibrant and savory filling, creating a satisfying meal that’s both nutritious and indulgent.
Preparing an Italian-Style Veggie Panini allows you to experiment with different vegetables and cheeses, making it a versatile dish. The key is to use fresh and high-quality ingredients to guarantee the best possible flavor.
Whether you’re a seasoned chef or a novice cook, this recipe is straightforward and can be easily prepared in under 30 minutes. It’s an excellent choice for those who want to enjoy a taste of Italy without spending hours in the kitchen.
Ingredients (serving size: 4-6 people)
- 2 large zucchini, sliced
- 1 red bell pepper, sliced
- 1 yellow bell pepper, sliced
- 1 eggplant, sliced
- 1 red onion, sliced
- 2 tablespoons olive oil
- Salt and pepper to taste
- 1 loaf ciabatta bread or 6 ciabatta rolls
- 8 ounces fresh mozzarella, sliced
- 1 cup fresh basil leaves
- 1/4 cup balsamic glaze
Cooking Instructions
- Prepare the Vegetables: Preheat your oven to 400°F (200°C). On a large baking sheet, arrange the sliced zucchini, bell peppers, eggplant, and red onion. Drizzle with olive oil and season with salt and pepper. Toss the vegetables to guarantee they’re evenly coated.
- Roast the Vegetables: Place the baking sheet in the preheated oven. Roast the vegetables for 20-25 minutes, or until they’re tender and slightly caramelized, stirring halfway through cooking.
- Prepare the Bread: While the vegetables are roasting, slice the ciabatta loaf or rolls in half horizontally. If desired, lightly brush the cut sides with olive oil.
- Assemble the Panini: Once the vegetables are roasted, layer them evenly on the bottom half of the ciabatta. Top with slices of fresh mozzarella and a generous handful of fresh basil leaves. Drizzle with balsamic glaze.
- Grill the Panini: Preheat a panini press or a large skillet over medium heat. Place the assembled panini, top side down, onto the press or skillet. If using a skillet, press down with a heavy pan. Grill for 3-5 minutes, or until the bread is golden and the cheese has melted.
- Serve: Carefully remove the panini from the press or skillet. Let it cool for a minute before slicing and serving warm.
Extra Tips
For a more intense flavor, consider marinating the vegetables in olive oil, garlic, and Italian herbs for at least 30 minutes before roasting.
If you don’t have a panini press, you can use a grill pan or even a regular skillet, pressing the sandwiches down with a heavy pan or foil-wrapped brick to achieve that signature panini crunch.
Feel free to add other ingredients like sun-dried tomatoes, arugula, or a spread of pesto for an additional burst of flavor.
Lemon Parmesan Orzo
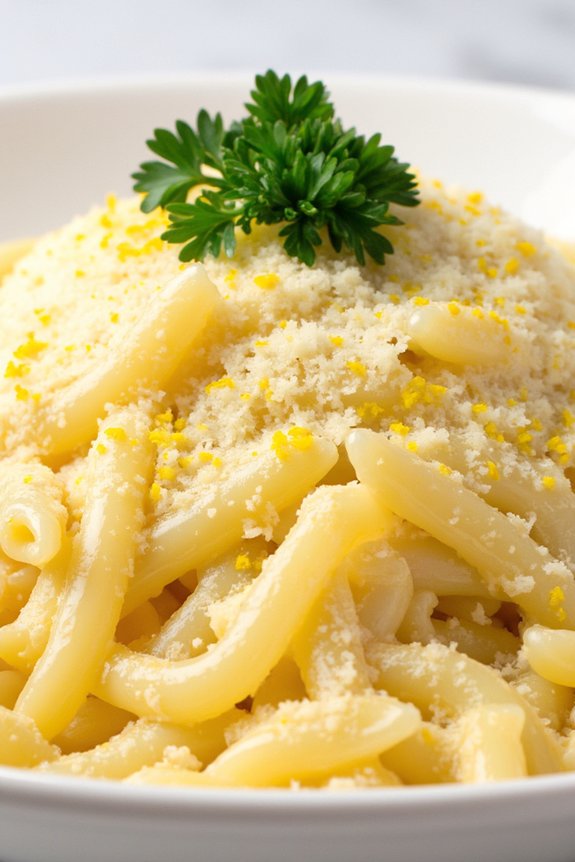
Lemon Parmesan Orzo is a delightful Italian-inspired dish that combines the bright, zesty flavors of lemon with the rich, savory taste of Parmesan cheese, all enveloped in the comforting texture of orzo pasta. This dish is perfect for a light lunch and pairs beautifully with a fresh green salad or grilled vegetables. Quick to prepare and bursting with flavor, Lemon Parmesan Orzo is an excellent choice for those looking to elevate a simple meal with a touch of elegance.
The beauty of this dish lies in its simplicity and versatility. Orzo, a rice-shaped pasta, absorbs flavors wonderfully, making it an ideal base for the tangy lemon juice and the creamy, nutty Parmesan. With just a handful of ingredients, you can create a satisfying dish that’s both comforting and invigorating. Ideal for serving 4-6 people, this recipe is perfect for a family lunch or a gathering with friends.
Ingredients (serving size: 4-6 people):
- 1 ½ cups orzo pasta
- 2 tablespoons olive oil
- 2 cloves garlic, minced
- 2 cups chicken or vegetable broth
- 1 cup water
- 1 cup freshly grated Parmesan cheese
- Zest of 1 lemon
- Juice of 1 lemon
- Salt and pepper to taste
- 2 tablespoons fresh parsley, chopped
- Optional: additional Parmesan for serving
Cooking Instructions:
- Prepare the Orzo: Begin by heating the olive oil in a large skillet over medium heat. Add the minced garlic and sauté for about 1 minute until fragrant, being careful not to let it burn.
- Cook the Orzo: Add the orzo to the skillet and stir it well to coat it with the garlic-infused oil. Cook for about 2-3 minutes, stirring frequently, until the orzo is lightly toasted.
- Add Broth and Water: Pour in the chicken or vegetable broth and the water. Stir to combine, and bring the mixture to a boil. Once boiling, reduce the heat to low, cover, and let it simmer for 10-12 minutes or until the orzo is tender and has absorbed most of the liquid.
- Incorporate Flavors: Once the orzo is cooked, remove the skillet from the heat. Stir in the lemon juice, lemon zest, and grated Parmesan cheese. Mix well until the cheese is melted and the orzo is creamy.
- Season and Serve: Taste and season with salt and pepper as needed. Stir in the chopped parsley for a fresh finish. Serve hot, garnished with additional Parmesan cheese if desired.
Extra Tips:
For best results, use freshly grated Parmesan cheese rather than pre-packaged varieties, as it melts more smoothly and provides a superior flavor.
If you prefer a creamier texture, you can add a splash of heavy cream or a dollop of mascarpone cheese at the end.
To make the dish more substantial, consider adding cooked chicken, shrimp, or roasted vegetables.
Always taste and adjust the seasoning before serving, as the flavors of lemon and Parmesan can vary in intensity.
Antipasto Platter With a Twist
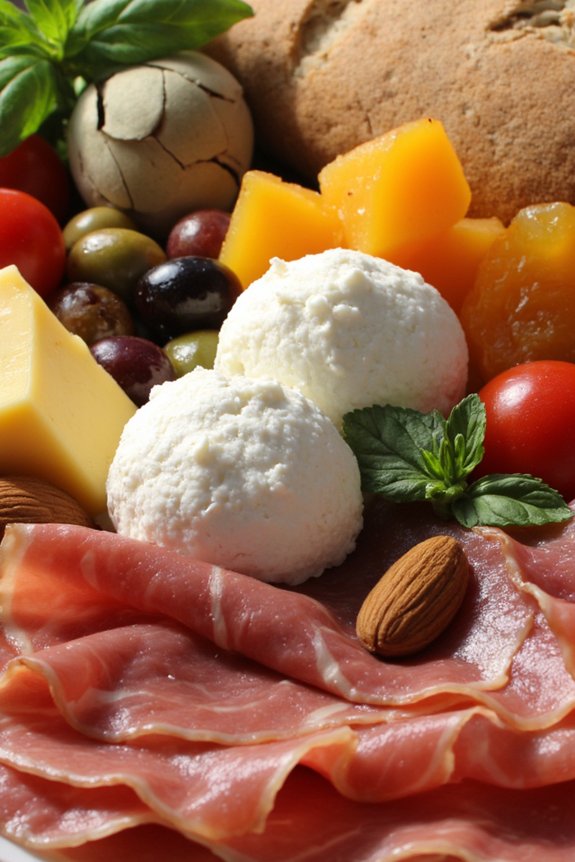
The Antipasto Platter is a beloved Italian starter, offering a delightful variety of flavors and textures that set the stage for a memorable meal. Our version of this classic dish introduces a unique twist by incorporating unexpected ingredients that add a modern flair to the traditional setup.
This platter balances the savory and tangy flavors of cured meats, cheeses, and marinated vegetables with the sweetness of fresh fruits and the crunch of nuts, providing an exciting gastronomic experience. Perfect for entertaining, this platter serves as an ideal centerpiece for a casual lunch or as an elegant appetizer for a more formal gathering.
This recipe is designed to serve 4-6 people, ensuring that each guest can enjoy a generous assortment of the diverse components. Whether you’re hosting a family gathering or a friendly get-together, the Antipasto Platter With a Twist is sure to impress.
With minimal cooking required, this dish allows you to focus on presentation and flavor, ultimately creating a visually stunning and delicious start to your meal.
Ingredients:
- 100g prosciutto
- 100g salami
- 150g mozzarella balls
- 100g aged cheddar cheese, cubed
- 1 cup marinated artichoke hearts
- 1 cup mixed olives (green and black)
- 1 cup cherry tomatoes, halved
- 1 cup seedless grapes
- 1/2 cup dried apricots
- 1/2 cup roasted almonds
- 1/4 cup fresh basil leaves
- 1/4 cup balsamic glaze
- 1 baguette or rustic bread, sliced
Instructions:
- Prepare the Meats and Cheeses: Lay out the prosciutto and salami on a large serving platter. Space them evenly, ensuring they aren’t overlapping too much. Arrange the mozzarella balls and aged cheddar cubes around the meats for easy access.
- Add the Vegetables: Drain the marinated artichoke hearts and scatter them around the platter. Add the mixed olives, ensuring a mix of colors and flavors across the platter. Place the halved cherry tomatoes in small clusters, adding a pop of color.
- Incorporate the Fruits and Nuts: Arrange the seedless grapes in small bunches across the platter. Add the dried apricots in small piles for a sweet contrast. Scatter the roasted almonds throughout for added crunch.
- Garnish with Herbs: Tuck fresh basil leaves in between the other components for an aromatic touch that enhances the overall presentation and flavor.
- Drizzle and Serve: Just before serving, drizzle the balsamic glaze lightly over the platter, focusing on the mozzarella and tomatoes to enhance their flavor. Serve the platter with slices of baguette or rustic bread on the side.
Extra Tips:
When assembling your antipasto platter, allow your creativity to shine. Feel free to substitute or add ingredients based on personal preference or seasonal availability.
Consider incorporating other elements like marinated mushrooms or roasted red peppers for additional variety. The key to a successful antipasto platter is balance, so aim for a harmonious mix of flavors and textures.
To save time, prepare the ingredients in advance and assemble the platter just before your guests arrive, ensuring everything remains fresh and vibrant.
Hearty Minestrone Soup

Minestrone soup is a classic Italian dish that’s both nutritious and comforting, making it an ideal choice for a hearty lunch. This vegetable-rich soup is versatile, allowing you to use seasonal vegetables and pantry staples to create a delightful meal. The beauty of minestrone lies in its ability to adapt to whatever ingredients you have on hand, while still delivering a satisfying and flavorful experience. Traditionally, this soup includes a variety of vegetables, beans, and pasta or rice, simmered in a rich tomato-based broth.
The following recipe for Hearty Minestrone Soup is designed to serve 4-6 people, perfect for a family lunch or to enjoy throughout the week. This version includes classic ingredients such as carrots, celery, and tomatoes, combined with cannellini beans and ditalini pasta for added texture and substance. Fresh herbs and spices elevate the flavors, while a sprinkle of parmesan cheese on top adds a delicious finish. Let’s explore the ingredients and steps to create this comforting dish.
Ingredients (for 4-6 servings):
- 2 tablespoons olive oil
- 1 onion, diced
- 2 cloves garlic, minced
- 2 carrots, diced
- 2 celery stalks, diced
- 1 zucchini, diced
- 1 can (14 oz) diced tomatoes
- 4 cups vegetable broth
- 1 can (14 oz) cannellini beans, drained and rinsed
- 1 cup ditalini pasta
- 1 teaspoon dried oregano
- 1 teaspoon dried basil
- Salt and pepper to taste
- 2 cups fresh spinach
- Grated parmesan cheese for serving
- Fresh basil for garnish
Instructions:
1. Prepare the Base:
Heat the olive oil in a large pot over medium heat. Add the diced onion and minced garlic, sautéing until the onion becomes translucent and the garlic is fragrant, about 3-4 minutes.
2. Add Vegetables:
Stir in the diced carrots, celery, and zucchini. Cook for about 5-7 minutes, allowing the vegetables to soften slightly.
3. Incorporate Tomatoes and Broth:
Pour in the diced tomatoes and vegetable broth. Stir well to combine the ingredients.
4. Season:
Add the dried oregano, dried basil, salt, and pepper. Bring the mixture to a gentle boil.
5. Simmer:
Reduce the heat and let the soup simmer for around 15 minutes, allowing the flavors to meld and the vegetables to tenderize.
6. Add Beans and Pasta:
Stir in the cannellini beans and ditalini pasta. Continue to simmer for another 10 minutes, or until the pasta is al dente.
7. Finish with Spinach:
Add the fresh spinach, stirring until it wilts into the soup. This should take about 2 minutes.
8. Serve:
Ladle the soup into bowls, garnishing with grated parmesan cheese and fresh basil. Serve hot and enjoy!
Extra Tips:
For a richer flavor, consider using homemade vegetable broth or adding a parmesan rind to the soup while it simmers, removing it before serving. If you prefer a thicker soup, mash some of the beans before adding them to the pot.
Feel free to substitute other seasonal vegetables or beans based on your preference. Minestrone is also a great make-ahead dish, as the flavors develop even more when reheated. Adjust the seasoning to taste before serving, especially if the soup has been refrigerated.
Spinach and Ricotta Stuffed Shells

Spinach and Ricotta Stuffed Shells is a classic Italian dish that combines tender pasta, creamy cheese, and nutritious spinach to create a delightful and satisfying meal. Perfect for a family lunch or a gathering with friends, this dish is both comforting and delicious.
The blend of ricotta, Parmesan, and mozzarella cheeses with fresh spinach creates a rich filling that’s encased within large pasta shells, then baked to perfection under a blanket of tangy marinara sauce.
This recipe is designed to serve 4-6 people, making it ideal for sharing. It involves simple ingredients and straightforward steps, allowing you to create a restaurant-quality meal in the comfort of your own kitchen. While the dish is hearty enough to be served on its own, it pairs beautifully with a simple green salad or garlic bread for a complete Italian feast.
The preparation is straightforward, and the result is a beautifully presented dish that’s sure to impress your guests.
Ingredients (Serves 4-6)
- 20-24 jumbo pasta shells
- 1 tablespoon olive oil
- 2 cups marinara sauce
- 1 cup ricotta cheese
- 1 cup fresh spinach, chopped
- 1 cup shredded mozzarella cheese
- 1/4 cup grated Parmesan cheese
- 1 large egg
- 2 cloves garlic, minced
- 1 teaspoon Italian seasoning
- Salt and pepper to taste
- Fresh basil leaves for garnish (optional)
Cooking Instructions
- Preheat and Prepare: Preheat your oven to 375°F (190°C). Grease a 9×13 inch baking dish with a little olive oil and set aside.
- Cook the Pasta: Bring a large pot of salted water to a boil. Add the jumbo shells and cook according to the package instructions until al dente. Once cooked, drain and rinse the shells under cold water to stop the cooking process and prevent them from sticking together.
- Make the Filling: In a large bowl, combine the ricotta cheese, chopped spinach, half of the mozzarella cheese, Parmesan cheese, egg, minced garlic, Italian seasoning, salt, and pepper. Mix well until all ingredients are thoroughly combined.
- Stuff the Shells: Carefully stuff each shell with the spinach and ricotta mixture using a spoon. Place each stuffed shell into the prepared baking dish, open side up.
- Assemble the Dish: Pour the marinara sauce evenly over the stuffed shells. Sprinkle the remaining mozzarella cheese over the top.
- Bake: Cover the baking dish with aluminum foil and bake in the preheated oven for 25 minutes. Remove the foil and bake for an additional 10-15 minutes, or until the cheese is bubbly and golden brown.
- Serve: Remove the dish from the oven and let it cool for a few minutes. Garnish with fresh basil leaves if desired before serving.
Extra Tips
For an added depth of flavor, consider sautéing the chopped spinach with a bit of olive oil and garlic before mixing it into the ricotta cheese. This will enhance the taste and texture of the filling.
If you’re short on time, you can prepare the stuffed shells a day in advance and store them in the refrigerator, unbaked. When ready to serve, simply add the marinara sauce and cheese, and bake as directed.
This dish also freezes well; just make sure to cover tightly before freezing and allow extra baking time if cooking from frozen.
Zesty Lemon Chicken Piccata

Zesty Lemon Chicken Piccata is a classic Italian-American dish that’s perfect for a light yet flavorful lunch. This dish features tender chicken breasts pan-seared to golden perfection and then smothered in a bright, tangy lemon caper sauce. The combination of fresh lemon juice, briny capers, and fragrant garlic creates a delightful medley of flavors, making it a family favorite that’s both satisfying and invigorating.
Serve it over pasta or alongside a simple salad for a complete meal. This recipe is perfect for a serving size of 4-6 people, making it an ideal choice for a family lunch or a small gathering. The preparation is straightforward, and with a few fresh ingredients, you can bring the taste of Italy right to your kitchen.
The key to a successful Chicken Piccata is in balancing the tartness of the lemon with the richness of butter and the salty pop of capers, resulting in a harmonious and delicious sauce that complements the chicken beautifully.
Ingredients:
- 4 boneless, skinless chicken breasts
- Salt and freshly ground black pepper
- 1 cup all-purpose flour, for dredging
- 4 tablespoons unsalted butter
- 3 tablespoons olive oil
- 1/2 cup fresh lemon juice
- 1 cup chicken broth
- 1/4 cup brined capers, rinsed
- 1/3 cup fresh parsley, chopped
- Lemon slices, for garnish (optional)
Instructions:
- Prepare the Chicken: Begin by seasoning the chicken breasts with salt and pepper on both sides. Dredge the chicken in flour, shaking off any excess. This will create a light crust when cooked.
- Cook the Chicken: In a large skillet, melt 2 tablespoons of butter with 3 tablespoons of olive oil over medium-high heat. Once the butter has melted and is sizzling, add the chicken breasts to the pan. Cook the chicken for about 3-4 minutes on each side, or until golden brown and cooked through. Remove the chicken from the skillet and set it aside on a plate.
- Make the Sauce: In the same skillet, add the lemon juice, chicken broth, and capers. Bring the mixture to a boil, scraping up any browned bits from the bottom of the pan for extra flavor. Let it simmer for about 5 minutes, until the sauce has slightly thickened.
- Finish the Dish: Return the chicken breasts to the skillet and simmer for about 5 minutes, allowing the chicken to soak up some of the sauce. Add the remaining 2 tablespoons of butter and stir until melted and the sauce is glossy.
- Garnish and Serve: Sprinkle the dish with fresh parsley and garnish with lemon slices, if desired. Serve immediately, with your choice of pasta or salad.
Extra Tips:
For best results, verify the chicken breasts are evenly pounded to a consistent thickness before cooking. This verifies even cooking and prevents the chicken from drying out.
If you prefer a thicker sauce, you can mix a teaspoon of cornstarch with a little cold water and add it to the sauce while simmering. Additionally, be careful not to overcook the chicken; it should be juicy and tender.
You can also adjust the amount of lemon and capers to suit your taste preferences, making the dish as zesty as you like.
Eggplant Parmesan Sandwich

Eggplant Parmesan Sandwich is a delectable Italian-inspired dish that brings together the rich flavors of eggplant, marinara sauce, and melted cheese, all nestled within a crusty sandwich roll. This hearty and comforting meal is perfect for lunch or dinner, offering a delightful blend of textures and tastes.
The dish showcases the versatility of eggplant, a staple in Italian cuisine, and transforms it into a satisfying sandwich that’s sure to please both vegetarians and meat-lovers alike.
The key to an excellent Eggplant Parmesan Sandwich lies in the preparation of the eggplant slices, which are breaded and baked to a crispy perfection before being layered with marinara sauce and cheese. The use of fresh, quality ingredients elevates the flavor, making each bite a symphony of savory goodness.
This recipe will guide you through creating a delicious Eggplant Parmesan Sandwich that serves 4-6 people, offering a taste of Italy in every mouthful.
Ingredients (serves 4-6):
- 2 medium eggplants
- Salt
- 2 cups all-purpose flour
- 4 large eggs
- 2 cups breadcrumbs
- 1 teaspoon dried oregano
- 1 teaspoon garlic powder
- 1 teaspoon onion powder
- 1/2 teaspoon black pepper
- 3 cups marinara sauce
- 2 cups shredded mozzarella cheese
- 1 cup grated Parmesan cheese
- 6 sandwich rolls
- Olive oil
- Fresh basil leaves (optional)
Cooking Instructions:
- Prepare the Eggplant: Slice the eggplants into 1/2-inch thick rounds. Place the slices on a paper towel-lined tray, sprinkle with salt, and let them sit for about 30 minutes to draw out excess moisture. Rinse and pat dry with a paper towel.
- Set Up Breading Stations: Prepare three shallow bowls: fill the first with flour, the second with beaten eggs, and the third with a mixture of breadcrumbs, oregano, garlic powder, onion powder, and black pepper.
- Bread the Eggplant: Dip each eggplant slice into the flour, shaking off excess, then into the beaten eggs, and finally coat with the breadcrumb mixture, pressing gently to adhere.
- Bake the Eggplant: Preheat the oven to 400°F (200°C). Arrange the breaded eggplant slices on a parchment-lined baking sheet. Drizzle or spray lightly with olive oil. Bake for 25-30 minutes, flipping halfway through, until golden brown and crispy.
- Assemble the Sandwiches: Split the sandwich rolls and toast them lightly if desired. Spread a generous amount of marinara sauce on the bottom half of each roll. Layer two to three slices of baked eggplant on top, sprinkle with mozzarella and Parmesan cheese, and add more marinara sauce if desired.
- Melt the Cheese: Place the assembled sandwiches on a baking tray and return to the oven for about 5-7 minutes, or until the cheese is melted and bubbly.
- Finish and Serve: Remove from the oven and garnish with fresh basil leaves if using. Top with the other half of the roll and serve warm.
Extra Tips: When selecting eggplants, look for ones that are firm with smooth, shiny skin and no blemishes. Salting the eggplant slices is essential to remove bitterness and excess moisture, resulting in a better texture when baked.
If you prefer a more traditional frying method, you can pan-fry the breaded eggplant slices in olive oil until golden brown before assembling the sandwiches. For added flavor, consider infusing the marinara sauce with a hint of red pepper flakes or fresh garlic.
Prosciutto and Melon Skewers

Prosciutto and Melon Skewers are a delightful Italian appetizer that combines the savory flavors of cured ham with the sweet juiciness of ripe melon. This dish isn’t only simple to prepare but also impressively elegant, making it an excellent choice for a light lunch or a dinner party starter. The combination of salty and sweet flavors is a classic pairing in Italian cuisine, and these skewers are a demonstration to the harmonious balance of taste and texture.
The key to making perfect Prosciutto and Melon Skewers lies in selecting high-quality ingredients. Choose a ripe and fragrant cantaloupe or honeydew melon, as its sweetness will contrast beautifully with the saltiness of the prosciutto. When skewered together, these ingredients create a colorful and appetizing presentation that’s sure to please any crowd. Serve these skewers alongside a fresh salad or as part of a charcuterie board for an authentic Italian lunch experience.
Ingredients for 4-6 servings:
- 1 ripe cantaloupe or honeydew melon
- 12-18 slices of prosciutto
- Fresh basil leaves
- Balsamic glaze (optional)
- Salt and pepper to taste
- 12-18 wooden skewers
Instructions:
- Prepare the Melon: Begin by cutting the melon in half and removing the seeds with a spoon. Slice the melon into wedges, then remove the rind from each wedge. Cut the melon flesh into bite-sized cubes, approximately 1-inch in size.
- Prepare the Prosciutto: Take each slice of prosciutto and cut it in half lengthwise. This will create narrow strips that are easier to wrap around the melon pieces.
- Assemble the Skewers: Take a piece of melon and wrap a strip of prosciutto around it, securing it with a skewer. Add a fresh basil leaf onto the skewer next to the prosciutto-wrapped melon. Repeat this process until all ingredients are used, filling each skewer with a couple of melon-prosciutto pieces.
- Season and Glaze: Once all skewers are assembled, lightly season them with salt and pepper to taste. If desired, drizzle a small amount of balsamic glaze over the skewers for added flavor and visual appeal.
- Serve: Arrange the skewers on a serving platter. These can be served immediately or chilled in the refrigerator for up to an hour before serving.
Extra Tips:
When selecting prosciutto, look for a good quality variety that’s thinly sliced, as this will allow it to wrap easily around the melon. If balsamic glaze isn’t available, you can create a simple reduction by simmering balsamic vinegar until it thickens.
Additionally, consider using toothpicks instead of skewers for smaller, bite-sized portions perfect for cocktail parties. Remember to taste your melon before assembling to confirm it’s sweet and ripe, as this will greatly enhance the overall flavor of the dish.