

When I started exploring Italian cooking, it felt both exciting and accessible. Let me share 14 beginner-friendly recipes that boosted my kitchen confidence. From mastering creamy Spaghetti Carbonara to crafting a simple Caprese Salad, each dish highlights quality ingredients and straightforward preparation. Ready to explore a culinary journey that sparks creativity and love for Italian cuisine? Let’s enjoy these delightful recipes together!
Classic Spaghetti Carbonara

Spaghetti Carbonara is a timeless Italian dish that embodies simplicity and exquisite flavor, making it a staple in Italian cuisine. This dish traditionally combines creamy eggs, savory pancetta, and sharp Pecorino Romano cheese, all enveloped around perfectly cooked spaghetti.
The beauty of Spaghetti Carbonara lies in its ability to deliver rich flavor and creamy texture without the use of cream, relying instead on the emulsion of pasta water, cheese, and eggs. This dish is perfect for a cozy family dinner or an impressive meal for guests, as it requires minimal ingredients yet offers maximum satisfaction.
One of the keys to a successful Spaghetti Carbonara is timing and temperature control. The pasta must be hot enough to cook the eggs gently, creating a luscious sauce, but not so hot that it scrambles them. The pancetta should be crisp but not overcooked, providing a perfect contrast to the creamy sauce.
As you begin preparing this classic dish, remember that quality ingredients make all the difference. Choose fresh eggs, authentic Pecorino Romano, and high-quality pancetta to guarantee the best results. This recipe serves 4-6 people, making it ideal for a hearty meal with loved ones.
Ingredients
- 500g spaghetti
- 4 large eggs
- 150g pancetta, diced
- 100g Pecorino Romano cheese, finely grated
- 100g Parmesan cheese, finely grated
- Salt, to taste
- Freshly ground black pepper, to taste
- 2 tablespoons olive oil
- 2 cloves garlic, peeled and crushed (optional)
Cooking Instructions
- Prepare the Pasta: Bring a large pot of salted water to a boil. Add the spaghetti and cook until al dente, according to the package instructions. Reserve about 1 cup of pasta water, then drain the spaghetti.
- Cook the Pancetta: While the pasta is cooking, heat the olive oil in a large skillet over medium heat. Add the pancetta and cook until it becomes golden and crispy, about 5-7 minutes. If using, add the garlic in the last 2 minutes to infuse flavor, then remove and discard.
- Beat the Eggs: In a mixing bowl, whisk together the eggs, Pecorino Romano, and Parmesan until well combined. Season with a generous amount of black pepper.
- Combine Ingredients: Add the hot, drained spaghetti to the skillet with the pancetta. Remove the skillet from the heat. Quickly pour the egg and cheese mixture over the spaghetti, tossing swiftly to coat the pasta evenly and prevent the eggs from scrambling. Add reserved pasta water a little at a time if the sauce is too thick, continuing to mix until creamy.
- Serve Immediately: Transfer the Spaghetti Carbonara to plates or a serving dish, and garnish with additional grated Pecorino Romano and a sprinkle of black pepper. Serve immediately while hot and creamy.
Extra Tips
When preparing Spaghetti Carbonara, remember to keep the pasta water handy as it’s instrumental in adjusting the consistency of the sauce. It’s rich in starch, helping to create a smooth and glossy finish.
Always remove the skillet from the heat before adding the egg mixture to avoid scrambling. If available, use guanciale instead of pancetta for a more authentic taste.
Finally, taste as you go, adjusting the seasoning to your preference, but be cautious with salt as both the cheese and pancetta are already salty.
Simple Caprese Salad

The Simple Caprese Salad is a classic Italian dish that showcases the vibrant flavors of fresh produce. Originating from the island of Capri, this salad is a tribute to the colors of the Italian flag – red, white, and green. The fresh mozzarella, ripe tomatoes, and fragrant basil leaves create a symphony of flavors and textures that’s both revitalizing and satisfying. Perfect as an appetizer, side dish, or light meal, the Caprese Salad is a representation of the idea that the best dishes are often the simplest.
Ideal for warm weather and quick to prepare, the Simple Caprese Salad is an easy recipe that requires no cooking, making it a go-to option for busy weeknights or casual gatherings. The key to a delicious Caprese Salad lies in using high-quality ingredients. Fresh mozzarella should be soft and creamy, the tomatoes ripe and juicy, and the basil fragrant and vibrant. A drizzle of extra virgin olive oil and a sprinkle of salt bring all the flavors together, offering a delightful taste of Italy in every bite.
Ingredients for 4-6 servings:
- 4 large ripe tomatoes
- 1 pound fresh mozzarella cheese
- 1 bunch fresh basil leaves
- 3 tablespoons extra virgin olive oil
- Salt, to taste
- Freshly ground black pepper, to taste
- Balsamic glaze (optional)
Instructions:
- Prepare the Tomatoes: Wash the tomatoes thoroughly under cold water, then pat them dry with a clean kitchen towel. Using a sharp knife, slice the tomatoes into 1/4-inch thick slices and arrange them on a large serving platter.
- Slice the Mozzarella: Drain any excess liquid from the mozzarella cheese. Slice the mozzarella into 1/4-inch thick rounds. Place a slice of mozzarella on top of each tomato slice on the platter.
- Add the Basil: Gently rinse the fresh basil leaves under cold water and pat them dry. Tear the larger leaves in half if desired. Tuck the whole or torn basil leaves between the layers of tomato and mozzarella, ensuring each piece is adorned with a fresh burst of basil.
- Season and Dress: Drizzle the extra virgin olive oil evenly over the arranged layers of tomatoes, mozzarella, and basil. Sprinkle a generous pinch of salt and a few cracks of freshly ground black pepper over the salad. If desired, drizzle a small amount of balsamic glaze over the top for added sweetness and depth of flavor.
- Serve: Allow the salad to sit for a few minutes before serving to let the flavors meld together. Serve at room temperature for the best taste.
Extra Tips:
For the freshest taste, use tomatoes and mozzarella that are locally sourced or in season. If possible, make the salad shortly before serving to maintain the fresh flavors and textures. You can also experiment with different types of tomatoes, such as heirloom or cherry, for a unique twist.
If you prefer a more robust flavor, consider adding a dash of balsamic vinegar instead of glaze. Remember, the quality of the olive oil can greatly impact the overall taste, so choose a high-quality extra virgin olive oil for the best results.
Easy Margherita Pizza

Easy Margherita Pizza is a classic Italian dish that highlights the simplicity and freshness of its ingredients. With a crisp, golden crust, tangy tomato sauce, creamy mozzarella cheese, and fragrant fresh basil leaves, this pizza is a perfect example of how a few high-quality ingredients can come together to create an unforgettable meal.
Perfect for a family dinner or a casual gathering with friends, this easy Margherita pizza recipe is sure to become a favorite. This recipe is designed to serve 4-6 people, making it an ideal choice for small gatherings or family meals. Using store-bought or homemade pizza dough, you’ll be able to prepare this delicious pizza in no time.
The key to a great Margherita pizza is in the balance of flavors and textures, ensuring each bite is both satisfying and authentic.
Ingredients for 4-6 servings:
- 1 pound pizza dough
- 1 cup tomato sauce (preferably homemade or high-quality store-bought)
- 8 ounces fresh mozzarella cheese, sliced
- 1/4 cup freshly grated Parmesan cheese
- Fresh basil leaves
- 2 tablespoons olive oil
- Salt and pepper to taste
- Cornmeal for dusting
Cooking Instructions:
- Preheat the Oven: Begin by preheating your oven to 475°F (245°C). If you have a pizza stone, place it in the oven as it heats. This will help achieve a crispy crust.
- Prepare the Dough: Lightly flour your work surface and stretch or roll out the pizza dough to your desired thickness, aiming for about 12 to 14 inches in diameter. If you prefer a thicker crust, make it slightly smaller.
- Dust the Peel: Sprinkle a pizza peel or a flat baking sheet with cornmeal to prevent sticking. Carefully transfer the rolled-out dough onto the peel.
- Add the Sauce: Spread the tomato sauce evenly over the surface of the dough, leaving a small border around the edges for the crust.
- Arrange the Cheese: Lay the slices of fresh mozzarella evenly across the pizza. Sprinkle the grated Parmesan cheese over the top for added flavor.
- Season and Drizzle: Lightly season the pizza with salt and pepper. Drizzle the olive oil over the top to enhance the flavors.
- Bake the Pizza: Carefully slide the pizza from the peel onto the preheated pizza stone in the oven. Bake for 10-12 minutes, or until the cheese is bubbly and the crust is golden brown.
- Add Fresh Basil: Once the pizza is out of the oven, immediately scatter fresh basil leaves over the hot pizza. The heat will slightly wilt the basil, releasing its aroma.
- Slice and Serve: Allow the pizza to cool for a couple of minutes before slicing. Serve hot and enjoy!
Extra Tips:
For the best results, use high-quality ingredients, especially when it comes to the cheese and tomato sauce. Fresh mozzarella offers the best melt and flavor, while a homemade or premium sauce can elevate the entire dish.
If you don’t have a pizza stone, a baking sheet will work, but be sure to preheat it for a crispier crust. Finally, consider experimenting with the thickness of your crust until you find the perfect texture for your taste.
Quick Pasta Primavera
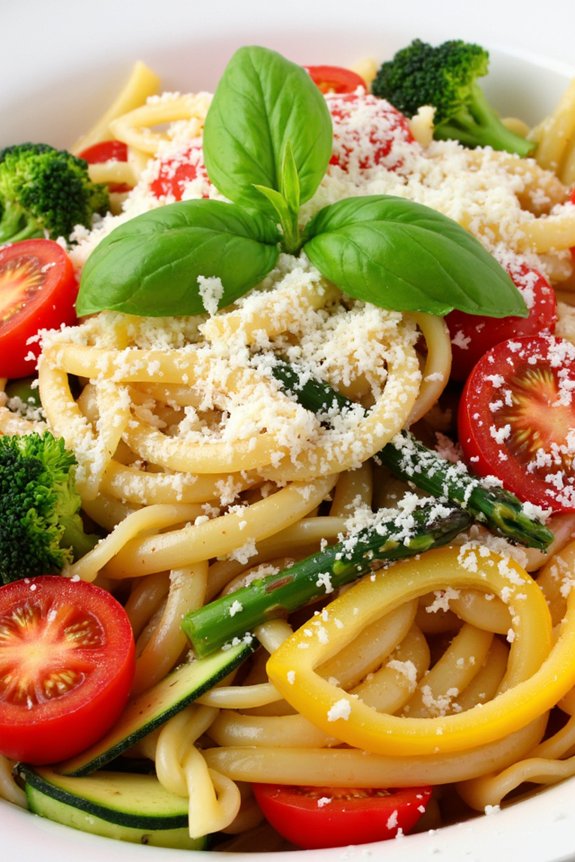
Pasta Primavera is a delightful and vibrant Italian dish that celebrates the freshness of spring vegetables combined with the comforting taste of pasta. This dish isn’t only visually appealing with its array of colorful vegetables but also quick and easy to prepare, making it perfect for a weeknight dinner.
The combination of crisp-tender vegetables and al dente pasta tossed in a simple, yet flavorful sauce creates a harmonious balance of textures and flavors. Whether you’re a seasoned cook or a beginner, this classic Italian recipe is sure to impress your family and friends.
The beauty of Pasta Primavera lies in its versatility. You can use any vegetables you have on hand, making it an excellent dish for using up leftovers or seasonal produce. Traditionally, vegetables like bell peppers, zucchini, and cherry tomatoes are used, but feel free to get creative and add your favorite veggies.
This recipe serves 4-6 people, making it ideal for a family meal or a small gathering. Let’s explore the ingredients and simple steps to create this delicious dish.
Ingredients (for 4-6 servings):
- 12 oz (340g) of pasta (such as penne or fettuccine)
- 2 tablespoons olive oil
- 1 small red onion, thinly sliced
- 2 cloves garlic, minced
- 1 red bell pepper, julienned
- 1 yellow bell pepper, julienned
- 1 zucchini, sliced into half-moons
- 1 cup cherry tomatoes, halved
- 1 cup asparagus, cut into 1-inch pieces
- 1 cup broccoli florets
- 1 teaspoon dried oregano
- Salt and pepper to taste
- 1/2 cup grated Parmesan cheese
- Fresh basil leaves for garnish
Cooking Instructions:
- Cook the Pasta: Bring a large pot of salted water to a boil. Add the pasta and cook according to the package instructions until al dente. Reserve 1 cup of pasta water, then drain the pasta and set aside.
- Prepare the Vegetables: In a large skillet, heat the olive oil over medium-high heat. Add the red onion and garlic, and sauté for about 2 minutes until the onion becomes translucent and the garlic is fragrant.
- Cook the Vegetables: Add the bell peppers, zucchini, asparagus, and broccoli to the skillet. Cook for about 5-7 minutes, stirring occasionally, until the vegetables are tender but still crisp.
- Add the Tomatoes and Seasoning: Stir in the cherry tomatoes, dried oregano, salt, and pepper. Cook for another 2 minutes until the tomatoes soften slightly.
- Combine Pasta and Vegetables: Add the cooked pasta to the skillet with the vegetables. Toss everything together, adding some of the reserved pasta water if needed to loosen the sauce and create a light coating.
- Finish the Dish: Remove the skillet from the heat and sprinkle the grated Parmesan cheese over the pasta. Toss gently to combine and allow the cheese to melt into the dish.
- Serve and Garnish: Transfer the Pasta Primavera to serving plates or a large serving bowl. Garnish with fresh basil leaves and additional Parmesan cheese if desired.
Extra Tips:
To enhance the flavor of your Pasta Primavera, consider roasting some of the vegetables for a deeper, caramelized taste before adding them to the skillet.
You can also experiment with different types of pasta, such as whole wheat or gluten-free varieties, to suit dietary preferences. If you prefer a creamier sauce, a splash of cream or a dollop of ricotta can be added just before serving.
Additionally, this dish pairs wonderfully with a light, crisp white wine or a revitalizing sparkling water with lemon. Enjoy your fresh and satisfying homemade Pasta Primavera!
Basic Risotto Milanese

Risotto Milanese is a classic Italian dish known for its rich flavor and vibrant golden color, achieved through the addition of saffron. Originating from Milan, this creamy rice dish is a reflection of the simplicity and elegance of Italian cooking.
Despite its luxurious taste, Risotto Milanese is straightforward to prepare, making it a favorite among both novice cooks and seasoned chefs. The key to its success lies in using high-quality ingredients and patiently stirring the risotto to achieve the perfect creamy consistency.
This dish is perfect for a family dinner or a sophisticated get-together, as it serves 4-6 people. When paired with a glass of white wine and a light salad, Risotto Milanese becomes a complete meal that delights the senses. Its comforting texture and savory aroma make it an ideal choice for any occasion, bringing a touch of Italy to your dining table.
Ingredients:
- 1 1/2 cups Arborio rice
- 4 cups chicken or vegetable broth
- 1/2 cup dry white wine
- 1/4 teaspoon saffron threads
- 1/2 cup grated Parmesan cheese
- 2 tablespoons unsalted butter
- 1 small onion, finely chopped
- 2 tablespoons olive oil
- Salt and black pepper to taste
Cooking Instructions:
- Prepare the Broth: In a small saucepan, warm the chicken or vegetable broth over low heat. This will guarantee that the broth is hot when added to the rice, which helps maintain the cooking temperature.
- Bloom the Saffron: Add the saffron threads to the warm broth and let them steep while you prepare the other ingredients. This step releases the saffron’s color and flavor into the broth.
- Sauté the Onion: In a large saucepan or Dutch oven, heat the olive oil and 1 tablespoon of butter over medium heat. Add the chopped onion and cook until it becomes translucent, about 5 minutes. Be careful not to brown the onion.
- Toast the Rice: Add the Arborio rice to the pan with the onions, stirring to coat the rice with the oil and butter. Toast the rice for about 2 minutes until it becomes slightly translucent around the edges.
- Deglaze with Wine: Pour in the white wine and stir continuously until it’s mostly absorbed by the rice. This step adds depth of flavor to the dish.
- Cook the Risotto: Begin adding the warm broth one ladle at a time, stirring constantly. Wait until the liquid is mostly absorbed before adding the next ladle. Continue this process until the rice is creamy and cooked to al dente, about 18-20 minutes.
- Add Cheese and Butter: Once the rice is done, remove the saucepan from the heat. Stir in the remaining tablespoon of butter and the grated Parmesan cheese. Season with salt and pepper to taste.
- Serve Immediately: Serve the risotto hot, garnished with additional grated Parmesan cheese if desired.
Extra Tips:
To achieve the ideal texture, verify that you stir the risotto frequently. This constant motion releases starch from the rice, contributing to the dish’s creamy consistency.
If you find the risotto becoming too thick before the rice is cooked through, simply add more warm broth or water to achieve the desired consistency. Additionally, use good-quality saffron, as this is essential for the authentic flavor and color of Risotto Milanese.
Finally, enjoy the process; cooking risotto is a labor of love that rewards patience with a delicious meal.
Traditional Bruschetta Al Pomodoro

Traditional Bruschetta Al Pomodoro is a classic Italian appetizer that captures the essence of Mediterranean flavors with its simple yet delicious ingredients. Originating from central Italy, this dish is a celebration of the ripest tomatoes, fragrant basil, and high-quality olive oil, all served atop crispy bread. Bruschetta Al Pomodoro is perfect for a light snack, a starter before a meal, or even as a main course for a summer lunch. The freshness of the ingredients is key, making this dish both healthy and satisfying.
To truly appreciate the authentic taste of Bruschetta Al Pomodoro, it’s vital to use the freshest tomatoes and a robust, extra-virgin olive oil. The bread, typically a rustic Italian loaf, should be toasted to a perfect golden brown, providing a crunchy contrast to the juicy tomato topping. This recipe serves 4-6 people and can be easily adjusted for larger gatherings. Whether you’re hosting a dinner party or enjoying a quiet evening at home, this traditional dish is sure to impress with its vibrant flavors and simplicity.
Ingredients for 4-6 servings:
- 1 loaf of rustic Italian bread or ciabatta
- 4 ripe tomatoes
- 2 cloves of garlic
- 1/4 cup extra-virgin olive oil
- Salt to taste
- Freshly ground black pepper to taste
- 10-12 fresh basil leaves
- Optional: Balsamic glaze for drizzling
Cooking Instructions:
- Prepare the Tomatoes: Start by washing the tomatoes thoroughly. Cut them into small, even dice, discarding the seeds if you prefer a less juicy topping. Place the diced tomatoes in a bowl.
- Season the Tomatoes: Mince 2 cloves of garlic and add them to the tomatoes. Add salt, freshly ground black pepper, and about 2 tablespoons of extra-virgin olive oil. Mix well to guarantee that all the ingredients are evenly combined. Let the mixture sit for at least 10 minutes to allow the flavors to meld.
- Prepare the Bread: Preheat your oven to 400°F (200°C). Slice the loaf of Italian bread or ciabatta into 1/2-inch thick slices. Arrange them on a baking sheet in a single layer.
- Toast the Bread: Drizzle or brush each slice of bread with the remaining olive oil. Place the baking sheet in the oven and toast the bread for about 5-7 minutes, or until the edges are golden brown and crispy.
- Assemble the Bruschetta: Once the bread is toasted, remove it from the oven and let it cool slightly. Spoon a generous amount of the tomato mixture onto each slice. Tear the fresh basil leaves by hand and sprinkle them over the top.
- Finish and Serve: Optionally, drizzle a little balsamic glaze over the bruschetta for added sweetness and acidity. Serve immediately while the bread is still warm.
Extra Tips:
For the best results, choose tomatoes that are ripe and juicy, as they’ll enhance the flavor of the bruschetta. If you prefer a less garlicky taste, rub the toasted bread with a whole clove of garlic before adding the tomato mixture.
Additionally, if you want to prepare the dish ahead of time, you can make the tomato topping a few hours in advance and store it in the refrigerator. Just be sure to toast the bread right before serving to keep it crisp and fresh. Enjoy this traditional Italian appetizer with a chilled glass of white wine for a true Mediterranean experience.
Creamy Fettuccine Alfredo

Creamy Fettuccine Alfredo is a classic Italian dish that’s both simple and satisfying. With its rich and velvety sauce, this dish is perfect for a cozy dinner at home or a special occasion. The key to a great Fettuccine Alfredo is using high-quality ingredients and guaranteeing that the sauce is creamy and smooth, coating every strand of pasta perfectly.
This recipe combines the traditional flavors of butter, cream, and Parmesan cheese to create a luscious sauce that complements the pasta beautifully. To make this dish even more delicious, you can add your favorite protein, such as grilled chicken or shrimp, or keep it vegetarian by including sautéed mushrooms or spinach.
Regardless of how you choose to customize it, this recipe will guide you through creating an authentic and delicious Creamy Fettuccine Alfredo that serves 4-6 people.
Ingredients:
- 1 pound fettuccine pasta
- 1 cup heavy cream
- 1/2 cup unsalted butter
- 1 cup freshly grated Parmesan cheese
- Salt to taste
- Freshly ground black pepper to taste
- 2 cloves garlic, minced
- Chopped parsley for garnish (optional)
Instructions:
- Cook the Pasta: In a large pot, bring salted water to a boil. Add the fettuccine pasta and cook according to package instructions until al dente. Reserve 1 cup of pasta water, then drain the pasta and set aside.
- Prepare the Sauce: In a large skillet over medium heat, melt the butter. Add the minced garlic and sauté for about 1 minute until fragrant, being careful not to brown it.
- Combine Cream and Cheese: Stir in the heavy cream and bring to a gentle simmer. Gradually add the Parmesan cheese, whisking continuously until the cheese melts and the sauce becomes smooth and creamy.
- Season the Sauce: Season the sauce with salt and freshly ground black pepper to taste. Adjust the seasoning as necessary to suit your preference.
- Mix Pasta and Sauce: Add the cooked fettuccine to the sauce, tossing to combine. If the sauce is too thick, add the reserved pasta water a little at a time until you reach your desired consistency.
- Serve: Transfer the creamy fettuccine Alfredo to serving plates. Garnish with chopped parsley if desired and serve immediately.
Extra Tips:
To guarantee your Fettuccine Alfredo is perfectly creamy, avoid overheating the sauce once the cheese has been added, as this can cause it to become grainy. For a lighter version, you can substitute half of the heavy cream with milk.
Additionally, if you like a bit of heat, consider adding a pinch of red pepper flakes to the sauce. Always use freshly grated Parmesan cheese for the best flavor and texture, as pre-grated cheese often contains additives that can prevent it from melting smoothly.
Rustic Tuscan Panzanella

Rustic Tuscan Panzanella is a classic Italian bread salad that embodies the simplicity and vitality of Tuscan cuisine. Originating from the rural region of Tuscany, this dish makes use of stale or day-old bread, which soaks up the vibrant flavors of ripe tomatoes, crisp cucumbers, and fragrant herbs.
It’s a perfect summer dish that can be served as a side or a light main course, showcasing the beauty of seasonal produce. The key to a great Panzanella is using high-quality ingredients, as the flavors truly shine through in this no-cook dish.
This recipe is a wonderful way to reduce food waste by repurposing leftover bread, and it also allows for plenty of personal creativity. Traditionally, Panzanella includes ingredients like tomatoes, onions, and basil, but you can also add other vegetables or ingredients like capers or olives to suit your taste.
The combination of juicy vegetables and the tangy dressing is sure to please any palate. This recipe serves 4-6 people and is perfect for a family gathering or a casual dinner with friends.
Ingredients:
- 4 cups of day-old crusty bread, cut into cubes
- 4 large ripe tomatoes, chopped
- 1 cucumber, peeled and sliced
- 1 red onion, thinly sliced
- 1/4 cup fresh basil leaves, torn
- 1/4 cup extra virgin olive oil
- 2 tablespoons red wine vinegar
- Salt and freshly ground black pepper, to taste
- Optional: 1/4 cup capers, rinsed and drained
- Optional: 1/4 cup pitted black olives, sliced
Instructions:
- Prepare the Bread: Start by cutting the day-old bread into bite-sized cubes. If the bread isn’t stale enough, you can toast it lightly in the oven at 350°F (175°C) for about 10 minutes until it’s dry and slightly golden.
- Mix the Vegetables: In a large mixing bowl, combine the chopped tomatoes, sliced cucumber, and thinly sliced red onion. Add the torn basil leaves and optional capers and olives if using.
- Make the Dressing: In a small bowl or a jar with a lid, whisk together the extra virgin olive oil and red wine vinegar. Season the dressing with salt and freshly ground black pepper to taste.
- Combine the Ingredients: Add the bread cubes to the bowl with the vegetables. Pour the dressing over the salad, and gently toss everything together until the bread is well-coated with the dressing and the vegetables are evenly distributed.
- Let it Rest: Allow the Panzanella to sit for at least 30 minutes at room temperature before serving. This resting time allows the bread to soak up the flavors from the dressing and the juices from the vegetables, enhancing the taste of the salad.
- Serve: Once the flavors have melded, give the salad a final toss and adjust the seasoning if necessary. Serve the Panzanella as a rejuvenating side dish or a light main course.
Extra Tips:
To make the best Rustic Tuscan Panzanella, use the freshest and ripest tomatoes you can find, as they provide the salad with its essential juiciness and flavor.
If you prefer a bit of crunch, keep some of the bread cubes aside and add them just before serving. This dish can be made ahead of time and stored in the refrigerator, but it’s best served at room temperature.
Feel free to experiment with different herbs like parsley or mint for a unique twist. Enjoy this delicious and versatile Italian classic!
Flavorful Penne Arrabbiata
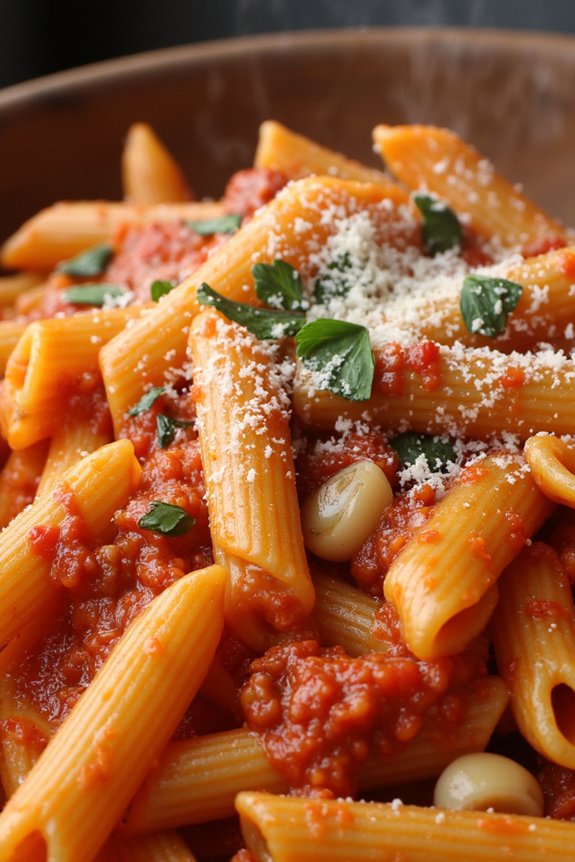
Penne Arrabbiata is a classic Italian pasta dish known for its bold, spicy flavor. The name “Arrabbiata” translates to “angry” in Italian, which refers to the heat from the chili peppers used in the sauce. This dish is perfect for those who enjoy a bit of spice in their meals. Traditionally, the sauce is made with tomatoes, garlic, and red chili peppers, tossed with al dente penne pasta, and garnished with fresh parsley.
It’s a simple yet delicious meal that can be prepared in under 30 minutes, making it ideal for a quick weeknight dinner or a satisfying lunch. The beauty of Penne Arrabbiata lies in its simplicity and the fresh ingredients that bring out its vibrant taste. While the dish is inherently spicy, you can always adjust the level of heat to suit your preference.
The key to a great Penne Arrabbiata is using high-quality ingredients like ripe tomatoes, good olive oil, and fresh herbs. This recipe serves 4-6 people, making it perfect for family gatherings or a small dinner party. Follow the steps below to create this delightful Italian dish that will surely impress your guests.
Ingredients:
- 500g penne pasta
- 3 tablespoons olive oil
- 3 cloves garlic, minced
- 1 teaspoon red chili flakes (adjust to taste)
- 800g canned whole tomatoes, crushed
- Salt, to taste
- Freshly ground black pepper, to taste
- 1/4 cup fresh parsley, chopped
- Grated Parmesan cheese, for serving (optional)
Cooking Instructions:
- Cook the Pasta: Begin by bringing a large pot of salted water to a boil. Add the penne pasta and cook according to the package instructions until al dente. Drain the pasta, reserving about 1 cup of the pasta cooking water, and set aside.
- Prepare the Sauce: While the pasta is cooking, heat the olive oil in a large skillet over medium heat. Add the minced garlic and sauté for about 1 minute until fragrant, being careful not to let it burn.
- Add Spice: Stir in the red chili flakes, cooking for another 30 seconds to release their flavor. Adjust the amount of chili flakes based on your preferred level of spiciness.
- Cook the Tomatoes: Add the crushed tomatoes to the skillet, season with salt and freshly ground black pepper, and bring the mixture to a simmer. Let it cook for about 10-15 minutes, stirring occasionally, until the sauce thickens slightly.
- Combine Pasta and Sauce: Add the cooked penne to the sauce, tossing to coat the pasta evenly. If the sauce is too thick, gradually add some of the reserved pasta water until you reach the desired consistency.
- Finish with Fresh Herbs: Stir in the chopped parsley and cook for another minute until the pasta is heated through. Taste and adjust seasoning if necessary.
- Serve: Transfer the Penne Arrabbiata to a serving dish and sprinkle with grated Parmesan cheese, if desired. Serve immediately, garnished with additional parsley if you like.
Extra Tips:
For the best Penne Arrabbiata, use high-quality canned tomatoes, as they form the base of your sauce. If you prefer a smoother sauce, you can blend the tomatoes before adding them to the skillet.
Be cautious with the chili flakes if you’re sensitive to heat—start with a smaller amount and gradually increase to taste. If you want to add more depth of flavor, consider incorporating a splash of red wine into the sauce as it simmers.
Finally, always reserve some pasta water before draining, as it can help adjust the sauce’s consistency and guarantee it clings to the pasta perfectly.
Authentic Chicken Marsala

Chicken Marsala is a classic Italian-American dish that combines the rich flavors of mushrooms and Marsala wine with tender chicken breasts. This dish originates from the region of Sicily, where Marsala wine is produced. Its popularity stems from its unique, slightly sweet, and deeply savory taste profile that pairs beautifully with pasta, mashed potatoes, or a simple side of sautéed vegetables.
Perfect for both a family dinner and a special occasion, this dish is sure to impress with its depth of flavor and simplicity of preparation.
To achieve the authentic taste of Chicken Marsala, it’s important to use high-quality ingredients, particularly the Marsala wine. The cooking process involves lightly pan-frying the chicken breasts, which have been seasoned and dredged in flour, to create a golden crust. These are then simmered in a rich sauce made with Marsala wine, mushrooms, and chicken broth. The combination of these elements creates a velvety sauce that coats the chicken beautifully, making every bite a delight.
Ingredients (Serves 4-6)
- 4 boneless, skinless chicken breasts
- Salt and freshly ground black pepper, to taste
- 1/2 cup all-purpose flour, for dredging
- 1/4 cup olive oil
- 8 ounces cremini or button mushrooms, sliced
- 3/4 cup Marsala wine
- 3/4 cup chicken broth
- 2 tablespoons unsalted butter
- 2 tablespoons chopped fresh parsley, for garnish
Cooking Instructions
- Prepare the Chicken: Begin by seasoning the chicken breasts with salt and pepper. Place the flour in a shallow dish and dredge each chicken breast in the flour, shaking off any excess.
- Cook the Chicken: Heat the olive oil in a large skillet over medium-high heat. Add the chicken breasts and cook them for about 4-5 minutes on each side, or until they’re golden brown and cooked through. Remove the chicken from the skillet and set it aside on a plate.
- Sauté the Mushrooms: In the same skillet, add the sliced mushrooms. Cook them for about 5 minutes or until they’re browned and tender, stirring occasionally.
- Deglaze the Pan: Pour the Marsala wine into the skillet with the mushrooms. Use a wooden spoon to scrape up any browned bits from the bottom of the pan. Allow the wine to simmer for about 2 minutes to reduce slightly.
- Create the Sauce: Add the chicken broth to the skillet and bring the mixture to a simmer. Return the chicken breasts to the skillet, spooning some of the sauce over them. Continue to simmer for about 10 minutes, allowing the flavors to meld and the sauce to thicken.
- Finish the Dish: Stir in the butter until it melts and is fully incorporated into the sauce, adding a rich and glossy finish. Adjust seasoning with salt and pepper if needed.
- Serve: Transfer the chicken to a serving platter, pour the sauce and mushrooms over the top, and garnish with chopped parsley. Serve immediately alongside your favorite side dish.
Extra Tips
For the best results, use a good quality Marsala wine, as this is the key ingredient that imparts the unique flavor to the dish. If possible, choose a dry Marsala over a sweet one for a more balanced taste.
When pounding the chicken breasts to an even thickness, they’ll cook more uniformly, ensuring tender and juicy results. Finally, if you prefer a thicker sauce, you can mix a teaspoon of cornstarch with a tablespoon of water and add it to the sauce to help it thicken more quickly.
Savory Eggplant Parmesan
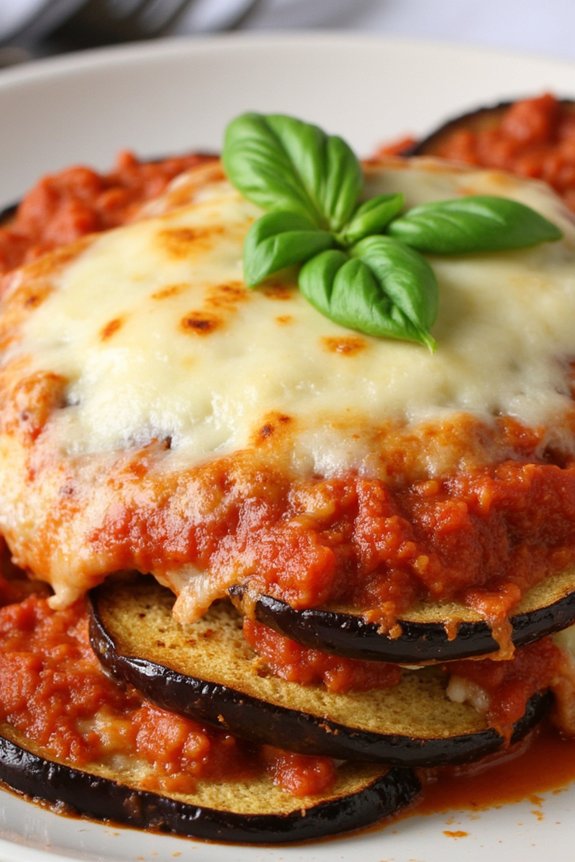
Savory Eggplant Parmesan is a classic Italian dish that marries the rich flavors of eggplant with the comforting taste of melted cheese and tangy tomato sauce. It’s a hearty vegetarian meal that can be served as the main course or as a delightful side dish. The key to a successful Eggplant Parmesan is in the preparation of the eggplant, guaranteeing it’s cooked to perfection with a crispy exterior and a tender, flavorful interior.
This dish is perfect for family dinners or when entertaining guests, providing a warm and inviting aroma that fills the kitchen. Eggplant Parmesan isn’t only delicious but also packed with nutrients, making it a healthy choice for any meal. The combination of eggplant, marinara sauce, and cheese creates a mouthwatering balance that will have everyone coming back for seconds.
Preparing this dish requires some patience and attention to detail, but the end result is well worth the effort. Below is a recipe for Savory Eggplant Parmesan that serves 4-6 people, with a list of ingredients and step-by-step instructions to guide you through the process.
Ingredients for 4-6 servings:
- 2 large eggplants
- Salt, for sprinkling
- 3 cups marinara sauce
- 2 cups shredded mozzarella cheese
- 1 cup grated Parmesan cheese
- 1 cup all-purpose flour
- 4 large eggs
- 1 cup Italian breadcrumbs
- Olive oil, for frying
- Fresh basil leaves, for garnish
Cooking Instructions:
- Prepare the Eggplants: Slice the eggplants into 1/4-inch thick rounds. Lay them out on a baking sheet and sprinkle both sides generously with salt. Let them sit for about 30 minutes to draw out excess moisture and bitterness. Rinse the slices under cool water and pat them dry with paper towels.
- Set Up Breading Station: In one shallow bowl, place the flour. In a second bowl, beat the eggs. In a third bowl, mix the breadcrumbs and half of the Parmesan cheese.
- Bread the Eggplant: Dredge each eggplant slice first in flour, shaking off the excess, then dip in the beaten eggs, and finally coat with the breadcrumb mixture. Confirm each slice is evenly covered.
- Fry the Eggplant: Heat olive oil in a large skillet over medium-high heat. Fry the breaded eggplant slices in batches, about 3-4 minutes per side, or until golden brown. Transfer them to a paper towel-lined plate to drain excess oil.
- Assemble the Dish: Preheat the oven to 375°F (190°C). In a baking dish, spread a thin layer of marinara sauce. Arrange a layer of fried eggplant slices over the sauce. Top with more marinara sauce and a generous sprinkle of mozzarella and Parmesan cheeses. Repeat the layers until all ingredients are used, finishing with a layer of cheese.
- Bake: Cover the baking dish with aluminum foil and bake in the preheated oven for 25 minutes. Remove the foil and bake for an additional 10-15 minutes, or until the cheese is bubbly and golden brown.
- Serve: Allow the dish to cool for a few minutes before serving. Garnish with fresh basil leaves for added flavor and presentation.
Extra Tips:
When preparing the eggplant, it’s essential to let the slices sit with salt to draw out moisture. This step helps prevent the dish from becoming too soggy and enhances the flavor of the eggplant.
If you prefer a lighter version, consider baking the breaded eggplant slices instead of frying them. Simply place them on a baking sheet and bake at 400°F (200°C) for about 20 minutes, flipping halfway through, until they’re crispy.
Also, feel free to add other cheeses, such as provolone or fontina, to the dish for a richer taste.
Fresh Lemon Ricotta Pancakes

Fresh Lemon Ricotta Pancakes are a delightful twist on traditional pancakes, offering a burst of zesty lemon flavor with a creamy, fluffy texture thanks to the addition of ricotta cheese. These pancakes are perfect for a special breakfast or brunch, providing a revitalizing and light start to your day.
The tangy lemon complements the rich ricotta, creating a harmonious balance that will delight your taste buds and leave you craving more.
This recipe for Fresh Lemon Ricotta Pancakes serves 4-6 people, making it ideal for family gatherings or small brunch parties. The pancakes are easy to prepare and cook quickly, allowing you to spend more time enjoying the meal with your loved ones.
Whether you’re a seasoned cook or a beginner, this recipe is straightforward and sure to impress anyone who tries it.
Ingredients:
- 1 cup ricotta cheese
- 1 cup all-purpose flour
- 1 tablespoon baking powder
- 1/4 teaspoon salt
- 3 tablespoons granulated sugar
- Zest of 2 lemons
- 1/4 cup fresh lemon juice
- 3/4 cup milk
- 3 large eggs
- 2 teaspoons vanilla extract
- Butter or oil for cooking
- Maple syrup or powdered sugar for serving (optional)
Instructions:
- Prepare the Batter: In a large mixing bowl, combine the ricotta cheese, flour, baking powder, salt, and granulated sugar. Stir the ingredients together until they’re well combined.
- Add Lemon and Wet Ingredients: Add the lemon zest, lemon juice, milk, eggs, and vanilla extract to the dry ingredients. Mix everything together until you have a smooth batter. It’s okay if the batter is a little lumpy; this will add to the texture of the pancakes.
- Heat the Pan: Preheat a non-stick skillet or griddle over medium heat. Add a small amount of butter or oil to the pan to prevent sticking.
- Cook the Pancakes: Once the pan is hot, pour about 1/4 cup of batter onto the skillet for each pancake. Cook until bubbles form on the surface and the edges look set, about 2-3 minutes.
- Flip the Pancakes: Carefully flip the pancakes and cook for an additional 2-3 minutes on the other side, or until they’re golden brown and cooked through.
- Serve: Serve the pancakes warm with a drizzle of maple syrup or a dusting of powdered sugar, if desired. Enjoy them with a side of fresh fruit for a complete meal.
Extra Tips: For the fluffiest pancakes, be gentle when mixing the batter; over-mixing can lead to tough pancakes.
If you prefer a stronger lemon flavor, you can add an extra tablespoon of lemon juice or an additional lemon’s zest. To keep pancakes warm while cooking the entire batch, place them in a preheated oven at 200°F.
Finally, if you want to make the pancakes ahead of time, they can be stored in the refrigerator for up to two days or frozen for up to a month. Reheat them in the oven or a toaster for best results.
Homemade Tiramisu
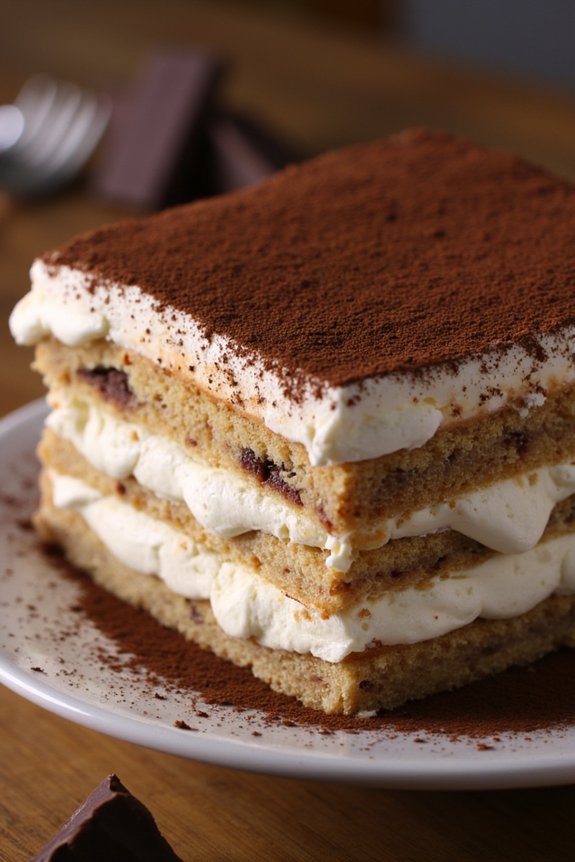
Tiramisu is a timeless Italian dessert that’s loved for its rich flavors and creamy texture. This classic dessert is perfect for any occasion, whether you’re hosting a dinner party or simply craving a sweet treat. Homemade Tiramisu is surprisingly easy to make and requires no baking, making it an ideal choice for both novice and experienced cooks alike. The combination of coffee-soaked ladyfingers, creamy mascarpone cheese, and a dusting of cocoa powder makes this dessert irresistibly delicious.
The beauty of Tiramisu lies in its simplicity and the quality of its ingredients. By using fresh, high-quality components, you’ll be able to create a dessert that’s both decadent and authentic. This recipe is designed to serve 4-6 people, making it suitable for a small gathering or family dessert. Follow these steps, and you’ll have a delightful Tiramisu that captures the essence of Italy in every bite.
Ingredients (Serves 4-6):
- 3 large eggs, separated
- 1 cup granulated sugar
- 1 cup mascarpone cheese
- 1 cup heavy cream
- 1 cup strong brewed coffee, cooled
- 2 tablespoons coffee liqueur (optional)
- 24 ladyfinger cookies (savoiardi)
- Unsweetened cocoa powder, for dusting
- Dark chocolate shavings, for garnish (optional)
Cooking Instructions:
- Prepare the Mascarpone Mixture: In a mixing bowl, whisk the egg yolks and sugar together until the mixture becomes pale and creamy. This should take about 3-5 minutes. Gently fold in the mascarpone cheese until smooth and well combined.
- Whip the Cream: In a separate bowl, whip the heavy cream until soft peaks form. Carefully fold the whipped cream into the mascarpone mixture, making sure not to deflate the cream. Set aside.
- Beat the Egg Whites: In another clean mixing bowl, beat the egg whites until stiff peaks form. Gently fold the egg whites into the mascarpone and cream mixture, being careful to maintain the fluffiness.
- Prepare the Coffee Mixture: Combine the brewed coffee and coffee liqueur (if using) in a shallow dish. This will be used to soak the ladyfingers.
- Assemble the Tiramisu: Quickly dip each ladyfinger into the coffee mixture, making sure they absorb enough coffee without becoming soggy. Layer half of the soaked ladyfingers on the bottom of a 9×9-inch dish.
- Layer the Cream: Spread half of the mascarpone mixture over the ladyfingers. Repeat the process with another layer of soaked ladyfingers and the remaining mascarpone mixture.
- Chill and Serve: Cover the dish with plastic wrap and refrigerate for at least 4 hours, or overnight for best results. Before serving, dust the top with cocoa powder and garnish with chocolate shavings if desired.
Extra Tips:
When making Tiramisu, the quality of the coffee is essential for authentic flavor. Use freshly brewed espresso or a strong coffee blend for the best results.
Additionally, make sure that the mascarpone cheese is at room temperature before mixing to achieve a smooth and creamy consistency. Remember to handle the whipped cream and egg whites gently to maintain their volume, which contributes to the dessert’s light and airy texture.
Finally, allowing the Tiramisu to chill for an extended period helps the flavors meld together beautifully, making it even more delicious.
Zesty Lemon Basil Granita

Indulge in the invigorating and revitalizing taste of Zesty Lemon Basil Granita, a quintessential Italian treat that’s perfect for a warm day. This delightful dessert combines the citrusy punch of fresh lemons with the aromatic essence of basil, creating a harmonious balance of flavors that will tantalize your taste buds.
Originating from Sicily, granita is a semi-frozen dessert that’s made by freezing a mixture of sugar, water, and various flavorings, and then scraping it into delicate, icy crystals. The Zesty Lemon Basil Granita is an ideal palate cleanser and a crowd-pleaser at summer gatherings, offering a sophisticated yet simple way to end a meal.
This recipe is easy to make and requires minimal ingredients, making it an accessible dessert for any home cook. The granita’s texture is achieved by periodically raking the mixture with a fork as it freezes, resulting in a fluffy, granular consistency. Unlike other frozen desserts, granita doesn’t require any special equipment, making it an excellent option for those who don’t own an ice cream maker.
Follow these steps to create a delicious Zesty Lemon Basil Granita that serves 4-6 people.
Ingredients for 4-6 servings:
- 1 cup fresh lemon juice (about 4-5 lemons)
- Zest of 2 lemons
- 1 cup fresh basil leaves
- 1 cup granulated sugar
- 2 cups water
Cooking Instructions:
- Prepare the Basil Syrup: In a medium saucepan, combine the water and sugar. Bring to a gentle simmer over medium heat, stirring occasionally until the sugar completely dissolves. Remove from heat and add the basil leaves. Allow the mixture to steep for 15-20 minutes, infusing the syrup with basil flavor.
- Strain the Syrup: After steeping, strain the syrup through a fine-mesh sieve into a large bowl, discarding the basil leaves. This will guarantee a smooth consistency for the granita.
- Combine Ingredients: Add the freshly squeezed lemon juice and lemon zest to the basil-infused syrup. Stir well to combine all the ingredients thoroughly.
- Freeze the Mixture: Pour the lemon basil mixture into a shallow baking dish or a metal pan. Place the dish in the freezer, allowing it to set for 30 minutes.
- Scrape the Granita: After 30 minutes, remove the dish from the freezer and use a fork to scrape and break up any ice crystals that have formed around the edges. Return the dish to the freezer.
- Repeat the Scraping Process: Every 30 minutes, remove the granita from the freezer and scrape the mixture with a fork, focusing on breaking up the ice into fine crystals. Repeat this process for about 3-4 hours, or until the entire mixture has transformed into light, fluffy crystals.
- Serve the Granita: Once the granita is fully frozen and has a granular texture, use a fork to fluff the ice one last time before serving. Spoon the granita into chilled bowls or glasses, and garnish with additional basil leaves or lemon zest if desired.
Extra Tips:
For an extra burst of flavor, consider adding a splash of limoncello to the mixture before freezing. This can enhance the granita’s citrus notes and add a slight hint of sweetness.
Additionally, make sure that the granita is scraped frequently during the freezing process to achieve the ideal texture; more frequent scraping will result in a finer, more delicate granita. If you prefer a more intense basil flavor, you can lightly bruise the basil leaves before steeping them in the syrup to release more of their essential oils.
Enjoy this granita as a standalone dessert or as an invigorating accompaniment to a summer meal.