

Discovering the magic of Italian 00 flour has completely transformed my kitchen adventures. This fine, powdery flour elevates simple recipes into bakery-quality creations with ease. Think about enjoying a classic Neapolitan pizza with a perfectly airy crust or savoring the tender layers of homemade tagliatelle. Ready to bring these authentic flavors to your home? Let’s explore these delightful recipes together.
Classic Neapolitan Pizza Dough

The Classic Neapolitan Pizza Dough is a celebrated staple in Italian cuisine, known for its thin, soft crust with a slightly crispy edge. The secret to achieving this perfect texture lies in the use of 00 flour, a finely milled flour that’s ideal for pizza dough.
Originating from Naples, this recipe captures the authentic flavors and textures of traditional Neapolitan pizza, making it an essential addition to any pizza lover’s repertoire. This dough creates a light and airy base that pairs beautifully with simple, fresh toppings, allowing the flavors to shine.
Creating this dough requires a bit of patience and precision, but the results are well worth the effort. The dough needs time to rise and develop its characteristic flavor, so it’s best to plan ahead. This recipe is intended for a serving size of 4-6 people, making enough dough for several individual pizzas.
Whether you’re a seasoned chef or a home cook looking to elevate your pizza game, this Classic Neapolitan Pizza Dough won’t disappoint.
Ingredients:
- 500g 00 flour
- 325ml lukewarm water
- 10g salt
- 3g fresh yeast (or 1g active dry yeast)
Instructions:
- Prepare the Yeast Mixture: Dissolve the fresh yeast (or active dry yeast) in the lukewarm water. Let it sit for 5 minutes until it becomes frothy, indicating that the yeast is activated.
- Mix the Ingredients: In a large mixing bowl, combine the 00 flour and salt. Gradually add the yeast mixture to the flour, mixing with a wooden spoon or your hands until the dough starts to come together.
- Knead the Dough: Transfer the dough onto a lightly floured surface. Knead the dough for about 10 minutes until it becomes smooth and elastic. This step is vital for developing the gluten structure, which contributes to the dough’s texture.
- First Rise: Place the dough in a lightly oiled bowl, cover it with a damp cloth or plastic wrap, and allow it to rise at room temperature for about 2 hours or until it has doubled in size.
- Divide and Shape: Once the dough has risen, gently deflate it and divide it into 4-6 equal portions. Shape each portion into a ball, ensuring the surface is smooth.
- Second Rise: Place the dough balls on a lightly floured surface, cover them with a damp cloth, and let them rise for another 30-60 minutes. This second rise helps to relax the dough, making it easier to stretch.
- Preheat the Oven: While the dough is rising, preheat your oven to the highest possible temperature (usually around 250°C or 482°F) with a pizza stone or baking sheet inside.
- Stretch the Dough: On a floured surface, take one dough ball and gently press it into a flat disc. Using your hands, stretch the dough into a circular shape, leaving a slightly thicker edge to form the crust.
- Add Toppings and Bake: Transfer the stretched dough onto a piece of parchment paper. Add your desired toppings, then carefully slide the pizza onto the preheated stone or baking sheet. Bake for 7-10 minutes or until the crust is golden and crispy.
Extra Tips:
For an authentic Neapolitan pizza experience, use high-quality, fresh ingredients like San Marzano tomatoes, buffalo mozzarella, and fresh basil.
If you don’t have a pizza stone, a heavy-duty baking sheet will work as well. Be sure to heat it in the oven to mimic the stone’s effect. Avoid overloading the pizza with toppings to prevent a soggy crust.
Finally, for the best flavor development, consider preparing the dough a day in advance and letting it rise slowly in the refrigerator overnight.
Traditional Focaccia Bread

Focaccia bread is a staple in Italian cuisine, known for its delightful blend of crisp crust and airy, tender interior. Originating from the Ligurian region, this bread is traditionally made using 00 flour, a finely milled Italian flour that gives the bread its characteristic texture and flavor.
The recipe we’re sharing today is perfect for serving 4-6 people and captures the essence of rustic Italian baking. With its simple yet flavorful ingredients, focaccia bread is versatile and can be enjoyed as a side dish, a base for sandwiches, or simply on its own with a drizzle of olive oil.
When preparing focaccia, the key is to allow the dough to rise sufficiently, which gives it that soft and airy texture. The process involves a few steps of mixing, resting, and baking, but the result is well worth the effort. The addition of olive oil not only enhances the flavor but also contributes to the bread’s moistness.
You can get creative with toppings, adding ingredients like rosemary, cherry tomatoes, or olives to personalize your focaccia. This recipe focuses on the traditional version, highlighting the natural flavors of high-quality flour and olive oil.
Ingredients for 4-6 servings:
- 500g 00 flour
- 325ml lukewarm water
- 10g salt
- 15g fresh yeast or 7g active dry yeast
- 30ml extra virgin olive oil (plus extra for drizzling)
- 1 teaspoon sugar
- Coarse sea salt for sprinkling
- Fresh rosemary (optional)
Cooking Instructions:
- Prepare the yeast mixture: In a small bowl, combine lukewarm water with the sugar and yeast. Stir gently and let it sit for about 10 minutes, or until it becomes frothy. This indicates that the yeast is active.
- Mix the dough: In a large mixing bowl, combine the 00 flour and salt. Make a well in the center and pour in the yeast mixture and olive oil. Stir with a wooden spoon or use your hands to mix until a sticky dough forms.
- Knead the dough: Transfer the dough onto a lightly floured surface. Knead for about 10 minutes until the dough becomes smooth and elastic. Add a little more flour if necessary to prevent sticking.
- First rise: Place the dough in a lightly oiled bowl, cover it with a damp cloth or plastic wrap, and let it rise in a warm place for about 1 to 1.5 hours, or until it doubles in size.
- Prepare the baking tray: Preheat your oven to 220°C (430°F). Grease a baking tray with olive oil. Once the dough has risen, punch it down gently and transfer it to the prepared tray.
- Shape the dough: Use your fingers to spread the dough evenly in the tray, creating dimples across the surface. Drizzle with olive oil and sprinkle with coarse sea salt and rosemary, if using.
- Second rise: Cover the tray with a damp cloth and let the dough rise again for about 20-30 minutes.
- Bake: Place the tray in the preheated oven and bake for 20-25 minutes or until the focaccia is golden brown. Remove from the oven and let it cool slightly before serving.
Extra Tips:
For the best texture, confirm that your water is lukewarm as overly hot water can kill the yeast. If you prefer a crispier crust, you can increase the oven temperature slightly for the last few minutes of baking.
Feel free to experiment with different toppings such as sliced onions, cherry tomatoes, or olives to customize your focaccia. And remember, using high-quality olive oil will enhance the flavor of your bread considerably. Enjoy your homemade focaccia warm or at room temperature for the best taste experience!
Homemade Tagliatelle Pasta

Homemade tagliatelle pasta is a classic Italian dish that highlights the simple yet rich flavors of fresh pasta made with rustic Italian 00 flour. Known for its fine texture and high protein content, 00 flour is the secret to achieving a silky and tender pasta that absorbs sauces beautifully. This recipe will guide you through the traditional process of making tagliatelle from scratch, a rewarding culinary experience that’s sure to impress family and friends. With just a few basic ingredients, you can create a dish that’s both authentic and delicious.
Preparing homemade pasta is a process that requires patience and precision, but the results are more than worth the effort. The dough is made with just eggs and rustic Italian 00 flour, kneaded until smooth, and then rolled out to a thin sheet before being cut into ribbons. The tagliatelle can be served with a variety of sauces, from a simple butter and sage combination to a hearty Bolognese. This recipe serves 4-6 people, making it perfect for a cozy family dinner or a small gathering with friends.
Ingredients for Homemade Tagliatelle Pasta (Serves 4-6):
- 400 grams of rustic Italian 00 flour
- 4 large eggs
- A pinch of salt
- A little extra flour for dusting
Cooking Instructions:
- Prepare the Dough: Place the 400 grams of rustic Italian 00 flour on a clean surface, forming a mound. Make a well in the center and crack the 4 large eggs into it. Add a pinch of salt. Using a fork, gently beat the eggs and begin to incorporate the flour gradually, pulling it from the inner rim of the well.
- Knead the Dough: Once the mixture becomes too stiff to mix with a fork, use your hands to bring the dough together. Knead the dough for about 8-10 minutes until it’s smooth and elastic. If the dough is sticky, dust the surface with a bit more flour as needed.
- Rest the Dough: Wrap the dough in plastic wrap and let it rest for at least 30 minutes at room temperature. This allows the gluten to relax, making it easier to roll out.
- Roll Out the Dough: After resting, divide the dough into four portions. Keep the pieces you aren’t working with covered to prevent drying out. Flatten one piece slightly, then roll it out using a pasta machine or a rolling pin to the desired thickness (around 1-2 mm).
- Cut the Tagliatelle: Lightly dust the rolled-out pasta sheet with flour and fold it over itself several times. Use a sharp knife to cut it into strips about 6-8 mm wide. Unroll the strips and lay them flat or hang them to dry for a few minutes.
- Cook the Pasta: Bring a large pot of salted water to a boil. Add the tagliatelle and cook for 2-4 minutes until al dente. Fresh pasta cooks much quicker than dried pasta, so keep an eye on it.
- Serve: Drain the pasta and toss it with your choice of sauce. Serve immediately and enjoy the fresh taste of homemade tagliatelle.
Extra Tips:
When making homemade pasta, it’s essential to balance the dough’s hydration. If the dough is too dry, it will be difficult to knead; if too wet, it will stick to everything. Adjust by adding small amounts of water or flour as needed.
Additionally, when cutting the pasta, make certain your knife is sharp to achieve clean cuts. Fresh pasta can be dried for longer storage, but for the best taste and texture, cook it immediately after making.
Experiment with different pasta sauces to pair with your homemade tagliatelle to create a variety of delicious meals.
Authentic Italian Ciabatta

Ciabatta, a classic Italian bread known for its crisp crust and airy, soft interior, is a staple in Italian cuisine. Made with high-quality 00 flour, this rustic bread is perfect for sandwiches, serving alongside soups, or simply enjoying with a drizzle of olive oil.
The process of making ciabatta is straightforward but requires patience as you allow the dough to develop its unique flavor and texture through a long fermentation process. The result is a beautifully rustic bread that embodies the essence of traditional Italian baking.
This recipe is designed to serve 4-6 people, providing enough ciabatta for a small gathering or a family meal. By using 00 flour, known for its fine texture and high protein content, you’ll achieve a bread with a perfect balance between chewiness and tenderness. The key to a successful ciabatta lies in the dough’s hydration level, which contributes to its characteristic open crumb structure.
Ingredients:
- 500g Italian 00 flour
- 400ml water
- 10g salt
- 7g instant yeast
- 1 tablespoon olive oil
Instructions:
- Prepare the Dough: In a large mixing bowl, combine the 00 flour and instant yeast. Slowly add the water while mixing with a wooden spoon until a rough dough forms. The dough will be very sticky, which is typical for ciabatta.
- Knead the Dough: Transfer the dough onto a lightly floured surface and knead gently for about 10 minutes until it becomes smoother and more elastic. Avoid adding too much extra flour during this process, as it can alter the dough’s hydration.
- First Rise: Lightly oil a large bowl with the olive oil and place the dough inside. Cover with a damp cloth and let it rise in a warm, draft-free area for 1 to 1.5 hours, or until doubled in size.
- Shape the Dough: Once the dough has risen, gently turn it out onto a well-floured surface. Handle it carefully to avoid deflating the airy texture. Divide the dough into two equal portions, shaping each into a rectangle by folding the sides inward.
- Second Rise: Place the shaped dough onto a baking sheet lined with parchment paper. Cover with a cloth and let them rise for another 30-45 minutes.
- Preheat the Oven: Meanwhile, preheat your oven to 220°C (430°F). Place a baking stone or an inverted baking sheet in the oven to heat up, which will help achieve a crisp crust.
- Bake the Ciabatta: Once the oven is ready, transfer the dough onto the hot surface and bake for 20-25 minutes, or until the ciabatta turns golden brown and sounds hollow when tapped on the bottom.
- Cool the Bread: Allow the ciabatta to cool on a wire rack for at least 30 minutes before slicing. This resting period helps to set the crumb structure and makes slicing easier.
Extra Tips:
When working with high-hydration doughs like ciabatta, it’s important to resist the urge to add too much flour during kneading, as this can compromise the bread’s texture. Instead, keep your hands and work surface lightly floured to manage stickiness.
Additionally, letting the dough rest during the first rise allows for flavor development, so don’t rush this step. If you prefer a more pronounced crust, you can introduce steam into the oven by placing a pan of water on the bottom rack while baking. This technique helps achieve that beautiful rustic crust typical of artisan breads.
Rustic Grissini Breadsticks
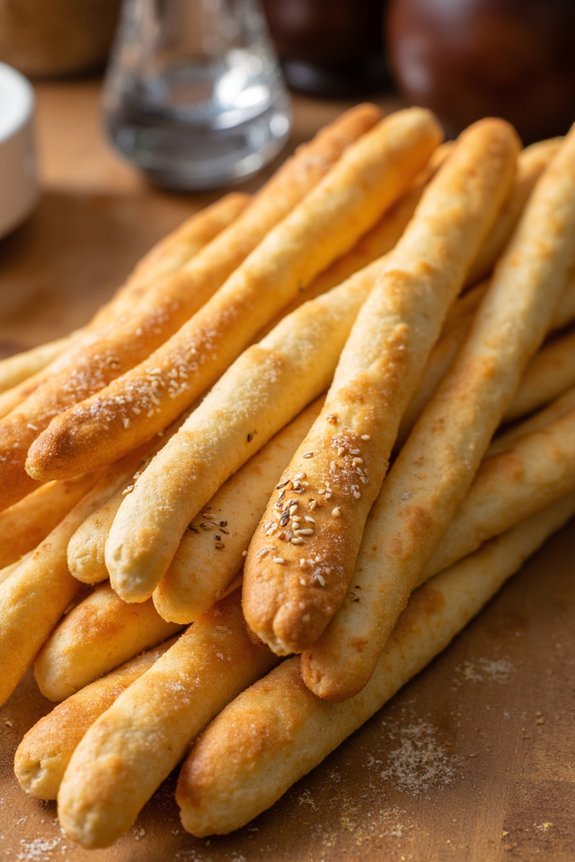
Rustic Grissini Breadsticks are a delightful Italian snack that can be enjoyed on their own or as an accompaniment to a variety of dishes. These slender, crunchy breadsticks are a perfect example of rustic Italian baking, using traditional 00 flour to achieve a delicate and slightly chewy texture. The use of 00 flour, which is finely milled, makes the dough easy to work with and results in a crisp, golden finish.
Whether served alongside a charcuterie board or dipped in olive oil, these breadsticks are sure to impress your family and friends at any gathering.
The process of making Rustic Grissini Breadsticks is both rewarding and straightforward, requiring only a few simple ingredients and some patience as the dough rises and develops its rich flavors. The key to perfect grissini is in the rolling and stretching of the dough into thin, even sticks, which will bake to a satisfying crunch.
This recipe is ideal for serving 4-6 people, guaranteeing everyone gets a taste of these irresistible breadsticks. Gather your ingredients, set aside some time, and immerse yourself in the comforting aromas of homemade Italian breadsticks.
Ingredients (serving size: 4-6 people):
- 500g Italian 00 flour
- 250ml lukewarm water
- 7g active dry yeast
- 2 tablespoons olive oil
- 1 teaspoon sugar
- 1 teaspoon salt
- Additional olive oil for brushing
- Optional: sesame seeds, poppy seeds, or coarse sea salt for topping
Cooking Instructions:
- Activate the Yeast: In a small bowl, combine the lukewarm water, sugar, and active dry yeast. Stir gently and let it sit for about 5-10 minutes, or until the mixture becomes frothy. This indicates that the yeast is active and ready to use.
- Prepare the Dough: In a large mixing bowl, combine the Italian 00 flour and salt. Make a well in the center and pour in the yeast mixture and olive oil. Gradually mix the ingredients together until a rough dough forms.
- Knead the Dough: Transfer the dough onto a lightly floured surface and knead it for about 10 minutes until it becomes smooth and elastic. If the dough is sticky, sprinkle a little more flour as needed.
- First Rise: Place the dough in a lightly oiled bowl, cover it with a damp cloth, and let it rise in a warm, draft-free area for about 1 hour or until it has doubled in size.
- Shape the Grissini: Preheat the oven to 200°C (392°F). Punch down the risen dough and divide it into small, equal portions. Roll each portion into a long, thin strip, approximately the thickness of a pencil. Place the strips onto a baking sheet lined with parchment paper.
- Add Toppings: Lightly brush each breadstick with olive oil. If desired, sprinkle sesame seeds, poppy seeds, or coarse sea salt over the top for additional flavor and texture.
- Bake the Breadsticks: Bake in the preheated oven for 15-20 minutes, or until the grissini are golden brown and crisp. Keep an eye on them to prevent over-browning.
- Cool and Serve: Once baked, remove the breadsticks from the oven and let them cool on a wire rack. Serve them warm or at room temperature.
Extra Tips:
When making Rustic Grissini Breadsticks, confirm that your oven is fully preheated to promote even baking. If you want evenly baked breadsticks, it’s vital to roll them to a consistent thickness.
Additionally, if you prefer softer breadsticks, you can reduce the baking time slightly. For a more adventurous flavor, try incorporating herbs like rosemary or thyme into the dough, or experiment with different toppings.
Store any leftover breadsticks in an airtight container to maintain their crispness. Enjoy these with a glass of wine, or as a crisp accompaniment to your favorite salads and soups.
Delicate Italian Croissants
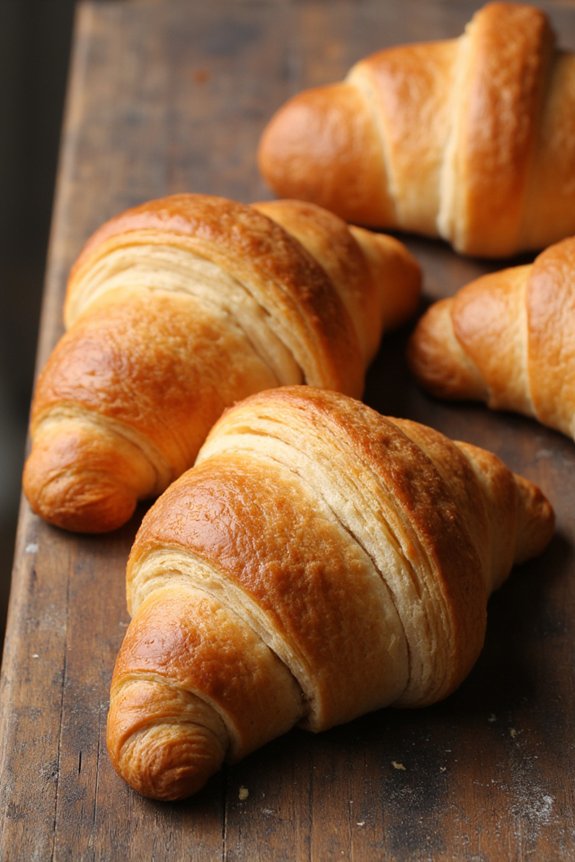
Delicate Italian Croissants are a delightful treat that combines the light, airy texture of traditional croissants with the unique qualities of Italian 00 flour. This type of flour is known for its fine grind and low protein content, which makes it especially suitable for creating delicate pastries.
When baked, these croissants have a beautifully crisp exterior and a soft, buttery interior that melts in your mouth. Perfect for breakfast or as an indulgent snack, these croissants are a reflection of the elegance of Italian baking.
Creating these croissants requires patience and attention to detail, as the dough must be carefully laminated to achieve the desired flakiness. The process involves repeatedly folding and rolling the dough with butter to create thin layers that puff up beautifully when baked.
While it may seem intimidating at first, with practice and the right ingredients, you can master the art of making these exquisite pastries. The following recipe will guide you through each step, assuring that your Italian croissants turn out perfectly every time.
Ingredients (serves 4-6 people):
- 500g Italian 00 flour
- 300ml whole milk
- 50g granulated sugar
- 10g salt
- 20g fresh yeast (or 7g active dry yeast)
- 250g unsalted butter (cold)
- 1 egg (for egg wash)
Instructions:
1. Prepare the Dough: In a large bowl, dissolve the yeast in lukewarm milk. Add the sugar, salt, and Italian 00 flour. Mix until a dough forms. Knead the dough on a floured surface for about 10 minutes until smooth and elastic.
Place the dough in a lightly oiled bowl, cover it with a damp cloth, and allow it to rise in a warm place for 1 hour or until doubled in size.
2. Prepare the Butter: While the dough is rising, Prepare the Butter. Place the cold butter between two sheets of parchment paper and roll it out into a 20cm square. Refrigerate until firm.
3. Laminate the Dough: Once the dough has risen, roll it out on a floured surface into a rectangle about 45cm by 25cm. Place the butter square in the center of the dough rectangle.
Fold the dough over the butter, enveloping it completely. Roll the dough out again into a large rectangle, then fold it into thirds like a letter. Wrap in cling film and refrigerate for 30 minutes.
4. Repeat Laminating: Remove the dough from the fridge, roll it out again into a rectangle, and fold into thirds. Repeat this process two more times, refrigerating for 30 minutes between each fold.
This creates the layers necessary for flaky croissants.
5. Shape the Croissants: After the final fold, roll the dough out into a large rectangle, about 5mm thick. Cut into triangles with a base of about 10cm.
Roll each triangle from the base to the tip to form the croissant shape. Place on a baking sheet lined with parchment paper.
6. Proof and Bake: Allow the shaped croissants to proof in a warm place for about 1 hour or until they’ve doubled in size. Preheat the oven to 200°C (392°F).
Brush the croissants with beaten egg for a glossy finish. Bake for 15-20 minutes or until golden brown and puffed.
Extra Tips:
For the best results, always verify your butter is cold when laminating the dough. This helps maintain the layers and prevents the butter from melting into the dough.
If your kitchen is warm, you may need to refrigerate the dough between folds for longer. When rolling the croissants, try to keep the dough cold; you can pop it back in the fridge if it becomes too warm.
These croissants are best enjoyed fresh out of the oven, but they can also be reheated in a warm oven to regain their crispness.
Light and Fluffy Gnocchi

Gnocchi, those delightful little dumplings, are a staple in Italian cuisine. When made with delicate Italian 00 flour, they achieve an unparalleled lightness and fluffiness. This flour, known for its fine texture, is perfect for creating gnocchi that melt in your mouth. By using rustic Italian 00 flour, the gnocchi maintain a tender structure that pairs beautifully with a variety of sauces, from simple butter and sage to rich marinara.
The key to perfect gnocchi lies in balancing the ingredients just right and handling the dough with care to avoid overworking it. The following recipe is designed to serve 4-6 people, making it ideal for a cozy family dinner or a small gathering. With just a few simple ingredients, you can create a dish that feels both indulgent and comforting. Follow these instructions closely to obtain gnocchi that are light, fluffy, and irresistibly delicious.
Ingredients:
- 1 kg (about 2.2 lbs) russet potatoes
- 2 cups rustic Italian 00 flour, plus extra for dusting
- 1 large egg
- 1 teaspoon salt
- Grated Parmesan cheese (optional, for serving)
- Fresh basil or parsley (optional, for garnish)
Instructions:
1. Prepare the Potatoes: Begin by boiling the potatoes whole, with their skins on, in a large pot of salted water. Cook them until they’re fork-tender, which should take about 20-25 minutes. Avoid overcooking to prevent them from becoming waterlogged.
2. Peel and Rice the Potatoes: Once cooked, drain the potatoes and let them cool slightly. While still warm, peel them, and pass them through a potato ricer or a food mill onto a clean work surface. Spread them out to let some steam escape, which will help guarantee a drier texture.
3. Make the Dough: Form the riced potatoes into a mound with a well in the center. Crack the egg into the well, add the salt, and sprinkle half of the flour over the top. Using your hands or a bench scraper, gently incorporate the flour and egg into the potatoes, gradually adding more flour until a soft dough forms.
Be careful not to overwork the dough to maintain a light texture.
4. Shape the Gnocchi: Cut the dough into 4 equal pieces. Roll each piece into a long rope about 1/2 inch thick. Cut the rope into 1-inch pieces. If desired, roll each piece over the back of a fork to create ridges, which help the sauce cling to the gnocchi.
5. Cook the Gnocchi: Bring a large pot of salted water to a gentle boil. Add the gnocchi in batches, being careful not to overcrowd the pot. They’re ready when they float to the surface, which should take about 2-3 minutes. Remove them with a slotted spoon and transfer them to a warm serving dish.
6. Serve: Serve the gnocchi immediately with your choice of sauce. Sprinkle with grated Parmesan cheese and garnish with fresh basil or parsley if desired.
Extra Tips:
To guarantee your gnocchi remain light and fluffy, avoid adding too much flour, as this can make them dense. The dough should be soft but not sticky. If the dough feels too sticky, lightly dust it with more flour, but be cautious not to overdo it.
Additionally, working with the potatoes while they’re still warm helps them absorb less moisture, resulting in a better texture. Finally, always test-cook a few gnocchi first to check their texture before cooking the entire batch, allowing for any minor adjustments if necessary.
Savory Calzone With 00 Flour

Calzones are a delightful Italian dish that can be enjoyed as a main course or a hearty snack. The use of rustic Italian 00 flour in this recipe gives the calzone dough a light and airy texture, while still providing a satisfying chewiness. This particular recipe for a savory calzone is filled with a rich combination of cheeses, cured meats, and vegetables, making it a perfect meal for any occasion.
The 00 flour is particularly important in achieving the authentic Italian texture, as it’s finely milled and creates a superior crust.
To make these savory calzones, you’ll start by preparing the dough with the 00 flour, which will need some time to rise. Once the dough is ready, you’ll roll it out and fill it with a delicious mixture of mozzarella, ricotta, salami, and spinach. The calzones are then baked until golden brown, resulting in a crispy exterior that encases the melted cheese and savory filling. This recipe serves 4-6 people, making it ideal for a family dinner or a small gathering with friends.
Ingredients (Serves 4-6):
- 500g 00 flour
- 1 teaspoon salt
- 1 packet (7g) instant yeast
- 1 tablespoon olive oil
- 320ml warm water
- 200g mozzarella cheese, shredded
- 150g ricotta cheese
- 100g salami, sliced
- 100g fresh spinach
- 1 teaspoon dried oregano
- 1 egg (for egg wash)
Instructions:
- Prepare the Dough: In a large mixing bowl, combine the 00 flour and salt. In a separate bowl, dissolve the yeast in warm water, then pour it into the flour mixture along with the olive oil. Mix until a dough forms.
- Knead the Dough: Transfer the dough to a floured surface and knead for about 8-10 minutes until smooth and elastic. Place the dough in a lightly oiled bowl, cover with a damp cloth, and let it rise for about 1-2 hours or until doubled in size.
- Preheat the Oven: Preheat your oven to 220°C (430°F). Place a baking sheet inside the oven to heat up.
- Prepare the Filling: In a bowl, combine the mozzarella, ricotta, salami, spinach, and oregano. Mix until well combined.
- Shape the Calzones: Once the dough has risen, punch it down and divide it into 4-6 equal portions. Roll each portion into a circle about 0.5cm thick. Spoon the filling onto one half of each circle, leaving a small border around the edge.
- Seal the Calzones: Fold the dough over the filling to create a half-moon shape and press the edges together. Use a fork to crimp the edges and guarantee they’re sealed tightly.
- Egg Wash and Bake: Beat the egg and brush it over the tops of the calzones. Carefully transfer the calzones to the preheated baking sheet and bake for 15-20 minutes, or until they’re golden brown and crispy.
- Serve: Remove the calzones from the oven and let them cool slightly before serving.
Extra Tips:
When working with 00 flour, it’s essential to verify that your dough is well-kneaded to achieve the right texture. If you find your dough is sticky, you can add a little more flour as needed.
Additionally, be creative with your fillings; you can substitute or add ingredients based on your preference, such as mushrooms, peppers, or different cheeses.
Finally, confirm the calzones are sealed properly to prevent the filling from leaking during baking. Enjoy your homemade savory calzones fresh out of the oven for the best flavor and texture.
Pillowy Soft Brioche Bread

Brioche is a classic French bread that’s known for its rich, buttery texture and slightly sweet flavor. When made with authentic Italian 00 flour, the result is an exceptionally tender crumb, perfect for both sweet and savory applications. This rustic Italian version of brioche marries the elegance of French baking with the rustic charm of Italian ingredients, resulting in a bread that’s both sophisticated and comforting.
Whether you’re enjoying it fresh out of the oven or using it as a base for French toast, this brioche will elevate your culinary repertoire.
The key to attaining the perfect brioche lies in the quality of the ingredients and the technique used in its preparation. Italian 00 flour is finely milled, which contributes to the bread’s soft and airy texture. The dough is enriched with butter, eggs, and milk, providing a rich flavor profile that pairs beautifully with a variety of accompaniments.
This recipe yields a loaf that serves 4-6 people, making it an ideal choice for a family breakfast or a special brunch gathering.
Ingredients (Serves 4-6):
- 500g Italian 00 flour
- 50g granulated sugar
- 10g salt
- 10g active dry yeast
- 250ml warm milk
- 4 large eggs
- 200g unsalted butter, softened
- 1 egg (for egg wash)
Cooking Instructions:
- Prepare the Yeast Mixture: In a small bowl, combine the warm milk and sugar. Sprinkle the yeast over the top and let it sit for about 10 minutes, or until it becomes frothy. This step guarantees that the yeast is active, which is essential for the bread to rise properly.
- Mix the Dry Ingredients: In a large mixing bowl, whisk together the Italian 00 flour and salt. Make a well in the center and set aside.
- Combine Wet Ingredients: In a separate bowl, beat the eggs until slightly frothy. Add the activated yeast mixture to the beaten eggs and stir until well combined.
- Form the Dough: Pour the wet ingredients into the well of the dry ingredients. Use a wooden spoon or your hands to mix until a shaggy dough forms.
- Incorporate the Butter: Gradually add the softened butter to the dough, kneading it in one piece at a time. Continue kneading until the dough is smooth and elastic, about 10 minutes. This step is vital for developing the gluten structure that gives brioche its characteristic texture.
- First Rise: Transfer the dough to a lightly greased bowl, cover with a damp cloth, and let it rise in a warm place for about 1.5 to 2 hours, or until it has doubled in size.
- Shape the Dough: Punch down the risen dough to release the air. Turn it out onto a lightly floured surface and shape it into a loaf. Place the shaped dough into a greased loaf pan.
- Second Rise: Cover the loaf pan with a damp cloth and let the dough rise again for about 30-45 minutes, or until it has doubled in size.
- Preheat and Prepare for Baking: Preheat your oven to 190°C (375°F). Beat one egg and brush it over the risen loaf to give it a shiny, golden crust.
- Bake: Place the loaf in the preheated oven and bake for 25-30 minutes, or until the top is deep golden brown and the bread sounds hollow when tapped.
- Cool and Serve: Remove the loaf from the oven and let it cool in the pan for about 10 minutes. Then, transfer it to a wire rack to cool completely before slicing and serving.
Extra Tips:
For an even richer flavor, consider letting the dough rest in the refrigerator overnight after the first rise. This extended fermentation enhances the flavor and makes the dough easier to handle.
Always verify your ingredients, especially the butter and eggs, are at room temperature for even mixing. If you find the dough too sticky while kneading, add a little more flour, but be cautious not to over-flour, as this can compromise the texture of the bread.
Enjoy your brioche fresh for the best taste and texture!
Italian Sourdough Starter
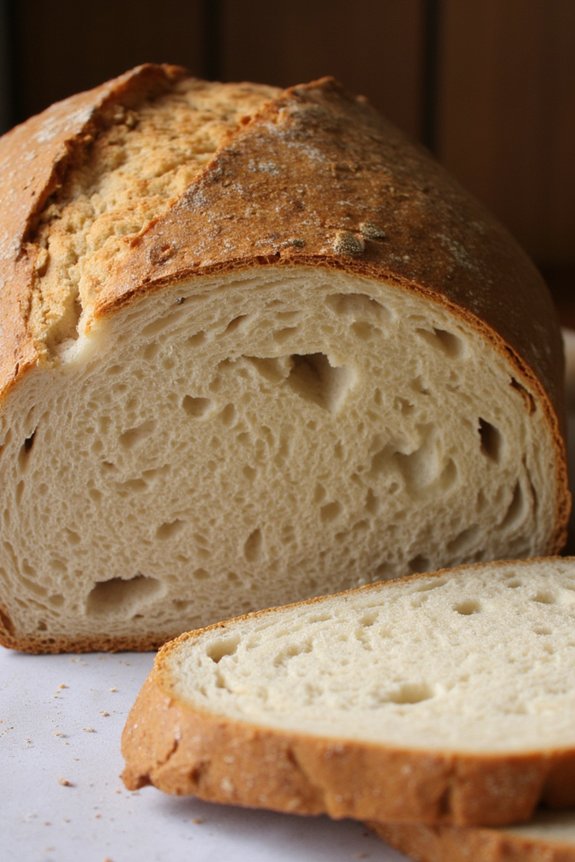
Rustic Italian Sourdough Bread is a delightful and artisanal loaf that embodies the essence of traditional Italian baking. Made with 00 flour, known for its fine texture and high protein content, this bread achieves a perfect balance of crisp crust and airy crumb. The sourdough starter, a fermented mixture of flour and water, imparts a distinct tangy flavor and natural leavening, making each bite a demonstration of time-honored baking techniques.
This recipe will guide you through creating your own sourdough starter, as well as crafting a loaf that brings the rustic charm of Italian bakeries right to your kitchen.
Creating a sourdough starter is an important first step in this recipe. It involves a week-long process of nurturing a mixture of flour and water until it becomes active and bubbly, ready to be used for baking. With patience and a little attention, your sourdough starter will develop its own unique flavor profile, which will enhance the taste of your bread.
Once your starter is ready, you’ll combine it with 00 flour, water, and salt to create a dough that’s kneaded, rested, and baked to perfection. This recipe is perfect for serving 4-6 people, making it ideal for family gatherings or cozy dinners.
Ingredients:
- 1 cup (227g) active sourdough starter
- 4 cups (500g) 00 flour
- 1 1/2 cups (360ml) water
- 2 teaspoons (12g) salt
Instructions:
- Create the Sourdough Starter: Combine equal parts of 00 flour and water in a jar. Stir until no dry flour remains. Cover loosely and let it sit at room temperature. Feed daily for 5-7 days by discarding half and replenishing with fresh flour and water until the starter is bubbly and has a pleasant, tangy aroma.
- Mix the Dough: In a large mixing bowl, combine the active sourdough starter with 4 cups of 00 flour and 1 1/2 cups water. Mix until a shaggy dough forms. Cover with a damp cloth and let it rest for 30 minutes to allow the flour to hydrate.
- Add Salt and Knead: Sprinkle 2 teaspoons of salt over the dough. Knead the dough for about 10 minutes until it becomes smooth and elastic. You can knead by hand or use a stand mixer with a dough hook attachment.
- First Rise: Place the dough in a lightly oiled bowl, cover it with a damp cloth, and allow it to rise at room temperature for about 4-5 hours, or until it has doubled in size.
- Shape the Loaf: Turn the risen dough onto a lightly floured surface. Gently shape it into a round or oval loaf, being careful not to deflate it too much.
- Second Rise: Transfer the shaped dough to a floured proofing basket or a parchment-lined baking sheet. Cover with a damp cloth and let it rise for another 2-3 hours, or until it has doubled in size.
- Preheat the Oven: Preheat your oven to 475°F (245°C) with a Dutch oven inside for about 30 minutes before baking.
- Score and Bake: Carefully transfer the risen dough into the preheated Dutch oven. Score the top with a sharp knife to allow steam to escape. Cover and bake for 20 minutes. Remove the lid and bake for an additional 25-30 minutes, or until the crust is golden brown and crisp.
- Cool: Allow the bread to cool on a wire rack for at least an hour before slicing. This ensures the crumb sets properly.
Extra Tips:
When working with sourdough, patience is key. The timing of the rises can vary based on room temperature and the activity level of your starter. If your kitchen is cooler, the dough may need more time to rise.
Additionally, avoid over-handling the dough during shaping to preserve the air pockets that contribute to the bread’s light texture. For a more intense sour flavor, you can extend the first rise by placing the dough in the refrigerator overnight.
Enjoy your homemade Rustic Italian Sourdough Bread fresh or toasted, with olive oil or your favorite toppings.
Perfect Thin-Crust Piadina

Piadina is a traditional Italian flatbread that originates from the Romagna region. Known for its thin and crispy texture, it serves as a delightful base for various fillings, from savory meats and cheeses to fresh vegetables. The secret to achieving the perfect piadina lies in using high-quality 00 flour, which is finely milled and lends a smooth, elastic dough that’s easy to work with and ideal for thin-crust recipes.
This recipe for Perfect Thin-Crust Piadina offers a rustic Italian experience with simple ingredients and a straightforward process. Whether you’re planning a casual meal with friends or a cozy family dinner, this versatile dish can be customized with your favorite toppings to suit any taste. Enjoy it warm off the griddle, paired with a glass of your favorite wine for a true Italian treat.
Ingredients (Serves 4-6):
- 500g Italian 00 flour
- 1 teaspoon baking powder
- 1 teaspoon salt
- 100g lard (or substitute with olive oil for a lighter version)
- 200ml warm water
- Extra flour for dusting
Cooking Instructions:
1. Prepare the Dough:
In a large mixing bowl, combine the Italian 00 flour, baking powder, and salt. Mix well to verify the dry ingredients are evenly distributed.
2. Add Fat:
Cut the lard into small pieces and add it to the flour mixture. Using your fingers, rub the lard into the flour until it resembles fine breadcrumbs. If you prefer a lighter piadina, substitute the lard with olive oil and mix until combined.
3. Incorporate Water:
Gradually add the warm water to the flour mixture, stirring continuously with a wooden spoon or your hand until a rough dough begins to form.
4. Knead the Dough:
Transfer the dough onto a lightly floured surface and knead it for about 8-10 minutes, or until it becomes smooth and elastic. This step is essential for developing the gluten, which will give the piadina its characteristic texture.
5. Rest the Dough:
Wrap the dough in a clean kitchen towel or plastic wrap and let it rest at room temperature for at least 30 minutes. This resting period allows the dough to relax, making it easier to roll out.
6. Divide and Roll:
After resting, divide the dough into 4-6 equal portions, depending on how many servings you desire. Roll each portion into a ball, then use a rolling pin to flatten each ball into a thin disc, about 2-3mm thick.
7. Cook the Piadina:
Heat a non-stick griddle or heavy frying pan over medium-high heat. Once hot, place a rolled-out piadina onto the griddle. Cook for 2-3 minutes on each side or until golden brown spots appear. Repeat with the remaining dough.
8. Serve:
Serve the piadina warm, either plain or filled with your choice of toppings such as prosciutto, mozzarella, arugula, or roasted vegetables. Fold or roll the piadina over the fillings and enjoy immediately.
Extra Tips:
For best results, verify the griddle or pan is thoroughly preheated before cooking the piadina to achieve the signature crispiness. If desired, you can brush the piadina with a little olive oil or sprinkle with herbs before serving for added flavor.
Additionally, if you have leftover dough, it can be stored in the refrigerator for up to 2 days; just let it come to room temperature before rolling and cooking. Enjoy experimenting with different fillings and flavors to make this traditional Italian dish your own!
Flaky Italian Sfogliatelle

Flaky Italian Sfogliatelle, a true demonstration of the artistry of traditional Italian pastry-making, is a delectable treat that hails from the region of Campania. With its distinctive shell-like shape and layers upon layers of crisp, flaky pastry, each bite promises a symphony of textures and flavors. The filling, often a sweet ricotta blend, is delicately scented with citrus zest and a hint of vanilla, creating a perfect balance of creamy and crunchy.
Creating sfogliatelle at home may seem intimidating due to its intricate layering and shaping process, but with patience and precision, it can be a rewarding culinary endeavor. The key to achieving the perfect sfogliatelle lies in the quality of the dough, which should be rolled as thinly as possible to create the signature flaky layers. Additionally, using Italian 00 flour guarantees the dough is both tender and elastic, allowing for easy manipulation and a superior final product.
Ingredients for 4-6 servings:
- Dough:
- 2 cups Italian 00 flour
- 1/2 teaspoon salt
- 3/4 cup water
- 1/2 cup unsalted butter, softened
- 1/4 cup lard
- Filling:
- 1 cup ricotta cheese
- 1/2 cup semolina flour
- 1/2 cup sugar
- 1 large egg
- 1 teaspoon vanilla extract
- Zest of 1 lemon
- Zest of 1 orange
- 1/4 teaspoon cinnamon
Cooking Instructions:
- Prepare the Dough:
- In a large bowl, combine Italian 00 flour and salt. Gradually add water, mixing until a rough dough forms. Knead the dough on a lightly floured surface for about 10 minutes until smooth and elastic. Wrap the dough in plastic wrap and let it rest for at least 1 hour.
- Make the Filling:
- In a separate bowl, mix ricotta cheese, semolina flour, sugar, egg, vanilla extract, lemon zest, orange zest, and cinnamon until smooth. Cover and refrigerate the filling while the dough rests.
- Roll Out the Dough:
- After the resting period, divide the dough into 4 equal pieces. Using a pasta machine, roll each piece into a thin sheet, starting with the thickest setting and gradually working to the thinnest setting. The dough should be nearly transparent.
- Layer and Shape:
- Spread the softened butter and lard mixture evenly over each sheet of dough. Carefully roll each sheet into a tight log, similar to a jelly roll, and wrap in plastic wrap. Chill in the refrigerator for at least 2 hours.
- Form the Sfogliatelle:
- Preheat your oven to 375°F (190°C). Remove the logs from the refrigerator and cut each into 1-inch thick slices. Gently press and stretch each slice from the center outward to form a cone shape, revealing the layers.
- Fill and Bake:
- Spoon a generous amount of the ricotta filling into each dough cone. Pinch the edges to seal. Place on a baking sheet lined with parchment paper and bake for 20-25 minutes, or until golden brown and crispy.
Extra Tips:
For the best results, verify that the dough is rolled out as thinly as possible to achieve the characteristic flakiness of sfogliatelle. Using a pasta machine can greatly aid in this process, providing even thickness and ease of handling.
Additionally, allowing the rolled dough logs to chill thoroughly helps maintain their shape when forming the cones. If you have time, chilling overnight can enhance the flavor and texture.
Finally, be patient during the shaping process; practice makes perfect, and each attempt will bring you closer to the authentic sfogliatelle experience.
Crusty Artisan Bread Rolls

Creating homemade Crusty Artisan Bread Rolls with rustic Italian 00 flour is a rewarding endeavor that fills your kitchen with the comforting aroma of freshly baked bread. These rolls are known for their crisp crust and tender, airy interior, making them a perfect accompaniment to any meal.
The use of 00 flour, a finely milled Italian flour, gives these rolls a unique texture and flavor that’s both delicate and robust. Whether you’re an experienced baker or a beginner, this recipe will guide you through the process of making the perfect artisan rolls.
The key to achieving the ideal crust and crumb lies in the preparation and handling of the dough. The dough requires a slow fermentation to develop its flavors fully, so patience is essential. Additionally, the high hydration level in the dough helps to create the characteristic large holes and chewy consistency that artisan breads are known for.
With a few simple ingredients and some time, you can enjoy the satisfaction of baking bread that rivals those from professional bakeries.
Ingredients (Serves 4-6):
- 500g Italian 00 flour
- 10g salt
- 5g instant yeast
- 350ml lukewarm water
- 1 tablespoon olive oil
Instructions:
1. Prepare the Dough:
In a large mixing bowl, combine the Italian 00 flour, salt, and instant yeast. Mix thoroughly to evenly distribute the ingredients. Slowly add the lukewarm water and olive oil, stirring with a wooden spoon or your hands until a shaggy dough forms.
2. Knead the Dough:
Transfer the dough onto a lightly floured surface. Knead the dough for about 10 minutes until it becomes smooth and elastic. You should be able to pull the dough into a thin sheet without tearing it, indicating proper gluten development.
3. First Rise:
Place the dough in a lightly oiled bowl, cover it with a damp cloth or plastic wrap, and let it rise at room temperature for 1-2 hours, or until it has doubled in size. The dough should feel puffy and have visible air bubbles.
4. Shape the Rolls:
Once the dough has risen, gently punch it down to release excess air. Divide the dough into 8 equal pieces, shaping each into a round roll. Place the rolls on a baking sheet lined with parchment paper, spacing them at least 2 inches apart.
5. Second Rise:
Cover the rolls with a damp cloth and let them rise for another 30-45 minutes until they’ve noticeably expanded.
6. Preheat the Oven:
While the rolls are rising, preheat your oven to 230°C (450°F). If you have a baking stone, place it in the oven to heat up as well.
7. Bake the Rolls:
Once the rolls have completed their second rise, place them in the preheated oven. Bake for 15-20 minutes or until they’re golden brown and sound hollow when tapped on the bottom. For an extra crusty finish, spray a bit of water into the oven before closing the door to create steam.
8. Cool the Rolls:
Remove the rolls from the oven and let them cool on a wire rack for at least 10 minutes before serving. This allows the interior to set and makes slicing easier.
Extra Tips:
To achieve the best crust, it’s essential to maintain the dough’s hydration level. Avoid adding too much extra flour during kneading, as this may result in dense rolls.
If you’re in a humid environment, you might need to adjust the water content slightly. Additionally, using a baking stone can help mimic the intense heat of a professional oven, contributing to a better rise and crust.
Finally, resist the urge to cut into the rolls immediately after baking; allowing them to cool slightly will improve the texture and flavor.