

When I think of summer, I envision fresh ingredients and meals enjoyed outdoors. Italian cuisine has a way of capturing that light and breezy feeling. Think of a Caprese salad with a drizzle of balsamic or lemon ricotta pasta that’s just bursting with flavor. I remember the first time I grilled a Margherita pizza—it was eye-opening. These dishes are more than just recipes; they’re memorable experiences. Curious to explore what makes these summer delights truly unforgettable?
Caprese Salad With Balsamic Reduction

Caprese Salad With Balsamic Reduction is a quintessential Italian summer dish that marries the fresh, vibrant flavors of ripe tomatoes, creamy mozzarella, and fragrant basil. This dish is elevated by the addition of a balsamic reduction, which adds a sweet and tangy depth that perfectly complements the simplicity of the other ingredients.
Perfect as an appetizer or a light meal, this salad is best enjoyed during the peak of summer when tomatoes are at their ripest and most flavorful. This dish isn’t only delicious but also visually stunning, with its contrasting colors and textures.
The key to a perfect Caprese Salad is sourcing high-quality ingredients. Opt for fresh, locally grown tomatoes, preferably heirloom varieties, and authentic buffalo mozzarella for the best taste. The balsamic reduction can be made ahead of time and stored, making it convenient for quick assembly. This recipe serves 4-6 people, making it ideal for a summer gathering or a family meal.
Ingredients:
- 4 large ripe tomatoes
- 1 pound fresh mozzarella cheese
- 1 bunch fresh basil leaves
- 1 cup balsamic vinegar
- 2 tablespoons honey
- Sea salt to taste
- Freshly ground black pepper to taste
- 2 tablespoons extra virgin olive oil
Instructions:
- Prepare the Balsamic Reduction:
- In a small saucepan, combine the balsamic vinegar and honey. Bring the mixture to a gentle boil over medium heat.
- Reduce the heat to low and simmer until the vinegar has reduced by about half and thickened to a syrupy consistency. This should take approximately 10-15 minutes. Be sure to stir occasionally to prevent burning.
- Remove from heat and let cool. The reduction will continue to thicken as it cools. Set aside.
- Slice the Ingredients:
- While the balsamic reduction is cooling, slice the tomatoes and mozzarella into 1/4-inch thick slices. Aim for even slices for a uniform presentation.
- Wash and gently pat dry the basil leaves.
- Assemble the Salad:
- On a large platter, arrange the tomato and mozzarella slices alternately, slightly overlapping each other.
- Tuck whole basil leaves between the layers of tomato and mozzarella, ensuring an even distribution throughout the salad.
- Season and Drizzle:
- Lightly season the salad with sea salt and freshly ground black pepper.
- Drizzle the extra virgin olive oil evenly over the salad.
- Using a spoon, drizzle the cooled balsamic reduction over the assembled salad, adding as much or as little as you desire. The reduction will add a touch of sweetness and acidity to the dish.
Extra Tips:
When making Caprese Salad, the ripeness and quality of the tomatoes are essential. Choose tomatoes that are firm but yield slightly to gentle pressure.
For an extra burst of flavor, consider adding a sprinkle of flaky sea salt or finishing salt just before serving. If you prefer a stronger balsamic flavor, you can add a touch of balsamic glaze in addition to the homemade reduction.
Finally, feel free to experiment with different types of tomatoes or even add a handful of arugula for an additional peppery flavor.
Lemon Ricotta Pasta With Fresh Herbs
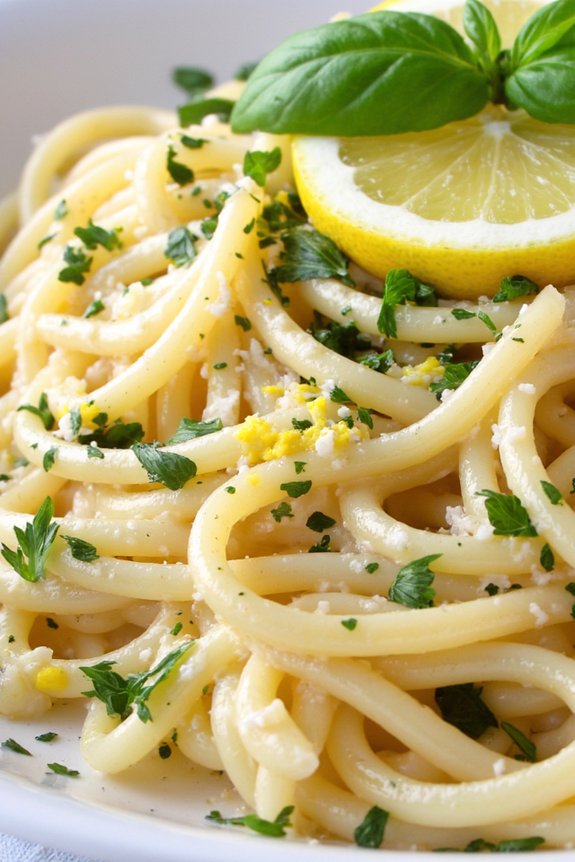
Lemon Ricotta Pasta With Fresh Herbs is a delightful and invigorating dish that embodies the essence of Italian summer cuisine. This recipe combines the light and tangy flavor of lemons with the creamy, rich texture of ricotta cheese. The addition of fresh herbs brings a burst of freshness, making it a perfect meal for warm weather.
The simplicity of this dish allows the natural flavors of each ingredient to shine, offering a satisfying and aromatic experience with every bite. Perfect for a family dinner or a casual gathering with friends, this Lemon Ricotta Pasta With Fresh Herbs serves 4-6 people.
It’s a quick and easy recipe that requires minimal cooking time, allowing you to spend more time enjoying the company of your loved ones. The harmony of flavors and textures makes this pasta dish a standout choice for any occasion, bringing a taste of Italy to your table.
Ingredients:
- 1 pound of pasta (such as fettuccine or linguine)
- 1 cup ricotta cheese
- Zest and juice of 2 lemons
- 1/4 cup olive oil
- 1 cup grated Parmesan cheese
- 1 teaspoon salt
- 1/2 teaspoon black pepper
- 1/2 cup fresh basil leaves, chopped
- 1/2 cup fresh parsley, chopped
- 1/4 cup fresh mint leaves, chopped
- Optional: extra lemon slices and herbs for garnish
Instructions:
- Boil the Pasta: In a large pot, bring salted water to a boil. Add the pasta and cook according to package instructions until al dente. Reserve 1 cup of pasta water before draining the pasta.
- Prepare the Ricotta Mixture: While the pasta is cooking, in a large bowl, combine the ricotta cheese, lemon zest, lemon juice, olive oil, grated Parmesan cheese, salt, and black pepper. Mix until smooth and creamy.
- Combine Pasta and Sauce: Once the pasta is drained, immediately add it to the bowl with the ricotta mixture. Toss the pasta to coat it evenly in the creamy sauce. Add a little reserved pasta water if the sauce is too thick, until you reach your desired consistency.
- Add Fresh Herbs: Gently fold in the chopped basil, parsley, and mint, ensuring they’re evenly distributed throughout the pasta. The herbs should be added just before serving to maintain their vibrant color and flavor.
- Serve and Garnish: Transfer the pasta to a serving dish. Garnish with extra lemon slices and a sprinkle of fresh herbs if desired. Serve immediately and enjoy the bright, fresh flavors.
Extra Tips: For the best results, use fresh, high-quality ricotta cheese and freshly grated Parmesan. These ingredients make a significant difference in the dish’s flavor and texture.
You can experiment with different types of pasta if preferred, but long noodles like fettuccine or linguine work best to capture the creamy sauce. If you like a little heat, consider adding a pinch of crushed red pepper flakes to the ricotta mixture.
Finally, always taste and adjust the seasoning before serving to suit your palate.
Grilled Eggplant and Zucchini Antipasto
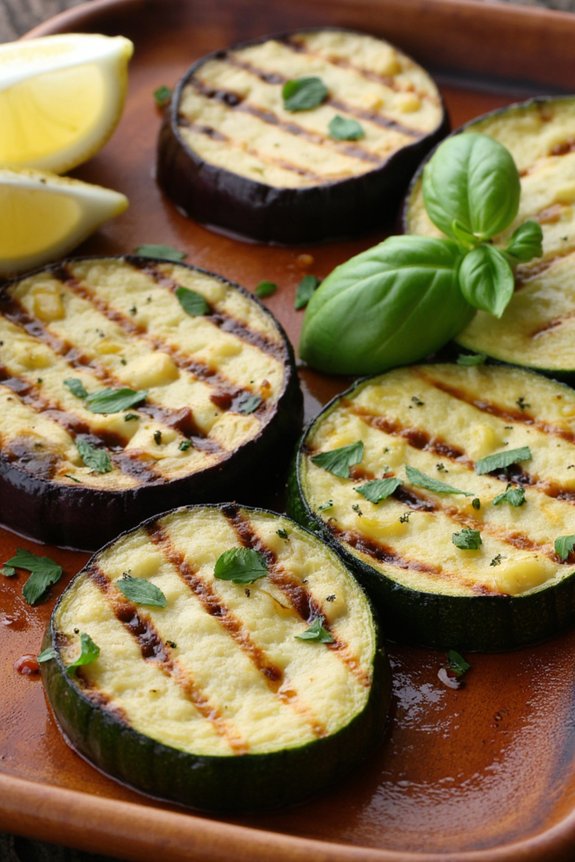
Grilled Eggplant and Zucchini Antipasto is a delightful Italian dish that perfectly encapsulates the flavors of summer. This dish is a celebration of fresh produce, with the smoky char of the grill enhancing the natural sweetness of the vegetables. The combination of eggplant and zucchini is a classic one, offering a balance of textures and flavors that’s both simple and sophisticated. Served as an appetizer or a side dish, this antipasto is sure to impress your guests at any gathering.
The key to a successful Grilled Eggplant and Zucchini Antipasto lies in selecting fresh, high-quality ingredients and grilling them to perfection. The vegetables should be sliced evenly to guarantee they cook uniformly, and a good drizzle of olive oil will prevent them from sticking to the grill while adding a rich depth of flavor. Once grilled, the vegetables are marinated in a mixture of garlic, herbs, and lemon juice, infusing them with a zesty tang that complements their natural sweetness. Serve this antipasto with crusty bread for a complete and satisfying appetizer.
Ingredients (Serves 4-6):
- 2 medium eggplants
- 2 medium zucchinis
- 4 tablespoons olive oil
- Salt and freshly ground black pepper to taste
- 2 cloves garlic, minced
- 1 tablespoon fresh basil, chopped
- 1 tablespoon fresh parsley, chopped
- Juice of 1 lemon
- Optional: Crusty bread for serving
Instructions:
- Prepare the Vegetables: Wash the eggplants and zucchinis thoroughly. Slice them into 1/4-inch thick rounds. Lay them out on a clean surface and lightly sprinkle with salt. Allow them to sit for about 15 minutes to draw out excess moisture.
- Preheat the Grill: Heat your grill to medium-high. Brush the grill grates with a little olive oil to prevent sticking.
- Season the Vegetables: Pat the eggplant and zucchini slices dry with a paper towel. Brush both sides with olive oil and season with salt and freshly ground black pepper.
- Grill the Vegetables: Place the vegetable slices on the preheated grill. Grill for about 3-4 minutes on each side, or until they’ve nice grill marks and are tender. Remove from the grill and set aside.
- Prepare the Marinade: In a large bowl, combine the minced garlic, chopped basil, chopped parsley, and lemon juice. Add the grilled vegetables to the bowl and toss gently to coat them in the marinade.
- Marinate the Vegetables: Let the vegetables sit in the marinade for at least 15 minutes to absorb the flavors. You can also cover and refrigerate them to marinate longer, if desired.
- Serve: Arrange the marinated vegetables on a serving platter. Serve as an antipasto with crusty bread, if using.
Extra Tips: When grilling, make sure not to overcrowd the grill to guarantee even cooking. Using a grill pan is an excellent alternative if you don’t have access to an outdoor grill. If you want a little extra flavor, consider sprinkling some grated Parmesan cheese over the top before serving. Additionally, this antipasto can be made ahead of time and stored in the refrigerator for up to two days, making it perfect for easy entertaining.
Classic Margherita Pizza on the Grill

The Classic Margherita Pizza is a timeless favorite, and grilling it adds a unique, smoky flavor that elevates the dish to the next level. The combination of fresh basil, creamy mozzarella, and rich tomato sauce on a crispy, charred crust makes for an unforgettable culinary experience.
By using a grill, you can achieve a perfectly crispy crust that’s usually found in wood-fired ovens, making this recipe ideal for summer gatherings or casual weeknight dinners.
Grilling pizza is a simple yet rewarding process that brings out the best in the ingredients. The high heat of the grill cooks the dough quickly, resulting in a beautifully charred crust with a lightly smoky flavor.
The key to success with this recipe is to have all your ingredients prepped and ready to go before you start grilling, as the process moves quickly once the dough hits the grill. This recipe serves 4-6 people, making it perfect for sharing with friends and family.
Ingredients (serves 4-6):
- 1 pound pizza dough (store-bought or homemade)
- 1 cup tomato sauce
- 8 ounces fresh mozzarella, sliced
- 1/4 cup fresh basil leaves
- 1 tablespoon olive oil
- Salt and pepper to taste
- Cornmeal or flour for dusting
Cooking Instructions:
- Prepare the Grill: Preheat your grill to medium-high heat, aiming for a temperature of around 500°F (260°C). Make sure the grates are clean and well-oiled to prevent the dough from sticking.
- Prepare the Dough: On a lightly floured surface, roll out the pizza dough to your desired thickness, about 12-14 inches in diameter for a thin crust. Transfer the dough to a pizza peel or a flat baking sheet dusted with cornmeal or flour to prevent sticking.
- Grill the Dough: Carefully slide the dough onto the grill grates. Close the lid and cook for 2-3 minutes, or until the bottom starts to char and the dough has set. Use tongs to rotate the dough if needed to guarantee even cooking.
- Flip the Dough: Using tongs and a spatula, carefully flip the dough over. Brush the grilled side with olive oil.
- Add Toppings: Quickly spread the tomato sauce over the dough, leaving a small border around the edges. Arrange the mozzarella slices evenly over the sauce. Sprinkle with salt and pepper to taste.
- Finish Grilling: Close the grill lid and cook for another 3-4 minutes, or until the cheese is melted and bubbly, and the crust is fully cooked and charred to your liking.
- Garnish and Serve: Remove the pizza from the grill using the pizza peel or baking sheet. Scatter fresh basil leaves over the top. Allow the pizza to cool for a minute or two before slicing and serving.
Extra Tips:
For an even more authentic flavor, consider adding a few wood chips to your grill to enhance the smoky taste.
If you prefer a crispier crust, roll the dough thinner and monitor it closely to prevent burning.
It’s important to let the pizza rest for a couple of minutes after grilling to allow the cheese to set slightly, making it easier to slice and serve.
And remember, the key to a great grilled pizza is to have everything ready to go before placing the dough on the grill, as things move quickly once you start cooking!
Prosciutto and Melon Skewers

Summer in Italy often means indulging in simple, yet delicious dishes that highlight the fresh, vibrant flavors of the season. One such delightful treat is Prosciutto and Melon Skewers, a classic Italian appetizer. This dish combines the sweetness of ripe cantaloupe melon with the savory saltiness of prosciutto, creating a harmonious balance that’s both invigorating and satisfying. Perfect for a light start to a meal or as a crowd-pleasing hors d’oeuvre, these skewers are a demonstration of the philosophy that the best dishes often require the fewest ingredients.
Preparing Prosciutto and Melon Skewers is incredibly straightforward, making it an ideal recipe for those hot summer days when you want to avoid spending too much time in the kitchen. The key to this dish is using high-quality ingredients; ripe cantaloupe and authentic Italian prosciutto are essential for achieving the desired flavor profile.
With minimal preparation time and no cooking required, these skewers aren’t only delicious but also visually appealing, adding a touch of elegance to any summer gathering.
Ingredients for 4-6 people:
- 1 ripe cantaloupe melon
- 12 slices of prosciutto
- Fresh basil leaves (optional)
- Toothpicks or small skewers
Instructions:
- Prepare the Melon: Begin by cutting the cantaloupe in half and scooping out the seeds. Use a melon baller or a small spoon to scoop out bite-sized melon balls. Alternatively, you can slice the melon into small, even cubes if you prefer.
- Prepare the Prosciutto: Take each slice of prosciutto and cut it in half lengthwise. This will create strips that are easy to wrap around the melon pieces.
- Assemble the Skewers: Take a piece of melon and wrap it with a strip of prosciutto. Secure it with a toothpick or small skewer. If you’re using basil leaves, add a leaf between the melon and prosciutto for an added burst of flavor.
- Repeat the Process: Continue assembling the skewers until all the melon and prosciutto have been used. Arrange the skewers on a serving platter.
- Chill Before Serving: For the best flavor, chill the skewers in the refrigerator for at least 15 minutes before serving, allowing the flavors to meld together.
Extra Tips:
To enhance the flavor of your Prosciutto and Melon Skewers, consider drizzling a little balsamic glaze over the top just before serving. This adds a tangy contrast to the sweet and salty combination.
Additionally, if you’re hosting a larger gathering, feel free to double or triple the recipe as needed. Remember, the key to this dish is the quality of the ingredients, so choose the freshest melon and the finest prosciutto you can find for the best results.
Panzanella With Heirloom Tomatoes
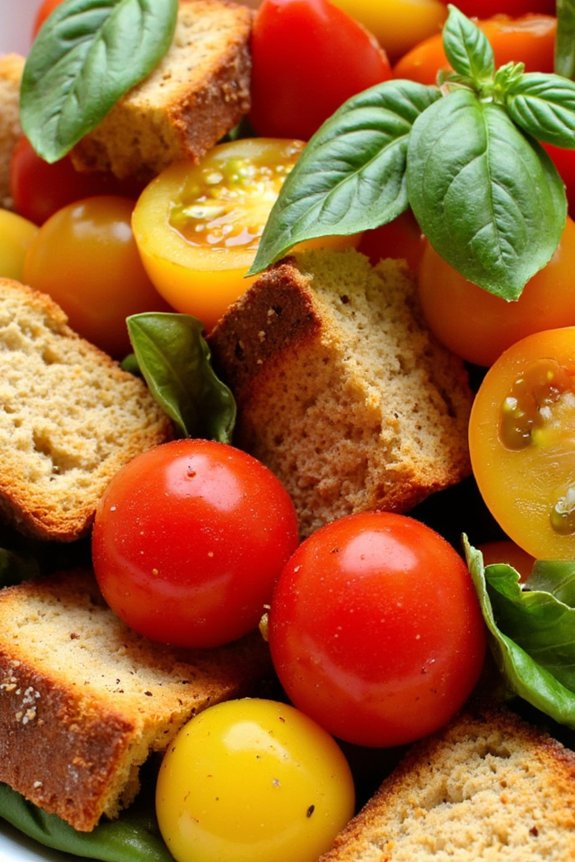
Panzanella With Heirloom Tomatoes is the quintessential Italian summer dish that captures the essence of sun-drenched gardens and vibrant flavors. This rustic salad hails from Tuscany and is traditionally made with stale bread and ripe tomatoes, making it a perfect way to use up leftovers while celebrating the bounty of summer produce.
The key to a great Panzanella lies in the quality of the ingredients: ripe, juicy heirloom tomatoes, crusty bread, and aromatic basil create a symphony of tastes that are both invigorating and satisfying.
This dish is ideal for a casual summer gathering or a light lunch, as it requires minimal cooking and comes together quickly. The bread soaks up the juices from the tomatoes and the dressing, becoming a deliciously savory sponge. The heirloom tomatoes, with their varied colors and flavors, add a delightful complexity to the salad.
Paired with the freshness of basil and the tang of red wine vinegar, Panzanella With Heirloom Tomatoes is a delightful way to enjoy the best of summer produce.
Ingredients for 4-6 servings:
- 6 cups of cubed stale or day-old crusty bread (such as ciabatta or sourdough)
- 2 pounds of heirloom tomatoes, roughly chopped
- 1 small red onion, thinly sliced
- 1 cucumber, peeled, seeded, and chopped
- 1/2 cup of fresh basil leaves, torn into pieces
- 1/4 cup of red wine vinegar
- 1/2 cup of extra virgin olive oil
- Salt and freshly ground black pepper, to taste
- Optional: 1/4 cup of capers or olives for added flavor
Cooking Instructions:
- Prepare the Bread: If your bread isn’t stale, preheat your oven to 350°F (175°C). Spread the bread cubes on a baking sheet and toast them in the oven for about 10 minutes, or until they’re dry and slightly golden. This will help them absorb the dressing without becoming too soggy.
- Mix the Vegetables: In a large mixing bowl, combine the chopped heirloom tomatoes, sliced red onion, and chopped cucumber. Toss them together gently to guarantee even distribution.
- Make the Dressing: In a small bowl, whisk together the red wine vinegar and olive oil. Season the mixture with salt and freshly ground black pepper to taste.
- Combine the Ingredients: Add the toasted bread cubes to the bowl with the vegetables. Pour the dressing over the top and toss everything together gently, ensuring that the bread is well-coated with the dressing.
- Let it Rest: Allow the salad to sit at room temperature for about 30 minutes. This resting time allows the bread to absorb the flavors of the tomatoes and dressing fully.
- Add the Finishing Touches: Just before serving, add the torn basil leaves to the salad and toss gently to combine. If using, sprinkle the capers or olives on top for an extra burst of flavor.
Extra Tips:
For the best results, use the freshest ingredients you can find—especially when it comes to the tomatoes and basil.
If possible, let the Panzanella sit for a few hours or even overnight in the refrigerator. This will allow the flavors to meld together beautifully.
If your salad seems a bit dry after resting, simply drizzle a little more olive oil or vinegar before serving. Additionally, be mindful of the saltiness of any added capers or olives, adjusting the seasoning accordingly to avoid an overly salty dish.
Linguine With Clams and White Wine Sauce
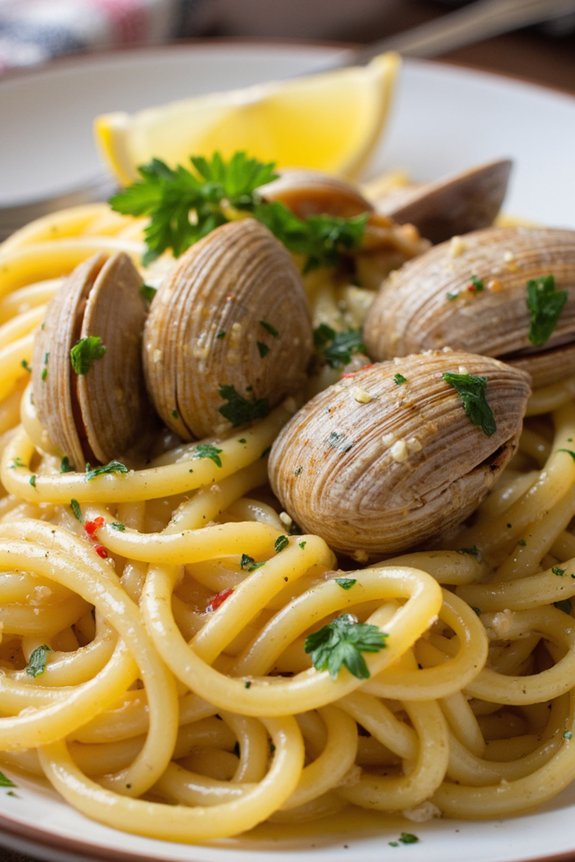
Linguine With Clams and White Wine Sauce is a classic Italian dish that perfectly captures the essence of summer with its light yet flavorful ingredients. This dish combines tender clams, al dente linguine, and a savory white wine sauce, creating a harmonious balance that’s both satisfying and invigorating.
The subtle brininess of the clams is beautifully complemented by the rich and aromatic white wine sauce, making it an ideal meal for a warm summer evening. This dish not only highlights the simplicity of Italian cooking but also emphasizes the freshness of its ingredients.
The key to a successful Linguine With Clams and White Wine Sauce lies in using fresh clams and high-quality wine, which together impart a depth of flavor that elevates the dish. Paired with a crisp salad and a glass of chilled white wine, this recipe is sure to be a hit at any summer gathering or intimate dinner.
Ingredients for 4-6 servings:
- 1 pound linguine
- 3 tablespoons olive oil
- 4 cloves garlic, minced
- 1/4 teaspoon red pepper flakes
- 1/2 cup dry white wine
- 3 pounds littleneck or Manila clams, scrubbed and rinsed
- 1/2 cup fresh parsley, chopped
- Salt and pepper to taste
- Lemon wedges for serving
Cooking Instructions:
- Cook the Linguine: Bring a large pot of salted water to a boil. Add the linguine and cook according to package instructions until al dente. Reserve 1 cup of pasta cooking water, then drain the linguine and set aside.
- Prepare the Sauce Base: In a large skillet or sauté pan, heat the olive oil over medium heat. Add the minced garlic and red pepper flakes, sautéing for about 1 minute until the garlic is fragrant but not browned.
- Add the White Wine: Pour in the dry white wine, stirring to combine. Simmer the mixture for about 2 minutes to allow the alcohol to evaporate and the flavors to meld.
- Cook the Clams: Add the clams to the skillet, cover with a lid, and increase the heat to medium-high. Cook for about 5-7 minutes, shaking the pan occasionally, until the clams open. Discard any clams that don’t open.
- Combine and Season: Add the cooked linguine to the skillet with the clams. Toss the pasta gently with the clams and sauce, adding reserved pasta water as needed to achieve the desired sauce consistency. Stir in the chopped parsley, and season with salt and pepper to taste.
- Serve: Transfer the linguine and clams to a large serving platter or individual plates. Serve immediately, garnished with fresh lemon wedges for squeezing over the top.
Extra Tips:
When preparing Linguine With Clams and White Wine Sauce, it’s essential to verify that your clams are fresh and properly cleaned to avoid any grit in the dish. Soaking the clams in cold water for 20 minutes before cooking can help remove any sand.
Additionally, using a good quality dry white wine will enhance the flavor of the sauce, so opt for a wine that you enjoy drinking. Finally, for a touch of extra richness, consider adding a tablespoon of butter to the sauce just before tossing it with the pasta.
Arugula and Parmesan Salad With Lemon Vinaigrette
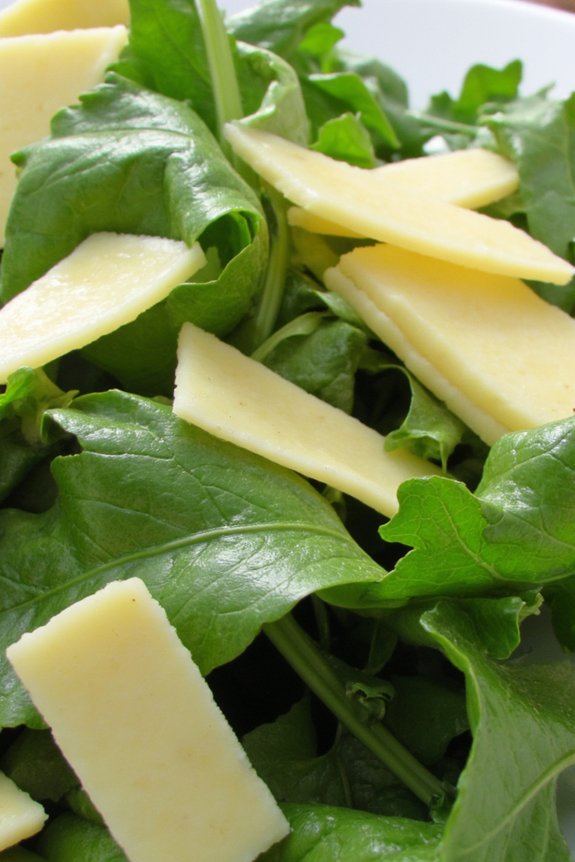
Arugula and Parmesan Salad with Lemon Vinaigrette is a quintessential Italian summer recipe that embodies freshness and simplicity. This salad combines peppery arugula with the rich, nutty flavor of Parmesan cheese, all brought together by a zesty lemon vinaigrette.
Perfect as a light appetizer or a revitalizing side dish, this salad is a celebration of summer’s vibrant flavors and textures. The crisp, peppery arugula pairs beautifully with the savory, umami notes of aged Parmesan, while the vinaigrette adds a tangy brightness that ties everything together.
Ideal for a casual lunch or as an accompaniment to grilled meats or seafood, this salad isn’t only delicious but also incredibly easy to prepare. It requires minimal ingredients, allowing each component to shine. The key is to use the freshest arugula and the best quality Parmesan you can find.
The lemon vinaigrette is straightforward yet flavorful, enhancing the salad without overpowering the natural tastes of the ingredients. Ready to serve in just a few minutes, this recipe will become a staple in your summer dining repertoire.
Ingredients (Serves 4-6):
- 6 cups fresh arugula
- 1 cup shaved Parmesan cheese
- 1/4 cup extra-virgin olive oil
- 2 tablespoons freshly squeezed lemon juice
- 1 teaspoon lemon zest
- Salt, to taste
- Freshly ground black pepper, to taste
Cooking Instructions:
- Prepare the Arugula: Rinse the arugula thoroughly under cold water to remove any dirt or grit. Pat it dry using a salad spinner or clean kitchen towel. Transfer to a large salad bowl.
- Shave the Parmesan: Using a vegetable peeler, shave the Parmesan cheese into thin slices. Add about half of the cheese to the bowl with the arugula, reserving the rest for garnish.
- Make the Lemon Vinaigrette: In a small bowl or jar, combine the extra-virgin olive oil, freshly squeezed lemon juice, and lemon zest. Whisk or shake until the mixture is well combined and emulsified. Season with salt and freshly ground black pepper to taste.
- Dress the Salad: Pour the lemon vinaigrette over the arugula and Parmesan in the salad bowl. Toss gently until the arugula is evenly coated with the vinaigrette and the cheese is well distributed.
- Finish and Serve: Transfer the salad to a serving platter or individual plates. Top with the remaining shaved Parmesan. Serve immediately, and enjoy the fresh, vibrant flavors.
Extra Tips:
To enhance the flavor of this salad, consider adding toasted pine nuts or walnuts for an extra crunch. Make sure the arugula is completely dry before dressing to prevent the vinaigrette from becoming diluted.
If desired, you can substitute baby spinach or mixed greens for the arugula for a milder taste. Remember, the quality of the ingredients is key—use fresh, organic produce and authentic Parmigiano-Reggiano cheese for the best results.
Shrimp Scampi With Garlic and Lemon
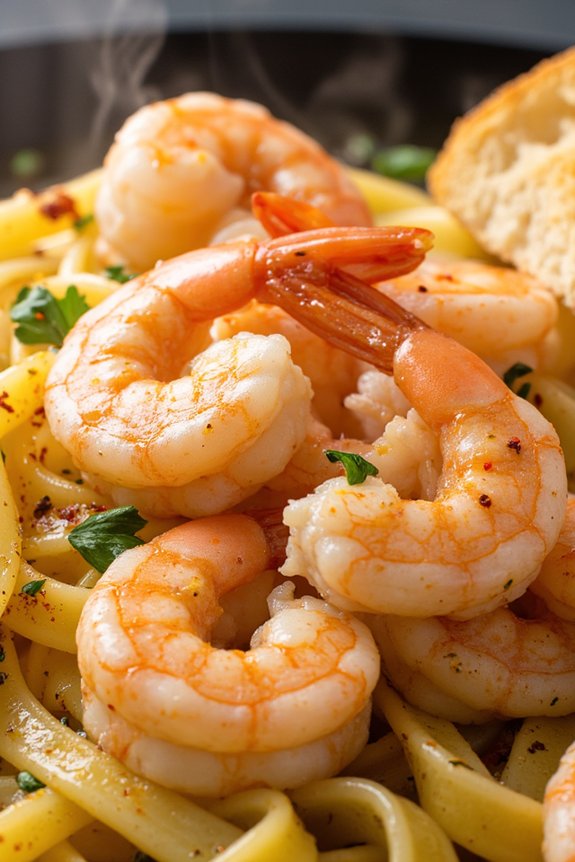
Shrimp Scampi With Garlic and Lemon is a delightful Italian summer dish that’s perfect for a light, flavorful meal. This dish highlights the fresh and vibrant flavors of shrimp, garlic, and lemon, perfectly harmonizing with the richness of butter and a hint of white wine.
It’s an ideal choice for a gathering of friends or a family dinner, bringing a taste of Italy’s sunny coastline to your table. This dish is typically served over pasta or with crusty bread, making it versatile and satisfying for everyone.
This recipe is designed to serve 4-6 people, providing generous portions of succulent shrimp bathed in a luscious sauce. The key to this dish is in its simplicity, allowing the high-quality ingredients to shine.
The shrimp are quickly sautéed to perfection, infused with the robust flavors of garlic and brightened by a splash of lemon juice. This harmonious blend of tastes is sure to make this Shrimp Scampi With Garlic and Lemon a summer favorite.
Ingredients:
- 1 1/2 pounds large shrimp, peeled and deveined
- 4 tablespoons unsalted butter
- 3 tablespoons olive oil
- 4 cloves garlic, minced
- 1/4 cup dry white wine
- Juice of 1 lemon
- Zest of 1 lemon
- 1/4 teaspoon red pepper flakes
- Salt and freshly ground black pepper, to taste
- 1/4 cup chopped fresh parsley
- Cooked pasta or crusty bread, for serving
Instructions:
- Prepare the Shrimp: Rinse the shrimp under cold water and pat them dry with paper towels. This guarantees that the shrimp will sear properly in the pan.
- Melt Butter and Olive Oil: In a large skillet, melt the butter and olive oil over medium heat. This combination provides a rich flavor base for the shrimp.
- Sauté Garlic: Add the minced garlic to the skillet and sauté for about 1 minute, until fragrant. Be careful not to burn the garlic, as it can turn bitter.
- Cook the Shrimp: Add the shrimp to the skillet in a single layer. Sprinkle with salt, pepper, and red pepper flakes. Cook for 2-3 minutes on each side until the shrimp are pink and opaque.
- Deglaze with Wine: Pour in the white wine and let it simmer for about 2 minutes, allowing the alcohol to evaporate and the flavors to concentrate.
- Add Lemon: Stir in the lemon juice and zest, mixing well to coat the shrimp. This step brightens and balances the dish with citrus notes.
- Finish with Parsley: Remove the skillet from the heat and sprinkle the chopped parsley over the shrimp. Toss gently to combine.
- Serve: Serve the shrimp and sauce over cooked pasta or alongside crusty bread to soak up the delicious sauce.
Extra Tips:
For the best results, use fresh, high-quality shrimp, as they’re the star of the dish. If you prefer, you can substitute chicken broth for the white wine.
To enhance the lemon flavor, consider adding a touch of lemon zest to the pasta or bread before serving. Keep an eye on the garlic, guaranteeing it doesn’t brown too much, which can occur quickly in a hot pan.
Enjoy your Shrimp Scampi With Garlic and Lemon with a chilled glass of white wine for a complete Italian summer experience.
Spinach and Ricotta Stuffed Shells
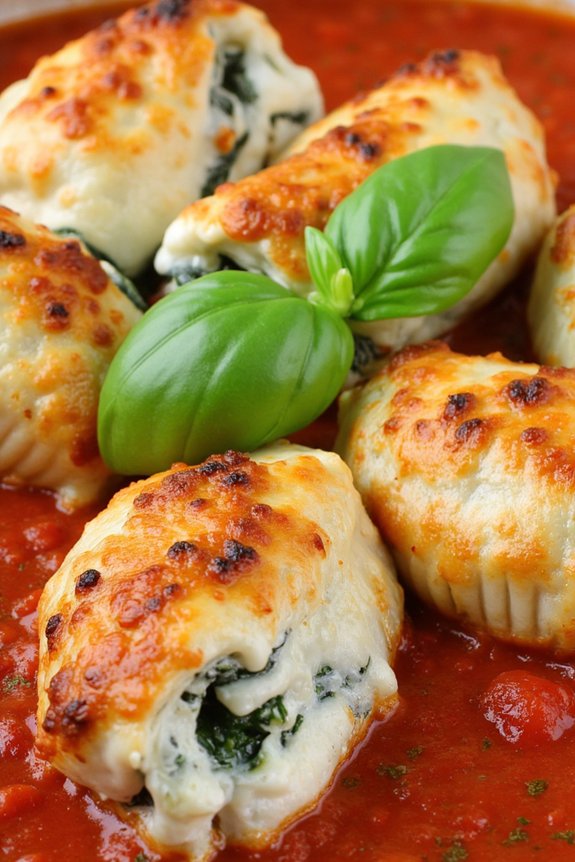
Spinach and Ricotta Stuffed Shells is a delightful Italian dish that combines the rich flavors of creamy ricotta cheese with the subtle earthiness of fresh spinach, all encased in tender pasta shells.
It’s a perfect meal for a summer gathering, light yet satisfying, and certain to impress your family and friends with its vibrant presentation and mouth-watering aroma. This dish brings together classic Italian ingredients in a way that makes every bite a symphony of taste and texture.
The beauty of this recipe lies in its simplicity and the freshness of its ingredients, making it a go-to for those warm summer evenings when you crave something comforting yet not too heavy.
The stuffed shells are baked in a rich tomato sauce, allowing the flavors to meld together beautifully, and are topped with a generous layer of melted mozzarella cheese for that irresistible gooey finish.
Whether you’re hosting a dinner party or just treating yourself, Spinach and Ricotta Stuffed Shells is certain to become a favorite in your summer recipe repertoire.
Ingredients (Serves 4-6):
- 20-24 jumbo pasta shells
- 2 cups ricotta cheese
- 1 cup grated Parmesan cheese
- 1 large egg
- 3 cups fresh spinach, chopped
- 2 cups marinara sauce
- 1 1/2 cups shredded mozzarella cheese
- 2 cloves garlic, minced
- 1/4 teaspoon ground nutmeg
- Salt and pepper to taste
- Fresh basil leaves for garnish (optional)
Cooking Instructions:
- Preheat the Oven: Start by preheating your oven to 375°F (190°C). This guarantees it reaches the right temperature by the time you’re ready to bake the shells.
- Cook the Pasta Shells: Bring a large pot of salted water to a boil. Add the jumbo pasta shells and cook until they’re al dente, following package instructions. Drain and set aside to cool slightly.
- Prepare the Filling: In a large mixing bowl, combine the ricotta cheese, Parmesan cheese, egg, chopped spinach, minced garlic, ground nutmeg, salt, and pepper. Mix until well incorporated.
- Stuff the Shells: Using a spoon, carefully fill each cooked pasta shell with the spinach and ricotta mixture. Make sure each shell is generously stuffed but not overfilled to prevent them from tearing.
- Assemble the Dish: Spread about 1/2 cup of the marinara sauce over the bottom of a baking dish. Arrange the stuffed shells in the dish, open side up. Pour the remaining marinara sauce evenly over the shells.
- Add Cheese: Sprinkle the shredded mozzarella cheese over the top of the shells, ensuring each one is well-covered.
- Bake: Cover the baking dish with aluminum foil and bake in the preheated oven for 20 minutes. Remove the foil and bake for an additional 10-15 minutes, or until the cheese is melted and bubbly with a golden-brown top.
- Serve: Remove from the oven and let it cool slightly before serving. Garnish with fresh basil leaves if desired.
Extra Tips:
When making Spinach and Ricotta Stuffed Shells, be sure to use fresh spinach for the best flavor and texture. If you’re using frozen spinach, make sure it’s thoroughly thawed and drained to avoid excess moisture in the filling.
Additionally, feel free to experiment with the cheese by adding a bit of grated fontina or pecorino for an extra depth of flavor. To save time, you can prepare the filling a day in advance and store it in the refrigerator until you’re ready to assemble the dish.
Tuscan White Bean and Tomato Bruschetta
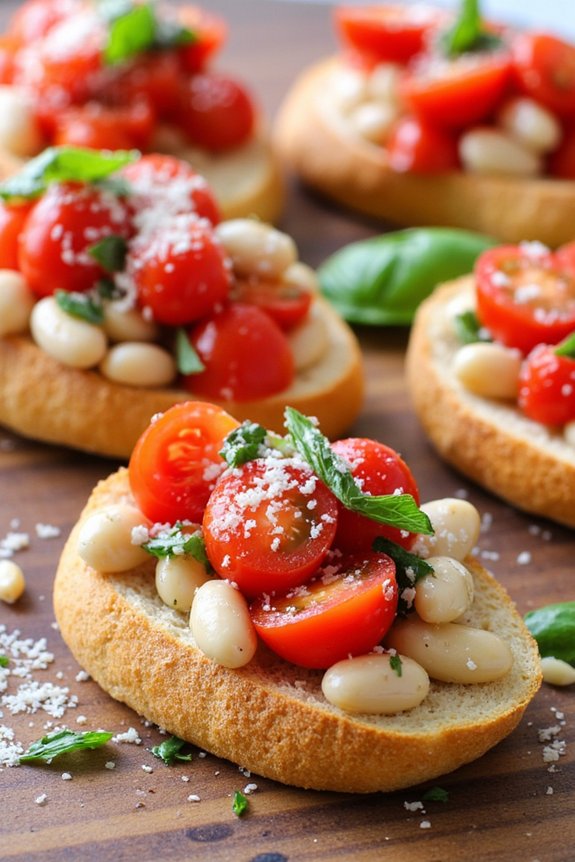
Tuscan White Bean and Tomato Bruschetta is a classic Italian appetizer that brings together the earthy flavors of white beans and the bright, fresh taste of tomatoes in a delightful combination. This dish is perfect for summer gatherings or a light, healthy snack. The crispy toasted bread serves as a perfect vehicle for the creamy beans and juicy tomatoes, creating a beautiful contrast of textures. The addition of garlic, olive oil, and fresh basil enhances the flavors, making each bite a delightful experience.
Bruschetta is a versatile dish that can be easily adapted to suit different tastes. The Tuscan White Bean and Tomato Bruschetta can be served as a starter or a side dish, and it’s sure to be a hit at any gathering. The dish isn’t only delicious but also healthy, as it’s packed with protein from the beans and nutrients from the fresh tomatoes. Best of all, it’s quick and easy to prepare, making it an ideal choice for any summer occasion.
Ingredients for 4-6 servings:
- 1 baguette or rustic Italian bread
- 1 can (15 oz) of white beans, drained and rinsed
- 2 cups cherry tomatoes, quartered
- 2 cloves garlic, minced
- 3 tablespoons extra-virgin olive oil
- 1 tablespoon balsamic vinegar
- Salt and pepper to taste
- Fresh basil leaves, roughly chopped
- Optional: Grated Parmesan cheese
Cooking Instructions:
- Prepare the Bread: Preheat your oven to 400°F (200°C). Slice the baguette or rustic Italian bread into 1/2-inch thick slices. Arrange the slices on a baking sheet and brush each side with a bit of olive oil. Toast in the oven for about 5-7 minutes on each side until golden brown and crispy. Remove from the oven and let them cool slightly.
- Prepare the Bean and Tomato Mixture: In a medium bowl, combine the drained and rinsed white beans, quartered cherry tomatoes, minced garlic, and chopped basil. Drizzle with 2 tablespoons of olive oil and 1 tablespoon of balsamic vinegar. Season with salt and pepper to taste. Gently mix all the ingredients until well combined.
- Assemble the Bruschetta: Once the bread slices have cooled slightly, top each piece with a generous spoonful of the bean and tomato mixture. Make sure to distribute the mixture evenly across all the bread slices.
- Garnish and Serve: If desired, sprinkle some grated Parmesan cheese over the top of each bruschetta. Serve immediately for the best taste and texture.
Extra Tips:
For an added depth of flavor, you can rub the toasted bread slices with a cut clove of garlic before adding the topping. This will infuse a subtle garlic flavor into the bread itself.
If you prefer a bit more heat, consider adding a pinch of red pepper flakes to the bean and tomato mixture. Additionally, this dish can be prepared ahead of time by making the topping a few hours in advance and storing it in the refrigerator. Just be sure to assemble the bruschetta right before serving to maintain the crispness of the bread.
Limoncello Sorbet With Fresh Mint

Limoncello Sorbet with Fresh Mint is a revitalizing Italian dessert that perfectly captures the essence of summer. This delightful treat combines the tangy zest of lemons with the sweetness of limoncello, a popular Italian lemon liqueur, complemented by the coolness of fresh mint. Ideal for hot days, it offers a palate-cleansing finish to an Italian meal, making it both a sophisticated and crowd-pleasing dessert.
The combination of citrus and mint delivers an invigorating burst of flavors that’s sure to delight your guests.
To make this Limoncello Sorbet, you’ll need fresh lemons, high-quality limoncello, and a few simple ingredients that are likely already in your kitchen pantry. Preparing this dessert is relatively easy and doesn’t require any special equipment. The sorbet can be made ahead of time, allowing the flavors to meld together beautifully, making it a stress-free option for entertaining.
The sorbet is best served chilled and garnished with fresh mint leaves for an added touch of elegance.
Ingredients for Serving Size of 4-6 People:
- 1 cup water
- 1 cup granulated sugar
- 1 cup freshly squeezed lemon juice (about 4-5 lemons)
- 1/2 cup limoncello
- Zest of 2 lemons
- 1 tablespoon finely chopped fresh mint leaves
- Fresh mint sprigs, for garnish
Cooking Instructions:
- Prepare the Simple Syrup: In a medium saucepan over medium heat, combine the water and sugar. Stir the mixture until the sugar has completely dissolved. Allow it to simmer for 1-2 minutes, then remove from heat and let it cool to room temperature.
- Juice the Lemons: While the simple syrup is cooling, juice your lemons to obtain one cup of fresh lemon juice. Strain the juice to remove any seeds or pulp, ensuring a smooth sorbet texture.
- Mix the Ingredients: In a large mixing bowl, combine the cooled simple syrup, lemon juice, limoncello, and lemon zest. Stir well to confirm that all ingredients are evenly distributed.
- Add Fresh Mint: Gently fold in the finely chopped fresh mint leaves. This will infuse the sorbet with a revitalizing herbal note that complements the citrus flavors.
- Chill the Mixture: Cover the bowl with plastic wrap and place it in the refrigerator for at least 1 hour. This allows the flavors to meld together and guarantees the mixture is thoroughly chilled before freezing.
- Freeze the Sorbet: Pour the chilled mixture into an ice cream maker and churn according to the manufacturer’s instructions, usually about 20-25 minutes. If you don’t have an ice cream maker, pour the mixture into a shallow dish and place it in the freezer. Stir the mixture every 30 minutes until it reaches the desired consistency.
- Serve: Once the sorbet has reached the desired texture, scoop it into individual serving dishes. Garnish each serving with a sprig of fresh mint for an elegant presentation.
Extra Tips:
For the best results, use freshly squeezed lemon juice rather than bottled juice, as it imparts a fresher and more vibrant flavor to the sorbet. Verify that your limoncello is of good quality, as it greatly influences the overall taste.
If you prefer a less sweet sorbet, you can reduce the amount of sugar in the simple syrup. Additionally, if you don’t have an ice cream maker, the manual freezing method will still yield excellent results, although the texture might be slightly less smooth.
Store any leftover sorbet in an airtight container in the freezer, and allow it to soften slightly at room temperature before serving again.
Peach and Amaretto Tiramisu
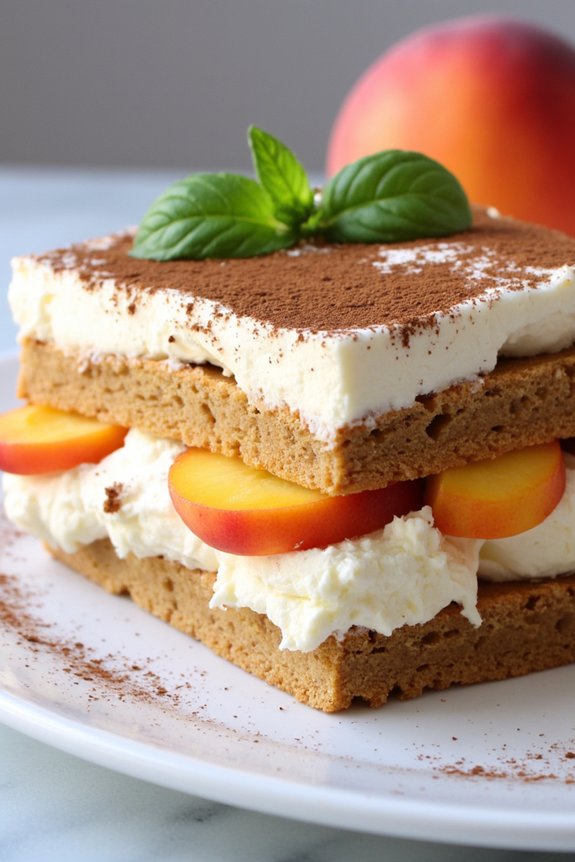
Peach and Amaretto Tiramisu is a delightful twist on the classic Italian dessert, perfect for summer gatherings or when you crave something sweet and invigorating. This dessert combines the rich and creamy layers of traditional tiramisu with the sweet and juicy flavors of ripe peaches, complemented by the subtle almond notes of amaretto liqueur. The result is a beautifully balanced treat that captures the essence of summer with every bite.
This recipe stays true to the traditional tiramisu structure, with layers of creamy mascarpone, espresso-soaked ladyfingers, and a touch of cocoa, but it introduces a fresh, fruity dimension with the addition of peaches. The amaretto not only enhances the flavor of the peaches but also adds a sophisticated touch, making it an ideal choice for both casual dinners and more formal occasions.
Follow these steps to create a Peach and Amaretto Tiramisu that will impress your guests and bring a taste of Italian summer to your table.
Ingredients for 4-6 servings:
- 4 ripe peaches, peeled and sliced
- 1/4 cup amaretto liqueur
- 2 cups mascarpone cheese
- 1 cup heavy cream
- 1/2 cup granulated sugar
- 1 teaspoon vanilla extract
- 2 cups espresso or strong coffee, cooled
- 24 ladyfinger cookies
- Unsweetened cocoa powder, for dusting
- Fresh mint leaves, for garnish (optional)
Instructions:
- Prepare the Peaches: In a medium bowl, combine the sliced peaches and amaretto liqueur. Gently toss to coat the peaches and let them sit for about 15 minutes to absorb the flavors.
- Make the Mascarpone Mixture: In a large mixing bowl, combine the mascarpone cheese, heavy cream, granulated sugar, and vanilla extract. Use an electric mixer to beat the mixture until it becomes smooth and forms soft peaks. Be careful not to overbeat, as the mixture can become too stiff.
- Prepare the Espresso: Brew 2 cups of strong espresso or coffee and let it cool to room temperature. Pour the cooled espresso into a shallow dish for dipping the ladyfingers.
- Assemble the Tiramisu: Quickly dip each ladyfinger into the espresso, making sure they’re soaked but not too soggy. Lay a layer of dipped ladyfingers at the bottom of your serving dish. Spread half of the mascarpone mixture over the ladyfingers, then layer half of the peaches on top of the mascarpone.
- Repeat Layers: Add another layer of espresso-dipped ladyfingers, followed by the remaining mascarpone mixture and the rest of the peaches.
- Chill: Cover the dish with plastic wrap and refrigerate for at least 3 hours, or overnight if possible, to allow the flavors to meld together.
- Serve: Before serving, dust the top of the tiramisu with unsweetened cocoa powder. Optionally, garnish with fresh mint leaves for added color and a hint of invigorating freshness.
Extra Tips:
For a more intense peach flavor, consider grilling the peaches slightly before layering them into the tiramisu. This will bring out their natural sweetness and add a subtle smokiness to the dish.
If you prefer a non-alcoholic version, you can replace the amaretto with almond extract or omit it entirely. Finally, make sure the espresso is completely cooled before dipping the ladyfingers to prevent them from becoming too soggy.
Enjoy the invigorating taste of summer with this Peach and Amaretto Tiramisu!