

Welcome to a burst of vibrant colors and flavors straight from the heart of Italy. These delightful vegetable side dishes are perfect for adding a touch of Italian charm to your meals. Picture the aroma of basil mingling with roasted bell peppers or the freshness of lemon paired with grilled zucchini. Each recipe offers a unique twist that can elevate your dining experience. Excited to bring these Italian-inspired dishes to your table? Let’s explore these mouthwatering recipes together.
Roasted Bell Peppers With Basil
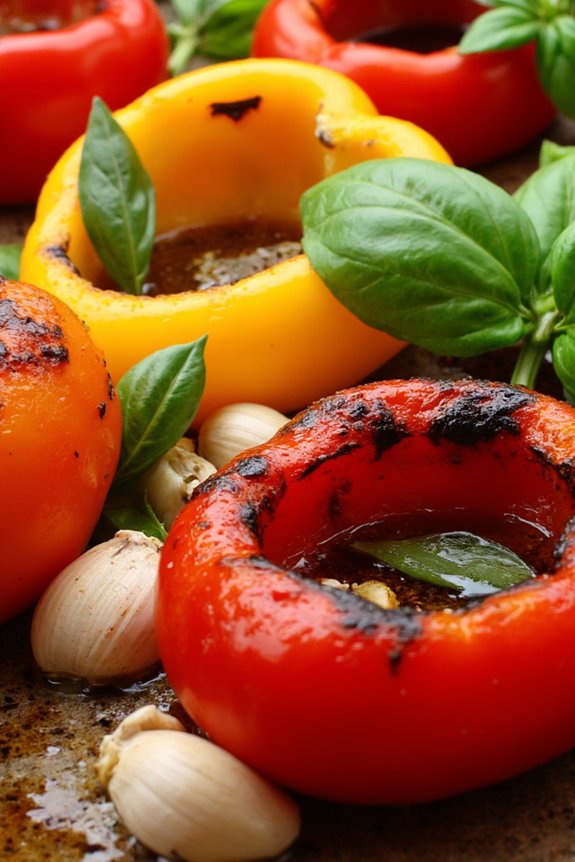
Roasted Bell Peppers With Basil is a delightful Italian vegetable side dish that brings a burst of color and flavor to any meal. This dish is both simple to prepare and incredibly versatile, making it a perfect accompaniment to a variety of main courses. The sweetness of the roasted bell peppers is enhanced by the aromatic freshness of basil, resulting in a dish that’s both visually appealing and delicious to taste.
Whether you’re serving it alongside grilled meats or as part of a vegetarian spread, this recipe is a crowd-pleaser that celebrates the vibrant flavors of Italian cuisine. Perfect for gatherings or family dinners, this dish can be prepared ahead of time and served at room temperature, making it convenient for entertaining.
The roasting process intensifies the natural sweetness of the bell peppers while giving them a slightly smoky flavor. The addition of fresh basil towards the end adds a fragrant touch that elevates the entire dish. With just a few simple ingredients and minimal preparation, Roasted Bell Peppers With Basil is an exquisite example of how Italian cooking can transform humble ingredients into something extraordinary.
Ingredients for 4-6 servings:
- 4 large bell peppers (mixed colors)
- 3 tablespoons olive oil
- Salt, to taste
- Freshly ground black pepper, to taste
- 1 clove garlic, minced
- 1 tablespoon balsamic vinegar
- 1/4 cup fresh basil leaves, torn
Cooking Instructions:
- Preheat the Oven: Start by preheating your oven to 450°F (230°C). A hot oven is crucial for achieving perfectly roasted bell peppers with a slightly charred skin.
- Prepare the Peppers: Wash the bell peppers thoroughly, then cut them in half lengthwise. Remove the seeds and membranes, and cut each half into thirds.
- Season the Peppers: Place the bell pepper pieces in a large mixing bowl. Drizzle them with olive oil and season with salt and freshly ground black pepper. Toss the peppers to guarantee they’re evenly coated with the oil and seasoning.
- Roast the Peppers: Arrange the seasoned pepper slices on a baking sheet lined with parchment paper. Make sure they’re spread out in a single layer to allow for even roasting. Roast in the preheated oven for about 20-25 minutes, or until the peppers are tender and slightly charred on the edges.
- Add Garlic and Balsamic: Once the peppers are done roasting, remove them from the oven and transfer them to a serving bowl. Add the minced garlic and balsamic vinegar, tossing to combine. The heat from the peppers will mellow the garlic flavor and enhance the overall taste.
- Finish with Basil: Just before serving, add the torn basil leaves to the roasted peppers. Gently toss to distribute the basil evenly throughout the dish.
Extra Tips:
When selecting bell peppers, choose firm ones with smooth skin for the best results. Mixing different colored peppers not only makes the dish more visually appealing but also provides a variety of flavors.
If you prefer a milder garlic flavor, you can roast the garlic along with the peppers instead of adding it raw. This dish can be served warm or at room temperature, making it ideal for preparing in advance. As a variation, you can also add a sprinkle of grated Parmesan cheese or a handful of toasted pine nuts for extra flavor and texture.
Caponata: Sicilian Eggplant Stew
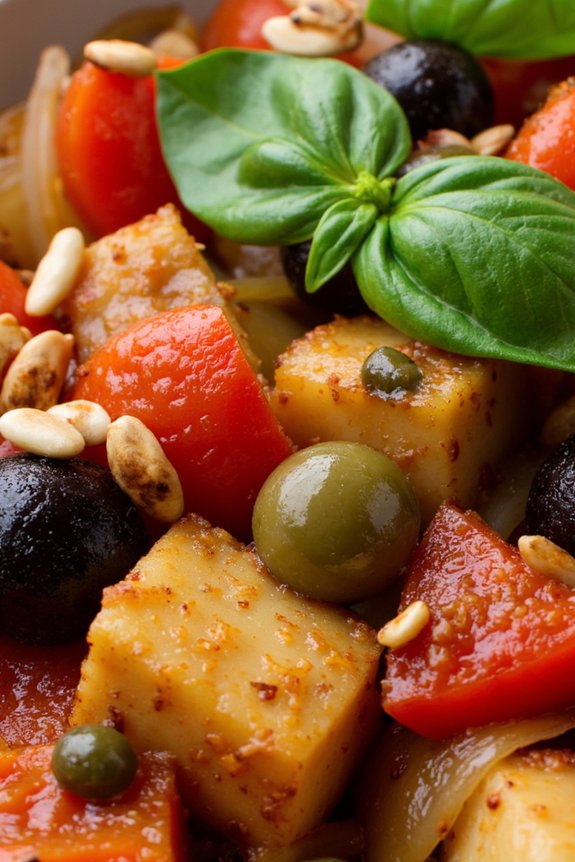
Caponata, a traditional Sicilian eggplant stew, is a flavorful and aromatic dish that encapsulates the essence of Italian cuisine. This delightful vegetable side dish is a harmonious blend of sweet and sour flavors, featuring a medley of eggplant, tomatoes, celery, and olives, all simmered together to create a rich, chunky sauce.
Originating from Sicily, Caponata is often served as an appetizer or side dish, but its robust flavors can also stand alone as a main vegetarian course. This dish is perfect for those who appreciate the vibrant taste of Mediterranean vegetables and desire a healthy, satisfying meal.
The key to a successful Caponata lies in balancing the complex flavors of its ingredients. The eggplant is the star of the dish, absorbing the tangy and sweet notes from the vinegar and sugar, while the capers and olives add a briny depth that complements the fresh tomatoes.
With its combination of textures and flavors, Caponata offers a delightful culinary experience that’s both hearty and invigorating. Best served at room temperature or slightly chilled, this versatile dish is ideal for gatherings, as it can be prepared ahead of time and allows the flavors to meld beautifully.
Ingredients (Serves 4-6)
- 2 large eggplants, diced
- 1/4 cup olive oil
- 1 medium onion, chopped
- 2 celery stalks, sliced
- 3 cloves garlic, minced
- 1/4 cup green olives, pitted and sliced
- 1/4 cup capers, rinsed
- 2 tablespoons tomato paste
- 1 can (14 oz) diced tomatoes
- 1/4 cup red wine vinegar
- 2 tablespoons sugar
- Salt and pepper to taste
- 1/4 cup fresh basil leaves, torn
- 1/4 cup toasted pine nuts (optional)
Cooking Instructions
- Prepare the Eggplant: Begin by dicing the eggplants into cubes. Sprinkle them with salt and let them sit in a colander for about 30 minutes to draw out any bitterness. Rinse and pat dry with paper towels.
- Cook the Eggplant: In a large skillet, heat the olive oil over medium heat. Add the eggplant cubes and cook until they’re golden brown and tender, about 10-12 minutes, stirring occasionally. Remove the eggplant from the skillet and set aside.
- Sauté the Vegetables: In the same skillet, add a bit more olive oil if needed. Sauté the chopped onion and sliced celery until they’re soft and translucent, about 5 minutes. Add the minced garlic and cook for an additional minute until fragrant.
- Combine Ingredients: Stir in the tomato paste and cook for another minute. Add the diced tomatoes, olives, capers, red wine vinegar, and sugar. Return the cooked eggplant to the skillet and stir to combine all ingredients.
- Simmer the Stew: Lower the heat and let the mixture simmer gently for about 20-25 minutes, allowing the flavors to meld. Stir occasionally and adjust seasoning with salt and pepper to taste.
- Finish the Dish: Remove the skillet from heat and stir in the fresh basil leaves. Let the Caponata cool to room temperature. Garnish with toasted pine nuts before serving if desired.
Extra Tips
When preparing Caponata, the key is to make certain the eggplant is cooked until it’s tender and creamy, absorbing the flavors of the stew. Be generous with the olive oil to achieve the desired texture.
Allowing the dish to rest for several hours or overnight enhances the flavors, making it even more delicious when served. Additionally, Caponata can be refrigerated for up to a week, making it a convenient option for meal prep or entertaining guests.
Serve it with crusty bread, as a topping for bruschetta, or alongside grilled meats for a complete Italian-inspired meal.
Grilled Zucchini With Lemon and Thyme

Grilled Zucchini With Lemon and Thyme is a delightful Italian vegetable side dish that captures the vibrant and fresh flavors of Mediterranean cuisine. The combination of zucchini, a versatile summer vegetable, with the zesty tang of lemon and the aromatic essence of thyme, creates a harmonious taste that complements a variety of main courses.
This dish isn’t only easy to prepare but also makes a visually appealing addition to your table, showcasing the bright green of the zucchini enhanced by the golden grill marks. Perfect for a summer barbecue or a weeknight dinner, Grilled Zucchini With Lemon and Thyme is both nutritious and delicious.
The grilling process brings out the natural sweetness of the zucchini while the lemon and thyme infuse it with a revitalizing flavor. This dish can be prepared in a short amount of time, making it ideal for busy cooks who still want to serve something healthy and flavorful. With just a few simple ingredients, you can create a side dish that will impress your family and guests alike.
Ingredients (Serves 4-6):
- 4 medium zucchinis
- 3 tablespoons olive oil
- 2 tablespoons fresh lemon juice
- 1 tablespoon lemon zest
- 1 tablespoon fresh thyme leaves
- Salt and pepper to taste
Cooking Instructions:
- Prepare the Zucchini: Wash and dry the zucchinis. Cut off the ends and slice them lengthwise into strips about 1/4 inch thick. This thickness will allow them to cook evenly and absorb the flavors without becoming too soft.
- Make the Marinade: In a small bowl, combine olive oil, lemon juice, lemon zest, fresh thyme leaves, salt, and pepper. Whisk the ingredients together until emulsified. This marinade will coat the zucchini and provide the dish with its distinctive lemon-thyme flavor.
- Marinate the Zucchini: Place the zucchini strips in a large shallow dish or a resealable plastic bag. Pour the marinade over the zucchini, making sure each piece is well coated. Let it marinate for at least 15 minutes. This will allow the flavors to penetrate the zucchini.
- Preheat the Grill: While the zucchini is marinating, preheat your grill to medium-high heat. Confirm the grates are clean to prevent the zucchini from sticking.
- Grill the Zucchini: Place the marinated zucchini strips directly on the grill grates. Grill each side for about 3-4 minutes, or until grill marks appear and the zucchini is tender yet crisp. Use tongs to carefully flip them halfway through to guarantee even cooking.
- Serve: Once grilled, remove the zucchini from the grill and arrange them on a serving platter. Optionally, garnish with additional thyme leaves or a sprinkle of lemon zest for extra flavor.
Extra Tips:
For the best results, use fresh, firm zucchinis to make certain they hold up well on the grill. If the zucchini strips are too thin, they may become overly soft, so aim for consistent thickness.
To add a bit of variation, you can also sprinkle some chili flakes for a hint of heat or add grated Parmesan cheese on top before serving for an extra layer of flavor. Finally, if you don’t have access to a grill, you can use a grill pan on your stovetop for similar results.
Italian-Style Green Beans With Garlic and Tomatoes
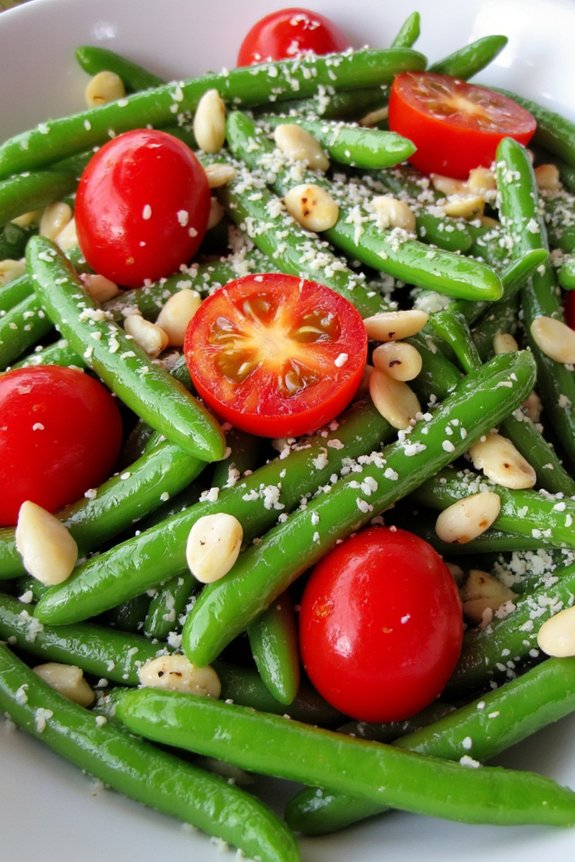
Italian-style green beans with garlic and tomatoes is a delightful side dish that’s both vibrant and flavorful. This dish combines the freshness of green beans with the rich, savory notes of garlic and the bright acidity of tomatoes. It pairs beautifully with a variety of main courses, making it a versatile addition to any meal.
The simplicity of its ingredients allows each component to shine, creating a harmonious balance that’s certain to please the palate. This recipe is perfect for serving 4-6 people, making it an excellent choice for family dinners or small gatherings.
The preparation and cooking process is straightforward, allowing even novice cooks to create a dish that resembles the authentic flavors of Italian cuisine. With just a few steps, you’ll have a side dish that not only tastes delicious but also adds a pop of color to your dining table.
Ingredients:
- 1 pound fresh green beans, trimmed
- 2 tablespoons olive oil
- 3 cloves garlic, minced
- 1 cup cherry tomatoes, halved
- Salt, to taste
- Black pepper, to taste
- 1 teaspoon dried oregano
- 1 tablespoon lemon juice
- 1/4 cup grated Parmesan cheese (optional)
Instructions:
- Prepare the Green Beans: Begin by washing the green beans thoroughly under cold water. Trim the ends of the beans using a sharp knife or kitchen scissors. Set aside.
- Blanch the Green Beans: Fill a large pot with water and bring it to a boil. Add a pinch of salt to the water. Once boiling, add the green beans and blanch them for about 3-4 minutes until they’re tender-crisp. Immediately transfer the beans to a bowl of ice water to stop the cooking process. Drain and set aside.
- Sauté Garlic and Tomatoes: In a large skillet, heat the olive oil over medium heat. Add the minced garlic and sauté for about 1 minute until fragrant. Be careful not to burn the garlic. Add the halved cherry tomatoes to the skillet and cook for another 2-3 minutes until they begin to soften.
- Combine Ingredients: Add the blanched green beans to the skillet with the garlic and tomatoes. Season with salt, black pepper, and dried oregano. Toss everything together and cook for another 3-4 minutes to ascertain the flavors meld together.
- Finish the Dish: Drizzle the lemon juice over the green beans and give everything a final toss. If desired, sprinkle grated Parmesan cheese over the top before serving, adding a rich, nutty flavor to the dish.
Extra Tips:
To enhance the flavor of this dish, consider using fresh oregano instead of dried, as it will add a more intense herbal aroma. If you prefer a spicier kick, a pinch of red pepper flakes can be added along with the garlic.
For added texture, you can toss in a handful of toasted pine nuts or slivered almonds just before serving. Remember to taste and adjust the seasoning to your preference, guaranteeing the dish suits your palate perfectly. Enjoy your Italian-style green beans as a vibrant addition to your meal!
Braised Artichokes With White Wine and Herbs

Braised Artichokes with White Wine and Herbs is a classic Italian side dish that highlights the unique flavor of artichokes paired with aromatic herbs and the richness of white wine. This dish is perfect for elevating any meal, whether you’re hosting a dinner party or simply enjoying a quiet family dinner.
The artichokes are slowly cooked until tender, allowing them to absorb the beautiful flavors of the wine and herbs. This results in a delightful, savory side dish that complements a variety of main courses, from grilled meats to pasta dishes.
Preparing Braised Artichokes with White Wine and Herbs requires a bit of patience, but the end result is well worth the effort. The key to this dish is to guarantee that the artichokes are fresh and properly cleaned before cooking.
Once prepped, the artichokes are simmered with white wine, fresh herbs, and garlic, creating a fragrant, flavorful broth that enhances their natural taste. Serve this dish warm, garnished with a sprinkle of fresh parsley, and watch how it captivates your guests with its delicious aroma and taste.
Ingredients for 4-6 servings:
- 6 medium-sized artichokes
- 1 lemon, halved
- 3 tablespoons olive oil
- 1 medium onion, finely chopped
- 3 cloves garlic, minced
- 1 cup dry white wine
- 1 cup vegetable broth
- 1 teaspoon salt
- 1/2 teaspoon black pepper
- 2 teaspoons fresh thyme leaves
- 2 teaspoons fresh oregano leaves
- 1/4 cup fresh parsley, chopped
Cooking Instructions:
- Prepare the Artichokes: Begin by trimming the artichokes. Remove the tough outer leaves and snip the tips of the remaining leaves. Cut off the stems, leaving about 1 inch. Rub the cut surfaces with lemon to prevent browning. Cut the artichokes in half lengthwise and scoop out the fuzzy choke with a spoon.
- Sauté the Aromatics: In a large skillet, heat the olive oil over medium heat. Add the chopped onion and sauté until translucent, about 5 minutes. Add the minced garlic and cook for another minute until fragrant.
- Deglaze the Pan: Pour in the white wine and bring to a simmer. Allow the wine to reduce slightly, about 2-3 minutes, which will enhance the flavors of the dish.
- Add the Artichokes and Herbs: Place the prepared artichokes in the skillet, cut side down. Add the vegetable broth, salt, pepper, thyme, and oregano. Guarantee the liquid covers the artichokes at least halfway. If necessary, add more broth or water.
- Braise the Artichokes: Cover the skillet with a lid and reduce the heat to low. Let the artichokes simmer for 25-30 minutes, or until they’re tender and can be easily pierced with a fork.
- Finish and Serve: Once the artichokes are cooked, remove the lid and increase the heat slightly to allow the liquid to reduce to a sauce-like consistency. Adjust seasoning if needed. Transfer the artichokes to a serving platter, drizzle with the remaining sauce, and garnish with chopped parsley.
Extra Tips:
When selecting artichokes, look for ones that are heavy for their size with tightly packed leaves. This indicates freshness.
If you find the artichokes to be tough or fibrous, you can peel the outer layers of the stem to reveal the tender core. If you prefer a thicker sauce, you can mash a few cooked artichoke leaves into the sauce to add body.
Fennel and Orange Salad With Olives
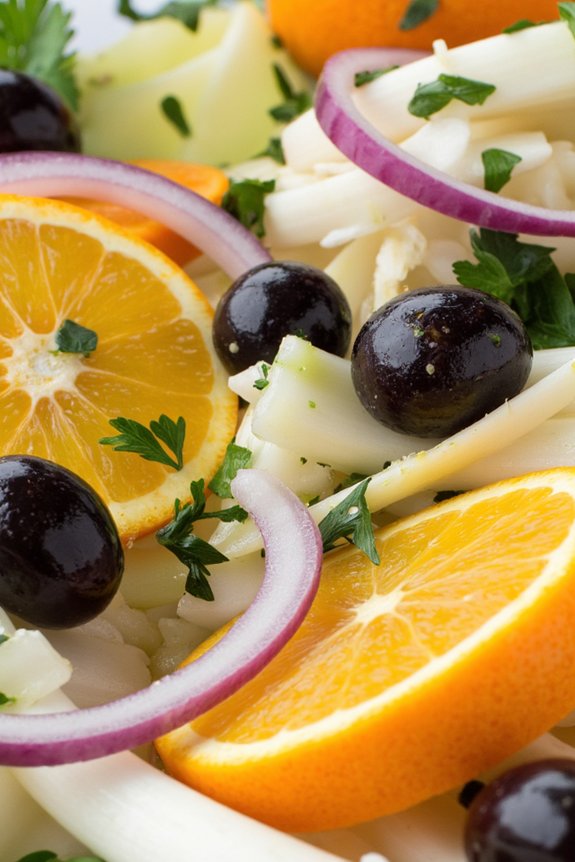
Fennel and Orange Salad With Olives is a delightful Italian vegetable side dish that perfectly balances sweet, tangy, and savory flavors. This invigorating salad is a vibrant and nutritious addition to any meal, showcasing the crispness of fennel, the juiciness of oranges, and the briny depth of olives. Ideal for serving at a family dinner or a festive gathering, this salad brings a touch of Mediterranean flair to the table, providing a burst of freshness with every bite.
The simplicity of the ingredients allows each element to shine, making this dish both aesthetically pleasing and packed with flavor. The anise-like flavor of fennel pairs beautifully with the sweetness of ripe oranges, while the olives add a savory complexity. The salad is typically dressed with a light vinaigrette, enhancing the natural flavors without overpowering them. Whether served alongside grilled meats, fish, or as part of a larger vegetarian spread, this Fennel and Orange Salad With Olives is sure to impress.
Ingredients (for 4-6 servings):
- 2 medium fennel bulbs
- 3 large oranges
- 1/2 cup pitted green or black olives
- 1/4 red onion
- 3 tablespoons extra-virgin olive oil
- 1 tablespoon white wine vinegar
- Salt to taste
- Freshly ground black pepper to taste
- 2 tablespoons fresh parsley, chopped
Instructions:
- Prepare the Fennel: Begin by trimming the fennel bulbs, removing the stalks and fronds (reserve some fronds for garnish if desired). Cut the bulbs in half lengthwise and then thinly slice them into half-moon shapes. Place the sliced fennel in a large salad bowl.
- Segment the Oranges: Peel the oranges, ensuring all the white pith is removed. Using a sharp knife, segment the oranges by cutting between the membranes to release each segment. Add the orange segments to the bowl with the fennel.
- Slice the Olives and Onion: Slice the olives in half and thinly slice the red onion. Add both to the salad bowl with the fennel and oranges.
- Make the Dressing: In a small bowl, whisk together the extra-virgin olive oil, white wine vinegar, salt, and black pepper until well combined. Adjust the seasoning to taste.
- Assemble the Salad: Pour the dressing over the fennel, orange, olive, and onion mixture. Gently toss everything together until the salad is well coated with the dressing.
- Garnish and Serve: Sprinkle the chopped fresh parsley over the top of the salad. If using, garnish with reserved fennel fronds. Serve immediately or let the salad sit for a few minutes to allow the flavors to meld.
Extra Tips: To enhance the flavor of your Fennel and Orange Salad With Olives, consider toasting some fennel seeds and sprinkling them over the salad for an extra layer of flavor. If you prefer a bit of heat, a pinch of red pepper flakes can add a subtle kick.
Make sure to use fresh, juicy oranges for the best results, and feel free to experiment with different types of olives to find your preferred taste combination. For the best texture, it’s important to slice the fennel and onion as thinly as possible. Enjoy this salad as a versatile and healthy side dish that can be prepared ahead of time and served chilled or at room temperature.
Marinated Eggplant With Mint and Chili
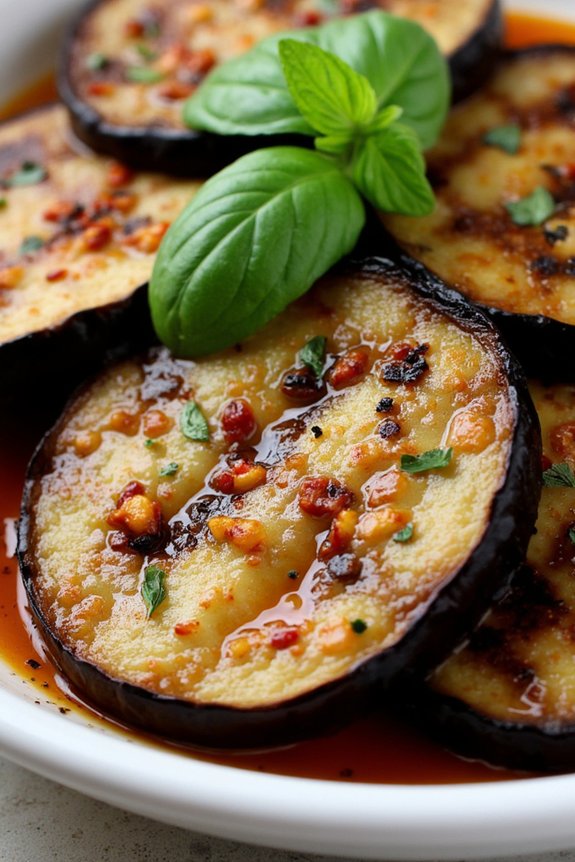
Marinated Eggplant With Mint and Chili is a delightful Italian vegetable side dish that combines the rich, earthy flavors of eggplant with the fresh, vibrant notes of mint and the spicy kick of chili. This dish is perfect for summer gatherings or as a flavorful accompaniment to grilled meats or fish. The marination process allows the eggplant to soak up all the aromatic flavors, making it a succulent and invigorating addition to any meal.
Not only is this dish easy to prepare, but it also provides a healthy and nutritious option for those looking to add more vegetables to their diet.
The key to a successful Marinated Eggplant With Mint and Chili is in selecting the right ingredients and allowing enough time for the flavors to meld together. Fresh, high-quality eggplants are vital, as they’ll absorb the marinade more effectively. The mint adds a stimulating contrast to the robust eggplant, while the chili provides a delicate heat that elevates the dish. This recipe serves 4-6 people, making it an ideal choice for family dinners or small gatherings with friends.
Ingredients:
- 3 medium-sized eggplants
- 1/4 cup extra virgin olive oil
- 2 tablespoons red wine vinegar
- 2 cloves garlic, minced
- 1 teaspoon dried oregano
- 1/2 teaspoon chili flakes
- 1/4 cup fresh mint leaves, chopped
- Salt and pepper to taste
Cooking Instructions:
- Prepare the Eggplants: Start by washing the eggplants and slicing them into 1/4-inch thick rounds. Sprinkle them lightly with salt and let them sit for about 20 minutes. This will draw out any bitterness and excess moisture.
- Grill the Eggplants: Preheat a grill pan over medium-high heat. Pat the eggplant slices dry with a paper towel and brush each side lightly with olive oil. Grill the eggplant slices in batches until they’re tender and have nice grill marks, about 3-4 minutes per side. Remove from the grill and set aside.
- Make the Marinade: In a small bowl, whisk together the olive oil, red wine vinegar, minced garlic, dried oregano, chili flakes, salt, and pepper. Adjust seasoning according to taste.
- Marinate the Eggplants: In a shallow dish, layer the grilled eggplant slices. Pour the marinade over the eggplant, guaranteeing each piece is well-coated. Cover the dish with plastic wrap and let it marinate in the refrigerator for at least 1 hour, or up to overnight for more intense flavor.
- Add Fresh Mint: Just before serving, sprinkle the chopped fresh mint leaves over the marinated eggplants. Toss gently to combine, and adjust seasoning if needed.
- Serve: Serve the marinated eggplants as a side dish, either warm or at room temperature. They pair well with grilled meats, fish, or as part of an antipasto platter.
Extra Tips:
When selecting eggplants, look for ones that are firm and have smooth, shiny skin without blemishes or soft spots. This will guarantee the best texture and flavor for your dish.
If you prefer a milder flavor, reduce the amount of chili flakes or omit them altogether. Additionally, if you don’t have access to a grill, you can use a broiler or stovetop grill pan as an alternative.
Remember to adjust the seasoning to your liking, as the balance of flavors is essential for a successful dish.
Sautéed Swiss Chard With Pine Nuts and Raisins
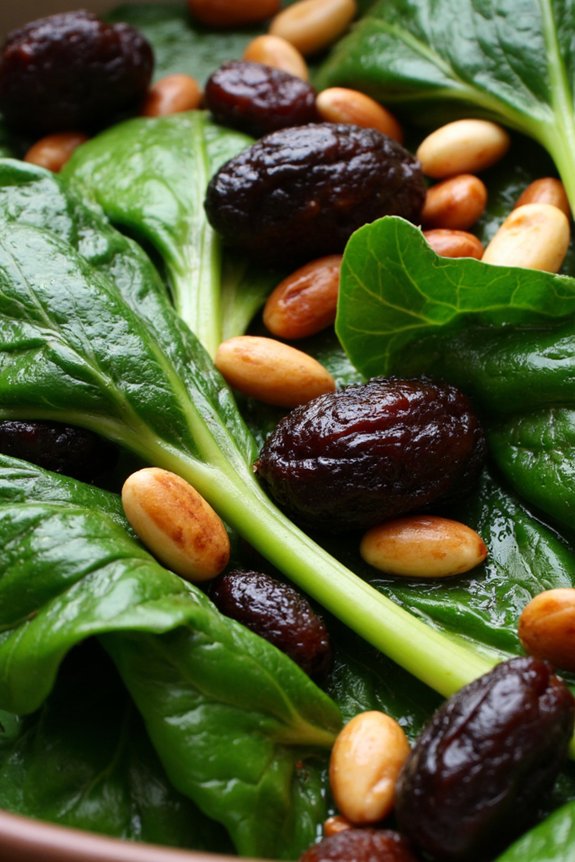
Sautéed Swiss Chard With Pine Nuts and Raisins is a delightful Italian vegetable side dish that combines the earthy flavors of Swiss chard with the sweet and nutty notes of raisins and pine nuts. This dish isn’t only visually appealing with its vibrant green leaves and colorful stems but also packed with nutrients.
The combination of the tender chard, buttery pine nuts, and plump raisins creates a harmonious blend of flavors that can complement any main course. This recipe is perfect for a family meal or a dinner party, serving 4 to 6 people. The preparation is straightforward, making it an excellent choice for both novice and experienced cooks.
The key to this dish is balancing the flavors and guaranteeing that the chard retains its bright color and fresh taste. Let’s explore how to create this delicious side dish.
Ingredients (Serves 4-6):
- 2 bunches of Swiss chard
- 3 tablespoons olive oil
- 2 cloves garlic, minced
- 1/4 cup pine nuts
- 1/4 cup raisins
- Salt and pepper to taste
- 1 tablespoon lemon juice
Cooking Instructions:
- Prepare the Swiss Chard: Start by washing the Swiss chard thoroughly under cold water to remove any dirt. Pat dry with a kitchen towel. Trim the ends and separate the stems from the leaves. Chop the stems into small pieces and roughly chop the leaves.
- Toast the Pine Nuts: In a large skillet, heat 1 tablespoon of olive oil over medium heat. Add the pine nuts and toast them until they’re golden brown, stirring frequently to prevent burning. This should take about 2-3 minutes. Once toasted, remove the pine nuts from the skillet and set aside.
- Sauté the Garlic and Stems: In the same skillet, add the remaining olive oil and the minced garlic. Sauté for about 1 minute until the garlic is fragrant. Then, add the chopped Swiss chard stems and cook for about 4-5 minutes until they start to soften.
- Cook the Swiss Chard Leaves: Add the chopped Swiss chard leaves to the skillet. Toss to combine with the stems and garlic. Cook for about 5-7 minutes, stirring occasionally, until the leaves are wilted and tender.
- Add Raisins and Season: Stir in the raisins and toasted pine nuts. Season the dish with salt and pepper to taste. Cook for an additional 2 minutes to allow the flavors to meld together.
- Finish with Lemon Juice: Just before serving, drizzle the lemon juice over the Swiss chard and toss everything together to guarantee the lemon juice is evenly distributed.
Extra Tips: When selecting Swiss chard at the store, look for fresh, crisp leaves without any browning or wilting. If you prefer a less sweet dish, you can reduce the amount of raisins or substitute them with dried cranberries for a different flavor profile.
To save time, you can toast the pine nuts in advance and store them in an airtight container until ready to use. Be cautious not to overcook the Swiss chard to maintain its vibrant color and prevent it from becoming too mushy.
Roasted Cauliflower With Parmesan and Rosemary
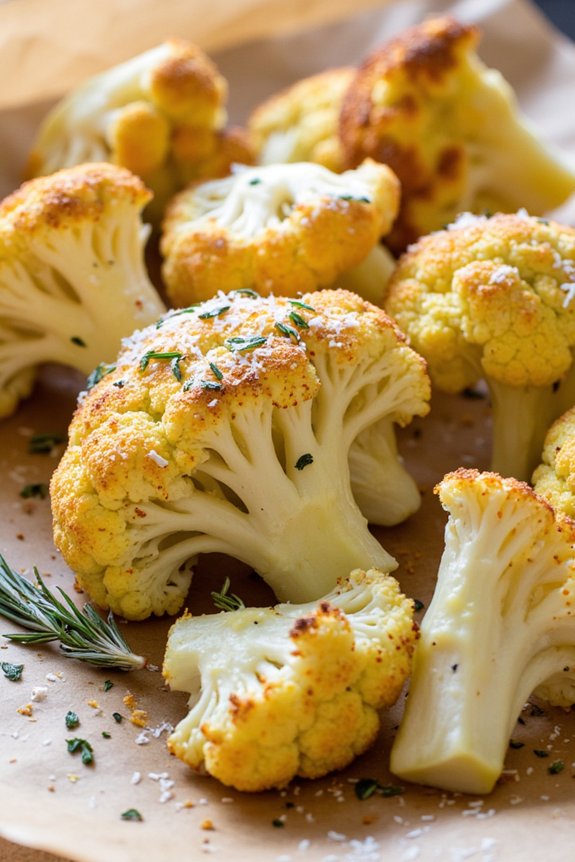
Roasted Cauliflower with Parmesan and Rosemary is a delightful Italian-inspired side dish that perfectly complements any main course. The combination of tender cauliflower florets, savory Parmesan cheese, and aromatic rosemary creates a flavorful and satisfying dish. This recipe isn’t only easy to prepare but also a healthy choice, as cauliflower is rich in nutrients and low in calories.
Whether you’re hosting a dinner party or preparing a weeknight meal, this dish is sure to impress your guests with its simplicity and delicious taste. This dish is best enjoyed fresh out of the oven, guaranteeing the cheese is perfectly melted and the cauliflower is roasted to perfection.
The preparation involves coating the cauliflower with a mixture of olive oil, Parmesan cheese, and rosemary, which allows the flavors to meld together beautifully. The roasting process brings out the natural sweetness of the cauliflower while the Parmesan adds a savory kick, and the rosemary infuses an earthy aroma.
This side dish serves 4-6 people, making it ideal for family meals or small gatherings.
Ingredients (serves 4-6):
- 1 large head of cauliflower, cut into florets
- 3 tablespoons olive oil
- 1/2 cup grated Parmesan cheese
- 2 tablespoons fresh rosemary, finely chopped
- Salt and freshly ground black pepper, to taste
- 1 teaspoon garlic powder (optional)
Cooking Instructions:
- Preheat the Oven: Preheat your oven to 425°F (220°C). This high heat is essential for achieving that perfect roasted texture and flavor.
- Prepare the Cauliflower: Wash and thoroughly dry the cauliflower, then cut it into bite-sized florets. The drier the cauliflower, the better it will roast.
- Season the Cauliflower: In a large mixing bowl, combine the cauliflower florets with olive oil, guaranteeing each piece is well coated. Add the Parmesan cheese, chopped rosemary, salt, pepper, and garlic powder (if using). Toss everything together until the cauliflower is evenly coated with the seasoning.
- Arrange and Roast: Spread the seasoned cauliflower evenly on a baking sheet lined with parchment paper. Make sure the florets are in a single layer and not overcrowded; this guarantees even roasting.
- Roasting Time: Roast in the preheated oven for 25-30 minutes, or until the cauliflower is golden brown and tender. Stir halfway through cooking to guarantee even browning.
- Serve: Once roasted, remove from the oven and transfer to a serving dish. Serve immediately while hot for the best taste experience.
Extra Tips:
For an extra burst of flavor, consider adding a squeeze of lemon juice over the cauliflower just before serving. This will brighten the dish and balance the rich flavors of the cheese and rosemary.
If you prefer a spicier version, a pinch of red pepper flakes can be added to the seasoning mix. When choosing Parmesan, opt for freshly grated cheese instead of pre-shredded to guarantee the best melt and flavor.
Finally, feel free to experiment with other herbs if rosemary isn’t available – thyme or oregano can be excellent substitutes.
Stuffed Tomatoes With Rice and Herbs
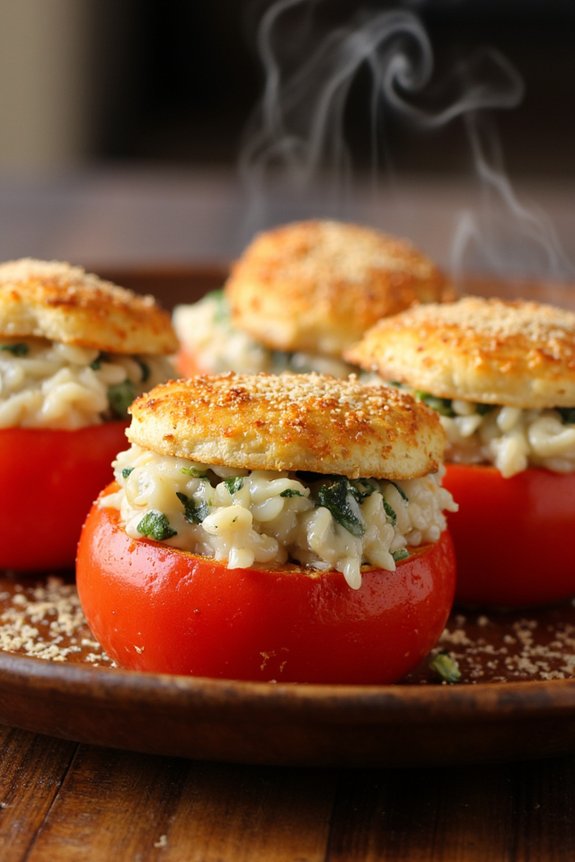
Stuffed Tomatoes With Rice and Herbs is a classic Italian side dish that brings together the freshness of ripe tomatoes with the aromatic flavors of herbs and the comforting texture of rice. This dish is perfect for summer when tomatoes are at their peak, offering a burst of flavor to any meal. It’s a versatile recipe that can be served alongside grilled meats or as part of a larger vegetarian spread. The combination of rice and herbs not only adds taste but also makes the dish hearty enough to stand on its own.
The simplicity of Stuffed Tomatoes With Rice and Herbs makes it a favorite for both beginner and experienced cooks. The preparation involves hollowing out large, juicy tomatoes, filling them with a savory mixture of rice, herbs, and seasonings, and then baking them to perfection. The result is a dish that’s not only visually appealing but also deliciously satisfying. The slow baking process allows the flavors to meld together, creating a delightful balance between the acidity of the tomatoes and the earthiness of the herbs.
Ingredients (Serves 4-6):
- 6 large ripe tomatoes
- 1 cup arborio or long-grain rice
- 1/4 cup chopped fresh basil
- 2 tablespoons chopped fresh parsley
- 1 tablespoon chopped fresh oregano
- 2 cloves garlic, minced
- 1/4 cup grated Parmesan cheese
- 2 tablespoons olive oil
- Salt and pepper to taste
- 1 cup vegetable or chicken broth
Instructions:
- Preheat Your Oven: Start by preheating your oven to 375°F (190°C). This guarantees that your stuffed tomatoes will cook evenly.
- Prepare the Tomatoes: Cut the tops off the tomatoes and use a spoon to carefully scoop out the insides, creating a hollow shell. Reserve the tomato flesh in a bowl. Be careful not to pierce the sides of the tomatoes.
- Cook the Rice: Rinse the rice under cold water until it runs clear. In a medium saucepan, combine the rice with the reserved tomato flesh and the vegetable or chicken broth. Bring to a boil, then reduce the heat and simmer until the rice is just tender and most of the liquid is absorbed, about 15 minutes.
- Mix the Filling: In a large bowl, combine the cooked rice mixture with chopped basil, parsley, oregano, minced garlic, Parmesan cheese, olive oil, and a pinch of salt and pepper. Stir until well mixed.
- Stuff the Tomatoes: Place the hollowed tomatoes in a baking dish. Spoon the rice mixture into each tomato, packing it gently. Drizzle a little olive oil over the top of each stuffed tomato.
- Bake: Cover the baking dish with foil and bake in the preheated oven for 20 minutes. Remove the foil and bake for an additional 10-15 minutes, or until the tops are golden and the tomatoes are tender.
- Serve: Allow the stuffed tomatoes to cool for a few minutes before serving. They can be enjoyed warm or at room temperature.
Extra Tips:
When preparing Stuffed Tomatoes With Rice and Herbs, choose tomatoes that are firm and ripe, as they’ll hold their shape better during baking. Feel free to experiment with different herbs according to your taste preference.
If you prefer a more cheesy flavor, increase the amount of Parmesan or add a sprinkle of mozzarella on top before baking. For a heartier dish, consider incorporating cooked sausage or ground beef into the rice mixture.
Finally, if you’re short on time, prepare the rice filling in advance and refrigerate it until you’re ready to stuff the tomatoes.
Zesty Marinated Zucchini Ribbons

Zesty Marinated Zucchini Ribbons is a delightful Italian vegetable side dish that brings a burst of vitality and tanginess to any meal. Perfect for summer gatherings or as a light addition to a hearty dinner, this dish highlights the natural flavors of zucchini, enhanced with a zesty marinade that balances the sweetness of the vegetable with a touch of acidity.
The zucchini is sliced into thin ribbons, allowing the marinade to infuse every layer, resulting in a revitalizing and flavorful experience with each bite. This dish not only elevates the humble zucchini but also celebrates the simplicity of Italian cooking, where quality ingredients and straightforward techniques shine.
The preparation requires minimal cooking, making it a perfect choice for those hot days when you want to keep the kitchen cool. With just a bit of slicing and marinating, you’ll have a vibrant and healthy side dish that pairs well with a variety of main courses or can even be enjoyed on its own.
Ingredients (serving size: 4-6 people):
- 4 medium zucchinis
- 1/4 cup extra-virgin olive oil
- Juice of 1 lemon
- 2 cloves garlic, minced
- 1 teaspoon salt
- 1/2 teaspoon freshly ground black pepper
- 1/4 teaspoon red pepper flakes (optional)
- 1/4 cup freshly grated Parmesan cheese
- 2 tablespoons chopped fresh basil
- 1 tablespoon chopped fresh mint
Cooking Instructions:
- Prepare the Zucchini: Wash the zucchinis thoroughly and pat them dry. Using a vegetable peeler or mandoline slicer, carefully slice the zucchinis into long, thin ribbons. Place the ribbons in a large mixing bowl.
- Make the Marinade: In a small bowl, whisk together the extra-virgin olive oil, lemon juice, minced garlic, salt, black pepper, and red pepper flakes (if using) until well combined.
- Marinate the Zucchini: Pour the marinade over the zucchini ribbons in the mixing bowl. Gently toss the ribbons with your hands or a pair of tongs to guarantee each ribbon is evenly coated with the marinade. Allow the zucchini to marinate for at least 20 minutes at room temperature, or cover and refrigerate for up to 2 hours for deeper flavor.
- Add Cheese and Herbs: Just before serving, sprinkle the freshly grated Parmesan cheese over the marinated zucchini ribbons. Add the chopped basil and mint, tossing gently to combine and distribute the herbs evenly.
- Serve: Transfer the marinated zucchini ribbons to a serving platter or bowl. Serve immediately for a fresh, vibrant side dish that complements a variety of main courses.
For best results, use fresh, firm zucchinis to guarantee the ribbons hold their shape and don’t become too soggy. Feel free to adjust the seasoning to your taste; a touch more lemon or a sprinkle of additional herbs can personalize the dish.
If you prefer a bit more heat, don’t hesitate to increase the amount of red pepper flakes. This dish is versatile and can easily be adapted to include other fresh herbs or a different type of cheese, such as feta or pecorino, for a unique twist.
Peperonata: Sweet Pepper and Onion Stew
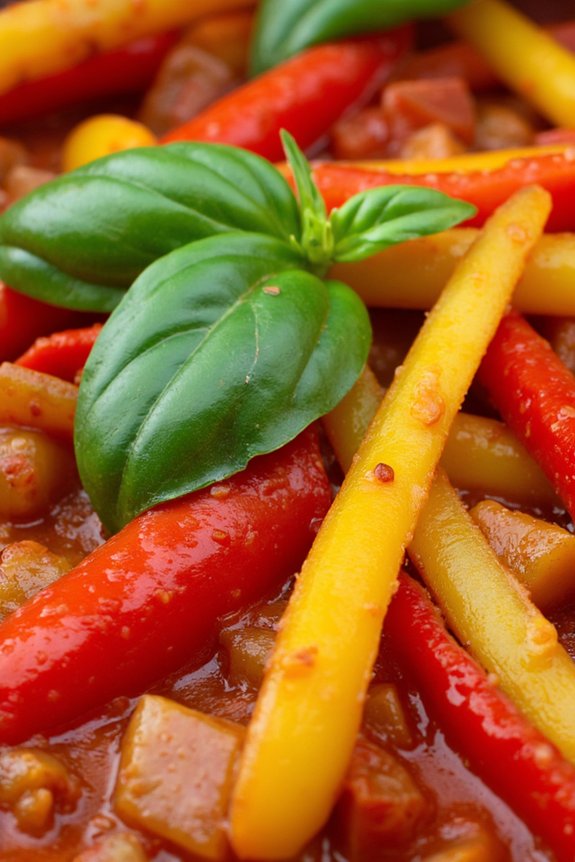
Peperonata: Sweet Pepper and Onion Stew is a classic Italian vegetable side dish that bursts with vibrant flavors and colors. This comforting stew is made with sweet bell peppers, onions, and tomatoes, slowly cooked to perfection, allowing the natural sweetness of the vegetables to shine through.
Peperonata can be served warm or at room temperature, making it a versatile addition to any meal. Traditionally enjoyed as a side dish, it can also be used as a topping for bruschetta, a filling for sandwiches, or even tossed with pasta for a light meal.
The beauty of Peperonata lies in its simplicity and the way it highlights the inherent flavors of fresh produce. The slow cooking process allows the peppers and onions to caramelize, enhancing their sweetness and creating a rich, savory base.
With just a few ingredients, this dish captures the essence of Italian cooking, where quality ingredients and time-honored techniques come together to create something truly special. Perfect for gatherings or a quiet family dinner, Peperonata is sure to become a favorite in your culinary repertoire.
Ingredients (Serves 4-6):
- 3 large bell peppers (red, yellow, or orange)
- 2 large onions
- 3 cloves of garlic
- 4 tablespoons olive oil
- 1 can (14 oz) of diced tomatoes
- 2 tablespoons tomato paste
- 1 teaspoon sugar
- Salt and black pepper to taste
- 1 tablespoon red wine vinegar
- Fresh basil leaves for garnish
Cooking Instructions:
- Prepare the Vegetables: Begin by washing the bell peppers thoroughly. Remove the stems, seeds, and any white membranes, then slice them into thin strips. Peel the onions and slice them thinly. Peel and finely chop the garlic cloves.
- Sauté Onions and Garlic: In a large skillet or saucepan, heat the olive oil over medium heat. Add the sliced onions and garlic, and sauté until the onions are soft and translucent, about 5-7 minutes. Stir occasionally to prevent them from burning.
- Cook the Peppers: Add the sliced bell peppers to the pan with the onions, stirring to combine. Continue to cook over medium heat, stirring occasionally, until the peppers start to soften, about 10 minutes.
- Add Tomatoes and Seasonings: Pour in the diced tomatoes, including their juices, and add the tomato paste. Stir well to combine all the ingredients. Add the sugar, and season with salt and black pepper to taste.
- Simmer the Stew: Lower the heat to a simmer and cover the pan. Allow the peperonata to cook for about 30 minutes, stirring occasionally, until the peppers are tender and the flavors have melded together.
- Finish with Vinegar: Once the peppers are tender, stir in the red wine vinegar. Taste and adjust seasoning if necessary. Let the stew cook for an additional 5 minutes to allow the vinegar to meld with the other flavors.
- Serve and Garnish: Remove from heat and let the peperonata cool slightly before serving. Garnish with fresh basil leaves and serve as a side dish or as desired.
Extra Tips:
For an added layer of flavor, try roasting the bell peppers before adding them to the stew. This can intensify their sweetness and add a subtle smokiness to the dish.
If you prefer a spicier version, consider adding a pinch of red pepper flakes during the cooking process. Peperonata can be made ahead of time and stored in the refrigerator for up to three days, allowing the flavors to develop even further.
Just reheat gently before serving, or serve it chilled as part of an antipasto platter.
Balsamic Glazed Carrots With Honey

Balsamic Glazed Carrots With Honey is a delightful Italian vegetable side dish that offers a perfect balance of sweetness and tanginess. This dish makes an excellent accompaniment to a variety of main courses, adding vibrant color and flavor to your meal.
The carrots are first roasted to bring out their natural sweetness and then coated with a luscious glaze made from balsamic vinegar and honey, which gives them a glossy finish and an irresistible taste.
The simplicity of this dish allows the flavors of the carrots to shine, while the glaze adds depth and complexity. It’s an ideal choice for both casual family dinners and special occasions.
With just a few ingredients, you can transform ordinary carrots into a gourmet side dish that will impress your guests and family alike. This recipe serves 4-6 people, making it perfect for a small gathering or a family meal.
Ingredients (Serves 4-6):
- 1 ½ pounds of carrots, peeled and cut into sticks
- 2 tablespoons olive oil
- 3 tablespoons balsamic vinegar
- 2 tablespoons honey
- Salt and freshly ground black pepper, to taste
- 1 tablespoon fresh parsley, chopped (optional, for garnish)
Cooking Instructions:
- Preheat the Oven: Preheat your oven to 400°F (200°C). This temperature is ideal for roasting the carrots, allowing them to caramelize and become tender.
- Prepare the Carrots: Peel the carrots and cut them into sticks of uniform size. This guarantees even cooking. Place the carrot sticks on a baking sheet.
- Season the Carrots: Drizzle the olive oil over the carrots, then sprinkle with salt and freshly ground black pepper. Toss the carrots until they’re evenly coated with the oil and seasoning.
- Roast the Carrots: Place the baking sheet in the preheated oven and roast the carrots for about 20-25 minutes, or until they start to caramelize and become tender. Stir them halfway through the roasting process for even browning.
- Prepare the Glaze: While the carrots are roasting, mix the balsamic vinegar and honey in a small saucepan over medium heat. Allow the mixture to simmer for about 5 minutes, or until it thickens slightly into a glaze.
- Glaze the Carrots: Once the carrots are roasted, remove them from the oven and immediately drizzle the balsamic honey glaze over them. Toss the carrots gently to guarantee they’re well coated with the glaze.
- Final Touches: Transfer the glazed carrots to a serving dish. Garnish with chopped fresh parsley, if desired, for a pop of color and added freshness.
Extra Tips:
To guarantee the best flavor, use fresh and high-quality balsamic vinegar. Aged balsamic vinegar will provide a richer, more complex taste.
When roasting the carrots, keep an eye on them to avoid overcooking, as they can become mushy. You can also add a pinch of red pepper flakes to the glaze for a hint of heat, or incorporate a few sprigs of thyme or rosemary while roasting for an aromatic twist.
Adjust the amount of honey based on your preference for sweetness. Enjoy your Balsamic Glazed Carrots With Honey as a delightful and vibrant side dish!
Spinach and Ricotta Stuffed Mushrooms

Spinach and Ricotta Stuffed Mushrooms are a delightful and savory addition to any Italian meal, offering a perfect blend of creamy ricotta cheese and vibrant spinach nestled within tender mushroom caps. This dish isn’t only visually appealing but also bursting with flavor, making it an excellent choice for a side dish that can easily complement a variety of main courses.
The earthiness of the mushrooms pairs beautifully with the rich, creamy filling, creating a harmonious balance that’s sure to please the palate. These stuffed mushrooms are both elegant and simple to prepare, making them ideal for both casual dinners and special occasions.
With a handful of ingredients and a straightforward preparation process, you can whip up this delicious side dish in no time. The combination of spinach and ricotta provides a creamy texture and a subtle, savory taste that’s enhanced by the natural umami of the mushrooms.
Whether you’re hosting a dinner party or simply looking to elevate your weeknight meals, Spinach and Ricotta Stuffed Mushrooms are sure to impress.
Ingredients (Serves 4-6):
- 12 large white or cremini mushrooms
- 1 cup ricotta cheese
- 1 cup fresh spinach, chopped
- 1/4 cup grated Parmesan cheese
- 1 clove garlic, minced
- 1/4 teaspoon salt
- 1/4 teaspoon black pepper
- 2 tablespoons olive oil
- 2 tablespoons breadcrumbs
- 1 tablespoon fresh parsley, chopped (optional)
Cooking Instructions:
- Preheat the Oven: Begin by preheating your oven to 375°F (190°C). This guarantees that the oven is hot enough to properly cook the mushrooms and melt the cheese.
- Prepare the Mushrooms: Gently clean the mushrooms with a damp cloth to remove any dirt. Carefully remove the stems from the mushrooms and chop them finely. Set the mushroom caps aside.
- Sauté the Filling: In a pan over medium heat, add 1 tablespoon of olive oil. Once heated, add the minced garlic and chopped mushroom stems. Sauté for about 2-3 minutes until the garlic is fragrant and the mushroom stems are tender.
- Mix the Filling: In a bowl, combine the sautéed garlic and mushroom stems with the ricotta cheese, chopped spinach, grated Parmesan, salt, and black pepper. Mix well until all ingredients are thoroughly combined.
- Stuff the Mushrooms: Place the mushroom caps on a baking sheet lined with parchment paper. Use a spoon to fill each mushroom cap generously with the ricotta and spinach mixture.
- Top with Breadcrumbs: In a small bowl, mix the remaining 1 tablespoon of olive oil with the breadcrumbs. Sprinkle the breadcrumb mixture over the stuffed mushrooms to add a crunchy topping.
- Bake: Place the baking sheet in the preheated oven and bake for 20-25 minutes, or until the mushrooms are tender and the tops are golden brown.
- Garnish and Serve: Once cooked, remove the mushrooms from the oven. If desired, sprinkle with fresh parsley before serving. Serve warm as a side dish.
Extra Tips:
For superior flavor, choose mushrooms that are firm and free from blemishes. You can also experiment with different types of mushrooms, such as portobello, for a variation in texture and flavor.
If you prefer a spicier kick, consider adding a pinch of red pepper flakes to the filling. It’s important to not overstuff the mushrooms to prevent the filling from spilling over during baking.
Finally, these stuffed mushrooms can be prepared ahead of time and refrigerated until ready to bake, making them a convenient option for entertaining.
Charred Broccoli With Lemon Zest and Pecorino

Charred Broccoli With Lemon Zest and Pecorino is a delightful Italian vegetable side dish that brings out the natural flavors of broccoli with a simple yet elegant preparation. This dish combines the earthy taste of charred broccoli with the zesty freshness of lemon zest and the rich, salty flavor of Pecorino cheese.
It’s a perfect accompaniment to any main course or a stand-alone dish for those who appreciate the simplicity and depth of Italian cuisine.
The key to this dish is in the technique of charring the broccoli, which enhances its flavor and adds a slightly smoky taste. The addition of lemon zest brightens the dish, while Pecorino cheese offers a savory finish. This recipe is designed to serve 4-6 people, making it ideal for family dinners or small gatherings.
Ingredients:
- 2 large heads of broccoli
- 3 tablespoons olive oil
- Zest of 1 lemon
- 1/2 cup grated Pecorino cheese
- Salt to taste
- Freshly ground black pepper to taste
- 1 tablespoon lemon juice (optional)
Instructions:
- Prepare the Broccoli: Rinse the broccoli heads thoroughly under cold water. Cut them into florets, making sure they’re relatively uniform in size for even cooking. Pat dry with a kitchen towel to remove excess moisture.
- Preheat the Skillet: Place a large cast-iron skillet over medium-high heat. Allow it to heat for a few minutes until it’s hot. This is crucial for achieving a good char on the broccoli.
- Cook the Broccoli: Drizzle the olive oil into the skillet and immediately add the broccoli florets in a single layer. Avoid overcrowding the pan to promote proper charring. Cook for about 5-7 minutes, turning occasionally, until the broccoli is tender-crisp and has a nice charred appearance.
- Season the Broccoli: Once charred, remove the skillet from heat. Sprinkle the lemon zest, salt, and freshly ground black pepper over the broccoli. Toss gently to coat the florets evenly.
- Add Pecorino Cheese: While the broccoli is still warm, sprinkle the grated Pecorino cheese over the top. Allow it to melt slightly from the residual heat of the broccoli.
- Serve: Transfer the charred broccoli to a serving platter. If desired, drizzle with a tablespoon of lemon juice for extra brightness. Serve immediately as a side dish.
Extra Tips:
To guarantee the best results, use fresh broccoli and a high-quality Pecorino cheese. If you prefer a bit more acidity, you can squeeze a bit more lemon juice over the dish just before serving.
For an added depth of flavor, consider adding a pinch of red pepper flakes or garlic powder to the seasoning mix. Remember to char the broccoli without burning it; the goal is to achieve a balance of smokiness and tenderness.