

Picture a spread of vibrant Caprese skewers, creamy marinated mozzarella balls, and savory prosciutto-wrapped melon. Each bite offers a taste of Italy’s rich flavors. These 13 bold antipasto recipes prove that simplicity can truly be an art form. Perfect for elevating any gathering into an unforgettable feast. Ready to explore these delicious creations?
Classic Caprese Skewers

Caprese Skewers are a delightful and simple Italian antipasto that combines the fresh flavors of ripe tomatoes, creamy mozzarella, and aromatic basil. This dish captures the essence of Italian cuisine, emphasizing quality ingredients and straightforward preparation. Perfect for a summer gathering or a quick appetizer, these skewers are visually appealing and tantalizing to the taste buds.
The skewers can be prepared quickly and offer a burst of flavor in every bite, making them a favorite among both children and adults. The beauty of Classic Caprese Skewers lies in their versatility and ease of preparation. They can be assembled in advance and stored in the refrigerator, making them an excellent choice for entertaining without the stress of last-minute cooking.
The balance of flavors is key: the sweetness of the tomatoes, the creaminess of the mozzarella, and the freshness of the basil, all tied together with a drizzle of balsamic glaze. This dish not only celebrates the simplicity of fresh ingredients but also showcases the vibrant colors of the Italian flag: red, white, and green.
Ingredients (Serves 4-6):
- 20 cherry tomatoes
- 20 small mozzarella balls (bocconcini)
- 20 fresh basil leaves
- 1 tablespoon extra virgin olive oil
- 1 tablespoon balsamic glaze
- Salt and freshly ground black pepper, to taste
- 20 small wooden skewers
Instructions:
- Prep the Ingredients: Begin by washing the cherry tomatoes and basil leaves thoroughly. Pat them dry with a clean kitchen towel to remove excess moisture. Drain the mozzarella balls from their liquid and gently pat them dry as well.
- Assemble the Skewers: Take a wooden skewer and thread a cherry tomato onto it, followed by a fresh basil leaf and a mozzarella ball. Repeat this sequence—tomato, basil, mozzarella—until you have used up all the ingredients, ensuring each skewer has a balanced composition of all three elements.
- Season the Skewers: Once all the skewers are assembled, place them on a serving platter. Drizzle the skewers evenly with extra virgin olive oil and balsamic glaze. Season them with a light sprinkle of salt and freshly ground black pepper to enhance the flavors.
- Serve: Serve the Caprese Skewers immediately, or cover them with plastic wrap and refrigerate them until you’re ready to serve. They’re best enjoyed fresh but can be prepared a few hours in advance.
Extra Tips:
To elevate the flavor, consider using heirloom cherry tomatoes for a more complex taste profile. If you can’t find small mozzarella balls, you can cut a larger mozzarella ball into bite-sized pieces.
For an additional layer of flavor, lightly toast the wooden skewers before assembling; this can add a subtle smokiness to the dish. When selecting basil, choose leaves that are vibrant green and free of brown spots for the freshest taste and appearance.
Finally, you can experiment with flavored olive oils or balsamic reductions to add a personal twist to this classic recipe.
Roasted Red Pepper and Artichoke Bruschetta
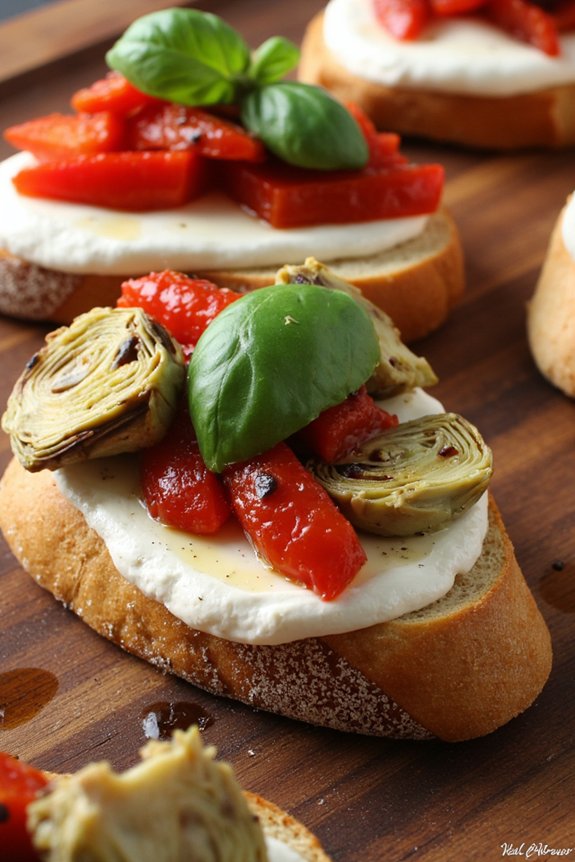
Roasted Red Pepper and Artichoke Bruschetta is a delightful Italian antipasto that combines the rich, smoky flavors of roasted red peppers with the tangy, earthy taste of artichokes. This dish is ideal for serving as an appetizer or a light snack, and its vibrant colors make it as visually appealing as it’s delicious.
The combination of creamy mozzarella and a hint of garlic on a crispy bread base creates a symphony of flavors that will tantalize your taste buds and leave your guests asking for more. This bruschetta is perfect for gatherings, as it can be made ahead of time and assembled just before serving.
The key to this dish is using fresh, high-quality ingredients to capture the essence of Italian cuisine. Roasting the red peppers yourself will enhance their natural sweetness and add a depth of flavor that jarred versions simply can’t match. Pair this bruschetta with a light, crisp white wine for a truly authentic Italian experience.
Ingredients (Serves 4-6):
- 2 large red bell peppers
- 1 can (14 oz) of artichoke hearts, drained and chopped
- 1 baguette, sliced into 1/2-inch thick slices
- 2 cloves of garlic, minced
- 1/4 cup of extra virgin olive oil
- 1 tablespoon balsamic vinegar
- 1/2 teaspoon salt
- 1/4 teaspoon freshly ground black pepper
- 1 cup of fresh mozzarella, diced
- Fresh basil leaves for garnish
Cooking Instructions:
1. Roast the Red Peppers: Preheat your oven to 450°F (230°C). Place the whole red peppers on a baking sheet lined with parchment paper. Roast in the oven for about 20-25 minutes, turning occasionally, until the skin is blistered and charred.
Remove from the oven and place the peppers in a bowl, covering them with a lid or plastic wrap to steam for 10 minutes. This will make it easier to peel off the skin. Once cooled, peel, deseed, and chop the peppers into small pieces.
2. Prepare the Bruschetta Topping: In a medium bowl, combine the chopped roasted red peppers, artichoke hearts, minced garlic, olive oil, balsamic vinegar, salt, and pepper. Mix well to guarantee all ingredients are evenly coated and flavors are combined.
3. Toast the Bread: Preheat your oven’s broiler. Arrange the baguette slices on a baking sheet and drizzle them lightly with olive oil. Place under the broiler for about 2 minutes per side, or until they’re golden brown and crispy. Keep a close eye on them to prevent burning.
4. Assemble the Bruschetta: Once the bread is toasted, remove from the oven and let it cool slightly. Top each slice with the prepared red pepper and artichoke mixture, guaranteeing that each piece has a generous amount of topping.
5. Add the Cheese: Evenly distribute the diced mozzarella over each bruschetta. Return the bruschetta to the oven briefly, just until the cheese begins to melt.
6. Garnish and Serve: Remove from the oven and garnish with fresh basil leaves. Serve immediately for the best flavor and texture.
Extra Tips:
For added flavor, consider adding a sprinkle of crushed red pepper flakes to the topping for a bit of heat. You can also experiment with different types of bread, such as ciabatta or sourdough, to find your preferred texture.
If you’re short on time, jarred roasted red peppers can be used as a substitute, but roasting them yourself will provide a more robust flavor. Additionally, for a more decadent version, you can drizzle a balsamic glaze over the top just before serving.
Marinated Mozzarella Balls
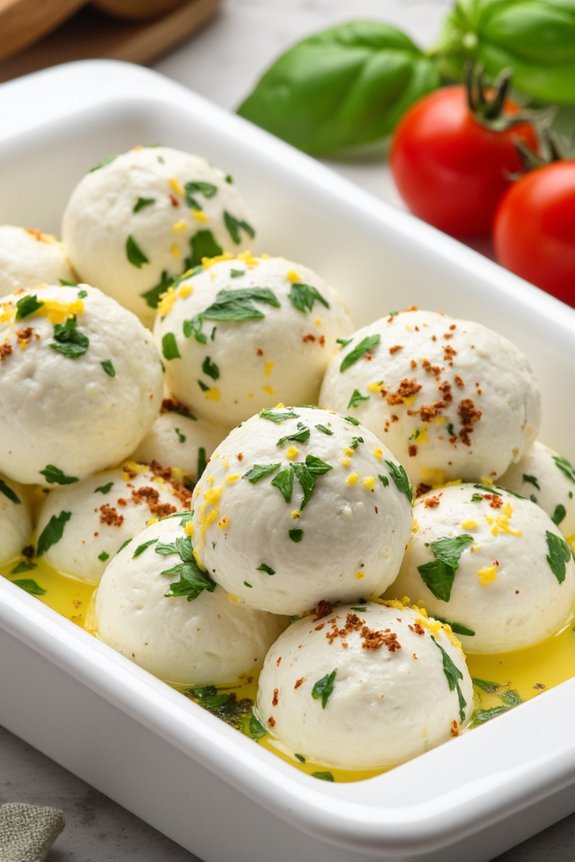
Marinated Mozzarella Balls are a delightful appetizer that captures the essence of Italian antipasto. This dish combines creamy mozzarella with aromatic herbs and spices, creating a flavorful and invigorating starter that will tantalize your taste buds. Perfect for any gathering or as a prelude to a hearty Italian meal, these marinated mozzarella balls offer a burst of flavor in every bite.
Easy to prepare and even easier to enjoy, they’re a versatile addition to any menu. The magic of Marinated Mozzarella Balls lies in the infusion of classic Italian flavors into soft, bite-sized mozzarella. By marinating the cheese in a mix of olive oil, herbs, and spices, the mozzarella absorbs the flavors, transforming into a savory and aromatic treat.
Not only are these mozzarella balls delicious, but they’re also visually appealing, making them a great choice for entertaining guests. Serve them with crusty bread or fresh vegetables for a complete antipasto experience.
Ingredients for 4-6 servings:
- 1 pound fresh mozzarella balls (ciliegine)
- 1/2 cup extra-virgin olive oil
- 2 cloves garlic, minced
- 1 teaspoon dried oregano
- 1 teaspoon dried basil
- 1/2 teaspoon red pepper flakes
- 1 tablespoon fresh parsley, finely chopped
- Zest of 1 lemon
- Salt and freshly ground black pepper, to taste
- Optional: cherry tomatoes and fresh basil leaves for garnish
Cooking Instructions:
- Prepare the Mozzarella: Drain the mozzarella balls from their packaging liquid and pat them dry with a paper towel to remove excess moisture. This helps the marinade adhere better to the cheese.
- Make the Marinade: In a medium-sized mixing bowl, combine the extra-virgin olive oil, minced garlic, dried oregano, dried basil, red pepper flakes, fresh parsley, lemon zest, salt, and black pepper. Stir the ingredients until well incorporated.
- Marinate the Mozzarella: Add the dried mozzarella balls to the marinade, gently tossing them to make sure they’re evenly coated. Cover the bowl with plastic wrap or transfer the mixture into an airtight container.
- Refrigerate: Let the mozzarella balls marinate in the refrigerator for at least 2 hours, or overnight for more intense flavor. This allows the cheese to absorb the delicious flavors of the marinade.
- Serve: Before serving, let the marinated mozzarella balls sit at room temperature for about 15 minutes. This will enhance the flavors and make them more aromatic. Garnish with cherry tomatoes and fresh basil leaves, if desired, and serve with crusty bread or alongside other antipasto items.
Extra Tips:
For the best results, use high-quality mozzarella and extra-virgin olive oil, as these are the primary flavors in the dish. Adjust the seasoning to your preference; if you enjoy a bit of heat, feel free to increase the amount of red pepper flakes.
Leftovers can be stored in the refrigerator for up to three days, but remember to bring them to room temperature before serving to maximize their flavor. Enjoy these marinated mozzarella balls as part of a larger antipasto platter, or as a simple, yet elegant appetizer on their own.
Prosciutto-Wrapped Melon
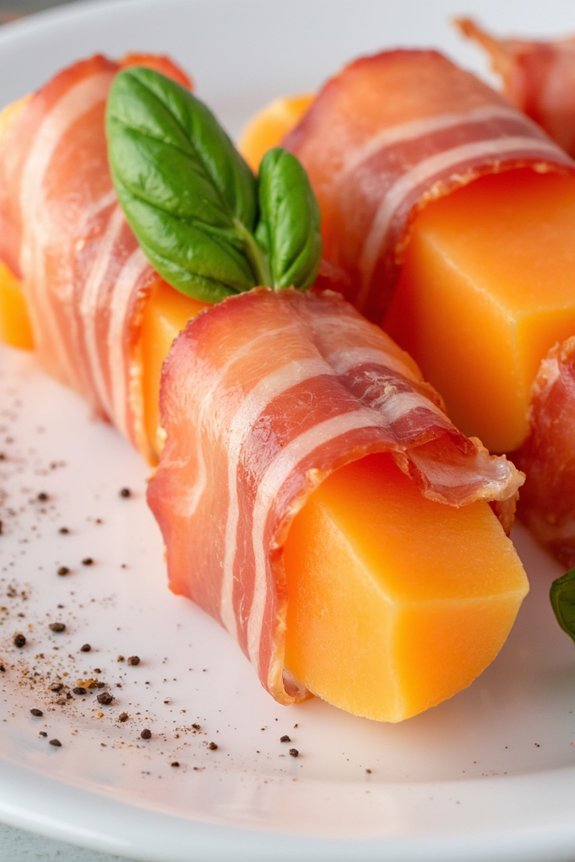
Prosciutto-wrapped melon is a classic Italian antipasto that combines the sweet juiciness of ripe melon with the savory, salty flavor of prosciutto. This delightful and easy-to-make appetizer is perfect for warm summer evenings or as a revitalizing starter for any Italian-themed dinner party.
The contrasting flavors and textures make it a crowd-pleaser that requires minimal preparation but delivers maximum flavor. This dish is traditionally made with cantaloupe or honeydew melon, but you can experiment with different varieties to suit your taste.
The key is to select a ripe, juicy melon that will complement the delicate, paper-thin slices of prosciutto. For the best results, use high-quality, freshly sliced prosciutto from your local deli. You can serve this appetizer on a platter, garnished with fresh basil leaves for an added touch of color and flavor.
Ingredients for 4-6 servings:
- 1 ripe cantaloupe or honeydew melon
- 12 slices of prosciutto
- Fresh basil leaves (optional)
- Freshly ground black pepper (optional)
Cooking Instructions:
- Prepare the Melon: Start by cutting the melon in half and scoop out the seeds with a spoon. Slice each half into wedges, and then carefully remove the rind from each wedge. Cut the melon into smaller pieces that are approximately 1 inch thick and 2-3 inches long, suitable for wrapping with prosciutto.
- Wrap with Prosciutto: Lay a slice of prosciutto flat on a clean surface. Place a piece of melon at one end of the prosciutto slice. Gently wrap the prosciutto around the melon, securing it in place. Repeat this process for all melon pieces.
- Arrange on a Platter: Arrange the prosciutto-wrapped melon pieces neatly on a serving platter. If desired, garnish with fresh basil leaves for added flavor and visual appeal.
- Season and Serve: Optionally, you can sprinkle the prosciutto-wrapped melon with freshly ground black pepper before serving. Serve immediately, or refrigerate for up to 1 hour before serving to keep the melon chilled.
Extra Tips:
When selecting a melon, check for a sweet fragrance and a slight give when you gently press the stem end to verify ripeness. If you’re preparing this dish ahead of time, assemble the prosciutto-wrapped melon no more than an hour before serving to ensure the prosciutto remains fresh and the melon juicy.
For a more luxurious touch, you can drizzle a balsamic glaze over the top just before serving. Additionally, consider adding a small wedge of fresh mozzarella or a sprinkle of crushed pistachios for extra texture and flavor.
Italian Antipasto Platter
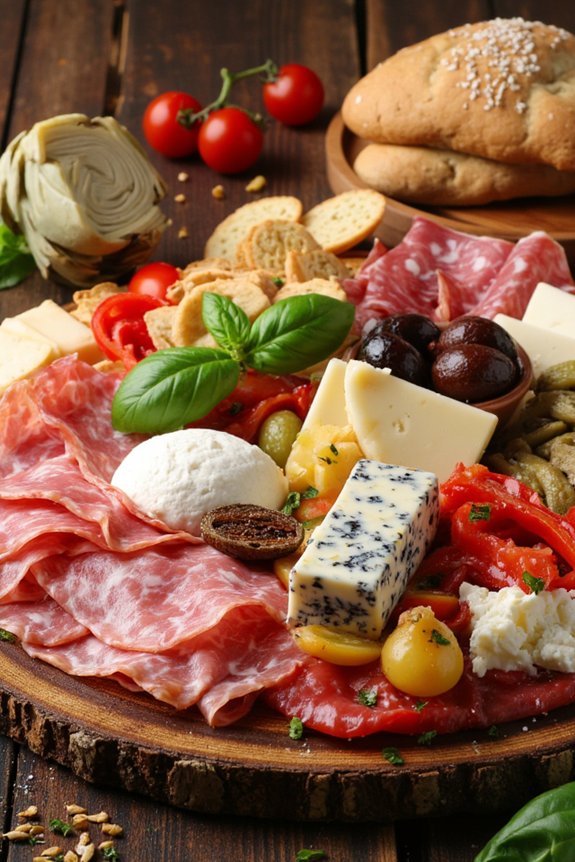
The Italian Antipasto Platter is a vibrant and flavorful appetizer that sets the stage for a delightful meal. This dish combines a variety of cured meats, cheeses, marinated vegetables, and other savory bites that embody the essence of Italian cuisine. Perfect for gatherings, this platter is as visually appealing as it’s delicious, offering a little something for everyone.
It’s a fantastic way to bring people together and start the meal with a burst of robust flavors.
Creating a traditional Italian Antipasto Platter involves selecting high-quality ingredients that complement each other exceptionally. The beauty of this dish lies in its simplicity and the harmonious blend of textures and flavors.
By carefully arranging an assortment of meats, cheeses, and accompaniments, you can create a stunning centerpiece that invites guests to explore and enjoy. Whether you’re hosting a formal dinner or a casual get-together, this antipasto platter will surely impress.
Ingredients (Serves 4-6):
- 200g Prosciutto
- 200g Salami
- 200g Mortadella
- 200g Fresh Mozzarella balls
- 150g Aged Parmesan cheese, cut into chunks
- 150g Gorgonzola cheese
- 150g Marinated artichoke hearts
- 150g Sun-dried tomatoes
- 100g Roasted red peppers
- 100g Marinated olives
- 100g Grissini (breadsticks)
- Fresh basil leaves for garnish
- Crusty Italian bread or focaccia
Instructions:
- Prepare the Ingredients: Begin by gathering all your ingredients on a clean workspace. Slice the meats thinly, and cut the cheeses into bite-sized pieces. Confirm the marinated vegetables are well-drained to avoid excess moisture on the platter.
- Arrange the Meats: On a large serving platter or wooden board, start by arranging the prosciutto, salami, and mortadella. Fan them out in small piles or roll them into neat bundles for a visually appealing presentation.
- Add the Cheeses: Place the fresh mozzarella balls in a small bowl or scatter them across the platter. Arrange the chunks of Parmesan and wedges of Gorgonzola in between the meats.
- Include the Vegetables: Distribute the marinated artichoke hearts, sun-dried tomatoes, roasted red peppers, and marinated olives around the meats and cheeses, confirming a balance of color and texture.
- Finish with Accents: Position the grissini and slices of crusty bread or focaccia around the edges of the platter. Tuck in fresh basil leaves for a fragrant and colorful garnish.
- Final Touches: Before serving, confirm the platter is balanced and visually appealing. Adjust any ingredients for ideal presentation and confirm that each component is easily accessible for guests.
Extra Tips:
When creating an antipasto platter, the quality of ingredients is key. Choose fresh and authentic Italian products for the best flavors.
Feel free to customize the platter based on personal preferences, perhaps adding other elements such as marinated mushrooms, pepperoncini, or anchovies. Remember to serve the platter at room temperature to enhance the flavors of the meats and cheeses.
Finally, consider pairing the antipasto with a selection of Italian wines to complement the flavors and enhance the dining experience.
Stuffed Cherry Peppers
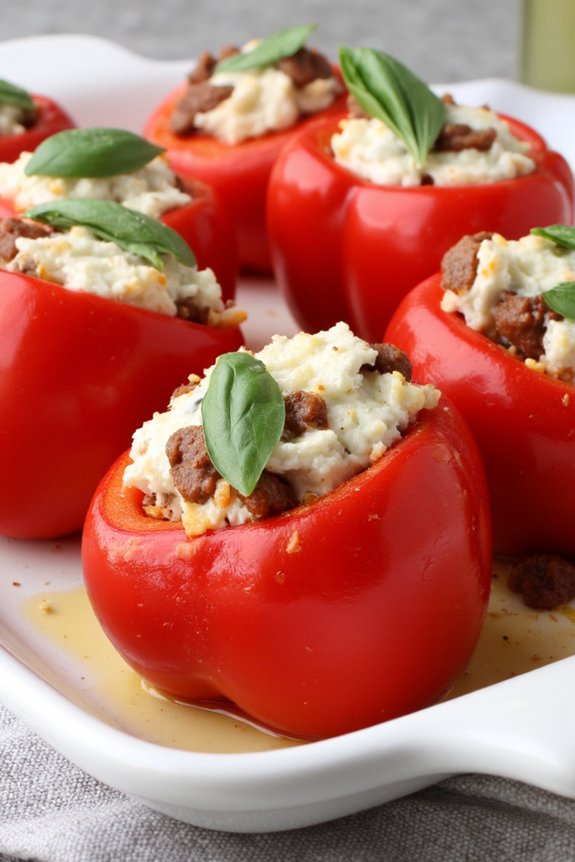
Stuffed Cherry Peppers are a delightful Italian antipasto that brings together the perfect blend of spicy, tangy, and savory flavors. These bite-sized peppers are hollowed out and filled with a delicious mixture of cheese and meats, making them an ideal appetizer for gatherings or as part of an antipasto platter.
The combination of creamy cheese and salty cured meats stuffed into the piquant cherry peppers creates an explosion of flavors in every bite, tantalizing the taste buds and leaving guests craving more.
Traditionally, these peppers are stuffed with a variety of ingredients, depending on regional preferences and personal tastes. For this recipe, which serves 4-6 people, we’ll use a classic filling of Italian cheeses, salami, and herbs. This will guarantee a rich and satisfying flavor profile, as well as a beautiful presentation.
The peppers can be prepared ahead of time, making them a convenient option for entertaining guests.
Ingredients:
- 24 cherry peppers
- 1 cup ricotta cheese
- 1/2 cup grated Parmesan cheese
- 4 ounces of salami, diced
- 2 tablespoons fresh basil, chopped
- 1 tablespoon fresh parsley, chopped
- 1 clove garlic, minced
- 2 tablespoons olive oil
- Salt and pepper to taste
Cooking Instructions:
- Prepare the Peppers: Begin by washing the cherry peppers thoroughly. Using a sharp knife, carefully cut the tops off and remove the seeds and membranes from inside the peppers. Be gentle to avoid tearing the peppers. Set them aside on a clean surface.
- Make the Filling: In a medium bowl, combine the ricotta cheese, grated Parmesan, diced salami, chopped basil, chopped parsley, and minced garlic. Mix everything together until well combined. Season with salt and pepper to taste.
- Stuff the Peppers: Using a small spoon or a piping bag, fill each hollowed-out cherry pepper with the cheese and salami mixture. Press the filling in gently to guarantee each pepper is fully packed.
- Drizzle with Olive Oil: Place the stuffed peppers on a serving platter. Drizzle them lightly with olive oil to enhance their flavor and give them a glossy finish.
- Chill: For the best flavor, refrigerate the stuffed peppers for at least 1 hour before serving. This allows the flavors to meld together and the filling to set.
- Serve: Once chilled, arrange the stuffed cherry peppers on a serving dish. They can be served cold or at room temperature, depending on preference.
Extra Tips:
When selecting cherry peppers, look for ones that are firm and have a bright red color, as they’ll hold their shape better and provide a more vibrant presentation.
If you prefer a milder version, soak the peppers in cold water for a few hours to reduce their heat. For an added dimension of flavor, consider incorporating finely chopped sun-dried tomatoes or olives into the filling.
Additionally, if you can’t find cherry peppers, you can substitute with small sweet peppers for a less spicy alternative.
Grilled Eggplant Rollatini
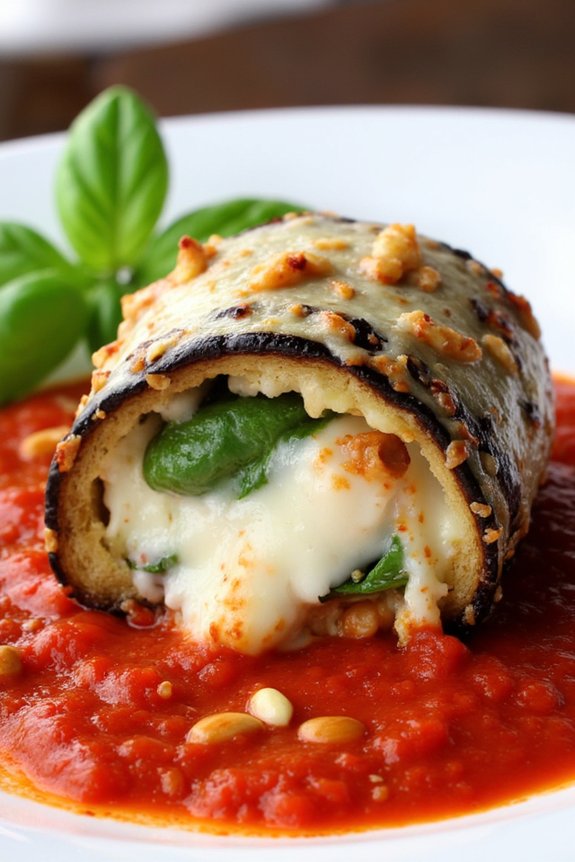
Grilled Eggplant Rollatini is a delightful Italian antipasto that brings together the smoky and tender flavors of grilled eggplant with a rich, cheesy filling. This dish is perfect as an appetizer or a light main course, offering a healthy yet indulgent option for gatherings.
The combination of creamy ricotta, savory Parmesan, and fresh herbs wrapped in thin slices of eggplant creates a beautiful balance of flavors and textures that will satisfy any palate.
This recipe serves 4-6 people and can easily be prepared in advance, making it an excellent choice for entertaining. While the eggplant adds a robust base, the filling can be customized to suit your taste preferences, allowing for a creative twist on this classic Italian dish.
With simple ingredients and straightforward preparation, Grilled Eggplant Rollatini is a must-try for anyone who appreciates the art of Italian cooking.
Ingredients:
- 2 large eggplants
- 2 tablespoons olive oil
- Salt and pepper to taste
- 1 cup ricotta cheese
- 1/2 cup grated Parmesan cheese
- 1 cup shredded mozzarella cheese
- 1 egg
- 2 cloves garlic, minced
- 1/4 cup fresh basil leaves, chopped
- 1 tablespoon fresh parsley, chopped
- 2 cups marinara sauce
- 1/4 cup pine nuts (optional)
Instructions:
- Prepare the Eggplant: Slice the eggplants lengthwise into 1/4-inch thick slices. You should have about 12 slices. Brush each side of the slices with olive oil and season with salt and pepper.
- Grill the Eggplant: Preheat a grill or grill pan over medium-high heat. Grill the eggplant slices for about 3-4 minutes on each side, until they’re tender and have nice grill marks. Set them aside to cool slightly.
- Make the Filling: In a mixing bowl, combine the ricotta cheese, Parmesan cheese, half of the mozzarella cheese, egg, minced garlic, chopped basil, and parsley. Mix well until all ingredients are thoroughly combined.
- Assemble the Rollatini: Preheat your oven to 375°F (190°C). Take each grilled eggplant slice and place about 2 tablespoons of the ricotta mixture at one end. Roll the eggplant slice around the filling to form a rollatini. Repeat with the remaining slices.
- Prepare for Baking: Spread 1 cup of marinara sauce evenly on the bottom of a baking dish. Arrange the eggplant rollatini, seam side down, in the dish. Pour the remaining marinara sauce over the top and sprinkle with the remaining mozzarella cheese.
- Bake the Rollatini: Cover the baking dish with foil and bake in the preheated oven for 20 minutes. Remove the foil and bake for an additional 10 minutes, or until the cheese is bubbly and golden.
- Finish and Serve: Remove the dish from the oven and let it cool for a few minutes. Sprinkle with pine nuts if using, and serve warm.
Extra Tips:
When selecting eggplants, look for ones that are firm and smooth, as they’ll grill more evenly. If the eggplants are particularly large, consider salting them after slicing and letting them sit for 20 minutes to reduce bitterness and excess moisture.
Feel free to experiment with additional herbs like thyme or oregano in the filling for a more aromatic flavor profile. If you prefer a spicier dish, add a pinch of red pepper flakes to the marinara sauce.
Enjoy this versatile and delicious Grilled Eggplant Rollatini as part of your Italian antipasto spread!
Sun-Dried Tomato and Olive Tapenade

Sun-Dried Tomato and Olive Tapenade is a delightful Italian antipasto that combines the rich, concentrated flavor of sun-dried tomatoes with the briny taste of olives.
This tapenade is perfect as a spread on crusty bread, a topping for grilled meats, or a flavorful addition to pasta dishes. Whether you’re hosting a dinner party or just want to enjoy a taste of Italy at home, this tapenade is sure to impress your guests with its vibrant flavors and rustic charm.
The key to a successful Sun-Dried Tomato and Olive Tapenade lies in the quality of its ingredients. Opt for sun-dried tomatoes that are packed in olive oil for a richer flavor and ease of blending.
Choose a mix of black and green olives for complexity, and don’t forget the capers, which add a delightful tanginess to the tapenade. With just a few simple steps, you can create a dish that’s both elegant and incredibly easy to prepare.
Ingredients for 4-6 people:
- 1 cup sun-dried tomatoes in olive oil, drained
- 1 cup mixed pitted black and green olives
- 2 tablespoons capers, drained
- 2 cloves garlic
- 2 tablespoons fresh lemon juice
- 1/4 cup extra-virgin olive oil
- 1 teaspoon fresh thyme leaves
- Salt and freshly ground black pepper, to taste
Cooking Instructions:
- Prepare Ingredients: Begin by draining the sun-dried tomatoes if they’re packed in oil. Pat them dry to remove excess oil. Also, drain the capers and set them aside.
- Blend Ingredients: In a food processor, combine the sun-dried tomatoes, olives, capers, and garlic cloves. Pulse the mixture until the ingredients are coarsely chopped. Avoid over-processing as the tapenade should have some texture.
- Add Seasoning: Add the fresh lemon juice, extra-virgin olive oil, and fresh thyme leaves to the mixture in the food processor. Pulse a few more times until the ingredients are well incorporated and the tapenade reaches your desired consistency.
- Season to Taste: Taste the tapenade and add salt and freshly ground black pepper as needed. Be cautious when adding salt because the olives and capers are already salty.
- Serve: Transfer the tapenade to a serving bowl and allow it to sit for at least 30 minutes to let the flavors meld together. Serve it with crusty bread, crackers, or as a topping for your favorite dishes.
Extra Tips: For a more intense flavor, you can make the tapenade a day in advance and store it in the refrigerator. This will allow the flavors to develop even further.
If you prefer a smoother texture, add a bit more olive oil while blending. Additionally, feel free to experiment with herbs such as basil or oregano for a different twist.
When serving, a drizzle of olive oil on top of the tapenade can enhance its presentation and add a touch of richness.
Sicilian Arancini

Sicilian Arancini are a beloved Italian antipasto, renowned for their golden and crispy exterior encasing a delicious filling of creamy risotto, savory meat, and gooey cheese. These scrumptious rice balls are a staple of Sicilian cuisine, traditionally enjoyed as an appetizer or snack.
Rich in flavor and texture, Arancini offer a delightful combination of crunchy, soft, and cheesy goodness in every bite. Perfect for gatherings or family meals, these rice balls are certain to impress your guests with their delightful taste and appealing presentation.
To make Sicilian Arancini, you begin by preparing a flavorful risotto, which serves as the base for the rice balls. The risotto is mixed with a delicious meat ragu, mozzarella cheese, and peas, then shaped into balls, coated in breadcrumbs, and deep-fried until golden brown.
This recipe yields 4-6 servings, making it perfect for a small dinner party or a cozy family meal. With a little patience and attention to detail, you can create these delectable morsels that capture the essence of Sicilian culinary tradition.
Ingredients for Sicilian Arancini (Serves 4-6):
- 1 ½ cups Arborio rice
- 4 cups chicken or vegetable stock
- 1 small onion, finely chopped
- 2 tbsp olive oil
- ½ cup dry white wine
- ½ cup grated Parmesan cheese
- 2 cups prepared meat ragu (or Bolognese sauce)
- 1 cup frozen peas, thawed
- 1 cup mozzarella cheese, diced
- 3 large eggs
- 1 cup all-purpose flour
- 2 cups breadcrumbs
- Salt and pepper to taste
- Vegetable oil for frying
Cooking Instructions:
- Prepare the Risotto: In a large saucepan, heat olive oil over medium heat. Add the chopped onion and sauté until translucent. Add the Arborio rice and stir to coat the grains with oil. Pour in the white wine and cook until absorbed.
- Cook the Rice: Gradually add the chicken or vegetable stock, a ladleful at a time, stirring frequently until each addition is absorbed. Continue this process until the rice is creamy and tender, approximately 18-20 minutes.
- Finish the Risotto: Stir in the grated Parmesan cheese and season with salt and pepper. Spread the risotto on a baking sheet to cool completely.
- Prepare the Filling: In a mixing bowl, combine the cooled risotto with the prepared meat ragu, peas, and diced mozzarella cheese.
- Shape the Arancini: With damp hands, take a portion of the risotto mixture and shape it into a ball approximately the size of a golf ball. Repeat with the remaining mixture.
- Coat the Arancini: Set up a breading station with three shallow bowls: one with flour, one with beaten eggs, and one with breadcrumbs. Roll each rice ball in flour, then dip in egg, and finally coat with breadcrumbs.
- Fry the Arancini: In a deep saucepan or fryer, heat vegetable oil to 350°F (175°C). Fry the Arancini in batches, turning occasionally, until golden brown and crispy, about 4-5 minutes per batch. Remove with a slotted spoon and drain on paper towels.
Extra Tips:
To guarantee your Arancini hold their shape, make sure the risotto is completely cooled before shaping the balls. You can prepare the risotto a day in advance and refrigerate it to save time.
Additionally, when frying, maintain the oil temperature to guarantee even cooking and a crunchy exterior. If you prefer a lighter version, you can bake the Arancini in a preheated oven at 400°F (200°C) for about 20-25 minutes, turning halfway through for even browning.
Anchovy and Olive Crostini
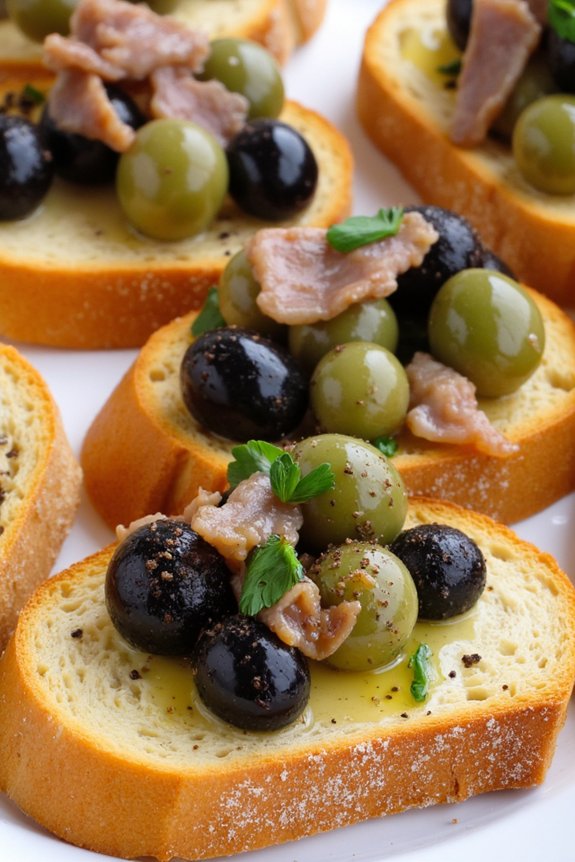
Anchovy and Olive Crostini is a delightful Italian antipasto that brings together the rich, salty flavor of anchovies with the briny taste of olives, all atop crispy slices of toasted bread. This dish is perfect for serving as an appetizer at a dinner party or as a savory snack for a casual gathering.
The combination of flavors creates a harmonious balance that’s both bold and satisfying, making it a crowd-pleaser for those who enjoy robust tastes.
To create this delectable crostini, you’ll need a few simple ingredients that are readily available. The preparation involves making a flavorful topping that can be quickly assembled before serving. With its ease of preparation and impressive presentation, Anchovy and Olive Crostini makes for a perfect starter that showcases the best of Italian culinary traditions.
Ingredients for 4-6 servings:
- 1 French baguette
- 1/2 cup pitted black olives
- 1/2 cup pitted green olives
- 8 anchovy fillets, drained
- 2 cloves garlic
- 1/4 cup extra virgin olive oil
- 1 tablespoon capers, drained
- Freshly ground black pepper to taste
- Fresh parsley for garnish (optional)
Instructions:
- Prepare the Baguette: Preheat your oven to 375°F (190°C). Slice the baguette into 1/2-inch thick slices, about 12 to 16 pieces. Arrange the slices on a baking sheet in a single layer.
- Toast the Bread: Drizzle a little of the olive oil over each slice of bread. Place the baking sheet in the oven and bake for about 8-10 minutes, or until the bread is golden brown and crisp. Remove from the oven and let cool slightly.
- Make the Topping: While the bread is toasting, prepare the topping. In a food processor, combine the black olives, green olives, anchovy fillets, garlic, capers, and the remaining olive oil. Pulse until the mixture is coarsely chopped and well combined. You want a slightly chunky texture, not a smooth paste.
- Assemble the Crostini: Spread a generous amount of the olive and anchovy mixture on each slice of toasted bread. Use a spoon to distribute the topping evenly.
- Season and Garnish: Sprinkle freshly ground black pepper over the crostini to taste. If desired, garnish with finely chopped fresh parsley for a touch of color and freshness.
- Serve: Arrange the crostini on a serving platter and serve immediately while the bread is still warm.
Extra Tips:
For the best flavor, use high-quality anchovy fillets and olives. If possible, choose olives from an olive bar rather than canned varieties, as they often have a more robust taste.
Adjust the amount of anchovies to suit your taste preference if you prefer a milder or stronger anchovy flavor. Additionally, this recipe can be easily doubled or halved, making it versatile for any size gathering.
If preparing in advance, keep the topping separate from the bread and assemble just before serving to guarantee the crostini remain crisp.
Ricotta and Spinach Stuffed Mushrooms

Ricotta and Spinach Stuffed Mushrooms are a delightful Italian antipasto that combines the earthy flavors of mushrooms with the creamy richness of ricotta cheese and the vibrant freshness of spinach. This delectable appetizer is perfect for any gathering, providing a savory bite-sized treat that’s both satisfying and elegant.
The combination of textures and flavors makes these stuffed mushrooms a popular choice for those who appreciate a classic Italian starter with a modern twist. In this recipe, we focus on creating a harmonious blend of ingredients that elevate the humble mushroom to new culinary heights.
The soft ricotta cheese melds beautifully with the sautéed spinach, garlic, and herbs, while the mushrooms serve as the perfect vessel to hold this delicious filling. Ideal for serving at parties or as a prelude to a larger Italian feast, this dish is sure to impress your guests with its simplicity and flavor.
Ingredients (serves 4-6):
- 24 large button mushrooms
- 1 cup ricotta cheese
- 1 cup fresh spinach, finely chopped
- 2 cloves garlic, minced
- 1/4 cup grated Parmesan cheese
- 1/4 cup breadcrumbs
- 2 tablespoons olive oil
- 1 tablespoon fresh parsley, chopped
- 1 teaspoon dried oregano
- Salt and pepper to taste
Cooking Instructions:
- Preheat the Oven: Begin by preheating your oven to 375°F (190°C). This guarantees that it will be at the proper temperature when you’re ready to bake the stuffed mushrooms.
- Prepare the Mushrooms: Clean the mushrooms by gently wiping them with a damp cloth. Carefully remove the stems and set them aside. You can finely chop the stems to include in the filling for added flavor.
- Cook the Spinach: In a skillet, heat 1 tablespoon of olive oil over medium heat. Add the minced garlic and sauté for about 1 minute until fragrant. Then, add the chopped spinach and cook until wilted, about 2-3 minutes. Remove from heat and let it cool slightly.
- Mix the Filling: In a large bowl, combine the ricotta cheese, cooked spinach, chopped mushroom stems, grated Parmesan cheese, breadcrumbs, parsley, oregano, salt, and pepper. Mix well until all ingredients are evenly incorporated.
- Stuff the Mushrooms: Arrange the mushroom caps on a baking sheet. Using a spoon, fill each mushroom cap generously with the ricotta and spinach mixture.
- Bake the Mushrooms: Drizzle the remaining olive oil over the stuffed mushrooms. Place the baking sheet in the preheated oven and bake for 20-25 minutes, or until the mushrooms are tender and the tops are lightly golden.
- Serve: Once baked, remove the mushrooms from the oven and let them cool for a few minutes before serving. They can be enjoyed warm or at room temperature.
Extra Tips:
When preparing Ricotta and Spinach Stuffed Mushrooms, verify the mushrooms are dry before stuffing to prevent excess moisture during baking. You can also experiment with different cheeses like mozzarella or feta to add unique flavors to the filling.
For a touch of heat, consider adding a pinch of red pepper flakes to the mixture. If you prefer a crispy finish, broil the stuffed mushrooms for an additional 2-3 minutes after baking. Enjoy this versatile dish as a starter or alongside other Italian antipasto selections.
Balsamic Glazed Cipollini Onions
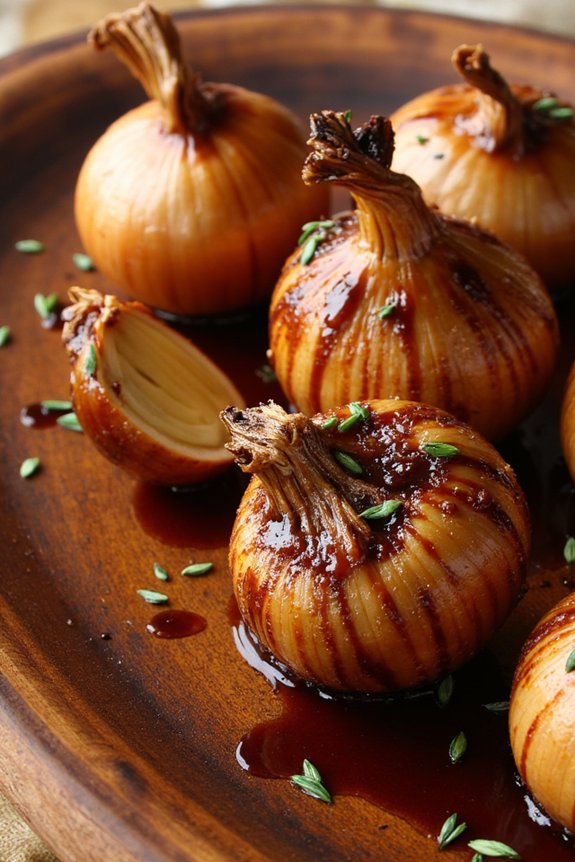
Balsamic Glazed Cipollini Onions are a delightful addition to any Italian antipasto spread. These small, flat onions are known for their sweet flavor, which is perfectly enhanced by the rich, tangy glaze made with balsamic vinegar.
This dish isn’t only visually appealing with its deep caramelized tones but also offers an irresistible aromatic experience. Whether served warm or at room temperature, balsamic glazed cipollini onions make a sophisticated appetizer that will impress your guests and complement a variety of other antipasto offerings.
The preparation of this dish highlights the natural sweetness of cipollini onions, which are first blanched to remove their skins and then sautéed until golden brown. The balsamic glaze, made with a reduction of balsamic vinegar, sugar, and a hint of butter, envelops the onions, creating a luscious coating.
This recipe serves 4-6 people, making it perfect for a small gathering or as part of a larger antipasto platter. The combination of sweet, savory, and tangy flavors will surely make this a standout dish at your next event.
Ingredients for 4-6 servings:
- 1 pound cipollini onions
- 2 tablespoons olive oil
- 1/4 cup balsamic vinegar
- 2 tablespoons sugar
- 2 tablespoons unsalted butter
- Salt and pepper to taste
- Fresh thyme leaves (optional, for garnish)
Cooking Instructions:
- Prepare the Onions: Start by blanching the cipollini onions in boiling water for about 2 minutes. This will make it easier to peel off their skins. Once blanched, drain the onions and allow them to cool slightly. Trim the root ends and carefully peel away the skins, being careful not to remove too much of the onion.
- Sauté the Onions: In a large skillet, heat the olive oil over medium heat. Add the peeled cipollini onions and sauté them until they start to turn golden brown, about 10-15 minutes. Stir occasionally to guarantee even cooking.
- Create the Balsamic Glaze: Once the onions are browned, lower the heat and add the balsamic vinegar and sugar to the skillet. Stir well to combine. Allow the mixture to simmer gently, letting the vinegar reduce and thicken. This should take about 5-7 minutes.
- Finish with Butter: As the glaze begins to thicken, add the unsalted butter to the skillet. Stir continuously until the butter is fully melted and integrated into the glaze. The glaze should be thick enough to coat the back of a spoon.
- Season and Serve: Season the onions with salt and pepper to taste. If desired, garnish with fresh thyme leaves for an added touch of flavor and color. Serve the balsamic glazed cipollini onions warm or at room temperature as part of your antipasto platter.
Extra Tips:
When preparing balsamic glazed cipollini onions, it’s important to keep an eye on the glaze as it reduces. Balsamic vinegar can quickly go from perfectly reduced to burnt if left unattended.
Additionally, if the glaze becomes too thick, you can add a splash of water to loosen it up. This dish can also be made ahead of time; simply reheat gently on the stove before serving.
For added flavor, consider experimenting with different types of balsamic vinegar, such as aged varieties, which can bring additional depth to the dish.
Herb-Marinated Olives
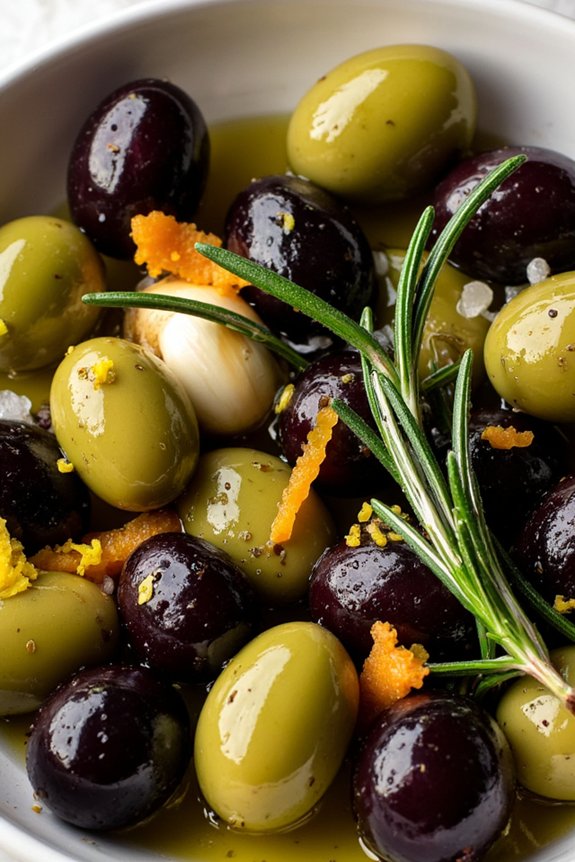
Herb-marinated olives are a delightful and aromatic addition to any Italian antipasto platter. This recipe takes the natural brininess of olives and enhances it with a blend of fresh herbs, garlic, and citrus zest, creating a flavorful appetizer perfect for gatherings.
Whether you’re serving them as a prelude to a meal or alongside a selection of cheeses and cured meats, these marinated olives are bound to impress your guests with their rich taste and enticing aroma.
The beauty of this dish lies in its simplicity and versatility. You can use a variety of olives—green, black, or a mix—to suit your taste preferences. The marinade, infused with rosemary, thyme, and other herbs, can be prepared in advance, allowing the olives to soak up the flavors and become even more delicious with time.
This recipe will serve 4-6 people, making it an ideal choice for small get-togethers or as part of a larger spread.
Ingredients for Herb-Marinated Olives (Serves 4-6):
- 2 cups mixed olives (green and black, pitted if preferred)
- 3 cloves garlic, thinly sliced
- 1 teaspoon crushed red pepper flakes
- 1 tablespoon fresh rosemary leaves
- 1 tablespoon fresh thyme leaves
- 1 teaspoon fennel seeds
- Zest of 1 lemon
- Zest of 1 orange
- 1/2 cup extra-virgin olive oil
- 1/4 cup white wine vinegar
- Salt and freshly ground black pepper to taste
Cooking Instructions:
- Prepare the Marinade: In a medium-sized mixing bowl, combine the sliced garlic, crushed red pepper flakes, rosemary, thyme, fennel seeds, lemon zest, and orange zest. Stir these ingredients together to create a fragrant herb mixture.
- Mix in the Liquids: Add the extra-virgin olive oil and white wine vinegar to the bowl with the herbs. Mix well to guarantee all the herbs and spices are evenly distributed throughout the liquid.
- Season the Marinade: Taste the marinade and season it with salt and freshly ground black pepper to your liking. Remember that the olives will add some saltiness, so adjust accordingly.
- Combine with Olives: Place the olives in a large, sealable container or jar. Pour the prepared marinade over the olives, making sure they’re fully submerged. Stir or shake the container gently to coat the olives evenly with the marinade.
- Marinate the Olives: Seal the container and refrigerate the olives for at least 4 hours, preferably overnight. This allows the olives to absorb the flavors of the marinade, enhancing their taste.
- Serve: Before serving, remove the olives from the refrigerator and let them come to room temperature. Transfer them to a serving dish, ensuring some of the marinade is included for extra flavor.
Extra Tips:
For a more intense flavor, you can marinate the olives for up to a week in the refrigerator. Feel free to experiment with different herbs and spices based on your personal taste preferences.
If you enjoy a bit more heat, increase the amount of crushed red pepper flakes. Additionally, using high-quality olive oil will enhance the overall flavor of the dish.
These marinated olives can be stored in the refrigerator for up to two weeks, making them a convenient make-ahead option for entertaining.