

The arrival of spring always fills me with joy as I start to incorporate fresh produce into my cooking. Italian cuisine, with its simple elegance, is perfect for highlighting the vibrant flavors of the season. I’ve curated a list of 13 delightful Italian recipes that showcase spring’s bounty, from a creamy Asparagus and Lemon Risotto to a revitalizing Fava Bean and Pecorino Salad. Ready to add some Italian sunshine to your meals? Let’s explore these dishes together.
Asparagus and Lemon Risotto
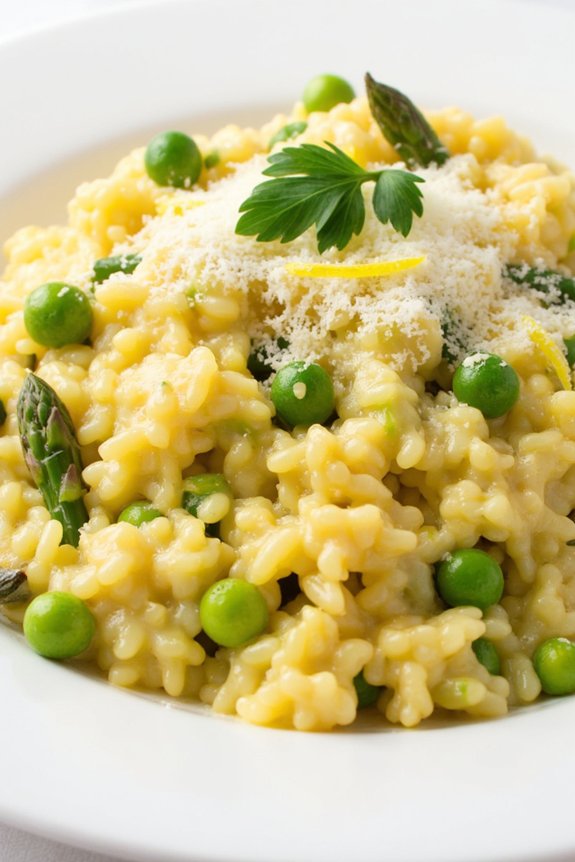
Asparagus and Lemon Risotto is a delightful Italian dish perfect for celebrating the vibrant flavors of spring. This creamy risotto combines the fresh, grassy taste of asparagus with the zesty brightness of lemon, creating a perfectly balanced and invigorating meal. Ideal for a family dinner or a small gathering, this dish is the epitome of Italian comfort food with a seasonal twist.
The key to a perfect risotto lies in the gradual addition of warm broth, allowing the Arborio rice to absorb the liquid and release its starch, resulting in a rich and creamy texture.
The Asparagus and Lemon Risotto isn’t only a feast for the taste buds but also a visual delight with its bright green specks of asparagus and the aromatic zest of lemon. The dish is simple yet sophisticated, offering an excellent way to showcase the fresh, high-quality ingredients of the season.
Whether you’re an experienced cook or a beginner in the kitchen, this risotto promises to impress with its complex flavors and creamy consistency.
Ingredients for 4-6 servings:
- 1 bunch of asparagus (about 1 pound)
- 1 tablespoon olive oil
- 2 tablespoons unsalted butter
- 1 small onion, finely chopped
- 2 cloves garlic, minced
- 1½ cups Arborio rice
- 1 cup dry white wine
- 4 cups vegetable or chicken broth, warmed
- Zest of 1 lemon
- Juice of half a lemon
- 1 cup grated Parmesan cheese
- Salt and freshly ground black pepper to taste
- Fresh parsley, chopped (for garnish)
Cooking Instructions:
- Prepare the Asparagus: Trim the woody ends of the asparagus and cut the spears into 1-inch pieces. Blanch the asparagus in boiling water for about 2 minutes, then transfer to an ice bath to stop the cooking. Drain and set aside.
- Sauté the Aromatics: In a large, heavy-bottomed pot, heat the olive oil and 1 tablespoon of butter over medium heat. Add the chopped onion and garlic, and sauté until the onion is translucent and fragrant, about 3-4 minutes.
- Toast the Rice: Add the Arborio rice to the pot and stir to coat each grain in the oil and butter. Cook for about 2 minutes until the edges of the rice become translucent.
- Deglaze with Wine: Pour in the white wine and stir continuously until the wine is fully absorbed by the rice.
- Add Broth Gradually: Begin adding the warmed broth, one ladle at a time, stirring frequently. Allow each addition of broth to be absorbed before adding the next, which should take about 18-20 minutes in total. The rice should be creamy and slightly al dente.
- Incorporate Asparagus and Lemon: Stir in the blanched asparagus pieces, lemon zest, and lemon juice. Cook for an additional 2-3 minutes until the asparagus is heated through.
- Finish with Cheese and Seasoning: Remove the pot from heat and stir in the remaining tablespoon of butter and the Parmesan cheese. Season with salt and freshly ground black pepper to taste.
- Serve: Spoon the risotto onto plates and garnish with chopped fresh parsley. Serve immediately for the best texture and flavor.
Extra Tips:
When making risotto, patience is key. Stirring frequently helps release the starches from the rice, contributing to the dish’s creamy texture. Keep the broth warm throughout the cooking process; adding cold broth can slow down the cooking and affect the texture of the risotto.
If you prefer a richer flavor, you can substitute chicken broth for vegetable broth. Finally, don’t rush the process; risotto is about enjoying the journey to a delicious meal.
Spring Vegetable Minestrone

Spring Vegetable Minestrone is a delightful Italian soup that combines the freshness of spring vegetables with the comforting warmth of a classic minestrone. This dish highlights the vibrant colors and flavors of seasonal produce, making it a perfect choice for celebrating the arrival of spring.
As the weather warms up, this soup offers a nourishing yet light option, ideal for lunch or dinner. The blend of vegetables, herbs, and broth creates a symphony of flavors that will tantalize your taste buds and leave you feeling satisfied.
This recipe makes enough to serve 4-6 people, allowing you to share the joy of spring with family or friends. The ingredients are simple yet flavorful, ensuring a delightful culinary experience. By using fresh, locally sourced vegetables wherever possible, you enhance the flavor profile and embrace the essence of the season.
This Spring Vegetable Minestrone isn’t only delicious but also adaptable, as you can swap out vegetables based on availability or personal preference.
Ingredients:
- 2 tablespoons olive oil
- 1 onion, finely chopped
- 2 garlic cloves, minced
- 2 carrots, diced
- 2 celery stalks, diced
- 1 zucchini, diced
- 1 cup green beans, trimmed and cut into 1-inch pieces
- 1 red bell pepper, diced
- 1 can (14 oz) diced tomatoes
- 6 cups vegetable broth
- 1 teaspoon dried oregano
- 1 teaspoon dried basil
- Salt and pepper to taste
- 1 cup small pasta (like ditalini or elbow)
- 1 cup fresh or frozen peas
- 1 cup spinach leaves
- 1/4 cup grated Parmesan cheese
- 2 tablespoons chopped fresh parsley
Instructions:
- Preparation and Sautéing: Begin by heating the olive oil in a large pot over medium heat. Add the chopped onion and sauté for about 5 minutes until it becomes translucent. Stir in the minced garlic and continue to cook for another minute, releasing its aroma.
- Adding Vegetables: Add the diced carrots, celery, zucchini, green beans, and red bell pepper to the pot. Stir everything well and cook for about 5-7 minutes until the vegetables soften slightly.
- Incorporating Tomatoes and Broth: Pour in the can of diced tomatoes, including the juice. Stir to combine, then add the vegetable broth. Season with dried oregano, dried basil, salt, and pepper. Bring the mixture to a gentle boil.
- Simmering: Once boiling, reduce the heat to low and let the soup simmer for about 20-25 minutes. This allows the flavors to meld together and the vegetables to become tender.
- Cooking the Pasta and Peas: Increase the heat to medium and add the small pasta to the soup. Cook according to the package instructions until al dente. In the last 5 minutes of pasta cooking time, add the peas to the pot.
- Finishing Touches: Stir in the spinach leaves, allowing them to wilt into the soup. Adjust the seasoning with more salt and pepper if needed.
- Serving: Ladle the Spring Vegetable Minestrone into bowls. Top each serving with a sprinkle of grated Parmesan cheese and a dash of freshly chopped parsley for added flavor and garnish.
Extra Tips:
To enhance the flavor of your Spring Vegetable Minestrone, consider using homemade vegetable broth if you have it on hand. For a heartier version, you can add white beans or chickpeas for extra protein and texture.
If you prefer a slightly thicker soup, mash some of the beans with a fork and stir them back into the pot. Remember, this dish is versatile, so feel free to use whatever fresh spring vegetables are available to you. Enjoy your minestrone with a side of crusty bread for a complete meal.
Fava Bean and Pecorino Salad

Spring in Italy brings a bounty of fresh produce, and among the most cherished are fava beans. This Fava Bean and Pecorino Salad is a celebration of the season’s vibrant flavors and vibrant colors. The nutty taste of fresh fava beans pairs beautifully with the sharp, salty pecorino cheese, while a simple dressing of lemon juice and olive oil ties the dish together. This salad isn’t only invigorating but also embodies the simplicity of Italian cuisine, allowing the natural ingredients to shine.
Perfect for a light lunch or a side dish at a spring gathering, this salad serves 4-6 people. The preparation is straightforward, but the key lies in using the freshest ingredients to guarantee maximum flavor. A few minutes of blanching the fava beans will enhance their tenderness and color, while shaving the pecorino cheese into thin slices will allow it to melt gently over the warm beans. Together, they create a harmonious balance of flavors and textures.
Ingredients (serves 4-6):
- 1 pound fresh fava beans in the pod (approximately 2 cups of shelled beans)
- 4 ounces pecorino cheese
- 1 lemon, juiced
- 1/4 cup extra-virgin olive oil
- Salt, to taste
- Freshly ground black pepper, to taste
- 1/4 cup fresh mint leaves, torn
Cooking Instructions:
- Prepare the Fava Beans: Begin by removing the fava beans from their pods. Bring a pot of water to a boil and blanch the shelled beans for about 2 minutes. Immediately transfer them to a bowl of ice water to stop the cooking process. Once cooled, peel off the outer skin of each bean to reveal the bright green inner bean.
- Prepare the Pecorino Cheese: Use a vegetable peeler or a cheese slicer to shave the pecorino cheese into thin slices. Set aside.
- Make the Dressing: In a small bowl, whisk together the lemon juice, olive oil, salt, and freshly ground black pepper until well combined.
- Assemble the Salad: In a large serving bowl, combine the peeled fava beans and the torn mint leaves. Drizzle the lemon-olive oil dressing over the top and toss gently to coat the beans evenly.
- Add the Cheese: Arrange the shaved pecorino cheese over the top of the salad. Gently toss again to distribute the cheese throughout.
- Final Touches: Taste and adjust the seasoning with more salt and pepper if needed. Serve immediately or refrigerate for up to an hour before serving to allow the flavors to meld.
Extra Tips:
When selecting fava beans, choose pods that are firm and bright green for the freshest taste. If you can’t find fresh fava beans, frozen ones can be used; just make sure to thaw them before blanching.
Pecorino Romano is a great cheese choice due to its robust flavor, but feel free to experiment with other hard cheeses if preferred. Additionally, if you find the flavor of raw mint too strong, you can substitute with flat-leaf parsley for a milder taste.
Finally, if you plan to prepare the salad ahead of time, hold off on adding the cheese and mint until just before serving to maintain their texture and freshness.
Spinach and Ricotta Stuffed Shells
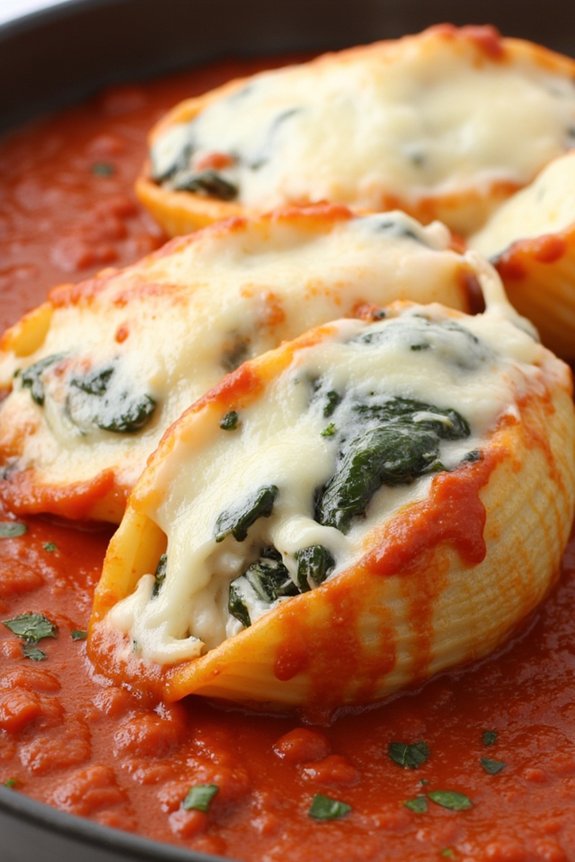
Spinach and Ricotta Stuffed Shells is a classic Italian dish that’s perfect for celebrating the flavors of spring. This dish combines tender pasta shells filled with a rich mixture of spinach, ricotta cheese, and herbs, all baked to perfection in a bubbling tomato sauce. It’s a comforting meal that’s perfect for gatherings or family dinners, offering a delightful balance of textures and flavors that everyone will love.
The beauty of Spinach and Ricotta Stuffed Shells lies in its simplicity and the freshness of its ingredients. Fresh spinach and creamy ricotta cheese create a filling that’s both satisfying and light, making this an ideal dish for springtime. The addition of herbs like basil and parsley adds a fragrant aroma and depth of flavor, while the tomato sauce provides a tangy contrast that complements the creamy filling.
This recipe serves 4-6 people, making it perfect for a small dinner party or a family meal.
Ingredients:
- 20-24 large pasta shells
- 2 cups ricotta cheese
- 1 cup grated Parmesan cheese
- 1 egg
- 2 cups fresh spinach, chopped
- 2 cloves garlic, minced
- 1/4 cup fresh basil, chopped
- 1/4 cup fresh parsley, chopped
- Salt and pepper to taste
- 3 cups marinara sauce
- 1 1/2 cups shredded mozzarella cheese
- Olive oil for greasing
Instructions:
- Preheat Oven and Prepare Baking Dish: Preheat your oven to 375°F (190°C). Grease a large baking dish with olive oil to prevent the shells from sticking.
- Cook the Pasta Shells: Bring a large pot of salted water to a boil. Add the pasta shells and cook them until they’re al dente, usually about 8-9 minutes. Drain the shells and set them aside to cool slightly.
- Prepare the Filling: In a large mixing bowl, combine ricotta cheese, grated Parmesan, egg, chopped spinach, minced garlic, basil, parsley, salt, and pepper. Mix well until all ingredients are thoroughly combined.
- Fill the Shells: Using a spoon, fill each cooked pasta shell with the ricotta and spinach mixture. Ascertain each shell is generously filled.
- Assemble the Dish: Spread 1 cup of marinara sauce evenly on the bottom of the prepared baking dish. Arrange the filled shells in the dish in a single layer. Pour the remaining marinara sauce over the shells, ensuring they’re well covered.
- Add Cheese and Bake: Sprinkle shredded mozzarella cheese evenly over the top of the shells. Cover the dish with aluminum foil and bake in the preheated oven for 25 minutes. Remove the foil and bake for an additional 10-15 minutes, or until the cheese is bubbly and golden.
- Serve: Once baked, let the dish cool for a few minutes before serving. Garnish with additional fresh basil or parsley if desired.
Extra Tips:
For the best flavor, use fresh spinach and high-quality ricotta cheese. If you prefer a smoother filling, you can blend the ricotta mixture until smooth before filling the shells.
Feel free to add a pinch of red pepper flakes to the filling for a bit of heat. If you have leftover filling, it can be stored in the refrigerator and used for other dishes such as lasagna or as a spread for crostini.
Enjoy this dish with a fresh green salad and a loaf of crusty bread for a complete meal.
Artichoke and Parmesan Frittata

Artichoke and Parmesan Frittata is a delightful Italian dish that celebrates the fresh flavors of spring. This versatile meal can be perfect for any time of the day, whether you’re serving it for breakfast, brunch, or a light dinner. The combination of tender artichokes and savory Parmesan cheese provides a rich and satisfying flavor profile, while fresh herbs add a touch of brightness.
This frittata isn’t only delicious but also easy to prepare, making it an excellent choice for a quick and nutritious meal. Originating from Italy, frittatas are similar to omelets but are typically cooked more slowly and finished in the oven, giving them a fluffier texture. This dish highlights the use of fresh, seasonal ingredients and can be easily customized to suit your preferences.
Whether you’re an experienced chef or a beginner in the kitchen, the Artichoke and Parmesan Frittata is a great way to enjoy the fresh produce of springtime.
Ingredients for 4-6 servings:
- 8 large eggs
- 1/2 cup grated Parmesan cheese
- 1 cup canned or jarred artichoke hearts, drained and chopped
- 1/4 cup chopped fresh parsley
- 1/4 cup chopped green onions
- 2 tablespoons olive oil
- Salt and pepper, to taste
Cooking Instructions:
- Preheat the Oven: Start by preheating your oven to 350°F (175°C). This will guarantee the frittata is evenly cooked and has a nice golden finish.
- Prepare the Egg Mixture: In a large mixing bowl, whisk together the eggs until well blended. Stir in the grated Parmesan cheese, chopped parsley, and a pinch of salt and pepper. Mix until all ingredients are fully incorporated.
- Sauté Vegetables: Heat the olive oil in an oven-safe skillet over medium heat. Add the chopped green onions and artichoke hearts. Sauté for about 5 minutes, or until the onions are soft and the artichokes are slightly browned.
- Combine and Cook: Pour the egg mixture over the sautéed vegetables in the skillet. Use a spatula to gently stir and ascertain the vegetables are evenly distributed throughout the eggs. Let it cook on the stovetop for about 5 minutes, or until the edges start to set.
- Bake the Frittata: Transfer the skillet to the preheated oven. Bake for 10-15 minutes, or until the frittata is puffed up and the center is set. You can check if it’s done by inserting a knife in the center; if it comes out clean, the frittata is ready.
- Serve: Let the frittata cool for a few minutes before slicing it into wedges. Serve warm or at room temperature. Enjoy your Artichoke and Parmesan Frittata with a fresh salad or crusty bread.
Extra Tips:
For the best results, use fresh eggs and high-quality Parmesan cheese, as these will enhance the overall flavor of the frittata. If you prefer a creamier texture, you can add a splash of milk or cream to the egg mixture.
Feel free to experiment with other herbs like basil or chives for added flavor. Additionally, be sure to use an oven-safe skillet to avoid any accidents when transferring from stovetop to oven. Finally, if you don’t have fresh artichokes, canned or jarred ones are a convenient and tasty alternative.
Pea and Mint Pesto Pasta

Pea and Mint Pesto Pasta is a delightful Italian Spring recipe that bursts with fresh flavors and vibrant colors. This dish combines the natural sweetness of peas with the revitalizing taste of mint to create a pesto that’s both aromatic and delicious. Perfect for a light lunch or dinner, this pasta dish isn’t only easy to prepare but also offers a unique twist on traditional pesto recipes.
The combination of fresh ingredients brings a taste of the Italian countryside to your dining table, making it an ideal choice for celebrating the arrival of spring. The creamy texture of the peas pairs beautifully with the al dente pasta, while the mint adds a refreshing note that enhances the overall taste of the dish.
The pesto can be made in advance, allowing you to enjoy this meal with minimal effort. Whether you’re cooking for family or entertaining guests, Pea and Mint Pesto Pasta is sure to impress with its beautifully balanced flavors and its visually appealing presentation. This recipe serves 4-6 people, making it perfect for sharing with loved ones.
Ingredients:
- 400g pasta (your choice of shape)
- 300g fresh or frozen peas
- 1 cup fresh mint leaves
- 1/2 cup grated Parmesan cheese
- 1/3 cup pine nuts
- 2 cloves garlic, peeled
- 1/2 cup olive oil
- Salt and pepper to taste
- Juice of 1 lemon
- Optional: extra Parmesan for serving
Cooking Instructions:
- Cook the Pasta: Begin by bringing a large pot of salted water to a boil. Add the pasta and cook according to the package instructions until al dente. Drain the pasta, reserving a cup of the pasta water, and set aside.
- Prepare the Peas: While the pasta is cooking, blanch the peas by adding them to a smaller pot of boiling water for about 3 minutes if fresh, or 1 minute if using frozen peas. Drain and immediately rinse under cold water to stop the cooking process. This will help retain their bright green color.
- Make the Pesto: In a food processor, combine the blanched peas, mint leaves, Parmesan cheese, pine nuts, and garlic. Pulse until the mixture is finely chopped. With the processor running, slowly drizzle in the olive oil until the mixture is smooth and creamy. Season with salt, pepper, and lemon juice to taste.
- Combine Pasta and Pesto: In a large mixing bowl, combine the cooked pasta and the pea and mint pesto. Toss well to guarantee the pasta is evenly coated. If the pesto is too thick, add a little of the reserved pasta water to achieve your desired consistency.
- Serve: Transfer the pasta to serving plates or a large serving dish. Optionally, sprinkle with additional Parmesan cheese and a few extra mint leaves for garnish. Serve immediately while warm.
Extra Tips: For a nut-free version of this Pea and Mint Pesto Pasta, you can substitute the pine nuts with sunflower seeds or pumpkin seeds. If you prefer a more substantial meal, consider adding grilled chicken or shrimp to the dish.
Also, remember that the quality of the ingredients, particularly the olive oil and Parmesan cheese, can profoundly impact the flavor of the pesto, so opt for the best you can find. Finally, this pesto can be stored in the refrigerator for up to three days in an airtight container, allowing you to enjoy it over several meals.
Caprese Salad With Balsamic Glaze

Caprese Salad With Balsamic Glaze is a quintessential Italian dish that perfectly captures the essence of spring with its fresh, vibrant ingredients. This salad is a celebration of simple yet flavorful components that come together to create a harmonious and delicious dish. It’s perfect as a light appetizer or a revitalizing side dish, and it’s sure to impress with its beautiful presentation and delightful taste.
The key to an exceptional Caprese Salad lies in using the freshest ingredients possible. Ripe tomatoes, creamy mozzarella, fragrant basil, and a rich balsamic glaze are all essential elements that contribute to the salad’s burst of flavors. The balsamic glaze adds a touch of sweetness and depth, beautifully complementing the freshness of the other ingredients. This recipe serves 4-6 people, making it ideal for a small gathering or family meal.
Ingredients:
- 4 large ripe tomatoes
- 16 ounces fresh mozzarella cheese
- A handful of fresh basil leaves
- 1/4 cup extra-virgin olive oil
- Salt and freshly ground black pepper to taste
- 1/2 cup balsamic vinegar
- 2 tablespoons honey (optional for balsamic glaze)
Instructions:
- Prepare the Balsamic Glaze: In a small saucepan, combine the balsamic vinegar and honey (if using). Place over medium heat and bring to a simmer. Reduce the heat to low and let it simmer until the mixture thickens to a syrupy consistency, about 10-15 minutes. Remove from heat and let it cool.
- Slice the Ingredients: While the glaze is cooling, slice the tomatoes and mozzarella cheese into 1/4-inch thick slices. Aim for even, uniform slices for a beautiful presentation.
- Assemble the Salad: On a large serving platter, alternate layers of tomato and mozzarella slices, slightly overlapping them. Tuck whole basil leaves between the layers for added aroma and flavor.
- Season the Salad: Drizzle the olive oil over the assembled salad. Sprinkle with salt and freshly ground black pepper to taste, enhancing the natural flavors of the tomatoes and cheese.
- Finish with Balsamic Glaze: Drizzle the cooled balsamic glaze over the salad. Make sure to distribute it evenly to guarantee every bite has the perfect balance of flavors.
- Serve Immediately: Caprese Salad is best enjoyed fresh, so serve it immediately after preparation to savor the crispness of the ingredients.
Extra Tips:
For the best results, select high-quality ingredients, especially the tomatoes and mozzarella. Heirloom tomatoes can add a variety of colors and flavors to the dish. If fresh mozzarella isn’t readily available, burrata can be a luxurious alternative.
Keep the salad chilled until just before serving, as the fresh ingredients are more enjoyable when cold. Adjust the sweetness of the balsamic glaze according to your preference by varying the amount of honey. Enjoy this classic Italian recipe that truly embodies the flavors of spring!
Grilled Eggplant and Zucchini Parmesan

Grilled Eggplant and Zucchini Parmesan is a delightful Italian dish that’s perfect for spring. The combination of tender grilled eggplant and zucchini, layered with rich marinara sauce and gooey melted cheese, makes for a comforting yet fresh meal. This recipe is a lighter take on the classic Eggplant Parmesan, eliminating some of the heavier breading and frying steps, yet it still retains all of the beloved flavors.
Perfect for a family dinner or a gathering of friends, this dish is sure to impress with its vibrant flavors and rustic appeal.
To make this dish, you’ll begin by grilling slices of eggplant and zucchini until they’re tender and slightly charred, enhancing their natural sweetness and adding a smoky depth to the flavor profile. Once grilled, the vegetables are layered with marinara sauce and a blend of mozzarella and Parmesan cheeses before being baked to golden perfection. The result is a savory, cheesy, and satisfying dish that pairs beautifully with a crisp green salad or a side of crusty Italian bread.
Ingredients (serves 4-6):
- 2 medium eggplants, sliced into 1/4 inch rounds
- 3 medium zucchinis, sliced into 1/4 inch rounds
- 4 tablespoons olive oil
- Salt and black pepper to taste
- 3 cups marinara sauce
- 2 cups shredded mozzarella cheese
- 1 cup grated Parmesan cheese
- 1 teaspoon dried oregano
- 1 teaspoon dried basil
- Fresh basil leaves for garnish
Cooking Instructions:
- Prepare the Vegetables: Begin by preheating your grill to medium-high heat. Brush the eggplant and zucchini slices with olive oil on both sides, and season them with salt and pepper.
- Grill the Vegetables: Place the eggplant and zucchini slices on the grill. Cook for about 3-4 minutes on each side until they’re tender and have nice grill marks. Remove from the grill and set aside.
- Preheat the Oven: Preheat your oven to 375°F (190°C).
- Assemble the Dish: In a large baking dish, spread a thin layer of marinara sauce on the bottom. Arrange a layer of grilled eggplant and zucchini over the sauce. Top with more marinara sauce, followed by a sprinkle of mozzarella and Parmesan cheeses. Repeat the layers until all the ingredients are used, finishing with a layer of cheese on top.
- Season the Top Layer: Sprinkle the top layer with dried oregano and basil.
- Bake the Dish: Cover the baking dish with foil and place it in the preheated oven. Bake for 20 minutes, then remove the foil and bake for an additional 10-15 minutes, or until the top is bubbly and golden brown.
- Garnish and Serve: Once baked, remove the dish from the oven and let it cool slightly. Garnish with fresh basil leaves before serving.
Extra Tips:
For the best flavor, use fresh eggplants and zucchinis that are firm and free of blemishes. If you prefer a little extra spice, consider adding a pinch of red pepper flakes to the marinara sauce.
Additionally, letting the dish rest for about 10 minutes after baking will make it easier to cut and serve. This dish can be made a day in advance and reheated, making it a convenient option for meal prep or entertaining. Enjoy your Grilled Eggplant and Zucchini Parmesan with a side of your favorite Italian wine for a complete dining experience.
Lemon and Herb Roasted Chicken

As the days grow longer and the air fills with the fragrance of blooming flowers, Italian kitchens come alive with vibrant, fresh flavors that celebrate the arrival of spring. Among these delightful dishes is Lemon and Herb Roasted Chicken, a classic yet simple recipe that captures the essence of the season. The use of fresh herbs and zesty lemon infuses the chicken with an irresistible aroma and taste, perfect for a family gathering or an intimate dinner.
Roasting the chicken allows the skin to become crispy and golden, while the meat remains tender and juicy, making it a mouthwatering centerpiece for your springtime table. This Lemon and Herb Roasted Chicken recipe serves 4-6 people and is perfect for those who enjoy the simple pleasures of a well-cooked meal. The key to this dish is in the balance of flavors; the tartness of the lemon complements the savory herbs, creating a harmony that’s both invigorating and satisfying.
Whether you’re an experienced cook or a novice in the kitchen, this recipe is easy to follow and requires minimal effort, allowing you to enjoy the process as much as the final result. Gather your ingredients, preheat your oven, and get ready to experience the delightful taste of Italian spring cuisine.
Ingredients (Serves 4-6):
- 1 whole chicken (about 4-5 pounds)
- 2 lemons
- 6 cloves garlic
- 1 bunch fresh rosemary
- 1 bunch fresh thyme
- 1 bunch fresh parsley
- 4 tablespoons olive oil
- Salt and pepper to taste
Cooking Instructions:
- Preheat the Oven: Start by preheating your oven to 375°F (190°C). This guarantees that your chicken will cook evenly and develop a beautifully crispy skin.
- Prepare the Chicken: Rinse the chicken under cold water and pat it dry with paper towels. Confirm the cavity is clean, and remove any giblets if present.
- Season the Chicken: Generously season the inside of the chicken cavity with salt and pepper. Stuff the cavity with one lemon (cut into quarters), halved garlic cloves, a few sprigs of rosemary, thyme, and parsley. These will infuse the chicken with flavor from the inside out.
- Prepare the Marinade: In a small bowl, combine olive oil with the juice of the second lemon. Add chopped rosemary, thyme, and parsley to the mixture. Season with salt and pepper.
- Coat the Chicken: Place the chicken in a roasting pan. Using a brush or your hands, coat the entire chicken with the prepared marinade, ensuring an even distribution of herbs and oil.
- Roast the Chicken: Place the chicken in the preheated oven and roast for about 1.5 to 2 hours, or until the internal temperature reaches 165°F (75°C) when checked with a meat thermometer. Baste the chicken with the pan juices every 30 minutes to keep it moist.
- Rest Before Serving: Once cooked, remove the chicken from the oven and let it rest for about 10 minutes before carving. This allows the juices to redistribute throughout the meat, guaranteeing each bite is flavorful and tender.
Extra Tips:
To enhance the flavor even further, consider marinating the chicken overnight in the refrigerator. This allows the herbs and lemon to penetrate deeper into the meat.
If you don’t have fresh herbs on hand, dried herbs can be used as a substitute, but remember that they tend to have a more concentrated flavor, so use them sparingly.
Finally, pairing this dish with a light, fresh salad or roasted spring vegetables will complement the lemony, herbaceous flavors perfectly, making your meal a true celebration of spring.
Strawberry and Mascarpone Tart

Strawberry and Mascarpone Tart is a delightful dessert that perfectly captures the essence of an Italian spring. The combination of sweet, juicy strawberries with creamy mascarpone cheese creates a harmonious blend of flavors that’s both invigorating and indulgent.
This tart isn’t only visually stunning with its vibrant red strawberries glistening atop a golden crust, but it also delivers a luscious taste that will leave your guests craving for more. Perfect for a springtime gathering or a special occasion, this tart showcases the best of seasonal ingredients in a way that’s both elegant and approachable.
The tart begins with a buttery, flaky crust that provides a solid foundation for the creamy mascarpone filling. The mascarpone is whipped into a smooth, velvety texture, then spread generously over the crust. Fresh strawberries are sliced and arranged in a beautiful pattern on top, creating a picture-perfect tart that’s as delicious as it’s visually appealing.
The addition of a simple glaze enhances the strawberries’ natural sweetness and adds a lovely sheen to the final presentation. Whether served as a show-stopping dessert at a dinner party or enjoyed as an afternoon treat, this Strawberry and Mascarpone Tart is sure to impress.
Ingredients (Serves 4-6)
- 1 1/2 cups all-purpose flour
- 1/4 cup granulated sugar
- 1/2 cup unsalted butter, chilled and cubed
- 1 large egg yolk
- 2 tablespoons cold water
- 8 ounces mascarpone cheese
- 1/4 cup powdered sugar
- 1 teaspoon vanilla extract
- 1 1/2 pounds fresh strawberries, hulled and sliced
- 2 tablespoons apricot preserves
- 1 tablespoon water
Instructions
1. Prepare the Crust: In a large bowl, combine the all-purpose flour and granulated sugar. Add the chilled, cubed butter and use a pastry cutter or your fingertips to blend until the mixture resembles coarse crumbs.
Add the egg yolk and cold water, then mix until the dough comes together. Form the dough into a disk, wrap it in plastic wrap, and refrigerate for 30 minutes.
2. Bake the Crust: Preheat the oven to 350°F (175°C). Roll out the chilled dough on a lightly floured surface to fit a 9-inch tart pan. Transfer the dough to the pan, pressing it into the edges and trimming any excess.
Prick the bottom with a fork to prevent bubbling, then line with parchment paper and fill with pie weights. Bake for 15 minutes, remove the weights and parchment, and bake for an additional 10 minutes until golden. Cool completely.
3. Prepare the Filling: In a medium bowl, combine the mascarpone cheese, powdered sugar, and vanilla extract. Mix with a hand mixer or whisk until smooth and creamy. Spread the mascarpone mixture evenly over the cooled tart crust.
4. Arrange the Strawberries: Neatly arrange the sliced strawberries on top of the mascarpone filling, starting from the outer edge and working towards the center, creating a visually appealing pattern or design.
5. Glaze the Tart: In a small saucepan, heat the apricot preserves and water over low heat until smooth and liquefied. Using a pastry brush, gently brush the glaze over the strawberries to give them a glossy finish.
6. Chill and Serve: Refrigerate the tart for at least 1 hour to set. Serve chilled and enjoy your Strawberry and Mascarpone Tart.
Extra Tips
For the best results, choose ripe, fresh strawberries as they’re naturally sweeter and more flavorful. Make sure the mascarpone is at room temperature before mixing to facilitate a smooth, creamy filling.
If you prefer a sweeter tart, you can add a bit more powdered sugar to the mascarpone filling. Additionally, you can experiment with other fruits such as raspberries or blueberries for a different flavor profile.
Finally, be gentle when glazing the strawberries to maintain their arrangement and prevent them from moving.
Arugula and Prosciutto Pizza

Arugula and Prosciutto Pizza is a delightful Italian spring recipe that combines the peppery taste of arugula with the savory and slightly sweet flavor of prosciutto. This pizza is a harmonious blend of fresh and vibrant ingredients, making it perfect for those warmer spring days.
The crispy crust serves as a perfect base for the rich tomato sauce, creamy mozzarella, and the delicate balance of arugula and prosciutto. It’s a dish that’s both simple to prepare and sophisticated in taste, ideal for a family meal or a gathering with friends.
This recipe is designed to serve 4-6 people, allowing everyone to enjoy a slice of this delectable pizza. The combination of flavors and textures is sure to impress your guests and leave them craving more.
With fresh ingredients and straightforward preparation, this Arugula and Prosciutto Pizza is a reflection of the beauty of Italian cuisine. Whether you’re a seasoned cook or a beginner, this recipe will guide you to create a pizza that’s bursting with flavor and embodies the essence of spring.
Ingredients:
- 1 lb pizza dough (store-bought or homemade)
- 1 cup tomato sauce
- 2 cups shredded mozzarella cheese
- 4 oz prosciutto, thinly sliced
- 2 cups fresh arugula
- 1/4 cup grated Parmesan cheese
- 2 tablespoons olive oil
- Salt and pepper to taste
- Cornmeal for dusting
- Optional: balsamic glaze for drizzling
Instructions:
1. Preheat the Oven: Start by preheating your oven to 475°F (245°C). Place a pizza stone or a baking sheet in the oven to heat up, which will help create a crispier crust.
2. Prepare the Dough: On a lightly floured surface, roll out the pizza dough into a 12-inch circle. If using a pizza stone, sprinkle cornmeal on a pizza peel to prevent sticking, then transfer the dough onto it.
3. Assemble the Pizza: Spread the tomato sauce evenly over the dough, leaving a small border around the edges. Sprinkle the shredded mozzarella cheese over the sauce, ensuring an even distribution.
4. Bake the Pizza: Carefully slide the pizza onto the preheated stone or baking sheet. Bake for 10-12 minutes, or until the crust is golden and the cheese is bubbly and lightly browned.
5. Add Prosciutto and Arugula: Once baked, remove the pizza from the oven. Immediately drape the thin slices of prosciutto over the hot pizza. The heat will slightly melt the prosciutto, enhancing its flavor.
Top with fresh arugula, allowing it to gently wilt from the residual heat.
6. Finish with Olive Oil and Parmesan: Drizzle olive oil over the arugula and sprinkle with grated Parmesan cheese. Season with salt and pepper to taste.
7. Slice and Serve: Use a pizza cutter to slice the pizza into wedges. For an optional touch, drizzle with balsamic glaze before serving.
Extra Tips:
To achieve the best results, make sure that your oven is thoroughly preheated before baking the pizza. This will help create a perfectly crisp crust.
If you don’t have a pizza stone, a preheated baking sheet can also work well. When rolling out the dough, aim for an even thickness to ensure uniform baking.
Remember to let the pizza rest for a minute or two before slicing, as this will allow the toppings to settle and make cutting easier. Enjoy your Arugula and Prosciutto Pizza with a glass of your favorite Italian wine for a complete culinary experience.
Lemon Ricotta Pancakes

Lemon Ricotta Pancakes are a delightful and revitalizing twist on a classic breakfast favorite, perfect for embracing the vibrant flavors of Italian spring. These pancakes are light, fluffy, and infused with the zesty aroma of fresh lemons, complemented by the creamy richness of ricotta cheese. The combination creates an irresistible stack of pancakes that are both satisfying and energizing, making them an excellent choice for a leisurely brunch or a special weekend breakfast.
These pancakes capture the essence of spring with their bright citrus notes and tender texture. The ricotta adds a subtle sweetness and a luxurious creaminess that balances the tartness of the lemon, while the pancakes themselves are soft and airy, creating the perfect vehicle for maple syrup or fresh fruit toppings. Whether you’re serving them to family or friends, Lemon Ricotta Pancakes are sure to impress and bring a touch of Italian elegance to your table.
Ingredients for 4-6 people:
- 1 ¾ cups all-purpose flour
- 1 tablespoon baking powder
- ¼ teaspoon salt
- 3 tablespoons granulated sugar
- Zest of 2 lemons
- 1 cup ricotta cheese
- 1 cup milk
- 3 large eggs
- ½ teaspoon vanilla extract
- 2 tablespoons lemon juice
- Butter or oil for cooking
Cooking Instructions:
- Prepare Dry Ingredients: In a large bowl, whisk together the flour, baking powder, salt, and sugar. Add the lemon zest and mix until well combined.
- Mix Wet Ingredients: In another bowl, combine the ricotta cheese, milk, eggs, vanilla extract, and lemon juice. Whisk the ingredients together until they’re smoothly blended.
- Combine Mixtures: Gradually add the wet ingredients to the dry ingredients, stirring gently with a spatula until just combined. Be careful not to over-mix; a few lumps are okay as this will help keep the pancakes fluffy.
- Heat Skillet: Preheat a non-stick skillet or griddle over medium heat. Once hot, add a small amount of butter or oil to the skillet.
- Cook Pancakes: Pour about ¼ cup of the pancake batter onto the skillet for each pancake. Cook until bubbles start to form on the surface and the edges look set, about 2-3 minutes. Flip the pancakes and cook for another 2 minutes or until golden brown and cooked through.
- Serve: Remove the cooked pancakes from the skillet and keep them warm. Repeat the process with the remaining batter, adding more butter or oil as needed. Serve the pancakes warm with your choice of toppings, such as maple syrup, fresh berries, or a dollop of whipped cream.
Extra Tips:
For the best results, verify your ricotta cheese is well-drained to avoid excess moisture in the batter. If you can, use fresh lemons for both the juice and zest to enhance the flavor and aroma.
To keep the pancakes warm while cooking in batches, place them on a baking sheet in a preheated oven at a low temperature. Additionally, these pancakes can be made ahead and stored in the refrigerator for up to two days, or frozen for longer storage, making them a convenient option for busy mornings.
Rhubarb and Almond Cake

As the warmth of spring sweeps across Italy, it’s the perfect time to embrace the season’s fresh produce in delightful desserts. One such treat is the Rhubarb and Almond Cake, a harmonious blend of tart rhubarb and nutty almonds, creating a moist and flavorful cake that captures the essence of spring.
This cake is ideal for a weekend brunch or a light afternoon snack, offering a sweet yet slightly tangy experience that leaves a lasting impression. With its beautiful presentation and rich flavors, the Rhubarb and Almond Cake is certain to become a household favorite during the spring months.
The combination of rhubarb and almonds offers not just a taste sensation but also a textural delight. The cake’s crumbly almond base perfectly complements the soft, juicy rhubarb, resulting in a dessert that’s both satisfying and sophisticated.
Whether you’re a seasoned baker or just beginning your culinary adventures, this recipe is straightforward and rewarding, making it accessible to all skill levels in the kitchen. Gather your ingredients and let’s create this delicious Italian spring delight.
Ingredients (Serves 4-6):
- 1 1/2 cups all-purpose flour
- 1 tsp baking powder
- 1/2 tsp salt
- 1 cup unsalted butter, softened
- 1 cup granulated sugar
- 3 large eggs
- 1 tsp vanilla extract
- 1/2 cup ground almonds
- 1/2 cup milk
- 2 cups rhubarb, chopped into 1-inch pieces
- 1/4 cup sliced almonds
- Powdered sugar for dusting (optional)
Cooking Instructions:
- Preheat and Prepare: Preheat your oven to 350°F (175°C). Grease and line a 9-inch round cake pan with parchment paper to guarantee easy removal after baking.
- Mix Dry Ingredients: In a medium bowl, whisk together the all-purpose flour, baking powder, and salt. Set this mixture aside; it will be incorporated later into the batter.
- Cream Butter and Sugar: In a large mixing bowl, beat the softened butter and granulated sugar together using an electric mixer on medium speed until light and fluffy. This should take about 3-4 minutes.
- Add Eggs and Vanilla: Add the eggs one at a time to the butter-sugar mixture, beating well after each addition. Stir in the vanilla extract and mix until fully combined.
- Incorporate Dry Ingredients: Gradually add the dry flour mixture to the wet ingredients, alternating with the milk. Begin and end with the flour mixture, mixing until just combined.
- Fold in Almonds and Rhubarb: Gently fold the ground almonds into the batter, followed by the chopped rhubarb. Be careful not to overmix to keep the cake light and airy.
- Prepare for Baking: Pour the batter into the prepared cake pan, spreading it evenly. Sprinkle the sliced almonds over the top for added texture and a decorative touch.
- Bake the Cake: Bake in the preheated oven for 45-50 minutes, or until a toothpick inserted into the center comes out clean. The cake should be golden brown and springy to the touch.
- Cool and Serve: Allow the cake to cool in the pan for 10 minutes, then transfer it to a wire rack to cool completely. Once cooled, dust lightly with powdered sugar if desired before serving.
Extra Tips:
For the best flavor and texture, choose fresh rhubarb that’s firm and brightly colored. Remember, rhubarb can be quite tart, so adjust the sugar to your taste if you prefer a sweeter cake.
To enhance the almond flavor, you can toast the sliced almonds before sprinkling them on top of the batter. This cake pairs beautifully with a dollop of whipped cream or a scoop of vanilla ice cream for an indulgent treat.
Enjoy your baking, and savor the delightful taste of spring with every bite!