

Italian side dishes are like the little black dress of the culinary world—they never go out of style and can make any meal shine. Picture the creamy indulgence of a Parmesan risotto or the refreshing taste of a Caprese salad on your table. These dishes aren’t just supporting players; they turn your main course into a star. Ready to see how these easy recipes can make your meals unforgettable? Let’s explore the delicious world of Italian cuisine together.
Classic Caprese Salad
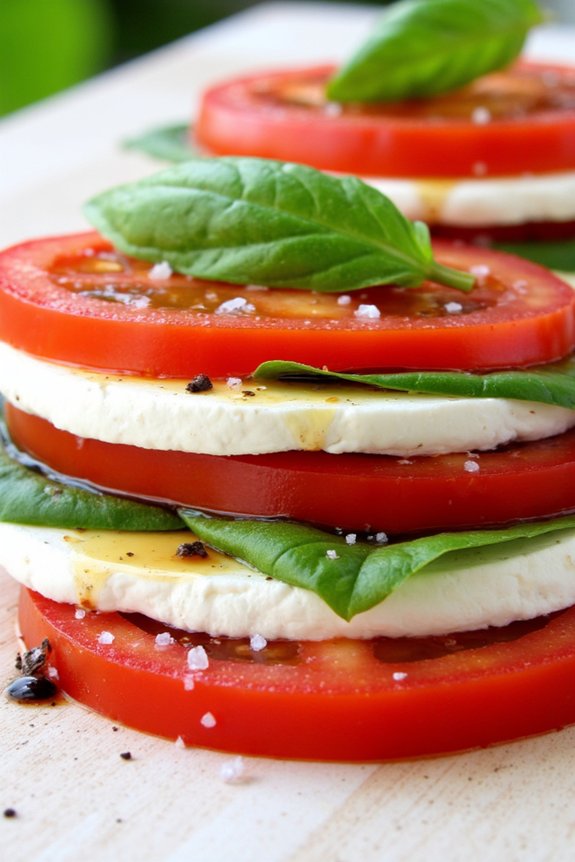
The Classic Caprese Salad is a quintessential Italian side dish that beautifully showcases the colors of the Italian flag while celebrating the simplicity and vibrance of its ingredients. Originating from the island of Capri, this salad is a delightful combination of ripe tomatoes, fresh mozzarella cheese, and aromatic basil leaves, finished with a drizzle of high-quality olive oil and a touch of sea salt.
Perfect as a starter or a side dish, the Caprese Salad is best enjoyed when the ingredients are at their peak vibrance, making it a popular choice during the summer months.
This salad isn’t only a feast for the eyes but also a reflection of the Italian culinary philosophy of letting high-quality ingredients shine on their own. It’s a dish that requires minimal preparation but delivers maximum flavor, making it ideal for both casual family meals and elegant dinner parties.
The Classic Caprese Salad is a versatile dish that can be easily scaled up or down, and its simplicity allows it to pair perfectly with a wide range of main courses.
Ingredients for 4-6 people:
- 4 large ripe tomatoes
- 1 pound fresh mozzarella cheese
- 1 bunch fresh basil leaves
- Extra virgin olive oil
- Sea salt
- Freshly ground black pepper
- Balsamic glaze (optional)
Cooking Instructions:
- Prepare the Ingredients: Begin by washing the tomatoes and basil leaves thoroughly under cold running water. Pat them dry with a clean kitchen towel. Slice the tomatoes into 1/4-inch thick rounds. Similarly, slice the fresh mozzarella into 1/4-inch thick pieces.
- Assemble the Salad: On a large serving platter, start layering the slices of tomato and mozzarella alternately, slightly overlapping them for a visually appealing presentation. Tuck whole basil leaves between the layers to add color and flavor.
- Season the Salad: Once the entire platter is assembled, drizzle generously with extra virgin olive oil. Sprinkle a pinch of sea salt and a few cracks of freshly ground black pepper over the top. If desired, add a drizzle of balsamic glaze for a sweet and tangy flavor contrast.
- Chill and Serve: Allow the salad to sit for a few minutes to let the flavors meld together. Serve the salad chilled or at room temperature, and enjoy it as a revitalizing side dish.
Extra Tips:
To make the most out of your Classic Caprese Salad, choose the freshest ingredients possible. Opt for vine-ripened tomatoes for the best flavor and juiciness, and seek out fresh mozzarella packed in water for a creamy texture.
If fresh basil is unavailable, substitute with arugula or spinach for a different but delightful twist. Avoid refrigerating the tomatoes before use, as this can diminish their flavor. Finally, if you prefer a bit of acidity, a light drizzle of fresh lemon juice can elevate the dish even further.
Garlic and Herb Focaccia Bread

Focaccia bread is a classic Italian side dish known for its rich flavor and airy texture. It’s perfect for serving alongside soups, salads, or pasta dishes. This particular recipe for Garlic and Herb Focaccia Bread elevates the traditional focaccia by infusing it with garlic and aromatic herbs, making it a delightful accompaniment to any meal.
The bread is simple to prepare, with most of the time dedicated to letting the dough rise, allowing you to focus on preparing the rest of your meal. The key to a good focaccia is guaranteeing that it has a crispy exterior and a soft, flavorful interior. This is achieved by using a generous amount of olive oil and a combination of fresh and dried herbs.
Garlic adds a depth of flavor, while the olive oil helps in keeping the bread moist. When topped with a sprinkle of sea salt, this bread becomes irresistible, making it a favorite for gatherings or family dinners. The following recipe serves 4-6 people.
Ingredients:
- 500 grams (about 4 cups) all-purpose flour
- 2 teaspoons salt
- 1 tablespoon sugar
- 7 grams (1 packet) active dry yeast
- 350 ml (1.5 cups) warm water
- 60 ml (1/4 cup) olive oil, plus more for drizzling
- 3 cloves garlic, minced
- 1 tablespoon fresh rosemary, chopped
- 1 tablespoon fresh thyme, chopped
- Coarse sea salt, for topping
Instructions:
- Prepare the Dough: In a large mixing bowl, combine the flour, salt, and sugar. In a separate small bowl, dissolve the yeast in warm water and let it sit for about 5 minutes until it becomes frothy.
- Mix Ingredients: Make a well in the center of the dry ingredients and pour in the yeast mixture and olive oil. Mix until the dough starts to come together. It should be slightly sticky.
- Knead the Dough: Transfer the dough onto a floured surface and knead it for about 10 minutes until it becomes smooth and elastic. You can add a little more flour if the dough is too sticky.
- First Rise: Place the dough in a lightly oiled bowl, cover it with a damp cloth, and let it rise in a warm place for about 1-2 hours, or until it has doubled in size.
- Prepare the Pan: Preheat your oven to 220°C (430°F). Generously oil a baking tray with olive oil.
- Shape the Dough: Once the dough has risen, punch it down and transfer it to the prepared baking tray. Stretch and press the dough to fit the tray, making indentations all over the surface using your fingers.
- Add Toppings: In a small bowl, mix the minced garlic, chopped rosemary, and thyme with about 2 tablespoons of olive oil. Spread this mixture evenly over the dough. Sprinkle coarse sea salt on top.
- Second Rise: Let the dough rise again for about 20-30 minutes until it puffs up slightly.
- Bake the Bread: Bake in the preheated oven for 20-25 minutes until the focaccia is golden brown and crisp on the edges.
- Cool and Serve: Remove from the oven and let it cool slightly before slicing. Drizzle a bit more olive oil on top before serving if desired.
Extra Tips:
For a richer flavor, try infusing the olive oil with the garlic and herbs overnight before using it in the recipe. This will enhance the aromatic qualities of the bread.
Additionally, you can experiment with other toppings such as sliced olives, sun-dried tomatoes, or caramelized onions to add variety to your focaccia. Remember, the key to a perfect focaccia is in the rise, so guarantee your yeast is fresh and the environment is warm enough for the dough to double in size.
Enjoy your homemade Garlic and Herb Focaccia Bread warm for the best experience!
Creamy Parmesan Risotto

Creamy Parmesan Risotto is a classic Italian side dish that perfectly complements any main course. Known for its rich and velvety texture, this dish is made by slowly cooking arborio rice and gradually adding broth until the rice reaches a creamy consistency. The star of the show is the generous amount of Parmesan cheese that’s stirred in at the end, providing a deliciously nutty and salty flavor that elevates the dish to new heights.
Whether served alongside a roasted meat or as a standalone vegetarian delight, Creamy Parmesan Risotto is sure to impress your guests with its elegance and simplicity.
The key to a perfect risotto is patience and constant stirring, which helps to release the starches from the rice, creating that sought-after creaminess. Using high-quality ingredients like fresh Parmesan and homemade chicken or vegetable broth can make a significant difference in flavor. This recipe serves 4-6 people, making it ideal for a family dinner or small gathering. With a little practice, you’ll master the art of risotto and enjoy a true taste of Italian cuisine.
Ingredients:
- 1 1/2 cups arborio rice
- 4 cups chicken or vegetable broth
- 1 cup dry white wine
- 1 cup freshly grated Parmesan cheese
- 1 medium onion, finely chopped
- 3 tablespoons unsalted butter
- 2 tablespoons olive oil
- Salt and black pepper, to taste
- Fresh parsley, chopped (optional, for garnish)
Cooking Instructions:
- Prepare the Ingredients: Begin by heating the broth in a separate saucepan over low heat. Keep it warm but not boiling. Chop the onion finely and grate the Parmesan cheese.
- Sauté the Onion: In a large, heavy-bottomed pan, heat the olive oil and 1 tablespoon of butter over medium heat. Add the chopped onion and sauté for about 3-4 minutes until it becomes translucent but not browned.
- Toast the Rice: Add the arborio rice to the pan with the onions. Stir for 2 minutes to lightly toast the rice, making certain each grain is well-coated with the oil and butter.
- Deglaze with Wine: Pour in the white wine and stir continuously until it’s fully absorbed by the rice. This step adds depth and flavor to the risotto.
- Add Broth Gradually: Begin adding the warm broth, one ladleful at a time, to the rice. Stir constantly, allowing each addition of broth to be absorbed before adding the next. This process should take about 18-20 minutes.
- Check for Doneness: Taste the rice after about 18 minutes. It should be tender but still have a slight bite to it, known as ‘al dente’. If needed, add more broth and continue cooking.
- Finish with Butter and Parmesan: Once the rice is cooked to your preference, remove the pan from heat. Stir in the remaining butter and the grated Parmesan cheese. Mix until the cheese is melted and the risotto is creamy.
- Season and Serve: Taste the risotto and add salt and black pepper as desired. Garnish with chopped parsley if using, and serve immediately.
Extra Tips:
When cooking risotto, it’s essential to keep the broth warm to guarantee even cooking of the rice. Cold broth can slow down the cooking process and result in unevenly cooked grains.
Additionally, avoid rushing the process by adding too much broth at once; the gradual addition is what creates the creamy texture. If you’d like to experiment with flavors, consider adding sautéed mushrooms, peas, or asparagus to the risotto.
Always serve risotto fresh and hot, as it tends to thicken and lose its creamy texture as it cools.
Roasted Italian Vegetables

Roasted Italian Vegetables is a delightful and colorful side dish that brings together the vibrant flavors of Italy. Perfect as a complement to any main course, this dish combines a variety of fresh vegetables with aromatic herbs and spices to create a medley of flavors that burst with every bite. The roasting process enhances the natural sweetness of the vegetables while adding a slightly crisp texture. Ideal for family gatherings or a simple weeknight dinner, this dish is both nutritious and satisfying.
Preparing Roasted Italian Vegetables is simple and requires minimal effort, making it a great option for those looking to add some Mediterranean flair to their meal. By using a mix of vegetables such as zucchini, bell peppers, eggplant, and cherry tomatoes, you can create a visually appealing and flavorful dish that’s sure to impress your guests.
Seasoned with garlic, olive oil, and Italian herbs, these roasted vegetables are packed with flavor and nutrition, making them a healthy addition to your dining table.
Ingredients (Serves 4-6):
- 2 medium zucchini, sliced
- 2 bell peppers (any color), sliced
- 1 medium eggplant, cubed
- 1 pint cherry tomatoes
- 1 red onion, sliced
- 3 cloves garlic, minced
- 1/4 cup extra-virgin olive oil
- 1 teaspoon dried oregano
- 1 teaspoon dried basil
- Salt and black pepper to taste
- Fresh basil leaves for garnish (optional)
Cooking Instructions:
- Preheat the Oven: Preheat your oven to 425°F (220°C) to guarantee it’s hot enough to roast the vegetables evenly.
- Prepare the Vegetables: Wash all the vegetables thoroughly. Slice the zucchini and bell peppers, cube the eggplant, slice the red onion, and keep the cherry tomatoes whole. Make sure all the vegetable pieces are roughly the same size for even cooking.
- Mix with Seasoning: In a large mixing bowl, combine the sliced vegetables with minced garlic. Drizzle with olive oil, and sprinkle with oregano, basil, salt, and black pepper. Toss everything together until the vegetables are evenly coated with the oil and seasonings.
- Arrange on Baking Sheet: Spread the seasoned vegetables in a single layer on a large baking sheet lined with parchment paper. Guaranteeing the vegetables are spread out will help them roast rather than steam.
- Roast the Vegetables: Place the baking sheet in the preheated oven and roast for about 25-30 minutes, or until the vegetables are tender and slightly caramelized. Stir the vegetables halfway through the cooking time to promote even roasting.
- Serve: Once done, remove from the oven and let cool slightly. Transfer the roasted vegetables to a serving platter. Garnish with fresh basil leaves if desired, and serve warm.
Extra Tips: For added flavor, consider adding a sprinkle of Parmesan cheese or a drizzle of balsamic glaze before serving. Be mindful not to overcrowd the baking sheet, as this can lead to steaming rather than roasting. If needed, use two baking sheets. Feel free to experiment with other seasonal vegetables or herbs to tailor the dish to your personal preferences.
Sauteed Spinach With Garlic
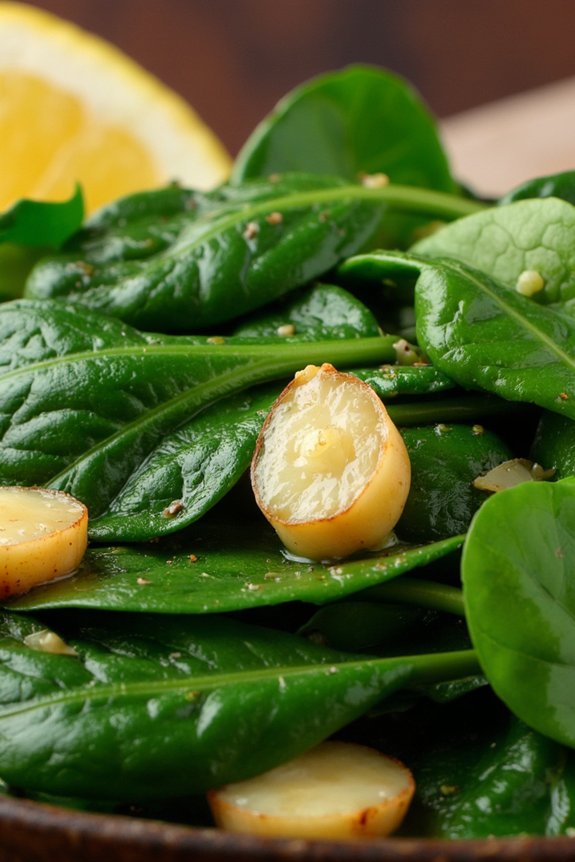
Sauteed Spinach With Garlic is a classic Italian side dish that’s both simple to make and packed with flavor. This dish combines the earthy, fresh taste of spinach with the robust aroma of garlic, creating a delightful accompaniment to any main course. Its vibrant green color and tender texture make it a visually appealing and appetizing addition to a meal.
Whether it’s served alongside a hearty pasta, a succulent roast, or a light seafood entrée, this dish is sure to enhance your dining experience with its subtle yet savory notes.
This recipe is perfect for those who want to enjoy a nutritious side dish with minimal preparation and cooking time. Spinach is rich in vitamins and minerals, making it a great choice for health-conscious individuals. The use of garlic not only adds a depth of flavor but also provides additional health benefits, as it’s known for its antioxidant properties.
This Sauteed Spinach With Garlic recipe will serve 4-6 people and can easily be doubled if you’re hosting a larger gathering.
Ingredients:
- 2 pounds fresh spinach, washed and trimmed
- 4 tablespoons olive oil
- 6 cloves garlic, thinly sliced
- Salt, to taste
- Black pepper, to taste
- Lemon wedges, for serving
Cooking Instructions:
- Prepare the Ingredients: Start by thoroughly washing the spinach to remove any dirt or grit. Trim the stems if they’re tough, leaving the tender leaves. Peel and thinly slice the garlic cloves.
- Heat the Oil: In a large skillet, heat the olive oil over medium heat. Once hot, add the sliced garlic and sauté for about 1-2 minutes until the garlic becomes fragrant and starts to turn golden. Be careful not to burn the garlic to avoid a bitter taste.
- Add the Spinach: Gradually add the spinach to the skillet. It may seem like a lot at first, but the spinach will wilt quickly. Stir occasionally to ascertain even cooking and to coat the leaves with the garlic-infused oil.
- Season and Cook: Once the spinach has wilted, season with salt and black pepper to taste. Continue to cook for another 2-3 minutes until the spinach is tender and fully cooked.
- Serve: Remove the skillet from the heat and transfer the sauteed spinach to a serving dish. Serve immediately with lemon wedges on the side for a fresh, tangy finish that complements the garlic.
Extra Tips:
When making Sauteed Spinach With Garlic, it’s important to monitor the heat carefully. High heat can burn the garlic and result in a bitter flavor.
Additionally, fresh spinach can release a lot of water as it cooks, so if you find the dish becoming too watery, simply increase the heat slightly to evaporate the excess moisture.
Finally, feel free to experiment by adding a pinch of red pepper flakes for a bit of heat or a sprinkle of grated Parmesan cheese for an added layer of flavor.
Italian Stuffed Mushrooms

Italian Stuffed Mushrooms are a delightful appetizer or side dish that brings the rich flavors of Italy to your table. With their savory stuffing of breadcrumbs, cheese, and herbs, these mushrooms are the perfect accompaniment to any Italian meal or a standout dish for your next gathering.
The combination of tender mushroom caps and the flavorful filling creates a dish that’s both comforting and elegant, sure to impress your guests.
This recipe is designed to serve 4-6 people, making it ideal for a family dinner or small party. Each mushroom cap is filled with a mixture that includes garlic, parsley, and Parmesan cheese, giving it a deliciously aromatic and cheesy profile. The stuffed mushrooms are then baked until they reach a golden perfection, offering a satisfying bite with every mouthful.
Ingredients:
- 1 lb (about 20) large white mushrooms
- 2 tablespoons olive oil
- 3 cloves garlic, minced
- 1 cup breadcrumbs
- 1/2 cup grated Parmesan cheese
- 2 tablespoons chopped fresh parsley
- 1/4 teaspoon salt
- 1/4 teaspoon black pepper
- 2 tablespoons melted butter
- 1/4 cup chicken or vegetable broth
Instructions:
1. Prepare the Mushrooms: Preheat the oven to 375°F (190°C). Clean the mushrooms with a damp paper towel to remove any dirt. Carefully remove the stems and set them aside. Place the mushroom caps on a baking sheet, cavity side up.
2. Make the Filling: Finely chop the mushroom stems. Heat olive oil in a skillet over medium heat, then add the chopped stems and minced garlic. Sauté for about 5 minutes until the stems are soft.
In a large bowl, combine the sautéed stems and garlic with breadcrumbs, Parmesan cheese, parsley, salt, and black pepper. Mix well.
3. Stuff the Mushrooms: Spoon the filling mixture into each mushroom cap, pressing it gently to pack the stuffing securely.
4. Bake the Mushrooms: Drizzle the melted butter over the stuffed mushrooms and then pour the chicken or vegetable broth into the baking dish. This will help keep the mushrooms moist during baking. Bake in the preheated oven for 20-25 minutes, or until the mushrooms are tender and the tops are golden brown.
5. Serve: Remove the mushrooms from the oven and let them cool slightly before serving. They can be served warm or at room temperature.
Extra Tips:
For added flavor, consider incorporating a pinch of red pepper flakes into the stuffing mixture for a bit of heat.
If you prefer a creamier filling, try mixing in some softened cream cheese with the breadcrumb blend.
Also, for a gluten-free option, substitute regular breadcrumbs with gluten-free breadcrumbs or crushed gluten-free crackers.
Remember not to overstuff the mushroom caps, as the filling expands slightly during baking. Enjoy these stuffed mushrooms as a delicious side dish, or double the recipe for a larger crowd!
Tuscan White Bean Salad

Tuscan White Bean Salad is a delightful Italian side dish that’s both hearty and invigorating, making it perfect for a variety of occasions. This salad combines creamy white beans with fresh vegetables and herbs, creating a dish that isn’t only nutritious but also bursting with flavor.
The combination of olive oil, lemon juice, and a hint of garlic brings all the ingredients together, giving the salad a bright and zesty finish that’s sure to please the palate.
This salad is a wonderful accompaniment to grilled meats or can be enjoyed on its own as a light meal. It’s best served chilled or at room temperature, allowing the flavors to meld beautifully. The recipe below serves 4-6 people, making it an ideal choice for a family dinner or a small gathering with friends.
Ingredients:
- 2 cans (15 ounces each) of cannellini beans, drained and rinsed
- 1 small red onion, finely chopped
- 1 cup cherry tomatoes, halved
- 1 cucumber, diced
- 1/4 cup fresh parsley, chopped
- 1/4 cup fresh basil, chopped
- 1/4 cup extra virgin olive oil
- 2 tablespoons lemon juice
- 1 clove garlic, minced
- Salt and pepper to taste
- Optional: 1/4 cup crumbled feta cheese
Cooking Instructions:
- Prepare the Beans: Start by draining and rinsing the cannellini beans thoroughly. Place them in a large mixing bowl to serve as the base of your salad.
- Chop the Vegetables: Finely chop the red onion, halve the cherry tomatoes, and dice the cucumber. Add these to the bowl with the beans.
- Add the Herbs: Chop the fresh parsley and basil, then sprinkle them over the bean and vegetable mixture to add a fragrant aroma and fresh taste.
- Make the Dressing: In a small bowl, whisk together the extra virgin olive oil, lemon juice, minced garlic, salt, and pepper until well combined.
- Combine the Salad: Pour the dressing over the bean and vegetable mixture. Toss everything gently to guarantee all ingredients are well coated with the dressing.
- Chill and Serve: Cover the salad with plastic wrap and refrigerate for at least 30 minutes to allow the flavors to meld. Before serving, give it a final toss and sprinkle with crumbled feta cheese if desired.
Extra Tips:
For the best flavor, use fresh herbs and ripe vegetables. If you have time, prepare the salad a few hours in advance and let it chill in the refrigerator; this will enhance the flavors even more.
Feel free to substitute or add additional vegetables such as bell peppers or olives to customize the salad to your taste. Additionally, if you prefer a more tangy taste, add a bit more lemon juice or a splash of red wine vinegar.
Enjoy your Tuscan White Bean Salad as a versatile side dish or a satisfying light meal!
Lemon and Herb Orzo
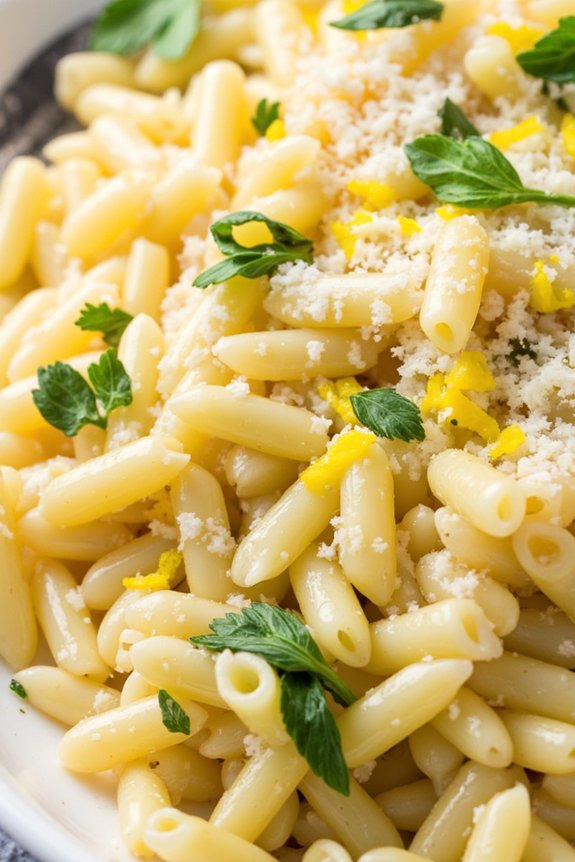
Lemon and Herb Orzo is a delightful Italian side dish that brings a burst of fresh flavors to any meal. This dish features orzo pasta, a rice-shaped pasta that cooks quickly and absorbs flavors beautifully. The combination of freshly squeezed lemon juice, aromatic herbs, and a hint of garlic creates a light yet satisfying accompaniment to grilled meats, seafood, or roasted vegetables.
Perfect for a family dinner or a special gathering, this recipe is both easy to prepare and guaranteed to impress your guests with its vibrant taste.
The beauty of Lemon and Herb Orzo lies in its simplicity and versatility. The dish can be customized with your choice of fresh herbs, such as parsley, basil, or mint, to suit your preference or to complement the main course. The lemon adds a zesty brightness, while a touch of parmesan cheese provides a rich, savory finish.
Whether you’re a seasoned cook or a beginner in the kitchen, this recipe is straightforward and requires minimal ingredients, making it an ideal choice for a quick weeknight side dish or a leisurely weekend meal.
Ingredients (serving size: 4-6 people):
- 1 ½ cups orzo pasta
- 2 tablespoons olive oil
- 2 cloves garlic, minced
- 1 ½ cups chicken or vegetable broth
- Zest and juice of 1 large lemon
- ¼ cup freshly grated Parmesan cheese
- ¼ cup chopped fresh parsley
- 2 tablespoons chopped fresh basil or mint
- Salt and pepper, to taste
Cooking Instructions:
- Cook the Orzo: In a medium saucepan, bring the chicken or vegetable broth to a boil. Add the orzo pasta and a pinch of salt. Reduce the heat to medium and cook the orzo, stirring occasionally, until it’s al dente, about 8-10 minutes. Drain any excess liquid if necessary.
- Prepare the Aromatics: While the orzo is cooking, heat the olive oil in a large skillet over medium heat. Add the minced garlic and sauté for about 1 minute, or until fragrant but not browned.
- Combine Ingredients: Add the cooked orzo to the skillet with the garlic. Stir in the lemon zest and juice, and mix until the orzo is evenly coated with the lemony garlic oil.
- Finish with Cheese and Herbs: Remove the skillet from the heat and stir in the freshly grated Parmesan cheese until melted and well combined. Add the chopped parsley and basil (or mint), and season with salt and pepper to taste.
- Serve: Transfer the Lemon and Herb Orzo to a serving dish. Garnish with additional herbs and a sprinkle of Parmesan cheese, if desired. Serve warm or at room temperature alongside your main course.
Extra Tips:
When making Lemon and Herb Orzo, verify that the orzo isn’t overcooked; it should be tender yet firm to the bite (al dente).
If using fresh herbs, add them at the end of cooking to preserve their vibrant color and delicate flavor. Feel free to experiment with different herbs or add a touch of chili flakes for a bit of heat.
For a creamier texture, a tablespoon of butter can be added along with the Parmesan cheese. This dish is best served fresh, but it can also be prepared in advance and gently reheated, adding a splash of broth or water to loosen the consistency before serving.
Balsamic Glazed Brussels Sprouts
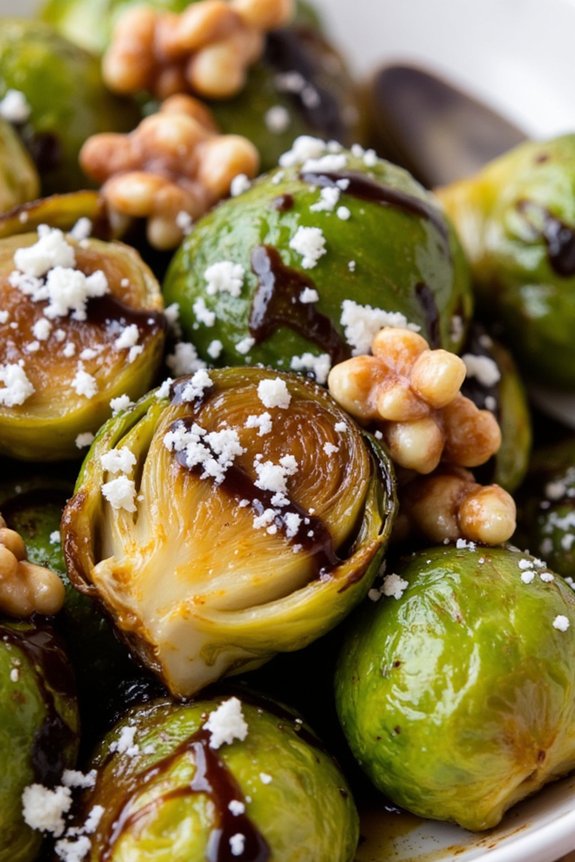
Balsamic Glazed Brussels Sprouts are a delightful Italian side dish that perfectly balances the earthy flavors of Brussels sprouts with the sweet tang of balsamic glaze. This dish is a great accompaniment to a variety of main courses, adding a burst of flavor and a touch of elegance to any meal.
Roasting the Brussels sprouts brings out their natural sweetness and crispiness, while the balsamic glaze adds a rich, caramelized coating that’s simply irresistible. Whether you’re hosting a dinner party or looking to spice up a weeknight meal, this recipe is certain to impress.
Preparing Balsamic Glazed Brussels Sprouts involves roasting the sprouts until they’re golden brown and tender, then tossing them in a balsamic glaze that has been reduced to intensify its flavor. This side dish isn’t only delicious but also healthy, as Brussels sprouts are packed with vitamins and antioxidants.
The combination of textures and flavors makes it a crowd-pleaser, and it’s a great way to introduce Brussels sprouts to those who mightn’t normally enjoy them. Serve this dish alongside your favorite Italian main course for an authentic culinary experience.
Ingredients for 4-6 servings:
- 1 1/2 pounds Brussels sprouts
- 2 tablespoons olive oil
- Salt, to taste
- Freshly ground black pepper, to taste
- 1/2 cup balsamic vinegar
- 2 tablespoons honey
- 1/4 teaspoon garlic powder
- 1/4 teaspoon onion powder
- 1/4 cup chopped walnuts (optional)
- 1/4 cup freshly grated Parmesan cheese (optional)
Cooking Instructions:
- Preheat the Oven: Start by preheating your oven to 400°F (200°C). This temperature is ideal for roasting Brussels sprouts, allowing them to become crispy on the outside while remaining tender on the inside.
- Prepare the Brussels Sprouts: Wash the Brussels sprouts thoroughly, then trim the ends and remove any yellowing or damaged outer leaves. Cut each sprout in half to guarantee even cooking.
- Season the Sprouts: In a large mixing bowl, combine the halved Brussels sprouts with olive oil, salt, and pepper. Toss the sprouts until they’re evenly coated with the oil and seasonings.
- Roast the Sprouts: Spread the seasoned Brussels sprouts in a single layer on a baking sheet. Roast them in the preheated oven for 20-25 minutes, or until they’re tender and have developed a golden brown color.
- Prepare the Balsamic Glaze: While the sprouts are roasting, prepare the balsamic glaze. In a small saucepan, combine balsamic vinegar, honey, garlic powder, and onion powder. Bring the mixture to a simmer over medium heat and cook until it reduces by half, becoming thick and syrupy.
- Combine and Serve: Once the Brussels sprouts are done roasting, remove them from the oven and transfer them to a serving dish. Drizzle the balsamic glaze over the sprouts and toss to coat evenly. If desired, sprinkle with chopped walnuts and freshly grated Parmesan cheese before serving.
Extra Tips:
To enhance the flavor of your Balsamic Glazed Brussels Sprouts, consider adding a sprinkle of red pepper flakes for a hint of heat. If you prefer a more pronounced garlic flavor, fresh minced garlic can be sautéed briefly in olive oil and added to the glaze.
Be careful not to overcook the Brussels sprouts, as they can become mushy if left in the oven too long. For added texture and flavor, toasted pine nuts can be used in place of walnuts. This dish is best served immediately while the glaze is still warm and the sprouts retain their crispiness.
Tomato and Basil Bruschetta

Tomato and Basil Bruschetta is a classic Italian side dish that perfectly captures the essence of fresh summer flavors. This simple yet delicious appetizer is made with ripe tomatoes, fragrant basil, and crunchy toasted bread. It’s an ideal choice for a light snack or to serve as an appetizer at a dinner party. The vibrant colors and aromatic ingredients make it a visually appealing and tasty addition to any meal.
Whether you’re hosting guests or simply treating yourself, Tomato and Basil Bruschetta is certain to be a hit.
The key to a great bruschetta lies in the quality of the ingredients. Freshly baked bread, juicy tomatoes, and aromatic basil are essential to achieve the authentic Italian taste. The tomatoes should be perfectly ripe to guarantee a sweet and tangy flavor, while the basil should be fresh to provide that signature herbal fragrance.
The bread is typically grilled or toasted until golden brown, giving it a satisfying crunch that complements the soft tomato topping. With just a few simple ingredients and minimal preparation, Tomato and Basil Bruschetta can be made in no time.
Ingredients (Serving 4-6 people):
- 6 ripe tomatoes, diced
- 1/4 cup fresh basil leaves, chopped
- 3 cloves garlic, minced
- 1 tablespoon balsamic vinegar
- 1/4 cup olive oil
- Salt and pepper to taste
- 1 baguette or Italian bread, sliced
- 1/4 cup grated Parmesan cheese (optional)
Cooking Instructions:
- Prepare the Tomato Mixture: In a medium-sized bowl, combine the diced tomatoes, chopped basil, minced garlic, balsamic vinegar, and olive oil. Season with salt and pepper to taste. Stir the mixture gently to affirm all ingredients are well combined. Let it sit for about 15 minutes to allow the flavors to meld.
- Prepare the Bread: Preheat your broiler or grill to medium-high heat. Slice the baguette or Italian bread into 1/2-inch thick slices. Brush each slice lightly with olive oil on both sides.
- Toast the Bread: Place the bread slices on a baking sheet and broil for 2-3 minutes on each side, or until they’re golden brown and crispy. Alternatively, grill the bread slices until they’ve nice grill marks and are crisp.
- Assemble the Bruschetta: Once the bread is toasted, remove it from the oven or grill. Spoon the tomato mixture generously onto each toasted slice. If desired, sprinkle grated Parmesan cheese on top for added flavor.
- Serve Immediately: Arrange the bruschetta on a serving platter and serve immediately to guarantee the bread remains crunchy. Enjoy this delightful appetizer while the bread is still warm and crisp.
Extra Tips:
For the best results, use high-quality extra virgin olive oil for a richer flavor. If you prefer a bit of heat, consider adding a pinch of red pepper flakes to the tomato mixture.
To prevent the bread from becoming soggy, assemble the bruschetta just before serving. If making in advance, keep the tomato mixture and toasted bread separate until ready to serve.
This dish can be easily customized by adding other toppings such as mozzarella, olives, or roasted red peppers to suit your taste preferences.
Zucchini and Parmesan Gratin

The Zucchini and Parmesan Gratin is a delightful Italian side dish that brings out the best in zucchini with the help of a creamy, cheesy topping. This dish is perfect for accompanying a wide variety of main courses, whether you’re having a simple grilled chicken or a more elaborate roast. The combination of tender zucchini and the rich flavor of Parmesan cheese creates a satisfying and elegant dish that can elevate any meal.
Not only is it delicious, but it’s also a fantastic way to use up an abundance of summer zucchini from your garden or local market. This gratin is a versatile dish that pairs well with many different flavors, making it a staple in any home cook’s repertoire. The preparation is straightforward, and it can easily be made ahead of time and baked just before serving.
With its golden, bubbling cheese topping and the layers of thinly sliced zucchini, this dish is as visually appealing as it’s tasty. It’s an excellent choice for those who are looking to expand their list of go-to side dishes with something both nutritious and indulgent.
Ingredients (serving size: 4-6 people):
- 4 medium zucchinis, thinly sliced
- 1 cup grated Parmesan cheese
- 1 cup heavy cream
- 2 cloves garlic, minced
- 1 teaspoon fresh thyme leaves
- Salt and pepper to taste
- 2 tablespoons olive oil
- 1/4 cup breadcrumbs
Cooking Instructions:
- Preheat and Prepare: Preheat your oven to 375°F (190°C). Grease a baking dish with olive oil to prevent the gratin from sticking.
- Slice the Zucchini: Use a knife or mandoline to thinly slice the zucchinis into rounds, about 1/8-inch thick. This guarantees even cooking and a delicate texture.
- Layer the Ingredients: Arrange a layer of sliced zucchini in the bottom of the baking dish, slightly overlapping each slice. Sprinkle a portion of the minced garlic, fresh thyme leaves, salt, and pepper over the zucchini. Add a light sprinkle of Parmesan cheese on top.
- Build the Gratin: Continue layering the zucchini slices, garlic, thyme, salt, pepper, and Parmesan cheese until all the ingredients are used, finishing with a top layer of Parmesan.
- Add the Cream: Pour the heavy cream evenly over the layered zucchini in the baking dish, allowing it to seep through the layers.
- Top with Breadcrumbs: Mix the breadcrumbs with a tablespoon of olive oil until well coated. Sprinkle the breadcrumb mixture over the top of the gratin for a crunchy topping.
- Bake the Gratin: Place the baking dish in the preheated oven and bake for 30-35 minutes, or until the top is golden brown and the zucchini is tender when pierced with a fork.
- Serve: Let the gratin cool for a few minutes before serving. This will allow the dish to set slightly and make it easier to cut into portions.
Extra Tips:
For a more robust flavor, consider adding a layer of thinly sliced onions or a pinch of nutmeg to the cream before pouring it over the zucchini. If you prefer a crispier topping, you can broil the gratin for an additional 2-3 minutes after baking, watching closely to prevent burning.
To make this dish even more nutritious, try adding a handful of spinach or kale between the zucchini layers. This gratin is best enjoyed fresh from the oven, but leftovers can easily be reheated in the oven to maintain the crispy texture.
Italian-Style Ratatouille
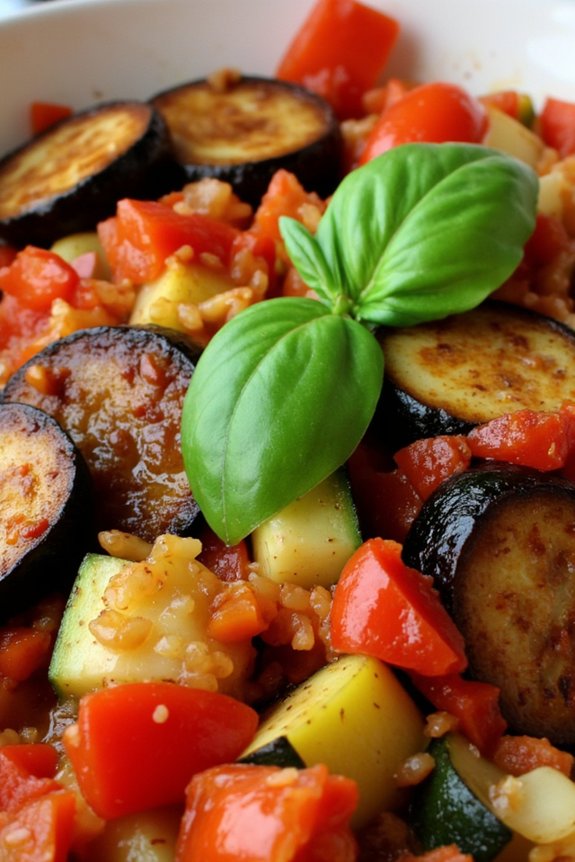
Italian-Style Ratatouille is a delightful and vibrant vegetable medley that embodies the essence of Italian cuisine. This dish combines a mix of fresh vegetables, herbs, and olive oil to create a healthy and flavorful side dish that’s perfect for any meal. The key to a great ratatouille is using the freshest vegetables you can find, allowing their natural flavors to shine through.
This Italian take on the classic French dish adds a touch of Italian herbs and seasoning, making it a perfect accompaniment to grilled meats or served over a bed of pasta or rice. This dish isn’t only delicious but also a feast for the eyes with its colorful array of vegetables. It’s a great way to use up any seasonal produce you might’ve on hand, and it’s versatile enough to be adapted with whatever vegetables are in season.
Whether you’re serving it at a family gathering or a casual dinner party, Italian-Style Ratatouille is sure to impress and satisfy your guests. The following recipe is designed for a serving size of 4-6 people, ensuring that everyone gets a generous portion of these flavorful vegetables.
Ingredients (serving size: 4-6 people):
- 2 medium eggplants, diced
- 2 medium zucchinis, sliced
- 2 bell peppers (any color), chopped
- 1 large onion, chopped
- 4 cloves garlic, minced
- 4 ripe tomatoes, diced
- 1/4 cup olive oil
- 1 teaspoon dried oregano
- 1 teaspoon dried basil
- Salt and pepper to taste
- Fresh basil leaves for garnish
Cooking Instructions:
- Prepare the Vegetables: Start by washing and drying all the vegetables. Dice the eggplants and tomatoes, slice the zucchinis, chop the bell peppers and onion, and mince the garlic.
- Sauté the Onion and Garlic: Heat the olive oil in a large skillet over medium heat. Add the chopped onion and minced garlic, sautéing for about 3-4 minutes until the onion becomes translucent and the garlic is fragrant.
- Cook the Vegetables: Add the diced eggplants, sliced zucchinis, and chopped bell peppers to the skillet. Stir the vegetables to coat them with the olive oil, and cook for about 10 minutes, stirring occasionally, until they begin to soften.
- Add the Tomatoes and Seasoning: Stir in the diced tomatoes, dried oregano, and dried basil. Season with salt and pepper to taste. Continue to cook for another 15-20 minutes, stirring occasionally, until all the vegetables are tender and the flavors are well combined.
- Let it Simmer: Reduce the heat to low and let the ratatouille simmer for an additional 10 minutes to allow the flavors to meld together.
- Garnish and Serve: Remove from heat, garnish with fresh basil leaves, and serve hot. Italian-Style Ratatouille can be enjoyed as a side dish or a vegetarian main course.
Extra Tips:
For the best results, try to use ripe, in-season vegetables, as they’ll provide the most flavor. If you prefer a richer taste, you can add a splash of balsamic vinegar or red wine during the cooking process.
For a creamier texture, sprinkle some grated Parmesan cheese over the top before serving. This dish can also be made ahead of time, as the flavors only improve after sitting for a day. Simply reheat before serving, and enjoy this delicious Italian-Style Ratatouille with your favorite main dishes!
Cheese and Herb Polenta

Cheese and Herb Polenta is a classic Italian side dish that combines the creamy texture of polenta with the rich flavors of cheese and fresh herbs. This dish isn’t only versatile but also incredibly satisfying, making it the perfect accompaniment to a wide variety of main courses.
Whether you’re serving it alongside a hearty stew or grilled meats, this polenta recipe is certain to elevate your meal with its delightful taste and comforting warmth.
Traditionally made with cornmeal, polenta is a staple in Italian cuisine that has been enjoyed for centuries. By incorporating cheese and herbs, this recipe adds a modern twist to the classic preparation, bringing a depth of flavor that’s both aromatic and savory.
The addition of butter creates a smooth, velvety consistency that melts in your mouth. This Cheese and Herb Polenta serves 4-6 people, making it ideal for family dinners or small gatherings.
Ingredients:
- 1 cup of polenta (coarse cornmeal)
- 4 cups of water
- 1 teaspoon of salt
- 2 tablespoons of unsalted butter
- 1 cup of grated Parmesan cheese
- 1/4 cup of chopped fresh herbs (such as basil, parsley, or thyme)
- Black pepper to taste
Instructions:
- Prepare the Polenta Base: In a medium-sized saucepan, bring the 4 cups of water to a boil. Add 1 teaspoon of salt to the boiling water. Once the water is boiling, slowly whisk in the polenta to prevent lumps from forming.
- Cook the Polenta: Reduce the heat to low and let the polenta simmer. Stir frequently, allowing the polenta to thicken, which should take about 25-30 minutes. The consistency should be creamy and smooth.
- Incorporate Butter and Cheese: Once the polenta is thick, stir in the 2 tablespoons of unsalted butter until melted and fully incorporated. Then, add 1 cup of grated Parmesan cheese, stirring until the cheese is evenly distributed and melted into the mixture.
- Add Fresh Herbs: Stir in the 1/4 cup of chopped fresh herbs, distributing them evenly throughout the polenta. This will infuse the dish with a fresh, aromatic flavor.
- Season to Taste: Add black pepper to taste, adjusting the seasoning according to your preference. Stir well to confirm all ingredients are well combined.
- Serve the Polenta: Remove the polenta from heat and allow it to sit for a few minutes before serving. This will let the flavors meld together beautifully.
Extra Tips: When preparing polenta, it’s important to stir frequently to prevent it from sticking to the bottom of the pan and burning. If you prefer a creamier consistency, you can substitute some of the water with milk or cream.
Additionally, feel free to experiment with different types of cheese for added flavor complexity, such as Fontina or Gorgonzola. The choice of herbs can also be varied according to what you have on hand or your personal preference.
Arugula and Parmesan Salad

Arugula and Parmesan Salad is a classic Italian side dish that combines the peppery flavor of fresh arugula with the rich, nutty taste of Parmesan cheese. This simple yet elegant salad is perfect for those who appreciate fresh ingredients and a light, invigorating accompaniment to their meals.
The salad is incredibly easy to prepare and pairs beautifully with a variety of main courses, from pasta to grilled meats. With its minimal ingredients and bold flavors, Arugula and Parmesan Salad is a reflection of the beauty of Italian cuisine’s simplicity.
This salad isn’t only delicious but also packed with nutrients. Arugula is a leafy green that’s rich in vitamins A, C, and K, as well as calcium and iron. Parmesan cheese adds a delightful depth of flavor and a boost of protein and calcium.
The combination of these ingredients, along with a drizzle of high-quality extra virgin olive oil and a squeeze of fresh lemon juice, creates a harmonious balance of flavors and textures. This dish is perfect for serving 4-6 people as a side dish, making it an ideal choice for family dinners or casual gatherings with friends.
Ingredients for Arugula and Parmesan Salad (Serves 4-6):
- 6 cups fresh arugula
- 1 cup shaved Parmesan cheese
- 1/4 cup extra virgin olive oil
- Juice of 1 lemon
- Salt, to taste
- Freshly ground black pepper, to taste
Cooking Instructions:
- Prepare the Arugula: Rinse the arugula leaves thoroughly under cold water to remove any dirt or grit. Pat them dry with a clean kitchen towel or use a salad spinner to remove excess water.
- Assemble the Salad: In a large salad bowl, combine the arugula with the shaved Parmesan cheese. Make sure the cheese is evenly distributed throughout the salad.
- Make the Dressing: In a small bowl, whisk together the extra virgin olive oil and the freshly squeezed lemon juice. Add salt and freshly ground black pepper to taste, then whisk again to combine.
- Dress the Salad: Pour the dressing over the arugula and Parmesan mixture. Gently toss the salad with salad tongs or your hands to verify the dressing coats all of the ingredients evenly.
- Serve Immediately: Transfer the salad to a serving platter or individual plates. Serve immediately to enjoy the fresh flavors and crisp texture.
Extra Tips:
To enhance the flavor of this salad, consider adding a handful of toasted pine nuts or walnuts for a bit of crunch. If you prefer a more intense lemon flavor, zest the lemon before juicing and add the zest to the dressing.
For an additional burst of freshness, try incorporating a handful of cherry tomatoes or thinly sliced radishes. Always use high-quality Parmesan cheese and extra virgin olive oil for the best taste, and feel free to adjust the seasoning according to your preference.