

As the crisp autumn air sweeps in, there’s nothing quite like the comfort of rustic Italian dishes. The earthy aroma of porcini mushrooms and the sweet, nutty scent of roasted chestnuts bring warmth to the kitchen. This season is perfect for gathering with loved ones over a steaming bowl of minestrone. Or perhaps enjoying the delicate flavors of pumpkin ravioli. Let’s explore these heartwarming recipes together.
Creamy Porcini Mushroom Risotto
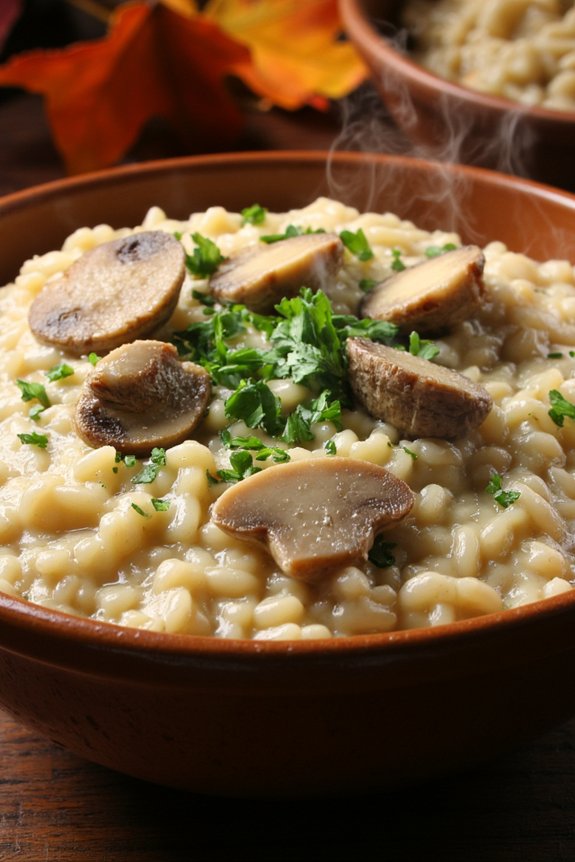
As the leaves turn golden and the air becomes crisp, nothing comforts quite like a warm, creamy bowl of risotto. Our Creamy Porcini Mushroom Risotto is a celebration of autumn’s bounty, featuring the earthy richness of porcini mushrooms combined with the velvety texture of Arborio rice. This dish captures the essence of rustic Italian cooking, where simplicity meets depth of flavor, making it a perfect centerpiece for any fall gathering.
Porcini mushrooms, with their intense, nutty flavor, are the star of this risotto. When paired with the creamy consistency of the rice, they create a dish that’s both luxurious and comforting. The key to a successful risotto lies in the gradual incorporation of broth, allowing the rice to release its starches and become wonderfully creamy without the addition of heavy cream. Whether you’re serving it as a main course or a decadent side, this risotto is sure to impress.
Ingredients (Serves 4-6):
- 2 cups Arborio rice
- 1 ounce dried porcini mushrooms
- 6 cups vegetable or chicken broth
- 1 cup dry white wine
- 1 medium onion, finely chopped
- 2 cloves garlic, minced
- 4 tablespoons unsalted butter
- 1 cup freshly grated Parmesan cheese
- Salt and freshly ground black pepper, to taste
- 2 tablespoons olive oil
- 2 tablespoons fresh parsley, chopped
Cooking Instructions:
- Prepare the Porcini Mushrooms: Begin by rehydrating the dried porcini mushrooms. Place them in a bowl and cover with 2 cups of hot water. Let them soak for about 20 minutes until they’re soft. Drain the mushrooms, reserving the liquid, and chop them finely.
- Heat the Broth: In a saucepan, bring the vegetable or chicken broth to a gentle simmer. Add the reserved mushroom soaking liquid, being careful to leave any sediment behind. Keep the broth warm over low heat.
- Sauté the Aromatics: In a large, heavy-bottomed pot, heat the olive oil over medium heat. Add the chopped onion and garlic, and sauté until the onion is translucent, about 5 minutes.
- Toast the Rice: Stir in the Arborio rice and cook for about 2 minutes, until the grains are well-coated with oil and lightly toasted. This step is essential for maintaining the rice’s texture during cooking.
- Add the Mushrooms and Wine: Add the chopped porcini mushrooms to the pot. Pour in the white wine and stir constantly until the wine has been absorbed by the rice.
- Cook the Risotto: Begin adding the warm broth to the rice, one ladleful at a time, stirring frequently. Wait until the liquid is mostly absorbed before adding more. Continue this process until the rice is al dente and creamy, about 18-20 minutes.
- Finish with Butter and Parmesan: Once the rice is cooked to your liking, stir in the butter and Parmesan cheese. Season with salt and pepper to taste. The risotto should be creamy and slightly runny.
- Garnish and Serve: Remove from heat and let the risotto sit for a minute. Garnish with chopped parsley before serving.
Extra Tips:
For the creamiest risotto, use a wooden spoon for stirring, as it helps to gently release the rice’s starches. If you prefer a richer flavor, consider adding a splash of cream or a drizzle of truffle oil before serving.
Additionally, maintaining a consistent stirring motion while gradually adding the broth is key to achieving the perfect texture. If you find yourself running out of broth before the rice is fully cooked, simply warm some additional broth or water to finish the process.
Enjoy this rustic dish with a glass of the same white wine used in the recipe for a perfect pairing.
Classic Minestrone Soup
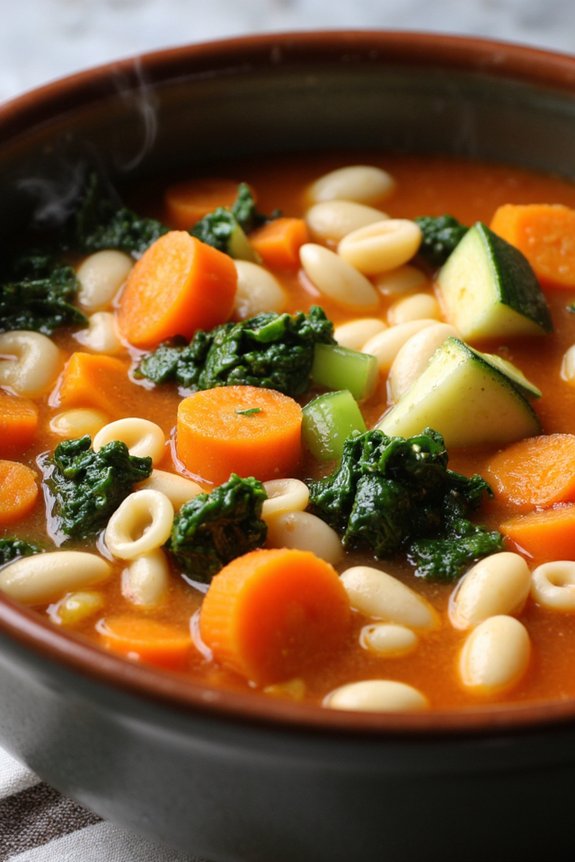
Embrace the rustic charm of Italy’s autumn with a warm bowl of Classic Minestrone Soup. This hearty dish is a staple in Italian cuisine, known for its rich flavors and wholesome ingredients. Minestrone is a versatile soup that varies by region, but it consistently features a delightful mix of seasonal vegetables, beans, and pasta, all simmered in a savory broth. As the leaves change color and the air turns crisp, this nourishing soup is perfect for warming both the body and soul.
Originating from humble Italian kitchens, Minestrone Soup was traditionally made with whatever vegetables were available, making it an excellent recipe to adapt to the produce of the season. This version focuses on capturing the essence of autumn with ingredients like butternut squash, kale, and hearty beans. It’s a nutritious and satisfying meal that can easily be adjusted to suit your taste preferences or dietary needs. Serve it with crusty bread for a complete and comforting dinner that will transport you to a cozy Italian countryside.
Ingredients for 4-6 servings:
- 2 tablespoons olive oil
- 1 large onion, diced
- 2 cloves garlic, minced
- 2 carrots, diced
- 2 celery stalks, diced
- 1 small butternut squash, peeled and diced
- 1 zucchini, diced
- 1 can (14 oz) diced tomatoes
- 6 cups vegetable broth
- 1 can (14 oz) cannellini beans, drained and rinsed
- 1 cup kale, chopped
- 1 teaspoon dried oregano
- 1 teaspoon dried basil
- Salt and pepper to taste
- 1/2 cup small pasta (such as ditalini or elbow)
- Grated Parmesan cheese (optional, for serving)
Cooking Instructions:
- Prepare the Base: Begin by heating the olive oil in a large pot over medium heat. Add the diced onion and sauté for about 5 minutes until it’s translucent. Add the minced garlic and cook for an additional minute, ensuring it doesn’t burn.
- Add Vegetables: Stir in the diced carrots, celery, butternut squash, and zucchini. Cook these vegetables for about 5-7 minutes, stirring occasionally, until they begin to soften.
- Incorporate Tomatoes and Broth: Add the can of diced tomatoes, including their juices, to the pot. Pour in the vegetable broth and bring the mixture to a gentle simmer.
- Season and Simmer: Stir in the cannellini beans, chopped kale, dried oregano, and dried basil. Season with salt and pepper to taste. Allow the soup to simmer for about 20 minutes, or until the vegetables are tender.
- Cook the Pasta: Add the pasta to the soup and continue to simmer for an additional 10 minutes, or until the pasta is al dente.
- Finalize and Serve: Taste and adjust the seasoning if necessary. Serve hot, garnished with grated Parmesan cheese if desired.
Extra Tips:
For an even heartier soup, consider adding a cup of cooked Italian sausage or pancetta at the beginning with the onions. If you prefer a thicker consistency, mash some of the beans before adding them to the soup.
Minestrone is highly adaptable; feel free to use other seasonal vegetables or beans you have on hand. This soup also improves with time, so feel free to make it a day in advance for the flavors to meld beautifully. When reheating, you may need to add a bit more broth or water, as the pasta tends to absorb liquid over time.
Pumpkin Ravioli With Sage Butter

As the crisp autumn air settles in, there’s no better way to embrace the season than with a cozy and flavorful dish like Pumpkin Ravioli With Sage Butter. This rustic Italian recipe combines the natural sweetness of pumpkin with the earthy aroma of sage, creating a harmonious balance that’s both comforting and elegant. The delicate pasta envelopes a creamy pumpkin filling, while the nutty richness of browned butter infused with sage leaves elevates the dish to a whole new level of deliciousness.
Perfect for a family dinner or a festive gathering, this recipe serves 4-6 people and will surely impress your guests with its authentic Italian flavors. The process of making ravioli from scratch may seem intimidating at first, but with a little patience and practice, you’ll find it to be a rewarding culinary adventure. Whether you’re an experienced cook or a beginner in the kitchen, this recipe is sure to become a cherished favorite in your autumn cooking repertoire.
Ingredients:
- 2 cups all-purpose flour
- 3 large eggs
- 1 tablespoon olive oil
- 1 cup pumpkin puree
- 1/4 cup grated Parmesan cheese
- 1/2 teaspoon nutmeg
- Salt and pepper, to taste
- 1/2 cup unsalted butter
- 12 fresh sage leaves
- 1/4 cup toasted pine nuts (optional)
- Extra Parmesan cheese for serving
Cooking Instructions:
- Prepare the Pasta Dough: On a clean surface, mound the flour and make a well in the center. Crack the eggs into the well and add the olive oil. Use a fork to gradually incorporate the flour into the eggs, then knead the dough by hand for about 8-10 minutes until smooth and elastic. Wrap the dough in plastic wrap and let it rest for at least 30 minutes.
- Make the Filling: In a medium bowl, combine the pumpkin puree, Parmesan cheese, nutmeg, salt, and pepper. Mix until well combined and set aside.
- Roll Out the Dough: Divide the rested dough into four pieces. Using a pasta machine or rolling pin, roll out each piece into thin sheets. If using a pasta machine, start with the widest setting and gradually move to the thinnest. Keep the sheets covered with a damp cloth to prevent drying.
- Assemble the Ravioli: Place one sheet of pasta on a floured surface. Drop small spoonfuls of the pumpkin filling onto the sheet, leaving enough space between each mound. Brush the edges and between the mounds with water, then place another sheet of pasta on top. Press around the filling to seal the edges and cut into individual ravioli using a pasta cutter or knife.
- Cook the Ravioli: Bring a large pot of salted water to a gentle boil. Add the ravioli in batches and cook for 3-4 minutes, until they float to the surface and are tender. Remove with a slotted spoon and set aside.
- Prepare the Sage Butter: In a large skillet, melt the butter over medium heat. Add the sage leaves and cook until the butter turns golden brown and the sage becomes crispy, about 3-4 minutes.
- Serve: Add the cooked ravioli to the skillet with the sage butter, gently tossing to coat. Serve immediately, garnished with toasted pine nuts and extra Parmesan cheese if desired.
Extra Tips:
When making the pasta dough, make sure that it’s well-kneaded to achieve the right texture. It should be smooth and slightly elastic, which will help it roll out more easily. If the dough feels too dry, add a little water, a teaspoon at a time. On the other hand, if it’s too sticky, incorporate a bit more flour.
Additionally, when cooking the ravioli, avoid overcrowding the pot to prevent them from sticking together. Finally, be cautious when browning the butter, as it can go from perfectly nutty to burnt quite quickly.
Hearty Osso Buco With Gremolata
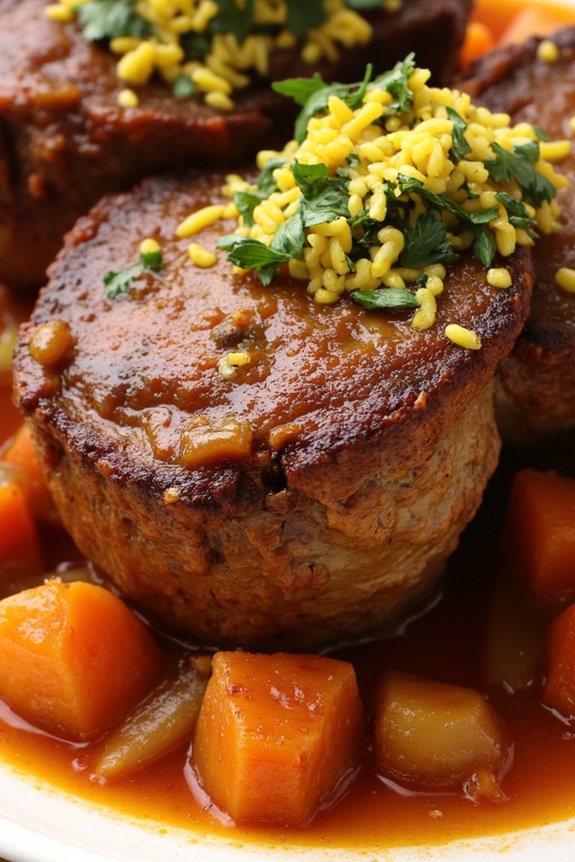
Osso Buco is a classic Italian dish that celebrates the rich and robust flavors of slowly braised meat. This hearty autumn recipe is perfect for cooler weather, providing a comforting yet elegant meal that’s bound to impress.
Osso Buco traditionally uses veal shanks, which are slowly cooked with a medley of vegetables, white wine, and broth until they reach a tender, melt-in-your-mouth consistency. This dish is then topped with gremolata, a zesty mixture of lemon zest, garlic, and parsley, adding a burst of freshness that beautifully complements the richness of the braised veal.
The key to a successful Osso Buco is patience; allowing the meat to braise slowly guarantees that it absorbs all the flavors while becoming exceedingly tender. Served with creamy polenta or a rich risotto, this dish is a quintessential example of Italian comfort food.
Whether you’re hosting a dinner party or simply enjoying a quiet weekend meal, Osso Buco is a dish that brings warmth and an authentic taste of Italy to your table.
Ingredients (Serves 4-6):
- 4-6 veal shanks, about 1 1/2 inches thick
- Salt and freshly ground black pepper
- 1/2 cup all-purpose flour, for dusting
- 1/4 cup olive oil
- 2 tablespoons unsalted butter
- 1 large onion, finely chopped
- 2 carrots, finely chopped
- 2 celery stalks, finely chopped
- 4 cloves garlic, minced
- 1 cup dry white wine
- 2 cups beef or veal broth
- 1 can (14 ounces) diced tomatoes, with juice
- 1 teaspoon dried thyme
- 1 bay leaf
For the Gremolata:
- Zest of 1 lemon
- 2 cloves garlic, minced
- 1/4 cup fresh parsley, finely chopped
Cooking Instructions:
- Prepare the Veal Shanks: Season the veal shanks with salt and pepper. Dust each shank with flour, shaking off the excess.
- Sear the Veal Shanks: In a large Dutch oven or heavy-bottomed pot, heat the olive oil over medium-high heat. Add the veal shanks in batches, if necessary, and sear on all sides until golden brown. Remove the shanks and set aside.
- Sauté the Vegetables: In the same pot, reduce the heat to medium and add the butter. Once melted, add the onion, carrots, and celery. Sauté until the vegetables are soft, about 5 minutes. Add the minced garlic and cook for an additional minute.
- Deglaze and Simmer: Pour in the white wine, scraping up any browned bits from the bottom of the pot. Allow the wine to reduce by half. Then, add the broth, diced tomatoes with juice, thyme, and bay leaf. Stir to combine.
- Braise the Veal Shanks: Return the veal shanks to the pot, nestling them into the liquid and vegetables. Bring the mixture to a gentle simmer. Cover the pot and transfer to a preheated oven at 325°F (165°C). Braise for 2 to 2 1/2 hours, or until the meat is tender and easily pulls away from the bone.
- Prepare the Gremolata: While the Osso Buco is braising, mix together the lemon zest, minced garlic, and chopped parsley in a small bowl. Set aside.
- Finish and Serve: Once the veal is tender, remove the pot from the oven. Serve the Osso Buco hot, garnished with the gremolata. Pair with polenta, risotto, or mashed potatoes.
Extra Tips:
For the best flavor, try to use fresh, high-quality ingredients, especially for the gremolata, as it provides a bright contrast to the rich Osso Buco.
If you prefer a thicker sauce, you can remove the veal shanks once cooked and simmer the sauce on the stovetop to reduce it further. Additionally, preparing the dish a day in advance can enhance the flavors, as the ingredients have more time to meld together.
Simply reheat gently before serving, and add the gremolata just before eating for maximum freshness.
Roasted Chestnut and Pancetta Bruschetta

Roasted Chestnut and Pancetta Bruschetta is a delightful autumnal appetizer that captures the essence of rustic Italian cuisine. With the rich, nutty flavor of roasted chestnuts paired with the savory and slightly smoky taste of pancetta, this dish is the perfect starter for a cozy fall gathering.
Each bite combines the crispiness of toasted bread with the creamy, savory topping, offering a tantalizing experience that embodies the warmth and comfort of Italian culinary traditions.
This recipe is designed to serve 4-6 people, making it perfect for a small dinner party or a family meal. The combination of textures and flavors will surely impress your guests and leave them craving more. The preparation is straightforward and can be done with relative ease, ensuring you spend more time enjoying the company of your loved ones rather than laboring in the kitchen.
Ingredients:
- 1 baguette, sliced into 1/2-inch thick slices
- 2 cups roasted chestnuts, roughly chopped
- 150g pancetta, diced
- 1/4 cup extra-virgin olive oil
- 2 cloves garlic, minced
- 1 tablespoon fresh rosemary, chopped
- Salt and pepper to taste
- 1/4 cup grated Parmesan cheese
- 1 tablespoon balsamic glaze (optional)
Cooking Instructions:
- Prepare the Bread: Preheat your oven to 350°F (175°C). Arrange the baguette slices on a baking sheet and brush each slice with a bit of the olive oil. Toast in the oven for about 10 minutes, or until they’re golden and crispy. Remove from the oven and set aside to cool slightly.
- Cook the Pancetta: In a large skillet, add the diced pancetta and cook over medium heat until it becomes crispy and golden brown, approximately 5-7 minutes. Use a slotted spoon to remove the pancetta from the skillet and drain on a paper towel-lined plate.
- Prepare the Chestnut Mixture: In the same skillet, add the remaining olive oil and minced garlic. Sauté for about 1 minute until fragrant. Add the chopped roasted chestnuts and rosemary, stirring occasionally, for about 3-4 minutes until the mixture is well heated and the flavors meld.
- Assemble the Bruschetta: Take each toasted baguette slice and top it with a spoonful of the chestnut mixture. Add a few pieces of crispy pancetta on top, then sprinkle with grated Parmesan cheese.
- Finish with Balsamic Glaze: If desired, drizzle a small amount of balsamic glaze over each bruschetta for a touch of sweetness that complements the savory flavors.
Extra Tips:
For best results, use fresh chestnuts and roast them yourself to enhance their natural sweetness and texture. Make sure the baguette slices are toasted until just golden to provide a sturdy base that doesn’t become soggy.
If you prefer a more intense garlic flavor, rub a whole garlic clove directly onto the toasted bread before adding the toppings. Ultimately, the balsamic glaze is optional but highly recommended for an added layer of complexity and depth to the dish’s flavor profile.
Wild Boar Ragu With Pappardelle
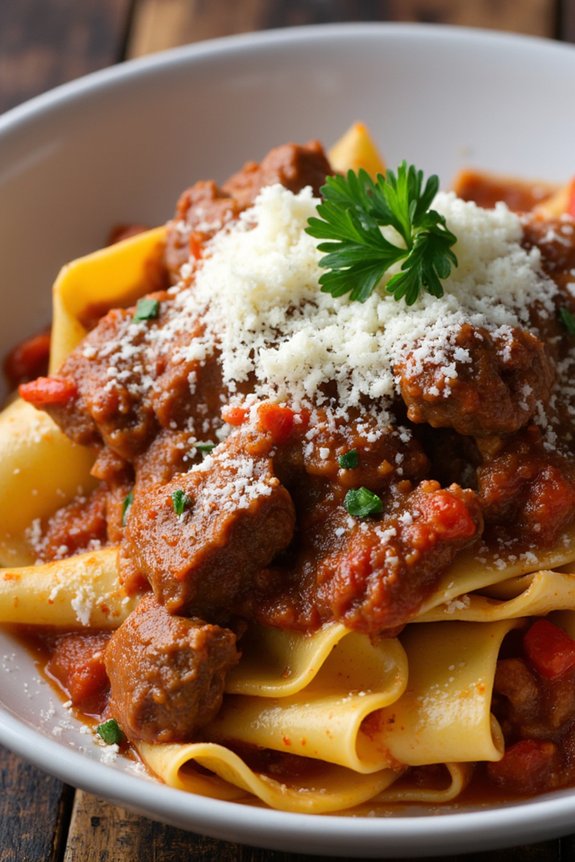
Wild Boar Ragu With Pappardelle is a hearty and rustic Italian dish that perfectly captures the essence of autumn. The rich flavors of wild boar, slow-cooked to tender perfection, meld beautifully with a robust tomato and red wine sauce. When paired with the wide ribbons of pappardelle pasta, this dish is a comforting and satisfying meal that warms you from the inside out. The key to this dish is patience, allowing the ragu to simmer slowly so that all the flavors meld together into a savory symphony.
Originating from the Tuscan region, this dish is ideal for a cozy family dinner or a special gathering with friends. The gaminess of the wild boar is mellowed by the long cooking time and the addition of aromatic vegetables, herbs, and spices. The result is a deep, complex flavor profile that’s truly unforgettable. When served with freshly grated Parmesan cheese and a sprinkle of chopped parsley, Wild Boar Ragu With Pappardelle becomes a feast for both the eyes and the palate.
Ingredients for 4-6 servings:
- 2 pounds wild boar shoulder or leg, cut into 1-inch cubes
- Salt and freshly ground black pepper, to taste
- 3 tablespoons olive oil
- 1 large onion, finely chopped
- 2 carrots, finely chopped
- 2 celery stalks, finely chopped
- 4 garlic cloves, minced
- 1 tablespoon tomato paste
- 1 cup red wine
- 1 can (28 ounces) whole peeled tomatoes, crushed
- 2 cups beef or game stock
- 2 bay leaves
- 1 teaspoon dried thyme
- 1 teaspoon dried rosemary
- 1 pinch red pepper flakes
- 1 pound pappardelle pasta
- Grated Parmesan cheese, for serving
- Fresh parsley, chopped, for garnish
Cooking Instructions:
- Prepare the Wild Boar: Season the cubed wild boar with salt and pepper. In a large, heavy-bottomed pot or Dutch oven, heat olive oil over medium-high heat. Add the boar in batches, browning on all sides. Remove the meat and set aside.
- Sauté the Vegetables: In the same pot, add the chopped onion, carrots, and celery. Cook over medium heat until the vegetables are soft and translucent, about 8-10 minutes. Stir in the minced garlic and tomato paste, cooking for an additional 2 minutes.
- Deglaze with Wine: Pour the red wine into the pot, scraping up any browned bits from the bottom. Allow the wine to reduce by half, concentrating the flavors.
- Create the Ragu Base: Add the crushed tomatoes, beef or game stock, bay leaves, thyme, rosemary, and red pepper flakes. Return the browned wild boar to the pot, stirring to combine all ingredients.
- Simmer the Ragu: Reduce the heat to low, cover the pot, and let the ragu simmer gently for 2-3 hours, stirring occasionally. The meat should become tender and the sauce thick and flavorful.
- Cook the Pappardelle: About 15 minutes before the ragu is ready, cook the pappardelle pasta in a large pot of salted boiling water until al dente. Drain the pasta and set aside.
- Combine and Serve: Remove the bay leaves from the ragu. Toss the cooked pappardelle with the wild boar ragu, making sure the pasta is well coated. Serve immediately with grated Parmesan cheese and a sprinkle of chopped parsley.
Extra Tips:
When cooking Wild Boar Ragu With Pappardelle, patience is key. Allowing the ragu to simmer slowly guarantees the meat becomes tender and the flavors fully develop. If wild boar is difficult to find, you can substitute it with pork shoulder or beef chuck, though the unique flavor of wild boar is worth seeking out.
Additionally, when browning the meat, avoid overcrowding the pot to guarantee even browning. This dish can also be made a day in advance, as the flavors deepen overnight, making it even more delicious when reheated.
Polenta With Sausage and Mushrooms
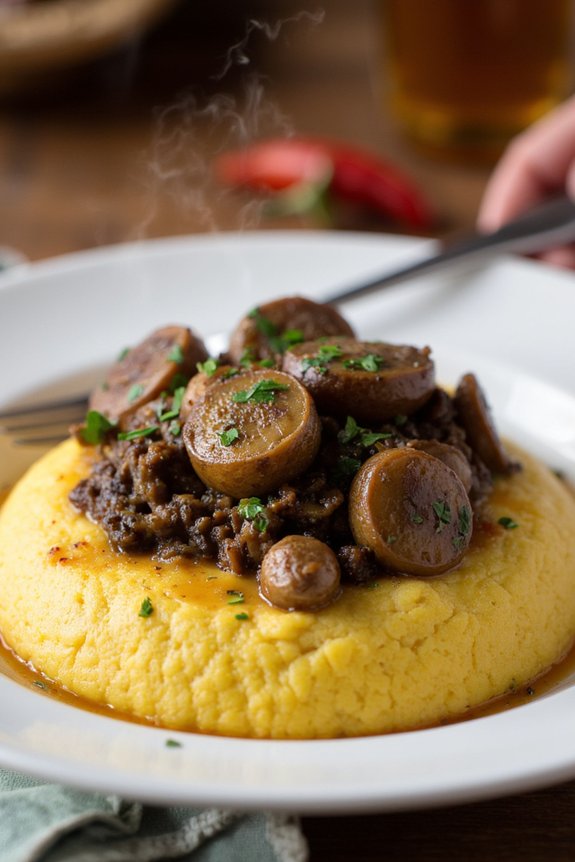
Polenta With Sausage and Mushrooms is a comforting, rustic dish that perfectly encapsulates the flavors of an Italian autumn. This hearty recipe combines creamy polenta with savory sausage and earthy mushrooms, resulting in a meal that warms both the body and soul. Perfect for a cozy evening at home, the dish isn’t only delicious but also relatively simple to prepare, allowing you to enjoy the essence of Italian cuisine without extensive cooking skills.
The combination of ingredients in this recipe highlights the robust flavors that are synonymous with Italian cooking. The creamy polenta serves as a soft, velvety base that beautifully complements the rich and spicy notes of the sausage, while the mushrooms add an earthy depth to the dish. Bringing these elements together harmoniously, this dish is sure to become a favorite on your autumn dining table, embodying a taste of Italy with every bite.
Ingredients (Serves 4-6):
- 1 cup coarse polenta
- 4 cups water
- 1 teaspoon salt
- 2 tablespoons unsalted butter
- 1 cup grated Parmesan cheese
- 1 tablespoon olive oil
- 1 pound Italian sausage, casings removed
- 1 pound mushrooms (such as cremini or button), sliced
- 2 cloves garlic, minced
- 1 teaspoon fresh thyme leaves
- Salt and pepper to taste
- Fresh parsley, chopped (for garnish)
Instructions:
- Prepare the Polenta: In a large saucepan, bring 4 cups of water and 1 teaspoon of salt to a boil. Gradually whisk in the polenta, reducing the heat to low. Continue to cook, stirring frequently, for about 30-35 minutes until the polenta is thick and creamy. Stir in the butter and Parmesan cheese until fully incorporated and smooth.
- Cook the Sausage: While the polenta is cooking, heat olive oil in a large skillet over medium heat. Add the sausage to the skillet, breaking it apart with a spoon, and cook until browned and cooked through, about 8-10 minutes. Remove the sausage from the skillet and set aside.
- Sauté the Mushrooms: In the same skillet, add the sliced mushrooms. Cook for 5-7 minutes, stirring occasionally, until the mushrooms are browned and have released their moisture. Add the minced garlic and thyme, cooking for another 1-2 minutes until fragrant.
- Combine and Season: Return the sausage to the skillet with the mushrooms. Stir everything together to combine, and season with salt and pepper to taste. Cook for another 2-3 minutes to heat through.
- Serve: Spoon the creamy polenta onto serving plates, creating a well in the center. Top with the sausage and mushroom mixture. Garnish with chopped fresh parsley before serving.
Extra Tips:
For the best results, use coarse polenta as it provides a hearty texture and guarantees the dish holds its shape when plated. If you prefer a creamier consistency, consider adding a splash of milk or cream to the polenta before serving.
The choice of mushrooms can vary; try using a mix of different types for more complex flavors. Finally, if you like a little heat, consider adding a pinch of red pepper flakes to the sausage while cooking for an extra kick. Enjoy the dish with a glass of red wine for a true Italian dining experience.
Spinach and Ricotta Stuffed Cannelloni

Spinach and Ricotta Stuffed Cannelloni is a classic Italian dish that’s perfect for the autumn season. The creamy ricotta and vibrant spinach filling, wrapped in tender pasta tubes, is baked to perfection in a rich tomato sauce and topped with melted cheese.
This comforting meal is ideal for family gatherings or a cozy dinner at home as the weather turns cooler. The combination of flavors is both hearty and rejuvenating, making it a versatile dish that can be served with a simple salad or a crusty loaf of bread.
This recipe is designed to serve 4-6 people, making it a great option for sharing. The preparation involves creating a smooth filling of spinach and ricotta, stuffing the cannelloni tubes, and baking them in a tomato sauce until bubbly and golden brown.
The use of fresh ingredients guarantees a depth of flavor that will impress your guests or family members. With a little preparation and patience, you’ll find this dish both rewarding and delicious.
Ingredients:
- 12 cannelloni tubes
- 500g fresh spinach
- 500g ricotta cheese
- 1 egg
- 100g grated Parmesan cheese
- 2 cloves garlic, minced
- 1/4 teaspoon nutmeg
- Salt and pepper to taste
- 800ml tomato passata
- 1 tablespoon olive oil
- 1 teaspoon dried oregano
- 200g mozzarella cheese, shredded
Instructions:
1. Preheat the oven: Start by preheating your oven to 180°C (350°F) to guarantee it’s ready for baking once the cannelloni is prepared.
2. Prepare the spinach: Wash the spinach thoroughly and dry it. Heat a large pan over medium heat, add the spinach, and cook until wilted. Remove from heat and let it cool slightly.
Once cooled, chop the spinach finely and set aside.
3. Make the filling: In a large mixing bowl, combine the ricotta cheese, chopped spinach, egg, Parmesan cheese, minced garlic, nutmeg, and a pinch of salt and pepper. Mix well until the ingredients are fully incorporated.
4. Stuff the cannelloni: Carefully fill each cannelloni tube with the ricotta and spinach mixture using a small spoon or a piping bag. Confirm they’re filled evenly and place them in a single layer in a greased baking dish.
5. Prepare the sauce: In a separate bowl, mix the tomato passata with olive oil, oregano, and a pinch of salt and pepper. Pour the sauce evenly over the stuffed cannelloni, making sure they’re well-covered.
6. Bake the dish: Sprinkle the shredded mozzarella cheese over the top of the cannelloni. Cover the baking dish with aluminum foil and bake in the preheated oven for 25 minutes.
Remove the foil and bake for an additional 10-15 minutes, or until the cheese is melted and golden brown.
7. Serve: Once baked, allow the dish to cool for a few minutes before serving. Enjoy it warm with a side of salad or bread.
Extra Tips:
When preparing Spinach and Ricotta Stuffed Cannelloni, it’s important to verify the spinach is well-drained after cooking to prevent excess moisture in the filling.
If you prefer a smoother texture, you can blend the filling ingredients in a food processor. For a richer flavor, consider adding a touch of cream to the tomato sauce or using fresh herbs like basil or thyme.
If you have any leftover filling, it can be used as a spread for sandwiches or stuffed into other pasta shapes for variety.
Tuscan Ribollita Soup
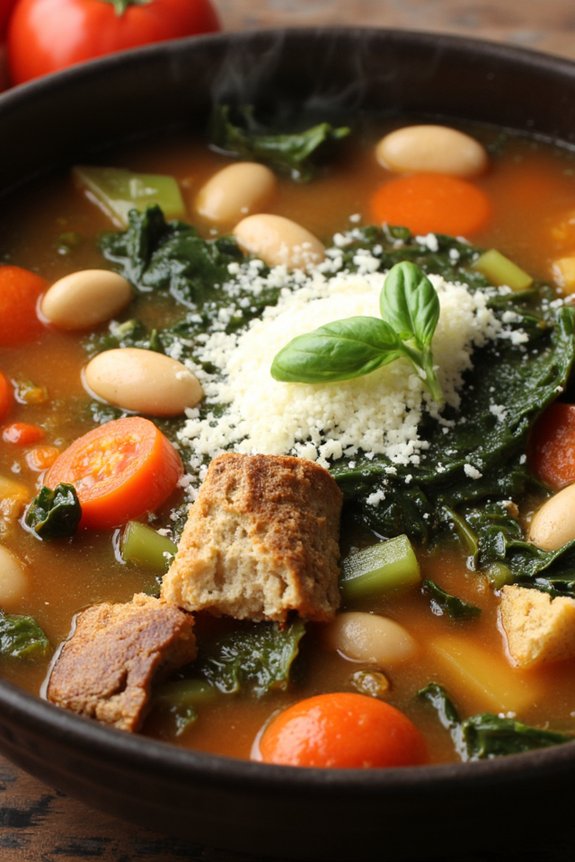
Tuscan Ribollita Soup is a traditional and hearty Italian soup that embodies the rustic flavors of Tuscany. Known for its robust and comforting taste, this soup is a wonderful blend of vegetables, beans, and bread, making it perfect for an autumn meal. The name “Ribollita” means “reboiled,” which reflects the traditional method of making this soup by reheating leftovers with day-old bread to create a thick, flavorful stew.
This dish isn’t only a demonstration of the resourcefulness of Italian cuisine but also a celebration of fresh, seasonal vegetables. Ideal for a family gathering or a cozy night in, Tuscan Ribollita Soup is both nutritious and satisfying.
The soup is typically made with Tuscan kale, also known as cavolo nero or black kale, which adds a unique depth to the dish. Other vegetables such as carrots, onions, and celery form the base, while cannellini beans contribute to its creamy texture. The inclusion of stale bread not only thickens the soup but also helps to marry the flavors together, making each spoonful a delight to savor.
Ingredients for 4-6 servings:
- 2 tablespoons olive oil
- 1 large onion, diced
- 2 carrots, diced
- 2 celery stalks, diced
- 3 cloves garlic, minced
- 1 bunch Tuscan kale, roughly chopped
- 1 can (14 oz) diced tomatoes
- 2 cans (14 oz each) cannellini beans, drained and rinsed
- 4 cups vegetable stock
- 1 bay leaf
- Salt and pepper to taste
- 1 small loaf of stale bread, torn into pieces
- 1/4 cup grated Parmesan cheese (optional)
- Fresh basil or parsley for garnish
Cooking Instructions:
- Prepare the Vegetables: Begin by heating the olive oil in a large pot over medium heat. Add the diced onion, carrots, and celery to the pot. Sauté for about 8-10 minutes, or until the vegetables are softened and the onions are translucent.
- Add the Garlic and Kale: Stir in the minced garlic and cook for an additional 1-2 minutes until fragrant. Add the chopped Tuscan kale to the pot, stirring to combine all the ingredients.
- Incorporate Tomatoes and Beans: Pour in the diced tomatoes and their juices, followed by the cannellini beans. Mix well to distribute the ingredients evenly.
- Simmer the Soup: Add the vegetable stock and bay leaf to the pot. Season with salt and pepper to taste. Bring the mixture to a boil, then reduce the heat to low. Cover the pot and let it simmer for about 30 minutes, allowing the flavors to meld together.
- Add the Bread: Once the soup has simmered, add the torn pieces of stale bread into the pot. Stir well to incorporate the bread into the soup, allowing it to soak up the liquid and thicken the soup. Simmer for an additional 10-15 minutes.
- Final Touches: Remove the bay leaf and adjust the seasoning if necessary. Serve the soup hot, garnished with grated Parmesan cheese and fresh basil or parsley, if desired.
Extra Tips:
For the best results, use day-old or slightly stale bread, as fresh bread may become too mushy when added to the soup. If Tuscan kale is unavailable, you can substitute with regular kale or even Swiss chard.
Ribollita is traditionally enjoyed even more after being reheated, so don’t hesitate to make it ahead of time. As it sits and is reheated, the flavors deepen, making it an even more satisfying dish. Additionally, feel free to customize the recipe by adding other seasonal vegetables or herbs to suit your taste.
Baked Eggplant Parmigiana
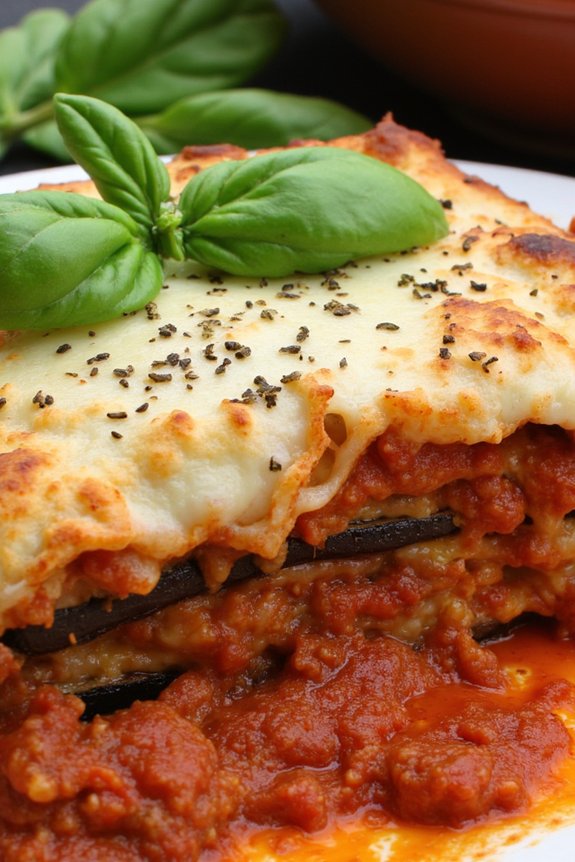
Baked Eggplant Parmigiana is a classic Italian dish that perfectly captures the essence of autumn with its rich flavors and comforting textures. This dish brings together layers of tender eggplant slices, savory tomato sauce, and creamy melted cheese, all baked to perfection in the oven. It’s a warm, hearty meal that can be enjoyed as a main course or a delightful accompaniment to other autumnal favorites. The combination of earthy eggplant, tangy sauce, and gooey cheese makes this dish a beloved staple in rustic Italian cooking.
Traditionally, Eggplant Parmigiana is a dish that involves frying the eggplant slices before layering them with sauce and cheese. However, to keep this recipe light yet flavorful, the eggplants are baked, allowing their natural flavors to shine through. This method not only makes the dish healthier but also enhances the eggplant’s tender texture. Ideal for a family gathering or a cozy dinner, this Baked Eggplant Parmigiana recipe serves 4-6 people, offering a delicious taste of Italy right in your home.
Ingredients:
- 2 large eggplants
- Salt, to taste
- 4 tablespoons olive oil
- 2 cups marinara sauce
- 1 cup grated Parmesan cheese
- 2 cups shredded mozzarella cheese
- 1 teaspoon dried oregano
- 1/2 teaspoon black pepper
- Fresh basil leaves, for garnish
Instructions:
- Prepare the Eggplant:
- Preheat your oven to 400°F (200°C).
- Slice the eggplants into 1/4-inch thick rounds. Lay them out on a baking sheet and sprinkle with salt. Let them sit for about 15 minutes to draw out excess moisture, then pat them dry with a paper towel.
- Bake the Eggplant:
- Brush both sides of the eggplant slices with olive oil and place them back on the baking sheet in a single layer.
- Bake in the preheated oven for about 20-25 minutes, flipping halfway through, until the eggplant is tender and lightly browned.
- Assemble the Dish:
- Reduce the oven temperature to 375°F (190°C).
- Spread a thin layer of marinara sauce on the bottom of a 9×13 inch baking dish.
- Arrange a layer of baked eggplant slices over the sauce.
- Sprinkle with Parmesan cheese, a handful of mozzarella cheese, and a pinch of oregano.
- Repeat the layers (sauce, eggplant, cheeses) until all the ingredients are used, finishing with a generous layer of mozzarella on top.
- Bake the Parmigiana:
- Cover the baking dish with foil and bake for 20 minutes.
- Remove the foil and bake uncovered for an additional 15-20 minutes, or until the cheese is bubbly and golden brown.
- Serve:
- Let the dish cool slightly before serving. Garnish with fresh basil leaves for added flavor and a touch of color.
Extra Tips:
For the best results, choose firm and shiny eggplants with smooth skin. Salting the eggplant is essential as it helps remove bitterness and guarantees a better texture when baked. If you prefer a more indulgent version, you can fry the eggplant slices in oil before baking, which adds a richer flavor to the dish.
For a twist, consider adding layers of sliced tomatoes or spinach between the eggplant layers. Finally, allow the dish to rest for a few minutes after baking to make it easier to cut and serve. Enjoy your Baked Eggplant Parmigiana with a side of crusty bread or a simple green salad.
Rustic Focaccia With Rosemary
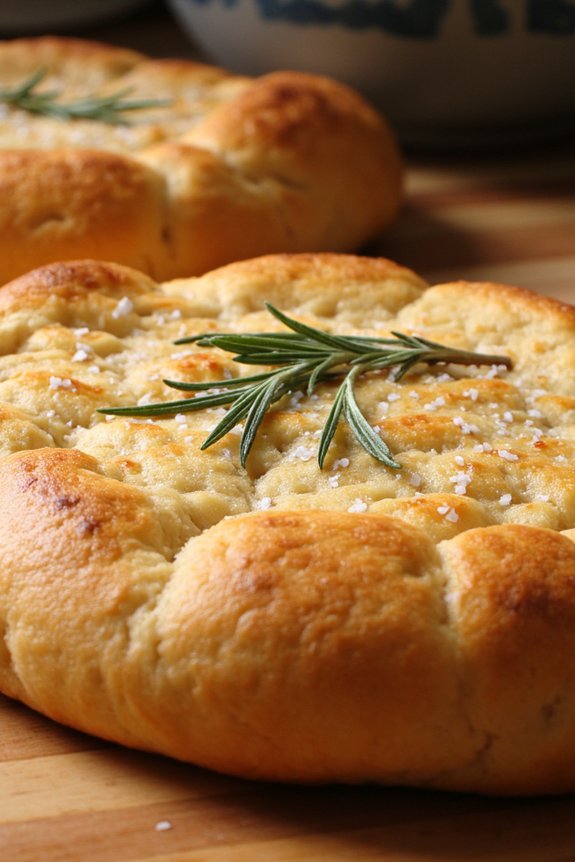
Rustic Focaccia With Rosemary is a classic Italian bread that embodies the flavors of autumn with its fragrant rosemary infusion. This rustic focaccia is perfect for cozy dinners or as an accompaniment to soups and stews. The bread is characterized by its golden crust, soft interior, and the aromatic hint of rosemary that wafts through your kitchen as it bakes.
Whether you’re a seasoned baker or a novice in the kitchen, this recipe will guide you through creating a delicious focaccia that captures the essence of Italian autumn. The simplicity of this focaccia allows the natural flavors of the ingredients to shine. The dough is mixed and kneaded with care, then left to rise until it doubles in size, creating a light and airy texture.
As it bakes, the rosemary releases its oils, creating an inviting aroma that fills the air. The addition of olive oil in the dough and on top of the focaccia guarantees a moist crumb and a delightful, slightly crispy crust. Serve this focaccia warm from the oven, and enjoy it with a drizzle of extra virgin olive oil or a sprinkle of sea salt for an authentic experience.
Ingredients for 4-6 servings:
- 4 cups all-purpose flour
- 1 ½ cups warm water (about 110°F)
- 1 packet (2 ¼ teaspoons) active dry yeast
- 1 tablespoon sugar
- 1 tablespoon sea salt
- ¼ cup extra virgin olive oil, plus more for greasing and drizzling
- 2 tablespoons fresh rosemary leaves, chopped
- Coarse sea salt for topping
Cooking Instructions:
- Activate the Yeast: In a large mixing bowl, combine the warm water, sugar, and active dry yeast. Stir gently and let it sit for about 5-10 minutes until it becomes frothy and bubbly, indicating that the yeast is activated.
- Make the Dough: Add the flour and salt to the yeast mixture. Begin mixing the ingredients with a wooden spoon or your hands until a rough dough forms. Add the olive oil and continue to knead the dough on a floured surface for about 10 minutes until it becomes smooth and elastic.
- First Rise: Grease a large bowl with olive oil and place the dough inside, turning it to coat in oil. Cover the bowl with a damp cloth or plastic wrap and let the dough rise in a warm place for about 1-1.5 hours, or until it has doubled in size.
- Prepare the Baking Sheet: Once the dough has risen, punch it down to release the air. Transfer it to a well-greased baking sheet. Stretch and press the dough to fit the entire surface of the pan, ensuring it’s evenly spread.
- Second Rise: Cover the dough again and let it rise for another 30 minutes. Preheat your oven to 450°F (232°C) during this time.
- Add Toppings: After the second rise, use your fingertips to make dimples all over the surface of the dough. Drizzle the top generously with olive oil, then sprinkle the chopped rosemary and coarse sea salt evenly over the dough.
- Bake the Focaccia: Place the baking sheet in the preheated oven and bake for 20-25 minutes, or until the focaccia is golden brown and sounds hollow when tapped on the bottom.
- Cool and Serve: Remove the focaccia from the oven and let it cool slightly on a wire rack. Cut into squares and serve warm or at room temperature.
Extra Tips:
For the best results, verify that your water is warm but not hot when activating the yeast, as too much heat can kill the yeast. If you prefer a more intense rosemary flavor, you can infuse the olive oil with rosemary by gently heating them together before drizzling it over the dough.
Additionally, feel free to experiment with other toppings like olives, cherry tomatoes, or caramelized onions to complement the rosemary. Enjoy your homemade Rustic Focaccia With Rosemary as part of a heartwarming Italian meal.
Butternut Squash and Gorgonzola Risotto
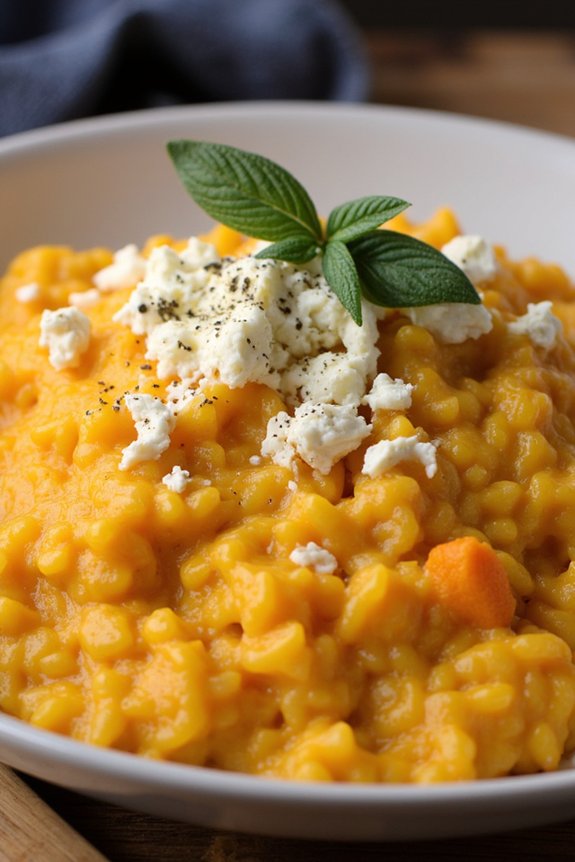
As the leaves turn golden and the air becomes crisp, there’s nothing quite like a warm, creamy risotto to capture the essence of autumn. This Butternut Squash and Gorgonzola Risotto combines the nutty sweetness of roasted butternut squash with the rich, tangy flavor of Gorgonzola cheese, creating a symphony of flavors that’s both comforting and sophisticated.
Perfect for a family dinner or a cozy night in, this dish is a celebration of rustic Italian cuisine that will leave everyone at the table satisfied.
The process of making risotto is an art form that requires patience and attention, but the result is well worth the effort. The key to a perfect risotto is slowly adding warm broth to the rice, allowing it to absorb gradually and release its starches, creating that signature creamy texture.
The addition of butternut squash provides a natural sweetness and a vibrant color, while the Gorgonzola adds a bold, creamy finish that elevates the dish to new heights. Serve this risotto alongside a crisp green salad and a glass of your favorite white wine for a truly indulgent meal.
Ingredients (serving size: 4-6 people):
- 2 cups Arborio rice
- 1 medium butternut squash, peeled and diced
- 5 cups chicken or vegetable broth
- 1 cup dry white wine
- 1 cup grated Parmesan cheese
- 4 ounces Gorgonzola cheese, crumbled
- 1 small onion, finely chopped
- 3 cloves garlic, minced
- 2 tablespoons olive oil
- 2 tablespoons unsalted butter
- Salt and freshly ground black pepper, to taste
- Fresh sage leaves for garnish (optional)
Cooking Instructions:
- Preheat the Oven: Begin by preheating your oven to 400°F (200°C). Spread the diced butternut squash on a baking sheet, drizzle with 1 tablespoon of olive oil, and season with salt and pepper. Roast in the oven for about 20-25 minutes, or until the squash is tender and slightly caramelized. Once done, set aside.
- Warm the Broth: In a medium saucepan, bring the chicken or vegetable broth to a gentle simmer. Keep it warm over low heat while you prepare the risotto.
- Sauté the Aromatics: In a large skillet or heavy-bottomed pot, heat the remaining tablespoon of olive oil and the butter over medium heat. Add the chopped onion and garlic, cooking until they’re soft and translucent, about 5 minutes.
- Toast the Rice: Add the Arborio rice to the skillet, stirring to coat it in the oil and butter. Cook for about 2-3 minutes, until the edges of the rice become translucent.
- Deglaze with Wine: Pour in the white wine and cook, stirring constantly, until the wine has been absorbed by the rice.
- Add the Broth Gradually: Begin adding the warm broth one ladle at a time, stirring frequently. Allow the rice to absorb most of the liquid before adding more. Continue this process until the rice is creamy and cooked to al dente, about 18-20 minutes.
- Incorporate the Squash and Cheese: Once the risotto is cooked, gently fold in the roasted butternut squash, Parmesan cheese, and Gorgonzola. Stir until the cheeses are melted and the mixture is creamy. Adjust seasoning with salt and pepper if needed.
- Serve and Garnish: Serve the risotto immediately, garnished with fresh sage leaves if desired.
Extra Tips:
To guarantee your risotto has the perfect texture, it’s important to keep the broth warm and add it slowly, allowing the rice to gradually absorb the liquid. Stirring frequently helps release the starches from the rice, contributing to its creamy consistency.
If you prefer a milder cheese flavor, you can reduce the amount of Gorgonzola or substitute it with another creamy cheese such as goat cheese or mascarpone. Finally, for a touch of freshness, consider adding a squeeze of lemon juice or a sprinkle of fresh herbs just before serving.
Pear and Walnut Crostata

Pear and Walnut Crostata is a delightful rustic Italian dessert that beautifully captures the essence of autumn. This open-faced tart combines the sweetness of ripe pears with the nutty richness of walnuts, all encased in a buttery, flaky crust. The crostata is perfect for a cozy evening or as the finale to a comforting meal, offering a simple yet elegant way to enjoy the season’s bounty.
The recipe is straightforward, making it a great option for both novice and experienced bakers. The key to a successful crostata is in the quality of the ingredients, especially the pears, which should be ripe yet firm, and the walnuts, which should be fresh and fragrant. This dish serves 4-6 people, making it ideal for a small gathering or family dessert.
Ingredients:
- 1 1/2 cups all-purpose flour
- 1/4 cup granulated sugar
- 1/2 teaspoon salt
- 1/2 cup unsalted butter, chilled and cubed
- 1/4 cup ice water
- 3 ripe pears, peeled, cored, and sliced
- 1/4 cup brown sugar
- 1 teaspoon ground cinnamon
- 1/4 teaspoon ground nutmeg
- 1 tablespoon lemon juice
- 1/2 cup walnuts, chopped
- 1 egg, beaten (for egg wash)
- 1 tablespoon turbinado sugar (for sprinkling)
Instructions:
- Prepare the Dough:
- In a large bowl, combine the all-purpose flour, granulated sugar, and salt. Add the chilled, cubed butter and use a pastry cutter or your fingers to work the butter into the flour mixture until it resembles coarse crumbs.
- Gradually add the ice water, one tablespoon at a time, mixing until the dough begins to come together. Form the dough into a disk, wrap it in plastic wrap, and refrigerate for at least 1 hour.
- Preheat the Oven:
- Preheat your oven to 400°F (200°C) and line a baking sheet with parchment paper.
- Prepare the Filling:
- In a large bowl, toss the sliced pears with brown sugar, ground cinnamon, ground nutmeg, and lemon juice until well-coated. Set aside.
- Roll Out the Dough:
- On a floured surface, roll out the chilled dough into a rough 12-inch circle. Transfer it to the prepared baking sheet.
- Assemble the Crostata:
- Arrange the prepared pear filling in the center of the dough, leaving a 2-inch border. Sprinkle the chopped walnuts over the pears.
- Fold the edges of the dough over the filling, pleating as necessary, to create a rustic edge.
- Bake the Crostata:
- Brush the exposed edges of the dough with the beaten egg and sprinkle with turbinado sugar.
- Bake in the preheated oven for 35-40 minutes, or until the crust is golden brown and the pears are tender.
- Cool and Serve:
- Allow the crostata to cool slightly before slicing. Serve warm or at room temperature.
Extra Tips:
When making the dough, make sure your butter is well-chilled; this guarantees a flaky crust. If you find your dough is too sticky, add a little extra flour. Similarly, if it’s too crumbly, a touch more ice water can help.
For an extra layer of flavor, consider adding a splash of vanilla extract to the pear filling. Finally, if you prefer a sweeter dessert, you can drizzle a bit of honey over the crostata just before serving. Enjoy your rustic Italian autumn treat!