

Hey there, fellow food lovers! If you’re anything like me, you’re always on the lookout for fresh and vibrant recipe ideas that bring the garden to your plate. Today, I’m sharing 13 Italian-inspired vegetarian dinner recipes that are as colorful as they are delicious. Think Caprese salads bursting with heirloom tomatoes and the creamy delight of spinach and ricotta stuffed shells. Let’s savor these beautiful dishes together!
Caprese Salad With Heirloom Tomatoes

Caprese Salad With Heirloom Tomatoes is a quintessential Italian dish that celebrates the freshness and simplicity of its ingredients. Known for its vibrant colors and delightful flavors, this salad is perfect as an appetizer or a light meal. The combination of juicy heirloom tomatoes, creamy mozzarella, aromatic basil, and a drizzle of olive oil brings forth a burst of summer flavors that’s both invigorating and satisfying. It’s a dish that not only pleases the palate but also the eyes, thanks to its colorful presentation.
This salad isn’t only delicious but also incredibly easy to prepare, making it an ideal choice for both novice cooks and seasoned chefs. The key to a great Caprese Salad is to use the freshest ingredients available. Heirloom tomatoes are prized for their sweet and tangy flavor, and their unique shapes and colors add a visual appeal to the dish. Fresh mozzarella, preferably made from buffalo milk, provides a creamy contrast to the tomatoes, while fresh basil leaves add a hint of peppery aroma.
This classic Italian salad is finished with a drizzle of high-quality extra virgin olive oil and a sprinkle of salt and freshly ground black pepper, which enhances the natural flavors of the ingredients.
Ingredients (serving size: 4-6 people):
- 4-5 large heirloom tomatoes
- 16 ounces fresh mozzarella cheese
- A handful of fresh basil leaves
- 4 tablespoons extra virgin olive oil
- Salt to taste
- Freshly ground black pepper to taste
- Balsamic glaze (optional)
Cooking Instructions:
- Prepare the Tomatoes: Wash the heirloom tomatoes thoroughly under cold water. Pat them dry with a clean kitchen towel. Using a sharp knife, slice the tomatoes into 1/4-inch thick rounds. Arrange them on a large serving platter, slightly overlapping each slice.
- Slice the Mozzarella: Drain the fresh mozzarella and pat it dry with a paper towel to remove excess moisture. Slice the mozzarella into 1/4-inch thick rounds. Arrange the mozzarella slices between the tomato slices on the platter.
- Add the Basil: Gently rinse the fresh basil leaves and pat them dry. Tear or cut the larger leaves into smaller pieces if desired. Tuck the basil leaves between the layers of tomatoes and mozzarella, ensuring they’re evenly distributed.
- Season and Drizzle: Drizzle the extra virgin olive oil evenly over the salad. Season with salt and freshly ground black pepper to taste. If desired, drizzle a small amount of balsamic glaze over the top for an added touch of sweetness and acidity.
- Serve: Allow the salad to sit at room temperature for about 10 minutes before serving. This will allow the flavors to meld together beautifully. Serve the Caprese Salad as a starter or alongside your favorite Italian dishes.
Extra Tips:
For the best Caprese Salad, always choose ripe and flavorful heirloom tomatoes. If heirloom tomatoes aren’t available, you can substitute with regular vine-ripened tomatoes, but be sure to select the freshest ones you can find.
Additionally, using a high-quality extra virgin olive oil makes a significant difference in taste, so opt for one with a rich, fruity flavor. If you enjoy a bit of tang, a light drizzle of balsamic glaze can complement the dish wonderfully, but it’s entirely optional.
Finally, serve the salad at room temperature to fully enjoy the flavors of the fresh ingredients.
Creamy Spinach and Ricotta Stuffed Shells

Creamy Spinach and Ricotta Stuffed Shells is a comforting Italian dish that’s perfect for a family dinner or a cozy night in. This dish features large pasta shells generously stuffed with a rich, creamy mixture of ricotta cheese, spinach, and herbs, then baked to perfection in a savory tomato sauce. The contrasting textures of the tender pasta, creamy filling, and bubbly melted cheese on top make it an irresistible meal that’s sure to impress both vegetarians and meat-eaters alike.
This recipe isn’t only delicious but also versatile, allowing for a variety of ingredients to be added or substituted according to personal taste. Whether you’re serving it as a main course or as part of a larger Italian feast, these stuffed shells are sure to be a hit. Designed to serve 4-6 people, this dish is perfect for an intimate gathering or a larger family meal.
Ingredients:
- 20 large pasta shells
- 2 cups ricotta cheese
- 1 cup shredded mozzarella cheese
- 1/2 cup grated Parmesan cheese
- 2 cups fresh spinach, chopped
- 1 egg, lightly beaten
- 2 cloves garlic, minced
- 1 tablespoon fresh basil, chopped
- 1 teaspoon dried oregano
- Salt and pepper to taste
- 3 cups marinara sauce
- 1 tablespoon olive oil
Cooking Instructions:
- Preheat the Oven: Preheat your oven to 375°F (190°C) to make sure it’s ready for baking once the shells are prepared.
- Cook the Pasta Shells: Bring a large pot of salted water to a boil. Add the pasta shells and cook until al dente, according to package instructions. Drain and set aside to cool slightly.
- Prepare the Filling: In a large mixing bowl, combine the ricotta cheese, half of the mozzarella cheese, Parmesan cheese, chopped spinach, beaten egg, minced garlic, fresh basil, dried oregano, salt, and pepper. Mix until well combined.
- Stuff the Shells: Using a spoon, carefully fill each pasta shell with the ricotta and spinach mixture. Be generous with the filling to make sure each shell is packed with flavor.
- Assemble the Dish: Spread a thin layer of marinara sauce on the bottom of a large baking dish. Arrange the stuffed shells in the dish, open side up. Pour the remaining marinara sauce over the shells.
- Add Cheese and Bake: Drizzle olive oil over the top and sprinkle the rest of the mozzarella cheese over the shells. Cover the dish with aluminum foil and bake in the preheated oven for 25 minutes. Remove the foil and bake for an additional 10 minutes, or until the cheese is bubbly and golden brown.
- Serve: Once baked, remove the dish from the oven and let it cool for a few minutes before serving. Garnish with additional fresh basil or Parmesan cheese if desired.
Extra Tips:
When preparing Creamy Spinach and Ricotta Stuffed Shells, make sure your pasta shells are cooked to al dente to prevent them from becoming too soft during baking.
If you prefer a creamier filling, consider adding a bit of cream cheese or mascarpone to the ricotta mixture. For an extra burst of flavor, try mixing in some sun-dried tomatoes or roasted red peppers into the filling.
Finally, if you’re short on time, use pre-made marinara sauce, but a homemade one will enhance the overall taste of the dish.
Grilled Eggplant and Zucchini Lasagna

Grilled Eggplant and Zucchini Lasagna is a delightful Italian vegetarian dish that combines the rich flavors of grilled vegetables with creamy ricotta and tangy tomato sauce. This dish is perfect for those who want a hearty meal without the meat. The smoky taste of grilled eggplant and zucchini slices layered with gooey cheese and flavorful sauce makes for a satisfying meal that can be enjoyed by both vegetarians and meat-lovers alike.
This lasagna isn’t only delicious but also a great way to incorporate more vegetables into your diet. The grilling process enhances the natural sweetness of the eggplant and zucchini, adding depth to the dish. Whether you’re hosting a dinner party or looking for a comforting family meal, this Grilled Eggplant and Zucchini Lasagna will surely impress.
Let’s explore the ingredient list and step-by-step instructions to bring this Italian classic to life!
Ingredients (Serves 4-6):
- 2 medium eggplants, sliced into 1/4-inch rounds
- 2 large zucchinis, sliced into 1/4-inch rounds
- 1 tablespoon olive oil
- Salt and pepper to taste
- 9 lasagna noodles
- 2 cups ricotta cheese
- 1 egg
- 1/4 cup freshly grated Parmesan cheese
- 2 cups marinara sauce
- 2 cups shredded mozzarella cheese
- Fresh basil leaves, for garnish
Instructions:
- Prepare the Vegetables:
- Preheat your grill to medium-high heat. Brush the eggplant and zucchini slices with olive oil and season with salt and pepper.
- Grill the vegetables for about 3-4 minutes on each side until they’ve nice grill marks and are tender. Set aside.
- Cook the Lasagna Noodles:
- In a large pot of boiling salted water, cook the lasagna noodles according to package instructions until al dente. Drain and set aside.
- Prepare the Ricotta Mixture:
- In a bowl, combine the ricotta cheese, egg, and Parmesan cheese. Mix well until smooth and set aside.
- Assemble the Lasagna:
- Preheat your oven to 375°F (190°C). In a 9×13 inch baking dish, spread a thin layer of marinara sauce on the bottom.
- Place a layer of lasagna noodles over the sauce, followed by half of the grilled eggplant and zucchini slices.
- Spread half of the ricotta mixture over the vegetables, then sprinkle with one-third of the mozzarella cheese.
- Repeat the layers with more sauce, the remaining noodles, vegetables, ricotta mixture, and another third of the mozzarella.
- Finish with a final layer of noodles, marinara sauce, and the remaining mozzarella cheese.
- Bake the Lasagna:
- Cover the dish with aluminum foil and bake in the preheated oven for 25 minutes. Remove the foil and continue baking for an additional 15 minutes, or until the cheese is bubbly and golden brown.
- Serve:
- Allow the lasagna to cool for about 10 minutes before slicing. Garnish with fresh basil leaves before serving.
Extra Tips:
For the best results, make sure to choose fresh and firm eggplants and zucchinis. This will guarantee that the vegetables hold their shape during grilling and don’t become mushy in the lasagna.
If you prefer a spicier sauce, consider adding a pinch of red pepper flakes to the marinara before assembling the lasagna. Additionally, letting the lasagna rest after baking allows the layers to set, making it easier to slice and serve.
Enjoy this dish with a side salad and a crusty Italian bread for a complete meal!
Rustic Margherita Pizza With Fresh Basil

Rustic Margherita Pizza With Fresh Basil is a classic Italian dish that epitomizes simplicity and freshness. This pizza focuses on the perfect balance of flavors between the tangy tomato sauce, creamy mozzarella, and aromatic fresh basil.
It’s a delightful vegetarian option that’s perfect for gatherings or a cozy family dinner. The rustic nature of this pizza comes from its hand-stretched crust and use of the freshest ingredients, which allows each component to shine and contribute to an authentic Italian taste.
This recipe serves 4-6 people and can be made with either store-bought or homemade pizza dough. The key to a successful Margherita pizza lies in the quality of the ingredients used. Opt for fresh, high-quality mozzarella, ripe tomatoes or a good canned tomato sauce, and freshly picked basil leaves.
Baking the pizza at a high temperature will guarantee a crispy yet chewy crust, which is essential for the rustic feel of this dish.
Ingredients:
- 1 pound pizza dough (store-bought or homemade)
- 1 cup tomato sauce (preferably San Marzano)
- 12 ounces fresh mozzarella cheese, sliced
- 1/4 cup freshly grated Parmesan cheese
- A handful of fresh basil leaves
- 2 tablespoons extra-virgin olive oil
- Salt and pepper to taste
- All-purpose flour (for dusting)
Cooking Instructions:
1. Preheat the Oven: Begin by preheating your oven to 475°F (245°C). If using a pizza stone, place it in the oven while preheating to guarantee it’s hot enough for baking.
2. Prepare the Dough: On a lightly floured surface, roll out the pizza dough into a 12-inch circle. The dough should be thin but not too fragile.
Transfer the dough to a pizza peel or an inverted baking sheet dusted lightly with flour or cornmeal to prevent sticking.
3. Assemble the Pizza: Spread the tomato sauce evenly over the dough, leaving about a 1/2-inch border around the edges for the crust.
Arrange the mozzarella slices evenly over the sauce. Sprinkle the grated Parmesan cheese on top.
4. Bake the Pizza: Carefully slide the pizza onto the preheated pizza stone or a baking sheet. Bake for 10-12 minutes, or until the crust is golden brown and the cheese is bubbly and slightly browned.
5. Add Fresh Basil and Olive Oil: Remove the pizza from the oven and immediately scatter fresh basil leaves over the top.
Drizzle with extra-virgin olive oil and sprinkle with a pinch of salt and pepper to taste.
6. Serve: Allow the pizza to cool slightly before cutting and serving. This allows the cheese to set a bit, making it easier to slice.
Extra Tips:
For an extra crispy crust, consider brushing the edges with olive oil before baking. If you prefer a bit of a smoky flavor, you can use a grill to cook the pizza instead of an oven.
Remember that fresh basil should be added after baking to prevent it from wilting too much. If you want to enhance the flavor of your tomato sauce, you can simmer it with a garlic clove and a sprig of basil before using it on the pizza.
Enjoy this classic dish with a side salad or a glass of your favorite Italian wine for a complete meal.
Lemon and Asparagus Risotto

Lemon and Asparagus Risotto is a delightful Italian dish that combines the creamy texture of risotto with the fresh flavors of lemon and asparagus. Perfect for a spring or summer meal, this dish is both satisfying and invigorating. The risotto’s base is Arborio rice, which is known for its ability to absorb liquids and release starch, creating a creamy consistency. The addition of lemon zest and juice introduces a bright citrus note that complements the earthy, slightly nutty flavor of asparagus.
This vegetarian dish can serve as a main course or a side dish, making it versatile for any occasion. Asparagus, a spring vegetable, adds a burst of color and nutrition to the risotto. It’s important to choose fresh asparagus; look for firm stalks with tightly closed tips. The preparation involves cooking the asparagus until tender yet still vibrant green, ensuring it retains its nutrients and crispness.
The interplay of flavors in this risotto is enhanced by the use of quality vegetable broth and a generous sprinkle of Parmesan cheese, which adds a savory depth to the dish. This Lemon and Asparagus Risotto serves 4-6 people and is sure to impress your guests with its elegant simplicity.
Ingredients:
- 2 cups Arborio rice
- 1 bunch asparagus, trimmed and cut into 1-inch pieces
- 1 medium onion, finely chopped
- 2 cloves garlic, minced
- 1/2 cup dry white wine
- 6 cups vegetable broth
- 1 lemon, zested and juiced
- 1 cup grated Parmesan cheese
- 3 tablespoons olive oil
- 2 tablespoons butter
- Salt and freshly ground black pepper to taste
Cooking Instructions:
- Prepare the Broth: In a medium saucepan, heat the vegetable broth over medium-low heat. Keep it warm but not boiling as you’ll need to add it gradually to the risotto.
- Cook the Asparagus: In a large skillet, heat 1 tablespoon of olive oil over medium heat. Add the asparagus and cook for about 4-5 minutes until they’re tender yet still vibrant green. Remove the asparagus from the skillet and set aside.
- Sauté the Aromatics: In the same skillet, add the remaining olive oil and butter. Once the butter has melted, add the chopped onion and cook until translucent, about 5 minutes. Add the minced garlic and cook for an additional 1 minute.
- Toast the Rice: Add the Arborio rice to the skillet, stirring to coat the grains with the oil and butter. Cook for 2-3 minutes until the rice is lightly toasted.
- Deglaze with Wine: Pour in the white wine and stir continuously until the liquid is absorbed by the rice.
- Add the Broth Gradually: Begin adding the warm vegetable broth, one ladle at a time, stirring frequently. Allow each addition to be absorbed before adding the next. Continue this process until the rice is creamy and al dente, about 18-20 minutes.
- Incorporate the Asparagus and Lemon: Stir in the cooked asparagus, lemon zest, and lemon juice. Season with salt and freshly ground black pepper to taste.
- Finish with Cheese: Remove the skillet from the heat and stir in the grated Parmesan cheese until melted and incorporated into the risotto.
- Serve: Serve the Lemon and Asparagus Risotto immediately, garnished with additional Parmesan cheese if desired.
Extra Tips:
When making risotto, patience and attention are key. Stirring the rice frequently helps release the starch, giving risotto its signature creamy texture. It’s important not to rush the process of adding the broth; allow each ladle to be fully absorbed to avoid a mushy texture.
Adjust the seasoning to your preference, and feel free to add a little extra lemon juice for a more pronounced citrus flavor. For a touch of elegance, consider adding a sprinkle of fresh herbs, like parsley or basil, before serving.
Pesto Genovese With Trofie Pasta

Pesto Genovese With Trofie Pasta is a classic Italian dish hailing from the Liguria region, where the aromatic and vibrant flavors of fresh basil are celebrated. This dish is a perfect example of how simple ingredients can come together to create something delightful and satisfying. Traditionally, the pesto is made using a mortar and pestle, which helps release the essential oils of the basil leaves, giving it an intense and fresh flavor.
When combined with the unique, twisted shape of trofie pasta, this dish becomes a delightful experience in both taste and texture. Trofie pasta is specifically chosen for this dish because its shape is ideal for holding onto the rich pesto sauce, ensuring each bite is packed with flavor. The pesto Genovese is typically made with fresh basil, pine nuts, garlic, Parmesan cheese, and high-quality olive oil. This combination delivers a nutty, cheesy, and slightly garlicky sauce that beautifully coats the pasta.
Perfect for a family dinner or a casual gathering, this Pesto Genovese With Trofie Pasta serves 4-6 people, providing a generous helping of Italian comfort.
Ingredients for 4-6 servings:
- 500g trofie pasta
- 2 cups fresh basil leaves
- 1/2 cup grated Parmesan cheese
- 1/2 cup extra-virgin olive oil
- 1/4 cup pine nuts
- 2 garlic cloves
- Salt to taste
- Freshly ground black pepper to taste
Cooking Instructions:
- Prepare the Pesto: Start by washing the fresh basil leaves thoroughly and drying them using a kitchen towel or a salad spinner. In a food processor, add the basil leaves, pine nuts, garlic cloves, and a pinch of salt. Pulse until the mixture is finely chopped.
- Blend the Ingredients: With the food processor running, slowly add the olive oil in a steady stream. This will help emulsify the sauce, giving it a smooth and creamy texture. Once well-blended, add the grated Parmesan cheese and pulse a few more times until it’s fully incorporated.
- Season the Pesto: Taste the pesto and adjust the seasoning by adding more salt or black pepper, if necessary. Set the pesto aside while you prepare the pasta.
- Cook the Pasta: Bring a large pot of salted water to a boil. Add the trofie pasta and cook according to the package instructions, usually about 10-12 minutes, until al dente. Make sure to reserve about 1 cup of the pasta cooking water before draining the pasta.
- Combine Pasta and Pesto: In a large mixing bowl, add the cooked and drained pasta. Pour the pesto sauce over the pasta and toss gently to combine. If the sauce is too thick, add some reserved pasta water, a little at a time, until the desired consistency is reached.
- Serve Immediately: Transfer the Pesto Genovese With Trofie Pasta to a serving dish. Garnish with extra grated Parmesan cheese and a few fresh basil leaves for decoration, if desired. Serve immediately while warm.
Extra Tips:
For the best flavor, use the freshest basil you can find and a high-quality extra-virgin olive oil. If you don’t have a food processor, you can make the pesto using a mortar and pestle, which will give the sauce a more traditional texture.
Make sure not to overcook the pasta, as it should be al dente to best absorb the pesto. If you prefer a creamier pesto, you can add a tablespoon of softened butter when mixing the pasta and pesto. Enjoy this delightful dish with a side of crusty bread or a simple green salad for a complete meal.
Roasted Red Pepper and Tomato Soup

Roasted Red Pepper and Tomato Soup is a delightful Italian-inspired dish that’s perfect for a cozy dinner. This flavorful soup combines the rich, smoky taste of roasted red peppers with the tangy sweetness of tomatoes. Perfectly balanced with the addition of garlic, onion, and basil, this soup is an ideal starter or light main course.
It’s a great choice for those who enjoy vibrant, robust flavors, and it’s also a great way to incorporate more vegetables into your diet. This soup isn’t only delicious but also healthy and easy to prepare. Roasting the red peppers and tomatoes enhances their natural sweetness and adds a depth of flavor that’s hard to resist.
The creamy texture, achieved without any dairy, makes it suitable for vegans and those who are lactose intolerant. Whether you’re serving a family dinner or hosting a dinner party, this Roasted Red Pepper and Tomato Soup is sure to impress and satisfy your guests.
Ingredients for 4-6 servings:
- 4 large red bell peppers
- 6 ripe tomatoes
- 1 large onion, chopped
- 4 cloves of garlic, minced
- 4 cups vegetable broth
- 2 tablespoons olive oil
- 1 teaspoon dried oregano
- Salt and pepper to taste
- Fresh basil leaves for garnish
Cooking Instructions:
- Preheat and Prepare: Preheat your oven to 400°F (200°C). While the oven is heating, wash the red bell peppers and tomatoes thoroughly.
- Roast the Vegetables: Place the whole red peppers and halved tomatoes (cut side up) on a baking sheet. Drizzle with 1 tablespoon of olive oil and sprinkle with salt and pepper. Roast in the oven for about 25-30 minutes, or until the skin of the peppers is blistered and the tomatoes are soft.
- Cool and Peel: Remove the roasted peppers and tomatoes from the oven. Allow them to cool slightly. Once cool enough to handle, peel the skins off the peppers and tomatoes. Remove the seeds from the peppers.
- Sauté Aromatics: In a large pot, heat the remaining tablespoon of olive oil over medium heat. Add the chopped onion and cook until translucent, about 5 minutes. Add the minced garlic and cook for an additional 1-2 minutes until fragrant.
- Combine and Simmer: Add the roasted peppers, tomatoes, and any juices from the baking sheet to the pot. Pour in the vegetable broth and add the dried oregano. Stir well and bring the mixture to a boil. Reduce the heat to low and let it simmer for about 15-20 minutes to allow the flavors to meld.
- Blend the Soup: Use an immersion blender to puree the soup until smooth. Alternatively, you can transfer the soup in batches to a countertop blender. Blend until you achieve a creamy consistency.
- Season and Serve: Taste the soup and adjust the seasoning with additional salt and pepper if needed. Serve hot, garnished with fresh basil leaves.
Extra Tips:
For a spicier version, consider adding a pinch of red chili flakes during the sautéing of the onion and garlic. If you prefer a creamier texture, you can add a splash of coconut milk or a dollop of cashew cream before blending.
This soup can be made a day in advance; the flavors will deepen with time, making it even more delicious. Serve with crusty bread or a side salad for a more complete meal. Enjoy your Italian Veg Dinner with this warming and satisfying Roasted Red Pepper and Tomato Soup!
Mushroom and Truffle Oil Tagliatelle

Mushroom and Truffle Oil Tagliatelle is a luxurious Italian dish that combines the earthy flavors of mushrooms with the aromatic allure of truffle oil. This dish is perfect for a special occasion or when you want to impress your dinner guests with a gourmet meal. The rich and creamy sauce clings to the tagliatelle pasta, creating a harmonious blend of flavors that’s both comforting and indulgent.
The use of fresh ingredients and the simplicity of preparation make this recipe a must-try for any pasta lover. This dish showcases the delicate balance between the robust taste of mushrooms and the subtler, yet distinctive, truffle oil. The key to achieving the perfect Mushroom and Truffle Oil Tagliatelle lies in the quality of the ingredients, particularly the truffle oil, which should be used sparingly to enhance rather than overpower the dish.
Paired with a crisp white wine, this dish makes for an exquisite dining experience that brings a taste of Italy to your dinner table.
Ingredients (Serving Size: 4-6 people):
- 500g tagliatelle pasta
- 2 tablespoons olive oil
- 500g mixed mushrooms (such as cremini, shiitake, and oyster), sliced
- 3 cloves garlic, minced
- 1/2 cup dry white wine
- 1 cup heavy cream
- Salt and freshly ground black pepper, to taste
- 1/4 cup grated Parmesan cheese
- 2 tablespoons truffle oil
- Fresh parsley, chopped, for garnish
Cooking Instructions:
- Cook the Pasta: Bring a large pot of salted water to a boil. Add the tagliatelle pasta and cook according to the package instructions until al dente. Drain and set aside, reserving a cup of the pasta water.
- Sauté the Mushrooms: In a large skillet, heat the olive oil over medium heat. Add the sliced mushrooms and cook until they’re browned and tender, about 5-7 minutes. Stir occasionally to guarantee even cooking.
- Add Garlic and Wine: Add the minced garlic to the skillet and sauté for an additional minute until fragrant. Pour in the white wine and let it simmer until reduced by half, about 2-3 minutes.
- Prepare the Sauce: Lower the heat and add the heavy cream to the skillet. Stir well and let it simmer for 5 minutes until the sauce thickens slightly. Season with salt and pepper to taste.
- Combine with Pasta: Add the cooked tagliatelle to the skillet with the mushroom sauce. Toss the pasta to coat it evenly with the sauce. If the sauce is too thick, add some reserved pasta water to reach the desired consistency.
- Finish with Truffle Oil: Remove the skillet from the heat and drizzle the truffle oil over the pasta. Sprinkle with Parmesan cheese and gently toss to combine.
- Serve: Garnish with freshly chopped parsley before serving. Serve hot and enjoy your Mushroom and Truffle Oil Tagliatelle with a side of crusty bread or a fresh salad.
Extra Tips:
When cooking this dish, it’s important to use high-quality truffle oil for the best flavor. A little goes a long way, so start with a small amount and adjust to taste.
Additionally, make sure not to overcook the mushrooms; they should be soft yet still hold their shape. If you prefer a bit of spice, consider adding a pinch of red pepper flakes to the garlic step for a subtle kick.
Finally, for added richness, you can incorporate a knob of butter into the sauce just before adding the pasta.
Fennel and Orange Salad With Arugula

Fennel and Orange Salad With Arugula is a revitalizing and vibrant dish that perfectly captures the essence of Italian cuisine. This salad combines the crisp and slightly sweet taste of fennel with the juicy, tangy flavor of oranges, all complemented by the peppery notes of fresh arugula.
It’s a delightful addition to any Italian veg dinner, offering a burst of color and a medley of flavors that will tantalize your taste buds. This salad isn’t only delicious but also incredibly nutritious, providing a healthy dose of vitamins and antioxidants.
Ideal for a light lunch or as a starter for your Italian dinner, this Fennel and Orange Salad With Arugula is easy to prepare and sure to impress your guests. The key to this dish is using the freshest ingredients possible.
The sweetness of the oranges balances beautifully with the anise-like flavor of the fennel, while the arugula adds a slightly spicy kick. A simple dressing of olive oil and lemon juice brings all these flavors together, making this salad a perfect harmony of taste and texture.
Ingredients (Serves 4-6):
- 2 large fennel bulbs
- 3 large oranges
- 5 oz (about 6 cups) of fresh arugula
- 1/4 cup extra virgin olive oil
- 2 tablespoons freshly squeezed lemon juice
- Salt, to taste
- Freshly ground black pepper, to taste
- 1/4 cup thinly sliced red onion
- 1/4 cup chopped fresh parsley
- 1/4 cup toasted pine nuts (optional)
Instructions:
- Prepare the Fennel: Begin by trimming the fennel bulbs. Cut off the stalks and fronds, reserving some fronds for garnish. Slice the bulbs in half and remove the tough core. Thinly slice the fennel using a sharp knife or a mandoline for even slices.
- Segment the Oranges: Peel the oranges, making sure all white pith is removed. Over a bowl, segment the oranges by cutting between the membranes to release the segments. Collect any juice that runs out during this process to add to the dressing later.
- Make the Dressing: In a small bowl, whisk together the extra virgin olive oil, freshly squeezed lemon juice, and the reserved orange juice. Season with salt and freshly ground black pepper to taste.
- Assemble the Salad: In a large salad bowl, combine the sliced fennel, orange segments, arugula, and thinly sliced red onion. Pour the dressing over the salad and gently toss to combine, making sure all ingredients are evenly coated.
- Garnish and Serve: Sprinkle the salad with chopped parsley and toasted pine nuts, if using. Garnish with reserved fennel fronds. Serve immediately for the best flavor and texture.
Extra Tips: For the best results, select firm, fresh fennel bulbs without any brown spots, and opt for sweet, juicy oranges like navel or blood oranges. If you prefer a bit more sweetness, you can add a teaspoon of honey to the dressing.
Preparing the salad just before serving ensures the arugula remains crisp and the flavors are fresh. If making ahead, store the components separately and combine just before serving. Toasting the pine nuts enhances their flavor, but be sure to watch them closely as they can burn quickly.
Summer Vegetable Minestrone Soup

Summer Vegetable Minestrone Soup is a vibrant and hearty dish that celebrates the abundance of fresh produce available during the summer months. This Italian-inspired soup is a medley of colorful vegetables, tender pasta, and aromatic herbs simmered in a rich tomato broth.
It’s a versatile recipe that can be adapted to include whatever seasonal vegetables you have on hand, making it a perfect way to utilize your garden haul or farmers’ market finds. The soup is both satisfying and light, making it a great option for a nourishing meal during warm summer evenings.
The beauty of Summer Vegetable Minestrone Soup lies in its simplicity and flexibility. While traditional minestrone often includes beans, this summer version focuses on the natural sweetness and flavors of fresh vegetables like zucchini, tomatoes, and green beans.
The inclusion of pasta makes it a complete meal, while basil adds a fragrant, finishing touch. This recipe serves 4-6 people, ensuring there’s plenty to go around or leftovers for the next day. Whether you’re a seasoned cook or a kitchen novice, this easy-to-follow recipe will guide you through creating a delicious and comforting soup.
Ingredients (Serves 4-6):
- 2 tablespoons olive oil
- 1 onion, diced
- 2 cloves garlic, minced
- 2 carrots, diced
- 2 celery stalks, diced
- 1 zucchini, diced
- 1 cup green beans, trimmed and cut into 1-inch pieces
- 1 can (14 oz) diced tomatoes
- 6 cups vegetable broth
- 1 teaspoon dried oregano
- 1 teaspoon dried basil
- 1 cup small pasta (such as ditalini or elbow)
- Salt and pepper to taste
- 1/4 cup fresh basil, chopped
- Grated Parmesan cheese, for serving (optional)
Cooking Instructions:
- Prepare the Vegetables: Begin by washing and dicing all your vegetables. This includes the onion, garlic, carrots, celery, zucchini, and green beans. Having everything prepped will make the cooking process smoother.
- Sauté the Aromatics: Heat the olive oil in a large pot over medium heat. Add the diced onion and garlic, sautéing until the onion becomes translucent and fragrant, approximately 5 minutes.
- Add the Vegetables: Stir in the carrots, celery, zucchini, and green beans. Cook the vegetables for about 5-7 minutes until they start to soften, stirring occasionally.
- Simmer the Soup: Add the canned diced tomatoes, vegetable broth, oregano, and dried basil to the pot. Bring the mixture to a boil, then reduce the heat to a simmer. Let the soup cook for 15-20 minutes to allow the flavors to meld and the vegetables to become tender.
- Cook the Pasta: While the soup is simmering, separately cook the pasta according to package instructions until al dente. Drain and set aside.
- Combine and Season: Add the cooked pasta to the soup pot. Season the soup with salt and pepper to taste. Stir in the fresh basil, reserving a little for garnishing.
- Serve: Ladle the soup into bowls and top with a sprinkle of grated Parmesan cheese if desired. Garnish with additional fresh basil for an extra burst of flavor.
Extra Tips:
When cooking Summer Vegetable Minestrone Soup, feel free to add or substitute vegetables based on what you have available. Bell peppers, spinach, or peas can be great additions.
If you’re aiming for a heartier version, consider including a can of drained and rinsed cannellini beans. For a gluten-free option, simply use gluten-free pasta.
Remember to taste and adjust the seasoning before serving, as the flavors can vary depending on the freshness of your vegetables and the type of broth used. This soup is perfect for making ahead of time, as it often tastes better the next day when the flavors have had time to develop.
Eggplant Parmigiana With Mozzarella

Eggplant Parmigiana With Mozzarella is a classic Italian dish that brings together the rich flavors of tender eggplant, tangy tomato sauce, and creamy mozzarella cheese. This comforting vegetarian meal is perfect for a family dinner or a gathering with friends, offering a delicious taste of Italy in every bite.
The layers of eggplant and cheese melt together beautifully, creating a satisfying and hearty dish that’s both flavorful and filling. This recipe serves 4-6 people and provides a wonderful opportunity to enjoy the healthy benefits of eggplant, which is low in calories and high in fiber.
The dish is easy to prepare, requiring only a few simple ingredients that can be found in any grocery store. By following these instructions, you’ll be able to create a homemade Eggplant Parmigiana With Mozzarella that rivals any restaurant version.
Ingredients:
- 2 large eggplants
- Salt
- Olive oil
- 2 cups marinara sauce
- 3 cups shredded mozzarella cheese
- 1 cup grated Parmesan cheese
- 1 cup all-purpose flour
- 3 large eggs
- Fresh basil leaves (for garnish)
Instructions:
1. Prepare the Eggplant: Begin by slicing the eggplants into 1/4-inch thick rounds. Sprinkle the slices with salt and let them sit for about 30 minutes to draw out any bitterness.
After 30 minutes, rinse the eggplant slices under cold water and pat them dry with paper towels.
2. Set Up Dredging Station: In one shallow dish, place the flour. In a second dish, beat the eggs. Dip each eggplant slice into the flour, shaking off any excess, then dip it into the beaten eggs, confirming it’s fully coated.
3. Fry the Eggplant: Heat olive oil in a large skillet over medium heat. Fry the eggplant slices in batches until they’re golden brown on both sides, approximately 3-4 minutes per side.
Drain the fried eggplant on paper towels to remove excess oil.
4. Assemble the Dish: Preheat your oven to 375°F (190°C). In a 9×13 inch baking dish, spread a thin layer of marinara sauce. Layer half of the fried eggplant slices over the sauce, then top with half of the remaining marinara sauce, half of the mozzarella cheese, and half of the Parmesan cheese.
Repeat the layers with the remaining ingredients.
5. Bake: Cover the dish with aluminum foil and bake in the preheated oven for 25 minutes. Remove the foil and bake for an additional 15 minutes, or until the cheese is bubbly and golden brown.
6. Garnish and Serve: Allow the Eggplant Parmigiana to cool for a few minutes before garnishing with fresh basil leaves. Serve warm and enjoy!
Extra Tips: When selecting eggplants, look for ones that are firm and smooth with no blemishes. This guarantees the best texture and flavor.
If you prefer a lighter version, you can bake the eggplant slices instead of frying them. Simply brush the slices with olive oil and bake them at 400°F (200°C) for about 20 minutes, flipping halfway through.
Additionally, using fresh, high-quality mozzarella and Parmesan cheese will greatly enhance the taste of your dish.
Zucchini and Sun-Dried Tomato Frittata

Zucchini and Sun-Dried Tomato Frittata is a delightful Italian dish that combines the fresh flavors of zucchini with the rich, tangy taste of sun-dried tomatoes. This frittata is perfect for a hearty breakfast, a light lunch, or even a satisfying dinner.
The frittata is a versatile dish that can be served warm or at room temperature, making it an excellent choice for any occasion. With its vibrant colors and savory aroma, it’s sure to be a hit with family and friends.
This recipe is designed to serve 4-6 people, making it ideal for small gatherings or a family meal. The combination of eggs, zucchini, sun-dried tomatoes, and cheese creates a harmonious blend of textures and flavors. The added herbs and seasoning elevate the dish, guaranteeing every bite is full of zest.
Whether you’re an experienced cook or a beginner, this frittata is simple to prepare and is sure to impress your guests.
Ingredients:
- 8 large eggs
- 1/4 cup milk
- 1 medium zucchini, thinly sliced
- 1/2 cup sun-dried tomatoes, chopped
- 1/2 cup grated Parmesan cheese
- 1 small onion, finely chopped
- 2 cloves garlic, minced
- 2 tablespoons olive oil
- Salt and pepper to taste
- 1 teaspoon dried oregano
- 1/4 cup fresh basil, chopped
Instructions:
- Preheat the Oven: Start by preheating your oven to 375°F (190°C). This will guarantee that the frittata cooks evenly.
- Prepare the Egg Mixture: In a large bowl, whisk together the eggs and milk until well combined. Add a pinch of salt and pepper for seasoning.
- Cook the Vegetables: In an oven-safe skillet, heat the olive oil over medium heat. Add the chopped onion and garlic and sauté until the onion becomes translucent.
- Add the sliced zucchini and sun-dried tomatoes, and cook for another 5 minutes until the zucchini is tender.
- Combine Ingredients: Pour the egg mixture over the vegetables in the skillet. Sprinkle the grated Parmesan cheese and dried oregano evenly across the top. Gently stir to combine the ingredients without scrambling the eggs.
- Bake the Frittata: Transfer the skillet to the preheated oven and bake for 15-20 minutes, or until the frittata is set in the center and slightly golden on top.
- Garnish and Serve: Remove the skillet from the oven and let it cool slightly. Sprinkle the fresh basil over the top before slicing and serving the frittata.
Extra Tips:
For a more flavorful frittata, consider adding a pinch of red pepper flakes or a handful of your favorite cheese blend for extra creaminess.
If you don’t have an oven-safe skillet, you can transfer the mixture to a greased baking dish before baking. Additionally, feel free to customize the vegetables based on what you have on hand or what’s in season.
This dish pairs well with a side salad or crusty bread for a complete meal. Remember to keep an eye on the frittata as it bakes, as oven temperatures may vary. Enjoy your delicious Zucchini and Sun-Dried Tomato Frittata!
Artichoke and Olive Tapenade Bruschetta
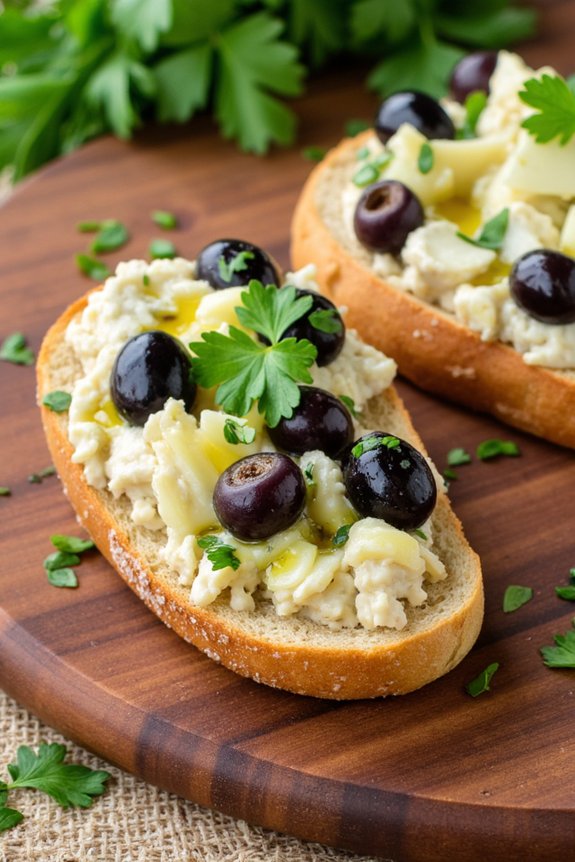
Artichoke and Olive Tapenade Bruschetta is a delectable Italian appetizer that combines the briny goodness of olives with the subtle, earthy flavor of artichokes. This dish is perfect for starting off a sumptuous Italian veg dinner, offering a deliciously crunchy contrast to the creamy tapenade spread over crisp slices of baguette.
The hearty artichokes and flavorful olives meld beautifully, creating a spread that’s both savory and satisfying. It’s a simple yet elegant dish that will impress your guests with its vibrant taste and ease of preparation.
This bruschetta is versatile and can be served as a starter or alongside a variety of dishes. The tapenade can be made in advance, allowing the flavors to meld and deepen, making it even more delicious. The bread is toasted to perfection, providing a crunchy base that complements the smoothness of the spread.
This recipe serves 4-6 people, making it an ideal addition to your Italian-themed dinner party or a cozy family meal.
Ingredients for 4-6 servings:
- 1 French baguette, sliced into 1/2-inch slices
- 1 cup canned artichoke hearts, drained and chopped
- 1 cup black olives, pitted and chopped
- 2 cloves garlic, minced
- 2 tablespoons capers, drained
- 1 tablespoon fresh lemon juice
- 1/4 cup extra-virgin olive oil
- 1/4 cup fresh parsley, chopped
- Salt and pepper to taste
- Optional: 1/4 teaspoon red pepper flakes for a spicy kick
Cooking Instructions:
- Prepare the Tapenade: In a food processor, combine the chopped artichoke hearts, black olives, minced garlic, and capers. Pulse until the mixture is coarsely chopped. Add the lemon juice, olive oil, and parsley. Pulse again until the mixture is well combined but still slightly chunky. Season with salt, pepper, and optional red pepper flakes to taste. Transfer to a bowl and set aside.
- Preheat the Oven: Before toasting the bread, preheat your oven to 400°F (200°C). This guarantees your baguette slices will toast evenly and quickly.
- Toast the Baguette Slices: Arrange the baguette slices on a baking sheet in a single layer. Lightly brush each slice with olive oil. Place in the preheated oven and toast for about 5-7 minutes or until the edges are golden and crisp. Remove from the oven and let cool slightly.
- Assemble the Bruschetta: Once the baguette slices are cool enough to handle, generously spread the artichoke and olive tapenade over each slice. Arrange them on a serving platter.
- Serve and Enjoy: Garnish with additional chopped parsley if desired and serve immediately while the bread is still slightly warm.
Extra Tips:
For the best flavor, prepare the tapenade a few hours ahead of time or even the day before. This allows the ingredients to meld together beautifully.
If you’re short on time, the tapenade can also be made quickly with a high-quality store-bought option, but fresh is always best. When selecting olives, choose a variety that you enjoy eating on their own, as their flavor will dominate the tapenade.
For a gluten-free option, substitute the baguette with gluten-free bread.