

Get ready for a summer feast that’s all about vibrant Italian flavors and fresh seasonal ingredients. Picture yourself enjoying a refreshing Caprese Salad with juicy heirloom tomatoes and creamy mozzarella. Then, savor the layers of flavor in a Grilled Eggplant Parmesan. From zesty Lemon and Herb Risotto to delightful Prosciutto-Wrapped Melon Skewers, each recipe is a celebration of summer’s best. Ready to explore these delicious dishes?
Caprese Salad With Heirloom Tomatoes
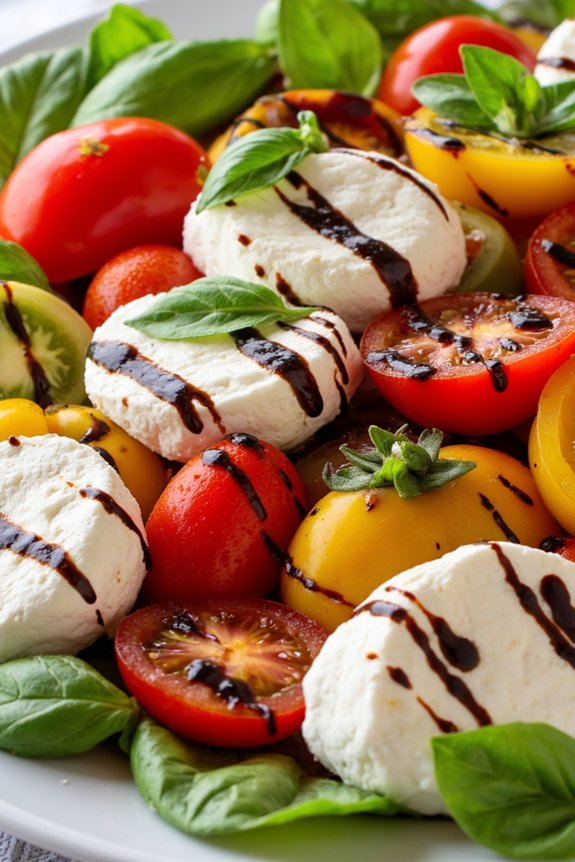
Caprese Salad With Heirloom Tomatoes is a quintessential Italian summer dish that highlights the vibrant flavors of fresh produce. This revitalizing salad is a celebration of simplicity, showcasing the natural sweetness and juiciness of heirloom tomatoes paired with creamy mozzarella and fragrant basil.
It’s an ideal dish for warm summer evenings, offering a perfect balance of textures and flavors that’s both satisfying and light. This salad isn’t only delicious but also incredibly easy to prepare, making it a great choice for both casual meals and elegant dinners.
The key to a perfect Caprese Salad lies in using the freshest ingredients available, as each component contributes considerably to the overall taste. When selecting heirloom tomatoes, opt for a variety of colors and shapes to add visual appeal and a range of flavors.
The addition of high-quality extra virgin olive oil and a drizzle of balsamic glaze elevates the salad, adding depth and a touch of acidity that complements the sweetness of the tomatoes.
Ingredients (Serves 4-6):
- 4-5 large heirloom tomatoes
- 1 pound fresh mozzarella cheese
- 1 bunch fresh basil leaves
- Extra virgin olive oil
- Balsamic glaze
- Salt and freshly ground black pepper
Cooking Instructions:
- Prepare the Ingredients: Start by washing the heirloom tomatoes and basil leaves thoroughly. Pat them dry with a clean towel to remove any excess moisture.
- Slice the Tomatoes and Mozzarella: Cut the heirloom tomatoes into thick slices, about 1/4-inch thick. Similarly, slice the fresh mozzarella cheese into similar-sized slices.
- Assemble the Salad: On a large serving platter, arrange the tomato and mozzarella slices in an alternating pattern. Tuck fresh basil leaves between the slices, ensuring they’re evenly distributed throughout the salad.
- Season the Salad: Drizzle a generous amount of extra virgin olive oil over the arranged slices. Add salt and freshly ground black pepper to taste, ensuring even seasoning across the salad.
- Add Balsamic Glaze: Complete the salad by drizzling a balsamic glaze over the top. This adds a sweet, tangy flavor that enhances the dish.
- Serve Immediately: Serve the salad immediately to enjoy the fresh flavors at their peak. The salad can be served as a standalone dish or as a side to complement other Italian dishes.
Extra Tips:
For the best flavor, allow the salad to sit at room temperature for about 10-15 minutes before serving. This allows the juices from the tomatoes to mingle with the olive oil and mozzarella, enhancing the overall taste.
If you can’t find heirloom tomatoes, ripe vine-ripened tomatoes are a suitable alternative. To make the dish more substantial, consider adding a few slices of prosciutto or a handful of arugula for a peppery contrast.
Finally, if you prefer a sharper flavor, try using aged balsamic vinegar instead of a glaze.
Grilled Eggplant Parmesan

Grilled Eggplant Parmesan is a delicious twist on the classic Italian dish, perfect for a summer dinner. This lighter version uses grilled eggplant instead of the traditional breaded and fried slices, allowing the natural flavors of the eggplant to shine through while adding a smoky depth to the dish. Combined with rich marinara sauce and gooey melted mozzarella, this dish is both satisfying and full of flavor, making it an ideal centerpiece for a warm evening meal.
Whether you’re planning a family dinner or a gathering with friends, Grilled Eggplant Parmesan offers a delightful blend of textures and tastes that are bound to impress. By grilling the eggplant, you not only reduce the amount of oil used but also enhance the overall experience with a subtle charred aroma. Serve it with a side of crusty bread or a fresh green salad to complete the meal. Below is the list of ingredients you’ll need to serve 4-6 people.
Ingredients:
- 2 large eggplants
- 1 tablespoon salt
- 2 tablespoons olive oil
- 2 cups marinara sauce
- 2 cups shredded mozzarella cheese
- 1 cup grated Parmesan cheese
- 1 teaspoon dried oregano
- 1/2 teaspoon black pepper
- Fresh basil leaves for garnish (optional)
Instructions:
- Prepare the Eggplant: Begin by slicing the eggplants into 1/2 inch thick rounds. Lay them out on a large baking sheet and sprinkle with salt. Let them sit for about 30 minutes to draw out excess moisture, then rinse and pat them dry with paper towels.
- Preheat the Grill: Set your grill to medium-high heat. Brush both sides of each eggplant slice with olive oil and season with black pepper.
- Grill the Eggplant: Place the eggplant slices directly on the grill grates. Grill for about 4-5 minutes on each side, or until they’ve nice grill marks and are tender. Remove from the grill and set aside.
- Assemble the Dish: Preheat your oven to 375°F (190°C). In a baking dish, spread a thin layer of marinara sauce on the bottom. Arrange a layer of grilled eggplant slices over the sauce. Top with more marinara sauce, a sprinkle of mozzarella, and a bit of Parmesan. Repeat the layers until all ingredients are used, finishing with a topping of mozzarella and Parmesan.
- Bake: Cover the baking dish with aluminum foil and bake in the preheated oven for 20 minutes. Remove the foil and bake for another 10-15 minutes, or until the cheese is bubbly and golden brown.
- Serve: Let the dish cool for a few minutes before serving. Garnish with fresh basil leaves if desired, and enjoy!
Extra Tips:
For an extra burst of flavor, consider adding a layer of sautéed spinach or mushrooms between the eggplant layers. Make sure to use a high-quality marinara sauce; a homemade version will provide the freshest taste.
If you’re preparing this dish ahead of time, you can assemble it and refrigerate for up to 24 hours before baking, which makes it convenient for entertaining. Remember, the key to perfect Grilled Eggplant Parmesan is to guarantee the eggplant slices are well-grilled, tender, and not too thick, allowing them to absorb the flavors of the sauce and cheese beautifully.
Lemon and Herb Risotto
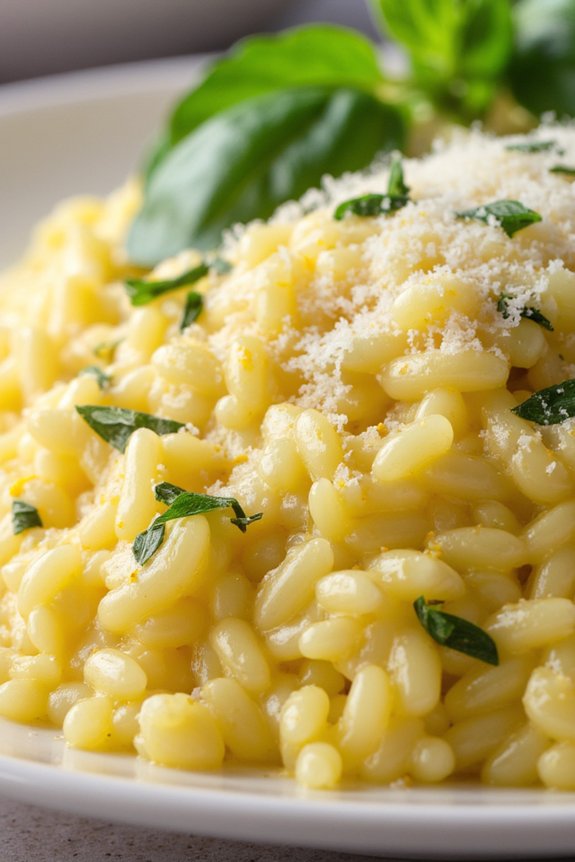
Indulge in the delightful flavors of Italian summer with this invigorating Lemon and Herb Risotto. This dish combines the creamy texture of traditional risotto with the zesty brightness of lemon and the aromatic essence of fresh herbs. Perfect for a light summer dinner, this risotto is both satisfying and stimulating, making it an ideal choice for entertaining or a cozy family meal.
Whether you’re a seasoned chef or a kitchen novice, this recipe is straightforward and promises to delight your taste buds. The key to a perfect risotto lies in the gradual addition of broth and constant stirring, which releases the starches from the rice, creating that signature creamy texture.
In this version, the infusion of lemon juice and zest adds a tangy kick, while a blend of herbs such as parsley, basil, and thyme brings a fragrant, garden-fresh quality to the dish. It’s a versatile recipe that pairs wonderfully with a variety of proteins or can stand alone as a vegetarian main course.
Ingredients (Serves 4-6):
- 2 tablespoons olive oil
- 1 small onion, finely chopped
- 2 cloves garlic, minced
- 1 1/2 cups Arborio rice
- 1/2 cup dry white wine
- 4 cups chicken or vegetable broth, warmed
- 1 lemon, zest and juice
- 1/2 cup grated Parmesan cheese
- 2 tablespoons butter
- 1/4 cup fresh parsley, chopped
- 1/4 cup fresh basil, chopped
- 1 teaspoon fresh thyme leaves
- Salt and pepper to taste
Cooking Instructions:
- Prepare the Ingredients: Begin by finely chopping the onion and mincing the garlic. Warm the chicken or vegetable broth in a separate pot over low heat.
- Sauté Aromatics: In a large pan, heat the olive oil over medium heat. Add the chopped onion and sauté for about 3-4 minutes until translucent. Add the minced garlic and cook for an additional 1 minute, stirring constantly to prevent burning.
- Toast the Rice: Stir in the Arborio rice, ensuring each grain is coated with the oil. Cook the rice for about 2 minutes until it’s lightly toasted. This step enhances the nutty flavor of the rice.
- Deglaze with Wine: Pour in the dry white wine, stirring continuously until the liquid is fully absorbed by the rice. This step adds depth and complexity to the dish.
- Add Broth Gradually: Begin adding the warmed broth, one ladleful at a time, stirring constantly. Wait until each addition of broth is mostly absorbed before adding the next. This process should take about 18-20 minutes, resulting in a creamy consistency.
- Incorporate Lemon and Cheese: Once the rice is tender and creamy, stir in the lemon zest, lemon juice, grated Parmesan cheese, and butter. Mix well until the cheese and butter are fully melted and incorporated into the risotto.
- Finish with Herbs: Remove the pan from heat and gently fold in the fresh parsley, basil, and thyme. Season with salt and pepper to taste. Cover the pan and let the risotto rest for a couple of minutes before serving.
Extra Tips:
For the best results, use fresh herbs as they greatly enhance the flavor and aroma of the risotto. If you prefer a more intense lemon flavor, add additional lemon zest or a splash of lemon juice before serving.
Remember that risotto should have a creamy, slightly loose consistency, so adjust the amount of broth accordingly. Avoid rinsing the rice before cooking as it removes the starches necessary for the creamy texture. If you want to add protein, consider topping the risotto with grilled shrimp or chicken for a complete meal.
Shrimp Scampi With Zucchini Noodles

Shrimp Scampi With Zucchini Noodles is a delightful, light, and flavorful dish perfect for warm summer evenings. This Italian-inspired recipe combines succulent shrimp with zucchini noodles, also known as “zoodles,” which are a healthy and low-carb alternative to traditional pasta. The dish is infused with the classic flavors of garlic, lemon, and butter, offering a revitalizing and satisfying meal that’s both quick and easy to prepare.
The zucchini noodles soak up the savory sauce beautifully, creating a harmonious blend of textures and flavors. The garlic and lemon bring a zesty brightness, while the shrimp adds a touch of luxury to the dish. This recipe is ideal for a family dinner or a small gathering, serving 4-6 people. It’s a great way to enjoy the bounty of summer produce and indulge in a taste of Italy without leaving your home.
Ingredients:
- 1 ½ pounds large shrimp, peeled and deveined
- 4 medium zucchini, spiralized
- 4 tablespoons unsalted butter
- 3 tablespoons olive oil
- 6 cloves garlic, minced
- ½ cup dry white wine
- Salt and pepper to taste
- 1 tablespoon lemon juice
- 1 teaspoon lemon zest
- ¼ cup fresh parsley, chopped
- ½ teaspoon red pepper flakes (optional)
- Grated Parmesan cheese, for garnish
Cooking Instructions:
- Prepare the Zucchini Noodles: Begin by spiralizing your zucchini into noodles using a spiralizer. If you don’t have a spiralizer, you can use a vegetable peeler to create thin strips resembling fettuccine. Set the zucchini noodles aside.
- Cook the Shrimp: In a large skillet over medium heat, heat 2 tablespoons of olive oil. Add the shrimp to the skillet, season with salt and pepper, and cook for about 2-3 minutes on each side, until they turn pink and opaque. Remove the shrimp from the skillet and set aside.
- Make the Garlic Butter Sauce: In the same skillet, add the remaining olive oil and butter. Once the butter has melted, add the minced garlic and cook for about 1 minute, stirring constantly, until fragrant.
- Deglaze with Wine: Pour in the white wine and bring the mixture to a simmer. Let it cook for about 2-3 minutes, allowing the alcohol to evaporate and the sauce to reduce slightly.
- Combine Ingredients: Return the cooked shrimp to the skillet, along with lemon juice, lemon zest, red pepper flakes (if using), and chopped parsley. Stir to combine and cook for an additional minute to heat through.
- Add Zucchini Noodles: Toss the zucchini noodles into the skillet, mixing them with the shrimp and sauce. Cook for 2-3 minutes, until the noodles are just tender but still have a slight crunch. Be careful not to overcook the noodles, as they can become mushy.
- Serve: Plate the Shrimp Scampi With Zucchini Noodles, and garnish with grated Parmesan cheese if desired. Serve immediately while hot.
Extra Tips:
When cooking Shrimp Scampi With Zucchini Noodles, be mindful not to overcook the zucchini noodles, as they can quickly become watery and lose their texture. It’s best to add the noodles only at the end to maintain their crispness.
If you prefer a thicker sauce, consider adding a small amount of pasta water or cornstarch slurry, but be certain to keep the sauce light to complement the delicate flavors of the shrimp and zucchini. For those looking to add a bit more heat, increase the amount of red pepper flakes according to taste.
Prosciutto-Wrapped Melon Skewers

Prosciutto-Wrapped Melon Skewers are a delightful and invigorating appetizer perfect for an Italian summer dinner. This dish combines the sweet juiciness of ripe melon with the savory, salty flavors of thinly sliced prosciutto. It’s a simple yet elegant way to impress your guests with minimal effort. The contrast of textures and flavors in each bite makes these skewers an irresistible treat.
This dish is incredibly easy to prepare and requires no cooking, making it ideal for hot summer days when you want to keep things cool and fresh. The key to success is choosing high-quality ingredients: a ripe, fragrant melon and freshly sliced prosciutto. These skewers can be assembled in advance, allowing you to enjoy time with your guests rather than being stuck in the kitchen.
Here’s how to make Prosciutto-Wrapped Melon Skewers for 4-6 people.
Ingredients:
- 1 ripe cantaloupe or honeydew melon
- 12 slices of prosciutto
- Fresh basil leaves
- 1 tablespoon olive oil
- Freshly ground black pepper
- Skewers (12-15, depending on size)
Instructions:
- Prepare the Melon: Start by cutting the melon in half and removing the seeds. Use a melon baller or a sharp knife to scoop out bite-sized pieces. Aim for uniform pieces so that they look appealing and are easy to eat.
- Wrap the Melon: Take a slice of prosciutto and wrap it around each piece of melon. The prosciutto should be snug but not overly tight to allow the flavors to meld beautifully.
- Assemble the Skewers: Thread the prosciutto-wrapped melon pieces onto skewers, alternating with fresh basil leaves for added flavor and color. Arrange them neatly, usually 2-3 melon pieces per skewer depending on the size.
- Add Finishing Touches: Drizzle a small amount of olive oil over the skewers and give them a light sprinkle of freshly ground black pepper. This adds a touch of richness and seasoning that enhances the overall taste.
- Serve: Arrange the skewers on a platter for an attractive presentation. They can be served immediately or chilled in the refrigerator for up to an hour before serving.
Extra Tips:
To guarantee the best flavor, choose a melon that’s fragrant and slightly soft to the touch. This indicates ripeness and will yield the sweetest taste.
If you prefer a bit more complexity, consider adding a small ball of mozzarella or a cherry tomato to each skewer. For a more pronounced basil flavor, consider using a basil-infused olive oil.
Finally, if you’re preparing these in advance, cover them with plastic wrap to prevent the melon from drying out before serving.
Summer Vegetable Panzanella
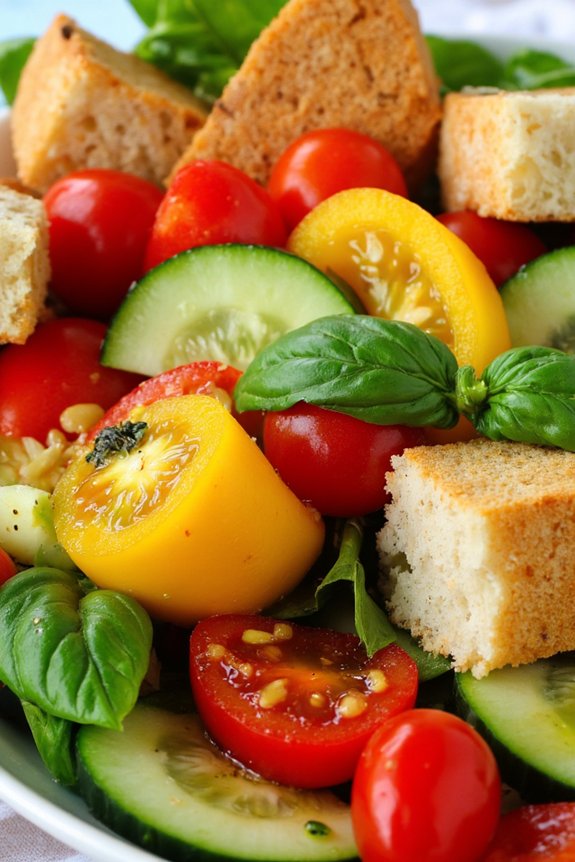
Experience the vibrant flavors of an Italian summer with a delightful Summer Vegetable Panzanella. This traditional Tuscan salad is a perfect way to celebrate the bounty of fresh summer produce.
Combining juicy tomatoes, crisp cucumbers, and aromatic basil with chunks of rustic bread, this dish is both invigorating and satisfying. Perfect for a light lunch, dinner, or a side dish for a summer barbecue, Panzanella is a versatile dish that truly lets the ingredients shine.
Our Summer Vegetable Panzanella is designed to serve 4-6 people, making it an ideal choice for gatherings or family meals. With a balance of textures and a burst of flavor in every bite, this recipe is sure to become a summer favorite.
The key to a great Panzanella is using high-quality, ripe vegetables and letting the salad sit for a bit, allowing the bread to soak up the juices and flavors. Let’s explore this simple yet delicious recipe and bring a taste of Italy to your table.
Ingredients:
- 4 cups of rustic Italian bread, cubed
- 2 large ripe tomatoes, diced
- 1 cucumber, peeled and sliced
- 1 red bell pepper, chopped
- 1 yellow bell pepper, chopped
- 1 small red onion, thinly sliced
- 1/4 cup fresh basil leaves, torn
- 1/4 cup extra virgin olive oil
- 3 tablespoons red wine vinegar
- Salt and freshly ground black pepper to taste
- Optional: 1/2 cup pitted black olives, halved
Cooking Instructions:
- Prepare the Bread: Preheat your oven to 375°F (190°C). Spread the cubed bread on a baking sheet and bake for about 10-15 minutes until golden and crispy. Set aside to cool.
- Prepare the Vegetables: In a large mixing bowl, combine the diced tomatoes, sliced cucumber, chopped red and yellow bell peppers, and thinly sliced red onion. If using olives, add them at this point.
- Make the Dressing: In a small bowl, whisk together the extra virgin olive oil and red wine vinegar. Season with salt and freshly ground black pepper to taste.
- Assemble the Panzanella: Add the toasted bread cubes to the bowl with the vegetables. Pour the dressing over the salad, ensuring all ingredients are evenly coated.
- Add the Basil: Gently fold in the torn basil leaves, being careful not to bruise them.
- Marinate: Allow the salad to sit at room temperature for at least 30 minutes before serving. This will give the bread time to absorb the flavors from the dressing and the juices from the vegetables.
- Serve: Give the salad a gentle toss just before serving to redistribute the dressing and flavors. Enjoy your Summer Vegetable Panzanella chilled or at room temperature.
Extra Tips:
For the best results, use day-old bread or any leftover rustic bread you have on hand; this helps it absorb the dressing without becoming too soggy.
Feel free to customize your Panzanella with other seasonal vegetables or herbs you enjoy, such as zucchini or parsley. If you’re pressed for time, you can grill the bread instead of baking it for a smoky flavor.
Tuscan White Bean and Kale Soup
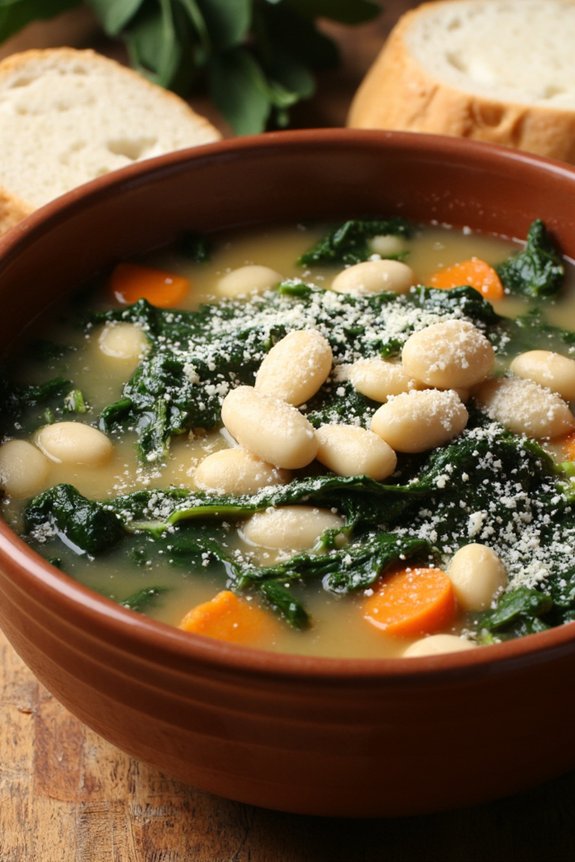
Tuscan White Bean and Kale Soup is a comforting and hearty dish that embodies the flavors of the Italian countryside. This nourishing soup combines tender white beans with the earthy taste of kale, creating a nutritious meal that’s perfect for a cozy summer evening. The simplicity of the ingredients allows the flavors to shine, making it a satisfying option whether you’re serving it as a main course or a starter. Packed with fiber and essential nutrients, this soup is a wholesome choice for those seeking a light yet fulfilling dinner option.
The beauty of Tuscan White Bean and Kale Soup lies in its versatility and ease of preparation. With a few basic ingredients and minimal effort, this dish can be ready to serve within an hour, making it an ideal choice for busy weeknights or impromptu gatherings. The aromatic blend of garlic, onions, and herbs infuses the broth with a rich, savory depth that perfectly complements the creamy texture of the white beans.
The addition of kale not only enhances the visual appeal of the soup but also provides a delightful contrast in texture, offering a slight chewiness that balances well with the softness of the beans.
Ingredients for 4-6 servings:
- 2 tablespoons olive oil
- 1 medium onion, diced
- 3 cloves garlic, minced
- 2 carrots, peeled and diced
- 2 celery stalks, diced
- 1 tablespoon tomato paste
- 1 teaspoon dried thyme
- 1 teaspoon dried rosemary
- 1 bay leaf
- 6 cups vegetable broth
- 2 (15-ounce) cans white beans, drained and rinsed
- 1 bunch kale, stems removed and leaves chopped
- Salt and pepper to taste
- Parmesan cheese, grated (optional)
- Crusty bread for serving (optional)
Cooking Instructions:
- Prepare the Aromatics: In a large pot, heat the olive oil over medium heat. Add the diced onion and sauté for about 5 minutes until it becomes translucent. Stir in the minced garlic and continue to cook for another 1-2 minutes, being careful not to let it burn.
- Add Vegetables and Herbs: Incorporate the diced carrots and celery into the pot. Stir them together with the onion and garlic, allowing them to cook for about 5 minutes until they begin to soften. Mix in the tomato paste, dried thyme, dried rosemary, and bay leaf, stirring well to coat the vegetables.
- Simmer the Soup: Pour in the vegetable broth and bring the mixture to a gentle boil. Reduce the heat to low, cover the pot, and let it simmer for about 15 minutes, allowing the flavors to meld together.
- Incorporate Beans and Kale: Add the drained and rinsed white beans to the pot, stirring to combine. Then, fold in the chopped kale, ensuring it’s well submerged in the broth. Continue to simmer for an additional 10 minutes until the kale is tender and the beans are heated through.
- Season and Serve: Remove the bay leaf and season the soup with salt and pepper to taste. Ladle the soup into bowls, optionally garnishing with grated Parmesan cheese. Serve hot, accompanied by crusty bread if desired.
Extra Tips:
When making Tuscan White Bean and Kale Soup, consider using homemade vegetable broth for an even richer flavor profile. If you prefer a creamier texture, you can blend a portion of the soup and then return it to the pot.
Additionally, this soup can be made ahead and stored in the refrigerator for up to 3 days, allowing the flavors to deepen over time. For a heartier meal, consider adding cooked Italian sausage or pancetta. Enjoy this versatile dish with your favorite wine for a complete Italian summer dining experience.
Baked Cod With Cherry Tomatoes and Olives
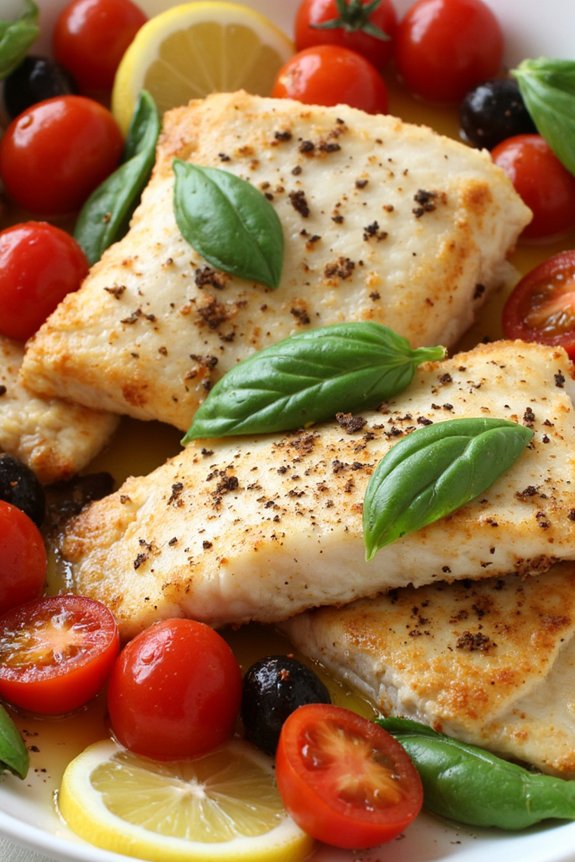
Baked Cod With Cherry Tomatoes and Olives is a delightful Italian dish that perfectly captures the vibrant flavors of a summer evening in Italy. This recipe combines tender, flaky cod with the sweetness of cherry tomatoes, the briny richness of olives, and the aromatic touch of fresh herbs. It’s a light yet satisfying meal that brings a taste of the Mediterranean to your dinner table, perfect for sharing with family and friends.
This dish isn’t only delicious but also quick and easy to prepare, making it an ideal choice for both weeknight meals and special occasions. The combination of fresh ingredients guarantees a burst of flavor in every bite, while the baking process allows the flavors to meld together beautifully.
The cherry tomatoes burst with sweetness, complementing the mild flavor of the cod, while the olives add a depth of savory complexity. A sprinkle of fresh herbs like basil or parsley not only adds color but also enhances the aromatic profile of the dish. This Baked Cod With Cherry Tomatoes and Olives is a showcase to the simplicity and elegance of Italian cuisine, offering a delightful culinary experience that’s both wholesome and satisfying.
Ingredients for 4-6 servings:
- 4-6 cod fillets (about 6 ounces each)
- 1 pint cherry tomatoes, halved
- 1 cup pitted olives (Kalamata or green), sliced
- 3 tablespoons olive oil
- 3 cloves garlic, minced
- 1 lemon, sliced
- Salt and pepper to taste
- Fresh basil or parsley, chopped for garnish
- Optional: a pinch of red pepper flakes for heat
Cooking Instructions:
- Preheat the Oven: Begin by preheating your oven to 400°F (200°C). This guarantees that the dish will bake evenly and develop a beautiful golden color.
- Prepare the Baking Dish: In a large baking dish, drizzle 1 tablespoon of olive oil to lightly coat the bottom. This prevents the cod from sticking and adds flavor.
- Arrange the Ingredients: Place the cod fillets in the dish, leaving some space between each piece. Scatter the halved cherry tomatoes and sliced olives around and on top of the fish.
- Season the Fish: Drizzle the remaining olive oil over the cod and vegetables. Sprinkle the minced garlic evenly over the dish, and season with salt, pepper, and optional red pepper flakes for a hint of spice.
- Add Lemon Slices: Lay the lemon slices over the cod fillets, ensuring each piece gets a slice or two. The lemon will infuse the fish with a citrusy aroma as it bakes.
- Bake the Dish: Place the baking dish in the preheated oven and bake for 20-25 minutes, or until the cod is opaque and flakes easily with a fork. The tomatoes should be softened and slightly blistered.
- Garnish and Serve: Once done, remove the dish from the oven. Sprinkle freshly chopped basil or parsley over the top for a burst of color and freshness. Serve immediately, pairing it with a side of crusty bread or a light salad.
Extra Tips:
For the best results, use fresh, high-quality cod fillets. If fresh cod is unavailable, frozen fillets can be used; just make sure to thaw them completely and pat them dry before cooking.
Feel free to experiment with different types of olives or add capers for an extra salty kick. Adjust the seasoning to your preference, and remember that fresh herbs make a significant difference in flavor, so don’t skip them unless necessary.
This dish pairs wonderfully with a crisp white wine, like a Pinot Grigio or Sauvignon Blanc, to enhance its light and invigorating qualities.
Spinach and Ricotta Stuffed Shells
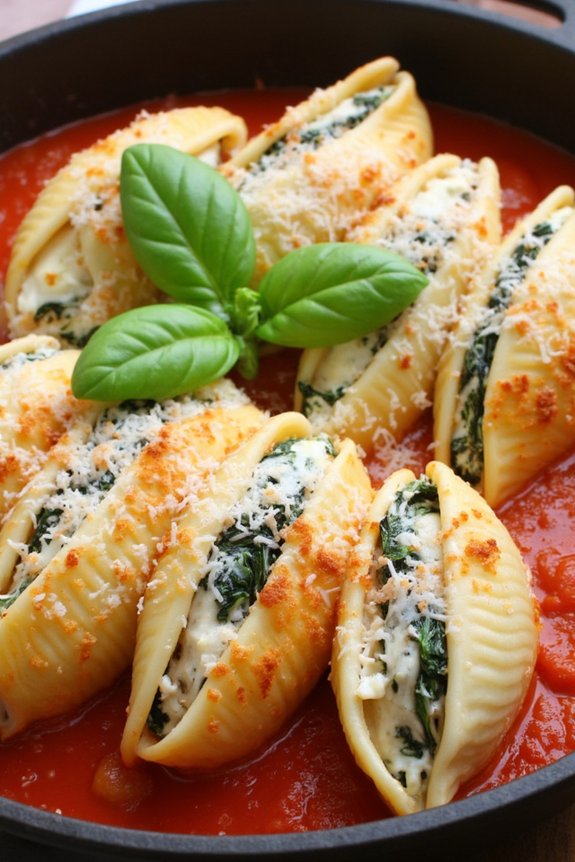
Spinach and Ricotta Stuffed Shells is an Italian classic that beautifully combines creamy ricotta cheese with fresh spinach stuffed inside tender pasta shells, all nestled in a rich tomato sauce. This dish is perfect for a summer evening, providing a comforting yet light meal. The blend of flavors and textures makes it a crowd-pleaser, and it pairs wonderfully with a crisp green salad and a glass of chilled white wine.
It’s a dish that’s not only delicious but also visually appealing, making it a great option for entertaining guests or enjoying a special family meal.
The preparation involves filling pasta shells with a savory mixture of ricotta cheese, spinach, and parmesan, then baking them in a tangy tomato sauce until bubbly. It’s a dish that can be prepared in advance, making it ideal for those who like to plan ahead.
Whether you’re an experienced home cook or a novice in the kitchen, Spinach and Ricotta Stuffed Shells is an accessible recipe that delivers exceptional results. This recipe is designed to serve 4-6 people, making it perfect for a family dinner or small gathering.
Ingredients:
- 20 jumbo pasta shells
- 2 cups ricotta cheese
- 1 cup grated parmesan cheese
- 1 large egg
- 2 cups fresh spinach, chopped
- 2 cups marinara sauce
- 1 cup shredded mozzarella cheese
- 1 teaspoon dried oregano
- 1 teaspoon salt
- 1/2 teaspoon black pepper
- Fresh basil for garnish (optional)
Cooking Instructions:
- Preheat and Prepare the Pasta: Preheat your oven to 375°F (190°C). Cook the jumbo pasta shells according to the package instructions until al dente. Drain and set aside to cool slightly.
- Prepare the Filling: In a large mixing bowl, combine the ricotta cheese, 1/2 cup of the grated parmesan, the large egg, chopped spinach, oregano, salt, and pepper. Mix until all ingredients are thoroughly combined.
- Stuff the Shells: Using a spoon, gently fill each cooked pasta shell with the ricotta and spinach mixture. Be careful not to overfill to avoid tearing the shells.
- Assemble the Dish: Spread half of the marinara sauce evenly over the bottom of a 9×13-inch baking dish. Arrange the stuffed shells in the dish, open side up. Pour the remaining marinara sauce over the shells, ensuring they’re well covered.
- Top and Bake: Sprinkle the shredded mozzarella cheese and the remaining 1/2 cup of parmesan cheese over the top of the shells. Cover the dish with aluminum foil and bake in the preheated oven for 25 minutes.
- Finish and Serve: After 25 minutes, remove the foil and bake for an additional 10 minutes, or until the cheese is golden and bubbly. Remove from the oven and let it cool for a few minutes before serving. Garnish with fresh basil if desired.
Extra Tips:
For a more robust flavor, consider adding a pinch of nutmeg to the ricotta mixture. If you prefer a spicier dish, a dash of red pepper flakes can be added to the marinara sauce.
You can also prepare the stuffed shells a day in advance, storing them in the fridge until you’re ready to bake. Just remember to add a few extra minutes to the baking time if the dish is cold from the refrigerator.
Ultimately, this dish freezes well, so consider making a double batch to have on hand for a quick weeknight meal.
Grilled Chicken With Basil Pesto
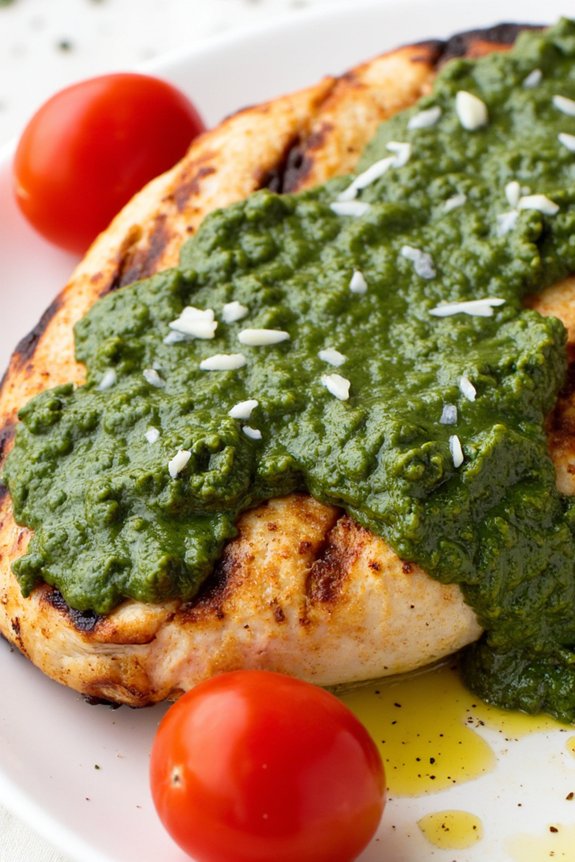
Grilled Chicken With Basil Pesto is a quintessentially Italian dish that brings the flavors of summer straight to your dining table. This recipe combines succulent grilled chicken breasts with a vibrant, homemade basil pesto, resulting in a dish that’s both delicious and visually stunning. The smoky flavor of the grilled chicken pairs beautifully with the fresh, aromatic basil pesto, creating a meal that’s perfect for a warm summer evening.
Whether you’re hosting a backyard barbecue or simply enjoying a weeknight dinner with family, this dish is bound to delight your taste buds and impress your guests.
The beauty of Grilled Chicken With Basil Pesto lies in its simplicity and the use of fresh ingredients. The basil pesto is a breeze to make and can be prepared in advance, allowing you to focus on grilling the chicken to perfection. This recipe serves 4-6 people, making it ideal for small gatherings or family dinners. By following the steps below, you’ll be able to create a dish that embodies the essence of Italian summer cuisine, bringing joy and satisfaction to everyone at the table.
Ingredients (serving size: 4-6 people):
- 4-6 boneless, skinless chicken breasts
- 2 cups fresh basil leaves
- 1/2 cup grated Parmesan cheese
- 1/2 cup extra-virgin olive oil
- 1/3 cup pine nuts
- 3 cloves garlic, minced
- 1 tablespoon lemon juice
- Salt and freshly ground black pepper to taste
- Optional: Cherry tomatoes for garnish
Cooking Instructions:
- Prepare the Basil Pesto: In a food processor, combine the fresh basil leaves, Parmesan cheese, pine nuts, and minced garlic. Pulse until the mixture is finely chopped. With the processor running, slowly drizzle in the olive oil until the pesto reaches your desired consistency. Add lemon juice, salt, and pepper to taste. Set aside.
- Preheat the Grill: Preheat your grill to medium-high heat. Verify the grates are clean and lightly oiled to prevent the chicken from sticking.
- Season the Chicken: Season the chicken breasts on both sides with salt and freshly ground black pepper. You can also lightly brush them with olive oil for added moisture and flavor.
- Grill the Chicken: Place the chicken breasts on the preheated grill. Cook for about 6-7 minutes on each side, or until the internal temperature reaches 165°F (75°C) and the chicken is cooked through. Remove from the grill and let rest for a few minutes.
- Serve with Pesto: Slice the grilled chicken and arrange it on a serving platter. Spoon the basil pesto generously over the chicken. Garnish with cherry tomatoes if desired, adding a pop of color and freshness.
Extra Tips:
For an even more flavorful pesto, consider lightly toasting the pine nuts before adding them to the food processor. This will enhance their nutty flavor and add depth to the pesto.
If you prefer a creamier texture, you can add a small dollop of ricotta cheese to the pesto mixture. Remember, the key to perfectly grilled chicken isn’t overcooking it, so use a meat thermometer to verify it’s juicy and tender.
Enjoy this dish with a side of crusty bread or a light salad for a complete meal.
Margherita Pizza on the Grill

There’s something magical about grilling a pizza that enhances its flavors and gives it a delightful, smoky char. A Margherita Pizza on the Grill is a summer staple that brings the essence of Italy to your backyard. The combination of fresh tomatoes, creamy mozzarella, and fragrant basil atop a crispy crust makes for a simple yet exquisite dish. Cooking pizza on the grill allows for a high heat environment similar to a traditional pizza oven, guaranteeing a perfectly cooked crust every time.
Grilling the pizza not only adds a unique flavor but also makes it a fun and interactive cooking experience, perfect for outdoor gatherings. The key to a successful grilled Margherita pizza is in the preparation of fresh ingredients and the timing of the cooking process. With a few simple steps, you can enjoy a taste of Italy without leaving your home. This recipe serves 4-6 people, making it ideal for family dinners or small get-togethers.
Ingredients for Margherita Pizza on the Grill (Serves 4-6):
- 2 pounds pizza dough
- 1 cup pizza sauce
- 2 cups fresh mozzarella, sliced
- 2 medium tomatoes, thinly sliced
- 1/4 cup fresh basil leaves
- 2 tablespoons olive oil
- 1 teaspoon sea salt
- 1 teaspoon freshly ground black pepper
- All-purpose flour (for dusting)
Cooking Instructions:
- Prepare the Dough: On a lightly floured surface, roll out your pizza dough into two 10-inch circles. Aim for a uniform thickness to guarantee even cooking on the grill.
- Preheat the Grill: Heat your grill to high, approximately 500°F (260°C). You need a hot grill to mimic the conditions of a pizza oven. If using a charcoal grill, arrange the coals for direct heat.
- Oil the Dough: Brush both sides of the rolled-out dough with olive oil. This step helps prevent sticking and promotes a crisp crust.
- Grill the Dough: Carefully place the dough directly onto the grill grates. Close the lid and grill for 2-3 minutes until the bottom is golden brown and has grill marks. Use tongs to flip the dough.
- Add Toppings: Quickly spread half of the pizza sauce over each crust. Distribute the mozzarella slices and tomato slices evenly. Sprinkle with sea salt and black pepper. Close the lid and grill for another 3-5 minutes until the cheese is melted and bubbly.
- Finish with Basil: Once the pizza is cooked, remove it from the grill and immediately scatter fresh basil leaves over the top. Let the residual heat wilt the basil slightly.
- Serve: Slice the pizzas and serve warm, enjoying the fresh, vibrant flavors of the Margherita.
Extra Tips:
For an even crispier crust, allow the dough to come to room temperature before rolling it out. This makes it more pliable and easier to handle.
Keep an eye on the grill’s temperature, as high heat is essential but can also cause the crust to burn quickly if left unattended.
Feel free to experiment with additional toppings such as a drizzle of balsamic glaze or crushed red pepper flakes for a personalized touch.
And remember, fresh ingredients are key to capturing the authentic taste of a Margherita pizza, so opt for the freshest tomatoes, mozzarella, and basil you can find.
Fresh Berry Tiramisu

Indulge in a delightful twist on a classic Italian dessert with this Fresh Berry Tiramisu. Perfect for warm summer evenings, this no-bake dessert combines the rich creaminess of mascarpone with the invigorating flavors of fresh berries. The traditional coffee-soaked ladyfingers are replaced with a berry-infused syrup, adding an unexpected yet delightful layer of flavor.
This dessert can be prepared in advance, allowing the flavors to meld together beautifully, making it an ideal choice for entertaining guests or enjoying a quiet evening at home.
Our Fresh Berry Tiramisu serves 4-6 people, making it perfect for a family gathering or a small dinner party. The dish strikes a balance between sweet and tangy, with layers of berry-soaked ladyfingers, creamy mascarpone mixture, and a medley of fresh berries. Not only is it visually stunning, but it also provides a burst of summer flavors in every bite.
Gather your ingredients and follow the step-by-step instructions to create this memorable dessert that will surely be a hit with everyone.
Ingredients for 4-6 servings:
- 1 cup strawberries, hulled and sliced
- 1 cup raspberries
- 1 cup blueberries
- 1/4 cup sugar
- 1/4 cup water
- 1 tablespoon lemon juice
- 16-20 ladyfinger cookies
- 1 cup mascarpone cheese
- 1 cup heavy cream
- 1/2 cup powdered sugar
- 1 teaspoon vanilla extract
- Fresh mint leaves for garnish (optional)
Cooking Instructions:
1. Prepare the Berry Syrup: In a medium saucepan, combine the sliced strawberries, raspberries, blueberries, sugar, water, and lemon juice. Cook over medium heat, stirring occasionally, until the berries soften and release their juices, about 5-7 minutes. Remove from heat and let it cool slightly.
Strain the mixture through a fine-mesh sieve to remove seeds and pulp, keeping the syrup.
2. Soak the Ladyfingers: Dip each ladyfinger into the berry syrup quickly, making certain they’re well-coated but not soggy. Arrange a layer of soaked ladyfingers at the bottom of a 9×9 inch dish or a similarly sized serving dish.
3. Prepare the Mascarpone Cream: In a mixing bowl, beat the mascarpone cheese, heavy cream, powdered sugar, and vanilla extract together using an electric mixer until the mixture is smooth and forms soft peaks.
4. Assemble the Tiramisu: Spread half of the mascarpone cream evenly over the layer of ladyfingers in the dish. Scatter half of the remaining fresh berries over the cream layer.
Repeat with another layer of berry-soaked ladyfingers, followed by the remaining mascarpone cream and fresh berries on top.
5. Chill and Serve: Cover the dish with plastic wrap and refrigerate for at least 4 hours or overnight. This allows the flavors to meld and the tiramisu to set properly. When ready to serve, garnish with fresh mint leaves if desired.
Extra Tips:
For the best results, use fresh, ripe berries to maximize flavor. The tiramisu can be made a day in advance, which not only saves time but also enhances the taste as the flavors meld together.
If you prefer a stronger berry flavor, consider mashing some of the berries into the syrup for a more intense infusion. Finally, verify that your mascarpone and cream are cold before mixing to achieve the perfect creamy texture.
Enjoy this dish as an invigorating and elegant conclusion to any summer meal.